1
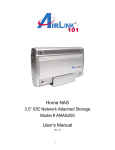
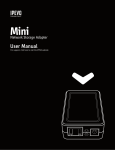
LanDrive User Manual And Installation Guide 1 2 Table of Contents Overview .................................................................................................................................................................. 5 A First Glance ..................................................................................................................................................... 5 Minimum System Requirements ................................................................................................................ 5 Hardware Installation .................................................................................................................................... 6 Connecting the LanDrive to Your Computer ......................................................................................... 7 Installing the drive on Mac OS X ............................................................................................................ 7 Installing the drive on Windows ME/XP/Vista/7........................................................................... 7 Installing the drive on Windows 98 ..................................................................................................... 7 Connecting the drive to your Network................................................................................................ 7 Configuring the LanDrive .............................................................................................................................. 8 Configuring the LanDrive (Other Operating Systems).................................................................. 9 Configuring your LanDrive via the Web Interface ............................................................................... 10 Status.................................................................................................................................................................. 10 System Information ................................................................................................................................. 10 Network Information .............................................................................................................................. 11 Service Information ................................................................................................................................. 11 Disk Information ....................................................................................................................................... 11 LanDrive IP Configuration ......................................................................................................................... 12 Maintenance .................................................................................................................................................... 13 SMB Server....................................................................................................................................................... 14 Configuring a Samba Server ................................................................................................................. 14 Enabling Samba for Windows 95/98/ME Computers ............................................................... 16 Configuring Your Windows Network ............................................................................................... 16 Accessing the Samba Server from Windows 95/98 .................................................................... 19 3 Accessing the Samba Server from Windows ME .......................................................................... 20 Setting up Windows XP Computers ....................................................................................................... 21 FTP Server ........................................................................................................................................................ 26 Configuring an FTP Server .................................................................................................................... 26 Connecting to FTP via Internet Explorer......................................................................................... 28 BitTorrent ........................................................................................................................................................ 29 Downloading Files via BitTorrent ...................................................................................................... 29 Configuring BitTorrent ........................................................................................................................... 30 Print Server...................................................................................................................................................... 31 Media Server ................................................................................................................................................... 34 Sharing Media with an Xbox 360 ........................................................................................................ 35 Sharing Media with a Playstation 3 ................................................................................................... 37 Sharing Media with iTunes ................................................................................................................... 39 Disk Utility ....................................................................................................................................................... 40 Frequently Asked Questions .......................................................................................................................... 41 4 Overview The LanDrive enclosure adds the convenience of network-attached storage to your home or small business, providing you with a central storage location for your data and allowing you to access your data from any computer across your network. A First Glance The LanDrive includes the following optional and required components: LanDrive Unit LanDrive Vertical Stand Securing screws Network cable (optional) Power Adapter Minimum System Requirements Safari/Mozilla/Internet Explorer 5+/Netscape 6+ Windows 98/ME/2K/XP/Vista/7 or MacOS 10+ or Linux 3.5” SATA Hard Drive, FAT32 (required) 5 Hardware Installation Step 1 – Remove the two screws on the back of the enclosure. Step 2 – Loosen the four screws on the surface of the unit. Step 3 – The plastic bracket should slide out effortlessly. Ensure that your hard drive jumper setting is configured to Master. Insert your hard drive. Connect the SATA and power cables. Step 4 – Secure your hard drive to the bracket with the four screws included in the package. Step 5 – Re-insert the bracket and secure all the screws that were previously removed. 6 Connecting the LanDrive to Your Computer The LanDrive is a multifunctional hard drive enclosure. In addition to being a network storage device, you can also use it as a standalone external hard drive. Installing the drive on Mac OS X Driver installation is not required for systems using Mac OS 10.1.2 or higher. Simply connect the LanDrive using the included USB cable and access the data by clicking the “Untitled” HDD icon on your Desktop. Installing the drive on Windows ME/XP/Vista/7 Driver installation is not required for Windows ME or higher. Simply connect the LanDrive using the included USB cable and access the data via “My Computer” on your Desktop. Installing the drive on Windows 98 To utilize the drive via USB on Windows 98, you must install the drivers from the included CD. Be sure to install the device drivers before connecting the drive to your computer. After completing the driver installation, reboot your computer before connecting the LanDrive. Note: You can also access the data in the LanDrive by connecting it to your computer via Ethernet. The LanDrive will have a default IP of 169.254.0.1 when connected directly. Connecting the drive to your Network Plug the LanDrive into a wall outlet or power strip. Connect one end of the network cable to the LAN port on the back of the LanDrive and the other end to a port on your hub, switch, or router. Note: The Ethernet port on the LanDrive is Auto-MDI/MDIX, which means you can connect it using either patch or crossover cable. 7 Configuring the LanDrive The LanDrive features a web-based control interface to manage your settings. If you are using an operating system other than Windows, please refer directly to the next section, entitled “Other Operating Systems.” Step 1 – Open your web browser. To connect to the web interface, visit http://storage/ (If you have more than once device, use http://storage-XXXX/). You can also connect directly to the LanDrive using its IP address. Step 2 – Enter the default credentials: Login: admin / Password: admin If you are having trouble accessing the LanDrive via the URL or IP address: 1. Install the latest version of the Java Runtime Environment (http://www.java.com). 2. Open the included CD and double-click the file named “Sdisk.jar” 8 3. Connect to your LanDrive at http://10.130.11.229 or http://STORAGE-1010 Configuring the LanDrive (Other Operating Systems) To access the LanDrive from a non-Windows operating system, input the IP address of the LanDrive in the browser URL address bar. If you do not know the IP address of the LanDrive, connect it directly to your computer and then visit the default IP address: http://169.254.0.1. 9 Configuring Your LanDrive via the Web Interface Once you have successfully logged into the LanDrive, you will see the following screen: Status The status tab provides detailed information about your System, Network, Service, and Disk. System Information Host Name – This is the name of your LanDrive. The default value is STORAGE-XXXX. Storage devices need unique names so that they can identify and communicate with one another. It’s best to keep host names short (fifteen characters or less) and easy to recognize. We recommend using only alphanumeric characters in the Host name. The host name cannot consist entirely of numbers, nor can it contain spaces or special characters. 10 Group Name – This is the name of your home network. The default value is WORKGROUP. When you set up your network, Windows automatically creates a workgroup and gives it a name. Administrator – To change the administrator password, enter a new value here. Date/Time – To change the date and time, enter the new values here. You can set both date and time manually, adjust your time zone, and automatically adjust the internal clock for Daylight Savings Time. Firmware Version – Displays information about the current firmware. Network Information IP Address – Displays the IP address of the LanDrive MAC Address – Displays the MAC address of the LanDrive DHCP Server – Allows you to enable or disable the LanDrive’s DHCP server. Service Information SAMBA Service – Allows you to enable or disable the Samba server. FTP Service – Allows you to enable or disable the FTP server. Disk Information Displays data about the hard drive, including the model, size, and free space. 11 LanDrive IP Configuration This menu allows you to perform advanced configuration of the LanDrive’s IP address. Typically, you will not need to change this from “Automatic IP” unless you are a network administrator with specific needs. Auto IP – When the LanDrive boots up, it will automatically check for DHCP servers on the network. If a DHCP server is active, the DHCP server will assign the LanDrive an address. If a DHCP server is not active, the LanDrive will assign itself an address and act as its own DHCP server. Static IP – If necessary, you can set the LanDrive’s IP address manually. Your network administrator will know what values to enter here. 12 Maintenance The Maintenance tab allows you to update the LanDrive’s firmware, perform a system reboot, and reset the LanDrive to factory defaults. Firmware Upload – Update your LanDrive’s firmware. Do not turn off the power or close the web browser while the firmware is updating, or for at least thirty seconds afterwards! This could “brick” your LanDrive, rendering it inoperable! System Reboot – The Reboot button will force the LanDrive to perform a software restart. The SYSTEM LED will blink as the device restarts. If the restart is successful, the LED will remain on. Please wait about a minute before refreshing your browser and logging in again. Factory Default – Allows you to reset your LanDrive to the factory default settings, removing any customization. Click the “Reset” button to clear all configuration and restore the default settings. Do not turn off the power or close the web browser while the storage device is resetting. Click the “System Reboot” button after reset. 13 SMB Server Samba is networking software that allows your computer to connect with computers running different operating systems. It is typically used to connect to files and folders shared on a Microsoft Windows system from a computer running Linux or UNIX. Read more about Samba at samba.org. Configuring a Samba Server Log in to the router and click on the SMB Server tab. From this menu, you can create, modify, or delete Samba shares. New – Create a Samba share folder. Default username: Guest, Default password: [empty]. 14 Modify – Modify an existing Samba share. Password – Allows you to change the password of the Samba share. Access – Control whether users on this share can write data. Folder List – A list of all the existing folders on the hard drive. Sharing List – A list of all the existing folders on the Samba server. If you want to share a folder, simply move it from the Folder List to the Sharing List. 15 Enabling Samba for Windows 95/98/ME Computers The following process will enable you to share folders from your Windows computer via Samba. Configuring Your Windows Network Samba uses TCP/IP to communicate with clients on the network, so you will need to make sure that TCP/IP support is enabled on each Windows computer. Step 1 – Open the Control Panel and double-click the Network icon. Step 2 – If you see the TCP/IP protocol listed, you can skip this step. If not, you need to add the protocol manually. To add the protocol, insert the Windows CD into your CD-ROM drive and click the “Add” button below the components window. 16 Indicate that you wish to add a protocol by selecting “Protocol” and clicking “Add.” Next, select Microsoft under the Manufacturer tab, then select the protocol TCP/IP and click OK. After doing so, you will be returned to the network dialog. Click OK to close the dialog box. Windows will install the necessary components from the CD and request that the system be rebooted. Reboot the system and TCP/IP will be installed. Step 3 – Select the TCP/IP protocol linked to the network adapter that will be used to access the Samba network. Click the Properties button to open the TCP/IP Properties dialog. 17 Click the IP Address tab. If you are using DHCP on your network to assign IP addresses dynamically, select the "Obtain IP address automatically" radio button. Otherwise, select the "Use the following address:" radio button, and fill in the computer's IP address and netmask in the spaces provided. You or your network manager should have selected an address for the client on the same subnet (LAN) as the Samba server. Step 4 – On the Network Configuration dialog, select the Identification tab. 18 Set your Workgroup name to match the Group name on the LanDrive’s configuration. Follow any instructions from Windows (You may be instructed to insert your Windows CD and/or reboot). Accessing the Samba Server from Windows 95/98 Double-click the Network Neighborhood icon on the desktop. You should see your Samba server listed as a member of the workgroup. Double-click the server name to see the shared folders and printers. 19 Accessing the Samba Server from Windows ME Double-click the “My Network Places” icon on the Desktop. Double-click the Entire Network icon, and you should see an icon for your workgroup. Double-click this icon and you should see your Samba shared folders. Note: If you don’t see your server listed right away, it may take a few moments to appear on the list. If it does not show up after a few moments, you can click Start, and then Run. Type two backslashes, followed by the IP of your LanDrive, followed by the name of the share: \\192.168.1.12\sambashare 20 Setting up Windows XP Computers By default, Windows XP will display the Control Panel in Category View. The instructions in this document recommend that you switch to Classic View via the menu in the upper-left corner of the window. You should perform these steps while logged in as Administrator. Step 1 – Go to the Control Panel and double-click the Network and Dial-up Connections icon. You should see at least one Local Area Connection. Identify the LAN connection that corresponds with the network adapter that is connected to your Samba network. Rightclick the Local Area Connection icon and click on the Properties button. You should see both of the following components: Client for Microsoft Networks Internet Protocol (TCP/IP) If you do not see both components, you will need to add them. To add either, click the Install button, select the type of component (Client or Protocol), then click the Add button. 21 Next, click the component you want to add, and click the OK button. The component should appear in the list. Step 2 – Click the Internet Protocol (TCP/IP) component, then click Properties to open the TCP/IP Properties dialog box. If you are using DHCP on your network to assign IP addresses dynamically, select the "Obtain IP address automatically" radio button. Otherwise, select the "Use the following address:" radio button, and fill in the computer's IP address and netmask in the spaces provided. You or your network manager should have selected an address for the client on the same subnet (LAN) as the Samba server. For example, if the server's address is 192.168.1.1 and its network mask is 255.255.255.0, you might use the address 192.168.1.12 (if it is available) along with the same netmask. You can also fill in the IP address of the default gateway. 22 Step 3 – From the Control Panel, double-click the System icon to open the System Properties dialog box. Click the Computer Name tab and the System Properties dialog box will open. To change your computer name and workgroup, click Change, which will bring up the Computer Name Changes dialog box. You need to identify your computer with a name and change the workgroup to the one you specified in the web page of your Samba server. Don't worry that Windows forces the 23 workgroup to be all capital letters; it's smart enough to figure out what you mean when it connects to the network. Accessing the Samba Server from Windows XP Your Samba server is running, and you have set up Windows XP to connect to it. In the Start menu, select “My Computer” and click on “My Network Places” in the Other Places box in the left part of the window. You should see a folder icon for the test directory. Next, click the View Workgroup Computers link in the Network Tasks box. You should see your Samba server listed as a member of the workgroup. Double-click its icon and you will see the Samba share. If you don't see the server listed in the workgroup, don't panic. Select Run from the Start menu. Enter your LanDrive’s Host name, followed by the name of the share folder. For 24 example, you would enter \\toltec\test, as shown below, and use your server's hostname instead of "Toltec". If all works, try copying files to and from the server via drag and drop. 25 FTP Server File Transfer Protocol (FTP) is a network protocol used to transfer data from one computer to another through a network, such as over the Internet. FTP is a file transfer protocol for exchanging files over any TCP/IP based network to manipulate files on another computer on that network regardless of which operating systems are involved (if the computers permit FTP access). Configuring an FTP Server Connect to the LanDrive via HTTP and click on the FTP Server tab. FTP Port – Enter the port number for the internal FTP server. You can enter a number anywhere between 1024 and 65500, and the default port is 21. If you are behind a firewall, remember to open the port you have selected. FTP Codepage – Select one of the following depending on your locale: 26 Central Europe (CP1250): Croat, Czech, Hungarian, Polish, Romanian, Slovak, Slovene and Sorbian. Cyrillic (CP1251): Bulgarian, Belorussian, Macedonian, Moldavian, Russian, Serbian and Ukrainian. Latin I (CP1252): Albanian, Danish, Dutch, Faroese, Finnish, French, German, Icelandic, Irish, Italian, Norwegian, Portuguese, Spanish and Swedish. Baltic (CP1257): Estonian, Latvian, Lithuanian. New – Create an FTP account. Default username: Guest, Default password: [empty]. Modify – Modify an existing FTP account. Password – Allows you to change the password of the FTP account. Access – Control whether users on this account can write data. 27 Folder List – A list of all the existing folders on the hard drive. Sharing List – A list of all the existing folders on the Samba server. If you want to share a folder, simply move it from the Folder List to the Sharing List. Connecting to FTP via Internet Explorer Step 1 – Open Internet Explorer Step 2 – In the address bar, type the following URL: ftp://10.130.xxx.xxx where the URL reflects the IP Address of your LanDrive. Step 3 – Internet Explorer will display a list of files and folders on the FTP server. To save a file locally, right-click the file and select “Save Target As…” Step 4 – Click the “Page” menu button on the right-hand side of the browser window and select the option “Open FTP Site in Windows Explorer.” Now you can drag and drop files to and from this window from other areas of your Desktop. 28 BitTorrent BitTorrent is a peer-to-peer file sharing (P2P) communications protocol. BitTorrent is a method of distributing large amounts of data widely without the original distributor incurring the entire costs of hardware, hosting, and bandwidth resources. Instead, when data is distributed using the BitTorrent protocol, each recipient supplies pieces of the data to newer recipients, reducing the cost and burden on any given individual source, providing redundancy against system problems, and reducing dependence on the original distributor. Downloading Files via BitTorrent Step 1 – Download the torrent file onto your computer. Step 2 – Double-click the BitTorrent tab. 29 Step 3 – Browse to and select the torrent file. Click Upload. Step 4 – The LanDrive will begin to download the data via the BitTorrent protocol. When the torrent download completes, the data will be stored in the download path. Step 5 – You can access the file from your PC via the Samba or FTP client. Configuring BitTorrent System ID – Contains the Torrent ID. Number of Downloads – Configures the maximum number of concurrently active torrents. Server Port: Configures the BitTorrent server upload port. Upload Limit: Sets the maximum upload throughput. Mail Notification – Sends an email to the Administrator whenever torrent downloads are interrupted. 30 Print Server Your LanDrive can act as a Print Server, allowing you to print to your printer from any computer in your house. Step 1 – Plug the printer into your LanDrive via USB. Step 2 – Ensure that Add Print Services is installed. Step 3 – On your computer, click Start and select Printers and Faxes. Step 4 – Under Printer Tasks, select Add a Printer and click Next. Step 5 – Select “Local Printer attached to this computer.” Click Next. Step 6 – Select the Create New Port radio button. Step 7 – From the “Type of Port” drop-down list, choose “Standard TCP/IP Port.” Click Next. 31 At this point, you will be prompted for two items: the Name or Address of Server Providing IP and the Name of the Printer. The first item is the Static IP address that has been assigned to the device. The second item is the Queue name that you found in the device’s documentation. Step 8 – In the Name or Address of Server Providing IP box, enter the IP Address of the LanDrive. Note: Select “Static IP” mode in the “IP Configuration” menu instead of “DHCP” mode. Step 9 – Click Next and select the “User-Defined” option. Step 10 – Setup the protocol (LPR) and queue name. 32 Note: If you receive an error message saying that the "LPD server did not respond as expected,” click Cancel. Attempt to reenter the IP Address or Print Queue name. Click OK again. If this process fails, the device may not support LPR printing. You should stop now and contact the manufacturer for further assistance. Step 11 – You are now ready to install the driver. Click Have Disk and then click Browse. Step 12 – Locate the .INF file for the device. You may need to browse to the CD or to the folder on your computer where you have the device driver downloaded. Click Next. If you are prompted to replace or keep the existing driver, click on Keep Existing Driver. Step 13 – If asked to print a test page, select No. Click Next. Click Finish. 33 Media Server Using the LanDrive as a Media Server allows you to access the data on it from other devices. Step 1 – Select the Media Server sharing folder. Click the Set button. Step 2 – Make sure the media server (LanDrive) is on the same subnet as the media player (Xbox 360, PS3, or iTunes). 34 Sharing Media with an Xbox 360 To access media files—including audio, video and pictures—from storage, you need to connect an Ethernet cable from the Ethernet port on the back of your Xbox 360 console to your Storage. Step 1 – Connect your console to your storage as described above. Step 2 – Click Media Server page of storage, and set up sharing list (photo, music, and video) Step 3 – When setup is complete, Media Server of storage should automatically start. Step 4 – Xbox360 will search for devices on your network. Step 5 – On your Xbox 360 console, in the Media area of the Xbox Dashboard, select Music, Pictures, or Video. 35 Step 6 – Select Storage. Step 7 – Select the media you want to play, and then select Play. 36 Sharing Media with a PlayStation 3 To access media files—including audio, video and pictures—from storage, you need to connect an Ethernet cable from the Ethernet port on the back of your PS3 console to your Storage. 1. Go into the PS3's Settings menu and navigate to Network Settings - Media Server Connection, and select Enabled. This allows the PS3 to detect networked device running Universal Plug and Play (UPnP) server software. 2. When you turn on the PS3™ system, Media Servers on the same network are automatically detected and icons for the detected servers are displayed under (Music), and (Video). 3. Select the icon of the DLNA Media Server that you want to connect to under (Music), or (Photo), (Photo), (Video) in the home menu. All available folders and files that can be played by the PS3™ system will be displayed. 37 The PS3™ system must be connected to a network. For details on network settings, see (Settings) > (Network Settings) > [Internet Connection Settings] in this guide. When the method of allocating IP addresses has been changed from AutoIP to DHCP under the settings for the network environment, perform another search for servers under (Search for Media Servers). The DLNA Media Server icon is only displayed when [Media Server Connection] is enabled under (Settings) > (Network Settings). The folder names that are displayed vary depending on the DLNA Media Server. Depending on the DLNA Media Server, some files may not be playable or operations that can be performed during playback may be restricted. You cannot play copyright-protected content. File names for data that is stored on servers that are not compliant with DLNA may have an asterisk appended to the file name. In some cases, these files cannot be played on the PS3™ system. Also, even if the files can be played on the PS3™ system, it might not be possible to play the files on other devices. 38 Sharing Media with iTunes Step 1 – Enable the Music Directory Media Server. Step 2 – iTunes should configure itself. Simply find the music you want to play. 39 Disk Utility This tab allows you to control some of the more advanced features of your hard drive. Format Disk – This will erase all of the data on your hard drive. Sleep Timer – Configure the hard drive to enter sleep mode when idle. Scan Disk – Check the hard drive for hardware errors, bad sectors, etc. Note: Format all new hard drives with the Disk Utility. 40 Frequently Asked Questions Does the LanDrive support power management? Yes, when there isn’t any hard drive activity within fifteen minutes, the LanDrive will power down to reduce power consumption. The sleep time can be configured via the web control panel. How does the LanDrive achieve its data sharing capabilities? Utilizing the SMB (Server Message Block) protocol, the LanDrive allows any computer client that supports TCP/IP, NetBuei or IPX/SPX to share files. The built-in FTP server also allows any clients with internet connectivity to access the LanDrive. What is the size limitation for the LanDrive? The LanDrive support LBA (48-bit Logical Block Addressing) which in theory includes all hard drives from 32 gigabytes to 2 terabytes. Why the LanDrive only support FAT32 format? As a cross platform file server, FAT32 format is compatible with all major operating systems (Windows/Mac OS/Linux). The only drawback of a FAT32 format is the single file size limitation of 4 gigabytes. How does the LanDrive DHCP service work? The LanDrive functions as a DHCP (Dynamic Host Configuration Protocol) server when it does not detect the presence of other DHCP servers in its network. DHCP is an Internet protocol for automating the configuration of computers that use TCP/IP by automatically assigning IP addresses. What are the naming limitations of the files located in the LanDrive? The maximum length of a folder/directory/file name is 12 characters. Invalid characters such as “* \ : " < > . ? /” may not be used. 41 What kind of hard drives are compatible with the LanDrive? The LanDrive supports 3.5” Ultra DMA/ATA hard drives which are mostly manufactured after 1998. Below is a list of manufacturer websites you can refer to for more information on the hard drive you own. Western Digital: http://www.westerndigital.com IBM/Hitachi: http://www.hitachigst.com Samsung: http://www.samsung.com Seagate: http://www.seagate.com Maxtor: http://www.maxtor.com 42