1
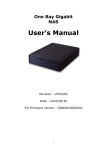
Dual HD Giganet NAS Enclosure
User’s Manual
Before you begin
1. If you purchased the Dual HD Giganet NAS enclosure (indicated as The NAS hereafter)
to share your file or media with other computers, you must use an Ethernet cable with a
properly configured internet environment.
2. For optimal security and convenience, we recommend designating a single computer to
handle all NAS configuration settings.
Check your package content
z
z
z
z
DUAL HD Giganet NAS (Network Attached Storage)
CD-ROM (Containing Setup software & user’s manual)
Ethernet (CAT5 UTP/Straight Through) cable
12V/4A DC Power Adapter
Connect the NAS to Network.
1. First, connect the power adapter to the receptor at the back panel of the NAS and then
plug the other end of the power adapter to a wall outlet or power strip. Turn on the power
switch; the Power LED will turn ON to indicate proper operation.
2. Insert an Ethernet cable to LAN port on the back of the NAS and an available Ethernet
port on the network adapter in the router/switch/hub you will use to connect the NAS. The
LED light for Link Port will illuminate to indicate proper connection.
- Please use a straight-through cable to the LAN port.
- Please make sure that your Local Area Network is already working properly.
3. USB ports can connect to USB printer, by connecting printer the NAS will become a
printer server.
Note: the NAS does not support GDI/Host-based printers
4. Press the power switch to start or shut down the NAS. It will take about 3 minutes to
booth up/shutdown the operation system.
5. Before setting up the NAS, it’s recommended to go through Q&A section on page 40 to
avoid mistakes and confusion.
The descriptions of LEDs
- When you have completed these steps, your connected network should look similar to
this:
Hardware Installation
Power ON/OFF Procedure
Always connect the power adapter to your device before you plug it into the wall socket.
To turn on the power, press the ON/OFF switch. The blue backlight LED will turn on and
the unit will start to boot up. It will take about 1-2 minute for the drive to go online and
be ready. During boot up, the Link LED will be blinking.
To turn off the NAS, stop all current downloads, then turn off the power using the ON/OFF
switch. It will take about 1 minute for the drive to park. Once the system has shut down,
and if it will not be in use for a longer period of time, remember also to remove the power
supply from the wall socket.
Alternatively, the device can also be turned off using the admin interface via web browser.
Login, go to the Turn Off Server menu in the System area and turn the server off.
Quick Installation Guide
Following is a quick installation guide and for further details on each of the settings, please
refer to chapter below:
1. Install at least one hard drive.
2. Connect the Ethernet cable from your network router or switch to the NAS.
3. When everything is connected, turn the NAS on and give it about 2-3 minutes to boot
up.
4. Access the web configuration interface via your web browser. See “How to login” in
Chapter below.
5. Go to the Maintenance menu and use the disk utility to format the drive. If two identical
drives are installed, you can also go to the RAID setting section and create your RAID
array.
6. Once the drive has been formatted, go to the Basic menu and follow the quick setup
wizard. This will help you to set up the IP configuration, add the first user and prepare file
sharing.
7. You are now ready to start sharing or downloading files.
Note: Without installing and formatting a drive first, most functions will not be available
(example: User&Group Management, BitTorrent download).
How to login
To configure your NAS, you will need to use the web browser, enter the IP address and
then use the web configuration for further setup. To find out the IP address of your device
once it is connected to the network, there are several different ways as described on the
following pages.
Use the Setup utility included on the CD. This will list the device automatically and allow
you to access the web configuration interface with a simple click of your mouse. You may
also use the same utility at a later point to map the network drive after you setup your
shares.
Step1. Turn on your NAS and make sure it is connected to the same network as your
computer.
Step2. Start the Setup utility by double clicking on the EXE file and then pressing the
Setup button.
Step3. Your NAS will automatically show up in the device list, but if not, make sure the
Setup utility has access to the network and search again. You might have to configure
your firewall or even temporarily turn it off.
Step4. Select your device and click on OK to start the setup wizard.
Step5. Before you can access the device, you will have to enter the admin password. The
default login is admin/admin, so enter admin for the password and press OK to login.
Step6. You can define the name for your device and set up the IP configuration. We
recommend using the “Automatically obtain an IP address (DHCP)”. When set, press Next
to continue.
Step7. Set time zone, current Date and Time. Click Next.
Step8. You can compare your new settings with the previous configuration. If you find a
mistake, go back to make changes but if everything is OK, press Save.
Step9. Double click “nas” to Enter Web UI of NAS.
Note: Alternatively, you could also simply write down the IP address in the first step of
the setup wizard and then access the web configuration interface via your web browser.
Input the IP address in the URL field of your web browser, hit the Enter key, enter admin
for the username, once more admin for the password and then login. You can now use the
setup wizard online or configure the individual settings yourself.
Web Configuration
- Input the User’s name and password in the login page, “admin” is default password;
change security privilege is recommended.
Basic
The settings in this menu are aimed at the user who wants to quickly set up the NAS and
share files on the local network. Only the most basic functions and settings are available
but it is ideal for someone first using this device. For a more advanced set up, see Control
Panel.
Control Panel
This menu includes all the settings and information the NAS offers. Sorted into individual
categories, the user can access only particular settings or adjust and modify everything
manually.
Personal Info
This menu is for the system administrator account. It includes the option to set the
password and some other options related to the web interface.
Logout
This can be used to logout once all the settings have been configured.
Note: Without installing and formatting a drive first, several functions will not be available
(example: User&Group Management, BitTorrent download).
Quick Setup
The settings in this menu are aimed at the user who wants to quickly set up the NAS and
share files on the local network. Only the most basic functions and settings are available
but it is ideal for someone first using this device. For a more advanced set up, see Control
Panel.
z
Wizard
The setup wizard can be used to configure all the basic LAN settings for your NAS. For PC
users, if you have followed the setup wizard previously, there is no need to go through
this again unless you want to change some of the settings or have not yet completed the
setup.
Step 1: Select your preferred language for the web interface from the drop down list.
Step 2: Set a new password for the web configuration interface. Not required but strongly
recommended.
Step 3: If you prefer a different hostname for your NAS, you can change the name here,
otherwise simply use the default name.
Step 4: We recommend setting both IP Address and DNS Server to obtain the IP
automatically but if required, you can set it manually. If you need assistance in manually
filling out these fields, please contact your network administrator for help.
Step 5: Set the date and time manually or select your time zone from the drop down list
and use a NTP server to synchronize the time via the internet.
Step 6: Compare the new settings with the previous configuration and if OK, complete the
setup wizard to save the new settings.
Note: For a more detailed explanation of each of the settings, refer to System.
z
Add User
Use this setup wizard to quickly add and configure a new user account.
Step 1: Enter the user name and password for the new account. At the same time, you
can also create a private folder for that user and set the quota limit.
Step 2: If there are other users already set up, they can be added to the user account
management.
Step 3: In the last step you can configure the permissions to the shared folder and add or
remove other users.
z
Add Group
Use this setup wizard to quickly add a new group.
Step 1: Enter the group name.
Step 2: Configure which members will be included in this group by adding and removing
the members from the list.
Step 3: Configure the share permissions by adding (read only or writable) and removing
the shares from the list.
z
Add Folder
Use this setup wizard to quickly add a new share folder.
Step 1: Enter the share folder name and an optional description for the share.
Step 2: Configure the Windows/FTP access permissions by adding (read only or writable)
and removing the members or group from the list.
Step 3: Configure the NFS access permissions by adding unique IP addresses or a subnet.
Note: For a more detailed explanation to each of the settings, refer to Users and Group
Management or File and Print.
Users and Groups
In this menu, the admin can manage the users and groups for the NAS. Start by adding
your users first, then create the groups and assign the members to their groups.
Note: If there is no hard drive installed or the HDD is not yet formatted, this menu is not
available.
z
User Management
In this section you can see all existing users for the NAS and manage them by adding or
removing them from the list.
- Existing Users: Lists the current users of the NAS.
- Adding Users: To add a new user, clear the form by pressing the “Clear Form” button,
then fill out a user name and password. The description is optional but will help you to
manage multiple users, so we recommend filling out a short description. If required, you
can create a private folder for that user and set a limit for the capacity. Once done, press
the “Save” button to create the new user. If you would like to add this user to an existing
group, select the user from the existing users list and press the “Groups” button for
further settings.
- Modifying Users: Select the user from the existing users list and modify the settings.
Once done, press the “Save” button to apply the new settings.
- Removing Users: To remove a user, select it from the existing users list and then press
the “Delete User” button.
z
Group Management
In this section you can see all existing groups for the NAS and manage them by adding or
removing them from the list. Groups are not required to grant access to the Dual Giga
NAS but will help the admin to manage multiple users and easily share a folder among a
group of people.
- Existing Groups: Lists the current groups of the NAS.
- Adding Groups: To add a new group, clear the form by pressing the “Clear Form”
button, then enter a new group name. Once done, press the “Save” button to create the
new group. If you would like to add some members to this group, select the group from
the existing groups list and press the “Members” button for further settings.
- Modifying Groups: Select the group from the existing groups list and modify the
members by pressing the “Members” button for further settings. Once done, press the
“Save” button to apply the new settings.
- Removing Groups: To remove a group, select it from the existing groups list and then
press the “Delete Group” button.
File and Print
In this menu, you can configure all the settings related to the FTP, NFS and printer server.
Use this to manage how your files and folders are shared.
z
File Server
In this section you can modify the server settings and also enable or disable a service.
- Character set: By default, this is set to English (CP437). If your file names include
characters from another language, change the encoding here and select your language
from the drop down list.
- Windows Setting: In this section, you can change the workgroup that the NAS belongs
to and modify its description. The IP for the WINS Server (Windows Internet Name Server)
can be left blank unless this is required for your network.
- FTP Server: This service can be enabled or disabled. When enabled, the default FTP
port number will be set to 21 but you can change that if required.
- NFS Server: This service can either be enabled or disabled depending on your
requirements.
- Guest Access: To enable guest access (guest-share), enable it and if required, set a
limit for the disk space. For security reasons, the guest access can also be disabled.
Note: After changing any of the settings, press the “Save” button to apply the new
configuration and save its settings.
z
Share Management
In this section you can manage the shares and access rights.
- Existing Shares: Lists the current shares on the NAS.
- Adding Shares: To add a new share, clear the form by pressing the “Clear Form”
button, then enter a new share name. Once done, press the “Save” button to create the
new group.
Select the new group from the existing shares list, then depending on how you share the
files, click on “Windows, FTP Access” or “NFS Access” and add the users or groups that will
have access to this share. You can allow access for all users or define each user and group
separately. The names with an @ for the first letter are groups.
- Modifying Shares: Select the share from the existing shares list and modify the access
rights by pressing the “Windows, FTP Access” or “NFS Access” button for further settings.
Once done, press the “Save” button to apply the new settings.
- Removing Shares: To remove a share, select it from the existing shares list and then
press the “Delete Share” button.
z
Printer Server setup page
The NAS support most of major brand of printers, user can share printer resource form
the network. Simply follow the steps below:
Step1. Power on and connect your USB printer in to your NAS.
Step2. Browse the Web UI and see whether the printer has been detect the by the NAS.
(for example Epson printer has been detected)
Step3. Install your Printer driver in to your computer, (for example. if Epson PL-6200L
Printer is connected to the NAS, you must install PL-6200L driver in to the computer which
going to perform the print job. After driver installation please click “Start” → “Setting” →
“Printer and Faxes” → “Add a printer”→ “Next”.
Step4. Select “A network printer or printer attached to another computer”, and then click
“Next”.
Step5. Select “Browse for a printer” than Click “Next”.
Step6. Search the NAS and USB Printer attached, then click “next” to browse the printer
driver.
Step7. Go to Printer wizard and select the printer driver. Click “OK” to complete setup.
Notes: The NAS Printer server does not support GDI/Host-based printers. For some Multi
Function Printers (MFP); scanning functions might not be functional probably. Please
contact Printer Manufacture for detail Specifications.
System
In this menu you can configure the basic network settings for the NAS, find some details
related to the firmware, disk usage and set up the error notification.
z
LAN Settings
In this section you can define the hostname for your NAS and set up the IP configuration.
We recommend using the “Obtain IP/DNS address automatically”. When selecting a
hostname, make sure to use a unique name and not one that has already been used on
the local network.
If required, you can also set the individual addresses yourself. If you need assistance in
manually filling out these fields, please contact your network administrator for help.
Note: After changing any of the settings, press the “Save” button to apply the new
configuration and save its settings.
z
Time Settings
In this section, you can set the date and time manually or select your time zone from the
drop down list and use a NTP server to synchronize the time via the internet. When set
manually, press the “Save” button to apply the new time and save the settings or when
synchronized via the internet, select the NTP server and press the “Update Time” button.
Note: To use the NTP function, you need to enter a valid NTP server or select one from the
drop down list. If the default address at time.windows.com does not work, find a new one
and then try again or turn off the NTP server and set the time manually.
z
Turn Off Server
In this section, you can restart the server or turn off the NAS via the web browser. Make
sure that nobody is accessing the device when you restart or turn it off. Press the
“Restart” button to restart the server. The system will restart and automatically prompt
you for the login when it’s ready. Press the “Turn Off” button to shut down the system.
The browser will prompt you to close it the window after about 90 seconds (Internet
Explorer only, for other browser close it manually).
z
Information
In this section, you can find the product name, the current firmware and the current IP
address.
z
Disk Usage
In this section, you can find a summary of the hard disk status and disk usage. Press the
“Refresh” button to update the information.
z
Error Notification
In this section, you can set up how the system should inform the admin of system errors.
Define which services should be included in the report, select a time from the drop down
list for the interval and set up how the errors should be sent.
- Pop-Up Notification: For the pop-up notification to work, the Messenger service has to
be started. To test it, enter the computer name (see System Properties) of the PC that
should receive the message and press the “Send Test Pop-Up” button (Windows only).
Network Service
In this menu, you can enable or disable the network services like the DHCP server,
Bonjour and the BitTorrent™ download service.
z
DHCP Server
In this section, you can enable and set up the DHCP server. In general, there is already a
DHCP server on the local network, so you don’t need to enable this but if required, enable
it and configure the addresses. Once you have set everything up, press the “Save” button
to start the DHCP server and save the settings.
z
Bonjour
In this section, you can enable or disable the Bonjour service. By default, this is enabled,
offering easy access to the login page. In addition to that, you can also enable the iTunes
service.
When the iTunes option is enabled, you can store your MP3 music files in the
/public/music folder and play them directly from iTunes. The Dual Giga NAS will
automatically appear in iTunes under shared devices.
z
BTorrent
In this section, you can manage your torrents and add new downloads to the queue.
Before you add the first job, set a limit for the download and upload speed according to
your network’s bandwidth. After changing the settings, press the Save button to apply the
new configuration.
To start downloading files, you will have to download a torrent file from the internet first
and then upload it to the NAS; using browser to select the torrent in your computer. Once
the torrent file has been added, you can start downloading. The files will be stored in your
/public/btdownload folder. To update downloaded percentage simply press “Refresh”
button.
Note: If there is no hard drive installed or the HDD is not yet formatted, this menu is not
available. To add a new torrent file, use Internet Explorer!
Maintenance
In this menu, you can format the hard drives, setup the RAID array, upgrade the firmware
and manage the configuration settings.
z
Disk Utility
This utility can be used to format the individual hard drives and also to see all the
information related to those disks.
- Disk spin down time: To save power and reduce heat, you can let the hard disk spin
down if not used for a certain amount of time. Enter a time in minutes and press the
“Save” button to apply the new setting.
- Encryption: The NAS supports 128bit loop-AES encryption for the EXT2 file system.
When enabled, the drive has to be formatted again and you will be prompted for a
password (has to be exactly 20 characters).
- File System: .For drives that are not in a RAID array, there is a choice between EXT2,
EXT3 and FAT32. For drives installed in the Dual Giga NAS, we recommend using EXT2 for
optimum performance and functionality.
- Scandisk: Press the “Scan” button to check the disk integrity. If possible, any errors
found will automatically be fixed. This will take a while to finish depending on the capacity
of the drive, and also the disk can not be used in that time.
- Detail: Press the “Detail” button to see further disk information. If the HDD supports
S.M.A.R.T, it will also report the disk’s health status.
z
RAID Setting
In this section you can manage the RAID array and set up your drives. The Dual Giga NAS
supports RAID 0 and RAID 1. Two hard drives of identical capacity and make are required.
If only one drive is installed, the RAID configuration will not be available.
- RAID 0: Used where speed is the primary objective, RAID Level 0 (also called "striping")
is not redundant. This form of array splits each piece of data across both of the drives in
segments; since data is written without any form of parity data-checking, it allows for the
fastest data transfer compared to the other setups. However, if one drive becomes
damaged, the whole array can become corrupted.
- RAID 1: This mode requires 2 identical drives to implement. A RAID 1 creates an exact
copy (or mirror) of a set of data on the second drive. This is useful when reliability and
backup are more important than data capacity. The available capacity to the user will only
be as large as a single drive but when one of the hard drives fails, it can be replaced and
the data rebuilt.
- JBOD: Used to combine two hard drives of different capacity and create one single
larger hard drive. If you are using two identical drives, we recommend using RAID 0
instead.
Note: Creating the RAID system will take several hours, depending on HDD capacity. Do
not turn off the power or interrupt the system in any other way during this process! We
recommend using the EXT2 file system for optimum performance and functionality.
Changing the RAID setup will require you to re-format the drives. Make sure you backup
all data before doing so!
- Rebuilding a RAID array
When using RAID 1 and one of the drives has failed, the faulty HDD has to be replaced
and the RAID 1 array rebuilt.
1. Login and go to the RAID Setting menu to check the disk status. If there is a problem,
it will show which drive has to be replaced.
2. Turn off the power, remove the power supply from the wall socket and replace a new
HDD. Please refer to the table below for the HDD allocations.
3. Turn on the power and go to the RAID setting menu. Add the new drive and the NAS
will start to rebuild your RAID array.
4. Depending on the capacity, this will take several hours. Do not turn off the power or
interrupt the system in any other way. The HDD LED will be ON while the RAID array is
being rebuilt.
Note: Rebuilding the RAID system will take several hours, depending on HDD capacity. Do
not turn off the power or interrupt the system in any other way during this process!
z
Firmware Upgrade
In this section you can check the current firmware version and upgrade if a new one is
available. Download the new firmware and store in on your computer, then browse for the
*.gz file, select it and start the upgrade. The upgrade process will take 10-20 minutes.
Please contact your dealer for latest Firmware update.
Note: Never turn off your unit during the firmware upgrade procedure. This may damage
your device! If for any reasons (e.g. power supply failure during firmware update) the
procedure fails, you may not be able to operate your device any more.
z
Save Configuration
For backup and before every firmware upgrade, you can use this function to save your
current configuration. Press the “Save” button and save the config.tar file on your
computer.
z
Restore Configuration
To quickly restore previous settings or set up multiple units, you can save the
configuration and then use this function to upload a previous backup. Browse for the
config.tar file on your computer and press the “Restore” button to restore the previous
settings.
z
Factory Reset
Pressing the “Factory Reset” button will restore all settings to their default configuration.
Before pressing this button, we recommend saving your current configuration in case you
want to restore it again later.
Note: When the “Factory Reset” button is pressed, all users, groups and other
configurations will be lost!
Log File
This menu includes all the log files of your NAS. You can find logs for the SAMBA, FTP and
DHCP server as well as system and administration logs.
Note: For the system log, you have the option to redirect the log to another Linux
computer by entering its IP address in the redirect field.
32
Personal Information
z
Account
In this menu, you can change your admin password and the menu language for the
configuration interface. There is also an overview of disk usage and share list available.
33
File Access on a PC
To access the data on the NAS via the network connection, you may use either FTP or
SMB. Before you can access the shared folders, you will have to set up your users, groups
and shares. See chapter 3 for more details about user, group and share management.
FTP
Use your Windows Explorer and type ftp:// followed by the IP address of yourNAS. It will
list the available folders and you can download or upload new files.
As an example, your URL might look something like this: ftp://192.168.11.1
Note: For FTP transfers, we recommend installing and using a dedicated FTP application,
which can either be a free utility or professional shareware program.
Windows Explorer
Use Windows Explorer and type \\ followed by the IP address of your Dual Giga NAS. It
will list all available folders and shares on your Dual Giga NAS, which you can then access
directly.
You can copy files to the network storage as if it were a folder on your local drive.
Depending on the bandwidth, you can also directly play and open the files, although we
recommend transferring the data to your local drive first.
34
Mapping a Network Drive
For easy access, we recommend mapping the storage as network drive.
Step1. Double click on My Computer, go to the Tools menu and select “Map Network
Drive…
Step2. Follow the setup wizard and fill in the path to your Dual Giga NAS. Alternatively,
you can also browse for the shares by clicking on the Browse button and locating the
folder that way.
Step3. Once the drive has been mapped, you are able to find and access it under My
Computer. This link will still be there even after rebooting your Operating System.
35
Note: For quick and temporary access, you can also simply go to My Network Places, view
the workgroup computers and select your Dual Giga NAS.
UPnP
The NAS supports UPnP v1.0. To access the device on a PC, go to My Network Places and
the NAS will be listed as an UPnP device. You can select it and access the configuration
page.
How to setup UPnP function in PC
Step1. Go to control panel/ Adding new device/ Windows Components Wizard.
Select “Networking Service” than click Next to continues.
Step2. Select “Universal Plug and Play” than Click “OK” to start setup.
36
Step3. Go to “My network place to search Dual Giga NAS.”
Bonjour & iTunes
For easy access to the web configuration interface on the Mac, a shortcut to the NAS will
be available in the bookmarks collection under Bonjour.
37
iTunes
If the iTunes support for Bonjour is enabled, the NAS will appear as a shared music folder
in your iTunes library. Store your MP3 files in the music folder of the NAS and play them
over the network.
Step1. Make sure the support for iTunes in the Bojour menu is enabled.
Step2. Store your MP3 files in the music folder of your NAS. The folder has already been
created in /public/music.
38
Step3. Start iTunes and the NAS will appear as shared device.
39
Q&A:
Q: Why can’t I access to the NAS setup page?
A: Please connect the NAS directly to your computer via RJ45 port. Open your web
browser and key in the default IP address 192.168.1.1 Then type “admin” for both
Account name and password to enter the NAS setup page.
Q: Why Can’t I perform RAID function under FAT32 format.
A: FAT32 format doesn’t support RAID functions, to perform RAID functions please use
EXT2 or EXT3 format.
Q: Some of the functions and menus are not available!
A: Many of the functions require a hard drive to be installed. Make sure you have at least
one HDD installed and formatted in EXT2 or EXT3.
Q: I lost my password, what do I do?
A: Press the reset button and hold it for 5 seconds to reset the device to its default
settings. The default login is admin/admin. Be aware that resetting the device will erase
all user and group accounts plus some other settings.
Q: When install two HDD without performing RAID setting, and creating a ShareFolder, Why NAS can only to create Folder an the second Disk
(/mnt/ide3/sharefolder) and not on the first Disk (/mnt/ide1/sharefolder)
A: The NAS GUI Software is design to managing RAID 1 or 0 functions, if user wants to
use two separate HDD in the NAS, share management will recognize only the first
formatting disk.
For example, if user format Ide1 HDD first than managing priority goes to Ide1. But still
another HDD space can be recognize in the LAN development. User can browse it through
“My Network place”
Q: Why can’t I create/share folders in SMB or FTP server with a non-English
langauge?
A: To avoid languages support issue, you are suggested to create/share folders with
English characters only.
Q: Why can’t I upload the files via LAN connection or got disconnected
A1: Please make sure the networking is connected properly and you have the access right
(read & write) for the folders.
A2: Please make sure you have enough bandwidth for uploading large files. A complicate
network environment such as too many workgroups or too many layers of network can
result in network disconnection.
Q: How to reset the NAS
A: Please press the reset button for 5 seconds and the NAS will start to reset to factory
default setting.
Q: How can I reduce the noise of the NAS??
A: Make sure the hard drive/case/fan are properly screwed without interference and put
the foot stickers on the case.
Q: Why WinXP can not enter SMB folder with password via the NAS?
A: Please update WinXP to SP2 or above. After update, please make sure if you have
installed Norton Internet Security. If you do, please check with Norton service center.
Q: What is The NAS default login name and password?
A: The default Login name: admin , default password: admin.
Q: How do I access to my NAS via the Internet ?
40
A: If your NAS is using a public IP, please perform the following steps.
1. Enter the management web base of NAS and go to the FTP Server page to enable FTP
Status.
2. Create User account and limits of authority.
3. Open Microsoft Internet Explorer or other FTP software, and enter NAS’s IP address in
the address field (ftp://NAS IP).
Q: Why FTP can not link to the NAS or show link time out when using IE?
A: Due to IE FTP do not compatible with Router, suggest user to use FTP software to start
with. If you would like to use IE FTP to link the NAS, please refer to following steps.
1. Please open port 21 and 20 on Router and link to NAS.
2. Open IE > Tool > Internet Options
3. Don't tick "Enable folder view for FTP site" and click "OK"
Q: What is the limitation of user on the NAS FTP, Samba and account mode?
A: There are following limitations.
1. Maximum user number: FTP: 8 Users, Samba: 8 Users (total 24 sessions at the same
time).
2. FTP Server: Maximum is able to create 32 users accounts, 8 users account connect at
the same time, and maximum 16 folders shared by one account).
3. Samba Server: Share Level Access (maximum 16 folders shared by root).
Q: What can DHCP do as well with the NAS?
A: You can setup your NAS as a DHCP server when it is no any other DHCP Server exist in
your LAN, otherwise, the NAS will automatically turn off its DHCP server function and
become a DHCP client of existing DHCP Server. For example, if you have installed a
router with built-in (activate) DHCP Server, the NAS will automatically setup itself as
DHCP client.
Q: Does the NAS support Hard disk Power Management?
A: The NAS uses standby mode for power management (Sleep time), if there is no any
activity ranging 5-60 min. You can go to web base > Disk Utility > Set Sleep Time
function (0 to disable function, range 5-60 to enable function.
Q: What is the protocol of network file sharing system using by the NAS?
A: The NAS has the built-in Samba Server for file sharing, it is using SMB (Server Message
Block) protocol to integrate TCP/IP, NETBUEI and IPX/SPX protocol. In other words, if the
client PC that can support TCP/IP, NETBUEI or IPX/SPX, it will be compatible with the NAS.
You can also use the built-in FTP Server for file sharing with Internet client.
Q: Why My USB Printer can not be detected by the NAS Printer server?
A: The NAS Printer server does not support GDI/Host-based printers. For some Multi
Function Printers (MFP); scanning functions might not be functional probably. Please
contact Printer Manufacture for detail Specifications.
41