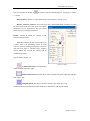
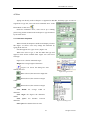
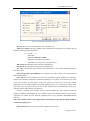
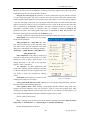
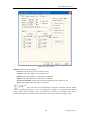
1
EzCad2UNI User’s Manual EzCad2UNI User’s Manual I All rights reserved EzCad2UNI User’s Manual Contents Chapter1 Introduction............................................................................................................ 1 1.1 EzCad2 Brief Introduction ................................................................................................... 1 1.1.1 Software Installation ................................................................................................ 1 1.1.2 Software Function .................................................................................................... 1 1.1.3 Interface Introduction .............................................................................................. 1 1.2 About EzCad2 User’s Manual .............................................................................................. 3 1.2.1 Contents Arrangement ............................................................................................. 3 1.2.2 Announcement......................................................................................................... 3 Chapter 2 File Menu............................................................................................................... 4 2.1 New (N) ............................................................................................................................... 4 2.2 Open (O) .............................................................................................................................. 5 2.3 Save (S) / Save As (A) ........................................................................................................... 6 2.4 Print ..................................................................................................................................... 7 2.5 Obtain Scan Images (M) ...................................................................................................... 7 2.6 System Parameter (P) .......................................................................................................... 7 2.6.1 General ..................................................................................................................... 7 2.6.2 Color ......................................................................................................................... 8 2.6.3 Work Space............................................................................................................... 8 2.6.4 Auto Save ................................................................................................................. 9 2.6.5 Move-Rotate............................................................................................................. 9 2.6.6 Plug Manager ........................................................................................................... 9 2.6.7 User manager ......................................................................................................... 10 2.6.8 Language ................................................................................................................ 10 2.7 Recent File List................................................................................................................... 11 2.8 Exit (X) ............................................................................................................................... 11 2.9 Object List.......................................................................................................................... 11 2.10 Object Properties ............................................................................................................ 11 Chapter 3 Edit Menu ............................................................................................................ 14 3.1 Undo (U) / Redo (R) ........................................................................................................... 14 3.2 Cut (T) / Copy (C) / Paste (P).............................................................................................. 14 3.3 Combine / Uncombine ...................................................................................................... 15 3.4 Group / UnGroup .............................................................................................................. 15 3.5 Hatch ................................................................................................................................. 15 3.6 To Curve............................................................................................................................. 19 Chapter 4 Draw Menu .......................................................................................................... 20 4.1 Point (D) ............................................................................................................................ 20 4.2 Curve ................................................................................................................................. 21 4.3 Rectangle ........................................................................................................................... 21 4.4 Circle.................................................................................................................................. 22 4.5 Ellipse ................................................................................................................................ 23 4.6 Polygon .............................................................................................................................. 23 4.7 Text .................................................................................................................................... 24 4.7.1 Character Properties .............................................................................................. 24 II All rights reserved EzCad2UNI User’s Manual 4.7.2 Circle Text ............................................................................................................... 25 4.7.3 Barcode Text ........................................................................................................... 26 4.7.4 Variable Text ........................................................................................................... 31 4.8 Bitmap ............................................................................................................................... 47 4.9 Vector File.......................................................................................................................... 51 4.10 Time-lapser ..................................................................................................................... 52 4.11 Input Port ........................................................................................................................ 52 4.12 Output Port ..................................................................................................................... 52 4.13 Select ............................................................................................................................... 53 4.14 Node Editing .................................................................................................................... 55 4.17 Encoder distance ............................................................................................................. 57 Chapter 5 Modify Menu ....................................................................................................... 58 5.1 Array .................................................................................................................................. 58 5.2 Transformation .................................................................................................................. 59 5.2.1 Move ...................................................................................................................... 60 5.2.2 Rotate ..................................................................................................................... 60 5.2.3 Mirror ..................................................................................................................... 60 5.2.4 Zoom ...................................................................................................................... 61 5.2.5 Lean ........................................................................................................................ 62 5.3 Plastic ................................................................................................................................ 63 5.4 Curve Editing ..................................................................................................................... 63 5.5 Align .................................................................................................................................. 63 Chapter 6 View Menu .......................................................................................................... 65 6.1 Zoom ................................................................................................................................. 65 6.2 Ruler / Gridding / Guide Line ............................................................................................ 66 6.3 Snap Grid ........................................................................................................................... 66 6.4 Snap Guide Line................................................................................................................. 66 6.5 Snap Objects...................................................................................................................... 66 6.6 System Toolbar / View Toolbar / Draw Toolbar / Status Bar / Object List Toolbar / Object Properties Toolbar/ Mark Parameter Toolbar ......................................................................... 66 Chapter 7 Special ................................................................................................................. 67 7.1 Nesting .............................................................................................................................. 67 7.1.1 Nesting multi part .................................................................................................. 67 7.1.2 Nesting one part..................................................................................................... 69 Chapter 8 Laser .................................................................................................................... 71 8.1 Rotary marking .................................................................................................................. 71 8.2 Rotary marking 2 ............................................................................................................... 75 8.3 Globe Mark........................................................................................................................ 76 8.4 Multi part mark ................................................................................................................. 82 8.5 Power Keyboard ................................................................................................................ 86 8.6 Power Ruler ....................................................................................................................... 88 8.7 RingMark ........................................................................................................................... 94 8.8 Rotate Text Mark ............................................................................................................... 98 8.9 Split mark 2 ....................................................................................................................... 99 III All rights reserved EzCad2UNI User’s Manual Chapter 9 Help ................................................................................................................... 101 9.1 About EzCad2 .................................................................................................................. 101 Chapter 10 Marking ........................................................................................................... 102 10.1 Pen List .......................................................................................................................... 102 10.2 Marking Parameter Base ............................................................................................... 103 10.3 Mark-Control Bar........................................................................................................... 108 10.4 Machine Parameters ..................................................................................................... 109 10.4.1 Field Parameter .................................................................................................. 109 10.4.2 Laser Control Parameter .................................................................................... 112 10.4.3 Port parameter ................................................................................................... 115 10.4.4 Other .................................................................................................................. 117 IV All rights reserved EzCad2UNI User’s Manual Chapter1 Introduction 1.1 EzCad2 Brief Introduction 1.1.1 Software Installation The EzCad2 software run on an PC with 900 MHz CPU and 256 MB RAM at least. In general, we recommend the fastest PC available. EzCad2 was developed in Microsoft Windows XP and will run in VISTA The installation of EzCad2 is very easy. Users simply need to copy EzCad2 folder that is in the Install CD to hard disk, and then double click the Ezcad2.exe under the EzCad2’s directory to run the software. EzCad2 requires a software security device sometimes known as a 'dongle'. This device plugs into the USB port on the PC. If there is no dongle or the dongle do not install correctly, a caution will appears and the software will work at demo state. In demo state, we can evaluate the software but we cannot save files and cannot control laser device. 1.1.2 Software Function Main functions of the software: Users can design their graphics freely. Various types of fonts are supported. Such as TrueType, SHX, JSF(Single line font defined by EzCad2), DMF(Dot Matrix Font), One-Dimensional bar code, Two-Dimensional bar code , and so on) Flexible variable text: changes the text real time while in laser processing. Excel datasheet is supported. Can through the serial port direct read text data Can through the network direct read text data Strong node editing function make the curve modification more easier The software can support 265 “pencils”, which used to draw graphic and can be set different processing parameters. Common types of images are supported. (bmp, jpg, gif, tga, png, tif…) Common vector images are supported. (ai, dxf, dst, plt…) Image processing (Grayscale, White / Black Transformations) Powerful hatching functions, such as support round hatch. More convenient IO operations and more easier to harmonize the auxiliary equipments. Supports the dynamic focus (3 axis processing system) Supports directly the SPI G3 fiber laser and the newest IPG_YLP fiber laser An opening language supporting system makes it easy to run the software in various languages platform. 1.1.3 Interface Introduction Software starting interface The picture (Figure 1-1) appears while running the program, and meanwhile the initial operations takes place in the background. 1 All rights reserved EzCad2UNI User’s Manual Figure 1-1 Program starting interface Main Interface (Figure 1-2) Figure 1-2 EzCad2 Main Window 2 All rights reserved EzCad2UNI User’s Manual 1.2 About EzCad2 User’s Manual 1.2.1 Contents Arrangement The User’s Manual will introduce each menu (File, Edit, Draw, Modify, View, Help) in turn. 1.2.2 Announcement 3 All rights reserved EzCad2UNI User’s Manual Chapter 2 File Menu The File Menu is used for common file functions such as opening, saving, importing images from Twain equipment, etc. (Figure 2-1) Figure 2-1 File Menu 2.1 New (N) “New" is used to create a blank work space to construct objects, and its shortcut key is “Ctrl + N”1. When “New” is clicked, the software will close the documents which you are editing and meanwhile create a new file. If the documents you are working on have not been saved yet, the software will prompt if you would like to save it. The icon of “New” in toolbar is . Click on this icon will achieve the same operation. If you move the mouse cursor onto the icon mentioned above and keep it for a while, a piece of prompt information( Tooltip ) will appear, which briefly explains the function of this icon, and also there will be some detailed explanations appearing in the status bar in the bottom of the main window. And if you move the mouse cursor onto “New” in File Menu will only show detailed explanations in the status bar. 1 “Ctrl + N” refers to press the key ‘N’ while press the key ‘Ctrl’. The following contents do the same. 4 All rights reserved EzCad2UNI User’s Manual Reminder: In EzCad2 software, each icon in the Toolbar contains a function of showing brief prompt information and displaying detailed explanation. Also, each icon has a corresponding menuitem, and both the two ways carry out the same function. The User’s Manual will not mention it again in the following chapters. 2.2 Open (O) “Open” is used to load a saved “.ezd” file, and its shortcut key is “Ctrl + O”. (Figure 2-2) When click “Open”, the software will pop an open-file dialog to ask you select the file you want to open, See fig 2-2. When you select a valid “.ezd” file, the dialog would display the preview of the file (you must have saved the preview when you save the file). Figure 2-2 “Open” Dialog Box The icon of “Open” in toolbar is . The files saved with other file-format will not be opened by the “Open” command. 5 All rights reserved EzCad2UNI User’s Manual 2.3 Save (S) / Save As (A) “Save” file is used to save the current state of a mark Document to disk. “Save As” is used to write the current mark Document to disk by another name. Writing a file to its current name is the same as the Save function. Figure 2-3 “Save” dialog box If the current Document has already been named, “Save” is selected to save it under the name that was used to open the file, or the software will prompt to the user to choose a destination path and type a name. Whether the current file is named or not, “Save As” will appear to ask for a new name to save file, and the previous file will not be overwritten. If you select “Save Preview Image”, you will see the preview when you open the file(refer to “Open” function). The icon of “Save” in toolbar is . 6 All rights reserved EzCad2UNI User’s Manual 2.4 Print “Print” is used to print the images you are working with. 2.5 Obtain Scan Images (M) “Scan Images” is used to get digital graphic object from Twain device. When selected the “Scan Images” function will prompt the user to choose a Twain device. (The Twain device listed in the column should be those which have been legally installed in the computer.) When the suitable device is selected, you can now insert a graphic object into the currently selected Document. (Different devices show different prompts. Please consult the devices operation reference.) 2.6 System Parameter (P) “System Parameter” configures the software, and the icon of “System Parameter” in toolbar is . Users can use this command to change the default setting of Display, Save and Language, etc. When selected, a dialog box will appear, and you can set the unit the software uses, the color displayed, the work space’s parameter, the interval of auto save, the locale language, etc. 2.6.1 General In “General”, common parameters can be configured. (Figure 2-4) “Unit Type”: millimeter and inch are two options can be selected. “Paste X” and “Paste Y”: the relative offsets to the previously object when paste. “Grid”: show or hide the grid “Grid Space”: adjust the distance in grid. “ Enable Mark Mutex (EZCAD2MUTEX_MARKING) ” :This option is used to synchronize the Ezcad program with third-party programs. If checked, the Ezcad software create a mutex object named “EZCAD2MUTEX_MARKING”. The mark command cannot be executed until the mutex is “signaled” by other programs. After marking, the mutex will be switched to “nonsignaled” state by Ezcad software “Execute when Ezcad starts” :The exe file appointed here will be executed when the Ezcad software starts. “Execute when Ezcad Finish” :The exe file appointed here will be executed when the Ezcad software ends 7 All rights reserved EzCad2UNI User’s Manual Figure 2-4 System Parameter 2.6.2 Color “Color” is used to set the color of background, work space, guide line and grid, etc. Double click the color stripe could change the color wanted. (Figure 2-5) Figure 2-5 Color Figure 2-6 Set the Work Space 2.6.3 Work Space The set of the work space’s property contains setting the size, type and position at the work space. (Figure 2-6) The Work Space is the rectangle or circle area in the main interface window. This space is 8 All rights reserved EzCad2UNI User’s Manual corresponded with the available working field of the laser machine, and any object drawn in this area will be marked in operation. Due to the limit of the field, those objects drawn out of this space may not be marked. 2.6.4 Auto Save “Auto Save” refers to the interval time between two automatic saves, and the initial value is 10 which means to save file per ten minutes. The file saved is named as ‘AutoSave.ezd’ in EzCad2’s directory. (Figure 2-7) Figure 2-7 Auto Save Figure 2-8 Move-Rotate 2.6.5 Move-Rotate See figure 2-8. Nudge Distance: the distance that the object moved when pressing direction keys each time. Big Nudge Scale: indicates the number the user wants to time the Nudge distance so as to achieve further each time when synchronously press direction keys and “shift” key together Rotate Angle: the angle the object rotates each time when press direction keys and “ctrl” key together Object’s Origin: when use “Put to origin” function, which point of the object should be put on the origin. 2.6.6 Plug Manager The list displays the EzCad software plug which has already been installed in the computer. The users can activate or inactivate each plug. Press “blank” key or double click the plug name will swtich the active state. (Figure 2-9) Changes will take effect in EzCad’s next start. 9 All rights reserved EzCad2UNI User’s Manual Figure 2-9 Plug List 2.6.7 User manager Uses in choosing whether to use the current software must to input the user password, as shown in Figure 2-10 When enable “You must enter and password before using”, the system default has a administrator and a designer, the user can increase operator. The jurisdiction of administrator is can use software all functions The jurisdiction of designer is may revise all software function besides the user information The jurisdiction of operator is only could open already completed document, cannot revise and preserve the document, as well as revise the system parameter, this may prevent the operator to change the system parameters to cause the equipment work by mistake not to be normal. 2.6.8 Language Figure 2-10 user manager dialog box This item is used to change languages between Chinese and English. (Figure 2-11) Changes will take effect when restarting the marking software. Figure 2-11 Language 10 All rights reserved EzCad2UNI User’s Manual 2.7 Recent File List Below the menuitem of System Parameter, a list is displayed to show the latest Document files opened, and the max amount of the file items is ten. There is no file listed if users have never opened / saved any “.ezd” files, and “Recent File” is unavailable. 2.8 Exit (X) Exit the EzCad software. When selected the Exit function will prompt the user whether to save the files which have not been saved yet. 2.9 Object List Object List is in the left side of the main interface window. Marked objects are grouped into an object structure or ungrouped to many objects. (Figure 2-12) When in marking process, system will follow the order to mark the objects listed. Users can rearrange the list by directly dragging the object up/down to change the marking order. Users can double click the object bar to name them. Figure 2-12 Object List 2.10 Object Properties Object Properties are displayed in the left side of the main interface window 11 All rights reserved EzCad2UNI User’s Manual X position: the X coordinate of the the left button corner of the object Y position: the Y coordinate of the the left button corner of the object Z position: the Z coordinate of object X Size: width of the object selected Y Size: height of the object selected : Lock the current width/height point in selected. point in selected selected proportion of the object selected. If changes the object’s size, system will X/Y ratio. Click the button will switch unlock state user keep the to Figure 2-13 Object Property : The coordinate data (X position, Y position) is maped to which point of the object. Array: copy the current object and arrange them to the destination users want by setting the row|column number and space Count X: the count of the row Count Y: the count of the column Inc (mm): the space between each row|column. Figure 2-14 stands for the situation when “X=3, Y=2” Figure 2-15 stands for the situation when Figure 2-14 Array (X=3, Y=2) “X=2, Y=3” : set array’s row as marking precedence : set array towards vertical direction as marking precedence : Unidirection marking. : Bidirectional marking I/O Control condition: The system reads the Figure 2-15 Array (X=2, Y=3) input port first, and then compare whether the current input singal is as the same as the object’s “I/O Control condition”, and if it does, the current object will be marked, or, the system will skip the current object and handle next object. Only four bits (0, 1, 2, 3) are available now. Each bit has three states. The grayed state means 12 All rights reserved EzCad2UNI User’s Manual skip this signal. The unchecked state means that if we want to mark this object then the signal of this bit must be low level voltage (TTL compatibel). The checked state stands for the high level voltage (TTL compatibel) needed. : expect the high level voltage : expect the low level voltage : skip the signal Figure 2-16 Input Port 13 All rights reserved EzCad2UNI User’s Manual Chapter 3 Edit Menu “Edit Menu” carries out the editing operation of an object. (Figure 3-1) Figure 3-1 Edit Menu 3.1 Undo (U) / Redo (R) “Undo” will undo the last action that the user made in EzCad2. For example, if the user deleted an object accidentally, clicking Undo will bring the program back one step to where that item still existed. And the user also can select “Redo” to redo the last action which has just been deleted. 3.2 Cut (T) / Copy (C) / Paste (P) “Cut” will delete the object selected from EzCad2 and copy it to the clipboard. It can be inserted back into the .ezd file later using “Paste” function. Note that it will be lost if other data is copied to the clipboard. “Copy” will copy the selected object to the clipboard and reserve the current object. “Paste” will paste the object from the clipboard to current document file. The shortcut keys of “Cut”, “Copy” and “Paste” respectively are: Ctrl+X, Ctrl+C and Ctrl+V. 14 All rights reserved EzCad2UNI User’s Manual 3.3 Combine / Uncombine “Combine” will ignore all the selected objects’ curve properties and combine those objects into a new curve combination with new curve properties. Same as other objects, this new combination can be selected, copied, pasted and set properties. “Uncombine” will get the combination back to the curve objects separately. The objects after “Uncombine” may be different from those before “Combine”. “Undo” should be used to restore the original objects The feature Combine’s icon in Toolbar is is , and the feature Uncombine’s icon in Toolbar . The shortcut keys of “Combine” and “Uncombine” respectively are: Ctrl+L and Ctrl+K. 3.4 Group / UnGroup When selected the “Group” function will keep the selected objects’ original properties and make them into a new object, and this new group, as the same as other object, can be selected, copied, pasted and set object properties. “Ungroup” will turn the object which has just been grouped into previous situation. The icon of Group in Toolbar is , and UnGroup’s is . The shortcut keys of “Group” and “UnGroup” respectively are: Ctrl+G and Ctrl+U. 3.5 Hatch “Hatch” is used to force EzCad to calculate the hatch fills for the current objects. The object to be filled must be closed curve, and if you choose many objects to fill, these figures can be objects nested mutually. Any two objects may not have intersectant parts (Figure 3-2) Figure 3-2 Hatch (Objects on the left can be filled; The two rectangles on the right may get unexpected result for they intersect each other.) 15 All rights reserved EzCad2UNI User’s Manual The icon of Hatch in Toolbar is , and when selected a hatch dialog box will appear as Figure 3-3 shows. Mark Contour: whether to show and mark the current object’s contour or not Hatch 1 / Hatch 2 / Hatch 3: Users may have three independent hatch parameters to hatch the same object at the same time. Each set of hatch parameters can be appointed a Pen No. which stands for a set of marking parameters. Enable: whether to permit the validity of the current hatch parameter. All Calc: Calculate all the selected objects as a whole. This is an optimizing option. In some cases the speed of marking may highly be raised. It will take long time to calculate large, complex objects. When not selected, the objects will be calculated separately. Type of Hatch: (Figure 3-4) Figure 3-3 Hatch Unidirection hatch: The hatch lines will be marked from left to right. Bidirectional hatch: The hatch lines will be marked from left to right first, and then from right to left. Ring-like hatch: fills objects from the outside to the inside like a ring Click the button will switch between the unidirection, bidirection, and ring-like hatch. 16 All rights reserved EzCad2UNI User’s Manual Figure 3-4 Types of hatch (The left object is being filled by Unidirection Hatch or Bidirectional Hatch, and the right object by Ring-like hatch) Angle: Hatch Angle stands for the angles between hatch lines and X axis, and Figure 3-5 is the feature when the angle is 45 degrees. Line Space: the space between two hatch lines Edge offset: the distance between hatch lines and the object’s outline (Figure 3-6) Figure 3-5 Degrees Figure 3-6 Border Distance (The left object shows the figure when Edge offset is 0 and the right shows when it is 0.5.) Follow edge one time: draws outline one time around the hatch lines after filling (Figure 3-7) 17 All rights reserved EzCad2UNI User’s Manual Figure 3-7 Follow edge one (The left object do not enable this option and the right one do.) Start Offset: the distance between the first fill line and the border of the object End Offset: the distance between the last fill line and the border of the object Figure 3-8 shows the feature when it is filled. Figure 3-8 Offset Distances (The left figure is the object when the Start offset and End Offset are 0, and the right figure is the object when the Start offset and End Offset are both 0.5.) Average distribute line: The solution the starting and ending hatch line are non-average distributes question when the object is hatched. After select this item, the software automatic adjust the hatch line space in the user setting hatch line space foundation, will let the hatch line average distribute. Linereduction: The hatch line both sides reduction. (Figure 3-9) 18 All rights reserved EzCad2UNI User’s Manual Figure 3-9 Linereduction ( The left figure is the object when the Linereduction is 0,the middle figure is the object when the Linereduction is 0.5, and the right figure is the object when the Linereduction is -0.5) NumLoops: The times of Ring-like hatch before the aclinicing hatch (Figure 3-10). Figure 3-10 NumLoops ( The left figure is the object when the NumLoops is 0,and the right figure is the object when the NumLoops is 2) Auto rorate hatch: Refers to after every marking, the hatch line will fill the revolving angle which we setted automatically to marking again. 3.6 To Curve “To Curve” turns the current selected vector graphics object into curve object 19 All rights reserved EzCad2UNI User’s Manual Chapter 4 Draw Menu “Draw Menu” consists of various common items for drawing, for instant, Dot, Line, Curve, Polygon, etc. Draw Menu has a Toolbar correspondingly, and all the operations can be achieved by pressing the icon on the Toolbar. For example, as Figure 4-1 shows, when you have selected the drawing command or the icon in Toolbar, the Present Command Toolbar on the top of the main window will be changed to show some options of the current command. (a) Figure 4-1 Draw Menu (The three pictures above stand for: (a) Draw Toolbar; (b) Draw Menu; (c) Command Toolbar) 4.1 Point (D) To draw a dot in the working space is one of the easiest drawing operations. When selected, the mouse pointer will be changed into a cross feature, and users just press the left button of the mouse in an appropriate place, a dot can be drawn. Also users can draw more dots by pressing the left button, when it is finished, user can press the right button of the mouse to end the drawing command, and then the last dot drawn is displayed as selected object. Under dot drawing mode, the Present Command Toolbar will be displayed as: 20 All rights reserved EzCad2UNI User’s Manual If users press button , a set of dots with equal distance will be placed along a curve. Point num: the amount of dots settled on the curve Start Offset: the distance between the first dot and the beginning of the curve Point dist: the distance between the two bordered dots 4.2 Curve To draw a curve, users can select command “Curve” in the Draw Menu or click the icon . (Figure 4-2) Figure 4-2 Draw a Curve When command “Curve” selected, users can draw free curves by pressing the left button of the mouse and drag it. When command “Curve” selected, users can move the mouse to the nodes on the middle of the curve and press the left button of the mouse to delete the current node. When “Curve” commands selected, user can move the mouse to the node on the beginning of the curve and press the left button of the mouse to close the current curve automatically. When command “Curve” selected, users can move the mouse to the node on the end of the curve and press the left button of the mouse to change the node of the current object into “sharp”. When command “Curve” selected, users can move the mouse to the points which are not nodes and press the left button of the mouse to add a node to the current position of the curve. 4.3 Rectangle To draw a rectangle, users can select command “Rectangle” in Draw Menu or click the icon 21 All rights reserved EzCad2UNI User’s Manual . Under the command “Rectangle”, users can press the left button of the mouse and drag it to draw a rectangle. Under the command “Rectangle”, users can draw a square by pressing the left button of the mouse and drawing it when press “Ctrl” key synchronously. After drawing and selecting, the Properties Toolbar will display a feature like Figure 4-3 shows. Arc radius: This refers to the smooth degree of the rectangle’s four corners, and when the degrees are 100%, then the rectangle changes into a circle. All corner Round: When selected, users can change the angles of the four corners at the same time just by changing one of them. NOTE: After changing the parameters in the Properties Toolbar each time, we must click “Apply” button to update the object with new parameters. Figure 4-3 Rectangle Properties 4.4 Circle To draw a circle, users can select command “Circle” in the Draw Menu or click the icon . Under the command “Circle”, users can press the left button and drag it to draw a circle. After drawing and selecting, the Properties Toolbar will display a feature like Figure 4-4 shows. Diameter: the diameter of the circle Starting Angle: the angle between the starting point and the centre of a circle : This figure refers to the drawing direction of the circle is clockwise. : This figure refers to the drawing direction of the circle is anticlockwise. Figure 4-4 Circle Properties 22 All rights reserved EzCad2UNI User’s Manual 4.5 Ellipse To draw an ellipse, users can select command “Ellipse” in Draw Menu or click the icon. Under the command “Ellipse”, users can press the left button of the mouse and drag it to draw an ellipse. Under the command “Ellipse”, users can draw a circle by pressing the left button of the mouse and drawing it when press “Ctrl” key synchronously. After drawing and selecting, the Properties Toolbar will display a feature like Figure 4-5 shows. Start Angle: the angle between the starting point and the centre of an ellipse End Angle: the angle between the ending point and the centre of an ellipse : This figure refers to the drawing direction of the ellipse is clockwise. : This figure refers to the drawing direction of the ellipse is anticlockwise. Figure 4-5 Ellipse Properties 4.6 Polygon To draw a polygon, users can select command “Polygon” in Draw Menu or click icon . Under the command “Polygon”, users can press the left button of the mouse and drag it to draw a polygon. After drawing and selecting, the Properties Toolbar will display a feature like Figure 4-6 shows. Edge Num: This item indicates the number of the polygon’s borders, and that is at least three. Normally the border number is less than ten, and with borders more than ten the polygon will look like a circle. : When selected, the current polygon to be drawn will be a convex polygon. : When selected, the current polygon to be drawn will be a Figure 4-6 Polygon Properties star. 23 All rights reserved EzCad2UNI User’s Manual 4.7 Text Typing text directly in the workspace is supported in EzCad2, and many types of fonts are supported. To type text, users can select command “Text” in the Draw Menu or click icon. Under the command “Text”, users can set up a starting point at any position wanted in the workspace to type characters by left click mouse. 4.7.1 Character Properties When selected, the Properties Toolbar will display a feature like Figure 4-7 shows. Users may change the characters by typing in the text box. EzCad2 supports five types of text. (Figure 4-8) When users select a type, a font list under that type will appear to show all the available fonts. Figure 4-9 is the list of TrueType. 4-7 Character Properties Figure 4-10 is the list of Barcode Type. Height: the average height of characters : Figure 4-11 shows the dialog box after clicking this icon. Figure 4-8 Types of Text : When selected, the current text aligns left. : When selected, the current text aligns center. : When selected, the current text aligns right. Char Width: the average width of characters Char Angle: the degrees the characters incline Char space: the distance between characters Lines space: the distance between rows Figure 4-9 TrueTpye List 24 All rights reserved EzCad2UNI User’s Manual Figure 4-10 List of Barcode Type 4.7.2 Circle Text EzCad2 supports circular text, after select Figure 4-11 Character Options in the figure 4-11, the text will align according to the user definition circle diameter. The demonstration graph in Figure 4-12 is according to Figure 4-11 parameter making. Base Angle: The benchmark of the text aligning the circle. Angle range limit: When checked, no matter how much chars that users type in, the text will be limited in the angle range. (Figure 4-13) Figure 4-12 Circle Text Figure 4-13 Comparison of Two Texts (Limiting Angle is 45 degrees.) 25 All rights reserved EzCad2UNI User’s Manual 4.7.3 Barcode Text When users click the icon , a dialog box will be displayed as Figure 4-14 shows. Figure 4-14 Barcode Text 1. Sketch Map The sketch map is that the current barcode will look like. 2. Barcode Information The barcode explanation shows some information about the current barcode’s format, and if users are not very clear with the format, it is recommended to read the tip first to get to know what types of characters is valid. 3. Text This item refers to the text to be made into barcode. And if the characters users types in the Text space is valid, there will be a cross selected in which shows the current characters are valid for being made into a barcode. 4. Show Text Whether to show a corresponding text under the barcode (Figure 4-15) 26 All rights reserved EzCad2UNI User’s Manual Figure 4-15 Show Text Font: The font of the current characters to be displayed Width: the width of the characters Height: the height of the characters Text Offset X: When selected and set up, the text displayed under the barcode will be moved towards either the positive or the negative directions of X axis. Text Offset Y: When selected and set up, the text displayed under the barcode will be moved towards either the positive or the negative directions of Y axis. Text Space: the space between characters 5. Quiet: Refer to the size of the barcode’s blank area, when let the barcode “Reverse” valid. One-Dimensional Barcode This kind of barcode consists of bar and space one by one. The barcode information is carried by different width and position of the bars and space, and the information volume they carry is decided by the width and the precision. Wider the barcode is, more the bars and the space included, and more information carried. This kind of barcode technology can store information towards only Unidirection through permutation and combination of the bars and the space, and so it is called one-dimensional barcode. Figure 4-16 shows a feature of parameter setting when a one-dimensional barcode is chosen. CheckNum: This refers to whether the current barcode needs verify code. Users can freely choose which barcode they would like to add verify code on, and users have the decision whether to use the verify code or not. Reverse: This refers to whether to reverse the parts which should be marked into the unexpected parts of an object. This function is used in some materials which appear light color after the marking. Bar Height: the height of the barcode Narrowest Width: This refers to the width of unit bar. Commonly a one-dimensional barcode consists of bars with four types of width and space with four types of width, 1 \ 2 \ 3 \ 4. The narrowest bar’s width indicates the width is 1 unit. 27 All rights reserved EzCad2UNI User’s Manual Interchar space Figure 4-16 One-Dimensional Barcode Parameter Figure 4-17 Characters’ Distance Setting Interchar space: It is prescribed that some barcodes have distance between characters. (e.g. Code 39) This parameter is used to set this like Figure 4-17 shows. Scale: Bar: setting the width of one bar. Space: setting the width of the space, Quiet: Refer to the size of the barcode’s blank area, when let the barcode “Reverse” valid. The actual size of the blank area is the multiple of the unit bar. Two-Dimensional Barcode 1. PDF417 Barcode Figure 4-18 PDF417 Barcode Figure 4-19 Compress PDF417 Barcode PDF is the abbreviation of the Portable Data File. Figure 4-18 is the demonstration of PDF417 Barcode and Figure 4-19 of the Compress PDF417 Barcode. Figure 4-20 is the parameter setting of the PDF417 Barcode. Bar Height: the height of the barcode Narrow Width: This refers to the width of the unit bar. 28 All rights reserved EzCad2UNI User’s Manual Level: the Error-Checking Level of PDF417 barcode, from 0 to 8 Lines and Columns: the lines and Columns of PDF417 barcode Figure 4-18 shows a feature of a barcode with the row’s number is four and the column’s is four. Figure 4-20 PDF417 parameter 2. Data Matrix Barcode: Data Matrix is a kind of two-dimensional barcode based on Matrix, and currently there are two types: Ecc000-140 and Ecc200. EzCad2 supports Ecc200 at present. Figure 4-21 shows the parameter setting of Data Matrix Barcode. Figure 4-21 Data Matrix Barcode Parameter Figure 4-22 Data Matrix Figure 4-23 Data Matrix Setting Barcode Size Barcode Width Data Matrix has various fixed size, and users can choose what they want. If the smallest size is chosen, the system will automatically select the smallest frame to fit the all text users have typed. Narrow Width: the width of the unit bar (Figure 4-23) 3. QRCODE Barcode: QRCODE Barcode is two dimensional (2D) code format. The character set includes all ASCII values. There are no size restrictions. The figure 4-24 ,4-25, 4-26 are the parameter of QRCODE Barcode. 29 All rights reserved EzCad2UNI User’s Manual Figure 4-24 QRCODE Barcode Figure 4-25 QRCODE Barcode text setting Figure 4-26 QRCODE Barcode Parameter Setting 4. USER DEFINE Code: USER DEFINE Code is user can define code format by self. Figure 4-27 and figure 4-28 are the demonstration of user defines code. Figure 4-27 USER DEFINE Code Parameter Setting 30 All rights reserved EzCad2UNI User’s Manual Figure 4-28 USER DEFINE Code 4.7.4 Variable Text The function of variable text is available after is selected. Variable Text is a disciplinary and dynamic text which can be customized during the operation. Figure 4-29 Variable text attributes The adjacent character distance in current text character arrangement situation What the adjacent character spacing's computation refers to is left side the character right boundary to the right side character left boundary distance, see the figure 4-30: 31 All rights reserved EzCad2UNI User’s Manual Figure 4-30 Calculate spacing according to character boundary What the adjacent character spacing's computation refers to is left side the character center to the right side character center distance, see the figure 4-31: Figure 4-31 Calculate spacing according to character center is the special array uses in the variable text array, when uses this array the time text to change automatically, but 2.11 object property said the array will not change the text object, this is the difference about these two array. Inside the EZCAD2 international edition the variable text is a character string according to successively the order by each kind of different real-time change text element. The user may according to need to increase each kind of variable text element, may carry on the order of rank to the text element. After the user click “increases”, the system will display a dialog box as Figure 4-32 shows. 32 All rights reserved EzCad2UNI User’s Manual Figure 4-32 Text element dialog box Currently EzCad2 supports 8 types of variable text: Fixed text: refers to the fixed invariable element in the operating process. Serial number: The system will change the text according to the fixed increment when in the operating process. Date Code: When the operation is taking place, the system will automatically pick up the date information from the computer as a new formed text. Time: When the operation is taking place, the system will automatically pick up the time information from the computer as a new formed text. TCP/IP communication: When the operation is taking place, the system will pick up the text from the network Serial communication: When the operation is taking place, the system will pick up the text from the serial port File: The system will seriatim read what to be marked in the customized text file line by line. Keyboard: Users can type text to be marked through keyboard when the marking is in process. Fixed text The fixed text is refers to the fixed invariable element in the operation process. 33 All rights reserved EzCad2UNI User’s Manual Figure 4-33 Fixed text Change Line character: uses in variable text, can resolve the question about multi-text must branch marking. When application, increases one change line character between two variable texts, the software according to the change line character position automatic text branch. If many texts need to divide into the multi-lines, only need in the behind where want to branch's text to increase one change line character. The fixed text has a special option is , when chooses this item, the system uses the current user name to replace the fixed text automatically. Below explains with examples the situation needs to use in the fixed text the user name function. If the present must process one batch of work piece as shown in Figure 4-34, because the worker is every day three number of runs in turn, in order to control the quality to need each operator marks his own name, does not process the part in the work piece. Because only the designer and the administrator have the jurisdiction of change processing document, the operator is unable to change the processing document to increase own name, this time needs to use in the fixed text the user name function. The administrator must enable “You must enter and password before using” (see Chapter 2.6.7), then sets a user name and the password for each operator. The designer completes the processing document which as shown in Figure 4-34, the last text sets the user name in the object list. After like this each operator goes to work, after opening EZCAD2, must input own user name and the password, in processes this document time, the system alters to automatically the last text operator's name. 34 All rights reserved EzCad2UNI User’s Manual Figure 4-34 the processing example has the user name in the fixed text Serial number Serial number text is a text which is changed according to the fixed increment when in the operating process. When selected, a serial number parameter setting will automatically appear in the variable text dialog box. (Figure 4-35) Figure 4-35 Serial number parameter definition Mode: The mode current series number used, see the figure 4-36. Figure 4-36 Serial number mode Dec: Series number carry according to decimal system, the effective character is from zero to nine. HEX: Series number carry according to capital letter hexadecimal system, the effective character is from A to F hex: Series number carry according to small letter hexadecimal system, the effective character is from a to f User define: The series number carry defines according to user define system, after selecting, the system will display a dialog box like Figure 4-37 shows. 35 All rights reserved EzCad2UNI User’s Manual Figure 4-37 User define other number system dialog box The user can define carry ways discretionary between 2 to 64, only needs to define the max number, and then revises each serial number correspondence the text Start SN: This item indicates the first serial number to be marked at the present Current SN: the serial number to be marked at the present Increment: the increment of the current serial number. The value may be plus or minus When the increment is “1”, and if the starting serial number is 0000, there will be an increment “1” added on the previous serial number. For example, 0000, 0001, 0002, 0003 … 9997, 9998, 9999, and when it comes to 9999, the system will be back to 0000 automatically. When the increment is “5”, and if the starting serial number is 0000, the serial number is: 0000, 0005, 0010, 0015, 0020, 0025 … Others can be analogized by this. Marker: the marked number. This item indicates how many times every serial number is marked before changing. Date Code When the operation is taking place, the system will automatically pick up the date information from the computer as a new formed text. When selected, a date parameter definition will be shown in the dialog box automatically. As Figure 4-38 shows, users can directly choose the type they prefer. 36 All rights reserved EzCad2UNI User’s Manual Figure 4-38 Data parameter definition Year-2008: Use computer clock's current year for corresponding text, the form is four characters. Year-08: Use computer clock's current year for corresponding text, the form is two characters: latter two digits are effective of the year. Month-07: Use computer clock's current month for corresponding text, the form is two characters. Day-04: Use current computer clock's each month's date for corresponding text, the form is two characters. Day-186: The use current computer clock this day takes the corresponding text from January 1 number of days, the form is three charactes. (What 001 represent is on January 1 , what 002 represent is on January 2, what 003 represent is on January 3, ex analogia) Day of week-5: Use current computer clock's week date for corresponding text, the form is one character Week of year-27: The use current computer clock this day is this year's several week for the text which corresponds, the form is two characters (from January 1 to January 7 is 01, from January 8 to January 14 is 002, ex analogia) Date: When system read computer clock's date, needs to add on the the displacement date is the finally date, this function mainly uses in the work piece processing having the production date and guaranteeing nature date professions and so on food. User-defined month character: When selected the month as the corresponding text, the Figure 4-39 will be shown. Users can define the month character, changes to other characters that no longer uses the digit which the software defaulted, only needs double-clicks the selected month, input the month other characters, finally the month which shown on the software workspace is with the input character. Figure 4-39 User-defined month character 37 All rights reserved EzCad2UNI User’s Manual Time When the operation is taking place, the system will automatically pick up the time information from the computer as a new formed text. When selected, a time parameter definition will be shown in the dialog box automatically. As Figure 4-40 shows, users can directly choose the type they prefer. Figure 4-40 Time section Hour-24: Use current computer clock's hour for the corresponding text, the time format is 24-hour-setting Hour-12: Use current computer clock's hour for the corresponding text, the time format is 12-hour-setting Minute: Use current computer clock's minute for the corresponding text. Second: Use current computer clock's second for the corresponding text. Time Section: Divides into 24 time sections one day of 24 hour, the user may define each time section is a text. This function mainly uses in the work piece the processing needing to have the number of runs information. TCP/IP communication When the operation is taking place, the system will pick up the text from the network. Notice: The network interface in here is the network interface uses in TCP/IP agreement. When the user selected the “TCP/IP communication”, the parameter defines will display automatically in the dialog box, see the figure 4-41: Figure 4-41 TCP/IP communication parameter definition IP Address: select the IP address which from reads the data 38 All rights reserved EzCad2UNI User’s Manual Port: select the port the TCP/IP communication used Command: When the system processes to this text object, the system through the network interface to transmit this order character string to a computer assigned the IP address, request the computer sends the character string needs to process at present, the system will not return until the computer replied, after the response of the computer, the system will process the returns text automatically. Unicode: After choosing this option, the system to the computer transmission which and the read character is the Unicode form, otherwise is the ASCII form. The following example showed how to use this function: Now has a customer to process 10000 work pieces, on the work piece the marking content is a text, but each work piece must process the text content is dissimilar, therefore, before each work piece processing, must real-time read the processing content through the network from the local area network a computer server (IP: 192.168.0.1 port is 1000) on. 1. Open ezcad2 to establish a text object, adjust the text size, the position and the processing parameter. 2. Choice the text object, select the “enables variable text”, click the “increase” button, the system will spring a Figure dialog box as 4-32, select TCP/IP communication, set the network interface parameter, the IP address parameter fills in server computer's IP, here is 192.168.0.1; the port parameter sets to use in the communication the port number, here is 1000, the network interface parameter must identically with the server computer on , otherwise it will cause to be unable communication. 3. Set the command is TCP: Give me string.(This command may for the random server definition command) 4. After closing the dialog box, click the application button. 5. Click F2 to start to process, the computer will send the command “TCP: Give me string” to the server immediately through the net mouth, and waited for that the server will return. 6. After the server discovered the network interface receives the command is “TCP: Give me string”, reads the database immediately to obtain the text which the current must process, then gives the local computer through the network interface reply. 7. After the local computer obtains the text which must process, changes the processing data to transmit immediately to the marking board. 8. After the marking board receives the processing data, control the machining to mark the work piece immediately. Flow chart as shown in Figure 4-42: 39 All rights reserved EzCad2UNI User’s Manual Figure 4-42: TCP/IP communication flow chart Serial communication When the operation is taking place, the system will pick up the text from the serial port. When the user selected the “Serial communication”, the parameter defines will display automatically in the dialog box, see the figure 4-43 Figure 4-43 Serial communication parameters Port: the port which computer and peripheral equipment connection used BaudRate: the BaudRate which the serial communication used DataBits: the DataBits which the serial communication used StopBits: the digits of StopBits of which the serial communication used Parity: select the digits of Parity which the serial communication used Command: When the system processes to this text object, the system through the serial port to transmit this order character string to a peripheral equipment, request the peripheral equipment 40 All rights reserved EzCad2UNI User’s Manual sends the character string needs to process at present, the system will not return until the peripheral equipment replied, after the response of the peripheral equipment, the system will process the returns text automatically. Unicode: after choosing this option, the system to the computer transmission which and the read character assigns is the Unicode form, otherwise is the ASCII form. The following example showed how to use this function: Now has a customer to process 10000 work pieces, on the work piece the mark content is a text, but each work piece must process the text content is dissimilar, therefore, before each work piece processing, must real-time through the serial port (On serial port parameter establishment server: the BaudRate is 15200, the DataBits is 8, the StopBits is 1, the Parity is NO)the content which the read must process to other server on. 1. Open ezcad2 to establish a text object, adjust text size, the position and the processing parameter. 2. Choice the text object, select the “enables the variable text”, click the “increase” button, the system will spring a Figure dialog box as 4-32, select Serial communication, the setting of serial port parameter must with server's serial port parameter correspondence (the BaudRate is 15200, the DataBits is 8, the StopBits is 1, the Parity is NO), the port for current the port number which uses with it connected server, the serial port parameter must establish identically with the server computer on 3. Set the command is COM: Give me string. (This command may for the random server definition command). 4. After closing the dialog box, click the application button. 5. Click F2 to start to process, the computer will send the command “COM: Give me string” to the server immediately through serial port and wait for that the server will return. 6. After the server discovered the serial port receives the command is “COM: Give me string”, reads the database immediately to obtain the text which the current must process, then gives the local computer through the serial port reply. 7. After the local computer obtains the text which must process, changes the processing data to transmit immediately to the marking board. 8. After the marking board receives the processing data, control the machine to mark the work piece immediately. Flow chart as shown in Figure 4-44: 41 All rights reserved EzCad2UNI User’s Manual Figure 4-44 Serial communication flow chart File Txt files and Excel files are supported now. 1.Txt files When select TXT file, a dialog box as Figure 4-45 shows will be displayed to ask for the file’s name and the current text’s line number. Auto reset: If checked, the line number will change to 0 automatically when reach the last line. The next mark will start from the first line Figure 4-45 TxT document parameter definition again. Read all lines: When processes to the text document direct read entire document. 2.Excel files We have to appoint the file name, Field name, Line number to tell the software which cell in the excel table will be mark. File name: The text string of the first row in the datasheet1. This parameter indicates which column will be marked. Figure 4-46 Excel document parameter definition 42 All rights reserved EzCad2UNI User’s Manual Keyboard The keyboard element is the text which must process from the keyboard entry by the user, when select the keyboard element, a dialog box as Figure 4-47-a shows will be displayed to ask for the user set the keyboard element parameter. Figure 4-47-a Keyboard element parameter Prompt: In the processing, the system will spring the input dialog box which ask for the user input the processing text when meets the keyboard variable text, like the figure 4-47-b shows, this time the user direct by-hand input the text. The keyboard element function uses frequently in this kind of situation when the processing needs the real-time input to the processing content. If the customer present need processes one batch of work pieces, on each work piece is printed with a bar code, when processing needs the user with the bar code scanning gun real-time scans the work piece to read the content on the bar code, then with laser to mark to the work piece assigns in the position, at this time can use the keyboard element function. At the processing time system springs like the figure 4-47-b shows the dialog box, the operator with the bar code scanning gun scanning bar code work piece on, the bar code scanning gun inputs the read content to the dialog box inside and closes it automatically, then the system will start to process the content read a moment ago automatically . Figure 4--47-b Keyboard input text dialog box Advance Click “Advance” then the dialog box will be displayed shown as Figure 4-48 43 All rights reserved EzCad2UNI User’s Manual Figure 4—48 Advance function dialog box Mark Self: In certain situations, the user need division the input keyboard text then places them the different position to mark, simultaneously also needs to mark this keyboard text, application this function can achieve this requirements. After set the parameters of the division character, select “Mark Self”, when the marking, marks the division character besides, will also mark all keyboard text in the corresponding position which input a moment ago. At present, the Advance function has split character string function. The following processing example will explain it. For example: In Beijing Olympic Games ticket prints on the bar code has the sports field entrance number as well as the seat number information, but the human is unable to distinguish the bar code directly, must use the laser to mark this information to the ticket assigns in the position. At this time we may use the split character string function, through the bar code scanning gun read the series number, then split the series number automatically, and processes to assigns the position. As shown in Figure 4-49 the Olympic Games ticket sketch map, the bar code following serial number is the bar code content, the serial number altogether has 7 characters, first 3 character expression entrance number, latter 4 character expression seat number, what bar code scanning gun read-out is the entire character string, EZCAD2 must split the reads series number according to the request and puts to assigns the position automatically. Figure 4—49 Olympic Games ticket sketch map 1.First establishes a keyboard variable text: establish text—→enable variable text—→add—→keyboard, such as the figure 4-50-a: 44 All rights reserved EzCad2UNI User’s Manual Figure 4-50-a Keyboard 2. Input prompting message, click “OK”, then we can obtain the figure 4-50-b. Figure 4-50-b Keyboard text parameter 3. Select “Advance” then the dialog box will be displayed shown as Figure 4-48. 4. Selects “enable split string to change other text entity” to revise has assigned the name text object, click “Add” then the dialog box will be displayed shown as Figure 4-50-c. Index of the first character in string: In the TEXT1 text the first character is the several characters in the keyboard variable text character string. The number of characters to extract from string: extract how many characters in the keyboard variable text's character string. The name of text entity which you want to change: The fixed text name the split read's character is at. 45 All rights reserved EzCad2UNI User’s Manual Figure 4-50-c Add split character string parameter Here increases two conditions, one is revises TEXT1 the object, starts from the 1st character to take 3 characters, other one is revises TEXT2 the object, starts from the 4th character to take 4 characters. At last the result like the figure 4-50-d shows the dialog box. Figure 4-50-d The result add split character string 5. Set two text objects and change its name TEXT1, TEXT2. Here should pay attention to the keyboard variable text must arrange before two fixed texts in the object list, the TEXT1 object places the position which the entrance number must process, the TEXT2 object places the position which the seat number must process, then set the processing parameter. 6. Click “Mark” then the dialog box will be displayed shown as Figure 4-50-e, the user use bar code scanning gun scanning the ticket's bar code, the system will put the series number division to inside TEXT1 and TEXT2 and process automatically. 46 All rights reserved EzCad2UNI User’s Manual Figure 4-50-e Keyboard input prompt dialog box 4.8 Bitmap To add a photo, users may select command “Bitmap” in the Draw Menu or click icon in the Toolbar Figure 4-51 Add a photo Then the system will pop a dialog box as Figure 4-51 shows to open a graphic file. The current supported graphic file formats are: Bmp;Jpeg, Jpg;Gif;Tga;Png;Tiff, Tif; Show Preview: When users select a graphic file, there will be a preview displayed in the dialog box. Put to center: put the photo’s center in the origin When finishing adding a photo, a “Bitmap” parameter setting will appear in the Property 47 All rights reserved EzCad2UNI User’s Manual Toolbar as Figure 4-52 shows. Dynamic file: whether to reread files when in process. Fixed DPI: When selected, the system will fasten the unfixed DPI of dynamic photo. The higher the DPI’s level is, the closer the dots gather; and the photo’s precision is better, then the marking time is longer. DPI: dot per inch; 1 inch is about 25.4 millimeters Fixed Size X: When checked, the width of the dynamic photo will be preserved in an appointed size, and if unchecked, the photo’s width will be the original size of the photo. Fixed Size Y: When checked, the height of the dynamic photo will be preserved in an appointed size, and if unchecked, the photo’s height will be the original size of the photo. Fixed position: the benchmark the dynamic photo based on while in size changing Image Manipulation: Invert: run negative effect on photos (Figure 4-53) Figure 4-52 Bitmap Parameter Figure 4-53 Invert Effect (Left is original.) Gray: change color photos into grey of level 256 (Figure 4-54) 48 All rights reserved EzCad2UNI User’s Manual Figure 4-54 Color and Grey (Left is original.) Dither: This effect is similar with the function “Grey Adjust” in Adobe PhotoShop. It uses color black and white to simulate grey image, so as to achieve a grey effect with dots arranged in different densities, as Figure 4-55 shows. (The white bar in the photo was caused by display, which will not be marked.) Figure 4-55 Dither Click the “Expand” button to run the “Bitmap” dialog box. (Figure 4-56) 49 All rights reserved EzCad2UNI User’s Manual Figure 4-56 Bitmap Dialog Box Lighten: adjust the current image's brightness and contrast values. Scan Mode: Bidirectional Scan: the scan mode is bidirectional when in marking process (Figure 4-57) Figure 4-57 Left is unilateral scan; right is bidirectional. Mark Mode: Drill mode: whether the laser is kept on or restricted in appointed time for each dot’s marking when in process Adjust Power: whether the laser’s power is adjusted according to each dot’s grey level when in process Expand Parameter: Figure 4-58 Y Scan: The scan will run along Y axis line by line. 50 All rights reserved EzCad2UNI User’s Manual Scan line Increment: This item indicates whether to scan line by line or skip some lines. This function may quicken the marking speed when in low precision marking requirement. 4.9 Vector File To input a vector file, users can select command “Vector File” in Draw Menu or click icon . Figure 4-58 Scan Parameter Figure 4-59 Input a Vector File There will be a dialog box pop up to ask for the vector file to be inputted. The current supported vector file formats are: PLT;DXF;AI;DST NOTE: If the vector files includes color information (when draw it by image software like CorelDraw, AutoCAD, Photoshop and so on), Ezcad can distinguish the color automatically. Then user can pick the object according to the color or pen (see Chapter 4.12) and set marking parameters (see Chapter 10.1 “color”, “pen”) 51 All rights reserved EzCad2UNI User’s Manual When users have opened a vector file, a vector file parameter setting as Figure 4-60 shows will appear. 4.10 Time-lapser To input the Time-lapser, users can select command “Time-lapser” in Draw Menu or click icon . When selected, there will be a property setting of the time-lapser displayed in the Property Toolbar as Figure 4-61 shows. Waiting time: The marking will pause until the specific time has passed. Figure 4-60 Vector File Parameter Setting Figure 4-61 Waiting Time 4.11 Input Port To check the Input signal, users can select command “Input Port” in the Draw Menu or click icon . When selected, there will be an input port property setting appearing in the Property Toolbar as Figure 4-62 shows. I/O Control Condition: The software will pause until the input signal is the same as the I/O control condition. Message: If checked, the software will pop up a message box to info the user. The message text can be custom defined. Figure 4-62 Input Parameter 4.12 Output Port To output signal, users can select command “Output Port” in the Draw Menu or click the icon . When checked, there will be an output port property setting appearing in the Property Toolbar as Figure 4-63 shows. 52 All rights reserved EzCad2UNI User’s Manual : This icon indicates that the system will export a high-level voltage (TTL compatible) when the operation is taking place at the current output port. : This icon indicates that the system will export a low-level voltage (TTL compatible) when the operation is taking place at the current output port. Figure 4-63 Output Parameter : This icon indicates that the system will export a fixed-level. : This icon indicates that the system will export a pulse. 4.13 Select Icon on the top of the Draw Toolbar is used to select object. The pressed-down state of this icon indicates that the current command is “select”. Now, you can use mouse to click object in the workspace to select it. EzCad2 software has “auto-snap” function. When you move the mouse in the workspace and approach to a curve, the mouse pointer will automatically be changed into , and now you can press the left button of the mouse to select the object. Figure 4-64 Select Toolbar You can also select an object by moving the mouse while pressing the left button of the mouse, and there will be a dashed frame appearing in the area as the mouse move. This selection method is called “Frame Select”. If the moving direction of the mouse is from left to right, then only the objects completely involved in the dashed frame will be selected; and if the moving direction of the mouse is from right to left, then all the objects touched by the dashed frame will be selected. 53 All rights reserved EzCad2UNI User’s Manual Figure 4-65 Lock an Object When command “Select” is chosen, a Select Toolbar will appear, and you can achieve some specific operations. (Figure 4-64) : This icon indicates to select all the objects in the current workspace. : Invert Selection : This icon indicates to delete the current object selected. : This icon indicates that the current object is locked. Users can not take any operation on the locked object, and there will be some lock-like icons appearing around the object.(Figure 4-65) : unlock the object locked : This icon indicates to unlock all the objects locked. As Figure 4-65 shows, the Bezier Curve is locked and the circle is not, and now you cannot take any operation on the curve object, such as editing, modifying, moving, zooming, etc. : Put object selected on the origin : This icon indicates to use different pen to select objects. When clicked, a dialog box as Figure 4-66 shows will appear. 54 All rights reserved EzCad2UNI User’s Manual Figure 4-66 Select object by Pen 4.14 Node Editing All the objects drawn in EzCad2 are vector graphs. Users can modify an object’s shape by editing the nodes. To edit nodes, you may press icon in the Draw Toolbar. When clicking an object in the workspace, there will be a node appearing around the object. Nodes are denoted as hollow squares, and the bigger one is the starting point of the curve. When selected, a Node Editing Toolbar will appear as Figure 4-67 shows. (a) (b) Figure 4-67 Node Editing (a) Nodes (b) Node Editing Toolbar 55 All rights reserved EzCad2UNI User’s Manual : This icon is used to add a node. When click any point on the curve where has no node, there will be a black solid circle appearing, and now users may add a node by click this icon. : This icon is used to delete a node. When clicking any node on the curve, the node will be blacked, and here users may click this icon to delete it. : This icon is used to combine two nodes. If two nodes are close enough, users may “frame select” the two nodes and click this icon to combine them into one node. : This icon is used to separate a node. When users click a node on the curve, the node will be blacked, and then we may click this icon to separate this node into two separated nodes. : This icon is used to turn curves into lines. Users may click any position between two neighbored nodes and select the command “Line” to make the curve (line/arc/curve) between the two nodes into a line. : This icon is used to turn curves into arcs. Users may click any position between two neighbored nodes and select the command “Arc” to make the curve (line/arc/curve) between the two nodes into an arc. : This icon is used to turn curves into curves. Users may click any position between two neighbored nodes and select command “Curve” to make the curve (line/arc/curve) between the two nodes into a curve. : This icon is used to sharp a node. When selected, a sharp will take the place of the node, and the curve is sharp. : This icon is used to smooth a node. When selected, the node will be changed into a smooth curve. : This icon is used to symmetrize a curve. If you click a node and select command “Symmetrize”, the curves on both sides of the node will be symmetrized. : This icon is used to change the directions of a curve, by exchanging the starting and ending points. : This icon is used to close a curve. : This icon is used to align objects. When users “frame select” more than two nodes and click this icon, a dialog box of Aligning Nodes will appears, and you can choose the ways of aligning, top, bottom, left, right, for example. 56 All rights reserved EzCad2UNI User’s Manual NOTE: You cannot do node editing on text objects and hatch objects; you can edit the path’s nodes of curved texts. 4.17 Encoder distance Select command “Encoder distance” in Draw Menu, the Object List will display the encoder distance like Figure 4-68 shows. “Encoder distance” is used to test the motion distance in fly mark. Encoder parameters please refer “Instruction of marking-on-fly”. 57 Figure 4-68 Encoder distance All rights reserved EzCad2UNI User’s Manual Chapter 5 Modify Menu Commands in Modify Menu will take easy operations on selected objects, such as Transformation, Plastic, Curve Editing, Aligning, etc. (Figure 5-1) Figure 5-1 Modify Menu 5.1 Array Click “Array”, we can see the figure 5-2(a): Figure 5-2-a Array dialog box(Rectangle) Rectangle: The graph according to rectangle array Circle: The graph according to circle array The figure 5-2(a) is the Rectangle Array dialog box :Set array’s row as marking precedence :Bidirectional array Array num: The row number Array num: The column number Array: The space between two objects on X direction 58 All rights reserved EzCad2UNI User’s Manual Array: The space between two objects on Y direction Calculate by offset distance: The space of the graphs is calculated by offset distance. (Figure 5-3(a)) Figure 5-3(a)Calculate by offset distance Figure 5-3(b)Calculate by graph distance Calculate by graph distance: The space of the graphs is calculated by graph distance. (Figure 5-3(b)) If we select the array type is “Circle”, we can see the figure 5-2(b): Figure 5-2-b Array dialog box(Circle) : The graphs array is clockwise or anticlockwise. Array number: The graph number. Radius: The radius of the circle. Start Angle: The angle between the starting graphs of the circle. Angle: The angle between two graphs. 5.2 Transformation When selected, a parameter setting box will appear as Figure 5-4 shows. 59 All rights reserved EzCad2UNI User’s Manual 5.2.1 Move : stroll Tool for moving objects Position: the coordinates of the current selected object datum mark. This function is the same as the Position which is introduced in object label of properties toolbar in chapter 2.10. : select a datum mark of an object Relative Position: use relative coordinates : Activate the modification : This item is used to copy the current selected object and move it into a new place. 5.2.2 Rotate Figure 5-4 Transformation : rotate your object When selected, a parameter setting will appear in the Transformation Setting Box as Figure 5-5 shows. Angle: angle to rotate Center: the coordinates of the current selected object’ datum mark : Select a datum mark of an object Relative Center: change the current coordinates into relative coordinates : Apply. Let the modification of the current object active : This item is used to copy the current selected object and rotate it into a new place. 5.2.3 Mirror Figure 5-5 Rotate 60 All rights reserved EzCad2UNI User’s Manual : mirror the current selected object When select mirror command, a parameter setting box will appear as Figure 5-6 shows. Scale: the zoom ratio of the X/Y size after being mirrored : The current object’s vertical mirror : The current object’s horizontal mirror : select a datum mark of an object : Let the modification of the current object active : This item is used to copy the current selected object and mirror it into a now place. 5.2.4 Zoom : zoom your objects When selected, a dialog box will appear as Figure 5-7 shows. 61 Figure 5-6 Mirror All rights reserved EzCad2UNI User’s Manual Size: the size after zooming. This function is the same as the Size which is introduced in object label of properties toolbar in chapter 2.10. : select a datum mark of an object : Let the modification of the current object active : This item is used to copy the current selected object and zoom it into a now place. 5.2.5 Lean : lean the current selected object When selected, a parameter setting box will appear as Figure 5-8 shows. Figure 5-7 Zoom Angle: the angle the object leans : select a datum mark of an object : Let the modification of the current object active : This item is used to copy the current selected object and lean it into a now place. Figure 5-8 Lean 62 All rights reserved EzCad2UNI User’s Manual 5.3 Plastic When selected, a parameter setting box will appear as Figure 5-9 shows. Figure 5-10 shows examples of the following three items. : Joint two close intersect areas into one : Shear a close intersect area contained in another : pick up the intersect part of two close intersect areas Figure 5-9 Plastic Figure 5-10 Plastic 1. Original 2. Joint 3. Shear 4. Intersect 5.4 Curve Editing Auto- Connect: When selected, a dialog box will appear as Figure 5-11 shows. Auto-Connect Error: If the distance between two curves’ starting and ending points is less than the parameter set, the two curves will be jointed into one. Figure 5-11 Auto-Connect 5.5 Align Command “Align” will be available only when more than one object is selected in the workspace. “Align” is used to align the objects users select on the two-dimensional plane. There 63 All rights reserved EzCad2UNI User’s Manual are several ways to align: Left: All objects align left. Right: All objects align right. Vertical: All objects align vertical. These three ways above only support to move objects on horizontal direction. Top: All objects align top. Bottom: All objects align bottom. Horizontal: All objects align horizontal. These three ways above only support to move objects on vertical direction. Center: All objects align center. This way may cause moves on both horizontal and vertical directions. Note: The benchmark to align is according to the last object users select, and other objects align behind it. If you select several objects by “Frame Select”, then the system will hardly identify which is the last one, and this may cause unexpected alignment. It is strongly recommended that you select the object which is to be the benchmark at the end when you want to align several objects. 64 All rights reserved EzCad2UNI User’s Manual Chapter 6 View Menu The View Menu is used to set every option for view in the EzCad2 window, as Figure 6-1 shows. Figure 6-1 View Menu 6.1 Zoom The Toolbar of the zoom Menu is types for different requirements. , and there are seven : This item is used to fill the whole view area with the appointed area. Users may use mouse to select rectangle area to zoom in. If pressing the right button of the mouse, the current view will zoom out for one time with the mouse pointer’s position as the center; and if pressing the left button of the mouse, the current view will zoom in for one time with the mouse pointer’s position as the center. : To move the current view : Zoom in : Zoom out : Fill the whole view area with all the objects 65 All rights reserved EzCad2UNI User’s Manual : Fill the whole view area with only the selected objects : Fill the whole view area with the whole workspace 6.2 Ruler / Gridding / Guide Line There are Horizontal Guage, Vertical Guage, Gridding and Guide Line for selection. 6.3 Snap Grid This item is used to automatically put the dots you draw on the grid. 6.4 Snap Guide Line This item is used to make objects approach to guide lines automatically when moving the object. 6.5 Snap Objects This item is used to snap an object’s top, center, nodes, circle center, intersect points, etc. 6.6 System Toolbar / View Toolbar / Draw Toolbar / Status Bar / Object List Toolbar / Object Properties Toolbar/ Mark Parameter Toolbar EzCad2 supports many toolbars to achieve different functions. Toolbars can be either displayed or hidden by selecting corresponding options in View Menu; and also the Status Bar can be displayed or hidden, either. When there is a “√” selected in front of the submenu, the corresponding toolbars or Status Bar is visible, and if not, they are hidden. 66 All rights reserved EzCad2UNI User’s Manual Chapter 7 Special 7.1 Nesting After drawing figure in workspace, the menu item of Nesting will be enabled when you click the menu of Special. There are two ways to use Nesting function in EzCad2 software. One is Nesting multi part and the other is Nesting one part, which place different figures or single figure on one workpiece automatically. 7.1.1 Nesting multi part This function is used to place different figure in specified border as many as possible to save material. Step 1. Draw the figures need to nest and the border that contain the figures, and then click the menuitem Special—Nesting—Nesting multi part. The interface will be showed as Figure 7-1 Figure 7-1 Nesting multi part Step 2. Click the button Nesting parameter to sets the required parameters. See Figure 7-2 67 All rights reserved EzCad2UNI User’s Manual Figure 7-2 Multi part optimization nest dialog box Bridge distance: half of minimum edge distance between two figures; Stock distance: half of minimum distance between figures and border; Rotate: Checked to allow the software to try to rotate the figures to achieve the best nest effect. Rotate Degree: The fixed angles each time the software try to rotate the figure. After setting the parameters, we can click Ok button. Step 3. Click Pick edge button and select the nest border. After selecting borderline, the borderline will turn green. Step 4. Click auto nesting button to start the operation. The result shows in Figure 7-3. (Figures and Parameters are set in Figure 7-2.) . 68 All rights reserved EzCad2UNI User’s Manual Figure 7-3 the nested result 7.1.2 Nesting one part It indicates that a single figure achieve average distribution with fixed size in terms of the set value in Nesting one part. Specific operation: After drawing figures in workspace, you can click menuitem Special—Nesting—Nesting one part .A dialog box shown in the Figure 7-4 will pop up. Figure 7-4 single part nest Bridge distance: half of minimum edge distance between two figures. Rotation degree: It indicates that content rotate in fixed degree to achieve best effect; Sheet size: Width: the width of material; Height: the length of material. Click Ok button after setting the parameters. Figure 7-5 shows an example of this function. 69 All rights reserved EzCad2UNI User’s Manual Figure 7-5 the original figure Having setting parameters, you can click Ok. Then software will nest automatically. It needs more time to calculate as rotation degree descrease. The result shows as Figure 7-6: Figure 7-6 The nested Result Note: The nested graph may overstep work space with the specific parameters, here you need to place the whole graph on the center of work space. 70 All rights reserved EzCad2UNI User’s Manual Chapter 8 Laser Laser menu mainly aims at expansion axis control, it includes following modules. As is shown in Figure 8-1: Figure 8-1 8.1 Rotary marking The file AngleRotate.plg under the directory EzCad2\plug is the module that fulfills rotary marking. When EzCad software begins to run, it will look for all files with extention plg under directory Ezcad/plug. The menuitem rotary marking will be enabled if the file exists in plug directory. Figure 8-2 Figure 8-3 Coordinate value of axis Z stands for rotary angle in rotary marking. The software will rotate the workpiece first before marking. So we should set a rotation angle to each object when we draw objects in work space, and place each object in the middle of the work space (as shown in Figure 8-3). The configuration parameter is shown in the below Figure 8-4: 71 All rights reserved EzCad2UNI User’s Manual Figure 8-4 Configuration parameter dialog box Reverse: Reverse the move direction of the expansion axis. Pulses per round: The pulse numbers each round that the expansion axis rotating. We can calculate it through following formula: X=(360/N)* n Thereinto: X denotes Pulses per round. N denotes step angle of step motor. n denotes micro-step set by step motor driver. Min speed: the minimum rotary speed of expansion axis. Max speed: the maximum rotary speed of expansion axis. Acc. time: Acceleration time needed when expansion axis moves from minimum speed to maximum speed. Goto start position after finished: The expansion axis will go back to the initial position after finishing marker. Zero: Whether current expansion axis has zero-switch input signal. Without zero signal, the software can’t build up an absolute coordinates. Marking a set of parts, we need make every mark at the same position. To mark figure at the same position each time, the system takes current expansion axis as a default original point before marking in the case of without zero signal. After processed a part, the system moves the axis to the original position automatically. In this way, each part will be marked in the same position. If zero is enabled, zero switcher will be found automatically. The software creates an absolute coordinate after Finding out zero switcher. If the system failed to find out zero switcher, expansion axis cannot be used until the appointed time set by parameter zero time out has expired. Note: The switcher used for zero signal must be normal-open type and the signal should be connected to input port 0. Speed of Go Zero: The move speed when expansion axis go zero. 72 All rights reserved EzCad2UNI User’s Manual Zero offset: The offset distance for expansion axis to leave from zero after the zero the system has reached the zero position. Zero time out: The system will present “Zero time out” when failed to reach the position where the zero switcher was assembled within the appointed time. Origin: When we click origin button, the following dialog box will popup. Figure 8-5 In this dialog box we can set origin position. User can either input origin coordinates directly, or click button (D) set current point to origin point to setting current coordinates as origin coordinates automatically. Special motion: When click special motion button, the dialog box shown in Figure 8-6 will popup. Goto marker origin: The current expansion axis moves to origin position. Axis go zero: The current expansion axis go zero and reset coordinates. Figure 8-6 Special motion The following example explains how to use this module. Requirement: Mark three letters a、b、c on the surface of a column, the angle intervals between two adjacent letters is thirty degree. Step 1: Draw letter a in workspace. Set coordinate Z to 0 and click Apply button. Click put to origin button on toolbar to put the letter a to the center of workspace. As is shown in Figure 73 All rights reserved EzCad2UNI User’s Manual 8-7-1. Figure8-7-1 setting of letter a Figure8-7-2 setting letter b Figure8-7-3 setting of letter c Step 2: Draw letter b in workspace similarly. Set coordinate Z to 30. Then click Apply button and click put to origin button, as is shown in Figure 8-7-2. Step 3: Draw letter c in workspace and set coordinate Z to 60. Then click Apply button and click put to origin button. As is shown in Figure 8-7-3. Step 4: Click menu item Rotary marking. The dialog box shown in below Figure 8-7-4 will popup. Figure 8-7-4 rotary marking dialog box 74 All rights reserved EzCad2UNI User’s Manual Step 5: Click button Param(F3) or press key F3 to setup configuration parameters. Step 6: Click button Mark(F2) or press key F2 to start the job. 8.2 Rotary marking 2 Except the new option 360 degree mark, the others parameters in Rotary marking2 is the same as those in Rotary marking, as is shown in Figure 8-8. Figure 8-8 Rotary marking2 interface 360 degree mark: Selected to mark the figure on the column evenly. Total num: The count of figure that will be marked on the column with evenly interval. If we don't check 360 degree mark, Increment button will show. Increment: The angle that the column should rotate after mark each figure. It is the angle interval between two adjacent figures. Application 1: Draw the figure need to mark on the workspace and place it to the center. Make sure that the coordinate Z is zero. Select 360 degree mark and set Total num to 10, and then click Mark button. The whole mark procedure is that: Firstly, mark the figure; Then, the column rotate 36 degree(360/10) , and mark the figure again, until total 10 figure have been mark on the column evenly. Application 2: Draw the figure need to mark on the workspace and place it to the center. Make sure that the coordinate Z is zero. Uncheck 360 degree mark. Set Total num to 10 and incremental to 45. Click Mark button to start. The mark procedure is that: Firstly, mark the figure; Then, the column rotate 45 degree, and mark the figure again, until total 10 figure have been mark on the column. Note: Only expansion axis A can be used in Rotary marking module and Rotary marking2 75 All rights reserved EzCad2UNI User’s Manual module. Please take care when connecting the wire. The following example explains how to use this module. Requirement: Mark the same letter a on the column evenly. The total count is five. Step 1: Draw letter a in workspace. Click Apply button after setting font and size. Step 2: Click menuitem Rotary marking2 and the dialog box shown in Figure 8-8 popup. Step 3: Select 360 degree mark and set Total num to five. Step 4: Click button Mark (F2) or press key F2 to start the job. 8.3 Globe Mark Click “Globe Mark” to edit the Globe, as is shown in the Figure8-9: Figure 8-9 Load Graduation: load a saved “.globe” file. Save Graduation: save the current document to disk. Save as: save the current document to disk by another name. Add: create a blank work space to construct objects Delete: delete the selected document Mark: to execute marking Parameter: machine parameter. Key “F3” is the shortcut key of this function. Quit: quit Globe Mark Part: the total counts that the mark command has been executed Total num: The total counts that the mark command should be executed. The value would decrease 1 automatically after the mark command has been executed each time. It is unavailable 76 All rights reserved EzCad2UNI User’s Manual under the mode of Continuous Marking. When in marking process, if the amount number is more than 1, the marking operation will not stop until the marking number is 0. Press the button R on the rightwards will reset the part count. Time current: the time mark the current document used. Time Total: the time mark N times consecutively Click “Add” presenting to edit the Globe, as shown in Figure8-10: Figure 8-10 Line: The current parameter is the line parameter value Text: The current parameter is the text parameter value Vector File: The current parameter is the vector file parameter value Angle: Hatch Angle stands for the angles between hatch lines and X axis Pen No.: This item indicates that objects with selected pen’s number will be marked Longitude: coordinates X of the text Latitude: coordinates Y of the text Line width: the width of the line Start point: the start point of line’s coordinates End point: the end point of line’s coordinates Text: the text information show on the globe. VectorFile: the vectorfile information show on the globe. Click “ ” then the dialog box popup shown as Figure 8-11 77 All rights reserved EzCad2UNI User’s Manual Figure 8-11 Click “Param” then the dialog box will popup shown as Figure 8-12 Figure 8-12 Enable: Enable current expansion axis. ID: The current expansion axis will be used as axis X/Y/Z. ID is X, the figure will be split in direction X to mark. ID is Y, the figure will be split in direction Y to mark. ID is Z, the expansion axis will move to the appointed position to mark. Pulses per round: The pulse numbers each round that the expansion axis rotating. We can calculate it through following formula: X=(360/N)* n X denotes Pulses per round. N denotes step angle of step motor. n denotes micro-step set by step motor driver. Min speed: the minimum rotary speed of expansion axis. 78 All rights reserved EzCad2UNI User’s Manual Max speed: the maximum rotary speed of expansion axis. Acc. time: Acceleration time needed when expansion axis moves from minimum speed to maximum speed. Goto start position after finished: The expansion axis will go back to the initial position after finishing marker. Zero: Whether current expansion axis has zero signal. When expansion axis hasn't enabled zero signal, it can’t set up an absolute coordinates. Therefore, marking a set of parts require adjusting site to make every processing stay in the same site. So, the system takes expansion axis as default origin point before processing. After processing a workpiece, the system will move expansion axis back. In this way each workpiece will process in the same site. Speed of Go zero: the moving speed of expansion axis looking for zero signal. Zero offset: The leave distance of current expansion axis after finding out zero signal. Zero time out: Set the time of expansion axis finding zero point. If it overruns it, the system will present “overtime”. We can see “Origin” and “Pecial motion” in the figure 8-13 when Select “zero” Figure 8-13 Origin point: user click origin point presenting origin point set dialog box. As is shown in Figure 8-14: 79 All rights reserved EzCad2UNI User’s Manual Figure 8-14 Origin point setting In this dialog box user can set the origin point site of current expansion axis. User can either input origin point coordinates or click “(D) set current origin point to be origin point” setting current coordinates to be origin coordinates. When user click special motion button presenting special motion dialog box, as is shown in Figure 8-15: Go to mark origin: It refers to current expansion axis moving to origin point. Axis go zero…: It refers to current axis find zero signal automatically and reset coordinates system. Figure 8-15 Special motion dialog box for example:mark the national capital name: Beijing:East longitude 116.46 degree,North latitude 39.92 degree Moscow:East longitude 37.35 degree, North latitude 55.45 degree Canberra:East longitude 149.08 degree,South latitude 35.17 degree Washington:West longitude 77.02 degree, North latitude 38.17 degree See the figure 8-16: 80 All rights reserved EzCad2UNI User’s Manual 81 All rights reserved EzCad2UNI User’s Manual Figure 8-16 8.4 Multi part mark Multi part mark module is used to mark the same content on the workpiece that place in different position. Set coordinates according to actual position of each part. Also this function can use in other aspects. Draw the figure need to mark and click put to origin button on toolbar. Click menuitem Multi part mark as shown in Figure 8-17. 82 All rights reserved EzCad2UNI User’s Manual Figure 8-17 Multi part mark The dialog box of Multi part mark is shown in Figure 8-18: Figure 8-18 The dialog box of Multi part mark 83 All rights reserved EzCad2UNI User’s Manual Click Select part type to add or modify part parameters, which is shown in Figure 8-19: Figure 8-19 Part enactment Take Add for an example to account for the operation of Multi part mark. Firstly, click Add button to add a new part type. The dialog box in Figure 8-20 will popup. 84 All rights reserved EzCad2UNI User’s Manual Figure 8-20 Part parameter Thereinto: Part title: Define the part title. Part number: The number of part which need to mark, or the number of the figure marking in the same part. Update position: Click Update position button after setting Part number to show detailed information of each part, as is shown in Figure 8-20. Double click the item directly to modify the position and angle of each part as Figure 8-21 shows. Figure 8-21 Parameters of Part position 85 All rights reserved EzCad2UNI User’s Manual X: Coordinates X of the part Y: Coordinates Y of the part Rotate angle: the anti-clockwise angle of the part Return multi part mark dialog box after setting all parts. Close this dialog box and restart it, we can preview the figure that placed on the position we just set. Click button Select part type ------Modify to correct any invalid position. The other parameters in multi part mark are introduced here: Current pos: the part that is being processed currently. It can be appointed manually. Marked count: The count of part that has been processed. Stop when reaching max count: Select this option to calculate the count of the parts that have been process automatically and stop marking when reaching the appointed count. A dialog box prompting “Finish mark part count” popup when we want to mark more parts. Max count: Set maximum number of marking. F1 Mark all part: Mark all parts of current part type by click this button or by press key F1. F2 Continual mark all: Repeatedly mark all parts of current part type by click this button or by press key F2. F8 Mark current part: Mark current part one time by click this button or by press key F8. F9 Modify current part: Modify the parameters of current part by click this button or by press key F9. Note: EzCad2 takes the first part of left top corner as “part one”, in turns “part two” , “part three” place from left to right. Putting the figure in the center can locate coordinates more accurately when you set part. 8.5 Power Keyboard The Power Keyboard module is the special module for the keyboard marking. The dialog box is the following figure 8-22 86 All rights reserved EzCad2UNI User’s Manual Figure 8-22 Specific operation: 1.Suppose the user needs to processes one kind of keyboard,on the keyboard has 10 key -presses, respectively is 0,1,2,3,4,5,6,7,8,9, the user must make a .dxf graphic file for each pressed key: The key-press 0 corresponding graphic files are 0.dxf The key-press 1 corresponding graphic files are 1.dxf The key-press 2 corresponding graphic files are 2.dxf The key-press 3 corresponding graphic files are 3.dxf The key-press 4 corresponding graphic files are 4.dxf The key-press 5 corresponding graphic files are 5.dxf The key-press 6 corresponding graphic files are 6.dxf The key-press 7 corresponding graphic files are 7.dxf The key-press 8 corresponding graphic files are 8.dxf The key-press 9 corresponding graphic files are 9.dxf Must place inside the identical table of the ten .dxf documents,may place inside d:\kbdxf\1. 2.In the Power Keyboard module, put these 10.dxf document inside the identical directory, we can place them inside d:\kbdxf\1. 3.Click “Add” then the dialog box popup shown as Figure8-23: 87 All rights reserved EzCad2UNI User’s Manual Figure 8-23 Input the key-press’s name 0, the corresponding processing document is 0.dxf and the key-press locating point coordinate Set other keys according to the above step 4. Clicks mark then carries on the processing If the user processing's keyboard type is the same, but is only the processing document which each pressed key corresponds is dissimilar, the user need sets the keyboard directory as the identical directory, the system will replace all documents automatically. 8.6 Power Ruler The function of is Power Ruler mainly uses for to design each kind of scale, turn on EzCad 2 and select “PowerRuler ” in the laser menu, as is shown in Figure 8-24: Figure 8-24 Click “Power Ruler” the mark dialog box is shown in Figure 8-25: 88 All rights reserved EzCad2UNI User’s Manual Figure 8-25 New File:The software will close the documents which you are editing and meanwhile create a new file Open File:When click “Open”, the software will pop an open-file dialog to ask you select the file you want to open Save File: save the current file to disk. Save as: save the current file to disk by another name. Export to WS: export the file to the software workspace. Edit: Revision the content. Delete:Delete the content. Click “Add” presenting to edit the ruler, following dialog box shown in Figure 8-26: 89 All rights reserved EzCad2UNI User’s Manual Figure 8-26 Make ruler dialog box Type: Line: The current parameter is the line parameter value Value:The current parameter is the value parameter value Text:The current parameter is the text parameter value VectorFile:The current parameter is the vectorfile parameter value Text: Rotate: the angle of the text revolving Hatch: Pen No.:This item indicates that objects with selected pen’s number will be marked. Graduation Num: The total graduation numbers need to be marked Start Graduation: Set the position of start marking graduation Increment pos: the space between two neighboring lines Line width: Set the width of the line Start point: Set start point of the line End point: Set end point of the line Start value: Set start value of line Inc. value: Set Inc. value of the line Dot bit count:Set dot bit count of the line, for example:set the dot bit count as 2,the value may 90 All rights reserved EzCad2UNI User’s Manual become 0 not show tail zero:0 did not show behind 0 Text: show the text information on the ruler. We can see the figure when we select “Text” , We can compilation the text content in the white frame Vector File: Show the information of the vector file on the ruler Scale X: width of the vector file Scale Y: height of the vector file Angle: the angles between vectorfile and X axis For example: make a Straight ruler long thirty centimeters(three hundred millimeters): After set well the External Axis, select Straight ruler, click “Add” then the dialog box popup shown as Figure 8-26 to set the Line Set the longest degree ten: There are thirty one degree ten lines from zero to three hundred, from the start graduation of the workpiece,the space is ten millimeters,the length is seven millimeters,so as to the “Graduation Num” is thirty one,“Start Graduation” is 0,“Increment pos” is ten,“Start point” is(zero,zero) ,“End point” is(zero,seven) ; Set the degree five : There are thirty degree five lines from zero to three hundred,from five millimeters of the start graduation,the space is ten millimeters,the length is five millimeters,so as to the “Graduation Num” is thirty,“Start Graduation” is five,“Increment pos” is ten,“Start point” is(zero,zero) ,“End point” is(zero,five) ; Set the degree one : There are two hundred and forty degree one lines from zero to three hundred,in order to avoid with degree ten and degree five superposition,degree one lines need to set four times:from one millimeter,two millimeters,three millimeters,four millimeters in turn, the space is five millimeters,the length is three millimeters, so as to the “Graduation Num” is sixty,“Start Graduation” is one, two, three, four in turn,“Increment pos” is five,“Start point” is (zero,zero) ,“End point” is(zero,three) ; Set the Value: select “Value”,only input the value of degree ten lines,so as to the “Graduation Num” is thirty one,“Start Graduation” is zero,“Increment pos” is ten, “Start value” is zero,“Inc. value” is ten,“Start point” is(zero,zero) ,“End point” is(zero,eight) ; Set the unit of the ruler: select “Text”,“Graduation Num” is one,input “Start Graduation” and “Start point” according to actual situation,and inputs the text content which can show. At last, the figure 8-25 turns to: 91 All rights reserved EzCad2UNI User’s Manual Now, the thirty centimeter Straight ruler completed. The method of make Ring ruler or Disk ruler: at first, click “Param” the dialog box popup shown as Figure 8-27 to set the External Axis 92 All rights reserved EzCad2UNI User’s Manual Figure 8-27 configuration parameters of expansion axis Straight ruler/Ring ruler/Disk ruler: The ruler's type need to mark currently,choose is enable Part diameter: The workpiece accurately diameter of the “Ring ruler” or “Disk ruler”. Reverse: Reverse the move direction of the expansion axis. Pulses per round: The pulse number of expansion axis motor makes a circle needed. We can count pulse number per revolution X through following formula: X = (360 / N) * n X refers to pulse number per round; N is the pace angle of electric motor; n refers to subdivision number of driver; Minimum speed: The minimum speed of expansion axis; Maximum speed: The maximum speed of expansion axis; Accelerate time: The time of expansion axis need when it moves from minimum speed to maximum speed. Go to start position after finish: Expansion axis returns to start position after finishing processing; Zero: Whether current expansion axis has zero-switch input signal. Without zero signal, the software can’t build up an absolute coordinates. Marking a set of parts, we need make every mark at the same position. To mark figure at the same position each time, the system takes current expansion axis as a default original point before marking in the case of without zero signal. After processed a part, the system moves the axis to the original position automatically. In this way, each part will be marked in the same position. If zero is enabled, zero switcher will be found automatically. The software creates an absolute coordinate after Finding out zero switcher. If the system failed to find out zero switcher, expansion axis cannot be used until the appointed time set by parameter zero time out has 93 All rights reserved EzCad2UNI User’s Manual expired. Speed of Goto Zero: The move speed when expansion axis go zero Zero offset: The system will present “Zero time out” when failed to reach the position where the zero switcher was assembled within the appointed time. Return“Power Ruler”, similarly the method of make straight ruler to complete the graphics. See the figure 8-28 about the Disk ruler: Figure 8-28 the Disk ruler 8.7 RingMark This module was mainly developed for jewelry processing trade. The file Ringmark.plg under the directory Ezcad2/plug fulfill the function. If the file exist then the menuitem Ringmark will show as Figure 8-29. Figure 8-29 menu item--RingMark Click menuitem Ringmark then the dialog box popup shown as Figure 8-30. 94 All rights reserved EzCad2UNI User’s Manual Figure 8-30 Ringmark dialog box Distance: The move distance each time when the key Ctrl and arrow key Left/Right/Up/Down was pressed together. Press key PageUp/PageDown to increase/decrease the distance. Press Ctrl+Left to move left and Ctrl+Right to move right for expansion axis X. Press Ctrl+Up to move up and Ctrl+Down to move down for expansion axis Y or axis Z. Split size: The marking size before rotation each time. When marking the figure on the column, we always split the figure into many strips to keep the focus point as the same. Mark one strip, then rotate the column, and mark the next strip, one by one until the whole figure was processed. Note: The split size is very important for the whole figure. It has great influence on the time and the effect. Part: The part count that has been marked. Press the button R on the rightwards will reset the part count. Total num: The total count need to mark. When the parts have been marked reach the Total num, software will stop it automatically. Continues: Repeatedly mark the figure until stop it manually. Mark Selected: Only those figures selected will be marked. Force split: Divide the whole figure into equal parts neglecting the size of each object. Figure 8-31 is the case without Force split selected while Figure 8-32 is the one that enable Force split. The split size in two figures is 18mm. 95 All rights reserved EzCad2UNI User’s Manual Figure 8-31 Marking without Force split selected Figure 8-32 Marking with Force split selected In Figure 8-31, the left two circles smaller than split size and be marked without split. The circle on the right is greater than split size and was divided into three parts to mark. Without force split selected, the objects smaller than split size will be marked without split and those greater than split size will be divided to mark according the split size. In Figure 8-32, the whole figure (three circles) was split into equal parts to mark. The object on the split border will be divided even its size is smaller than split size. Force all split: When there are multiple objects in the object list, all objects will be processed as a whole one according to the split size. The objects smaller than split size will be marked first, the rest that exceed split size will be divided to mark. Part diameter: the diameter of the workpiece such as ring, namely Ф. (the size of workspace will change with this value) Height: the height of the workpiece (the size of workspace will change with this value) : Used to correct barrel distortion of direction X. 96 All rights reserved EzCad2UNI User’s Manual : Used to correct barrel distortion of direction Y : Used to correct ladder distortion of direction. Note: the above three correction will be add on the original correction. It does not influence original correction after quitting RingMark. The size of workspace will be changed by Part diameter and Height. The height of workspace is the value set by Height, and the length of workspace equal [(part diameter multiply pi) divided by scale compensation factor]. Restore the size of workspace need to adjust in menuitem system parameter---workspace. Click “parameter” button to setup parameters of expansion axis. The dialog box pops up as Figure 8-33. Figure 8-33 configuration parameters of expansion axis The definition of each parameter: Enable: Enable current expansion axis. ID: The current expansion axis will be used as axis X/Y/Z. ID is X, the figure will be split in direction X to mark. ID is Y, the figure will be split in direction Y to mark. ID is Z, the expansion axis will move to the appointed position to mark. Pulses per round: The pulse numbers each round that the expansion axis rotating. We can calculate it through following formula: X=(360/N)* n Thereinto: 97 All rights reserved EzCad2UNI User’s Manual X denotes Pulses per round. N denotes step angle of step motor. n denotes micro-step set by step motor driver. Min coor: The minimum logical coordinates of expansion axis. When the object’s coordinate of the expansion axis is smaller than the minimum coordinates, the warning message will popup. Max coor: The maximum coordinate of expansion axis. When the object’s coordinate of the expansion axis is greater than the maximum logical coordinates, the warning message will popup. Min speed: the minimum rotary speed of expansion axis. Max speed: the maximum rotary speed of expansion axis. Acc. time: Acceleration time needed when expansion axis moves from minimum speed to maximum speed. Goto start position after finished: The expansion axis will go back to the initial position after finishing marker. Rotation axis: Select it, it's indicates that current expansion axis is rotation axis. Moving manner is rotation; otherwise, it indicates flat content processing or Z axis locating process. Gear ratio: Electric motor connecting axis, the reducing ratio is one. If there are reducing setup, the reducing ratio is reducing setup ratio. Part diameter: The workpiece need to mark currently. If expansion axis is rotation axis, part diameter, an important parameter to count move distance, must fill in accurately. Zero: Whether current expansion axis has zero signal. When expansion axis hasn't enabled zero signal, it can’t set up an absolute coordinates. Therefore, marking a set of parts require adjusting site to make every processing stay in the same site. So, the system takes expansion axis as default origin point before processing. After processing a workpiece, the system will move expansion axis back. In this way each workpiece will process in the same site. Speed of Go zero: the moving speed of expansion axis looking for zero signal. Zero offset: The leave distance of current expansion axis after finding out zero signal. Zero time out: Set the time of expansion axis finding zero point. If it overruns it, the system will present “overtime”. Scale compensation: It refers to the scale coefficient of corresponding move distance in expansion axis. Adjust this parameter can remove separation and superposition in connection. Space compensation: It refers to reverse space compensation, making up for sapce error between gear when moving. Shear compensation: When machine make bigger error ratio, shear phenomena will be created during flat marking. Adjust this parameter can remove it. When all parameters are set, you can click “mark” to process. Note: 1. Use Corfile.exe to make whole linearity correction, making sure the consistency of effect. 2. Table level, stable electric rotation and nice light mode are the keys for marking best effect. 8.8 Rotate Text Mark “Rotate Text Mark”:can solve the question the hatch lines and text independent mark when rotate mark the hatch text,they are cannot superposition,using this function,the hatch lines and 98 All rights reserved EzCad2UNI User’s Manual text are marking together. 8.9 Split mark 2 “Split mark2” module is able to split joint big content. We can either choose an expansion axis to be X direction split joint, or choose two expansion axes to be XY direction split joint respectively. That function menu is shown in figure 8-34: Figure 8-34 “Split mark 2” item Its operation dialog box is shown as follows: Figure 8-35 “Split mark 2”dialog box Of which function item meaning instruction can refer to “Ringmark” module. Hereinto: Special pos button can set the position that the motor moves to before mark. Hitting “Special position” button and set appointed position coordinates. Then, hit “Special motion” button and 99 All rights reserved EzCad2UNI User’s Manual choose ‘Goto special position’, the motor will go to the position you set. As is shown in figure 8-36, figure 8-37: Figure 8-36 Figure 8-37 100 All rights reserved EzCad2UNI User’s Manual Chapter 9 Help 9.1 About EzCad2 An “About EzCad2” dialog box will appear if users select command “About” as Figure 9-1 shows. This box will display some information about the software, for example, the edition, the user authorized and the copyright. User’s name will also be included in the dialog box. Figure 9-1 about EzCad2 101 All rights reserved EzCad2UNI User’s Manual Chapter 10 Marking Figure 10-1 is the Marking Properties Table. 10.1 Pen List In EzCad2, every document file has 256 pens, 0 to 255 numbered, and they are located in the top of the Marking Properties Table. Each pen is corresponding to a group of marking parameter and the parameter base’s name is after the color. : This item indicates that objects with selected pen’s number will be marked. Users may customize the color by double-clicking the color sticker. : This item indicates that the current object has not been marked with a pen’s number, and it will not be marked. Color: the current pen’s color Apply Parameter Button: The buttons show as Figure 10-2 When pressed the button, the pen number of the current object will be changed to the one that the color stands for. When pressing the right button of the mouse, a shortcut menu will appear as Figure 10-3 shows. Figure 10-1 Marking Properties Table Figure 10-2 Button to apply parameters Figure 10-3 Shortcut Menu 102 All rights reserved EzCad2UNI User’s Manual 10.2 Marking Parameter Base Marking Parameter Base is a base filled with all marking parameters which have been set by users already. Figure 10-4 is a Marking Parameter List. YAG: YAG indicates that the current Marking Parameter is for YAG laser machine, and if not, it is for CO2 laser machine. Select param from library: When press this button, a dialog will pop up as figure 10.2-1 shows. We can save the parameters to disk files, or to delete parameters from files. Curr param Save As: “Curr param Save As” is used to name the current marking parameter to disk as another parameter base’s name. Delete: to delete the current parameter base name. Apply to Default: save all Figure 10-4 Marking Parameter Base List the current parameter to “default” parameter base name Loop count: loop times to mark an object Speed: the current marking speed Power / Current: In CO2 mode, this item indicates the power percentage of the current marking parameter, and 100% refers to the biggest power of the laser equipment. In YAG mode, this item indicates the current of the Q-switch. Frequency: the laser machine’s frequency in the marking parameter Q pulse Width: the high-level’s time of the Q pulse if the laser equipment is Q-switch YAG laser machine Start TC: When the scanhead has to execute a mark command, the scanner mirrors first have to be accelerated up to the defined marking speed. In the beginning of the movement, the laser focus moves very slowly which may result to burn-in effect at the start point. To avoid this, We insert a delay (Start TC) at the beginning of each mark command. When the laser eventually turns on, the mirrors have already reached a certain velocity. However, if this value is too large, the first part of the vector will be cut off. Also negative value is supported. Laser Off TC: The delay time of the laser shutting down after marking finished. Proper time can wipe off the burn-in effect at the end. This value cannot be negative. End TC: The End TC parameter is used to control how long the software will wait at the end of a series of vectors. The wait is required because the software is always "ahead" of the 103 All rights reserved EzCad2UNI User’s Manual hardware and must wait for the hardware to catch up. This delay applies to the end of all vectors in which the laser is to be turned off after execution. Polygon TC: the Polygon TC parameter is used to control how long the software will wait at vector connection points. The wait is required due to the lag time between the software/DAC position and the actual hardware/mirror position. This timer applies to all vectors whose endpoint is also the start point of the next vector (polygon connection points). In other words, this timer applies to end of all vectors in a series of connected vectors, except for the last one (the end of last one is controlled by the End TC parameter). The three connected points in a square or the intermediate connection points in a polyline circle are examples of points the Polygon TC parameter can effect. The starting point of the square is controlled by Start TC parameter. The last corner of the square is controlled with the End TC timer. Clicking “Advanced” will prompt an advanced parameter dialog box as Figure 10-5 shows. Jump Speed: set a jump speed of the scanner for the current parameter Jump Position TC | Jump Dist TC: After each jump movement, the system will delay some time then execute the next command. The actual delay time is calculated by the following formula: Total delay = (Jump Distance *Jump Dist TC) + Jump Position TC End compensate: Only when in high-speed operation or this parameter need not to be set. This parameter is used to mark a little bit more as an ending increment at the end of an operation. Negative value is supported. Acc Distance: In those applications that require laser marking without variation of intensity, we have to add an accelerated segment before the start point to reach the homogenous marking results. Point Time: This parameter is used to set the Figure 10-5 Advanced marking time if there are dot objects. Vector point mode/Pulse per point: Marking the vector graph using point mode, and force the pulse number while marking each point YAG optimize mode: While marking on the high reflection material using YAG laser, optimize the hatch arithmetic. Note: the function is used to resolve the irregular lines when marking on the high reflection material using YAG laser. If you want to use this function, you must connect the PWM signal to the pulse modulate signal of the Q-switch. Now let’s take it into practice: Mark a rectangle with size 40×20 and fill it with the following parameters: Mark Contour/ Edge offset=0 / Line Distance =1.0 /Hatch Angle= 0 / Unidirectional hatch Set the marking parameters like this: 104 All rights reserved EzCad2UNI User’s Manual Parameter Name: XX ---- the name users customize (easy to understand it’s means.); Loop count: 1; Marking Speed: XX ---- the speed users need; Jump Speed: XXX ---- the jump speed users customize (It is suggested to use 1200 –2500.); Power Percentage: 50%; Frequency: 5KHZ; Start TC: 300; End TC: 300; Polygon TC: 100; Jump Position TC: 1000; Jump Distance TC: 1000; End compensate: 0; Acc. Distance: 0; There may be several results to mark this hatched rectangle. Case #1: The hatch-lines and the border are separated. (Figure 10-6) This is because the Start TC Value is too big, and it needs to be smaller. Figure 10-6 Case #1 Figure 10-7 Case #2 Case #2: The hatch-lines and the border are intersected (burn-in effect). (Figure 10-7) This is because the Start TC Value is too small, and it needs to be higher. Case #3: Uniform result. (Figure 10-8) 105 All rights reserved EzCad2UNI User’s Manual Figure 10-8 Case #3 Figure 10-9 Case #4 Different manufacturers use different Laser sources and scanner (gavlo), so the performances are also different. Sometimes when however users modify the Start TC, the hatch-lines and the border cannot be superposed. Here users need to set the Acc Distance Parameter (Values from 0.05 to 0.25). But this may cause the 4th case: the hatch-lines are beyond the border, as Figure 10-9 shows. Users may increase the Start TC Value or lower the Acc Distance Parameter, and if the two parameters are adjusted well, there will be a perfect result. Adjust End TC: Still mark the hatched rectangle mentioned above Here are three possible cases about the hatch-lines and the border’s relative positions. Case #1: The fill-lines and the border are separated, as Figure 10-10 shows. This is because the End TC is too short, and users need to raise it. Figure 10-10 Case #1 Figure 10-11 Case #2 Case #2: Burn-in effect as Figure 10-11 shows. This is because the End TC is too long, and users need to shorten it. 106 All rights reserved EzCad2UNI User’s Manual Case #3: Perfect result as Figure 10-12 shows. Figure 10-12 Case 3 Figure 10-13 Case 4 Different manufacturers use different Laser sources and scanner(gavlo), so the performances are also different. Sometimes when however users modify the End TC, the hatch-lines and the border cannot be superposed. Here users need to set the End Compensate (Values from 0.05 to 0.25). But this may cause the 4th case: the hatch-lines are beyond the border, as Figure10-13 shows. Users should lower the End Compensate to reach the perfect result. Adjust Jump Position TC | Jump Dist TC : Below is the adjust steps: Set the two Jump TC items’ values (Position TC value and Distance TC value) as 0 and then mark the rectangle. If the start segment and ending segment of the hatch-line are bent, users need to increase the two Jump TC’s values until there is no bend appearing. Note: The Jump TC is too big may influence marking efficiency. The scanner (gavlo) have better performance, the lower the two Jump TC’s value is. Adjust Polygon TC: If mark a rectangle with size 40×20, you may find three possible results about the rectangle’s corners: Case #1: As Figure 10-14 shows, it is changed into arc angle which should be right angle, and this is because the Polygon TC is too short, here users need to raise the value. 107 All rights reserved EzCad2UNI User’s Manual Figure 10-14 Case #1 Figure 10-15 Case #2 Case #2: As Figure 10-15 shows, although the right angle is what it should be, the corner of the angle is heavy marked, and this is because the Polygon TC is too long, here users need to shorten the value. Case #3: As Figure 10-16 shows, it is right angle and there is no heavy marking. This is the result we want. Figure 10-16 Case #3 When finish setting these parameters already, you may start to mark. It is recommended that users had better not modify the parameters which have been adjusted well. If they were changed, the result would be changed too. Users can use the same way to set other parameters and save them in the parameter list. By doing this, users can reduce the repeated works and raise the work efficiency. 10.3 Mark-Control Bar The Mark-Control Bar is located at the bottom of the main interface window, as Figure 10-17 shows. Figure 10-17 Mark-Control Bar 108 All rights reserved EzCad2UNI User’s Manual Light: This item is used to mark the frame of the object without laser output so that users are convenient to orient the workpiece. This function is available in those laser machines which have guide light. Key “F1” is the shortcut key of this function for guide light show. Mark: to execute marking Key “F2” is the shortcut key of this function. Continuous: mark the objects repeatly until user stop the mark Mark Selected: only those selected objects would be marked Part: the total counts that the mark command has been executed Total: The total counts that the mark command should be executed. The value would decrease 1 automatically after the mark command has been executed each time. It is unavailable under the mode of Continuous Marking. When in marking process, if the amount number is more than 1, the marking operation will not stop until the marking number is 0. Parameter: machine parameter Key “F3” is the shortcut key of this function. 10.4 Machine Parameters 10.4.1 Field Parameter See Figure 10-18 109 All rights reserved EzCad2UNI User’s Manual Figure 10-18 Area Parameter Field: the widest range for marking Gavlo 1=x: the track of gavlo 1 uesd as the X axis Gavlo 2=x: the track of gavlo 2 uesd as the X axis Offset X: The offset distance on X direction of scanhead. Offset Y: The offset distance on Y direction of scanhead. Use the corrected file: Use the correction file generated by our CorFile.exe soft. Negate: the opposite direction of the current gavlo This item refers to the distortional correction coefficient, and the default value is 1.0 (range from 0.875 – 1.125). If your design is as Figure 10-19 shows but the marked work is Figure 10-20 or Figure 10-21, you will have to increase the coefficient on the X axis direction for Figure 10-20 and lower the coefficient on the X axis direction for Figure 10-21. 110 All rights reserved EzCad2UNI User’s Manual Figure 10-19 Your Design Figure 10-20 Marked Work Figure 10-21 Marked Work This item indicates the parallelogram correction coefficient, and the default is 1.0 (range from 0.875 – 1.125). If your design is as Figure 10-19 shows but the marked work is Figure 10-22, you will have to adjust this parameter to correct it. Figure 10-22 Marked Work Scale: It refers to the flex percentage, and the default is 100%. This parameter will be adjusted when the trim size marked is different from the setting size. If the trim size is smaller than the designed one, users can raise this parameter; if the trim size is bigger than the designed one, users can lower this parameter. Note: If there are some distortions with the Laser scanner (gavlo), users should firstly adjust the distortions and then the flex percentage. 111 All rights reserved EzCad2UNI User’s Manual When setting scale, we may press the button ,and a dialog will pop up just like figure 10-23. Figure 10-23 Set the scale Goal mark size: the size set in the software. Real mark size: the measured size of the object that have been marked on the workpiece. The software will calculate the scale automatically according to these two values. After mark Go to: The gavlo jump to the appointed position when finishing marking password: after set the password ,we must input it can enter the Param Dialog Box. 10.4.2 Laser Control Parameter See Figure 10-24: Figure 10-24 Laser Parameter 112 All rights reserved EzCad2UNI User’s Manual Laser type: Co2: It indicates that current laser size is Co2 laser. YAG: It indicates current laser size is YAG laser. IPG: It indicates that current laser size is IPG laser. SPI_G3: It indicates that current laser size is SPI laser. Note: this function only support USBLMC control card. PWM: Enable PWM signals: The PWM signal will be output from Control Card Max. PWM freq: the max frequency of the PWM signals Enable Tickle: Let the preionization signals active for some CO2 laser sources. Pulse Width: the pulse width of the preionization signals Pulse Period: the frequency of the preionization signals Use Digital Q-switch driver: This function is for digital Q-switch. If check this function, the output port 1 and 2 cannot apply in other purpose. This mode mainly design for Digital Q driver of Guilin Xingchen Q-switch Open when F.P.K End: If Checked, the Q-switch modulation signal will begin pulsing after the FPS delay has expired. Otherwise Q-switch pulsing begins at the end of the Start TC delay and coincidentally with the beginning of the FPK signal. First Pulse Killer ( F.P.K): the lasting time for the first pulse suppression Pulse width reverse: Reverse the PWM signal. See figure 10-25 Figure 10-25 pulse width reverse Enable Power Analog Output: Enable the control card to output analog signal which used to control laser power. Power Mapping: This is power emendation function, used to set the power percentages of the customized and the corresponding one, as Figure 10-26 shows. If the customized power percentage is not in the displays of the Power dialog box, the system will pick the linearity margin values. Enable Frequency Analog Output: Enable the control card to output analog signal which used to control Q-Switch frequency Frequency Mapping: This is frequency emendation function, used to set the frequency percentages of the customized and the corresponding one, as Figure 10-27 shows. Enable CO2 FPK: can wipe off the burn-in effect at the start. 113 All rights reserved EzCad2UNI User’s Manual Figure 10-26 Power Map Dialog Box Figure 10-27 Frequency Map Dialog Box Enable Analog First Pulse Killer: Max: Max voltage of analog FPK. Min: Min voltage of analog FPK. T1: Time that the FPK signal changes from Max voltage to Min voltage, or reverse. T2: If the time gap between the laser off and laser on is less than T2, the FPK would not output. :The direction that the FPK changes. About the T1 and T2 we can see figure 10-28: Figure 10-28 Test laser It is used to test whether laser is working normally or not. Hit “test laser” button presenting 114 All rights reserved EzCad2UNI User’s Manual dialog box shown in graph 10-29: Figure 10-29 Test laser dialog box Fill in the frequency, power, pulse width and laser on time and hit “Laser on”. After that LASER open and it will close when reach the appointed time. 10.4.3 Port parameter Equipment port parameter is shown in graph 10-30: 115 All rights reserved EzCad2UNI User’s Manual Figure10-30 Port Parameter Dialog Box Stop Marking Input Port: When in marking process, if the system detects there is a corresponding input signal, the current marking operation will be ended, and prompt the users with error information. Out port for Laser power: The port can be used to control the laser power supply. If you set this port, there is a ‘Power off’ button displayed on the marking bar, see the figure Red light pointer I/O: The system will output High-level to the appointed output port when guide light show. Marking IO: The appointed port will output high level voltage (TTL Compatible) while in marking. Start Mark IO: In idle state, the software will start mark if detect the high level voltage from the appointed port Pulse Mode: Checking this option means the soft receive the start signal as pulse mode, otherwise it is as level mode. 116 All rights reserved EzCad2UNI User’s Manual 10.4.4 Other Figure 10-31 Other Parameter Dialog Box Starting Mark Delay: The delay before marking. Finish Mark Delay: The delay after marking Max. Power Delay: The Max dealy when the laser power is changed from 0% to 100% during marking. When the power’s range is changed less then 100% during marking, the time is less proportional to the Max vaule. This function is suit for the laser power supply with slow response speed. If the laser power supply’s response speed is very quick, this value may be 0 ms. Max. Freq Delay: Same as max power delay Show start mark dialog: Every time inquired whether mark it before the marking Enable execute mark start and stop command file: When the mark started and finishes needs to execute a command file first. After enabling this function, when the marking starts, the system will seek for the start.bat document under the current software of contents automatically and executes it; After the marking had ended the system will seek for the stop.bat document under the current software of contents automatically and executes it. The bat document format is simple, it can use the textual edit software (for example: The notepad, tablet and so on the other software) to direct compilation. Bat is the pure ASCII code text 117 All rights reserved EzCad2UNI User’s Manual document, altogether has 3 orders. 1. The examination input port orders IN, for example IN2=1 expression system examination input port 2, if IN2 is the high level downward carries out, otherwise has waited for that IN2 turns high. 2. The establishment output port orders OUT, for example OUT4=1, the expression system establishment output port 4 is the high levels. 3. The time delay orders DELAY, for example DELAY=1000, expression system time delay 1000 milliseconds. Auto reset mark count: after the mark stop, the software reset mark count automatic Disable mark when reach total count: set the total count, when the amount reached, the software will not continue mark. User step mark mode: When the marking according to the establishment the Galvo smallest distance movement, delay fixed time after each movement distance, this function mainly uses in the strong laser power hitting the depth, the step delay is bigger, the laser marks in the pause position deeply. Fly Mark Mark with working line simultaneously. Hit “fly mark” button presenting the dialog box shown in graph 10-32. Figure 10-32 Fly mark set dialog box Fly mark: choosing this item refers to enable “Fly mark” function. Fly from right to left: Choosing this item indicates that stream line direction is from right to left. Fly continue mode: Choosing it indicates mark object is continuous one, namely, we need to mark content on continuous object. (Such as: wire ,cable and so on). Enable total part num: Selecting it indicates the mark “total number” set is effective. Disable start mark IO in continue mode: it indicates that software doesn’t test start mark port when marking continuous object. Otherwise, software will test input signal while marking 118 All rights reserved EzCad2UNI User’s Manual every time. Enable hardware fly mode: It indicates that using rotation coder follow linear speed automatically. Enable hardware simulation mode: It indicates that using simulation hardware method produce linear speed. It requires appointing speed. Enable fly according to object order: Selecting it indicates that software will mark content according to its order in the list in turns. Otherwise, software will mark content according to its position in working space from left to right. Fly speed coefficient: The calculation formula is shown as follows: Fly speed coefficient = perimeter of coder tachometer wheel / coder pulse per revolution; Selecting “Fly mark” but “enable hardware fly mode”, “linear speed” will be shown in “Mark parameter” column, as is shown in graph 10-33: Figure 10-33 Mark parameter Red Light Pointer: Max. Freq Delay: Same as max power delay Red Light Pointer: Refers to guide light Light Speed: the speed of guide light Offset Pos X and Y: it is used to compensate the position error between guide light and the laser beam. Enable continue mark mode: enable this function, return the software surface, click “Param” then the dialog box popup shown as following Figure,it will be appear after mark stop every time, the Red Laser Pointing always exist. 119 All rights reserved EzCad2UNI User’s Manual 120 All rights reserved