1
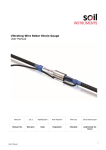
User’s Manual
K Type Thermometer DT1311, DT1312
1. Features Introduction
This product is a K-type thermocouple temperature sensor for sensor digital thermometer, which converts
thermal electromotive force and temperature relationship to IEC458 international standard K-type
conversion function definitions
* Selectable ℃ / ℉ / K temperature units. (K units for dual channel thermometer Only DT1312)
* Automatic shift / maximum / minimum test function. (For dual channel thermometer)
T1 and T2 double-ended input, T1-T2 differential temperature readings. (For dual channel thermometer)
* Low voltage display and automatic shutdown.
* Long battery life and low power consumption (single thermometer power 0.5mA, dual channel
thermometer 1mA)
* after stent with a shockproof sheath.
2. General technical parameters
Display: Large LCD display, the largest display 999.9
Measuring range: -200℃ to 1370℃; -328℉ to 2498℉; 73K to 1643K (Only DT1312)
Resolution: 0.1℃/0.1℉, 1℃/1℉, 0.1K /1K.
Accuracy: ±(1% of reading+1℃), ±(1% of reading+2℉), ±(1% of reading+2K).
Note: The temperature 25 +/- 3 ℃ relative humidity 80% RH environment checksum
Temperature Coefficient.
When the operating environment temperature exceeds 22 ℃ to 28 ℃, every 1 ℃ ambient temperature
changes do not need to add the following
Accuracy: 0.02% of reading + 0.05 ℃
0.04% of reading + 0.1 ℉
0.02% of reading + 0.05K
Note: The above specification is the thermometer itself, but the practical application is the need to
consider the specifications of the probe itself is a thermocouple error.
Storage temperature: 0 to 50℃(14 to 122℉), Humidity <80%.
Operating ambient temperature:0 to 40℃(14 to 104℉), Humidity<80%.
Power source: 4* AAA,1.5V
Weight: 300g(Including battery)
Size:145x71x40mm
3. Single channel thermometer
(1)LCD display shows
(2)The measured value
(3)emperature ℉ unit indicator
(4)Temperature ℃ units indicator
(5)Low battery indicator
(6)Automatic shutdown indicator
(7)Data Hold indicator
2. Single channel thermometer and name each part
(1)LCD display
(2)The power key
(3)Data hold key
(4)Temperature ℃ unit conversion key
(5)Temperature ℉ unit conversion key
(6)A resolution conversion key
(7)0.1 resolution conversion key
(8)Input port (Figure II)
(9)Anti-vibration protective sleeve
(10)After stent
3 Operating Instructions for Single channel thermometer
(1) Open the package and remove the instrument package, install the battery and the battery cover and
shockproof protective suits better.
(2) Press '(1)' red button, power (in this case there will be a short stay is a normal phenomenon) marked
by positive and negative probe is inserted in the input port, preheat 10 minutes, for the convenience of
users, the instrument is set up two kinds of temperature mode and range selection, users may need to
be ℃ / ℉, and 0.1 / 1 switch.
(3) The probe is placed in the measuring place, reading is the temperature of the object on the display
until after the meter reading to stabilize.
(4) the need to maintain the measured data, press 'HOLD' appear 'HOLD' symbol on the key display, the
display does not change the lock, press 'HOLD' key to cancel the Hold function, the instrument continues
normal tests.
5) The instrument has an automatic shutdown function, automatic shutdown working time is 10 minutes. If
you need a long time measurement, first hold down the 'HOLD' key just boot, press '(a)' red button, the
instrument launched automatic shutdown mode to manual shutdown mode, the automatic shutdown
symbol on the display disappears.
6) After the measurement is completed, press '(a)' red button to turn off power to the instrument.
4. Dual channel thermometer
(1)LCD liquid crystal display shows
(2)The measured value
(3)Measurement probe T1 indicator
(4)Negative indicator
(5)T2 indicator measuring probe
(6)Measuring probe difference T1-T2 indicator
(7)K unit temperature indicator
(8)Temperature ℃ units indicator
(9)Temperature ℉ unit indicator
(10)Low battery indicator
(11) Auto power off indicator
(12)The minimum test indicator
(13) The maximum test indicator
(14)Data hold indicator
3. Dual channel thermometer and name each part
(1) LCD display
(2) The power key
(3) Data Hold key
(4) Temperature ℃ / ℉ / K unit conversion key
(5) T1-T2 temperature difference between the
switching key
(6) T1 / T2 temperature channel conversion key
(7) Max / Min test conversion key
(8) Input Port
(9) Vibration-proof protection cover
(10) After stent
3 Operating Instructions for Dual channel thermometer
(1) Open the package and remove the instrument package, install the battery and the battery cover and
shockproof protective suits better.
(2) Press '(1)' red button, power (in this case there will be a short stay is a normal phenomenon) marked
by positive and negative probe is inserted in the input port, preheat 10 minutes, for the convenience of
users, the instrument is set up three temperatures mode selection, users may need to be ℃ / ℉ / K switch,
temperature measurement range is automatically switched.
(3) The probe is placed in the measuring place, reading is the temperature of the object on the display
until after the meter reading to stabilize.
(4) The need to maintain the measured data, press 'HOLD' appear 'HOLD' symbol on the key display, the
display does not change the lock, press 'HOLD' key to cancel the Hold function, the instrument continues
normal tests.
(5) Press the 'MAX / MIN' button will cycle through maximum / minimum test and numerical lock, so that
the user is used to understand the variation in temperature.
(6) For dual channel thermometer, thermocouple probes were inserted into the two T, T2 measurement
input port (which can also insert a), press the 'T1 / T2' button you can measure the different positions of
the two temperature points when, LCD display, said display value T1 is the temperature of the object T1,
T2, said display displays the value of T2 is the temperature of the measured object.
(7) Press the key difference between the temperature T1-T2, then the LCD display 'T1-T2' symbol, it is
possible to measure the temperature difference between the two different objects or different temperature
points.
(8) The instrument has an automatic shutdown function, auto power off working time is 10 minutes. If
you need a long time measurement, first hold down the 'HOLD' key just boot, press the red button, the
instrument launched auto power off mode to manual shutdown
mode, the auto power off symbol
disappears on the display.
(9) After the measurement is completed, press the red button to turn off power to the instrument.
5. Prepare presentation before measuring
(1) Make sure the battery has been installed properly. As displayed on the LCD monitor “
”,Said the
battery must be replaced.
(2) Determine the function of the switches are set in the correct position. (HOLD switch in the OFF state,
determined without the LCD "HOLD" the symbol is displayed.
(3) Check the temperature probe placed in the correct temperature measurement outlet. (Temperature
probe connected to the end of the "+" terminal must be connected to the outlet of the temperature
measurement "+" side, temperature probe connected to the end of the "-" terminal must be connected to
the outlet of the temperature measurement "-" end)
Notes:
(1) When determining battery device properly power on the instrument, such as a monitor LCD display is
not correct, turn off the power meter to restart the meter, you can get the proper display.
(2) When to replace the battery, open the table analyzer instrument sound an alarm if the power to
re-install the battery so that the table can disarm the alarm sound meter is working properly.
(3) During the test, when the meter is affected by external electromagnetic interference signals, does not
work or display disorder, off the table to restart the instrument power meter you can get right to work state.
In the course of the above, please note the correct operation of the instrument to work, to protect the
instrument during the test accuracy and function are not affected.
6. Measurements
(1) Select the function switch at the right temperature unit file.
(2) The temperature probe (K-tape) the connection end into the outlet temperature measurement.
(3) To measure the temperature probe (K-tape) the end of a temperature measurement every occasion
Note:
(1) To get accurate temperature measurements when used as the internal temperature of the liquid
temperature measurement or measure its protective tube insertion depth should be fine speed
thermocouple 12-20 times the outer diameter of the long.
(2) When used as surface temperature measurement, temperature probe (K-tape) the
dorsal surface of the measuring end close contact English.
7. Maintenance Matters
(1) Please avoid rapid changes in the surrounding environment of the workplace use them and do not
store in high temperature, high humidity, vibration column harm the place.
(2) When not using the meter, remove the batteries.
(3) This thermometer is for K (CA)-type thermocouple temperature probe to use.
(4)The thermometer is prohibited to make any voltage and current test
(5)Thermocouples will be subject to the use of oxidation and reduction. Corrosion, contamination,
evaporation, diffusion or influence on other metallurgical gradually aging, aging a lot of influence on the
temperature measurement.
(6)Clean and check the temperature probe: A note attached to the surface of the smoke temperature
probe, coal, dust, oil will cause the thermocouple heat conduction becomes dull, the formation of the test
error, you need to periodically clear, when fine-speed thermocouple protection tube coated metal
corrosion when the phenomenon should be replaced.
Specifications subject to change, if not notice.
The contents of this manual are identified correctly, if users find errors omissions, please contact the
manufacturer. The Company does not undertake accidents and harm caused by user errors, and the
function of this specification is not the product is used as a reason for special purposes