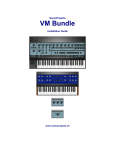
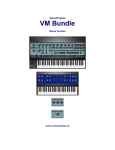
1
Paddy 4.2
User guide
December 2012
(V 4.2)
© [email protected]
Paddy user guide, V4.2
Table of contents
1
PDF Version............................................................................................................................ 7
2
Version remarks ...................................................................................................................... 8
3
Registering Paddy ................................................................................................................... 9
3.1
Summary of the policy ..................................................................................................... 9
3.2
Philosophy ........................................................................................................................ 9
3.3
50 days to play.................................................................................................................. 9
3.4
How it Works ................................................................................................................... 9
3.5
Important Details ............................................................................................................ 10
4
Key Aspects of working with Paddy .................................................................................... 11
5
Where to get help .................................................................................................................. 12
6
Installing Paddy and getting started ...................................................................................... 13
7
Navigating Paddy .................................................................................................................. 14
8
9
7.1
The Lightroom Plugin menu .......................................................................................... 14
7.2
The Windows tray menu ................................................................................................ 15
Short description of specific tasks ........................................................................................ 16
8.1
Adjust Paddy for your region ......................................................................................... 16
8.2
Map keyboard keys to functions .................................................................................... 16
8.3
Use a BCF2000 or BCR2000 Midi Controller ............................................................... 18
8.4
Use a supported external Keyboard ............................................................................... 19
8.5
Share your settings with other users ............................................................................... 20
8.6
Load settings you downloaded ....................................................................................... 20
Assigning Lightroom functions to keyboard(s) .................................................................... 22
9.1
Mapping Lightroom functionality .................................................................................. 22
9.1.1
Overall Settings ....................................................................................................... 25
9.1.2
Select and Move Slider ........................................................................................... 25
9.1.3
Move a specific slider ............................................................................................. 25
9.1.4
Midi : Sliders........................................................................................................... 26
9.1.5
Presets, Macros, Camera profiles............................................................................ 26
9.1.6
Apply a Keyword .................................................................................................... 26
9.1.7
Switch to keyset ...................................................................................................... 26
9.1.8
Relative Midi Sliders .............................................................................................. 26
1
Paddy user guide, V4.2
9.1.9
9.2
10
11
Display a message ................................................................................................... 27
Keyboard ........................................................................................................................ 27
9.2.1
General usage .......................................................................................................... 27
9.2.2
Regional keyboards ................................................................................................. 28
9.3
Mouse ............................................................................................................................. 28
9.4
External keyboards ......................................................................................................... 29
9.4.1
Genovation 682 and 683 ......................................................................................... 30
9.4.2
Xkeys Professional.................................................................................................. 31
9.4.3
Logitech G13 .......................................................................................................... 31
9.4.4
Generic external keyboard ...................................................................................... 31
Key Sets ................................................................................................................................ 33
10.1
Switching key sets on and off ..................................................................................... 33
10.2
Selecting a key set while editing ................................................................................ 33
10.2.1
Via Hotkey .............................................................................................................. 33
10.2.2
Cycling through key sets ......................................................................................... 33
10.2.3
Via the tray menu .................................................................................................... 33
10.3
Selecting a key set in the mapping Menus ................................................................. 35
10.4
Renaming the key sets ................................................................................................ 35
10.5
Reminder what key set you are using ......................................................................... 36
Midi ....................................................................................................................................... 37
11.1
General stuff about Midi you should know ................................................................ 37
11.2
Interface for the Behringer BCF2000 and BCR2000 Controllers .............................. 38
11.2.1
Accessing ................................................................................................................ 39
11.2.2
Overview ................................................................................................................. 39
11.2.3
Mapping functions .................................................................................................. 40
11.2.4
Changing control properties .................................................................................... 40
11.2.4.1
Display value property ................................................................................................ 40
11.2.4.2
Toggle Mode ............................................................................................................... 40
11.2.4.3
Encoder LED modes .................................................................................................... 40
11.2.4.4
Encoder Resolution ..................................................................................................... 40
11.2.5
Set a Preset name .................................................................................................... 41
11.2.6
Copy from a Preset.................................................................................................. 41
11.2.7
Associate a Preset with a Tool ................................................................................ 41
11.2.8
Update the controller............................................................................................... 42
2
Paddy user guide, V4.2
11.2.8.1
Updating the current preset ....................................................................................... 42
11.2.8.2
Updating all presets .................................................................................................... 42
11.2.9
12
13
14
15
Importing and exporting settings ............................................................................ 42
11.2.10
Documenting your Mapping ............................................................................... 42
11.2.11
Creating a SystemExclusive file ......................................................................... 43
11.2.12
Sending a SystemExclusive File ......................................................................... 43
11.2.13
Technical Details ................................................................................................. 43
11.2.14
Troubleshooting for Behringer BCF2000 and BCR2000 controllers ................. 44
11.3
iPad as Midi controller for LR .................................................................................... 44
11.4
Working with Generic Midi Controllers .................................................................... 45
11.4.1
Generic controller - Paddy Midi mapping .............................................................. 45
11.4.2
Generic controller - own mapping .......................................................................... 47
11.5
Using Midi Pitch Bend messages ............................................................................... 49
11.6
Interface for MIDI keyboards and instruments .......................................................... 49
Voice Recognition ................................................................................................................ 51
12.1
Switching voice recognition on .................................................................................. 51
12.2
Creating new voice commands ................................................................................... 51
12.3
Switching Voice recognition off while working ........................................................ 52
12.4
Tips ............................................................................................................................. 52
Presets and Macros ............................................................................................................... 53
13.1
Relative Presets........................................................................................................... 53
13.2
Adjustment Brush Presets ........................................................................................... 54
13.3
Camera Profile Presets................................................................................................ 56
13.4
Macros ........................................................................................................................ 56
Scripts ................................................................................................................................... 58
14.1
Script filenames and locations .................................................................................... 58
14.2
Recording a script ....................................................................................................... 58
14.3
Stop Recording a script............................................................................................... 58
14.4
Playing back a script ................................................................................................... 58
14.5
Editing a script ............................................................................................................ 58
14.5.1
Navigating the editor............................................................................................... 59
14.5.2
Keyboard shortcuts available .................................................................................. 60
Importing and Exporting settings.......................................................................................... 61
15.1.1
Exporting................................................................................................................. 61
3
Paddy user guide, V4.2
15.1.2
16
Importing................................................................................................................. 61
Tweaking Preferences ........................................................................................................... 62
16.1
Basic Setup ................................................................................................................. 62
16.1.1
Looks....................................................................................................................... 63
16.1.1.1
Use English regardless of Region ................................................................................ 63
16.1.1.2
Keep selection Tree collapsed..................................................................................... 63
16.1.1.3
Use 10 key sets ............................................................................................................ 63
16.1.1.4
Enable key sets in tray Menu ...................................................................................... 63
16.1.1.5
Show key set info ........................................................................................................ 64
16.1.1.6
Uncheck to show no message ..................................................................................... 64
16.1.1.7
Start voice recognition ................................................................................................ 64
16.1.2
Behavior .................................................................................................................. 64
16.1.2.1
Force NumLock On ...................................................................................................... 64
16.1.2.2
Intercept Mouse.......................................................................................................... 64
16.1.2.3
Sync Paddy slider selection with Lightroom ............................................................... 64
16.1.2.4
Open Panel when moving a slider............................................................................... 64
16.1.2.5
Remember last used key set ....................................................................................... 65
16.1.2.6
Time to try switching modules .................................................................................... 65
16.1.2.7
Time before committing change to history ................................................................ 65
16.1.3
Keyboard ................................................................................................................. 65
16.1.3.1
Keyboard adjustment .................................................................................................. 65
16.1.3.2
Dealing with keyboard issues ...................................................................................... 65
16.1.3.3
Show F13-F24 in Keyboard GUI................................................................................... 66
16.1.4
Midi ......................................................................................................................... 66
16.1.5
External Keyboards ................................................................................................. 66
16.1.6
Update options ........................................................................................................ 67
16.1.7
Settings file ............................................................................................................. 67
16.1.8
Debug ...................................................................................................................... 67
16.1.9
Message Design ...................................................................................................... 67
16.2
Slider Move Deltas ..................................................................................................... 69
16.3
Raw Keylist ................................................................................................................ 69
16.4
User defined external keyboards ................................................................................ 70
16.4.1
Define Layout ......................................................................................................... 70
4
Paddy user guide, V4.2
16.4.2
17
Changing Key mapping .......................................................................................... 71
16.4.2.1
Individual assignment ................................................................................................. 71
16.4.2.2
Mass Assignment ........................................................................................................ 71
16.4.2.3
Documentation ........................................................................................................... 72
16.4.3
Open and save layouts ............................................................................................ 73
16.4.4
Import or Export Layout ......................................................................................... 73
Updating Paddy..................................................................................................................... 74
17.1
Paddy fast update ........................................................................................................ 74
17.2
Download full installer ............................................................................................... 74
18
Known issues and limitations ............................................................................................... 76
19
Bug reporting and suggestions .............................................................................................. 77
20
Appendix ............................................................................................................................... 78
20.1
XKeys Professional keypad ........................................................................................ 78
20.2
Genovation 682 keypad .............................................................................................. 79
20.3
Genovation 683 keypad .............................................................................................. 80
20.4
G13 gamer keypad ...................................................................................................... 81
20.5
Behringer BCF2000 Midi controller .......................................................................... 82
20.6
Behringer BCR2000 Midi controller .......................................................................... 82
20.7
Reset a Behringer controller ....................................................................................... 82
20.8
Advanced techniques - programming your own settings with BC Manager .............. 83
20.9
Anatomy of a keyboard definition file ....................................................................... 88
20.9.1
name section............................................................................................................ 89
20.9.2
GUI section ............................................................................................................. 89
20.9.3
Hokey section.......................................................................................................... 90
20.10
Legal Remarks ............................................................................................................ 93
5
Paddy user guide, V4.2
6
Paddy user guide, V4.2
1 PDF Version
A PDF version of this guide can be found here:
https://sourceforge.net/projects/paddy/files/98%20Documentation/
The PDF is often a few edits behind the online version.
7
Paddy user guide, V4.2
2 Version remarks
This version of the user guide reflects Paddy 4.2 as of November 20, 2012.
8
Paddy user guide, V4.2
3 Registering Paddy
3.1 Summary of the policy
You will need to register Paddy after 50 days by donating through a PayPal account or a
credit card via PayPal. Use this link to donate: Donate and register
The minimum donation is 1 cent (though I would like you to consider something
appropriate)
You will get an email with the registration code. If did not get that email after 2 hours, let
me know.
You can register 2 PCs max per PayPal transaction code(you need to be online for the
process but not afterwards)
If you do not have a PayPal or credit card account, or you administer many computers
(e.g., in a school or a large business), contact me and I will take care of you so you don't
have a big hassle.
3.2 Philosophy
Paddy is open source. Anybody can get the source code and try to run Paddy from it. It is not
easy, but it is doable. Paddy had been free for several years. However, Paddy takes a lot of time
to work on. I have traced bugs for hours, and every Lightroom change requires several days of
investment to make Paddy work again. Moreover, I invested in hardware and software I would
otherwise not have bought. On the other hand, Paddy can save Photographers hundreds of hours
of work, depending on workflow and number of pictures per week. Alternatives to Paddy costs
hundreds of Dollars. The cost/benefit balance didn't seem right any more, as I have most of the
cost in time and real dollars.
So Paddy is now mandatory registration with a 1 cent donation minimum. Essentially, I would
like to encourage reasonable donations. As a guideline, I would like you to consider that some
wedding photographers have donated sums that are equivalent to a reasonably important
packaged software. Think about how much time Paddy saves you. If none, stick with the one
cent (whic goes completely to Paypal). If significant, donate appropriately.
3.3 50 days to play
Paddy will work for 50 days without any registration. You will get a pop-up reminder at each
start of Paddy, though. After 50 days, you will have to register for Paddy to work. You can do it
for 1 cent via PayPal (not that I will see that - anything up to about $1 goes to Paypal), but it
would be nice if at that point, you asked yourself how much you would pay for a software with
this functionality if it was a commercial solution.
3.4 How it Works
9
Paddy user guide, V4.2
You can register Paddy by making a payment of at least $0.01 (or your local minimum) using
PayPal. You will get an email with your registration code to enter into Paddy, so keep that ID.
You do not need a PayPal account: if you don't have one, you can pay through PayPal using a
credit card.
If you choose to make a payment of $0.01 (or whatever minimum PayPal allows for your
currency), PayPal takes that as a fee and I receive nothing, and that's perfectly acceptable. If you
choose to make a larger payment, PayPal takes its fees off the top – at least the first fifty cents or
so – and what remains goes to me.
If you don't have a PayPal account and don't have a credit card, you won't be able to register
Paddy in this way. Send me a note and I'll take care of you. Not a problem, please reach out
3.5 Important Details
You can at the moment register two computers with each PayPal ID. When you upgrade
computers, you will need to donate another cent to get a new ID. Given that you just bought a
new computer, I hope that's acceptable. If you administer Lightroom on a bunch of computers
(e.g. at a school or large business), send me a note (dorfl68 [at] gmail.com) and I will get you a
series of registration codes. If you are indeed a large business, a large donation would be nice,
though (one can dream, right?).
The only information stored online is the registration ID key and a random string that is
associated with your computer. It is impossible for me or anybody to identify anything about you
or your computer from this information. Your email address is not stored. Your Lightroom serial
number is not stored. The upside is, no privacy issues. The downside is, should you lose the
registration ID, you have to register again.
Lastly, you are not purchasing anything or any rights when you register the plugin. I give no
guarantees other than the registration code will work to remove the limitations of the copy you
have, for the version of Lightroom you have. I reserve the right to stop Paddy development, and
bugs might not be resolved the minute I receive the report (although I think I have a record of
trying hard and being fast)
10
Paddy user guide, V4.2
4 Key Aspects of working with Paddy
Paddy intercepts keystrokes from internal and external keyboards as well as Midi input and
assigns tasks in Lightroom to them. As such, it tries to work in the background all you should see
normally is a little logo in the windows tray. Some functions tell you what's happening (e.g.,
when running a script) but it's easy to forget that there is a plugin running all the time. It is
therefore important to realize a few things before you start
1. You will have to configure Paddy to your liking. This includes deciding what keys to
map (or not), and whether to use an external keyboard (or not). Paddy supports several
key maps that you can freely switch over, so you can always experiment
2. All you see of Paddy after the start (if all goes well) is a little logo in the windows tray. In
order to customize the functions, edit, run, or record a script, setup hardware etc, rightclick that logo and a menu pops up. Alternatively, you can use a Menu in LR under File>Plugin Extras.
3. If you use an external keyboard, you will have to assign a keyboard layout to those. For
the four keyboards that Paddy supports directly at the moment(Genovation682,
Genovation683, XKeys Professional Keypad, Logitech G13), these files are provided in
the Paddy download but they are not automatically installed. You will have to do that
(see Setting Up External Keypads below)
4. If you use an unsupported external keyboard, Paddy helps you through defining the
keyboard layout. See under User defined external keyboards in this guide
5. If you use MIDI, in theory, any controller will work. In practice, the Behringer BCF2000
controller and Behringer BCR2000 controller are natively supported by Paddy with a user
interface and thus preferred by most users
6. If you use a MIDI keyboard, such as the Axiom 25, You probably need to understand
how to tell the keyboard what MIDI channel to use, but not much more.
7. Paddy is donationware and a fun project for me. I am not a corporation or sponsored by
one. The good thing is, that makes Paddy free (other than a minimum 1 cent for
registration and any hardware you might want or indeed, a higher donations). On the
other hand, neither the quality control nor the support is on a level that you would expect
from a company (not that I am impressed with the quality of some professional software
support). I will do all I can and we have a good user community to improve the product,
and I have several years of good track record now. But in general, no guarantee for
anything
8. I do appreciate donations, which you can send my way via a menu entry in Paddy. I
continue to invest in hardware and software for this.
11
Paddy user guide, V4.2
5 Where to get help
If this user guide feels incomplete, incomprehensible, or both, please go to the help forum here:
https://sourceforge.net/apps/phpbb/paddy/
Video tutorials are on the YouTube Channel: http://www.youtube.com/user/PaddyforLightroom
12
Paddy user guide, V4.2
6 Installing Paddy and getting started
Download Paddy here: https://sourceforge.net/downloads/paddy/
The code you want is in "latest version - complete Installer". The installer runs like any other
installer under Windows. It creates the required files and directories in your Lightroom Plugin
folder. Once that is done, start Lightroom and install the Plugin the usual way using the Plugin
manager.
For updates, there are two processes
1. Paddy fast update: Paddy can download just the necessary files for an update. Check in
Paddy whether you have the latest version or set Paddy to remind you if a new version is
available
2. Download the newest installer. Your personal settings are carried over.
For more on updates see Updating Paddy
13
Paddy user guide, V4.2
7 Navigating Paddy
Paddy has many features. There are two ways to access them:
7.1 The Lightroom Plugin menu
You can access most key Paddy functions from the LR Plugin menu under File-Plug-in extras.
Below the current state of this menu
Most of the Menu entries will open a sub menu when clicked. Here is what you access where
1. Assign: Menu to assign LR functions, including sliders, to hotkeys, external keyboard
and your MIDI controller. The next level Menu will ask which of these you want to
assign
2. Preset and macro Setup: Go here to define Paddy's relative Development Presets,
Adjustment Brush presets, camera profiles, and to define your own macros.
3. Import/Export: To share part of you settings or import somebody else's, go here
4. General Setup: This is the "Preferences" part of Paddy. Set up your region, the amount
sliders move when you push a button, or define an unsupported external keyboard so
paddy can support it better
5. Scripting: Paddy can record, edit, and play back scripts using these menu entries
6. Restart and about should be self-explanatory
14
Paddy user guide, V4.2
7.2 The Windows tray menu
After Paddy starts (typically, after you install the LR plugin, Paddy starts up when Lightroom
starts), you will see Paddy's logo in the Windows Tray menu. When you right click on the logo,
the options you see in the screenshot above pop up. All of Paddy's functions are accessible via
these menus.
1. Assign: Key menu to assign LR functions, including sliders, to hotkeys, external
keyboard and your media controller. The next level menu will ask which of these you
want to assign
2. Preset and Macros: Go here to define Paddy's relative development presets, adjustment
brush presets, camera profiles, and to define your own macros.
3. Import/Export: To share part of you settings or import somebody else's, go here
4. Scripts: Paddy can record, edit, and play back scripts using these menu entries
5. Preferences: Set up your region, how Paddy communicates with you, the amount sliders
move when you push a button, whether or not to use a Midi controller and the mouse
with Paddy, or define an unsupported external keyboard so Paddy can support it better
6. Restart, Exit and About should be self-explanatory
7. Help and user guide: link to the Wiki, the forum, and the PDF user guide
8. Donate: Register/donate
15
Paddy user guide, V4.2
8 Short description of specific tasks
8.1 Adjust Paddy for your region
Paddy works under all Western languages for Lightroom. Support for Chinese, Korean and other
non-ANSI languages is not available at the moment. If you can help us implement these, please
let us know on the forums.
Paddy messages are available in English and German, and Paddy automatically adjusts to
Lightroom's setting. If you want to help to translate Paddy, please let us know - all you need to
know is English and basic Excel.
To check what language Paddy detected:
1. Right-Click Paddy's tray menu, go to Preferences -> Basic Setup
2. Go to the "keyboard" tab. Paddy reports the language it detected in the first line on the
tab
Paddy should now be configured for your language. Not all languages have been tested. If you
encounter errors, please go to the message board and ask for help
(https://sourceforge.net/apps/phpbb/paddy/)
8.2 Map keyboard keys to functions
The most basic thing you can do in Paddy is map keyboard keys ("Hotkeys") to functions.
1. Via the Plugin Menu or the Windows Tray Menu, select "Assign ->Keyboard".
2. The left hand side of the window that comes up is a virtual keyboard, the right hand side
shows all Paddy functions.
3. Use your mouse in combination with the shift/ctrl/alt keys to click on the keyboard key
you want to map, or simply hit the key by holding down and then releasing it (e.g., hit
CTRL-ALT-F3). On top of the virtual keyboard, the key you just selected is highlighted.
On the right hand side, first select the type of function you need, then the exact function
you want to map to this key.
4. See below for an example where the user has mapped the F1 key to the graduated filter
tool
5. When you are done, hit "OK" and test your new mapping
The keyboard section of the guide has some more details on adjusting this screen
16
Paddy user guide, V4.2
17
Paddy user guide, V4.2
8.3 Use a BCF2000 or BCR2000 Midi Controller
For more details of what you can do (a lot), please see later in the user guide under Interface for
the Behringer BCF2000 and BCR2000 Controllers In order to work correctly with Paddy, the
Midi controller needs a "map" that shows which fader, encoder, or button should be sending
what control command. Paddy in turn needs to know what the controller sends. For the
Behringer BCF2000 and Behringer BCR2000, Paddy will take care of all this for you but you
need to go through a few setup steps. You might want to get more fancy later, but in the
beginning, you can follow the steps below to get these controllers working.
In essence, we need to do are three things
1. Make sure the Behringer controller is in the right mode (important if bought used)
2. Design in Paddy what you want a controller on the BCF or BCR to do
3. Send that info to the controller
Step 1 can be tricky. Step 2 is easy as Paddy comes with a pre-configured set of Midi controls.
Step 3 is a button in Paddy's interface that says "Update BCF" or "Update BCR"
Detailed steps to set up the Behringer for the first time:
1. If you have bought a used Behringer, or are not sure about the setup, go to the entry on
how to reset a Behringer controller
2. Make sure the Behringer controller is set up to support USB, is set to USB mode 1, no
emulation ("bC mode") and the drivers (download from
18
Paddy user guide, V4.2
http://www.behringer.com/EN/Support/B-Control-Downloads.aspx) are installed . See
the Behringer manual for details
3. You also should check if the latest firmware is running on your Behringer controller
(especially when you bought it second hand). The firmware and the loading tool can also
be found at the Behringer download page. All this was tested with Behringer controllers
running firmware version 1.10. The firmware version is display right after you start up
your Behringer controller on its display.
4. Setup Paddy for your region and connect the Behringer Controller using USB. Do not
connect through a USB hub but directly with the computer. The Behringer has
massive USB timing problems otherwise, and will receive errors
5. Go in Paddy, select preferences-> Basic setup, go to the Midi setup and select the option
for the Behringer controller
6. Restart Paddy
7. Select the Behringer Midi menu (Assign -> Behringer Midi Controller). Either pick the
BCR 2000 or BCF 2000 tab, depending on your controller (above is a screenshot of the
interface). Check "use Midi out" and "use Midi in"
8. Select the Behringer controller from the pulldown menu for both Midi out and in. If the
controller doesn't appear here, try restarting Paddy. If it still doesn't appear, check
whether it's not connected or not powered on. Also check if you installed the drivers. If
all basics are covered, and you still can't find the Behringer in the pulldown, it's time to
ask for help on the Paddy forum (https://sourceforge.net/apps/phpbb/paddy/).
9. After you selected the Midi controller, hit "OK" and restart Paddy/Lightroom (e.g. via the
plugin menu in LR)
10. Go back to the Behringer setup menu
11. If you just want to use the settings that come with Paddy, click on "Update BCF (All
Presets)" (or "Update BCR"). Do not interrupt the transfer. The controller shows that it
receives data by having bars move around the display.
When this is over, you are ready to roll. If you want to change the setup, you can do so in the
interface. When you click on a control in the Behringer Menu, you can assign a LR function to
this control by clicking on the function on the right. Do not forget to update the controller by
clicking on "Update BCF (All Presets)" or "Update BCF (This Preset)"
If you are encountering problems, please go to the Paddy discussion boards and ask for help.
Visit the Paddy boards at https://sourceforge.net/apps/phpbb/paddy/ to find users who share their
settings and get tips on optimizing the Midi layout
You want to program all this by yourself? The detailed description about how to do this can be
found here Advanced techniques - programming your own settings with BC Manager.
8.4 Use a supported external Keyboard
Paddy supports the |Logitech G13,Genovation 683, Genovation 682 and theXKeys professional
USB keypads. For the Xkeys, Paddy Has its own driver which allows very flexible assignment of
the keys.
19
Paddy user guide, V4.2
You can use several external keypads at once. For instance, you can still use the Genovation
keyboards or other external keyboards in addition to the XKeys. To enter this mode, go to
Preferences->Basic Setup, click on the "external keyboard" tab and mark "XKeys" and the
Genovation in the list. Click OK and restart Paddy. You are now ready to map the keys to the
keyboards. Under "Assign", you should now see a menu entry for Each controller. Click on that
and a representation of the keyboard pops up. Click on the key you want to assign (either with
the mouse or directly on the XKeys/Genovation) and pick the function you want to assign on the
right. Right-Click to change a keys function to a "layer toggle" key (Paddy supports 4 layers on
the XKeys - no toggle key, toggle 1, toggle 2, and toggle 1&2 together). Make sure you are not
running MacroWorks!
For the Genovation and G13 keyboards, you first need to tell your keyboard what keys to send
when you push on a key. Essentially, a key on, say, the Genovation 683, will send something like
CTRL-ALT-F13 (yes, there are more than 12 function keys) to Windows. But the keyboard
needs to know what key to send when. Paddy provides you with the relevant files. Please see in
this use guide under external keyboards what procedure to use for your keyboard.
8.5 Share your settings with other users
Paddy allows you to share settings with other users. This is particularly useful for Midi settings
1. Select the Export Menu via File->Plugin Extras->Import/Export->Export (or directly
"Export settings in the tray menu)
2. Check the settings you want to share in the menu that pops up
1. Hit "Ok". Paddy now asks for the filename and where to save the file (extension .pxf)
2. Done. You can now post your settings online by sharing this file
8.6 Load settings you downloaded
Users can share settings. If you download a .pxf file or a .psf file, you can selectively import the
settings you want - no need to take everything
20
Paddy user guide, V4.2
1. Select the Import Menu via File->Plugin Extras->Import/Export->Import(or directly
"Import settings" in the tray menu)
2. Check the settings you want to import from the file
3. Hit "Ok". Paddy now asks for the filename and location of the file. Click the file that you
downloaded
4. Paddy imports and you are done
5. However, are you sure you want to save these settings? Paddy asks you where to save the
current settings (all Paddy settings). The current settings file is the default. Just hit "OK"
if you want to overwrite your current settings. If you prefer to save this imported setting
in a different file, enter a location and filename here. paddy now uses that settings file
21
Paddy user guide, V4.2
9 Assigning Lightroom functions to
keyboard(s)
The "Assign" menus open the world of assigning Lightroom functions, presets, and your own
macros to keys. Remember that if you do not assign a key, Paddy hands the original key to
Lightroom - e.g., leave F1 unassigned and the help function is still available.
For these menus, Paddy checks whether Lightroom is running. If Lightroom is running, Paddy
switches to the Library module and reads the Preset list. If it doesn't work, you might have
something selected in LR that Paddy can't get out of - or your computer is just a bit slow. In this
case Paddy complains via a pop-up window. You can choose to abandon the effort or try again.
Before you try again, maybe move to the Library module manually, then hit "yes" in the message
box.
9.1 Mapping Lightroom functionality
Watch a video on this, and all the stuff Paddy can map, here:
http://www.youtube.com/user/PaddyforLightroom?feature=mhum#p/a/u/0/VHgzjmHTh5s
In general, Paddy works by mapping stuff that Lightroom can do - plus some stuff that Paddy
can do - to keys on the normal or external keyboard, the mouse, or faders, encoders and buttons
on a midi controller. Whether you assign a key on the keyboard, a mouse key, a midi controller,
or anything else in Paddy, you cannot avoid a list of 2000+ functions you could assign to that
key or controller. The way you pick what you want this key to do is via a two level function list,
as pictured below
22
Paddy user guide, V4.2
The left hand column has categories of functions, the right hand column has the functions within
that category. Below is a broad overview of the key categories and what's in them. Everything in
LR Development is available here. Below the table is a more detailed description of some of the
less obvious categories
23
Paddy user guide, V4.2
Paddy overall
Settings for Paddy, like the Paddy Menu. Also the option "None", which
returns mapping of a key back to Lightroom, and options to switch to the
next/last key set
Select and Move These function allow you you to pick a slider with a keystroke, then move it a
Slider Functions large,medium, or small amount with another keystroke or the mouse wheel
Move a specific
slider
These are the functions that map moving a slider directly with a key, without
picking them first. You need more keys to do this (one for each slider
movement) than with "Select and Move". The Upside is that you don't need to
pick a slider first
Midi Sliders
Only accessible for Midi faders and encoders, these functions map LR sliders
to the Midi controllers (in absolute Midi mode for values from 0 to 127)
Midi Toggle
functions
Functions only for Midi that switch stuff on and off, like the side panels
Non-Slider
Access target adjustment tools, Tone curve settings, Lens correction settings,
develop Settings and post crop vignette settings that are not sliders
Apply Lightroom development presets, Paddy's relative presets, Adjustment
Presets, Macros,
brush presets, Paddy Macros, and Camera profiles on the push of a button.
Camera Profiles
you can also find filter presets and the ability to export using a preset
Reset or Revert
Slider
Reset is the classic LR reset. In addition, Paddy keeps a record of the last
position for each development slider, to which you can revert. This is different
than "reset", which sets a slider to the default position. It's also different than
"undo", since you can revert many steps later without changing the steps in
between.
Development
Tools
Access crop, brush etc on push of a button
Auto, Copy &
Paste
Functions like "Auto tone" and all copy/paste functions
Selecting
Anything that has to do with select all, select active, reject, etc
View and Zoom
Show clipping, compare, loupe, previous/next picture etc
LR Navigation
Go directly to subpanels like the HSL panel
LR looks
Open and close the side panels etc. More than what LR can - e.g, "Open Right
Panel" really forces an open, not only Toggle
Second Screen
Things that have to do with the second screen
Ratings, Color,
Flags
Ratings, Color, Flags
Other
Publish, help, rename, some metadata stuff, force publish, external editors, etc
Run a Script
Paddy can record scripts that you can edit and then play back. Very powerful
to record a set of actions and then map that to a single key (e.g., change to
B&W, apply your favorite preset and open the adjustment brush, all with one
key)
24
Paddy user guide, V4.2
Apply a
Keyword
Map keys to keywords for fast keywording LR
Select a keyset
Using a hotkey to select a different key set
Send a key
Send a key with any other key
Relative Midi
(Only for generic Midi controllers) relative Midi mode for rotary controllers,
see more the Midi section
Display a
message
(Only for Midi controllers) Displays a message on the screen when the signal
is received
Most of this is straightforward, but here is a quick walk through some not so obvious categories
in the box
9.1.1 Overall Settings
* None * select to have no action mapped to the key. LR behaves normally when the ket is
pressed, including the "preview" keys (like holding down "L" for a lights out preview)
Open Paddy Menu opens the Paddy menu at the current location of the cursor, not in the system
tray
Show mapped Keyboard keys shows all keys Paddy has currently mapped
Suspend/Re-Install hotkeys suspends all Paddy keyboard hotkeys except the key it is mapped
to. The Paddy icon in the tray menu changes to an icon with a red line through it, indicating the
suspension. Midi is still active, as is the XKeys when using the Paddy driver, so mapping this to
a midi key effectively suspends all keyboard hotkeys. Other external keyboards that send keys
are not active (but if this key is on the external keyboard, it will stay active). Reinstall all Paddy
keyboard hotkeys by hitting the key again.
Next/Previous Key Set uses a hotkey to cycle through the key sets. To select a specific key set,
use switch to key set
9.1.2 Select and Move Slider
In this mode, you use one keystroke to select a slider and then another to move it. This is the
preferred mode for External keyboards as it limits the number of keys you need to map. For
instance, you can map the 11 basic development sliders on 11 keys, and then use two keys to
move them up and down. On the XKeys, you could map an unlayered key for a medium move,
Layer 2 for a small move, and layer 3 for a large move.
Editing here means (1) Select a slider with a key, then (2) move the slider.
9.1.3 Move a specific slider
25
Paddy user guide, V4.2
Here you can map slider Movements to keys. In contrast to the previous mode, here you need at
least two keys per slider - one to move the slider up, one to move it down. You can choose
between small, medium, and large moves for the sliders. Editing here means that the first
keystroke moves a slider. However the overall number of keys is larger - at least 22 for the 11
basic development sliders, compared to at least 13 in the "select and move slider" mode
9.1.4 Midi : Sliders
Use these selections to map a Slider to a Midi fader or rotary controller. To use these, the
controller has to be in absolute Midi mode for values between 0 and 127. Paddy does not (yet)
support 14 bit Midi, so you have to make sure that your controllers are in 7 bit mode (Paddy
takes care of that for the Behringer controllers)
9.1.5 Presets, Macros, Camera profiles
On the push of a button, you can apply a Lightroom development preset (in Library and
Development module), a Paddy relative Development Preset , Filter Presets, Paddy's Adjustment
Brush Presets, Paddy's Paddy macros, Camera Profiles, and you can also pick an exporting preset
to use. For the preset you want to use, you will see a list of the current presets on the right.
Watch a video on the Filter presets here:
http://www.youtube.com/user/PaddyforLightroom?feature=mhum#p/u/2/4-nO16fPCMs. They
work in the development module, which is very cool
9.1.6 Apply a Keyword
Apply a keyword. Especially powerful when mapped to an external keyboard with many keys, so
it overcomes Lighroom's somewhat limited way to map keywords to the Numpad. When you
select this section, several additional buttons appear
1. Help - describes the functions of the buttons
2. Switch to Tree/List - The tree view shows the keywords in a tree like in Lightroom. The
list view shows them in a list, alphabetically
3. Import from Lightroom - Paddy will attempt to automatically import the list from
Lightroom. In praxis, this works by telling Lightroom to export a file, and then reading
this file.If this fails, it does because Lightroom is too slow closing a menu. Just try again
in that case (after closing any open Lightroom dialogues)
Video tutorial: http://www.youtube.com/watch?v=oMMWCIyyeEc
9.1.7 Switch to keyset
Select a specific key set to use.
9.1.8 Relative Midi Sliders
26
Paddy user guide, V4.2
Certain Midi rotary controllers cannot send absolute values but send a relative change in position
instead. See the section on working with generic midi controllers for more details on this. If you
have such a controller, use this set of functions to map the sliders (only available in "direct Midi
assignment")
9.1.9 Display a message
Certain Midi controllers send messages. In the Preferences->Basic setup tab, click the button
"customize Midi messages". You can enter up to 20 messages that you then can select here to
display when Paddy received a Midi CC.
9.2 Keyboard
9.2.1 General usage
Click on the key you want to program using the mouse, or simply hit the key, e.g. CTRL-A
(Note: this doesn't work for arrow keys as these are used to navigate). If you hold down a
modifier such as CTRL when you click with the mouse, you will program the modified key. In
the list of assigned keys above the keyboard, the selected key is bold, and the button stays lit. It
should be fairly intuitive to pick which key you want to assign. In the example below, the user is
assigning SHIFT-Q to a development preset and has already assigned "Q" to another preset
The keyboard can show the higher functions keys (F13-F24), which are often used by external
keyboards. If you want to see these keys, check in the preference section of this manual under
"show F13-F24 in keyboard GUI"
Under the keyboard, you have two options: Use "Numpad Enter as Shift", and use "Numpad 0 as
CTRL". These are useful if you are working with an external numerical keypad and want to use
only keys on that pad. When checked, the respective keys get re-mapped, and you can use
combinations like Numpad 0 plus Numpad 1 to simulate "Shift-Numpad 1". This also works in
the menu. Note that the combination of both does not yet work.
27
Paddy user guide, V4.2
9.2.2 Regional keyboards
At the moment (Paddy 2.0), Paddy rearranges keys only for the following local keyboards:
Germany, France, Spain, Italy, U.K. In all other regions, the screen will still show the U.S.
layout. This will not influence functionality. In certain regions, some keys are not available (e.g.,
all non-Roman letters on a Greek keyboard, most special characters on a German Keyboard).
Paddy disables the keys that cannot be mapped and shows a blank key instead. (Future versions
might enable Paddy to map regional characters).
9.3 Mouse
Assigning functions to the mouse can be very powerful. In order to enable this, you have to go to
preferences->basic setup, and in the "general settings" Tab, enable Paddy to intercept the mouse.
Under "assign", you will now find a menu to map the mouse keys and wheel (see screenshot
below). You cannot map the left button as it used by windows for to many important functions,
and the unmodified right mouse button is blocked as well for the same reason. For all other
mouse button or wheel combinations, while in the menu, either click on the menu button or
directly click on the mouse. E.g., if you do a CTRL-wheel up while in the menu, the button will
light up and the selection asterisk will move.
One suggestion is to choose the "Pick and move" slider functions, assign sliders to keys on an
external keyboards, and then move them with the mouse wheel as follow (See a video about a
similar setup here: http://www.youtube.com/user/PaddyforLightroom?feature=mhum#p/u/0/KJsMjog3MA, and the screenshot below)
28
Paddy user guide, V4.2
- Mouse wheel: Medium increment
- CTRL-mouse wheel: Small increment etc
All you have to do is assign the "selected slider +" (or -) functions to the mouse wheels. In
addition, you can map both mouse keys with CTRL/ALT/SHIFT or combinations thereof to any
function you want
9.4 External keyboards
Paddy supports several external keyboards natively, and really any external keyboard that can
send keystrokes. You will need to select what kind of keyboard you want to use in the
Preferences->Basic Setup menu. Paddy assumes that you take care off programming the
keyboard itself as described below. Mapping functions with external keyboards works the same
way as with the normal keyboard - click on a key with a mouse (or hit the key on the external
keyboard), select a layer, select a function. In the example below, the user is using the 3 layer
layout for the Xkeys and has just assigned the second layer of a key to moving the Exposure
slider a large amount. The first level is already assigned. The Menus for the Genovation
keyboards are similarly intuitive
29
Paddy user guide, V4.2
If you want to use one of the supported external keypads, you might have to upload the
configuration files that came with Paddy. They are pretty clearly labeled and you should have a
user guide for the Genovation MacroMaster software. Paddy comes with its own driver for the
Xkeys, so you don't need Macroworks. If you do not have one of the directly supported
keyboards, go to the section on user defined external keyboards.
9.4.1 Genovation 682 and 683
In Preferences->Basic setup, choose the external keyboard tab and select your keyboard in the
list. Do not select anything in the pull down if it appears as this will be phased out. Keep that
selection to "none"
There are four files - 2 for each keypad. To find them, go to the Windows Start Menu, then
Paddy->Device templates and choose "Genovation". The ones labeled "Toggle" install a shift
key that is "sticky" - you have to press it once to get to the second level and once again to get
back. The files labeled "Shift" install a "normal" shift - you are in the second level as long as you
press it.
To install
1.
2.
3.
4.
5.
Insert the keyboard in the USB board
Start the Macromaster software
Open the file you need
Hit "download" and wait until done
Exit the software
Done. You will not need the MacroMaster software to use the keyboard with Paddy.
30
Paddy user guide, V4.2
Hardware pages in the appendix: Genovation 682, Genovation 683
9.4.2 Xkeys Professional
Use Paddy's driver for the Xkeys. In Preferences->Basic setup, choose the external keyboard tab
and select "XKeys" in the list. Do not select XKeys in the pull down as this will be phased
out. Restart Paddy. That's it. The Xkeys will show up in the Assign Menu, and you can start
using it right away. There is no need to start Macroworks. In addition, this means you can use an
additional external keypad, giving you even more functions to assign. Make sure you are not
running MacroWorks in this mode.
You can select a function by left clicking on a key, or in the menu just hitting the key on the
XKeys. In addition, Paddy supports 4 layers under the XKeys
1.
2.
3.
4.
No layer toggle pressed
Layer toggle 1 pressed
Layer toggle 2 pressed
Layer toggle 1 and 2 pressed
You can assign layer toggle keys by right-clicking on a key in the menu and selecting its new
function
Hardware page in the Appendix: XKeys Professional keypad
9.4.3 Logitech G13
In Preferences->Basic setup, choose the external keyboard tab and select "Logitech G13
(Alternate)" in the list. This is highly recommended over the legacy file called "Logitech
G13"
You need to install a G13 Mapping file. . To find it, go to the Windows Start Menu, then Paddy>Device templates and Choose "Paddy_g13_alternate.xml" (this matches the recommended
alternate mapping for the G13). Install "Paddy_g13_alternate.xml" by importing it into the
Logitech Gaming software (available under downloads on the Logitech G13 web site). You have
to associate map setting with Paddy and also make it persistent while Paddy is running. A video
tutorial how to do this is available here: http://www.youtube.com/watch?v=LJmYJhBu_L4
9.4.4 Generic external keyboard
Paddy supports any external keyboard as long as it sends the equivalent of keystrokes. You have
to design a layout and assign keystrokes to the keyboard. When you have designed a layout for
your own generic external keyboard as described later in this guide under "user defined external
keyboards", you can use the graphical user interface to assign functions to keys. The screenshot
below shows a user assigning functions to a 2 layer keyboard with 2 rows of 7 keys, one row of 5
keys, and one row of 3 keys.
31
Paddy user guide, V4.2
This makes using any external keyboard very simple as it's layout is supported by Paddy as long
as it can reasonably be presented in a x/y grid structure.
32
Paddy user guide, V4.2
10 Key Sets
Paddy allows you to map keys on internal and external keyboards. Paddy supports up to 10 Key
Sets. Each set can hold independent key mappings for the keyboard and any external keyboard
(not for Midi). For instance, the first one could be for color editing, the second one for black and
white, the third one for Keywording and rating.
10.1 Switching key sets on and off
In the basic settings menu, under the "Looks" tab, you can switch the key sets on and off. If you
uncheck "use 10 key sets", you have only the basic key set. This setting removes a few controls
form menus so everything looks cleaner. Check the box if you need more than one key set.
10.2 Selecting a key set while editing
There are several ways to switch keysets: Via a hotkey to go to a specific set, cycling through the
key sets, and via the tray menu
10.2.1 Via Hotkey
Map a Hotkey to the key set you want to use using the category in the menu. Remember that
once the new keyset is selected, that hotkey is not available, so in the new keyset, you also nee
dto map hotkeys to shoft back
10.2.2 Cycling through key sets
Under "Overall settings" in the mapping menus, you can find "previous key set" and "next key
set". These functions will cycle through the keysets
10.2.3 Via the tray menu
In the Basic setup menu, under "Looks", check "Enable key sets in tray menu". This will insert
another menu called "Change Key set". When you select this, you will see the list of key sets,
with the current one checked. Selecting another key set will load that set and check it in the list
33
Paddy user guide, V4.2
34
Paddy user guide, V4.2
10.3 Selecting a key set in the mapping Menus
In the mapping menus for keyboards, roughly in the middle, is a pull down list with the current
key set. Select another one to map that. Note that Paddy keeps this key set loaded when you exit
the menu
10.4 Renaming the key sets
You can give the key sets any name you want. In the "Preferences" menu, select "Rename key
sets", write the names you want, and hit "OK". These names should now show up in the menus
you use to select the key sets
35
Paddy user guide, V4.2
10.5 Reminder what key set you are using
In the Basic setup menu, under "Looks", check "Show key set information in lower right" to
have a small window in the lower right hand side of your screen that always informs you about
the number of the active key set. The window is small so it is not in the way of any LR
fdunctionality
36
Paddy user guide, V4.2
11 Midi
Paddy's Midi support is extremely powerful, but like with many powerful software features, it
requires a bit of setup. The following section first addresses what to do if you have one of the
natively supported controllers. Afterwards, it addresses how to make any controller work with
Paddy. It's in no way a Midi tutorial, but it should be helpful to get you started.
11.1 General stuff about Midi you should know
Midi was originally developed to connect musical instruments digitally. This results in some
very specific language. For instance, the physical representation of what we in LR call a slider is
called a fader in midi-speak. Typically, instruments support Midi to record notes that are being
played. This is called a "note on" event. Paddy uses a specific part of Midi, which are the Midi
controller message as well as "note on events". One look at a midi controller and you see why
this is attractive for picture editing Here are a few things to be aware off
1. A midi keyboard or other instrument sends "note on" and "note off" events. For instance,
a chord on a piano would be several "note on" events followed by several "note off
events"
2. A Midi controller is typically a physical controller with many sliders, rotary controllers
(called encoders), and buttons.
3. Software controllers are possible - e.g., the IPad can be used as a MIDI controller (for
Paddy, we think and explore. If you have any knowledge, let us know)
4. Things that rotate are called encoders
5. Things that move linearly are called faders
6. Things that are pushed like a button are called buttons, to everybody's relief
7. A midi control is either a fader, an encoder or a button. Faders and encoders can have
values between 0 and 127 (there is a larger range available but not yet supported by
Paddy). Buttons typically have 0 when not pressed and 127 when pressed
8. Sometimes, buttons can be programmed as "toggles". First push moves value to 127,
second to 0, and so on
9. A midi controller sends so called CC (change control) messages over a midi network, and
nowadays over USB, when a fader, encoder, or button does something
10. There are 127 Midi controls available for CC messages
11. To complicate things, there are 16 MIDI channels that a control can send on
So, to put it all together, a MIDI instruments sends a specific note on/note off event, or several,
on a channel. A MIDI controller sends a message that is something like "Hello there on channel
[0 to 15], this is a CC message. I am controller [0 to 127]. I have just been set to value [0 to
127]".
Paddy uses the control messages to move sliders and push buttons in Lightroom. The physical
faders on controllers also move if you move the corresponding slider in LR, an effect that is too
much fun to describe here. You can also use keyboards and other instruments to work in
37
Paddy user guide, V4.2
Lightroom, and the feeling you get by editing a picture playing a chord on your MIDI piano is
somewhere between "what the hell" and "cool".
Unfortunately, all this flexibility means that you have to program any Midi controller for any
purpose. For all controls, a MIDI controller needs to know
1.
2.
3.
4.
What channel it sends on
What control number it is
If it's a button, whether it's a toggle or not
Depending on the controller, some other stuff, like lights that have to blink etc
Even simple controllers have lots of settings. The Behringer BCF2000 for instance, a popular
consumer model, has 8 faders, 20 buttons, and 8 encoders. Each of the encoders has 4 "levels"
called groups, and also has a button (i.e., you can press it down). That makes for a total of 40
continuous controllers (encoders or faders) and 52 buttons in one "preset". The BCF2000 has 32
presets. So many controllers are available.
So, the first step when using a controller with Paddy is to tell the controller what
button/fader/encoder has what ID and sends on what channel. This is typically done on the
controller or via a so called SysEx (.syx) message to the controller. Some program is used to
send this message to the controller, effectively programming it.
Fortunately, Paddy can do most of that for you as you will see below.
After the controller has learned what is what, Paddy has to learn it as well. For the Behringer
BCF2000 and Behringer BCR2000, that is very easy. It's a bit more complex but completely
manageable for other controllers.
11.2 Interface for the Behringer BCF2000 and BCR2000
Controllers
Paddy has a user interface for the Behringer controllers that makes working and updating them
very intuitive. If you are interested in how the interface is programmed go to the section on
technical details. The interface has both buttons to update the controller as well as a menu bar
with more functions.
Connect the Behringer controller directly with the computer, not through a USB hub. The
Behringer has massive USB timing problems otherwise, and will receive errors
Paddy ships with a presets already mapped for the BCF controller. A setup for the BCR will
come at some point (If you have one, please export the file and post it on the message boards)
38
Paddy user guide, V4.2
11.2.1 Accessing
In Preferences->Basic Setup->Midi, choose "Use Behringer BCR/BCF 2000" In the tray Menu,
go to Assign-> Behringer Midi Controller
NOTE: Every time you change an assignment in this menu, you will need to update the
controller using the "update preset" button for the change to work
11.2.2 Overview
In the interface, you can click on controls and map functions as before. However, in addition,
you can
1. For Sliders, Buttons, and encoders set whether they should display their value in the
Behringer LCD
2. For Buttons, set whether they are in Toggle mode
3. For encoders, set what the LEDs should show and what the resolution per spin should be
39
Paddy user guide, V4.2
4.
5.
6.
7.
8.
9.
Set Preset names
Update the Behringer Controller with the new settings via push of a button
Create a SystemExclusive (syx) file from the settings
Send any System Exclusive File
Import and Export your Settings
Create an HTML file which shows your settings as reference
11.2.3 Mapping functions
Click on a control to map a Lightroom function. Move to a different Preset either with the arrows
next to the Preset display or the little buttons that change presets on the picture of the controller.
Change encoder groups by pushing on the buttons. You can copy settings across presets using
the "copy preset" button. This is useful (for instance) if you keep the encoder banks the same for
all presets and only change the faders (or the lower encoders for the BCR).
If you hit "reset preset", the current preset will be reset (after Paddy asks whether you are sure).
All controls are "unmapped" and all other parameters are reset to defaults (not show value, not
toggle, resolution set to 60, LED set to one dot)
11.2.4 Changing control properties
You can change the way some controls behave on the Behringer. You can do this individually
(control by control) by clicking in a control or for all all controls using the menu entry "change
all settings". Through the menu, you can change control properties for the visible preset only or
for all presets.
11.2.4.1 Display value property
If you want the control to display the value in the LCD screen, check this box
11.2.4.2 Toggle Mode
If you want a button to be "sticky", e.g. for the Midi toggle functions, check this property. If
unchecked, the button acts like a normal key. If checked, the first click will set it "on", the
second "off"
11.2.4.3 Encoder LED modes
For all encoders, you can change how the LEDs should behave. For photo editing, the "1Dot" or
"1Dot/Off" are typically best. See the Behringer user manual for details on the modes
11.2.4.4 Encoder Resolution
One of the best features of encoders is that you can set the resolution per spin. This setting
determines how many "clicks" one turn of the encoder represents. Each encoder has a total range
40
Paddy user guide, V4.2
from 0 to 127, which Paddy maps to the range of the slider that the encoder moves. Setting the
resolution to 64 means that one slow spin spans half the range. If you spin faster, the resolution
increases in steps of 50% for four ranges. So if you set this to 30, increasing the speed of the turn
increases the resolution to 45, then 60 and then 75.
A value of 60 seems to work best for photo editing as they allow to move a slider in small
intervals but you can span a large range by turning the encoder quickly.
11.2.5 Set a Preset name
Overwrite the text in the preset name box to change the name of a preset. This is the name that
Paddy displays when you switch to the Preset on the controller (it's actually stored in the
Behringer itself). Maximum of 24 characters, no leading or trailing spaces (Paddy removes these
automatically)
11.2.6 Copy from a Preset
With this button, you can copy settings form another presets. This is useful if you want some
controllers to be the same in all presets - e.g., the first row of rotary controllers mapped to the
basic sliders.
11.2.7 Associate a Preset with a Tool
The LR sliders for the development tools (e.g., brush size) can be mapped to Midi. However,
they typically would not be in your normal preset, and you would have to switch the Behringer
as you switch Presets. In this menu, you can associate Tools with presets. If you pick a tool via a
Paddy keyboard shortcut, the Behringer will automatically switch to the assigned preset. This
works for crop, spot removal, red eye, graduated filter and adjustment brush. All tools could be
on the same preset.
Please note that the tool has to be accessed via the Paddy function (under "Development
functions" in the selection tree) for this to work.
Video tutorial for this: http://www.youtube.com/watch?v=-TRl9DqtnxA and
http://www.youtube.com/watch?v=1T4MoNDW8HQs
41
Paddy user guide, V4.2
11.2.8 Update the controller
There are two ways to update the controller: Updating the current preset only or updating all
presets. You can access this either with the large buttons or in the "Update Behringer Controller"
Menu
11.2.8.1 Updating the current preset
This sends the current Preset to the Behringer. It's relatively fast and best used if you changed
only one setting. You can only update the Preset for the controller you are working on, so if you
are in the BCR interface, the Menu option for the BCF is disabled (and vice versa)
11.2.8.2 Updating all presets
This sends all settings to the controller. Paddy optimizes the function and does not send info for
unused controllers (in contrast to software like BCManager), so it's relatively fast. However, this
obviously takes much more time than just updating one preset. You can always update either the
BCR or BCF.
11.2.9 Importing and exporting settings
Share your settings! In the "File" menu, choose "import" or "export" to export your settings. This
creates (or reads) a file with all settings for the BCR, BCF, and the Midi mapping.
11.2.10
Documenting your Mapping
42
Paddy user guide, V4.2
Paddy can automatically create an HTML file with your current mapping and displays it in your
browser (the user interface is closing for this). The file should print nicely as page margins and
page breaks are defined in the webpage. Some browsers fail at this, however, and you might
have to set these manually when printing (or use a software like MS Word). This is best printed
in landscape mode with small margins. Below is a screenshot of the output.
11.2.11
Creating a SystemExclusive file
If you want to save the current Behringer settings in a .Syx file for later use, go to "File->Create
[BCR or BCF] .SYX". Paddy asks for a filename and saves the .Syx. Paddy itself does not need
this file, nor is it necessary to crate one to update the Behringer controllers.
11.2.12
Sending a SystemExclusive File
Go to "Update Behringer Controller-->Send a .Syx file" to send a .Syx to the Behringer. Paddy
does not need this function to update the Behringer (use the procedure described under "Update
the controller" instead)
11.2.13
Technical Details
For this interface to work, each key Paddy function (like "move a slider") has been assigned a
Midi Channel and a Midi CC number. (The documentation file is available on the message
boards). Therefore, if the user assigns the same function to all faders, the faders all send the same
43
Paddy user guide, V4.2
information and react to the same slider change in Lightroom (try it, it's a fun setup). More
practically, if the temperature slider is on the first encoder in all presets, this takes up only one
Midi Channel/CC command to update the controller, saving significant communication time.
The downside is that the user has to send the Midi mapping to the Behringer whenever the
mapping changes.
Also, this way of operating makes the assignment of functions like "apply preset" tricky, since
every user has different presets. Paddy therefore holds the Midi channels 14, 15 and 16 reserved
for these functions (Preset, relative Preset, macro, etc). When the user maps one of these, Paddy
searches for a free slot in these channels. Consequently, Paddy is limited to mapping 3x127 =
381 Presets, macros, etc. on the Behringer controllers. (You can still add an additional external
keyboard or simply map presets to the keyboard, of course)
11.2.14
Troubleshooting for Behringer BCF2000 and BCR2000 controllers
The BCF and BCR seem to be somewhat unstable when used on a USB hub. If they become
unresponsive, try plugging them in directly onto a PC USB ports. If you cannot get them to work
at all, try to reset them with the procedure described in the Appendix.
11.3 iPad as Midi controller for LR
It's possible! An Ipad screenshot below (thanks to www.andersonmiranda.com.br).
44
Paddy user guide, V4.2
At this point, it's still a bit tricky to get there. We are working on presets and Setups and hope to
have a standard setup in January 2013.
If you are not afraid of a little bit of work, here are the steps. Essentially, you have to set up the
Ipad to be a Midi controller, and the PC to accept MIDI through WIFI.
To set up the Ipad
1. Buy the TouschOSC app: http://hexler.net/software/touchosc ($5)
2. Download the TouchOSC Editor from http://hexler.net/software/touchosc. This is a free
tool to create and download your own screens to iPad. You can use buttons, sliders,
rotary, encoders, etc. You can have several pages, with several context. Here is where
you still need to do your own work until we have a standard setup. or you can wait until
we are donw
3. Assign a CC and a channel number to each button or slider
4. Follow the instruction on TouscOSC website on how to download the created layout to
the IPAD
5. Turn on coreMIDI communication mode on TouchOSC on iPad. CoreMIDI its a protocol
to make MIDI working wirelessly
To set up the PC
1. Install rpcMIDI (http://www.tobias-erichsen.de/rtpMIDI.html) to connect the iPad to
computer. It will create a MIDI device on windows, wich can be selected on Paddy MIDI
assignment
2. In Paddy, use the raw Midi assignment (Basic setup->Midi->Other Midi controler
3. In the Midi raw menu, also choose Midi out. TouchOSC is bidirecional, when you go to a
new pic, the sliders are updated to parameters of the picture. Which is almost as cool as
the physical sliders on a Behringer controller
Watch for updates - we are planning to publish Paddy-ready settings
11.4 Working with Generic Midi Controllers
Paddy is not limited to the Behringer controllers (although we like them a lot). You can work
with any Midi controller and map functions to Paddy. This means you need to teach the
controller and Paddy to communicate. We recommend the mode where you you use Paddy's midi
mapping and only teach the controller, but you can also go and completely do it yourself.
11.4.1 Generic controller - Paddy Midi mapping
In this mode, you only need to teach your controller, not Paddy. In Preference->Basic setup->
Midi, choose "Generic controller, Paddy Midi mapping". Under the Assign menu, you now have
the option for "Midi assignment (Paddy defaults)". The first tab in this menu shows 127 controls
45
Paddy user guide, V4.2
for a selected channel (16 Channels). The second shows the assignment of One control across the
16 channels. Pick whichever is more useful to you, or switch at will (the interface stay in sync).
In this menu, if you click on a channel/control combination, it gives you the assigned function.
Even more useful, if you click on a function on the right, it gives you an assigned Midi Channel
and control. So this is an automatic lookup for the Paddy Midi Mapping. In addition, when you
click on presets, this menu will assign channels and controls to the presets.
You can also find Paddy's current Midi map [at this Google Docs link]. It is probably best to
copy it into Excel. As you can see, each Paddy function has a fixed Channel and CC control
assigned. All you need to teach your controller is to send the right command. The presets are
assigned as Paddy runs, so that block is empty in the map.
You will now have to program your Midi controller to send a CC message on a certain channel
when you move a certain control. Since you went down this path, you hopefully know how to do
this. Keep good track of what is what, and then in these tabs assign to the channels and control
numbers what you want this control to do.
In general, we recommend this workflow
1. Decide what LR function should be where on the controller
2. Get the Channel and CC number from the menu
3. Program the controller using whatever procedure your controller requires. Paddy requires
7 Bit CC messages, from 0 to 127.
Buttons should send 0 when released and 127 when pushed
Continuous controllers that send their position should send the 7 bit value (0 to
127)
Continuous controllers that send a change (sometimes called "Midi relative
mode") need to be in a mode that sends a positive change as value from 1 to 63
and a negative change as values above 64. In other words, bit 7 is the sign for the
46
Paddy user guide, V4.2
number. This is often called "signed bit method 2". Since this is not very intuitive,
a little table follows
Change = Midi
1 = 0000001 =
2 = 0000010 =
3 = 0000011 =
etc
-1 = 1000001 =
-2 = 1000010 =
-3 = 1000011 =
etc
value in Binary = Midi value in decimal
1
2
3
65
66
67
11.4.2 Generic controller - own mapping
In this mode, you are on your own. You have to program the controller and Paddy.
In Preference->Basic setup-> Midi, choose "Generic controller, free mapping". Under the Assign
menu, you now have the option for "Direct Midi assignment". The first tab in this menu shows
127 controls for a selected channel (16 Channels). The second shows the assignment of One
control across the 16 channels. Pick whichever is more useful to you, or switch at will (the
interface stay in sync).
47
Paddy user guide, V4.2
You will have to program your Midi controller to send a CC message on a certain channel when
you move a certain control. Then you need to teach Paddy what to do when this message arrives.
Since you went down this path, you hopefully know how to do this. Keep good track of what is
what, and then in these tabs assign to the channels and control numbers what you want this
control to do.
In general, we recommend this workflow
1. Decide what Lightroom function you want on what CC number and Channel. Write this
down and keep good track. A tested way is to have a table in Excel with CC down and
Channel across and the desired function in the cell
2. Decide what should be where on the controller and map accordingly using whatever
procedure your controller requires. Paddy requires 7 Bit CC messages, from 0 to 127.
Buttons should send 0 when released and 127 when pushed
Continuous controllers that send their position should send the 7 bit value (0 to
127)
Continuous controllers that send a change (sometimes called "Midi relative
mode") need to be in a mode that sends a positive change as value from 1 to 63
and a negative change as values above 64. In other words, bit 7 is the sign for the
number. This is often called "signed bit method 2". Since this is not very intuitive,
a little table follows
Change = Midi
1 = 0000001 =
2 = 0000010 =
3 = 0000011 =
etc
-1 = 1000001 =
-2 = 1000010 =
value in Binary = Midi value in decimal
1
2
3
65
66
48
Paddy user guide, V4.2
-3 = 1000011 = 67
etc
Now use Paddy's Midi interface to assign the functions to channels and controls. When you are
in the menu, try moving the control you want to program on your device (or pushing the button)
- the associated control and channel should be automatically selected (assuming the device is
programmed correctly). If not, in the "Control by Channel Tab", pick a channel from the
pulldown. Click on one of the 127 control buttons. The label above the control updates to show
what function has been assigned to this channel/control combination. Pick a function on the
right. In the "Channel by control" tab, select a control form the pulldown list. The area below the
control is updated with the current list of functions mapped to that control, listed by channel. To
assign something, click on the channel you want to assign, then pick a function on the right
When in doubt, go to the boards and ask for help.
11.5 Using Midi Pitch Bend messages
Some Midi controllers allow to send Midi pitch bend messages (and some only send these). For
the purpose of Paddy, these are like any other continuous controller. To assign Lightroom sliders
to the Pitch bend messages, go to Basic setup->Midi and check "Use Pitch bend". In the
assignment menu, a new item "Midi pitch bend" is now available
Click on the 16 possible channels to assign a slider to the pitch bend message on the right.
(While it is theoretically possible to assign any other function to pitch bend, it is probably not
practical to do so)
11.6 Interface for MIDI keyboards and instruments
Paddy supports the use of Midi keyboards, or in general, any Midi instrument that plays a note.
This can be used in addition to a Midi controller, as the Midi commands are independent.
49
Paddy user guide, V4.2
A Video tutorial is available on the YouTube channel:
http://www.youtube.com/watch?v=RSIT6_oT_Ws
To prepare Paddy for use with a Midi keyboard, go to Preferences->Basic Setup. In the Midi tab,
select "use Midi keyboard". Close the Basic menu. In the Assign menu, you should now see
"Midi keyboard". Go to this menu, select your keyboard in the pulldown, check the box for "use
Midi In", click OK in the Menu and restart Paddy.
Now we are ready to map notes from the keyboard or any instrument to Lightroom functions. In
the "Midi Keyboard" menu, either select a channel or note in the boxes, or just simply play the
note you want to assign on your keyboard or instrument. Then select the function on the right.
Paddy can also map chords. This is not possible via the on-screen keyboard - you need to play
the chord on the keyboard while in the menu. Paddy recognizes the chord and you can assign a
function. For instance, you can assign C0 to "select Temperature", D0 to 'Select Tint" and so on.
Then assign C# and D# to "move slider down" and "move slider up" respectively. Lastly, you
can assign a C-major chord to "reset temperature", d-major to "reset tint" and so on. Now you
have a very intuitive and easy to remember way to move the Lightroom sliders. And if you are a
musician, you probably do not have to lift your eyes from the screen while doing this.
Paddy recognizes keys that are pressed during a certain time as a chord. More accurately, Paddy
interprets several Midi "Note on" messages as belonging to a chord as long as they arrive in a
certain interval and no "note Off" is received. The time interval can be set under "chord delay" in
the menu. In general 200-300ms seems to be the best number. While this might sound slow to
musicians, keep in mind that Paddy needs to receive and process a lot of messages in this
timeframe.
50
Paddy user guide, V4.2
12 Voice Recognition
Paddy supports voice recognition. You can map voice commands to anything in Lightroom. A
video can be found here: http://www.youtube.com/watch?v=YPcIT5BVnt4 Using voice
recognition for tagging: http://www.youtube.com/watch?v=r5nj6wvRts4&feature=relmfu
It works exactly like this in the current official release
12.1 Switching voice recognition on
In basic setup, in the looks panel, you can check the box for voice recognition. Hit OK, then
restart Paddy.
On restart, Windows will start its voice recognition support. You might have to go through the
windows tutorial and learning (it improves the quality significantly, so worth spending the time).
The windows voice recognition tool sits on top of Lightroom. You can mute and unmute with a
simple click.
12.2 Creating new voice commands
In the Tray menu check, you can now go to "assign"-> "Voice Recognition". In contrast to the
other interfaces, this one requires you to define your own commands. Click on "new command",
enter the command, then select the function. You can enter several commands separated by
comma, and all of them will be added to the list.
You will have to map the voice command to a Lightroom command before you hit OK,
otherwise it will not be saved.
51
Paddy user guide, V4.2
For example, here are the steps to map "next picture" to the voice command "next"
1.
2.
3.
4.
Click on "New Command"
Enter "next" and hit return
On the left panel, check the new command
On the right panel, map the function "next picture"
Repeat this process for all voice commands.
To delete a command, right click on the command and select "delete"
12.3 Switching Voice recognition off while working
The voice recognition can be switched on and off by clicking on the Windows VR logo on top of
the screen. As soon as it is active, Paddy will translate voice commands into Lightroom
commands
12.4 Tips
1. One word commands work better than two word voice commands
2. Voice commands should be different than Lightroom items, as the Windows voice
recognition might get confused.
3. Speak clearly. Typically, speed is less a problem than clarity
4. Train Windows to your voice with the Windows voice recognition tool
52
Paddy user guide, V4.2
13 Presets and Macros
Paddy lets you define your own Macros, Relative Presets, Adjustment Brush Presets and Camera
Profile Presets.
13.1 Relative Presets
Watch a video on Lightroom presets and relative presets:
http://www.youtube.com/user/PaddyforLightroom?feature=mhum#p/u/3/JQUtw9WSuLs
A Relative Preset moves a slider a given amount, as opposed to Lightroom's presets, which move
a slider to a given value. Paddy allows you to set this for all LR development sliders
53
Paddy user guide, V4.2
This works just like a preset in Lightroom. The upper left corner has a dropdown box, in which
you can select the preset you want to edit or save the current settings as a new preset. If you want
to change the settings of a preset, just overwrite an existing one. Choose a name that you can
recognize later when you assign these presets to keys.
Don't forget: There is no automatic "save" here. If you load an existing preset, edit it, and want to
save it again under that name, you have to pull down "save preset" from the menu!
You can later assign these relative presets to any key.
13.2 Adjustment Brush Presets
54
Paddy user guide, V4.2
You can define adjustment brush presets that you would like to apply later via a key. This is
fairly straight forward - pick the LR preset, the brush size, whether or not automask is on, etc.
leave a field empty if you don't want to change its contents. E.g., you can just select a LR preset
here, keep everything else empty, and when you push the assigned key later, all that happens is
that the LR preset is applied, all other settings stay the same.
Lastly, you can conveniently just copy the current setting into a row to save the current setting as
preset.
55
Paddy user guide, V4.2
13.3 Camera Profile Presets
This menu let's you simply define Camera Profiles you use the most so you can map them to
keys later. Just write the name of the preset you want to use. it's important to have the spelling
right, otherwise it will just not work.
13.4 Macros
Here, you can edit additional macros (series of keystrokes) that you can later map to keys. The
names will later be used to map the macro to keys, so choose good names that you recognize.
Video tutorial: http://www.youtube.com/watch?v=83gJLP-Vzck
56
Paddy user guide, V4.2
Adding or editing a Macro is straightforward. Come up with a name (has to be a unique name),
and code the keystrokes you want Paddy to send. This could be anything including CTRL, ALT
and SHIFT (coded as ^, !, +) and special keys like {UP} or {HOME}. For example, ^+{End}
would send Control-Shift-End. Paddy uses the AutoHotKey convention for these keys, the most
useful ones are repeated below, and you can find more at
target:http://www.autohotkey.com/docs/KeyList.htm.
Key labels you can use in addition to normal keys: Space, Tab, Enter (or Return), Escape (or
Esc), Backspace (or BS), Delete (or Del), Insert (or Ins),Home, End, PgUp, PgDn, Up, Down,
Left, Right.
All the following are valid:
1.
2.
3.
4.
^d (Control D)
^!+A (Ctrl, alt, shift a)
^{Del} (ctrl - del}
+{ESC} (Shift Escape)
57
Paddy user guide, V4.2
14 Scripts
Paddy has a full scripting engine for Lightroom. The recorder can reord any keystroke and any
action that you can map to a key. You can edit scripts, record scripts, and play them back.
The Scripting menu
14.1 Script filenames and locations
Paddy expects script in the "Paddyscripts" directory. They are automatically recorded there, and
the editor defaults to that directory. Other directories will not work.
14.2 Recording a script
Select "record a script" from the Plugin Menu or the Tray Menu. A small message pops up in the
lower left hand corner. All keystrokes are recorded. Midi keys pushed are recorded, but not slider
moves via Midi.
14.3 Stop Recording a script
Select "Stop recording" from the Plugin Menu or the Tray Menu
14.4 Playing back a script
Select "Play back" from the Plugin Menu or the Tray Menu. A small menu with the available
scripts shows up. Select the script you want to play.
14.5 Editing a script
Watch a video on this here:
http://www.youtube.com/user/PaddyforLightroom?feature=mhum#p/a/u/0/Z9VVSq7ORY8
58
Paddy user guide, V4.2
Paddy's script editor is under constant improvement but works well. It's fairly self explanatory if
you have worked in a text editor before
14.5.1 Navigating the editor
On the left hand side, you see the script. One line represents one action. For each action, you see
the name of the action (like "Send a key" or "apply preset", in which Module the action should
be performed, and a parameter, which represents for instance the name of the preset to be
applied. On the right hand side you have the typical Paddy function selection box. There also two
menus.
1. File: Open and save files, exit the editor
2. Edit: Insert lines, delete lines, set in which Module the action should be performed.
And empty script is shown as the editor opens. The only action is "Pause". To create a simple
script, Left-Click that line and select a different action on the right, for instance "White balance >Reset white balance". You will see that the line changes. If you right-click the line again, you
can select in which module you want Paddy to perform the action (Library, Develop, or "Do not
care', in which case Paddy just performs the action without a check in which module LR is at the
moment). You can easily insert more lines above or below the current line by right-clicking the
line and selecting "insert line below". You can also delete lines this way.
To open an existing script, select "Open" in the menu or hit CTRL-O. The script should open in
the editor. You can now right-click on a line, insert more lines, or edit the action (e.g., change the
string that is being send or delete the line).
Scripts have no practical limit for number of lines.
When you are done, hit CTRL-S or select "Save" in the file Menu. The editor will ask for a file
name to save the script under.
59
Paddy user guide, V4.2
To exit the edit, Select "Exit" in the file menu or hit the button labelled "Done". If you haven't
saved your script after an edit, paddy will warn you that changes are lost. You will have the
opportunity to go back and save edits.
14.5.2 Keyboard shortcuts available
CTRL-S : Save the Script
CTRL-O : Open a Script
CTRL-A : Save a script under a new filename
Insert : insert a line above the selected line
CTRL-L : Execute this command in the library module
CTRL-D : Execute this command in the Develop module
CTRL-U : Execute this command regardless of where the script currently is
60
Paddy user guide, V4.2
15 Importing and Exporting settings
Paddy allows you to share settings with other users.
15.1.1 Exporting
1. Select the Export Menu via File->Plugin Extras->Import/Export->Export (or directly
"Export settings in the tray menu)
2. Check the settings you want to share in the menu that pops up
1. Hit "Ok". Paddy now asks for the filename and where to save the file (extension .pxf)
2. Done. You can now post your settings online by sharing this file
15.1.2 Importing
1. Select the Import Menu via File->Plugin Extras->Import/Export->Import(or directly
"Import settings" in the tray menu)
2. Check the settings you want to import from the file
3. Hit "Ok". Paddy now asks for the filename aand location of teh file. Click the file that
you downloaded
4. Paddy imports and you are done
5. However, are you sure you want to save these settings? Paddy asks you where to save the
current settings (all Paddy settings). The current settings file is the default. just hit "OK"
if you want to overwrite your current settings. If you prefer to save this imported setting
in a different file, enter a location and filename here. paddy now uses that settings file
61
Paddy user guide, V4.2
16 Tweaking Preferences
Under "Preferences" you find options to set what Paddy intercepts, rename key sets, change the
color and font (and position) of Paddy's messages, set up the amount that sliders move under
certain methods, access all keys in a raw format (without menu), and define an external keyboard
16.1 Basic Setup
The "Basic Setup" sub menu under "Preferences" allows you to set what Paddy should use
(keyboard, mouse, external keyboards, Midi controllers, etc). In addition, you can tweak some
technical settings and the way Paddy presents messages.
The Menu has several tabs: "Looks", "Behavior" "Keyboard", "Midi", "External Keyboards",
"Update Options", "Settings File", "Debug", and "Message Design"
62
Paddy user guide, V4.2
16.1.1 Looks
Here you find basic setup features for how Paddy's user interface looks, such regional settings
16.1.1.1 Use English regardless of Region
Paddy automatically detects the language that Lightroom uses. Checking this option overrides
this. this can be useful in regions with a keyboard that is not supported directly (Unicode
keyboards).
16.1.1.2 Keep selection Tree collapsed
When mapping functions in the assign menus, Paddy uses a tree to organize the list. Checking
this options means that Paddy only keeps the current branch of this tree open, which makes a
shorter list but sometimes harder to map many sliders in the same category. Unchecking means
that the tree does not collapse, which makes it sometimes easier to map many keys in one session
16.1.1.3 Use 10 key sets
Check if you want to use the ability to use several key sets
16.1.1.4 Enable key sets in tray Menu
if checked, paddy adds an additional item in the tray menu where the user can choose a key set
(instead of using a hotkey to switch key sets). See keysets.
63
Paddy user guide, V4.2
16.1.1.5 Show key set info
If checked, Paddy will show the current key set number in the lower right hand corner of the
screen
16.1.1.6 Uncheck to show no message
If this is unchecked, Paddy will not show any message, ever
16.1.1.7 Start voice recognition
Starts Paddy's voice recognition feature. See Voice Recognition for more
16.1.2 Behavior
Here you find settings regarding padding's behavior as the software works with Lightroom and
you
16.1.2.1 Force NumLock On
Paddy can force Numlock on start under some Windows versions. This is useful if you map the
numerical keypad to functions.
16.1.2.2 Intercept Mouse
Check if you want to map mouse clicks (like CTRL-ALT-RIGHT CLICK) or the mouse wheel
(also available with modifiers like CTRL, SHIFT etc). The menu to map the mouse will appear
in the "Assign" menu.
16.1.2.3 Sync Paddy slider selection with Lightroom
For certain functions, Paddy keeps track what slider the user selected. Checking this option
means that in parallel, Paddy makes Lightroom "aware" that this slider is selected. The
advantage is that the user can now also use the Lightroom method of moving the slider via the
+/- keys (or your regional equivalent), so this is the default. However, it causes Lightroom to
splash a large message on the screen. If you do not use the Lightroom keys to move sliders, there
is no need to keep this checked
16.1.2.4 Open Panel when moving a slider
In normal operation, Paddy can move LR sliders even when they are not visible. This enables
full screen editing without the side panels open. If this option is checked, and the user has the
right panel open, Paddy will open the subpanel where the currently moved slider is located. If the
64
Paddy user guide, V4.2
right panel is closed, nothing will happen. If solo mode is active, only the Panel with the current
slider will open
16.1.2.5 Remember last used key set
Normally, Paddy starts with the first keyset in the keyset list. If this option is checked, Paddy
instead starts with the keyset that was last used.
16.1.2.6 Time to try switching modules
At the beginning and before customization, Paddy needs to go to the library module to read the
presets. That can take a while, or LR is not even loaded, or you are stuck in an input and Paddy
can't convince LR to move. This input sets the length of time (in ms, 1s=1,000ms) that Paddy
will try to find LR and to switch modules before asking you to help out. Set this to 2-4 seconds
or so - the worst that can happen is a bit of nagging if the time is too short, or a longer wait until
you realize that LR has not even started yet.
16.1.2.7 Time before committing change to history
When a slider is moved via Paddy (either with a key or via MIDI), Paddy waits before
committing this change to the LR history in order to avoid crowding the history log in LR. Here,
you can set the time in milliseconds before Paddy sends this signal. 1-2 seconds seem to be a
good number. Regardless of the setting, if the user changes a different slider or clicks on any
other control, the most recent change is committed to the history log
16.1.3 Keyboard
16.1.3.1 Keyboard adjustment
For some functions, Paddy essentially sends key "hits" to the sliders to move them. In the U.S.,
these are "=" (not "+") and "-" for increase/decrease. If you use a different language, this might
be different. Here, you can pick what keys to send instead. The setting here overrides the
regional setting (to which it defaults when you change or set the region). If you don't know these
keys and Lightroom doesn't work, click on the "Temperature" label in the Develop module - after
about 1/2 seconds, LR tells you what the keys are.
16.1.3.2 Dealing with keyboard issues
Paddy supports ANSI keyboards - in essence, anything that looks roughly like an English
keyboard. Some regional keyboards have fewer keys or some additional ones. Russian, Chinese
and other keyboards are not supported, but external keyboards might still work (especially the
Xkeys with its own driver), as does Midi.
Paddy reports the number of keys it couldn't install. In some cases, this might be low, in others
(like a Russian keyboard), no key might be installed. Paddy reports these errors at startup as a
65
Paddy user guide, V4.2
balloon in the system tray. In this menu, you can change this behavior. Check "do not report
hotkey error at startup" to switch of the error messages. Supported keys are still installed.
16.1.3.3 Show F13-F24 in Keyboard GUI
Check this box if you want the virtual keyboard to show the F12 to F24 function keys
16.1.4 Midi
The first set of radio buttons allows you to select what MIDI controller you want to use: None
(default), a Behringer BCF or BCR, or a generic/other Midi controller with free assignment, or a
Generic controller using the default Paddy Midi assignments. If you select the Berhinger or a
generic controller, it will show up under the "Assign" menu immediately. However, in order to
function properly, you should restart Paddy if you change this option. See the relevant sections in
this guide for the description of the controllers and how to assign them. For a generic
controller, the option "Paddy standard midi mapping" is highly recommended as it saves a
lot of work!
Select the next checkbox if you use a MIDI keyboard (or similar instrument or tool that generates
a MIDI "note on" message". It will show up under the "Assign" Menu.
The next checkbox allows for extensive debugging. Keep it unchecked as it does slow Paddy
down. If you are interested, check the box and use a viewer such as DebugView.exe to see the
messages
"Use Pitch bend" allows Paddy to use the 16 Midi Pitch bend messages in addition to the other
messages. This is useful for some controllers that do not send CC messages but only Pitch bend.
When checked, a new assignment menu for the 16 pitch bend messages appears.
"Delay when sending Sysex" is for updating the Behringer controllers. SHould you encounter an
ERR22 error when updating, first make sure that the controller is connected directly to the
computer. If you still have the error, try increasing this number. For my computer, 15ms is
stable, but some users needed up to 30ms. Any number higher than that might indicate bigger
issues.
"Allow Midi if LR is not in the foreground". Normally, if the Lightroom window is not in teh
foreground, Paddy "drops" midi messages. This is to avoid "accidental editing" of pictures when
the Lightroom window id hidden. Checking here removes that safety. This is useful if you have a
touchscreen with a software Midi controller and want to use that as input for Midi commands.
Under windows, that command window is permanently active, not Lightroom, and Paddy would
never change settings in Lightroom. Checking this option overcomes this issue
16.1.5 External Keyboards
66
Paddy user guide, V4.2
For details on the keyboards, please see the relevant chapters in this guide. If you are using an
external keyboard, pick your layout here.
do not select the a controller from the top drop down menu (if visible) as these are only
there for backward support. They will be transitioned out in a future version. Instead,
select your controller from the list below that. Click on all keyboards you want to use.
For the XKeys, Click on XKeys in the list. Paddy has its own driver, so you do not need to use
MacroWorks. No other setup is needed. You can then select any other external Keyboard in
addition.
For the logitech G13, select "Logitech G13" from the list. You will need to install a file on the
G13 for this to work. A video tutorial can be found here:
http://www.youtube.com/watch?v=LJmYJhBu_L4
16.1.6 Update options
Normally, Paddy only alerts the user with a Balloon message that a new version is available. If
this option is checked, and a new version is available, Paddy pops up a Menu to update. See
updating Paddy for more
You can also check for new official versions here. Occasionally, there are experimental versions
of Paddy, when we are trying something completely new. These can be somewhat unstable. If
you are the experimental type, you can check here whether a new version is available
16.1.7 Settings file
You can save several different configuration files. Paddy always starts up with the last one used.
For example, I have one with no external keypad, one with external keypad for my laptop, and
one with Midi settings
The use is not recommended. This feature will be retired in one of the next versions
16.1.8 Debug
Normally, this should be set to "off" and no checkbox should be marked. You might be asked to
use these options if there are specific issues with your installation and we try to identify the
problem. Keep all this unchecked as it does slow Paddy down. If you are interested, use
"console", check the box and use a viewer such as DebugView.exe to see the messages.
16.1.9 Message Design
Paddy allows you to tweak the way its messages look and where they are displayed. You might
for instance choose a black and white and theme like Lightroom and display the messages at the
67
Paddy user guide, V4.2
bottom of the screen in order to not have them printed over the picture when you are editing with
Paddy.
When you click on this tab, the preferences Menu vanished and the Message designer shows up.
Paddy also displays an example message using the current settings. You can change font, size,
weight (=thickness) of the font, background and font color as well as window width and position.
You can also select to show no messages at all
Clicking the "OK" button saves the current settings and returns you to the setup menu.
68
Paddy user guide, V4.2
16.2 Slider Move Deltas
Watch a video tutorial on this topic here:
http://www.youtube.com/user/PaddyforLightroom?feature=mhum#p/u/4/ze9weTm72bk
Paddy feature many ways to move the LR sliders. When using keys or the external keyboard,
you can pick functions that move the sldier a lot (large increase), somewhat (medium increase)
or a little (small increase). In this menu, you can adjust the jumps to your liking. E.g., the default
for Clarity is 1 tick for small, 5 for medium, and 10 for large. overwrite this here if you don't like
the default.
16.3 Raw Keylist
Most users will not need this as the key functionality is provided in the menus to assign functions
to keys. This option gives you the raw list of all keys Paddy can access on the left and the list of
assignable functions on the right. The key list is more than 900 entries long as each combination
that Paddy can address (like CTRL-ALT-a) is one entry. It is very easy to overwrite settings for
external keyboards here, so use this with caution. Most keys can be accessed via the virtual
keyboard setup, including F13-F24.
69
Paddy user guide, V4.2
If you have an external keyboard that is not directly supported, and you cannot set it up with the
keyboard editor for generic external keyboards, then you can assign functions here to the keys
you have mapped to your keyboard.
16.4 User defined external keyboards
Video on how to use the G13 Logitech keyboard with Lightroom under Paddy can be found here:
http://www.youtube.com/watch?v=B2Y2MnM6RyA
Paddy supports anything that can send a keystroke or a mouse button push. As such, you can
always assign keys to an external keyboard such as the popular used POS keyboards, and use the
raw keylist to assign functions to those keys. However, most keyboards are reasonably
rectangular and have keys arranges in an x/y grid. In order to make support for these keyboards
easier, you can design a layout in Paddy that will help you to assign keys more flexibly.
Step 1 is to define the layout. Do this before you decide what keys to map to the keyboard.
Paddy will suggest a keymapping that you can then use.
We will use the layout of the Logitech G13 here as example. This keyboard has 2 rows of 7 keys,
one row of 5 keys, and one row of 3 keys. We assume you can create two layers with these. The
toggle key for the layers is not on the actual keyboard
16.4.1 Define Layout
When you click on the option, the main menu pops up. Here, you define the grid layout of the
keyboard. The screen starts with a generic keyboard.
Using the "file" menu, you can load existing keyboards you saved. You can also load the existing
Paddy presets for the Genovation keybvoards and the G13.
If you want to design a new keyboard, the first step is to define how many layers the keyboard
will have, how many rows, and how many columns. for our purpose, choose 4 rows, and 7
70
Paddy user guide, V4.2
columns (the length of the longest row) and click "create". Paddy then displays a grid with
squares, representing the keyboard. We now need to tell Paddy which keys are not in use. This is
how we create a more exact representation of the keyboard. By clicking on the squares, we can
assign keys to be toggle keys (that shift layers - we have none here) or unused keys.
16.4.2 Changing Key mapping
There are two ways to assign keys to the external keyboard: individually and as mass assignment
16.4.2.1 Individual assignment
When you click on a key in the design area, you see the keys that are assigned to the external
keyboard for each of the layers you defined. These are the keys Paddy assumes the keyboard will
send, in the layers available. Select on of these, and you can change the assignment. Paddy starts
out with a suggested key, but you can assign any key from the drop down box that comes up
16.4.2.2 Mass Assignment
In the Assignment menu, you can also select "Mass Assignment". This will create another menu
that is graphically less appealing (and you can't change the layout), but it is designed to change
assignment for all keys. For each layer, there is a tab, for each key, there is a pull down. Select
the keys you want to change and hit OK to go back to the main screen.
71
Paddy user guide, V4.2
When the menu opens, you will see the following
1. A tab for each layer you defined
2. Dropdown boxes for each key that is used
3. A box containing the text "Unassigned or Toggle" for keys that are not used. See the
screenshot below for our example.
Paddy also makes the task of assigning many keys easier by proposing two standard layouts.
1. The first layout uses as much as possible keys above F12. The function keys F13-F24 are
supported under Windows and have the advantage of not being used in normal
operations. Together with their modifiers (Ctrl, Alt, Shift and their combinations), Paddy
can react to 96 keys before we have to start double mapping keys on the actual keyboard
2. If the keyboard cannot send these keys, Paddy proposes another layout with unusual
keys. Choose "Paddy alternate" in this case
3. Lastly, you can map any key you want
For a new keyboard, you can always reset the keyboard by hitting "Set to Paddy defaults". If you
do not want to use these keys, try the button "set to Paddy alternates". Paddy proposes a layout
with often unused key combinations, like CTRL-ALT-SHIFT-F1. Lastly, you can also manually
change each of the assignments in the dropdown box.
Do not forget to check all layers. You can always come back here and edit later, of course.
When you are happy with your layout, hit OK. Paddy will go back to the main screen.
16.4.2.3 Documentation
Under "Assignment", select "create documentation". For your records, Paddy generates an
HTML file with the keyboard layout that you just created an opens it in a web browser. Print this
out and save the file.
Now you can program your keyboard using the Paddy printout. After that, you can use the Paddy
GUI to assign functions to your keyboard as described under the section describing the menu to
assign Lightroom Functions
72
Paddy user guide, V4.2
16.4.3 Open and save layouts
In the File menu, you can open and save layouts. The default directory is the directory where
Paddy looks for the keyboard files. The files have the extension .info. These files can also be
created directly, without the editor. This enables some definitions that are not available with the
editor. See anatomy of a keyboard definition file in the appendix
16.4.4 Import or Export Layout
If you have created a layout for a popular (or unique) keyboard, please share it with the Paddy
community on the boards. All files are saved as .info files in a Paddy directory. Under the file
menu, select "open directory" to go there. Choose a file you want to share and post it.
If somebody sends you a file, you can copy it into this director and it will be available for Paddy
in the Basic setup menu under "external keyboards"
73
Paddy user guide, V4.2
17 Updating Paddy
For updates, there are two processes available, a fast update, and downloading a new installer.
Paddy alerts the user via a Balloon message if a new version is available. In addition, under
"Preferences", "basic setup", in the "Update" tab, the user can select an option for Paddy to
automatically show a dialog box if a new version is available. The user can at any time choose
"Check for new version" in the tray menu to go to the following dialog.
If a new version is available, under most circumstances, the user has two choices (other than
cancelling the update). Regardless of the choice, present settings are maintained.
17.1 Paddy fast update
If you choose this, Paddy downloads only the files it needs for the update. For a typical bugfix,
this download is less than one Megabyte and 6 files (Paddy.exe and certain files used to translate
messages). Paddy automatically installs these files. This is the fastest way to keep Paddy up to
date
17.2 Download full installer
74
Paddy user guide, V4.2
A full installer for the newest release is always available at www.paddy-for-lightroom.com. This
process takes typically longer as the installer requires a download of all paddy files (>5MB) and
then a run of the Windows installer.
75
Paddy user guide, V4.2
18 Known issues and limitations
1. Paddy doesn't like other AutoHotKey scripts that observe strings or keystrokes, most
notably Texter. This sucks, since I use Texter, but the biggest issue is to remember to turn
Texter off
2. Paddy does not run in pure Unicode environments with Unicode keyboard (e.g., Russian,
Chinese, Korean). Paddy does work under, e.g., Greek with LR running in English.
Unclear how this pans out in other settings/languages/regions, looking for active testers.
Also, it is possible to set "option for non-unicode programs" to "English", but it's unclear
whether that works for all keyboard layouts.
3. Under certain combinations of keyboard and Lightroom, some functions don't work. For
instance, with a German keyboard and Lightroom in English, "Create Virtual Copy"
doesn't work as a Paddy function. One workaround in these situations is to use a Macro
that does what you want and map that to a ky
4. Certain functions only work in the Develop module (e.g., radius for sharpening)as the
sliders are not available.
5. Midi encoders bound to Exposure, Recovery Fill and Blacks can cause the histogram to
flicker in certain installations. Not replicable everywhere
6. When Paddy is running, SHIFT-Lock seems to be ignored for LR functions
7. If LR auto-starts with "import" window and Paddy starts (which it does if installed),
Paddy perpetually complains about not being able to shift to library. best to hit "cancel"
8. "Redo" seems to have issues working intermittently when MIDI is used. Hard to replicate
and seems to work fine in keyboard use
76
Paddy user guide, V4.2
19 Bug reporting and suggestions
Please use the forums at https://sourceforge.net/apps/phpbb/paddy/
77
Paddy user guide, V4.2
20 Appendix
20.1 XKeys Professional keypad
The Xkeys Professional USB keypad is manufactured by PI Engineering. Link: target:
http://www.xkeys.com/xkeys/xkpro.php
It retails for about $170 and provides 58 keys that can be programed in 3 Layers. Paddy has a
driver to seamlessly work with the Xkeys, providing 162 keys (54 on each layer plus two
Shift/toggle keys) that you can map to the development sliders or anything else that Paddy
covers.
See also: Genovation 683,Genovation 682
78
Paddy user guide, V4.2
20.2 Genovation 682 keypad
The Genovation 682 USB keypad is manufactured by Genovation. Link: target:
http://www.genovation.com/682.htm
It retails for about $110 and provides 35 keys that can be programed in 2 Layers. With Paddy
comes a script for the Genovation 683 that you can use to program the right keys on the Keypad
so Paddy works seamlessly with the pad, providing 68 keys (34 on each layer plus a Shift/toggle
key) that you can map to the development sliders or anything else that Paddy covers.
see also: Genovation 683, XKeys Professional
79
Paddy user guide, V4.2
20.3 Genovation 683 keypad
The Genovation 683 USB keypad is manufactured by Genovation. Link: target:
http://www.genovation.com/683.htm
It retails for about $70 and provides 24 keys that can be programed in 2 Layers. With Paddy
comes a script for the Genovation 683 that you can use to program the right keys on the Keypad
so Paddy works seamlessly with the pad, providing 46 keys (23 on each layer plus a Shift/toggle
key) that you can map to the development sliders or anything else that Paddy covers.
see also: Genovation 682 keypad, XKeys Professional keypad
80
Paddy user guide, V4.2
20.4 G13 gamer keypad
The G13 is a popular, reasonably priced gaming keypad. Link:
target:http://www.logitech.com/en-us/keyboards/keyboards/g13-advanced-gameboard
It provides 24 keys in 3 layers for a total of 72 keys, and a small joystick with 4 directions and a
"push". It is fully supported by Paddy. Video tutorial:
http://www.youtube.com/watch?v=LJmYJhBu_L4
81
Paddy user guide, V4.2
20.5 Behringer BCF2000 Midi controller
Behringer Website: http://www.behringer.com/EN/Products/BCF2000.aspx
The Behringer BCF2000 is a popular USB midi controller. It supports 8 push encoders, 8
motorized faders and up to 24 programmable buttons. It goes for about $170 new and $100 used.
Paddy supports it directly with a graphical user interface and files to download to the controller.
See also
1. Video with the controller BCF2000 in action:
http://www.youtube.com/watch?v=bAxR9byYTVM
20.6 Behringer BCR2000 Midi controller
Behringer Website: http://www.behringer.com/EN/Products/BCR2000.aspx
The Behringer BCR2000 is a popular USB midi controller. It supports 8 push encoders, 24
normal encoders and up to 24 programmable buttons. It goes for about $140 new and $100 used.
Paddy supports it directly with a graphical user interface and files to download to the controller.
20.7 Reset a Behringer controller
If you purchased your BCF2000 used you might have to have to reset some basic settings first.
1. Turn the device off, wait for the display to switch off, turn it on again. The first number
that is displayed is the firmware version. Paddy has been tested with version 1.10 .
2. While the version is displayed you can switch between different emulation modes by
using the buttons right under the encoders. Paddy requires the first one, called bC Mode.
The display should display bC for a short time if this mode is set.
3. The BCF2000 can be used in various modes for USB or standalone mode. The best mode
for Paddy is USB mode 1. To check and change the modes you need to press and hold
EDIT then press STORE. This gets you in the global edit menu. The display should show
EG for edit Global.
4. To set the USB-mode, you need to turn the first rotor counterclockwise until the display
displays U-1. Then save the setting by pushing EXIT.
In case pushing Edit and Store shows no reaction on the device, these buttons are set up for a
different mode, and you might have to reset the controller with Behringers own factory settings
that can be found here: http://www.behringer.com/EN/Support/B-Control-Downloads.aspx. You
will also need a programm to send the settings to the controller. The best one is MidiOx, which
can be found here: http://www.midiox.com/
In order to reset the controller
82
Paddy user guide, V4.2
1. Download the Factory_Presets_BCF.zip and decompress it to a folder
2. Install Midi-Ox and start it
3. In case Midi-Ox does not see your device automatically, you have to set it up by
choosing Options/MIDI-Devices.
4. Assuming that everything is all right with your Drivers and Fader you should see the
BFC2000 Device in the window.
1. For a factory reset, use Actions/Send/SysEx File... to send a file to the controller
2. Choose the correct file for your controller in the previously created folder. The file
should be called bcf_FACTORY_PRESETS.syx or bcr_FACTORY_PRESETS.syx.
Sending this file completely resets the controller.
You should now be able to enter the Edit Global menu as above.
20.8 Advanced techniques - programming your own settings
with BC Manager
In general, the template shipped with Paddy work fine. This section of the user guide is old but
useful to keep for our records. You will probably not need this.
If you want to tune the settings for the Behringer BCF2000 or BCR2000, we highly recommend
the BC Manager available here: http://home.kpn.nl/f2hmjvandenberg281/bcman.html
(Donationware) to do this - it's much more flexible than any other program, it's maintained and it
works.
There are a few settings you need to know when programing your Behringer controller with BC
Manager:
General settings: The channel and controller number need to be unique over all presets. In many
settings on the discussion board, users used the preset number (1 to 16) as the channel and
numbered all encoders and buttons ascending.
Encoders: Choose a channel and controller number ("Control Channel") in the tab "Standard
output", set the value range from 0 (Value 1) to 127 (Value 2). You do not need to set a default
value in tab "General" as the values are read back from Lightroom by Paddy but you have to set
the resolution. This defines by how much the internal value (0 to 127) is changed by one full turn
of the encoder. The default is 96 which means that you would need to turn an encoder 1 1/2
times to set any slider in Lightroom from one extreme to the other. Aa resolution of 60 seems to
be a good compromise between being able to fine adjust the settings and also use the encoders
without getting tired of turning.
For the 8 upper encoders (both on BCF2000 and BCR2000) you can choose which kind of LED
appearance you want to have (tab "General"). A bar, 1 dot, 1 or 2 dots and several other. This
does not affect any function of Paddy. On the BCR2000 the 24 lower encoders do not offer this
83
Paddy user guide, V4.2
function although you can set values there. The option "Show Value" on the tab "General" will
display the internal value (0 to 127) on the 7 segment display of the Behringer controller while
turning the encoders.
Faders: Choose a channel and controller number ("Control Channel") in the tab "Standard
output", set the value range from 0 (Value 1) to 127 (Value 2). Set the Sync to "Motor", so Paddy
can move the faders. Mode should be "Absolute"
84
Paddy user guide, V4.2
Buttons: Choose a channel and controller number ("Control Channel") in the tab "Standard
output", set the value range from 0 (Value 1) to 127 (Value 2) and the mode "Toggle off" (You
can map any toggle function of Paddy nevertheless). You do not need to set a default value in tab
"General" as the values are read back from Lightroom by Paddy. The option "Show Value" on
the tab "General" will display the internal value (on or off) on the 7 segment display of the
Behringer controller while turning the encoders.
For some functions in Paddy, "Toggle On" works better. For instance, you are able to open and
close Panels with a button. One push opens, the next closes. For this to work, the button needs to
set to "Toggle"
The buttons of the push encoders (the upper ones) do behave the same as the normal buttons.
You have to set a special option for the presets. Double click it and set the check box "Request
(i.e. LEARN Output) on the "Settings" tab and add add "C0" and "7F" as hexadecimal codes to
the "LEARN output" tab. The Behringer will send these codes to Paddy whenever it changes a
Preset. Paddy will then send the currentvalues for the controllers, so the preset stays in sync if
you changed something on the screen.
85
Paddy user guide, V4.2
In this window you also can define how you want to use the 4 special buttons of your Behringer
controller. If you map them to normal buttons (rather then STORE, LEARN, EDIT and EXIT)
you can map them in Paddy as well.
You can add an info to any encoder, button or slider, but this is only for documentation insider
the BC Manager. This text will not show up in Paddy or the Behringer controller. If you add a
name to a preset in BC Manager this name will be shown in a splash screen in Lightroom /
Paddy after you switch presets on your Behringer.
86
Paddy user guide, V4.2
For saving a lot of time when editing your settings in the BC Manager you can use the "Edit" "Set" menu option. Choose several lines and edit options for all of them at once.
After you defined your encoders, faders, buttons and options for one preset you can copy the
presets down to as many as you want to use. Don't forget to keep the channel and controller
numbers unique after doing this. You also can copy the settings of one preset, encoder, button
and so on to another or even to several destinations (just select as many destination as you want
to have).
The last step in BC Manager is to save all the settings in a *.syx file and send that file to the
Behringer controller, either using BCmanager or the Paddy option in the Behringer interface.
After that, you can treat the controller like a generic Midi controller in Paddy as described under
Working with Generic Midi Controllers
87
Paddy user guide, V4.2
20.9 Anatomy of a keyboard definition file
External keyboards to Paddy are just another item that sends keystrokes. The files that Paddy
uses to understand what these keyboards send contain three broad sections
Names, like what name to use in the selection menu for this keyboard
Structure of the keyboard for the interface - effectively, X and Y coordinates for keys
The keys that the keyboard will send
These definitions are in a .info file in the Paddy keyboard directory under C:\Users\[user
name]\AppData\Roaming\Paddy\keyboardpacks
Here is a typical file, in this case for the Genovation G683
88
Paddy user guide, V4.2
[NAME]
selection_name=Genovation 683
menu_name=Genovation 683
gui_name=Genovation 683
key_name=g683
[GUI]
number_of_layers=2
horizontal_count=4
vertical_count=6
max_interface_keys=23
button_x=0,1,2,3,0,1,2,3,0,1,2,3,0,1,2,3,0,1,2,3,1,2,3
button_y=0,0,0,0,1,1,1,1,2,2,2,2,3,3,3,3,4,4,4,4,5,5,5
button_w=1,1,1,1,1,1,1,1,1,1,1,1,1,1,1,1,1,1,1,1,1,1,1
button_h=1,1,1,1,1,1,1,1,1,1,1,1,1,1,1,1,1,1,1,1,1,1,1
toggle_x=0
toggle_y=5
layerbox_x=0
layerbox_y=7
[HOTKEYS]
layer_1_hotkeys=F13,F14,F15,F16,F17,F18,F19,F20,F21,F22,F23,F24,!F13,!F14,!F15,!F16,!F1
7,!F18,!F19,!F20,!F21,!F22,!F23
layer_2_hotkeys=^F13,^F14,^F15,^F16,^F17,^F18,^F19,^F20,^F21,^F22,^F23,^F24,^!F13,^!F1
4,^!F15,^!F16,^!F17,^!F18,^!F19,^!F20,^!F21,^!F22,^!F23
20.9.1 name section
selection_name=Genovation 683
select a keyboard
menu_name=Genovation 683
gui_name=Genovation 683
; The name that will appear in the Menu to
; The name that will apear in the "Assign" menu
; The name used in the actual menu title
key_name=g683 ; This is the name Paddy will use internally for the keys. No
Spaces or special characters allowed.
20.9.2 GUI section
number_of_layers=2 ;The number of layers this keyboard supports (here, one
basic and one "Shift"
89
Paddy user guide, V4.2
horizontal_count=4
vertical_count=6
;How many keys across
;How many rows of keys
max_interface_keys=23 ;This is the number of keys that can be assigned.
Here, less than 6*4 (=24), since one key is used to shift between layers
button_x=0,1,2,3,0,1,2,3,0,1,2,3,0,1,2,3,0,1,2,3,1,2,3 ;The X Coordinates of
all keys that can be assigned. starts at 0. Note that the last set misses
"0", as this is where the toggle key sits
button_y=0,0,0,0,1,1,1,1,2,2,2,2,3,3,3,3,4,4,4,4,5,5,5
for the buttons that can be assigned
;The Y coordinates
button_w=1,1,1,1,1,1,1,1,1,1,1,1,1,1,1,1,1,1,1,1,1,1,1
buttons. At the moment, only "1" is supported
;The width of the
button_h=1,1,1,1,1,1,1,1,1,1,1,1,1,1,1,1,1,1,1,1,1,1,1
buttons. At the moment, only "1" is supported
;The height of the
toggle_x=0
;X coordinates for toggle keys, separated by comma
toggle_y=5
;Y coordinates for toggle keys, separated by comma
layerbox_x=0
the GUI
;X coordinates for the box that shows the different layers in
layerbox_y=7 Y coordinates for the box that shows the different layers in the
GUI
20.9.3 Hokey section
This sections defines the keys that the keyboard will send. See here in the AutoHotkey help for a
list of allowed hotkeys. Some combinations are especially interesting as they are not readily
available in Paddy's designer. For instance, "Pause & 1" treats the Pause key like a shift key. If
the external keyboard is able to send the macro "Pause down,1 down, 1 up, Pause up", you could
map it by creating the hotkey "Pause & 1". This way, the external keyboard will never interfere
with your real keyboard. See here in the AutoHotkey documentation for more. In general, if it is
allowed in AutoHotKey (AHK), it is allowed here.
The section contains one variable per layer, with comma-separated keys in the order of the keys
as defined in the GUI. Note that leading and trailing spaces lead to errors. "A,SPACE,B" is OK,
"A,SPACE , B" will result in trouble because of the leading space for "B" and trailing space for
"Space".
90
Paddy user guide, V4.2
layer_1_hotkeys=F13,F14,F15,F16,F17,F18,F19,F20,F21,F22,F23,F24,!F13,!F14,!F1
5,!F16,!F17,!F18,!F19,!F20,!F21,!F22,!F23
layer_2_hotkeys=^F13,^F14,^F15,^F16,^F17,^F18,^F19,^F20,^F21,^F22,^F23,^F24,^
!F13,^!F14,^!F15,^!F16,^!F17,^!F18,^!F19,^!F20,^!F21,^!F22,^!F23
91
Paddy user guide, V4.2
Example from a more sophisticated file, here a G13 model that uses PrintScreen and Pause as
Shift keys:
[NAME]
selection_name=Logitech G13 (Alternate)
menu_name=G13
gui_name=G13
key_name=g13
[GUI]
number_of_layers=3
horizontal_count=11
vertical_count=6
max_interface_keys=29
button_x=0,1,2,3,4,5,6,0,1,2,3,4,5,6,1,2,3,4,5,2,3,4,7,8,9,9,10,9,8
button_y=0,0,0,0,0,0,0,1,1,1,1,1,1,1,2,2,2,2,2,3,3,3,3,5,3,2,3,4,3
button_w=1,1,1,1,1,1,1,1,1,1,1,1,1,1,1,1,1,1,1,1,1,1,1,2,1,1,1,1,1
button_h=1,1,1,1,1,1,1,1,1,1,1,1,1,1,1,1,1,1,1,1,1,1,2,1,1,1,1,1,1
toggle_x=
toggle_y=
layerbox_x=1
layerbox_y=-1
[HOTKEYS] layer_1_hotkeys=PrintScreen & 1,PrintScreen & 2,PrintScreen &
3,PrintScreen & 4,PrintScreen & 5,PrintScreen & 6,PrintScreen & 7,PrintScreen
& 8,PrintScreen & 9,PrintScreen & 0,PrintScreen & A,PrintScreen &
B,PrintScreen & C,PrintScreen & D,PrintScreen & E,PrintScreen & F,PrintScreen
& G,PrintScreen & H,PrintScreen & I,PrintScreen & J,PrintScreen &
K,PrintScreen & L,PrintScreen & M,PrintScreen & N,PrintScreen & O,PrintScreen
& P,PrintScreen & Q,PrintScreen & R,PrintScreen & S
layer_2_hotkeys=PrintScreen & T,PrintScreen & U,PrintScreen & V,PrintScreen &
W,PrintScreen & X,PrintScreen & Y,PrintScreen & Z,PrintScreen &
F1,PrintScreen & F2,PrintScreen & F3,PrintScreen & F4,PrintScreen &
F5,PrintScreen & F6,PrintScreen & F7,PrintScreen & F8,PrintScreen &
F9,PrintScreen & F10,PrintScreen & F11,PrintScreen & F12,PrintScreen &
SPACE,PrintScreen & TAB,PrintScreen & ENTER,PrintScreen & DEL,PrintScreen &
backspace,PrintScreen & home,PrintScreen & UP,PrintScreen & RIGHT,PrintScreen
& Down,PrintScreen & Left
layer_3_hotkeys=PrintScreen & Numpad0,PrintScreen & Numpad1,PrintScreen &
Numpad2,PrintScreen & Numpad3,PrintScreen & Numpad4,PrintScreen &
Numpad5,PrintScreen & Numpad6,PrintScreen & Numpad7,PrintScreen &
Numpad8,PrintScreen & Numpad9,PrintScreen & Numpadmult,PrintScreen &
Numpaddiv,PrintScreen & Numpadadd,PrintScreen & Numpadsub,PrintScreen &
Numpadenter,PrintScreen & Numpaddot,PrintScreen & End,PrintScreen &
pgup,PrintScreen & pgdn,PrintScreen & ESC,Pause & 1,Pause & 2,Pause & 3,Pause
& 4,Pause & 5,Pause & 6,Pause & 7,Pause & 8,Pause & 9
92
Paddy user guide, V4.2
20.10
Legal Remarks
Paddy is a third party product for use with Adobe Lightroom. Adobe, the Adobe logo, Lightroom
and Photoshop are either registered trademarks or trademarks of Adobe Systems Incorporated in
the United States and/or other countries. X-keys is a trade mark of P.I. Engineering, Inc.
GENOVATION is a registered trade mark of Genovation Incorporated. BEHRINGER is a
trademark of Behringer corporation. Logitech and G13 are a registered Trademark of Logitech.
Paddy is licensed under CC BSD
Redistribution and use in source and binary forms, with or without modification, are permitted
provided that the following conditions are met:
1. Redistributions of source code must retain the above copyright notice, this list of
conditions and the following disclaimer.
2. Redistributions in binary form must reproduce the above copyright notice, this list of
conditions and the following disclaimer in the documentation and/or other materials
provided with the distribution.
3. Neither the name of the programmer nor the names of its contributors may be used to
endorse or promote products derived from this software without specific prior written
permission.
THIS SOFTWARE IS PROVIDED BY THE COPYRIGHT HOLDERS AND
CONTRIBUTORS "AS IS" AND ANY EXPRESS OR IMPLIED WARRANTIES,
INCLUDING, BUT NOT LIMITED TO, THE IMPLIED WARRANTIES OF
MERCHANTABILITY AND FITNESS FOR A PARTICULAR PURPOSE ARE
DISCLAIMED. IN NO EVENT SHALL THE COPYRIGHT HOLDER OR CONTRIBUTORS
BE LIABLE FOR ANY DIRECT, INDIRECT, INCIDENTAL, SPECIAL, EXEMPLARY, OR
CONSEQUENTIAL DAMAGES (INCLUDING, BUT NOT LIMITED TO, PROCUREMENT
OF SUBSTITUTE GOODS OR SERVICES; LOSS OF USE, DATA, OR PROFITS; OR
BUSINESS INTERRUPTION) HOWEVER CAUSED AND ON ANY THEORY OF
LIABILITY, WHETHER IN CONTRACT, STRICT LIABILITY, OR TORT (INCLUDING
NEGLIGENCE OR OTHERWISE) ARISING IN ANY WAY OUT OF THE USE OF THIS
SOFTWARE, EVEN IF ADVISED OF THE POSSIBILITY OF SUCH DAMAGE.
Retrieved from
"https://sourceforge.net/apps/mediawiki/paddy/index.php?title=Paddy_user_guide"
This page was last modified on 6 December 2012, at 22:11.
93


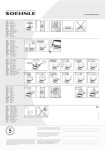
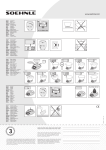


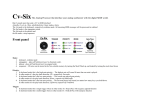
![Tester Bench [BETA] User Manual](http://vs1.manualzilla.com/store/data/005798606_1-651c3b6b51a13c0d6f27995a84bd9cc4-150x150.png)