1
.
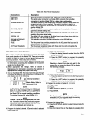
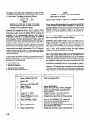
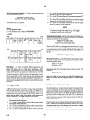
4. Number of poles is 2.
5. Use single scan mode.
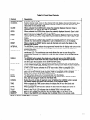
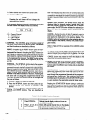
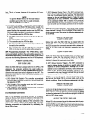
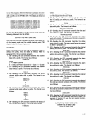
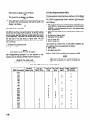
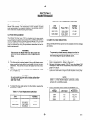
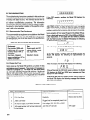
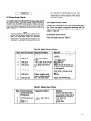
Use the steps outlined in Table 2-7 to program the Model 706
for the preceding parameters.
Upon the actuation of the START/STOP button in step 10,
channel 5 is closed for 0.5 seconds (programmed interval
rate) and then opens. The Model 706 advances to the next
channel and closes it for the programmed interval rate and
then opens it.
The sequence continues up to and including the last programmed channel. At this point the Model 706 reverts to the
programmed first channel and turns off the START/STOP
LED. The single scan sequence is now complete.
Pressing the START/STOP button during a single scan sequence stops the scan at the presently displayed channel.
The channel remains closed and turns off the START/STOP
LED. To continue the scanning sequence from the presently
displayed channel press the START/STOP button.
To stop the scanning sequence and reset the Model 706 to
the programmed first channel (which is 5 in this example)
simply press the RESET button.
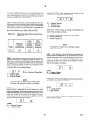
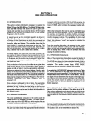
Example 3 Continuous
Scan-In
the continuous scan
mode the scanning sequence described in example 2 repeats
continuously until at least one of the following conditions are
met:
1. Power is interrupted.
2. During the sequence, the START/STOP
button is
pressed.
3.
4.
5.
6.
7.
RESET button is pressed.
PRGM button is pressed.
DATE button is pressed.
TIME button is pressed.
CHANNEL button is pressed.
In the continuous scan mode all the programmed channels
are scanned sequentially and the scan sequence is repeated
continuously. The continuous scan is started by pressing the
START/STOP button and it operates as follows:
1. The START/STOP LED is turned on.
2. The programmed first channel is closed for the programmed interval rate and then opened.
3. The Model 706 then advances to the next channel, closes
it for the programmed interval rate and then opens it.
4. This sequence is repeated up to and including the programmed last channel. At this point the Model 706 reverts
to the programmed first channel and repeats the sequence
continuously.
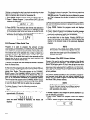
To help illustrate a continuous scan sequence we will choose
the following parameters. For the sake of simplicity we will
use the Model 7056 general purpose scanner card.
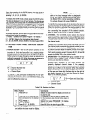
1. First channel is 1.
2. Last channel is 100.
3. Interval time is 0.3 seconds.
4. Number of poles is 2.
5. Use continuous scan mode.
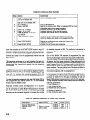
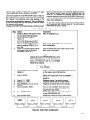
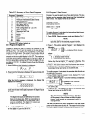
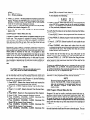
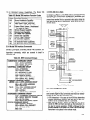
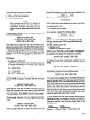
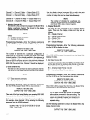
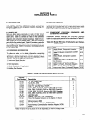
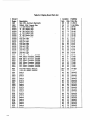
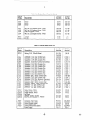
Use the steps outlined in Table 2-8 to program the Model 706
for the preceding parameters.
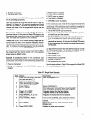
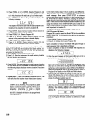
Table 2-7. Single Scan Example
I Comments
Ster, 1Action
Install the three Model 7056 scanRefer to paragraph 2.2.2.
1.
ner cards into slots 1, 2
* and 3 of the Model 706.
Select appropriate line voltage
2
and turn on the Model 706.
Press PRGM, 6.
Selects PROGRAM 6.
3
Press 2, ENTER.
Selects the 2-pole mode. Refer to paragraph 2.9 for
4
more information concerning front panel programs.
Press 0, 0, 5, FIRST.
Programs channel 5 as the first channel.
Press 0, 2, 5, LAST.
Programs channel 25 as the last channel.
z
Press INTERVAL, 0, 0, 0, 5,
Programs the interval time for 0.5 seconds.
7
0, 0, ENTER.
Press CHANNEL, RESET.
Turns on the CHANNEL LED, selects the channel
8
mode for display and resets to the programmed first
channel.
Press SINGLE.
Selects the single scan mode and turns on the
9
SINGLE LED.
Initiates the single scan sequence.
Press START/STOP.
10
2-9