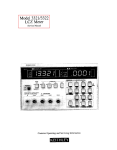
1
WARRANTY Keithley Instruments, Inc. warrants this product to be free from defects in material and workmanship for a period of 1 year from date of shipment. Keithley Instruments, Inc. warrants the following items for 90 days from the date of shipment: probes, cables, rechargeable batteries, diskettes, and documentation. During the warranty period, we will, at our option, either repair or replace any product that proves to be defective. To exercise this warranty, write or call your local Keithley representative, or contact Keithley headquarters in Cleveland, Ohio. You will be given prompt assistance and return instructions. Send the product, transportation prepaid, to the indicated service facility. Repairs will be made and the product returned, transportation prepaid. Repaired or replaced products are warranted for the balance of the original warranty period, or at least 90 days. LIMITATION OF WARRANTY This warranty does not apply to defects resulting from product modification without Keithley’s express written consent, or misuse of any product or part. This warranty also does not apply to fuses, software, non-rechargeable batteries, damage from battery leakage, or problems arising from normaI wear or failure to follow instructions. THIS WARRANTY IS IN LIEU OF ALL OTHER WARRANTI ES, EXPRESSED OR IMPLIED, INCLUDING ANY IMPLIED WARRANTY OF MERCHANTABILITY OR FITNESS FOR A PARTICULAR USE. THE REMEDIES PROVIDED HEREIN ARE BUYER’S SOLE AND EXCLUSIVE REMEDIES. NEITHER KEITHLEY INSTRUMENTS, INC. NOR ANY OF ITS EMPLOYEES SHALL BE LIABLE FOR ANY DIRECT, INDIRECT, SPECIAL, INCIDENTAL OR CONSEQUENTIAL DAMAGES ARISING OUT OF THE USE OF ITS INSTRUMENTS AND SOFTWARE EVEN IF KEITHLEY INSTRUMENTS, INC., HAS BEEN ADVISED IN ADVANCE OF THE POSSIBILITY OF SUCH DAMAGES. SUCH EXCLUDED DAMAGES SHALL INCLUDE, BUT ARE NOT LIMITED TO: COSTS OF REMOVAL AND INSTALLATION, LOSSES SUSTAINED AS THE RESULT OF INJURY TO ANY PERSON, OR DAMAGE TO PROPERTY. Keithley Instruments, Inc. 28775Aurora Road Cleveland, OH 44139 440-248-0400 Fax: 440-248-6 168 http://www.keithley.com l CHINA: FRANCE: GESMANY GREAT BRITAIN: ITALY: NETHERLANDS: SWITZERLAND: TAIWAN: Keithley Keithley Keithley Keithley Keithley Keithley Keithley Keithley Instruments Instruments Instruments Instruments, Instruments Instruments Instruments Instruments l l l l China. Yoan Chen Xin Building, Room 705 * 12Ymnin Road, Dewai, Madian * Beijing 100029~8610-62022886 l Fax: 8610-62022892 SARL l BP 60 l 3 All&e des Garays l 91122 Palaiseau (adex * 33-I-60-11-51-55 * Fax: 33-1-60-I l-77-26 GmbH * Landsberger Strasse 65 l D-821 10 Germering, Munich l 49-89-8493070 l Fax 49-89-84930759 Ltd. l The Minster l 58 Porunan Road l Reading, Berkshire, England RG3 lE.4 l 44-l 189-596469 l Fax: 44- 1189-575666 SRL l Viale S. Gimignano 38 l 20146 Milano * 39-2-48303008 l Fax: 39-z-48302274 BV * Avelingen West 49 * 4202 MS Gorinchem * 31-(0)183-635333 l Fax 31-(0)183-630821 SA. Kriesbachsuasse 4 l 8600 Diibendorf l 41-I-8219444 *Fax: 41-l-8203081 Taiwan l IFI.., 85 POAi Street l Hsinchu, Taiwan l 886-3-572-9077 * Fax: 886-3-572-9031 Model 3330 LCZ Meter Service Manual 01993, Keithley Instruments, Inc. Test Instrumentation Group All rights reserved. Cleveland, Ohio, U.S.A. First Printing February 1993 Document Number: 3330-902-07 Rev. A ALIKeithley product namesare trademarksor registeredtrademarksof Keithley Instruments,Inc. Other brand and product namesare trademarksor registeredtrademarksof their respectiveholders. Safety Precautions The following safety precautions should be observedbefore using this product and any associatedinstrumentation.Although someinstruments and accessorieswould normally be used with non-hazardous voltages, there are situations where hazardousconditions may be present. This product is intended for use by qualified personnelwho recognize shock hazardsand are familiar with the safety precautionsrequired to avoid possible injury. Read the operating information carefully beforeusing the product. The types of product usersare: Responsible body is the individual or group responsiblefor the use and maintenanceof equipment, for ensuring that the equipmentis operatedwithin its specifications and operating limits, and for ensuring that operatorsare adequatelytrained. Operators use the product for its intended function. They must be trained in electrical safety proceduresand properuse of the instmment. They must be protectedfrom electric shockand contact with hazardouslive circuits. Maintenance personnel perform routine procedureson the product to keep it operating, for example, setting the line voltage or replacing consumablematerials.Maintenanceproceduresaredescribedin the manual.The proceduresexplicitly stateif the operatormay perform them. Otherwise, they should be performed only by service personnel. Usersof this product must be protected from electric shock at all times. The responsiblebody must ensure that usersare prevented accessand/orinsulated from every connection point. In somecases, connectionsmust be exposedto potential human contact. Product usersin thesecircumstancesmust be trained to protect themselves from the risk of electric shock. If the circuit is capableof operating at or above 1000volts, no conductive part of the circuit may be exposed. As described in the International Electrotechnical Commission (IEC) Standard IEC 664, digital multimeter measuring circuits (e.g.,Keithley Models 175A, 199,2000,2001,2002, and 2010) are Installation CategoryII. All other instruments’ signal terminals are Installation CategoryI and must not be connectedto mains. Do not connectswitching cardsdirectly to unlimited power circuits. They are intended to be used with impedance limited sources. NEVER connectswitching cardsdirectly to AC mains. When connecting sourcesto switching cards,install protectivedevicesto limit fault current and voltage to the card. Before operatingan instrument, makesure the line cord is connected to a properly groundedpower receptacle.Inspectthe connecting cables,test leads,andjumpers for possible wear, cracks, or breaks before eachuse. Service personnel are trained to work on live circuits, and perform safeinstallations and repairs of products.Only properly trained service personnelmay perform installation and service procedures. For maximum safety,do not touch the product, test cables, or any other instrumentswhile power is applied to the circuit under test. ALWAYS removepower from the entire test systemand discharge any capacitorsbefore:connecting or disconnectingcables or jumpers, installing or removing switching cards, or making internal changes,such asinstalling or removing jumpers. Exercise extreme caution when a shock hazard is present.Lethal voltage may be presenton cable connectorjacksor test fixtures. The American National StandardsInstitute (ANSI) statesthat a shock hazard exists when voltage levels greater than 30V RMS, 42.4V peak,or60VDC~epresent.Agoodsafetypracticeistoexpect Do not touch any object that could provide a current path to the commonside of the circuit under test or power line (earth) ground. Always make measurementswith dry hands while standing on a dry, insulated surface capable of withstanding the voltage being measured. that hazardous voltage is present in any unknown circuit before measuring. The instrument and accessoriesmust be usedin accordancewith its specificationsand operating instructions or the safety of the equipment may be impaired. The WARNING heading in a manual explains dangersthat might result in personal injury or death.Always read the associatedinformation very carefully before performing the indicated procedure. Do not exceedthe maximum signal levels of the instrumentsandaccessories,as defined in the specifications and operating information, and as shown on the instrument or test fixture panels, or switching card. The CAUTION heading in a manual explains hazardsthat could damagethe instrument. Such damagemay invalidate the warranty. When fusesareusedin a product, replacewith sametype and rating for continued protection against fire hazard. Before performing any maintenance,disconnect the line cord and all test cables. Chassisconnections must only be used as shield connections for measuringcircuits, NOT as safety earth ground connections. If you are using a test fixture, keepthe lid closedwhile power is applied to the device under test. Safe operation requires the use of a lid interlock. Ifa@ screwis present,connectit to safetyearthground using the wire recommendedin the user documentation. The a ! symbol on an instrument indicatesthat the user should refer to the operating instructions located in the manual. The A symbol on an instrument showsthat it can sourceor measure 1000 volts or more, including the combined effect of normal and common mode voltages. Use standard safety precautions to avoid personalcontact with thesevoltages. Instrumentation and accessoriesshall not be connectedto humans. To maintain protection from electric shock and fire, replacement componentsin mains circuits, including the power transformer,test leads, and input jacks, must be purchased from Keithley Instruments. Standard fuses, with applicable national safety approvals, may be usedif the rating and type are the same.Other components that arenot safety relatedmay be purchasedfrom other suppliers as long asthey are equivalent to the original component.(Note that selected partsshould be purchasedonly through Keithley Instruments to maintain accuracy and functionality of the product.) If you are unsure about the applicability of a replacementcomponent,call a Keithley Instruments office for information. To clean the instrument, use a damp cloth or mild, water based cleaner. Clean the exterior of the instrument only. Do not apply cleaner directly to the instrument or allow liquids to enter or spill on the instrument. Rev. l/99 HOW TO USE THIS MANUAL r Details procedures to verify that the instrument meets stated specifications. Describes basic operating principles for the varicws circuits in the Model 3330. Covers fuse replacement, calibration and repair of the instrument, and lists replacement parts. SECTlON 1 Performance Verification SECTION 2 Principles of Operation SECTION 3 Service Information WARNING The information in this manual is intended for qualified service personnel who can recognize possible shock hazards. Do not attempt these procedures unless you are qualified to do so. Table of Contents SECTION 1 - Performance Verification 1.1 1.2 1.3 1.4 1.5 1.5.1 1.5.2 1.5.3 1.5.4 15.5 1.5.6 15.7 1.5.8 1.6 1.6.1 1.6.2 1.6.3 1.6.4 1.6.5 1.6.6 ~ODU~ON .............................................................. lJ?XIULCONDlTIONS ......................................................... LINEPOWER ................................................................. VERIFIcATlONLIMITs ......................................................... MEASUREMENTSIGNALTESTS ................................................. EnvironmentalConditions ..................................................... Recommended Test Equipment .................................................. FrequencyAccuracy.. ........................................................ Measurement Signal Level Accuracy .............................................. Measurement Signal Distortion .................................................. OutputImpedanceAc~a~ .................................................... Internal Bias Voltage Accuracy .................................................. ExternalDCBiasVoltageRange ................................................. MEAsuREMENTACcuRAcyTESTS.. ............................................ EnvironmentiCondiiions ..................................................... RecommendedEquipment ..................................................... Recommended Standards Accuracy .............................................. Resistance Measurement Accuracy ............................................... Capa~~ceReadingChecks.......................................InductanceReadingChecks .................................................... l-l l-l l-l l-l l-2 l-2 l-2 l-3 l-3 l-4 l-4 l-6 1-6 l-7 l-7 l-7 l-7 l-8 l-11 l-11 ............ SECTION 2 - Principles of Operation 2.1 2.2 2.3 2.4 2.5 2.6 2.7 INTRoDucTON......................................-....~.............~ BLOCKDLAGRAMS ............................................................ CURRENT AND VOLTAGE DETECTION ........................................... ................................................... lMl?EDANCECALCULATION O!XlLLATOR ............................................... CURRENT-TO-VOLTAGE CONVERTER ............................................ ANALYZER.. ................................................................ ..... . ................ 2-l 2-l 2-l 2-l 2-4 2-5 2-5 SECTION 3 - Service Information 3.1 3.2 3.2s 32.2' 3.3 3.4 3.5 3.5.1 INTRODUCTION .............................................................. FUSEREPLA CEMENT .......................................................... LineFuse .................................................................. ExternalBiasFuse........................................................... CALIBlUTiON ............................................................... FANmLTERCLEANING ........................................................ REl?AIR ..................................................................... FactoryService.. ............................................................ 3-l 3-1 3-1 3-l 3-l 3-2 3-2 3-2 3.5.2 3.5.3 3.5.4 3.5.5 3.6 3.6.1 3.6.2 CoverRemoval............................................................-. BatteryReplacement .......................................................... .................................................... OperationCheckProcedure ............................................................. RepairS~ary ......................................................... RIZLKEABLEPARTS PartsList .................................................................. OrderingParts .............................................................. APPENDICES A specifications 3-2 3-2 3-4 3-4 3-5 3-5 3-5 List of Tables SECTION 1 - Performance Verificatibn Table Table Table Table Table Table Table l-1 l-2 l-3 l-4 l-5 l-6 l-7 Recommended Test Equipment for Measurement Signal Tests ........................ Distortion Measurement Summary ............................................ Recommended Equipment for Measurement Accuracy Tests ......................... Resistance &Ieasurement Accuracy Reading Limits ( I Z I ) for 1Vrm.sLevel ............... Resistance Measurement Accuracy Reading Limits (9) for 1Vrms Level ................. Resistance Measurement Accuracy Reading Limits ( I Z I ) for 5OVrms Level .............. Resistance Measurement Accuracy Reading Limits (0) for 5OVrms Level ................ l-2 l-4 l-8 l-9 3-10 3-10 3-10 SECTION 3 - Service Information Table 3-l Table 3-2 Table 33 Table 3-4 Table 35 RecommendedLineFuse ................................................... Se~-calibrationErr ...................................................... Operation Check Problem Summary ........................................... Measurement Signal Problem Summary ........................................ Model 3330 Replaceable Parts ................................................ 3-l 3-4 3-4 3-5 3-6 List of Illustrations SECTION lFigure Figure Figure Figure Figure Figure Figure Figure 1-l l-2 l-3 . l-4 l-5 l-6 l-7 l-8 Performance Verification l-3 l-4 l-5 1-5 l-6 l-7 l-9 l-12 Connections for Measurement and Signal Level Accuracy ........................... Connections for Frequency Accuracy Measurement ................................ Connections for Distortion Measurements ....................................... Connections for Output Impedance Tests ....................................... Connections for DC Bias Accuracy Tests ........................................ Connections for External DC Bias Voltage Range Test .............................. Connections for Resistance Accuracy Measurements ............................... Connections for Capacitance and Inductance Reading Checks ........................ SECTION 2 - Principles of Operation Figure Figure Figure Figure Figure 2-l 2-2 2-3 2-4 2-5 Measuring System Block Diagram ............................................. Hardware Block Diagram ................................................... Oscillator Block Diagram ......................................... Current-to-Voltage Converter ................................................ Analyzer ............................................................... ., ......... 2-2 2-3 24 2-5 2-6 SECTION 3 - Service Information Figure 31 Figure 32 CoverRemoval..................................................-........ Model 3330 Exploded View . . . . . . . . . . . . . . . . . . . . . . . . . . . . . . . . . . . _ . . . . . _ . . . . . . . . 3-3 3-7 SECTION 1 Performance Verification 1.l INTRODUCTION The procedures outlined in this section may be used to verifythattheModel333oLcZMeterisoperatingwithin Emits stated in the specScations. Performance verification may be done when the instrument is first received to ensure that no damage or misadjustment has occurred during shipment. Verification may also be performed whenever there is a question of instrument accuracy. NOTE If instrument performance is outside the specified range, and the instrument is still under warranty, contact your Keithley representative or the factory to determine the correct course of action. Performance verification fahs into the foIlowing two general categories: l l Measurement signal tests (paragraph 1.5) Measurement accuracy and reading checks (paragraph 1.6) 1.2 INITIAL CONDITIONS The Model 3330 should be turned on and allowed to warm up for at least one-half hour before performing the verification procedures. (The test equipment should also beallowedtowarmupforthetimeperiodrecommended by the manufacturer..) If the instrument has been subjected to extreme temperature or humidity, allow additional time for internal circuits to reach normal operating temperature. Typically, it takes one additional hour to stabilize a unit that is 10°C (Wl?,I outside the specified temperature range. 1.3 LINE POWER Be sure to set the line voltage switch on the rear panel to the correct line voltage. The instrument should be tested while operating on a line voltage within +5% of the line voltage switch setting and at a line frequency from 48Hz to 62Hz. 1.4 VERIFICATION LIMITS The performance verification limits stated in this section reflect only the accuracy specifications of the Model 3330. They do not include test equipment tolerance. 1-l SECTION 1 PerformanceVerification 1.5 MEASUREMENT SIGNAL TESTS Measurement signal tests measure various characteristics of the test signal that is applied to the DTJT. These tests include: 1.51 Frequency accuracy . Measurement signal level accuracy l Measurement signal distortion 0 Output impedance accuracy l li&mal DC bias voltage accuracy * External DC bias voltage range Table l-l. Conditions All measurement signal tests should be performed at an ambienttemperatureof23”+5”Candatarelativehumidity of 50% + 30%. IS.2 l Environmental Recommended Test Equipment Table l-l lists the test equipment required to perform the measurement signal tests. The procedures for measurement signal verification tests are based on using this exact equipment. Alternate equipment may be used as long as ihat equipment has specifications at least good as those stated in Table l-l. Recommended Test Equipment for Measurement Signal Tests Manufacturer Model Description Specifications Keithley 197A DMM (AC volts, DC volts, 5-l /2 digits) 2VDC range; +(O.Oll% of rdg + 2 counts) 2VAC range; z!$O.35%of rdg + 100 counts) Philips PM 6654C PM 9678 Timer/counter TCXO option O.OlHz-12OMHz; time base aging <l x 10-7/month Panasonic VP-772Z4 Audio analyzer lOI&-1lOkHz; 0.01% accuracy at full scale; _+ldBharmonic distortion accuracy from lOH2 to 15.99kHz 04OVDC adjustable, <5mVp-p ripple DC power supply Keithley 1681 Test leads Two leads terminated with banana plug and clip-on probes Keithley 7051-2 BNC interconnect cable 5OQcoaxial cable (RG58C), male BNC connectors, 2ft. (0.6m) Keithley 7754-3 BNC to alligator cable Coaxial cable, male BNC connector, two alligator clips Keithley 3324 Test leads 4-terminal alligator clip test lead set Keithley 3325 Test leads Kelvin clip test lead set Pomona 1468 BNC-banana adapter Capacitor Resistor switch Female BNC connector to double banana plug lo@?, 1oOVDC 100Q &o-5%, 1/2w Single-pole, single-throw l-2 SECTION1 Pt7jinmance Verification 1s.3 Frequency Accuracy 1. ConnecttheModel333OHCURjacktoinputAofthe counter/timer, as shown in Figure l-l. Be sure to co~ect the G terminal of the LCZ meter to the shield of the connecting cable as shown 2. Set the LCZ meter operating modes as follows: FREQ: 1kH.z LEVELZ 1vrms BIAS: OFF 3. set the counter/timer to measure frequency on inPUt JJ4. Verify that the counter reading is between 0.99995OkHzand 1.00005OkHz&!Spprn~. 1.5.4 nal of the LCZ meter.to the shield of the connecting cable as shown. 2. Select the ACV function and auto-ranging on the DMU 3. Set the LCZ meter operating modes as follows: LEVEL: 1vrms FREQ: 1kHz BLAS:OFF 4. Verify that the DMM reading is between the limits for lVrms, lkH2 operation, as follows: 0.97vrms to 1.03vrms (23.0%). 5. Change the LEVEL to 5OmVrms, and verify the signal level accuracy for lkHz,5OmVrm.s operation is as follows: Measurement Signal Level Accuracy 1. Conned the Model 3330 H CUR jack to the DMM, as shown in Figure l-2. be sure to connect the G termi- 47.5mVrms to.52.5mVrms (&!S.O%) Model 3330 Model7051-2CoaxialCable to cable shield Figure z-1. ConnectionsforMeasurementand Signal LevelAccuracy l-3 SEcnONl Pe?yinmancevm.fication Model 3330 1 /i* I-’ Model 197A DMM Pomona 1468 I L / Connect G terminal to cable shield Figure z-2. 1.55 Model 7051-2 Coaxial Cable Gmnecfionsfar FrequencyAccuracy Measurml Measurement Signal Distortion 1. Connect the H CUR jack of the LCZ meter to the distortion meter, as shown in Figure 13. Be sure to connect the G terminal of the LCZ meter to the cable shield as shown. 2. Set the LCZ meter operating modes as follows: LEVEL: 1vrms BIAS OFF FREQ lkH.2 3. Verify that the distortion reading is 0.3% or less, as summarized in Table l-2. Table l-2. Distortion Frequency Measurement Summary Distortion Reading C. Press the ENTER/EXlT key twice to complete 2ooHz programming. 7. Verify that the distortion reading is 0.3% or less. 1 S.6 Output Impedance Accuracy 1. Connect the LCZ meter to the DMM, switch, and resistor, as shown in Figure l-4. Be sure that the G terminal of the LCZ meter is connected to the cable shield, and that the resistor and switch are connected as shown. 2. Select the 2VAC range on the DMM. 3. Set the LCZ meter operating modes as follows: FREQ lkH2 LEVEL 1vrms BIAS: OFF 4. Set the switch to the open position, then note the 4. Change the frequency to 1OOkHz. 5. Verify that the distortion reading is 0.5% or less. 6. Set the Model 3330 frequency to 2OOHzas follows: A. Press the SETCTPkey to enter the auxiliary setup mode. The LED above the FREQ (HZ) marking blinks, and the unit displays the present frequency in them DISPLAY area. B. Enter a frequency of 2OOHz. l-4 DMM reading. Call this reading VI. 5. Set the switch to the closed position, then note the DMM reading. Call this reading Vz. 6. Compute the output impedance from VI and Vz as follows: zour = 100 Wl/VZ - 1) IQ1 7. Verify that the output impedance computed in step 6 is between 97S2and 10322inclusive (S%). SECTION1 PerformanceVeri.ficafion Model 3339 cable shield Figure 23. Gmnections jbr Disfortion Measuremenfs Model 1681 Test Leads R = lOOR, 0.50/o,II2 w Figure l-4. Connecfionsfor Outpuf ImpedanceTests l-5 SECTION 1 Perjbrmanceverifhtion 1.5.7 BIAS lNT/EXTz EXT (rear panel switch) BIAS: OFF Internal Bias Voltage Accuracy 1. ConnecttheLumetertotheDMMusingtheModel 3324 cables (see Figure l-5). Note that connections are intended to measure the voltage between the H CURandLCURtermmals. 2. Select the 2VDC range on the DMM 3. Set the LCZ meter operating modes as follows: IAl DISPLAY: C LFivELz5omvrms RANGE: AUTO BIAS INT/lXTz INT (rear panel switch) B&e&*~~~~~~~~ ~~~~~~~~~~~~ ~~~~~~~~~ ~~~ 4. Verify that the DMM reading is between 1.9V and 21V inclusive (*%I. 5. Set the LCZ meter to BIAS OFF. 6. Select the 2OOmVDC range on the DMM. 7. Verify that the DMM reading is OVflOmV. 1.5.8 External DC Bias Voltage Range 1. Connect the LCZ meter to the DC power supply, capacitor, and DMM, as shown in Figure l-6. 2. Select the DCV function and auto-ranging on the DMM. 3. Set LCZ meter operating modes as follows: m DI!ZLAYz C FREQ 12oHz LEYELz!5omvrms Yodel3330 4. Set the unit to RANGE 2 as follows: A. Measure the value of the lo@? capacitor in the RANGE AUTO mode (DC BIAS OFF). B. Verify that the Model 3330 is properly measuring the capacitor. C. Press the RANGE/AUTO key, and check that the AUTO LED goes off. The unit is now set to RANGE 2. 5. Check the voltage across the capacitor with BIAS OFF,andwithBIASONanda35Vexternalbiasvoltage SeBingon -the DC ~power5q?plyWYmust~k available with BIAS ON). 6. Disconnect the DMM, and measure the capacitor value. Verify that the reading is stable to within fi digits of the center value (four digits of span). WARNING Hazardous voltage (>3OW will be used in the following steps. Do not touch the capacitor until the test is complete, and the capacitor is discharged. 7. Set the unit to BIAS OFF, and set the external DC power supply voltage to +4OV. 8. Set the LCZ meter to BIAS ON, and verify that the BIAS fuse does not blow. 9. Set the unit to BIAS OFF, then turn off and disconnect the external DC power supply. Model 197A DMM (Measure DCV) DMM Test Leads I I Model 3324 4-Terminal Test Leads Figure 1-S. 1-b Connectionsfir DC Bias Accuracy Tests Black (LCUR) I SECl7ON 1 Pqbrnzance Vmjbtion S&l 0 0 ~ Pomona ’ 1 1 p Model 7051-2 G?a%aI Cable BNza Adapter Figure 1-6. 1.6 lhdd 3330Front Panel ConnectionsfDf Extemnl DC Bias VoltageRange Test MEASUREMENT ACCURACY TESTS reading checks that are not based on instrument accuracy tZp?dfications. Measurement accuracy tests include: l R (resistance) measurement accuracy 0 C (capacitance> reading checks 0 L (inductance) reading checks 1.6.1 Environmental Conditions All resistance measurement accuracy tests should be performed at an ambient temperature of 23” f 1°C and at a relative humidity of 50% rt 20%. Capacitance and inductance reading checks can be performed at 23” + 5°C. 1.6.2 Recommended Equipment Table 1-3&s the resistance standards, capacitors, mductons, and additional equipment required to perform the measurement accuracy tests. The procedures for resktance measurement accuracy verification tests are based onusingthese standards. Listed capacitors and inductors are to be used to perform capacitance and inductance NOTE The Model 3330 makes all measurements based on the magnitude and phase of the impedance of the DLJT connected to the UNKNOWN terminals. For that reason, verification of resistance measurement accuracy is sufficient to guarantee the accuracy of capacitance and inductance measurements. The resistance standards values used are the same as those used for calibration. Capacitance and inductance reading checks are included to verify that the instrument properly displays capacitance and inductance values. 1.6.3 Resistance Standards Accuracy Resistance standards used for the measurement accuracy tests should be calibrated at certain interva.ls so as to ensure the accuracy of standards values. Standards accuracy tolerances should be added to the stated measurement limits. l-7 SECTTON 1 Perfomnce Verification 1.6.4 Resistance Measurement Accuracy Resistance accuracy measurements are made using the resistance standards listed in Table 1-3 and the test connections shown in Figure l-7. NOTE BesuretoconnecttheHandLterminakofthe resistance standards to the H and L terminals respectively of the LCZ meter, or inaccurate measurements may result. Do not handle the standards excessively, or the resulting temperature rise may affect their values. Procedure: 1. Set the Model 3330 operating modes as follows: Table l-3. LEVEL: 1vIm.s SPEED:MED RANGE: AUTO 2 Conned the OPEN resistance standard to the instrument, then press ZERO OPEN. Allow the instrument to complete the zero cycle before proceeding. 3. Connect the SHORT resistance standard to the instrument, then press ZERO SHORT. Allow the instrument to complete the zero cycle before proceeding. 4. Connect the lOO!Jresistance standard to the instrument, and allow the reading to settle. 5. Verify that the I Z I and 0 readings are within the limits shown in Table l-4 and Table l-5 respectively. 6. Repeat steps 4 and 5 for the remaining standards values listed in the table (1162through loowZ), and verify that all readings are within the required limits. 7. Repeat steps 2 through 6 for the remaining frequencies listed in the tables. 8. Change the LEVEL to 5OmVrms, then repeat steps 2 through 7 for the frequencies summarized in Table l-6 and Table l-7. Recommended Equipment for Measurement Accuracy Tests Description ManufachmrhBodel Resistance standards Hewlett-Packard HP 16074.A OPEN, SHORT, 1OOQ1 l&I, 1OkQ lOOw1 Calibration Standard Capacitors User supplied lOOpF,O.Oljt.F,kl% Inductors User supplied loom, lOmH, z!zl% Test Fixture* Keithley 3323 *Future used to connect capacitors and inductors. l-8 FREQ:4OHz Values SECTION1 PerformanceVmficafion Standard Resistance Note : Connect L and H terminals properly as shown Figure 1-7. Connectionsfor ResistanceAccuracy Measuremenfs Table 1-4. Resistance Me asurement Accuracy Reading Limits ( 1Z I 1for 1Vrms Level Resistance Standard Value I Z I Reading Limits at Indicat !d Frequen !VtHZ) 40 l!ul ! 100a 99.80 to 100.209 so0 1Ok 1 Sk I * 99.87to 99.89to 99.9Oto . 99.89to 99.87to 100.1322 lOOSlS2 100.10Q 100.1122 100.13Q 100.17&2 l&.@S2 I lk 1OOk I 99.30 to 100.7m 1kLl 0.9980to 0.9987to 0.9988 to 1.002okQ 1.0013m 1.001m 0.9990 to 0.9989 to 0.9987to 0.9983to 0.9960to 0.9930 to l.OOlOkQ l.oOllkG! 1.0013m l.cm7kQ 1.004Om 1.0070m lOu2 9.979to 9.986to 9.988to 10.021ksz 10.014m lO.Olw2 9.990to 9.988to 9.985to 9.980to 9.960to lO.OlOkQ 10.012kQ 10.015kQ 10.020wz 10.04oki2 1ookQ 99.78to 100.~ 99.85to 99.88to 99.90to 99.82to ’ 99.75to 100.150ks2 100.12wz 100.100m 100.18kQI 1ooB ’ 98.80 to 101.2okQ l-9 SEClTONl Pelyimla?lceVtification Table l-5. Resistance Measurement Accuracy Reading Limits (0) for 1Vrms Level Resistance 8 Reading Limik atIndicated Frecwencv(Hz) Sk 1Ok 20k soot lk Standard Value I 40 looi o” f 0.12O 0” f 0.08” 0” f 0.05” 0” + o.lo” lK? 0” f 0.12” lOlc.0 1 loowz . 120 50k look 0” c 0.15” 0” * 0.25” 0” i o.50° o” f 0.08” o” f o.c15° o” f o.c13° o” f 0.08O o” f 0.10” 0” f 0.15” 0” f 0.25” o” f 0.50” o” zk0.13” 0” z!z0.w 0” f 0.15” 0” * 0.10” o” * 0.03” -L 0” f 0.08” 0” f 0.05” 0” f 0.03” 00 * 0.06” o” 5 0.08” 0” f 0.12” o” + 0.30” 0” z!z0.60” 0” f o.cw 0” f 0.w 0” f 0.08” 0” rt 0.15” 0” f 0.20” 0” rf:0.40” 0” f o.80° NOTE: M easurements should be made at 239tl”C Table 1-6. Resistance Measurement Resistance Standard Value IlCHX2 1kQ 1om lOOk! Acwacy Reading L&nib ( 1Z I) for ~Vz-ms Level I Z I Reading Limik at Indicated Frequency!I&) 500 lk Sk 20k lok 1OOk 5Ok 40 Il.20 99.70 to 100.3022 99.80to 100.208 99.82 to loo.1852 99.85to 99.80to 99.77to 99.68to 100.1552 100.2OQ 100.23sz 100.32Q 0.9970 to 1.0030~ 0.9980to 1.002oks2 0.9982 to 1.0018kQ 0.9985 to 1.0015&? 0.9980 to 1.002OkQ 0.9977 to 0.9!%3 to 1.0023lcCI 1.0032kQ 0.9880 to 1.012om lO.O37k!J 9.975 to 10.02.5k!2 9.982 to 10.018IcQ 9.984 to 10.016m 9.980 to 10.02OkQ 9.976 to 10.024w2 9.965 to 10.035kQ 9.860to 9.800 to 10.140kQ 10.200k!2 99.55 to 100.45kR 99.70 to 1003OkQ 99.80 to 100.2Oki2 99.84 to 100.16kQ 99.76 to 100.24kQ 99.68 to 100.32k.Q 99.60 to 100.4OkQ 98.20 to 101.8OkQ 9.963to 98.80to 98.40to 101.20sz 101.6oi2 0.9840to 1.016OkR 97.00 to 103.ooks2 NOTE: limits shown do not inchxde resistance standards tolerances- Au measurements to be made at 2391°C Table 1-7. Resistance Measurement Accuracy Reading Limits (0) for 5OVrms Level Value 40 120 500 KHZ? 0” Z!I0.18O O” f 0.12” 0’ + 0.09” o” 320.06” 0” 2 0.12O o” zk0.13” 1wZ 0” + 0.18O O” zk0.12’ 0” i 0.09” 0” rk 0.06” O” zk0.12O 0” rfr0.13” lOld2 0” z!I0.23” o” F 0.15” 0” f 0.09” 0” rtr0.06” 0” * 0.12” 1OOwZ 0” + 02.P 0” f 0.18” 0” t- 0.12” NOTE: Readings should be taken at 239tPC l-10 o” 4 0.180 0” + o.70° o” 5 1.0” 0” f 0.18” 0” z!z0.70” 0” T!I1.0” 0” + 0.14O 0” Ik 020” 0” rtr0.80” 0” It 1.2’ SECTION I Perfomnce Vk$icatibn 1.6.5 Capacitance Reading Checks 1.6.6 Inductance Reading Checks Capacitance reading checks are made using the 1OOpF and O.Olp capacitors summarized in Table l-3. Inductance reading checks are made using the lOO#I and 1OmH inductors summarized in Table l-3. NOTE The capacitance reading check procedure is not based on instrument accuracy specifications and is included only to show that the instrument properly displays capacitance readings. As noted previously, verification of resistance measurement accuracy is sufficient to verify capacitance measurement accuracy. NOTE The inductance reading check procedure is not based on instrument accuracy specifications and is included only to show that the instrument properly displays inductance readings. As noted previously, verification of resistance measurement accuracy is sufficient to verify inductance measurement accuracy. RocedLuez 1. Set the Model 3330 operating modes as follows: m DISPLAYC a DISPLAY: D CKTMODIZ SEX FREQ: 1kHz LEVEL: IVrms sirEEDzMED RANGE: AUTO 2. Connect the Model 3323 Direct Test Fixture to the unit (Figure l-81, but do not connect the capacitor to the test fixture at this time. 3. Short the test fixture terminals by connecting a bare wire between them. Press ZERO SHORT, and allow the instrument to complete the zero cycle. Remove the shorting wire after the zero cycle is completed. 4. Press ZERO OPEN, and allow the instrument to complete the zero cycle. 5. Connect the lOOpF,kl% capacitor to the test fixture terminak, and verify that the capacitance reading is within rt2% of 1OOpF(98pF to 102pFX 6. Connect the O-01@?, +I% capacitor to the test fixture terminals, and verify that the capacitance reading is &bi2% of 1OnF(9.8nF to 10.2nF.I. Procedure: 1. Set the Model 3330 operating modes as follows: m DISPLAY L m DISPLAY: Q CKI’ MODE: SER FREQ 1kHz LEVEL: mms !SPEEDMED RANGE: AUTO 2. Connect the Model 3323 Direct Test Fixture to the unit (Figure l-81, but do not connect the inductor to the test fixture at this time. 3. Short the test fixture terminals by connecting a bare wire between them. Press ZERO SHORT, and allow the instrument to complete the zero cycle. Remove the shorting wire after the zero cycle is completed. 4. Press ZERO OPEN, and allow the instrument to complete the zero cycle. 5. Connect the lOO$H, Itl% inductor to the test fixture exminak and verify that the inductance reading is &thin & of 100~ (98jkH to 102@. 6. Connect the IOmH, kl% inductor to the test fixture terminals, and verify that the inductance reading is within 22% of 1OmH (9.8mH to 10.2mH~. l-11 SECTTOAT1 PnJimnrmce verifif!ufion 3323 Test Fixture Figure 1-8. l-12 Capacitor or Inductor Gmnections fM Cupucitunceand InducfanceReading Checks SECTION 2 Principles of Operation 2.1 INTRODUCTION This section discusses basic circuit operating principles for the Model 3330 LCZ Meter. 2.2 BLOCK DIAGRAMS Figure 2-1 shows a block diagram of the measuring system, and Figure 2-2 is a hardware block diagram. 2.3 CURRENT AND VOLTAGE DETECTION The instrument drives the device under test (DUTI with a signal from the built-in oscillator, and it detects the current I flowing through the DUT and the voltage EV across the DUT. The current is converted to a voltage EI by the operational amplifier and the reference resistor RR. Both AC signals EV and Erare converted into digital data by the A/D converter. The microprocessor then multiplies these signals by the reference sine wave and integrates the resultant signal digitally to obtain the voltage and current vectors (magnitude and phase) with respect to the~referenceoscilktor siQr&Using~th.is method, it is possible to measure only the fundamental oscillator frequency component, minimkhg the effects of distortion and noise. 2.4 IMPEDANCE CALCULATION Impedance is calcuked by dividing the voltage vector by the current vector. As a result, impedance is expressed as the ratio of the magnitudes and the differences in phase between the two vectors. Any current-to-voltage conversion errors are corrected based on factors determined when the instrument is calibrated. In addition, true impedance (Z=Rs + JX)is obtained by correcting residual impedance Zss and floating admittance YPP,and the instrument automatically calculates main and auxiliary parameters from Rs and X. 2-l SECTION2 Principles of Operation Display Ev * n GPIB Figure 2-1. 2-2 Measuring SystemBlock Diagmm SECTTON Principles 0fOperafion - i Oscillator $z+ I !I - I I---e-e-- D r -w--s I I) Y L L POT I I I a EXT ----w-----------1 IN I S& . Key Soard Display i zffrl :.;;::,gg?b Am Interface I I I f I I i I I IVDetector I--------------d Figure 2-2. 1 Power Supply 1 Hardware Block Diagram 2-3 2.5 OSCILLATOR converted into an analog signal by the D/A converter. Since the D/A converter output includes harmonics of the desired fundamental frequency, the D/A converter output signal is routed through the low-pass filter to obtain a pure sine wave. Theosciuator~i~e2-3)isadigitaldirectsynthesistn?e freqyuency synthesizer, which uses a quartz oscillator to generate the reference frequency. The quark oscihtor is used to ensure that the synthesizer output remains stable. TheoutputoftheosciUatortifedtotheHCURterxnhlto be applied to the DUT along with the DC bias voltage. The equivalent output impedance is approximately lOOS2. The synthesizer output, which is a digital ramp signal, is converted into a sine wave by the sine ROM and is then crystal 4MHz fc I Frequency Synthesizer 1 - ) SINE __) ROM D/A ccnv. Var- --) LPF An - t l l Frequency Runmop z INT/EXr - Sampling Pulse Phase - Bias Voltage SW- -/z/i w Generator c GND ON/OFF Figure 2-3. 2-4 H CUR (To DUT) 0 11 II - Oscillafor Block Diagram Principks 2.6 CURRENT-TO-VOLTAGE CONVERTER ThesignalcurrentfromtheDUI’isconvertedtoavoltage by the curbefore measurement, a function p&onned rent-to-voltage converter (Figure 2-4). The converter is made up of a high-gain operational amplifier and a reference resistor l&, which forms the feedbackloop for the op =nPSince the operational amplifier has very high gain, its inverting input is at virtual ground potentiak Consequently,thecurrentflowingthroughY~canbeneglected, and the signal current I has the same magnitude as the current flowing through RX. As a result, the voltage acrossI& which is the same as the output voltage Vour, is simply Ilk Note that the value of RRcan be changed according to the value of the DUT being measured in order to increase the dynamic range of the instn.unenL At higher frequencies, the gain of the operational amplifier decreases, and the value of the floating admittance (which is made up primarily of capacitance at higher frf+ GND Figure 2-4. SECTION2 of Operation quencies) increases. Consequently, the current to ground increases substantially, increasing the measurement error. The error term is proportional to the product of RR and the square of the frequency. 2.7 ANALYZER To eliminate the effects of a common-mode signal, the voltages CEvand l3 across theDUT and Rx are amplified by a differential amplikr and then routed to the A/D converter through a signal conditioner consisting of amplifiers and a low-pass filter (Figure 2-5). The low-pass filter attenuates any unwanted frequency components to prevent possible measurement errors. The variable-gain amplifiers (AMI’ xl and AMP xS) are used to increase the resolution of the X-bit A/D converter when the voltage and current are small. The gainphase characteristics are measured at power-on and in zero-measurement (OPEN and SHORT) modes, and the compensating factors are applied to subsequent impedance measurements to ensure that amptier characteristics do not affect measurement accuracy. Device under test Reference resistor 1eon, 1k&2,1OkQ, 5okQ Yp : Floating admittance OP AMP : Operational amplifier Cumnf-to-Voltage Conv&m 2-5 SECTION2 Principles of Operation Ev AMP e * DiiAMP * Xl - LPF - S/H - A/D X8 fc = 5ookHz 3okHz El Figure 2-S. 2-6 A?Udyzet 16Bii - To CPU SECTION 3 Service Information 3.1 lNTRODUCTlON This section contains information on fuse replacement, instrument repair, and replacement parts for the Model place the fuse only with the type recommended in Table 3-l. . Table 3-2 3330. 3.2 FUSE REPLACEMENT The following paragraphs discuss replacement of the line fuse and external bias fuse. WARNING Disconnect the line cord and all other equipment from the instrument before replacing fuses. CAUTION Using the wrong fuse type may result in instnunent 3.2.1 Recommended Line Fuses Line Voltage Descrktion lO0V/12UV 22OV/24OV 1/2A, WOV, slow blow, 5mm x 20mm I/4A, 25OV,slow blow, 5mm x 2Lhnm 3.2.2 I External Bias Fuse The external bias fuse protects the instrument from excessive current supplied by an external DC bias source. To replace this fuse, simply unscrew the fuse holder, then replace with the following type: O-IA, WOV, fast blow, 5lnmx2t.lnn-t. damage. Line Fuse The line fuse, which is located on the rear panel, protects the power line input from excessive current. To replace the fuse, first unplug the line cord, then pry out the fuse holder from the bottom of the line power receptacle. Re- 3.3 CALIBRATION Model 3330 &ration requires a special computer program, which is included with a calibration kit along with complete calibration instructions. Calibration kits are available free of charge from the factory. Please call ‘I-800-552-1115to obtain your calibration kit. 3-l SECTION3 SeroiceInformation 3.4 FAN FILTER CLEANING The fan filter should be cleaned at least once every three months whentheunit is operatedina cleanenvironment, or at least once a month when the unit is operated in a dirty environment. The fan filter element should be cleaned as follows: 1. Turn off instrument power, and disconnect the line cord. 2. Pry out the filter cover on the rear panel. 3. Remove the filter element. 4. Soak the filter element in a solution of mild detergent and water until clean. 5. Rinse the filter element thoroughly in clean water, then allow the filter to dry thoroughly before replacement. 6. When the filter has dried completely, install the filter and cover. WARNING Disconnect the line cord and alI other equipment from the Model 3330 before removing the covers. CAUTION A conductive coating is applied to the inner surfaces of the covers. Be careful not to scratch the coating when removing covers. Also be careful not to peel off the plastic film on the front panel. I. Place the instrument upside down on a soft cloth or rubber mat to avoid scratching the top cover. 2. Remove the four screws that secure the bottom cover, then remove the cover. 3. Place the instrument right side up. 4. Remove the top cover by separating it from the chasSk 3.5.3 Battery Replacement CAUTION The instrument should not be operated without the filter in place. 3.5 3.5.1 REPAIR Factory Service .If the Model 3330 is still under warranty, it is recommended that the unit be returned to the factory or a Keithley authorized repair facility for calibration or repair. When returning the unit for service, include the followingz l l l l Call the Instruments Division Repair Department at l-800-552-1115 for a Return Material Authorization 0 number. Write the RMA number and the following on the shipping label: ATTENTION REPAIR DEPARTMENT. Complete the service form at the back of this manual. Advise as to the warranty status of the instrument. 3.5.2 Cover Removal The covers must be removed for repair. Follow the steps below to remove the covers using Figure 3-l as a guide. 3-2 The battery, which backs up setup and calibration constants RAM, should last for at least three years. If you notice the instrument no longer stores setups, the battery should be replaced. (A calibration error during the selftest may also indicate a discharged battery.) Follow the steps below to replace the battery. CAUTION Many parts on the internal circuit boards are static sensitive. To avoid possible damage, perform any repair operations only at a properly grounded work station, and use only grounded-tip soldering irons and anti-static de-soldering tools. Replacement of lithium batteries is normally a safe procedure as long as the following safety precautions are followed: WARNING The precautions below must be followed avoid possible personal injury. to 1. Wear safety glasses or goggles when working with lithium batteries. 2 Do not short the battery terminals together. 3. Do not incinerate or otherwise expose lithium batteries to excessive heat (>6OOC). SECTIONS semice Infornzation Remove t Screw Screw t t 1. Remove Screws Figure 3-Z. t 2. Remove Bottom Cover Remove t t 3. Remove Top Cover covtT~ovu1 4. Keep _. -- lithium batteries away from all liquids. 5. Do not attempt to charge lithium batteries. 6. Observe proper polarity when installing lithium batteries. NOTE Calibration constants are stored in battery backed up RAM. Model 3330 calibration will be required if the battery becomes fully discharged, or if you remove the battery. 1. Disconnect the line cord and all other instruments from the Model 3330. 4 2. Remove the top and bottom covers. 3. Note the positions of the various cables connected to the circuit board, then discomwct all cables from the board. 4. Remove the screws that secure the circuit board to the chassis. 5. Remove the control board. 6. Unsolder the battery terminals, and remove the battery. 7. Install a new battery, taking care to observe polarity. 8. Install the circuit board, and connect all cables to the board. 9. Replace the covers. 10. Calibrate the instrument after replacing the battery (see paragraph 3.3). 33 SECTiON sf??viceInfo?Ynation 3.5.4 Operation Check Procedure 1. Connect the instrument to an appropriate power source using the supplied power cord. 2. Fress in on the front panel POWER switch to turn on the power. 3. Verify that the instrument displays the ROM version number on them DISPLAY area. 4. The instrument will then .perform internal circuit checks and enter the self-calibration mode. During self-calibration, XAL” is displayed on them DISPLAY, and a decrementing number is displayed on them DISPLAY section. 5. The number on the m DISPLAY section decrements; the self-calibratiofi cycle ends when this number reaches zero. Table 3-Z 6. If an error occurs, an appropriate message will be displayed (seeTable 3-2). Turn the instrument off for three seconds, then turn power back on to see if the error clears. If the error persists and cannot be cleared, the instrument requires the indicated service. 3.5.5 Repair Summary Table 3-3 summarizes themostlikely source of the problem for the various operation check item problems (see paragraph 3.5.4).Table 3-4 summ arizes actions to take for various measurement signal problems. (SeeSection 1 for measurement signal measurements.) Self-calibration Errors Table 3-3. Operation Check Problem Summary Problem Action Non-resettable error (except IEEFE 22222) Replace RAM, ROM, or circuit board WI?-10420). Resettable error’ Reset error, and proceed with’operation. lEFXE22222enor Repeat test, calibrate unit if problem persists.* Calibration error Replace main board @II?-10420). Front panel keys and/or LEDs do not function Replace front panel circuit board. Handler interface does not function Replace handler interface board WI?-21127). *If the calibration error persists, the intend battery may r&@re repkement. 3-4 SECTION 3 Senn’ceInformafion Table 3-4. Measurement Signal Problem Summary 3.6 3.6.1 Problem Action Frequency accuracy Replace main board (IQ?-10420). Measurement signal level Perform calibration (replace main board if calibration is not effective). Measurement signal distortion Replace main board. Output impedance accuracy Replace main board. Internal DC bias accuracy Replace main board. External DC bias voltage range Replace main board. REPLACEABLE PARTS Parts List Table 3-5 summariz es available Model 3330replacement parts, and Figure 3-2 shows the location of mechanical P*. 3.6.2 Ordering Parts To order a part, or to obtain information on replacement parts, contact your Keithley representative or the factory. When ordering parts, include the following information: l l l l Instrument model number Instrument serial number Keithley part number Part description 3-5 SECTION 3 Semite Informaiion Table 3-5. Model 3330 Replaceable Description Parts Part Number Quantity 400-12310-00 506-005X-00 332-19133-00 359-03554-00 526-12996-00 310-00169-00 330-05346-00 1' 400-12328-00 240-03212-00 330-05389-00 332-50057-00 300-00785-00 459-00205-00 600-01241-00 546-00138-00 310-00169-00 302-04045-00 606-00250-00 1 1 1 1 1 1 4 1 1 1 2 516-07107-00 606-00080-00 332-19141-00 526-13003-00 332-19150-00 244-10870-00 1 6 1 1 1 1 080-33072-00 080-33099-00 080-33099-00 080-33510-00 1 1** l** 1 FRONT PANEL SECTION Fro& panel Power switch (Front) Button Switch holder 1 BNC connector (BNC137) Ground terminal 1 1 1 4 1 REAR PANEL SrjCTlON Rear panel Noise filter (inlet) Ground terminal Voltage selection switch Fan @C12V, 60 x 6Omm) Air filter Flat head screw (M3x4Omm) Grommet (small) BNC connector (BNC137) Fuse holder Hex. stud (L,=25) CHASSIS SECTION ChZiSSiS Hex. stud (L=8) Power switch Switch holder 2 Flexible wire Power transformer (D: 432768) BOARD ASSEMBLY Nr-10457(hMN) NP-21101A-1 (KEY) NP-211OlA-2 (BIAS) NP-21127 (HANDLER I/F) * The front panel has two code numbers, and it is necessary to specify these two numbers when the front panel is ordered. ** These two boards combined into one set. 3-6 SECZ’TON3 ServiceInformation Figure 3-2. Model 3330 ExplodedView 3-7 APPENDIX A Model 3330 Specifications A.1 MEASUREMENT PARAMETERS Main Parameters (Display A) and Range ‘L: Inductance, 0.ln.H to 19.999kH C: Capacitance, O.OOlpFto 19999mF R: Resiitance, O.lmR to 19.999MR I Zl : Magnitude of impedance, O.lmR to 19.999Mn AUTO: Automatically selects main parameters, sub-parameters, and equivalent circuit. Sub-parameters (Display Parameter Selection Phase Display A +lZO” to +60” L +30” to -30” R -120” to -60° C others IZI Deviation Equivalent Circuits AUTO: Automatic selection SEl? Series PAR: Parallel B) and Range Q: Quality factor, 0.0001to 19999 D: Dissipation factor, 0.0001to 19999 ESR Equivalent series resistance, O.lmR to 19.999MR C: Parallel conductance, 0.0Oll1Sto 19999S X: Series reactance, O&n?.2to 19.999MR 8: Phase angle of impedance, -180.00° to +179.99’ V: Voltage monitor (RMS voltage across device) O.OmVto 1999Vrms I: Current monitor (RMS current through device), O.OOi.tArmsto 19.99mArms Measurement resolution will vary depending on frequency, measurement range, and impedance phase angle. Automatic Autoranging Time: Approximately equal to measurement time Stabilization Time After Range Change: 0.2 - 4.0s Stabilization Tie After Frequency Change: 0.15 - 4.0s Bias Stabilization Tie: (4 + 0.015C)s where: C = capacitance of DUT (m @) Display B Q Q D 0 Measurement A: Deviation of main parameter (range of deviation is at least flOO% of the measurement range) A% % deviation display of main parameter (display range i199.99%) Note: Deviation and % deviation of sub-parameters cannot be displayed. Automatic Equivalent Display A L,C,Ror IZI LorC(IZI Ilkf2) R(620) IZI L,C,Ror IZI LorC(IZI >lm) R@<O) Displayed Circuit Selection Display B ESRorX Q,D,e,VorI QD,O,VorI Q,D,&VorI G Q,D,e,VorI Q,D,e,VorI Equivalent circuit Series Series Series series Parallel Parallel Parallel Resolution 41/2 digits (19999max counts) D, Q maximum resolution: 0.0001 0 resolution: 0.01’ V resolution: O.lmV I resolution: 1pA (when reference resistance is lOOn) 0.1l1A (when reference resistance is 1kR) O.Ol@ (when reference resistance is 1Okn or 5OkS2) Note: Reference resistance is measurement range dependent. Accuracy of V, I Accuracy of V, I: zk(2%+ I Z I accuracy) Accuracy of I Z I and 0 (1 year 18°-280C)” Execution Times Measurement Tie m-488) FAST: 65msec (typ) MFD: 155msec(typ) SLOW 485msec (typ) Note: lkS2 impedance, 1kHz frequency and one shot trigger. Specifications subject to change without notice. For 0.2(1.< I Z I < 2OMR and 0.9-l.lV test level, see Table A-l. For 0.2D i; I Z I 5 2OMn and 50mV test level, see Table A-2. For I Z I < 0.252and 1V test level, see Table A-3. For I Z I >2OM!G? and 1V test level, see Table A-4. When properly zero corrected and using Model 3323A test fixture. Table A-l. Impedance Magnitude Accuracy (%I and Phase Accuracy (“1 Test Level= OSl.lVrms, Speed = Med or Slow Frequency (Hz) MOl30 40.” IZI (RI 90 43% 10Mr IZI c2OM 2.2s” I MO900 lk I I l.lk5.Ok 3.0% l.!? 3.5% 2o” 2.2% 13% 13O I 0.90” SMS IZI <lOM 5.lk 1Ok 1.8% l.1° 21111-s IZI c5h4 1.10% 0.68” 0.75% 0.450 05% 030° 03% o.20° 05% 030” 0.9% 0.60” 1.0% 0.60” 3.5% 200 5.0% 3.0” lIvIs IZI <2M 034% 033O 036% 02P 030% o.ls” 0.20% 0.100 030% 0.150 0.40% o.20° O.so% 0300 1.6% 1.00 3.0% 20” 037% t 0.22O 2OkS IZI <2OOk 0.22% 0.15” 025% 0.150 0.20% 0.12O 0.27% 0.16” 03.5% t o.20° 1.0% 0.60” 20% 12O 0.18% 0.08’ 023% 0.15” 2kS IZI <2Ok 0.21% 0.13O 0.14% 0.09” 0.15% 0.08” 10s IZI <2k 0.20% 0.12” 0.13% 0.08” 0.13% 0.10” 0.37% O.ZF O.zs% 0x9 0.32% o.20° I 035% OXP O.sO% 0.34Y 0.70% OAOO 1.0% 0.60” 20% CL0 1.0% 0.68” I 0.70% 0.45” 0.80% 050” 1.2% 0.70” 1.7% 1.0” 3.3% 20” 21% 13” I 1.4% 0.90” 1.2% 0.80” 2OOks IZI <lM 2s IZI <lO t 1s IZI c2 05s IZI <I 02s IZI <0.5 052% 0.33O 0.15% 0.100 020% 0.15% 0.12” 0.09” ~ 0.12% 0.10% 0.06” I 0.04O I Notes: 1. For ST-lST, or 28”C-40°C, multiply the I Z I accuracy by 1.4,and the phase accuracy by 1.8. 2 When measurement speed is FAST, multiply the accuracies by 20. 3. For test levels other than 0.9-l.lVrms or 5OmVrm.ssee Accuracy Notes. Table A-2. Impedance Magnitude Accuracy (%I and Phase Accuracy lo) Level = 5OmVims, Speed = Med or Slow 2Ms IZI <5M 3.0% 1.80 20% 1.2O 12% 0.80° 0.90% 0.60° 1.2% 0.8” 1.6% l.o” 3.5% 2o” 25% 150 30% 18” 1MS IZI <ZM 1.5% 0.90” 1.0% 0.60” 0.60% 035” 0.40% 0.w 0.60% 035O 0.80% 0.50” 1.6% 0.90” 12% 7.0° 14% 8.0° ZOOkS IZI <lM 0.75% 0.45-J 050% 0300 0.40% 0.25” 030% 0.18“ 035% 0.20” 0.40% 0.2Y 0.70% o.40° 6.0% 3.6” 7.0% 4.0” 2Okr IZI <200k 0.45% OCP 030% O.lV 0.20% 0.12O 0.16% 0.08” 024% 0.14” 0.32% 0.18O 0.40% OLD 1.8% 1.00 3.0% Iso 2kS IZI <2Ok 03% 0.23O 025% 0.156 0.18% 0.w 0.16% 0.06” 0.20% 0.12O 0.24% 0.14” 0.35% OXP 1.4% om 20% 1.2O 105 IZI c2k 030% 0.18” 0.20% 0.12O 0.18% 0.09” 0.15% 0.06” 020% 0.12O 0.23% 0.13” 0.32% 0.18” 1.2% 0.70” 1.6% 1.0” 2s IZI <lO 0.75% 0.45” 050% 03 035% o.20° 025% 0.140 035% o.20° 050% 030° 0.70% 0.40” 3.4% 20” 4.0% 23” 1s IZI <2 1.5% 0.90 1.0% 0.600 0.60% 0.400 050% o.30° 0.60% o.40° 0.80% 050” 1.1% 0.70” 6.0% 3.6” 8.0% 5.0” 0.5s IZI <I 27% 1.650 1.8% 1.10 1.2% o.70° 1.0% 0.60° l.2% o.70° 15% 0.90” 1.8% l.1° 10% 6.0” 14% 8.5” 0.2s IZI co.5 5.55% 3.30 3.7% 22” 26% 15” 20% 1-Y 26% 1Y 29% 1.7O 3.4% 20” 21% 13O 28% 16” Notes: 1. For 5”C-18T, or W’C-40°C, multiply the I Z I by 20, and the ph!se accuracy by 20. 2 When measurement speed is fast, multiply the accuracies by 20. 3. Accuracy is not guaranteed in the following ranges: I Z I z=2OMQ I Z I c 0.252 4. For test ieveis other than O-9-LlVrms or 5OmVnns see Accuracy Notes. Table A-3. Accuracy of I Z I and 0 for I Z I cO.2Q I Z I Accuracy: z!z(%reading + R) shown. 8 Accuracy: (0 Accuracy for 0.X I Z I co.5 in Table A-l) x (0.2Q/ I Z I ) When SPEED=FAST, multiply accuracy by 2 For 5”-18°C or W-40°C, multiply accuracy by 2 Table A-4. Accuracy of I Z I and 0 for I Z I 220MQ I Z I Accuracy: Specified by the + deviation (S) of admittance I Y I shown. 6 Accuracy: (e Accuracy for 1Om I Z I <2OM in Table A-l x ( I Z I /2OMQ). When SPEXD=FAST, multiply accuracy by 2 For 5”-18°C or 28”-4O”C,multiply accuracy by 2 Accuracy Notes 1. When a measurement is made at line frequency or at twice line frequency, the measured value may deviate beyond the accuracy range due to interaction with line frequency.. In this case, use 5OI-h or 1OOHzfor a 6OHz line and 6OHz or 12OHz for a 5OHz line. 2 Tables A-l through A-4show the worst case value in each impedance range. A more precise value for accuracy may be obtained by interpolation. 3. Inordertodetenninetheimpedancemagnitudeaccuracy(A,)andimpedancephaseaccuracy(Ad) atmeasurementsignallwels (LV) other than5OmV or 0.9V - l.lV, use one of the following equations: Measurement Signal Level 0 From To Measured Impedance Magnitude IZI 1OmV 49mV QOMnand ?0.2Q 51mV 899mV 22OMQ 51mV 899mV QOMQand rO.2Q 5lmV 899mV Impedance Magnitude Accuracy [%I Impedance Phase Accuracy I”1 (4) (4) corn where: LV = Test level voltage An = Impedance Magnitude Accuracy (%) from Table A-l A, = Impedance Phase Accuracy (O)from Table A-l 42 = Impedance Magnitude Accuracy (%) from Table A-2 A, = Impedance Phase Accuracy (“) from Table A-2 & = Impedance Magnitude Accuracy (%) from Table A-3 B, = Impedance Magnitude offset @IQ) from Table A-3 A, = Impedance Magnitude Accuracy (96)from Table A-4 A, = Impedance Phase Accuracy (“) from Table A-4 AZ5= Impedance Magnitude Accuracy for 51mV S LV S 899mV and I Z I c 0.2Q A,(%) i .;. ; *._ -:. it’ = ,’ :*. . ‘. ,‘f : I.,‘! ,*. i _ ‘\ i a’. ‘.i, - \q + s’ i ** :I :j. . : ;<‘: ;,* :.;. *’ 2 z : ‘. ,‘i _ ‘..,’ i _ ,?. i _ : ,, : *, j : ,* ‘-4j‘, ; *.* ,:* . I illllil, ; .’ , \ I ‘. r, 2k Impedance t !5k 10k inductance L 2Ok !SOk 1OOk Frequency f ‘(Hz) Notes: Use this chart to determine the impedance magnitude of an inductor or capacitor at a partia~lar frequency. For example, a 1H inductor at 1OkHz and a 1pF capacitor at 1kHz are shown on the diagram. lH@lOkHz=63kQ 1pF@lkHz=16O~ Figure A-l. Convmion Diagram Examples of Determining Accuracy Example 1: Component = 33m resistor Test Frequency = 1OkHz Test Level = 1V rms Temperature = 18’XWC Speed = Med or Slow 1. Find the accuracy values corresponding to 33m and 1OkHz on Table A-l. Record the impedance magnitude accuracy (0.25%)and impedance phase accuracy (0.15”). 2 If the ambient temperature is 5°C - 18OCor 28°C - 4O”C,multiply the impedance magnitude accuracy by 1.4 and the impedance phase accuracy by 1.8. 3. If measurement speed is set to FAST, multiply the impedance magnitude accuracy by 20 and the impedance phase accuracy by 20. 4. Resistance accuracy is approximately equal to the impedance magnitude accuracy if Q s 0.1. 5. If Q > 0.1, see example 4. Example 2: Component = 1OpFcapacitor Test Frequency = 1kHz Test Level = 5OmV Temperature = 18”-WC Speed = Med or Slow 1. Determine the impedance of the lOt.tFcapacitor at 1kHz by referring to Figure A-l or by solving the following equation: 1 2Rx1kHzx10pF = 16R 2 Find the accuracy values corresponding to 16R at 1kHz on Table A-2 Record the impedance magnitude accuracy (0.15%) and impedance phase accuracy (0.060). 3. If the ambient temperature is 5OC- 18°C or WC - 40°C, multiply the impedance magnitude accuracy by 1.4 and the impedance phase accuracy by 1.8. 4. If measurement speed is set to FAST, multiply the impedance magnitude accuracy by 20 and the impedance phase accuracy by 20. 5. If D s 0.1,the accuracy of the capacitance measurement accuracy (CJ is related to the impedance magnitude accuracy (ZJ by the followmg equation: c,r 3%. l-Zxc In this example Z- = 0.1% and C, = 0.1001%. 6. If D > 0.1, see example 4. Example 3: Component = 68OpH Test Frequency = 1OOkHz Test Level = 1V rms Temperature = 18”~WC Speed = Med or Slow 1. Determine the impedance magnitude accuracy of the 68OuH inductor at 1OOkHz by referring to Figure A-l or by solving the following equation: 2 Fmdtheaccuracyvaluescorrespondingto427SZatlOOkHzonTableA1. Record the impedance magnitude accuracy (0.70/q) and impedance phase accuracy (0.5’). 3. If the ambient temperature is 5°C - 18°C or 28°C - 40°C, multiply the impedance magnitude accuracy by 1.4 and the impedance phase accuracy by 1.8. 4. If measurement speed is set to FAST, multiply the impedance magnitude accuracy by 20 and the impedance phase accuracy by 20. 5. If Q > 10the inductance measurement accuracy is approximately equal to the impedance magnitude accuracy. 6. If Q < 10, see example 4. Example 4: Determine precision of parameters other than I Z I and 8 at any frequency. 1. Fit, measure I Z I and 8. Or, calculate them from other measured parameters by applying the following equations: Q =1/D %WM =arctanQ = 2xfLJESR = 2dr.,+n e IZl= 1/(2dCs ESR) = i/(2dcs sine) = (2xfC,)/G =27tfr+ine = 1/(2~fL,G) = sin 0/(2rfCJ where: f = frequency (Hz). C, L,r = series equivalent circuit variables. Cr, Lp = parallel equivalent circuit variables. 2 Determine the impedance magnitude accuracy (A,) and impedance phase accuracy (AJ of I ZmLUI and Bmurby referring to the appropriate table (Table A-l, A-2, A-3 or A-4). ,3. Determine the maximum and minimum value by using the following equations: Z-= IZI-x(l+Ar) z,, = I z I lllpu x (I- 4) 8 mm=%las+Ae e mh =emols-Ao 4. Determine the maximum and minimum value of the parameter of interest by substituting the values found in step 3 into one of the following equations. There will be four combinations: up = Izihse R, = izic0se G =c0se/izi ESR = IZI case B =sine/IZI = izi sine ; =X/2ltf L, =-1/2&B c, =B/2xf = -l/lxfx cs D =i/imei Q =itanei 5. Accuracy is found by determining the largest deviation from the measured values. A.2 MEASUREMENT SIGNAL Frequency Range: 4oHz-lxxk lOH2 steps 160,200,25OHz 3ooHz-9.9kH.z lOOH steps lOkI-Iz-1cKkHz 1kI-k steps Accuracy: fo.O05% Output Impedance: 100~(typ) Signal Level (voltage when drive terminal HCUR is open) Range: 1OmV~l.1OOVrms: 1mV steps AmUacy: zt(3% + 1mV) for lkH2 jz(4% + 1mV) for 4OHz-2OkHz z!c(5%+ 1mV) for 21kHz-lOOkHa) Output characteristics: Type: TTL negative logic Maximum TTL load: 10 standard TTL Maximum output current: 48mA (sink, output voltage nV) Input signals: TRIG Measurement start trigger (puke width ~lOO.us) LOCK: Panel operation prohibited Input characteristics Low level input voltage: -1.5 to cO.8V High level input voltage: +2.4V to 30V (TRIG), +3.5V to 30V (LOCK) Low level input current (Approximation) TRIG -033mA LOCK: -3mA Handler Interface Ground: isolated from chassis ground. Max voltage from chassis k42VDC. Beeper (two functions, dip switch selectable): Beeper on/off: Enables beeper function. Beeper Mode: 1. Beep oniy for NO GO 2 4KHz beep for GO and 2kHz beep for NO GO. Bias Voltage Internal: 0 or +2VDC (&5%) Extemal:oto- A.3 COMPARATOR/BINNING FUNCTIONS Number of bins 20. The comparator function can sort on the main parameters (It L, C, or Z) Into bins l-19. Also, the comparator function can sort on the sub-parameter into bin 0 (Q, D, ESR G or X). Note: GOrefers tocomparatorbinsl-19,and tor bin 0. NOGOrefers tocompara- A.6 IEEE-488 BUS IMPLEMENTATION Multiline Commands DCL, SDC, GET, GTL, LINT, UNL, SPE, SPD UniIine Commands: lFC, REN, EOI, SRQ, ATN Interface Functions: SHl, AI-Ii, T5, L4, SRl, RL2, PPO,DCl, DTI, CO. A.7 GENERAL A.4 FRONT PANEL SET-UP MEMORY Number of front panel set-ups: 10. Front panel set-up contents: All front panel parameters except bias control. Battery Iif? At least 3 years if storage temperhue is less than 4O“C. A.5 HANDLER INTERFACE Connector: 36-pin Centronics type (Cinch 5730360) Output signals: BIN O-11: Bin judgment signals A-NC: Main parameter failure B-NG: Sub-parameter failure STROBE: Judgment completion pulse (pulse width X5ms) Measurement in progress flag BUSY: Line Voltage: 100,120,220 or 240510% VAC (external switch selectable) Bnvimnmenb Operating: 0”-4O”C, lo-90% RI-I (non-condensing) Storage: -loo-50°C, lo-80% RH (non-condensing) Dimensions, Weight: 132.5mm high x 216mm wide x 350mm deep (5 ‘/, in. x 8 Yr in. x 13 ‘/, in.) Net weigth 3.7kg (8.1 Ibs.) (instrument only, exduding accessories). Warm-up: 30 minutes. Front Panel Connectors: 4 BNC connectors and a five way biding post. Rear Panel Connectors: Handler Interface External Bias: BNC IEEE Connector: Floating Display: Two 4 ‘/2digit displays for main and sub-parameters. Trigger Mode: Automatic (continuous) and manual. Trigger Delay Time: 0-199.99s Calibration Cycle: 1 year lOhmz- 8.\ . ‘. 1MQ -z- looks2 z- lOks2 :- loon c’ ‘\ ,’ (. lkf27 z- loR?- 1R -y Impedance Z , ,’ ‘\ ,’ ,’ *.c’ ’ ‘. Y :< I’ \ , ‘. ,’ ‘\ . #’ , --. Frequency f (Hz) Note : 1. For 5%18%, or 28%40%, muifipiy the IZl accuracy by 1.4,andthephaseaccuracyby1.8. 2. When measurement speed is FAST, double the accuracy. Level 3 0.9%1 .lV rms Speed E Medium or Slow lOhK? :- lMQ~- loom p- lOks2 7’ IkQ:- loof2~- 1on 2- ia?- capadtaflcec ’ I ,,,1111, 40 I I 8 , I II,, . , , I I,““, 1 ,I,““, 100 200 500 lk 2k 5k 10k 20k 50k 1OOk Frequency f (Hz) ImpedanceZ Note : 1. For 5%-l 8%, or 28%40°C. multiply the pi accuracy by and the phase accuracy by 2.0. 2. When measurement speed is FAST, double the accuracy. Accuraoy is not guaranteed in the following ranges : IZl>2OMQ, IZ]c.2Q. 2.0, 3. Level = 50mV rms Speed 3~Medium or slow hlduotance L Index Analyzer,Z-5 * B Fan Filter Cleaning, 3-2 Ordering Parts, 3-5 Frequency Accuracy, l-3 Oscillator, 2-4 Fuse Replacement, 3-1 Output Impedance Accuracy, l-4 I P Battery Replacement, 3-2 Impedance Calculation, 2-1 Parts List, 3-5 Block Diagram, 2-l Inductance Reading Checks, l-11 Performance Verification, l-l Inltial Conditions, C Cal&ration, 3-l Capacitance Reading Checks, l-11 1-l Line Fuse, 3-l Current and Voltage l?e&ction, 2-1 Line Power, l-1 Current-to-Voltage Converter, 2-5 M Measurement Signal Destination, l-4 JtkttXdBiiFuse,3-1 Measurement Signal Level Accuracy, 1-3 ExtemaI DC Bias Voltage Range, I-6 Measurement SignaI Tests, 1-2 Factory Service, 3-2 Recommended Equipment, l-7 Recommended Test Equipment, l-2 Repair,3-2 Repair Surnmsq, 3-4 Resistance Standards Accuracy, l-7 Measurement Accuracy Tests, l-7 Environmental Conditions, l-2,1-7 F R L Cover Removal 3-2 E Principles of Operation, 2-l Internal Bias Voltage Accuracy, l-6 0 Operation Check Procedure, 3-4 S !kvice Information, 3-l V Verification Limits, l-l SERVICE FORM Model No. Name and Telephone colnpany Date Serial No. No. List all control settings,describeproblem and check boxes that apply to problem. DAnalog output follows display q Particular rangeor function bad; specify IIlIntermittent q 0bvious problem on power-up q Batteriesand fuses are OK q DEEEfailure UFront panel operational q All rangesor functions are bad achecked all cables Display or output (circle one) q Drifts nUnstable ROverload nUnable to zero q Will not read applied input q Calibration only q Certificate of Calibration required IData required (attachanyadditionalsheetsasnecessary.) Show a block diagram of your measurementsystemincluding all instrumentsconnected(whether power is turned on or not). Also, describesignal source. Where is the measurementbeing performed? (factory, controlled laboratory, out-of-doors, etc.) Ambient Temperature? What power line voltage is used? Relative humidity? Other? Any additional information. (If specialmodifications have beenmadeby the user, pleasedescribe.) Be sure to include your nameand phonenumberon this service form. OF Keithley Instruments, Inc. 28775 Aurora Road Cleveland, Ohio 44 139 Printed in the U.S.A.