1
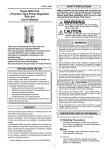
Industrial electronic systems
VEMA
Bulgaria, Pleven 5800, 27 Osogovo str.
tel./fax: +359/64/870172, tel.: +359/64/870170
e-mail: [email protected] http://vema-bg.com
PROGRAMMING CONSOLE
PRC 204
VEMA
PRC 204
PROGRAMMING CONSOLE
Esc
USER MANUAL
I. Introduction
The programming console PRC 204 provides the user interface to the executive
devices that control the heating power (PCN xxx power controller) and the speed of the
PET preforms (DC motor control drive) in the oven.
The programming console is designed to operate with all types of power
controllers PCN xxx, motor control drives and NPN inductive sensors (10-30V) or
mechanical switches.
Output signals are: RS232 to connect to the power controller that takes care of all
heating zones; analog signal from 0 to 10 VDC controls the chain speed and power
supply of 24 VDC for inductive switches.
The parameter values can be changed by the user through the console keypad.
The parameters are indicated on the console display in different menus. The user can
change the value of each heating zone and the speed of the preforms in the oven, enable
or disable heating totally. A discrete switch can be used to measure the time it takes
between two preforms to be blown, i.e. the machine productivity. A counter for the
produced items is built in.
All parameters can be changed when selected. For one-step change use the left
and right buttons, whereas for a step by 10 user can use the up and down buttons.
II. Technical specifications
1. Number of preset programs for different molds........................................................10
2. Number of heating zones in each program.....................................................6 up to 12
3. Heating zones and chain speed rates............................................................0 to 99.9%
4. Parameter resolution...........................................................................................0.1%
5. Maximal period between two preforms..........................................................99.9 sec.
6. Productivity resolution.....................................................................................0.1 sec.
7. Discrete input In1 for preforms counting...............................24V/10mA optoisolated
8. Discrete input In2 for all zone disable....................................24V/10mA optoisolated
9. Analog input Ain for external OFFSET.............................................................0-10V
10. Productivity counter range.....................................................up to 999999999 items
11. Analog output Uout|Iout for speed setting..........................................0 to 10V/5mA
12. Supply voltage......................................................................187- 242VAC/48-62Hz
13. Dimensions.......................................................................................85x180x65 mm
14. Operating temperature...........................................................................0 up to 50 °C
15. Storage temperature........................................................................... -10 up to 60 °C
2
III. Parameter mnemonics and navigation
The console display can work in two modes - MONITOR and PROGRAM. In
MONITOR mode the user can watch the current value of the desired parameter, i.e. the
machine productivity and how the heating zones are controlled. In PROGRAM mode
the values of the parameters can be changed. From MONITOR mode the user can press
(8 ) to switch to PROGRAM mode in order to change some of the parameters. In this
mode a cursor appears and the user can move it using the arrow buttons to select one of
the parameters. Pressing (8 ) again will set the cursor on the selected parameter value
indicating that a change can be made. After setting the desired value using the arrow
buttons, the user can save it by pressing (8 ), or go back to parameter selection without
saving by pressing (Esc). To return into MONITOR mode, the user should press
(Esc) and the cursor disappears:
MONITOR mode | MAIN menu
PROGRAM No ХХ
Produced XXXXXXXXX
Cycle time * XX.X s
OFFSET A!* ±XX.X %
PROGRAM mode | MAIN menu
any key but (Esc)
(Esc)
»PROGRAM No
»Items/Imp.
»Velocity
»OFFSET M!*
ХХ
XX
XX.X %
±XX.X %
The parameter PROGRAM No ХХ is used to select one of the ten console
programs as current. Each program is a set of power values for each of the heating zones.
Thus, the user can create programs of suitable values for the heating zones for each mold
type. When in PROGRAM mode, the user can go to the ZONE menu from this
parameter by pressing (8 ).
The second parameter (Produced in MONITOR mode) on the main menu is
used to count up the preforms. It will increment with XX on each impulse on the discrete
input In1, where XX is the value of the Items/Imp. parameter (the second one in
PROGRAM mode). When In1 is connected to the "mold close" state of the machine,
then this value should be the number of items in one cluster that the machine blows. If
In1 is connected to the sensor detecting the incoming preforms, then the value of XX
should be 1. Thus, the counter will represent the number of produced items. To reset the
counter the user must select the Items/Imp. parameter, press and hold (8 ) and then
press (Esc). Using the same parameter, the user can toggle the language between
English and Bulgarian by pressing and holding (8 ) and then pressing (!).
The third parameter on the main menu reads Cycle time in MONITOR mode,
and Velocity in PROGRAM mode. When in MONITOR mode, it shows the period
of time between two preforms (on In1) to be produced, i.e. this is the productivity of the
machine. In PROGRAM mode, the user can change the value in percent to set (by the
means of the analog output Uout|Iout) the proper speed of the chain. Status N/A will
indicate that the cycle time has not yet been computed or the chain is not moving. The
sign * in front of the measured value means that the movement of the chain is
temporarily disabled by user. Toggling between enabling and disabling a parameter is
done by pressing and holding (8 ) and then pressing (Esc).
3
The OFFSET parameter allows to add an offset (up to ±50%) to all heating zones
without the need to change each of the heating zones values in ZONE menu. The offset
can be manual (OFFSET М) or external (OFFSET А). Manual offset is set directly by
the parameter OFFSET in PROGRAM mode, while external offset depends on the
analog input Ain. Toggling between manual and external offset is done by pressing and
holding (8 ) and then pressing (!). The sign * states that all zones are temporarily
disabled by user by pressing and holding (8 ) and then pressing (Esc). The zones can
be disabled externally by input In2. This is denoted by the sign !. When a zone is
disabled, the heating of this zone is powered off. Thus, the user can quickly turn off
heating by disabling all zones from the console, or externally through input In2.
The heating zone parameters are located in the ZONE menu. The ZONE menu
can be reached in two ways. When in MONITOR mode in MAIN menu, pressing the
(Esc) button will put the display into ZONE menu. The second way is to select a new
value of the PROGRAM No parameter in PROGRAM mode. In ZONE menu, the user
can watch and change the value of each heating zone in the same manner as in the MAIN
menu. When no cursor is present, the display is in MONITOR mode and the current
measured values for each zone is indicated. In PROGRAM mode, the user can change
the set value for any zone:
MONITOR mode | ZONE menu
<1> 23.4%
<2> 43.1%
<3>* off
<4> 20.0%
<5>* off
<6>* off
<7> 33.9%
<8>* off
PROGRAM mode | ZONE menu
any key but (Esc)
(Esc)
<1> 23.5%
<2> 43.1%
<3>*43.9%
<4> 20.0%
<5>* 9.8%
<6>*29.1%
<7> 33.8%
<8>*59.8%
Zones are grouped by four in a column. The number of the zone is displayed first
and next to it is its value in percent - either read value from the PCN controller in
MONITOR mode, or set value in PROGRAM mode. Zones that are temporarily
disabled by user are denoted by the sign * and value off. Value of N/A means that the
zone value has not yet been read from the PCN controller. Value err denotes that there
is a problem with the corresponding phase to this zone in the power controller. Blinking
of a zone value in MONITOR mode means that the read value differs from the set value
by more than 0.1 %.
The values of each zone can be set in ZONE menu the same way as in MAIN
menu. The value can be adjusted or disabled by the usual way of pressing and holding
(8 ) and then pressing (Esc).
When a connection to the PCNxxx power controller is established, the console
reads the number of heating zones for this controller and formats the screen in the
ZONE menu. The number of the zones can be changed manually when no connection to
a controller is present. To do this, user needs to press and hold (8 ) in ZONE menu and
press (#) or ($) to increment/decrement the number of the heating zones.
When connection between the console and the power controller is not present or
failed, a message “not connected !” is blinking on the first line of the display.
4
IV. Mechanical connection and mounting
The PRC 204 programming console is assigned for mounting on facet panels of
electrical units. The slot for mounting should have a rectangular shape of
(80+0.4)x(176+0.4) mm. To secure the console on the panel, use the attaching screws.
The connector pin attachment of the console is pictured on its rear panel. The
connecting wires must be isolated and have thickness of 0.35 to 0.75 mm2. The
recommended scheme of connection follows below:
Connection to a machine with manual offset and preform counting through sensor:
PROGRAMMING CONSOLE
VEMA
220
VAC
220
VAC
PRC204
NC In1 V+1 +24V V+2 In2
RS232
Ain GND Uout Iout
220VAC
VOut
V+
Inductive sensor
NPN output.
DC motor
control drive
Connection to a machine with external offset and external enable of heating:
PROGRAMMING CONSOLE
VEMA
220
VAC
220
VAC
PRC204
NC In1 V+1 +24V V+2 In2
Ain GND Uout Iout
RS232
220VAC
DC motor
control drive
out1
V+
out2 d00
VPCxxxx PLC
5