1
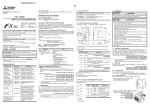
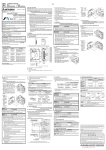
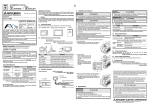
2.2 Connector Pin Layout
Pin No.
5
4
3
2
1
9
8
7
6
FX2N-232IF RS232C INTERFACE BLOCK
HARDWARE MANUAL
Signal name
*
Meaning
Function
1
CD(DCD)
Carrier detection
This signal indicates only status.
2
RD(RXD)
Receive data
Receive data (RS232C device to 232IF)
3
SD(TXD)
Send data
Send data (232IF to RS232C device)
4
ER(DTR)
Data terminal ready
ON when Send/Receive enable is ON
5
SG
Signal ground
Signal ground
6
DR(DSR)
Data set ready
This signal indicates only status.
7
RS(RTS)
Request to send
<Clear to receive>*
ON when Send command is ON
<ON when 232IF is Receive enabled>*
8
CS(CTS)
Clear to send
ON when RS232C device is ready to receive
9
JY992D73501C
3.3 Connection Example
CI(RI)
Calling indication
This signal indicates only status.
The signal wiring of the RS232C equipment varies depending on the RS232C specifications connected.
Check the specifications of the RS232C equipment used, then connect the signals correctly. Representative wiring examples are shown below.
1) Connection with counterpart equipment of terminal specifications (when control line is not used)
BFM #0 communication format: b9 = 0, b8 = 0, without control line
232IF side
Signal
name
RS232C device side
Pin
No.
SD(TXD)
Signal
name
9-pin
D-SUB
25-pin
D-SUB
3
2
3
SD(TXD)
RD(RXD)
2
RD(RXD)
2
3
SG(GND)
5
SG(GND)
5
7
Communication is performed in accordance
with the condition determined by the software in the 232IF and the counterpart equipment.
< > At selection of interlink connection mode
2.3 System Configuration
This manual contains text, diagrams and explanations which will guide the reader in the correct installation
and operation of the FX 2N-232IF RS232C Interface Block. It should be read and understood before
attempting to install or use the unit. Further information can be found in the FX PROGRAMMING MANUAL, FX series hardware manuals.
PLC
RS-232C device
FX2N/FX3U PLC
Personal computer
232IF side
If in doubt at any stage during the installation of the FX2N-232IF RS232C Interface Block always consult a
professional electrical engineer who is qualified and trained to the local and national standards.
or
1) Two or more devices with RS232C interfaces can be connected to an FX2N/FX2NC/FX3U/FX3UC series
PLC by using the RS232C special function block. Up to 8 special function block can be connected to
the FX2N/FX3U/FX 3UC*1 series PLC. Up to 4 special function block can be connected to the FX2NC
PLC. (Refer to section 2.1)
2) Communication requires no protocol
Full-duplex asynchronous communication between RS232C devices is specified through buffer memory (BFM). The FROM/TO instruction is used for the buffer memory.
3) The send/receive buffer can accommodate 512 bytes/256 words.
When the RS232C interlink connection mode is used, data exceeding 512 bytes/256 words can also
can be received.
4) ASCII/HEX conversion function
The function to convert and send and a hexadecimal numeric (0 to F) saved in the send data buffer as
well as the function to convert a received ASCII code into a hexadecimal numeric (0 to F) and save it
to the receive buffer are provided.
*1 Up to 7 special function block can be connected to the FX3UC-32MT-LT PLC
2. Specifications
2.1 External Dimensions and Part Names
Dimensions:mm(inches)
55(2.17")
Weight: Approx. 0.3 kg
➂ ➃➄
Accessory:Special block No. label
Signal
name
FX2N-232IF
1. INTRODUCTION
The RS232C interface block FX2N-232IF (hereinafter referred to as "232IF") is connected to the FX2N/
FX 2NC/FX3U/FX3UC series PLC to realize full duplex serial data communication with another RS232C
interface such as a personal computer, bar code reader, printer, etc.
POW
ER
FX2NC-CNV-IF
or
FX3UC-1PS-5V
FX2NC/FX3UC PLC
SD
RS-232C:max 15m
RD
Bar code reader
Printer
To connect this block to the FX2NC Series
PLC, the FX2NC-CNV-IF is required
To connect this block to the FX3UC Series
PLC, either the FX2NC-CNV-IF or FX3UC-1PS-5V is required.
3.1 Connection with the programmable controller
The 232IF can be connected to the FX2N/FX2NC/FX3U/FX3UC programmable controller or connected on
the right side of another extension block/unit. A number is assigned to each special unit/block counting
from the one nearest the main unit in the way of No.0, No.1. . . No.7". Up to 8 FX2N-232IF units can be
connected to the FX 2N/FX3U/FX3UC *1 Series PLC. Up to 4 FX2N-232IF units can be connected to the
FX2NC Series PLC. However, the capacity of the 5V DC power supplied from the programmable controller
is limited. The current consumption of the 5V DC power in the 232IF is 40 mA. Make sure that the total
current consumption of the 5V DC power supply including other special blocks is equivalent to or less than
that available.
*1 Up to 7 units can be connected to an FX3UC-32MT-LT PLC
Signal
name
9-pin
D-SUB
25-pin
D-SUB
SD(TXD)
3
SD(TXD)
3
2
RD(RXD)
2
RD(RXD)
2
3
RS(RTS)
7
RS(RTS)
7
4
CS(CTS)
8
CS(CTS)
8
5
CD(DCD)
1
8
ER(DTR)
4
20
DR(DSR)
6
6
SG(GND)
5
7
CD(DCD)
1
ER(DTR)
4
DR(DSR)
6
SG(GND)
5
*1
*2
Signal
name
RS232C device side
Pin
No.
SD(TXD)
Signal
name
9-pin
D-SUB
25-pin
D-SUB
3
SD(TXD)
3
2
RD(RXD)
2
RD(RXD)
2
3
RS(RTS)
7
*1 RS(RTS)
7
4
CS(CTS)
8
CS(CTS)
8
5
ER(DTR)
4
ER(DTR)
4
20
DR(DSR)
6
6
SG(GND)
5
7
DR(DSR)
6
SG(GND)
5
*2
POWER
RD
➆
FX2N-232IF
3.2 Power Supply Wiring
➈
c Extension cable
d Mounting hole (2-φ4.5(0.18"))
e POWER LED :Lit when both the 5V DC power supplied from the main unit and the 24V DC power
supplied from the external terminal are supplied.
Class D
grounding
100 Ω or less
0V
24V
24+
24FX2N -232IF
g RD LED:Lit while data is received from the RS232C equipment connected to the 232IF.
j RS232C connector (9-pin D-SUB connector: #4-40unc inch screw thread)
k DIN rail clip
l DIN rail groove (35(1.38"))
232IF side
Extension
cable
FX 2N
programmable
controller
f SD LED:Lit while data is sent to the RS232C equipment connected to the 232IF.
i Next step extension connector
*2 The 232IF only monitors the signal status
(ON/OFF).
In the interlink connection mode, data
exceeding 512 bytes (upper limit of the
receive buffer in the 232IF) can be received.
*1 In this mode, the Request to Send signal
(RS) functions as the receive enable signal in the 232IF. When receiving data that
exceeds 512 bytes (the upper limit of the
232IF receive buffer), the 232IF sets the
Request to Send signal (RS) to “OFF”
and requests the counterpart equipment
to suspend the data transmission. Once
the data saved in the receive buffer is
read by the sequence program, the
remaining data can be received.
4) Connection with counterpart equipment of modem specifications (Control line is essential.)
Straight cable used, BFM #0 communication format: b9 = 0, b8 = 1, standard RS232C mode
DC service supply
h Terminal screws (M3 (0.12"))
*1 When the CD signal is not monitored, the
CD signal pin is not required to be connected. The 232IF only monitors the signal status (ON/OFF).
➇
➉
4(0.16")
Because the carrier to send (CS) signal pin
of the 232IF itself receives the request to
send (RS) signal, signal transfer is performed as if the counterpart equipment is
functioning.
*2 The 232IF only monitors the signal status
(ON/OFF).
SD
90(3.54")
RD
80(3.15")
SD
mounting hole pitch
24-
POWER
Pin
No.
232IF side
24+
➀
RS232C device side
3) Interlink serial cross cable used,
BFM #0 communication format: b9 = 1, b8 = 1, RS232C interlink connection mode
3. WIRING AND CONNECTION
➅
85(3.35")
➁
2) Connection with counterpart equipment of terminal specifications (when control line is used)
Cross cable used, BFM #0 communication format: b9 = 0, b8 = 1, standard RS232C mode
24V DC±10%
80mA
DC service supply of
programmable controller
may be used.
Handling of the crimp-style terminal
6.2mm
(0.24")
6.2mm
(0.24")
Use the crimp-style terminals of the dimensions shown on the figure on the left. Make sure that the tightening torque of the terminal
is 0.5 to 0.8 Nym.
Tighten each terminal securely to avoid malfunction.
Signal
name
RS232C device side
Pin
No.
Signal
name
9-pin
D-SUB
25-pin
D-SUB
SD(TXD)
3
SD(TXD)
3
2
RD(RXD)
2
RD(RXD)
2
3
RS(RTS)
7
RS(RTS)
7
4
CS(CTS)
8
CS(CTS)
8
5
CD(DCD)
1
CD(DCD)
1
8
ER(DTR)
4
ER(DTR)
4
20
DR(DSR)
6
DR(DSR)
6
6
SG(GND)
5
SG(GND)
5
7
CI(RI)
9
22
CI(RI)
9
*1
*2
*3
*1 When the CD signal is not being monitored, the CD signal pin is not required
to be connected. The 232IF only monitors the signal status (ON/OFF).
*2 The 232IF only monitors the signal status (ON/OFF).
*3 When the CI signal is not required, the
CI signal pin is not required to be connected. The 232IF only monitors the
signal status (ON/OFF).
2.2 Connector Pin Layout
Pin No.
5
4
3
2
1
9
8
7
6
FX2N-232IF RS232C INTERFACE BLOCK
HARDWARE MANUAL
Signal name
*
Meaning
Function
1
CD(DCD)
Carrier detection
This signal indicates only status.
2
RD(RXD)
Receive data
Receive data (RS232C device to 232IF)
3
SD(TXD)
Send data
Send data (232IF to RS232C device)
4
ER(DTR)
Data terminal ready
ON when Send/Receive enable is ON
5
SG
Signal ground
Signal ground
6
DR(DSR)
Data set ready
This signal indicates only status.
7
RS(RTS)
Request to send
<Clear to receive>*
ON when Send command is ON
<ON when 232IF is Receive enabled>*
8
CS(CTS)
Clear to send
ON when RS232C device is ready to receive
9
JY992D73501C
3.3 Connection Example
CI(RI)
Calling indication
This signal indicates only status.
The signal wiring of the RS232C equipment varies depending on the RS232C specifications connected.
Check the specifications of the RS232C equipment used, then connect the signals correctly. Representative wiring examples are shown below.
1) Connection with counterpart equipment of terminal specifications (when control line is not used)
BFM #0 communication format: b9 = 0, b8 = 0, without control line
232IF side
Signal
name
RS232C device side
Pin
No.
SD(TXD)
Signal
name
9-pin
D-SUB
25-pin
D-SUB
3
2
3
SD(TXD)
RD(RXD)
2
RD(RXD)
2
3
SG(GND)
5
SG(GND)
5
7
Communication is performed in accordance
with the condition determined by the software in the 232IF and the counterpart equipment.
< > At selection of interlink connection mode
2.3 System Configuration
This manual contains text, diagrams and explanations which will guide the reader in the correct installation
and operation of the FX 2N-232IF RS232C Interface Block. It should be read and understood before
attempting to install or use the unit. Further information can be found in the FX PROGRAMMING MANUAL, FX series hardware manuals.
PLC
RS-232C device
FX2N/FX3U PLC
Personal computer
232IF side
If in doubt at any stage during the installation of the FX2N-232IF RS232C Interface Block always consult a
professional electrical engineer who is qualified and trained to the local and national standards.
or
1) Two or more devices with RS232C interfaces can be connected to an FX2N/FX2NC/FX3U/FX3UC series
PLC by using the RS232C special function block. Up to 8 special function block can be connected to
the FX2N/FX3U/FX 3UC*1 series PLC. Up to 4 special function block can be connected to the FX2NC
PLC. (Refer to section 2.1)
2) Communication requires no protocol
Full-duplex asynchronous communication between RS232C devices is specified through buffer memory (BFM). The FROM/TO instruction is used for the buffer memory.
3) The send/receive buffer can accommodate 512 bytes/256 words.
When the RS232C interlink connection mode is used, data exceeding 512 bytes/256 words can also
can be received.
4) ASCII/HEX conversion function
The function to convert and send and a hexadecimal numeric (0 to F) saved in the send data buffer as
well as the function to convert a received ASCII code into a hexadecimal numeric (0 to F) and save it
to the receive buffer are provided.
*1 Up to 7 special function block can be connected to the FX3UC-32MT-LT PLC
2. Specifications
2.1 External Dimensions and Part Names
Dimensions:mm(inches)
55(2.17")
Weight: Approx. 0.3 kg
➂ ➃➄
Accessory:Special block No. label
Signal
name
FX2N-232IF
1. INTRODUCTION
The RS232C interface block FX2N-232IF (hereinafter referred to as "232IF") is connected to the FX2N/
FX 2NC/FX3U/FX3UC series PLC to realize full duplex serial data communication with another RS232C
interface such as a personal computer, bar code reader, printer, etc.
POW
ER
FX2NC-CNV-IF
or
FX3UC-1PS-5V
FX2NC/FX3UC PLC
SD
RS-232C:max 15m
RD
Bar code reader
Printer
To connect this block to the FX2NC Series
PLC, the FX2NC-CNV-IF is required
To connect this block to the FX3UC Series
PLC, either the FX2NC-CNV-IF or FX3UC-1PS-5V is required.
3.1 Connection with the programmable controller
The 232IF can be connected to the FX2N/FX2NC/FX3U/FX3UC programmable controller or connected on
the right side of another extension block/unit. A number is assigned to each special unit/block counting
from the one nearest the main unit in the way of No.0, No.1. . . No.7". Up to 8 FX2N-232IF units can be
connected to the FX 2N/FX3U/FX3UC *1 Series PLC. Up to 4 FX2N-232IF units can be connected to the
FX2NC Series PLC. However, the capacity of the 5V DC power supplied from the programmable controller
is limited. The current consumption of the 5V DC power in the 232IF is 40 mA. Make sure that the total
current consumption of the 5V DC power supply including other special blocks is equivalent to or less than
that available.
*1 Up to 7 units can be connected to an FX3UC-32MT-LT PLC
Signal
name
9-pin
D-SUB
25-pin
D-SUB
SD(TXD)
3
SD(TXD)
3
2
RD(RXD)
2
RD(RXD)
2
3
RS(RTS)
7
RS(RTS)
7
4
CS(CTS)
8
CS(CTS)
8
5
CD(DCD)
1
8
ER(DTR)
4
20
DR(DSR)
6
6
SG(GND)
5
7
CD(DCD)
1
ER(DTR)
4
DR(DSR)
6
SG(GND)
5
*1
*2
Signal
name
RS232C device side
Pin
No.
SD(TXD)
Signal
name
9-pin
D-SUB
25-pin
D-SUB
3
SD(TXD)
3
2
RD(RXD)
2
RD(RXD)
2
3
RS(RTS)
7
*1 RS(RTS)
7
4
CS(CTS)
8
CS(CTS)
8
5
ER(DTR)
4
ER(DTR)
4
20
DR(DSR)
6
6
SG(GND)
5
7
DR(DSR)
6
SG(GND)
5
*2
POWER
RD
➆
FX2N-232IF
3.2 Power Supply Wiring
➈
c Extension cable
d Mounting hole (2-φ4.5(0.18"))
e POWER LED :Lit when both the 5V DC power supplied from the main unit and the 24V DC power
supplied from the external terminal are supplied.
Class D
grounding
100 Ω or less
0V
24V
24+
24FX2N -232IF
g RD LED:Lit while data is received from the RS232C equipment connected to the 232IF.
j RS232C connector (9-pin D-SUB connector: #4-40unc inch screw thread)
k DIN rail clip
l DIN rail groove (35(1.38"))
232IF side
Extension
cable
FX 2N
programmable
controller
f SD LED:Lit while data is sent to the RS232C equipment connected to the 232IF.
i Next step extension connector
*2 The 232IF only monitors the signal status
(ON/OFF).
In the interlink connection mode, data
exceeding 512 bytes (upper limit of the
receive buffer in the 232IF) can be received.
*1 In this mode, the Request to Send signal
(RS) functions as the receive enable signal in the 232IF. When receiving data that
exceeds 512 bytes (the upper limit of the
232IF receive buffer), the 232IF sets the
Request to Send signal (RS) to “OFF”
and requests the counterpart equipment
to suspend the data transmission. Once
the data saved in the receive buffer is
read by the sequence program, the
remaining data can be received.
4) Connection with counterpart equipment of modem specifications (Control line is essential.)
Straight cable used, BFM #0 communication format: b9 = 0, b8 = 1, standard RS232C mode
DC service supply
h Terminal screws (M3 (0.12"))
*1 When the CD signal is not monitored, the
CD signal pin is not required to be connected. The 232IF only monitors the signal status (ON/OFF).
➇
➉
4(0.16")
Because the carrier to send (CS) signal pin
of the 232IF itself receives the request to
send (RS) signal, signal transfer is performed as if the counterpart equipment is
functioning.
*2 The 232IF only monitors the signal status
(ON/OFF).
SD
90(3.54")
RD
80(3.15")
SD
mounting hole pitch
24-
POWER
Pin
No.
232IF side
24+
➀
RS232C device side
3) Interlink serial cross cable used,
BFM #0 communication format: b9 = 1, b8 = 1, RS232C interlink connection mode
3. WIRING AND CONNECTION
➅
85(3.35")
➁
2) Connection with counterpart equipment of terminal specifications (when control line is used)
Cross cable used, BFM #0 communication format: b9 = 0, b8 = 1, standard RS232C mode
24V DC±10%
80mA
DC service supply of
programmable controller
may be used.
Handling of the crimp-style terminal
6.2mm
(0.24")
6.2mm
(0.24")
Use the crimp-style terminals of the dimensions shown on the figure on the left. Make sure that the tightening torque of the terminal
is 0.5 to 0.8 Nym.
Tighten each terminal securely to avoid malfunction.
Signal
name
RS232C device side
Pin
No.
Signal
name
9-pin
D-SUB
25-pin
D-SUB
SD(TXD)
3
SD(TXD)
3
2
RD(RXD)
2
RD(RXD)
2
3
RS(RTS)
7
RS(RTS)
7
4
CS(CTS)
8
CS(CTS)
8
5
CD(DCD)
1
CD(DCD)
1
8
ER(DTR)
4
ER(DTR)
4
20
DR(DSR)
6
DR(DSR)
6
6
SG(GND)
5
SG(GND)
5
7
CI(RI)
9
22
CI(RI)
9
*1
*2
*3
*1 When the CD signal is not being monitored, the CD signal pin is not required
to be connected. The 232IF only monitors the signal status (ON/OFF).
*2 The 232IF only monitors the signal status (ON/OFF).
*3 When the CI signal is not required, the
CI signal pin is not required to be connected. The 232IF only monitors the
signal status (ON/OFF).
2.2 Connector Pin Layout
Pin No.
5
4
3
2
1
9
8
7
6
FX2N-232IF RS232C INTERFACE BLOCK
HARDWARE MANUAL
Signal name
*
Meaning
Function
1
CD(DCD)
Carrier detection
This signal indicates only status.
2
RD(RXD)
Receive data
Receive data (RS232C device to 232IF)
3
SD(TXD)
Send data
Send data (232IF to RS232C device)
4
ER(DTR)
Data terminal ready
ON when Send/Receive enable is ON
5
SG
Signal ground
Signal ground
6
DR(DSR)
Data set ready
This signal indicates only status.
7
RS(RTS)
Request to send
<Clear to receive>*
ON when Send command is ON
<ON when 232IF is Receive enabled>*
8
CS(CTS)
Clear to send
ON when RS232C device is ready to receive
9
JY992D73501C
3.3 Connection Example
CI(RI)
Calling indication
This signal indicates only status.
The signal wiring of the RS232C equipment varies depending on the RS232C specifications connected.
Check the specifications of the RS232C equipment used, then connect the signals correctly. Representative wiring examples are shown below.
1) Connection with counterpart equipment of terminal specifications (when control line is not used)
BFM #0 communication format: b9 = 0, b8 = 0, without control line
232IF side
Signal
name
RS232C device side
Pin
No.
SD(TXD)
Signal
name
9-pin
D-SUB
25-pin
D-SUB
3
2
3
SD(TXD)
RD(RXD)
2
RD(RXD)
2
3
SG(GND)
5
SG(GND)
5
7
Communication is performed in accordance
with the condition determined by the software in the 232IF and the counterpart equipment.
< > At selection of interlink connection mode
2.3 System Configuration
This manual contains text, diagrams and explanations which will guide the reader in the correct installation
and operation of the FX 2N-232IF RS232C Interface Block. It should be read and understood before
attempting to install or use the unit. Further information can be found in the FX PROGRAMMING MANUAL, FX series hardware manuals.
PLC
RS-232C device
FX2N/FX3U PLC
Personal computer
232IF side
If in doubt at any stage during the installation of the FX2N-232IF RS232C Interface Block always consult a
professional electrical engineer who is qualified and trained to the local and national standards.
or
1) Two or more devices with RS232C interfaces can be connected to an FX2N/FX2NC/FX3U/FX3UC series
PLC by using the RS232C special function block. Up to 8 special function block can be connected to
the FX2N/FX3U/FX 3UC*1 series PLC. Up to 4 special function block can be connected to the FX2NC
PLC. (Refer to section 2.1)
2) Communication requires no protocol
Full-duplex asynchronous communication between RS232C devices is specified through buffer memory (BFM). The FROM/TO instruction is used for the buffer memory.
3) The send/receive buffer can accommodate 512 bytes/256 words.
When the RS232C interlink connection mode is used, data exceeding 512 bytes/256 words can also
can be received.
4) ASCII/HEX conversion function
The function to convert and send and a hexadecimal numeric (0 to F) saved in the send data buffer as
well as the function to convert a received ASCII code into a hexadecimal numeric (0 to F) and save it
to the receive buffer are provided.
*1 Up to 7 special function block can be connected to the FX3UC-32MT-LT PLC
2. Specifications
2.1 External Dimensions and Part Names
Dimensions:mm(inches)
55(2.17")
Weight: Approx. 0.3 kg
➂ ➃➄
Accessory:Special block No. label
Signal
name
FX2N-232IF
1. INTRODUCTION
The RS232C interface block FX2N-232IF (hereinafter referred to as "232IF") is connected to the FX2N/
FX 2NC/FX3U/FX3UC series PLC to realize full duplex serial data communication with another RS232C
interface such as a personal computer, bar code reader, printer, etc.
POW
ER
FX2NC-CNV-IF
or
FX3UC-1PS-5V
FX2NC/FX3UC PLC
SD
RS-232C:max 15m
RD
Bar code reader
Printer
To connect this block to the FX2NC Series
PLC, the FX2NC-CNV-IF is required
To connect this block to the FX3UC Series
PLC, either the FX2NC-CNV-IF or FX3UC-1PS-5V is required.
3.1 Connection with the programmable controller
The 232IF can be connected to the FX2N/FX2NC/FX3U/FX3UC programmable controller or connected on
the right side of another extension block/unit. A number is assigned to each special unit/block counting
from the one nearest the main unit in the way of No.0, No.1. . . No.7". Up to 8 FX2N-232IF units can be
connected to the FX 2N/FX3U/FX3UC *1 Series PLC. Up to 4 FX2N-232IF units can be connected to the
FX2NC Series PLC. However, the capacity of the 5V DC power supplied from the programmable controller
is limited. The current consumption of the 5V DC power in the 232IF is 40 mA. Make sure that the total
current consumption of the 5V DC power supply including other special blocks is equivalent to or less than
that available.
*1 Up to 7 units can be connected to an FX3UC-32MT-LT PLC
Signal
name
9-pin
D-SUB
25-pin
D-SUB
SD(TXD)
3
SD(TXD)
3
2
RD(RXD)
2
RD(RXD)
2
3
RS(RTS)
7
RS(RTS)
7
4
CS(CTS)
8
CS(CTS)
8
5
CD(DCD)
1
8
ER(DTR)
4
20
DR(DSR)
6
6
SG(GND)
5
7
CD(DCD)
1
ER(DTR)
4
DR(DSR)
6
SG(GND)
5
*1
*2
Signal
name
RS232C device side
Pin
No.
SD(TXD)
Signal
name
9-pin
D-SUB
25-pin
D-SUB
3
SD(TXD)
3
2
RD(RXD)
2
RD(RXD)
2
3
RS(RTS)
7
*1 RS(RTS)
7
4
CS(CTS)
8
CS(CTS)
8
5
ER(DTR)
4
ER(DTR)
4
20
DR(DSR)
6
6
SG(GND)
5
7
DR(DSR)
6
SG(GND)
5
*2
POWER
RD
➆
FX2N-232IF
3.2 Power Supply Wiring
➈
c Extension cable
d Mounting hole (2-φ4.5(0.18"))
e POWER LED :Lit when both the 5V DC power supplied from the main unit and the 24V DC power
supplied from the external terminal are supplied.
Class D
grounding
100 Ω or less
0V
24V
24+
24FX2N -232IF
g RD LED:Lit while data is received from the RS232C equipment connected to the 232IF.
j RS232C connector (9-pin D-SUB connector: #4-40unc inch screw thread)
k DIN rail clip
l DIN rail groove (35(1.38"))
232IF side
Extension
cable
FX 2N
programmable
controller
f SD LED:Lit while data is sent to the RS232C equipment connected to the 232IF.
i Next step extension connector
*2 The 232IF only monitors the signal status
(ON/OFF).
In the interlink connection mode, data
exceeding 512 bytes (upper limit of the
receive buffer in the 232IF) can be received.
*1 In this mode, the Request to Send signal
(RS) functions as the receive enable signal in the 232IF. When receiving data that
exceeds 512 bytes (the upper limit of the
232IF receive buffer), the 232IF sets the
Request to Send signal (RS) to “OFF”
and requests the counterpart equipment
to suspend the data transmission. Once
the data saved in the receive buffer is
read by the sequence program, the
remaining data can be received.
4) Connection with counterpart equipment of modem specifications (Control line is essential.)
Straight cable used, BFM #0 communication format: b9 = 0, b8 = 1, standard RS232C mode
DC service supply
h Terminal screws (M3 (0.12"))
*1 When the CD signal is not monitored, the
CD signal pin is not required to be connected. The 232IF only monitors the signal status (ON/OFF).
➇
➉
4(0.16")
Because the carrier to send (CS) signal pin
of the 232IF itself receives the request to
send (RS) signal, signal transfer is performed as if the counterpart equipment is
functioning.
*2 The 232IF only monitors the signal status
(ON/OFF).
SD
90(3.54")
RD
80(3.15")
SD
mounting hole pitch
24-
POWER
Pin
No.
232IF side
24+
➀
RS232C device side
3) Interlink serial cross cable used,
BFM #0 communication format: b9 = 1, b8 = 1, RS232C interlink connection mode
3. WIRING AND CONNECTION
➅
85(3.35")
➁
2) Connection with counterpart equipment of terminal specifications (when control line is used)
Cross cable used, BFM #0 communication format: b9 = 0, b8 = 1, standard RS232C mode
24V DC±10%
80mA
DC service supply of
programmable controller
may be used.
Handling of the crimp-style terminal
6.2mm
(0.24")
6.2mm
(0.24")
Use the crimp-style terminals of the dimensions shown on the figure on the left. Make sure that the tightening torque of the terminal
is 0.5 to 0.8 Nym.
Tighten each terminal securely to avoid malfunction.
Signal
name
RS232C device side
Pin
No.
Signal
name
9-pin
D-SUB
25-pin
D-SUB
SD(TXD)
3
SD(TXD)
3
2
RD(RXD)
2
RD(RXD)
2
3
RS(RTS)
7
RS(RTS)
7
4
CS(CTS)
8
CS(CTS)
8
5
CD(DCD)
1
CD(DCD)
1
8
ER(DTR)
4
ER(DTR)
4
20
DR(DSR)
6
DR(DSR)
6
6
SG(GND)
5
SG(GND)
5
7
CI(RI)
9
22
CI(RI)
9
*1
*2
*3
*1 When the CD signal is not being monitored, the CD signal pin is not required
to be connected. The 232IF only monitors the signal status (ON/OFF).
*2 The 232IF only monitors the signal status (ON/OFF).
*3 When the CI signal is not required, the
CI signal pin is not required to be connected. The 232IF only monitors the
signal status (ON/OFF).
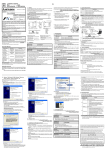
4. SPECIFICATIONS
4.1 General specifications
General specifications excluding withstand voltage
Same as those of the main unit
Withstand voltage
500V AC, 1 minute (between the entire
external terminal and the ground terminal)
4.2 Power Supply Specifications
Internal power supply from programmable controller
5V DC 40mA
External power supply
24V DC ± 10% 80mA
4.3 Specifications
Item
Content
Transmission Standard
Conforming RS232C
Transmission distance
Max. 15m
Connected the number
1:1
Connector
9-pin D-SUB type
Pin layout of connector
1:CD(DCD), 2:RD(RXD), 3:SD(TXD), 4:ER(DTR), 5:SG,
6:DR(DSR), 7:RS(RTS), 8:CS(CTS), 9:CI(RI)
Indication (LED)
POWER, SD, RD
Communication method
No protocol by full-duplex asynchronous
Sported baud rate
300, 600, 1200, 2400, 4800, 9600, 19200
Isolation
Photo-coupler
Number of I/O points occupied
8 points taken from the programmable controller extension bus
(can be either input or output)
Applicable programmable
controllers
FX2N/FX2NC/FX3U/FX3UC series
Communication with programmable controller
FROM/TO instruction
Guidelines for the safety of the user and protection of the FX2N-232IF RS232C
INTERFACE BLOCK
5. DIAGNOSTICS
For error code, refer to the FX Communication User’s Manual.
•
This manual has been written to be used by trained and competent personnel. This is defined
by the European directives for machinery, low voltage and EMC.
•
If in doubt at any stage during the installation of the FX2N-232IF always consult a professional
electrical engineer who is qualified and trained to the local and national standards. If in doubt
about the operation or use of the FX2N-232IF please consult the nearest Mitsubishi Electric
distributor.
•
Under no circumstances will Mitsubishi Electric be liable or responsible for any consequential
damage that may arise as a result of the installation or use of this equipment.
•
All examples and diagrams shown in this manual are intended only as an aid to understanding the text, not to guarantee operation. Mitsubishi Electric will accept no responsibility for
actual use of the product based on these illustrative examples.
•
Owing to the very great variety in possible application of this equipment, you must satisfy
yourself as to its suitability for your specific application.
1) Check the status of the POWER LED provided in the 232IF.
-
When it is lit, the drive power is correctly supplied.
-
If it is extinguished, supply the drive power correctly.
2) Check the status of the SD LED and the RD LED provided in the 232IF.
-
If the RD LED is not lit while data is received or the SD LED is not lighted while data is sent,
check the instruction and the wiring.
-
When the RD LED is lit while data is received or the SD LED is lit while data is sent, the installation and the wiring are correct.
3) Make sure that the communication setting (BFM #0) of the 232IF is equivalent to that of the external
equipment. If they are not equivalent each other, correct as required.
4) Verify the status of the data send/receive device. For example, make sure that the counterpart equipment is ready to receive before starting to send data to it.
5) When the terminator is not used, check whether the send data capacity is equivalent to the acceptable data capacity. Use the terminator, if the send data capacity may be changed.
6) Make sure that the external equipment is correctly operating.
This manual confers no industrial property rights or any rights of any other kind, nor does it confer any
patent licenses. Mitsubishi Electric Corporation cannot be held responsible for any problems involving
industrial property rights which may occur as a result of using the contents noted in this manual.
7) Check whether the type of send data and the type of receive data are equivalent. If they are different,
make them equivalent.
Manual number : JY992D73501
Manual revision : C
Date
: April 2015
HEAD OFFICE : TOKYO BUILDING, 2-7-3 MARUNOUCHI, CHIYODA-KU, TOKYO 100-8310, JAPAN
JY992D73501C
Effective April 2015
Specifications are subject to
change without notice
4. SPECIFICATIONS
4.1 General specifications
General specifications excluding withstand voltage
Same as those of the main unit
Withstand voltage
500V AC, 1 minute (between the entire
external terminal and the ground terminal)
4.2 Power Supply Specifications
Internal power supply from programmable controller
5V DC 40mA
External power supply
24V DC ± 10% 80mA
4.3 Specifications
Item
Content
Transmission Standard
Conforming RS232C
Transmission distance
Max. 15m
Connected the number
1:1
Connector
9-pin D-SUB type
Pin layout of connector
1:CD(DCD), 2:RD(RXD), 3:SD(TXD), 4:ER(DTR), 5:SG,
6:DR(DSR), 7:RS(RTS), 8:CS(CTS), 9:CI(RI)
Indication (LED)
POWER, SD, RD
Communication method
No protocol by full-duplex asynchronous
Sported baud rate
300, 600, 1200, 2400, 4800, 9600, 19200
Isolation
Photo-coupler
Number of I/O points occupied
8 points taken from the programmable controller extension bus
(can be either input or output)
Applicable programmable
controllers
FX2N/FX2NC/FX3U/FX3UC series
Communication with programmable controller
FROM/TO instruction
Guidelines for the safety of the user and protection of the FX2N-232IF RS232C
INTERFACE BLOCK
5. DIAGNOSTICS
For error code, refer to the FX Communication User’s Manual.
•
This manual has been written to be used by trained and competent personnel. This is defined
by the European directives for machinery, low voltage and EMC.
•
If in doubt at any stage during the installation of the FX2N-232IF always consult a professional
electrical engineer who is qualified and trained to the local and national standards. If in doubt
about the operation or use of the FX2N-232IF please consult the nearest Mitsubishi Electric
distributor.
•
Under no circumstances will Mitsubishi Electric be liable or responsible for any consequential
damage that may arise as a result of the installation or use of this equipment.
•
All examples and diagrams shown in this manual are intended only as an aid to understanding the text, not to guarantee operation. Mitsubishi Electric will accept no responsibility for
actual use of the product based on these illustrative examples.
•
Owing to the very great variety in possible application of this equipment, you must satisfy
yourself as to its suitability for your specific application.
1) Check the status of the POWER LED provided in the 232IF.
-
When it is lit, the drive power is correctly supplied.
-
If it is extinguished, supply the drive power correctly.
2) Check the status of the SD LED and the RD LED provided in the 232IF.
-
If the RD LED is not lit while data is received or the SD LED is not lighted while data is sent,
check the instruction and the wiring.
-
When the RD LED is lit while data is received or the SD LED is lit while data is sent, the installation and the wiring are correct.
3) Make sure that the communication setting (BFM #0) of the 232IF is equivalent to that of the external
equipment. If they are not equivalent each other, correct as required.
4) Verify the status of the data send/receive device. For example, make sure that the counterpart equipment is ready to receive before starting to send data to it.
5) When the terminator is not used, check whether the send data capacity is equivalent to the acceptable data capacity. Use the terminator, if the send data capacity may be changed.
6) Make sure that the external equipment is correctly operating.
This manual confers no industrial property rights or any rights of any other kind, nor does it confer any
patent licenses. Mitsubishi Electric Corporation cannot be held responsible for any problems involving
industrial property rights which may occur as a result of using the contents noted in this manual.
7) Check whether the type of send data and the type of receive data are equivalent. If they are different,
make them equivalent.
Manual number : JY992D73501
Manual revision : C
Date
: April 2015
HEAD OFFICE : TOKYO BUILDING, 2-7-3 MARUNOUCHI, CHIYODA-KU, TOKYO 100-8310, JAPAN
JY992D73501C
Effective April 2015
Specifications are subject to
change without notice
2.2 Connector Pin Layout
Pin No.
5
4
3
2
1
9
8
7
6
FX2N-232IF RS232C INTERFACE BLOCK
HARDWARE MANUAL
Signal name
*
Meaning
Function
1
CD(DCD)
Carrier detection
This signal indicates only status.
2
RD(RXD)
Receive data
Receive data (RS232C device to 232IF)
3
SD(TXD)
Send data
Send data (232IF to RS232C device)
4
ER(DTR)
Data terminal ready
ON when Send/Receive enable is ON
5
SG
Signal ground
Signal ground
6
DR(DSR)
Data set ready
This signal indicates only status.
7
RS(RTS)
Request to send
<Clear to receive>*
ON when Send command is ON
<ON when 232IF is Receive enabled>*
8
CS(CTS)
Clear to send
ON when RS232C device is ready to receive
9
JY992D73501C
3.3 Connection Example
CI(RI)
Calling indication
This signal indicates only status.
The signal wiring of the RS232C equipment varies depending on the RS232C specifications connected.
Check the specifications of the RS232C equipment used, then connect the signals correctly. Representative wiring examples are shown below.
1) Connection with counterpart equipment of terminal specifications (when control line is not used)
BFM #0 communication format: b9 = 0, b8 = 0, without control line
232IF side
Signal
name
RS232C device side
Pin
No.
SD(TXD)
Signal
name
9-pin
D-SUB
25-pin
D-SUB
3
2
3
SD(TXD)
RD(RXD)
2
RD(RXD)
2
3
SG(GND)
5
SG(GND)
5
7
Communication is performed in accordance
with the condition determined by the software in the 232IF and the counterpart equipment.
< > At selection of interlink connection mode
2.3 System Configuration
This manual contains text, diagrams and explanations which will guide the reader in the correct installation
and operation of the FX 2N-232IF RS232C Interface Block. It should be read and understood before
attempting to install or use the unit. Further information can be found in the FX PROGRAMMING MANUAL, FX series hardware manuals.
PLC
RS-232C device
FX2N/FX3U PLC
Personal computer
232IF side
If in doubt at any stage during the installation of the FX2N-232IF RS232C Interface Block always consult a
professional electrical engineer who is qualified and trained to the local and national standards.
or
1) Two or more devices with RS232C interfaces can be connected to an FX2N/FX2NC/FX3U/FX3UC series
PLC by using the RS232C special function block. Up to 8 special function block can be connected to
the FX2N/FX3U/FX 3UC*1 series PLC. Up to 4 special function block can be connected to the FX2NC
PLC. (Refer to section 2.1)
2) Communication requires no protocol
Full-duplex asynchronous communication between RS232C devices is specified through buffer memory (BFM). The FROM/TO instruction is used for the buffer memory.
3) The send/receive buffer can accommodate 512 bytes/256 words.
When the RS232C interlink connection mode is used, data exceeding 512 bytes/256 words can also
can be received.
4) ASCII/HEX conversion function
The function to convert and send and a hexadecimal numeric (0 to F) saved in the send data buffer as
well as the function to convert a received ASCII code into a hexadecimal numeric (0 to F) and save it
to the receive buffer are provided.
*1 Up to 7 special function block can be connected to the FX3UC-32MT-LT PLC
2. Specifications
2.1 External Dimensions and Part Names
Dimensions:mm(inches)
55(2.17")
Weight: Approx. 0.3 kg
➂ ➃➄
Accessory:Special block No. label
Signal
name
FX2N-232IF
1. INTRODUCTION
The RS232C interface block FX2N-232IF (hereinafter referred to as "232IF") is connected to the FX2N/
FX 2NC/FX3U/FX3UC series PLC to realize full duplex serial data communication with another RS232C
interface such as a personal computer, bar code reader, printer, etc.
POW
ER
FX2NC-CNV-IF
or
FX3UC-1PS-5V
FX2NC/FX3UC PLC
SD
RS-232C:max 15m
RD
Bar code reader
Printer
To connect this block to the FX2NC Series
PLC, the FX2NC-CNV-IF is required
To connect this block to the FX3UC Series
PLC, either the FX2NC-CNV-IF or FX3UC-1PS-5V is required.
3.1 Connection with the programmable controller
The 232IF can be connected to the FX2N/FX2NC/FX3U/FX3UC programmable controller or connected on
the right side of another extension block/unit. A number is assigned to each special unit/block counting
from the one nearest the main unit in the way of No.0, No.1. . . No.7". Up to 8 FX2N-232IF units can be
connected to the FX 2N/FX3U/FX3UC *1 Series PLC. Up to 4 FX2N-232IF units can be connected to the
FX2NC Series PLC. However, the capacity of the 5V DC power supplied from the programmable controller
is limited. The current consumption of the 5V DC power in the 232IF is 40 mA. Make sure that the total
current consumption of the 5V DC power supply including other special blocks is equivalent to or less than
that available.
*1 Up to 7 units can be connected to an FX3UC-32MT-LT PLC
Signal
name
9-pin
D-SUB
25-pin
D-SUB
SD(TXD)
3
SD(TXD)
3
2
RD(RXD)
2
RD(RXD)
2
3
RS(RTS)
7
RS(RTS)
7
4
CS(CTS)
8
CS(CTS)
8
5
CD(DCD)
1
8
ER(DTR)
4
20
DR(DSR)
6
6
SG(GND)
5
7
CD(DCD)
1
ER(DTR)
4
DR(DSR)
6
SG(GND)
5
*1
*2
Signal
name
RS232C device side
Pin
No.
SD(TXD)
Signal
name
9-pin
D-SUB
25-pin
D-SUB
3
SD(TXD)
3
2
RD(RXD)
2
RD(RXD)
2
3
RS(RTS)
7
*1 RS(RTS)
7
4
CS(CTS)
8
CS(CTS)
8
5
ER(DTR)
4
ER(DTR)
4
20
DR(DSR)
6
6
SG(GND)
5
7
DR(DSR)
6
SG(GND)
5
*2
POWER
RD
➆
FX2N-232IF
3.2 Power Supply Wiring
➈
c Extension cable
d Mounting hole (2-φ4.5(0.18"))
e POWER LED :Lit when both the 5V DC power supplied from the main unit and the 24V DC power
supplied from the external terminal are supplied.
Class D
grounding
100 Ω or less
0V
24V
24+
24FX2N -232IF
g RD LED:Lit while data is received from the RS232C equipment connected to the 232IF.
j RS232C connector (9-pin D-SUB connector: #4-40unc inch screw thread)
k DIN rail clip
l DIN rail groove (35(1.38"))
232IF side
Extension
cable
FX 2N
programmable
controller
f SD LED:Lit while data is sent to the RS232C equipment connected to the 232IF.
i Next step extension connector
*2 The 232IF only monitors the signal status
(ON/OFF).
In the interlink connection mode, data
exceeding 512 bytes (upper limit of the
receive buffer in the 232IF) can be received.
*1 In this mode, the Request to Send signal
(RS) functions as the receive enable signal in the 232IF. When receiving data that
exceeds 512 bytes (the upper limit of the
232IF receive buffer), the 232IF sets the
Request to Send signal (RS) to “OFF”
and requests the counterpart equipment
to suspend the data transmission. Once
the data saved in the receive buffer is
read by the sequence program, the
remaining data can be received.
4) Connection with counterpart equipment of modem specifications (Control line is essential.)
Straight cable used, BFM #0 communication format: b9 = 0, b8 = 1, standard RS232C mode
DC service supply
h Terminal screws (M3 (0.12"))
*1 When the CD signal is not monitored, the
CD signal pin is not required to be connected. The 232IF only monitors the signal status (ON/OFF).
➇
➉
4(0.16")
Because the carrier to send (CS) signal pin
of the 232IF itself receives the request to
send (RS) signal, signal transfer is performed as if the counterpart equipment is
functioning.
*2 The 232IF only monitors the signal status
(ON/OFF).
SD
90(3.54")
RD
80(3.15")
SD
mounting hole pitch
24-
POWER
Pin
No.
232IF side
24+
➀
RS232C device side
3) Interlink serial cross cable used,
BFM #0 communication format: b9 = 1, b8 = 1, RS232C interlink connection mode
3. WIRING AND CONNECTION
➅
85(3.35")
➁
2) Connection with counterpart equipment of terminal specifications (when control line is used)
Cross cable used, BFM #0 communication format: b9 = 0, b8 = 1, standard RS232C mode
24V DC±10%
80mA
DC service supply of
programmable controller
may be used.
Handling of the crimp-style terminal
6.2mm
(0.24")
6.2mm
(0.24")
Use the crimp-style terminals of the dimensions shown on the figure on the left. Make sure that the tightening torque of the terminal
is 0.5 to 0.8 Nym.
Tighten each terminal securely to avoid malfunction.
Signal
name
RS232C device side
Pin
No.
Signal
name
9-pin
D-SUB
25-pin
D-SUB
SD(TXD)
3
SD(TXD)
3
2
RD(RXD)
2
RD(RXD)
2
3
RS(RTS)
7
RS(RTS)
7
4
CS(CTS)
8
CS(CTS)
8
5
CD(DCD)
1
CD(DCD)
1
8
ER(DTR)
4
ER(DTR)
4
20
DR(DSR)
6
DR(DSR)
6
6
SG(GND)
5
SG(GND)
5
7
CI(RI)
9
22
CI(RI)
9
*1
*2
*3
*1 When the CD signal is not being monitored, the CD signal pin is not required
to be connected. The 232IF only monitors the signal status (ON/OFF).
*2 The 232IF only monitors the signal status (ON/OFF).
*3 When the CI signal is not required, the
CI signal pin is not required to be connected. The 232IF only monitors the
signal status (ON/OFF).
4. SPECIFICATIONS
4.1 General specifications
General specifications excluding withstand voltage
Same as those of the main unit
Withstand voltage
500V AC, 1 minute (between the entire
external terminal and the ground terminal)
4.2 Power Supply Specifications
Internal power supply from programmable controller
5V DC 40mA
External power supply
24V DC ± 10% 80mA
4.3 Specifications
Item
Content
Transmission Standard
Conforming RS232C
Transmission distance
Max. 15m
Connected the number
1:1
Connector
9-pin D-SUB type
Pin layout of connector
1:CD(DCD), 2:RD(RXD), 3:SD(TXD), 4:ER(DTR), 5:SG,
6:DR(DSR), 7:RS(RTS), 8:CS(CTS), 9:CI(RI)
Indication (LED)
POWER, SD, RD
Communication method
No protocol by full-duplex asynchronous
Sported baud rate
300, 600, 1200, 2400, 4800, 9600, 19200
Isolation
Photo-coupler
Number of I/O points occupied
8 points taken from the programmable controller extension bus
(can be either input or output)
Applicable programmable
controllers
FX2N/FX2NC/FX3U/FX3UC series
Communication with programmable controller
FROM/TO instruction
Guidelines for the safety of the user and protection of the FX2N-232IF RS232C
INTERFACE BLOCK
5. DIAGNOSTICS
For error code, refer to the FX Communication User’s Manual.
•
This manual has been written to be used by trained and competent personnel. This is defined
by the European directives for machinery, low voltage and EMC.
•
If in doubt at any stage during the installation of the FX2N-232IF always consult a professional
electrical engineer who is qualified and trained to the local and national standards. If in doubt
about the operation or use of the FX2N-232IF please consult the nearest Mitsubishi Electric
distributor.
•
Under no circumstances will Mitsubishi Electric be liable or responsible for any consequential
damage that may arise as a result of the installation or use of this equipment.
•
All examples and diagrams shown in this manual are intended only as an aid to understanding the text, not to guarantee operation. Mitsubishi Electric will accept no responsibility for
actual use of the product based on these illustrative examples.
•
Owing to the very great variety in possible application of this equipment, you must satisfy
yourself as to its suitability for your specific application.
1) Check the status of the POWER LED provided in the 232IF.
-
When it is lit, the drive power is correctly supplied.
-
If it is extinguished, supply the drive power correctly.
2) Check the status of the SD LED and the RD LED provided in the 232IF.
-
If the RD LED is not lit while data is received or the SD LED is not lighted while data is sent,
check the instruction and the wiring.
-
When the RD LED is lit while data is received or the SD LED is lit while data is sent, the installation and the wiring are correct.
3) Make sure that the communication setting (BFM #0) of the 232IF is equivalent to that of the external
equipment. If they are not equivalent each other, correct as required.
4) Verify the status of the data send/receive device. For example, make sure that the counterpart equipment is ready to receive before starting to send data to it.
5) When the terminator is not used, check whether the send data capacity is equivalent to the acceptable data capacity. Use the terminator, if the send data capacity may be changed.
6) Make sure that the external equipment is correctly operating.
This manual confers no industrial property rights or any rights of any other kind, nor does it confer any
patent licenses. Mitsubishi Electric Corporation cannot be held responsible for any problems involving
industrial property rights which may occur as a result of using the contents noted in this manual.
7) Check whether the type of send data and the type of receive data are equivalent. If they are different,
make them equivalent.
Manual number : JY992D73501
Manual revision : C
Date
: April 2015
HEAD OFFICE : TOKYO BUILDING, 2-7-3 MARUNOUCHI, CHIYODA-KU, TOKYO 100-8310, JAPAN
JY992D73501C
Effective April 2015
Specifications are subject to
change without notice