1
.
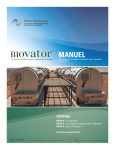
The #1 Name for In-Vessel Composting
Manual
Set-up, use and troubleshooting information
CONTENTS
PART A: Composting
PART B: The BIOvatorTM Composting Process
PART C: The BIOvatorTM Device
Limited Warranty Certificate
The #1 Name for In-Vessel Composting
User Manual (revised June 2010)
The #1 Name for In-Vessel Composting
NIOEX SYSTEMS INC.
171 Waverly Dr.
Brandon, MB
R7B 4A4
www.nioex.com
The #1 Name for In-Vessel Composting
Nioex Systems Inc.
Shawn Compton
[email protected]
1-701-370-0782
Nioex Systems USA, Inc.
John V. Walser
[email protected]
1-507-381-1556
User Manual (revised June 2010)
INTRODUCTION
vator
The BIO
™ was developed after extensive research and development work conducted at The Puratone
Corporation in Southern Manitoba. The main objective of the R&D work was “development of a cost-effective
alternative to the outdoor composting process”. The BIO
™ achieves this goal, and its introduction into
the market was the result of successful operation at Puratone’s own farms.
vator
vator
The BIO
™ is a combination of a device and process, targeting the quickest transformation of animal
carcasses into consistent - quality compost at the lowest possible cost and management effort.
This manual includes the information you may need to successfully operate the BIO
divided into three main parts:
vator™. The manual is
Part A: general information about composting, including an overview of mortality and organic composting and how it differs from regular composting.
™, including material mix requirements, how to control the Part B: how to compost using the BIO
process, set-up requirements and instructions for first time use, and general operation guidelines.
Part C: information about the BIO
™ mechanical components, including available BIO
™ models, the capacities and technical specifications of each, service and maintenance requirements, and your warranty certificate. vator
vator
vator
Appendices I and II: Frequently Asked Questions, recommendations for troubleshooting, and composting
recording sheet.
vator
With the BIO
™ you are ahead of the rest -- ready to meet any stringent environmental standards that
may restrict operations from using traditional disposal methods. By following the guidelines set out in this
manual, you will be able to transform your mortality and organic wastes into a value added to your operation
and in turn recover some or all of its capital investment.
SAFETY FIRST
People who manage on-site composting should use precautions, just as they would when working with any
other soil amendment. Minimize direct contact. Always wear a mask when opening the BIO
™ doors
for inspection or loading. If discharged compost is dry, use the mask to minimize inhalation of particles during
handling or spreading. (Good quality compost, however, should not be allowed to dry out to that extent.)
People with asthma, allergies or serious health problems should not work with soil amendments.
vator
vator™ requires paying attention to the following:
Driving system cover: The BIOvator™ comes with safety guards to all mechanical parts. Make sure the Working with the BIO
•
motor, gearboxes, pulleys, belts, chains and rollers are well covered.
vator™ or any • Loading of waste and shavings: If using a front-end loader, make sure not to hit the BIO
part of its supporting structure.
• Opening of doors: Loading and inspection doors are heavy. Make sure you are standing on a solid and stable support while opening or closing these doors.
The #1 Name for In-Vessel Composting
User Manual (revised June 2010)
TABLE OF CONTENTS
INTRODUCTION
SAFETY FIRST
PART A: COMPOSTING
1.
COMPOSTING
1.1. What is composting?
1.2. Mortality composting
vator™ COMPOSTING PROCESS
PART B: THE BIO
2.
MATERIAL REQUIREMENTS
2.1.
2.2.
2.3.
2.4.
3.
OPERATING THE BIO
3.1.
3.2.
3.3.
3.4.
4.
CONTROLLING COMPOSTING CONDITIONS
4.1.
4.2.
4.3.
4.4.
The “Recipe”
Carbon and Nitrogen
Moisture Content
Heat and Aeration
vator™
Guidelines for First Time Operation
Guidelines for Regular Operation
Guidelines for Higher Than Average Mortalities
Winter Operation
Temperature and Moisture Control
Bones
Odour
Flies, Insects, Vermin, and Scavengers
vator™ DEVICE
PART C: THE BIO
vator™
BIOvator™ Set-up Instructions
BIOvator™ Description of the device
BIOvator™ Components & Technical Specifications
BIOvator™ Models and Capacities
5.
THE BIO
5.1.
5.2.
5.3.
5.4.
6.
MAINTENANCE AND SERVICE GUIDE
6.1. Maintenance Guidelines
Appendix I: FAQ and Troubleshooting
Appendix II: Compost Control Conditions Monitoring Sheet
Appendix III: Compost Lab Analysis
Limited Warranty Certificate
The #1 Name for In-Vessel Composting
User Manual (revised June 2010)
PART A: COMPOSTING
1. COMPOSTING
1.1. What is Composting?
Normal decay of any organic material occurs naturally, due to the action of micro-organisms. Some of these
micro-organisms (bacteria and fungi) can live without air (anaerobic) and the rest (aerobic) need air to survive
and carry out the decomposing of organic material.
General composting of organic matter is a method of speeding up the normal decay processes caused by
bacteria and fungi. During this process, bacteria and fungi decompose organic material in a predominantly
aerobic (with air) environment. These micro-organisms break down organic material into a stable mixture called
compost. Brown to dark brown in colour and odourless, compost is considered an ideal soil amendment.
1.2. Mortality Composting
In contrast to general composting, mortality composting takes place in both aerobic (with air) and anaerobic
(without air) zones. The animal carcass (high in nitrogen, with high moisture content and near zero porosity)
is placed into a mixture of bulking agent (high in carbon, with high porosity and moderate moisture content),
creating an inconsistent mixture of materials. During this stage, called the primary stage, the carcass degrades
through the action of anaerobic bacteria and micro-organisms, releasing fluids and gases which diffuse away
from the carcass and enter the aerobic zone.
In the aerobic zone, aerobic bacteria and micro-organisms degrade the fluids and gases into carbon dioxide
(CO2) and moisture (H2O). This action results in the emission of heat. The composting (complete transformation
of the mixture, including the decomposed carcass which may include a few bones, into a neutral and odourless
dark compost), must undergo a curing process to complete the transformation.
This curing process is called the secondary stage. Throughout the process, the compost is turned to allow the
aerobic bacteria to finish their job. The composting is successfully completed when you can hold a handful of
material and smell no foul odour in it, squeeze no moisture from it, and feel no heat coming out of it. This form of
composting conserves the nutrients contained in dead animals, preserves the environment, and reduces odours
and nuisance associated with storing or incinerating carcasses.
The #1 Name for In-Vessel Composting
User Manual (revised June 2010)
vator™ COMPOSTING PROCESS
PART B: THE BIO
vator
vator
vator
Besides the economic advantage the BIO
™ offers, composting with the BIO
™ is simple to manage
and results are guaranteed. The BIO
™ offers a continuous composting process throughout the year, and
eliminates problems associated with outdoor composting.
Mortalities or organic waste are mixed with measured quantities of wood shavings and occasionally water.While
anaerobic activities are underway inside carcasses, aerobic micro-organisms are also in action throughout the
vessel, breaking all organic matter down into humus-like material that is consistent in quality and can be used
as a soil-enhancing agent. Unlike outdoor composting, the BIO
™ offers a highly controlled process, which
accelerates the natural process of decaying. Regardless of outdoor conditions, the composting temperature
inside the BIO
™ is always higher than 100˚F/38˚C. In less than 7 days in summer (14 days in winter), the
bulk of the composting process is finished inside the BIO
™, and the operator can discharge and pile it up,
or recycle it back with the addition of more mortalities and less wood shavings.
vator
vator
vator
2. MATERIAL REQUIREMENTS (using mortalities as a feedstock
example)
2.1. The “Recipe”
To survive and effectively do their intended job, micro-organisms that speed up the decaying process of
carcasses need:
•
•
•
•
Carbon and Nitrogen
Moisture
Heat
Aeration
vator
While composting may eventually occur naturally, the BIO
™ process utilizes proper mixing of those
ingredients so that composting occurs rapidly, minimizing odours and nuisance problems and yielding good
quality compost. The following presents the “recipe” that must be followed for successful composting.
2.2. Carbon and Nitrogen
Carbon and nitrogen are key compost ingredients. While the dead animals themselves supply nitrogen, carbon
is supplied through the use of carbon-rich bulking material such as wood shavings or sawdust, which may be
used as is. Other woody materials, such as bark, brush, tree trimming, branches, leaves, paper, and straw
should be shredded before use.
Carbon and nitrogen, however, must be supplied in proper balance. Without such a proper balance (called
Carbon to Nitrogen or C:N ratio), microbial growth is retarded, the rate of decay slows down, and odours can
be generated. This proper balance varies between 20:1 and 40:1. Lower carbon: nitrogen ratios (lower than
20:1) may result in emission of ammonia and other odours. Higher carbon:nitrogen ratios (higher than 40:1) may
reduce compost temperature and slow down the decomposition process.
The #1 Name for In-Vessel Composting
User Manual (revised June 2010)
Carbon to nitrogen ratio is the weight of carbon divided by the weight of nitrogen in the composting material.
When adjusting C:N ratio of a mixture for composting, the C:N ratio of each added material needs to be
considered.
Example:
Imagine that we would like to compost hog mortalities with added wood shavings as a bulking agent so
that the mixture has a C:N ratio of 25 and a water content of 50 percent. In this example, we assume
that hog mortalities contain 65 to 75 percent water, 1 percent nitrogen, and 5 to 10 percent carbon.
Wood shavings contain 5 percent water, 0.5 percent nitrogen and 25 to 50 percent carbon. Each pound
of carcasses contains an average of 0.30 lb solid, 0.01 lb nitrogen and 0.075 lb carbon, while each
pound of wood shavings contains an average of 0.95 lb solid, 0.005 lb nitrogen and 0.375 lb carbon.For
each pound of carcasses, the amount of shavings (SH) to add is calculated as follows:
Carbon in 1 lb of carcass + (SH x Carbon in 1 lb of SH)
C:N= 25=
Nitrogen in 1 lb of carcass + (SH x Nitrogen in 1 lb of SH)
(0.075 x 1) + (0.375 x SH)
(0.01 x 1) + (0.005 x SH)
where for each pound of carcass, 0.7 lb of shavings (SH) needs to be added.
If the unit weight of wood shavings is 10 lb/ft3, then we add about 0.07 ft3 of shavings to every 1 lb of
carcass.
All efforts should be made to use sawdust or wood shavings as bulking materials, because of their
better physical properties (particle size, moisture retention, etc.). Also, whenever possible, use manure
and/or recycled compost since they contain all of the nutrients needed by the micro-organisms as well
as the micro-organisms themselves, which act to ignite the composting process.
The following table lists approximate quantities that may be used as “recipes” for proper composting.
Wood Shavings
For each 1 lb of carcass, add
0.07 ft3
Or
0.035 ft3
Recycled Compost
0.035 ft3
In addition to providing proper carbon for the mix, bulking material also acts as a filter that suppresses
odours generated by the decaying process and reduces accumulation of flies and maggots. Therefore,
as a rule of thumb, carcasses should be “wrapped” completely with a 6” to 12” layer of such material.
vator
Bulking material should be stored as close as possible to the BIO
™. If an empty bin or a shed is
available, use it for storage. If stored outdoors, use tarps (or any impervious plastic sheets) to cover the
pile. Moist shavings or sawdust is better than “bone” dry material, since moisture is uniformly distributed
in wet material and it reduces the amount of water to be added.
The #1 Name for In-Vessel Composting
User Manual (revised June 2010)
2.3. Moisture Content
A proper moisture level is very important for proper composting. Like all living things, bacteria need water to
survive. To encourage bacterial growth and rapid composting, the mixture should have 40% to 60% moisture.
Lower moisture contents (less than 40%) will result in slow decaying of mortalities. Higher moisture contents
(above 60%) results in filling all pores needed to provide oxygen with moisture, replacing aerobic bacteria
with anaerobic ones that produce high odours and grow much more slowly than aerobic bacteria. Hence, the
composting rate becomes much slower.
Example:
To precisely calculate the amount of water needed for composting, let us consider the above example
again, where the water content is the weight of water in the carcass and shavings divided by the total
weight of the composting material. The following relationship will give 40% moisture content in both the
carcass and the shavings:
Water content
(%)=
(1x0.65) + (0.7 x 0.05))
x100
1 + 0.7
vator
Since carcasses have zero porosity when freshly added to the BIO
™, an equivalent amount of water (to
that contained in the carcasses) plus an additional 10% must be added to the shavings, so that the total mixture
has enough moisture content (50%) for bacteria to begin composting. This amounts to 0.5 liter of water for each
1 lb of carcass and .07 ft3 of wood shavings.
The following table shows recommended values of water added with different recipes to achieve target moisture
content of 50%
Wood Shavings
For each 1 lb of
carcass, add
0.07 ft3
Or
0.035 ft3
Recycled
Compost
Water
0.5 L
0.035 ft3
0.25 L-0.50L
These are start-up values.
As a rule of thumb, once the composting process has started within the vessel,
the moisture released from the mortalities is sufficient to maintain the required
40% to 60% moisture level in the mix.
The #1 Name for In-Vessel Composting
User Manual (revised June 2010)
2.4. Heat and Aeration
The temperature of compost is a very important indicator that the process of composting is working
properly. Warm mortalities degrade much more rapidly than cold ones. As bacteria begin to break down
the organic materials, heat is generated. As the compost warms up, different bacteria will flourish in the
higher temperatures, and the mass of composting material will be more active and break down faster. Above
150˚F/66˚C, the rate of composting will decrease as bacteria are inactivated or even destroyed by the excessive
temperature. Therefore, it is important to monitor the temperature and maintain it at the proper levels during
the different stages of composting. Generally speaking, the temperature inside the BIO
™ should be
above 100˚F/38˚C and should never be allowed to be lower than this, or to exceed 160˚F/71˚C. Unlike outdoor
composting, this range of temperature is sufficient to kill all pathogens (disease and odour causing bacteria). Different temperatures may overlap inside the BIO
™, with higher levels normally at the front end and
lower temperatures close to the discharge opening. These varying levels of heat are direct results of the actions
of the aerobic bacteria.
vator
vator
vator
Since these bacteria need oxygen, open spaces throughout the BIO
™ are important so that air can
move through the compost. It is estimated that 5% oxygen (or more) is essential for aerobic action. This level
is maintained by maintaining 35% to 50% porosity in the compost; therefore, it is important not to over-wet the
wood shavings. It is also important not to over-fill the BIO
™ (more than 75%) to allow some aeration
through the empty portion of the vessel.
vator
3. OPERATING THE BIOvator™
3.1. Guidelines: for First Time Operation
First: Testing:
• Make sure all doors open and close freely, and that all bolts for hinges and locks are secured with the proper nuts and washers.
• Make sure all chains and rubber belts connecting the motor and gearboxes to the vessel are attached properly.
• Make sure the pillow block is secured to the vessel shaft.
• Make sure the nylon casters are placed properly inside the channels.
• Make sure the motor is connected to the correct power outlet.
• Close all doors, turn power on, and observe rotations for at least 2 revolutions before loading for the first time.
vator™ for first time use
Second: Preparing the BIO
•
Add 8” to 10” layer of shavings at the bottom of the BIO
of the vessel (or at least at the loading door section).
vator™, preferably along the whole length 8” to 10” of shaving or
recycled compost
The #1 Name for In-Vessel Composting
User Manual (revised June 2010)
•
Moisten the shavings - not excessively, just enough for the shavings to absorb moisture without getting mushy or fully saturated.
8” to 10” of shaving or
recycled compost
•
Add feedstock. Make sure not to overcrowd the loading area.
4” to 6” of shaving or
recycled compost
•
Add another layer of shavings (4” to 6”) on top of feedstock. Make sure all flesh is covered.
The #1 Name for In-Vessel Composting
User Manual (revised June 2010)
•
Again, add enough water to the shavings to moisten it without over soaking it.
4” to 6” of shaving or
recycled compost
•
Close doors and leave for 4-5 days, or until temperatures reach 100˚F/38˚C, after which you may begin regular operation.
3.2. Guidelines for Regular Operation
vator™, or when temperatures reach 100˚F/38˚C, regular operation
In 4 to 5 days from first loading of the BIO
may commence.
The composting process begins by loading feedstock and adding properly calculated moisture and bulking
material, then rotating the BIO
™. Continue monitoring heat and moisture of the compost. Adjustments
to amounts of bulking material and/or moisture are done according to levels of heat inside the BIO
™.
Controlling these conditions along with the slow movement of material drastically reduces the time of
composting. Material reaches the discharge end in less than a week and it is then ready for discharge. Part of
the discharged material is recycled back into the BIO
™ while the rest is stockpiled until ready for use.
vator
vator
vator
The following are general instructions for maximum results of the BIO
vator™.
vator™ With Mortalities:
First: Loading The BIO
•
If your operation produces daily mortalities at a rate approaching that specified in the average daily capacity of the BIO
™ (refer to section 5.4), you may have to load the BIO
™ on a daily basis. If mortalities are produced on an irregular basis, as is the case with most operations, you may want to do the loading 2 or 3 times a week instead, provided carcasses are not rotting.
vator
The #1 Name for In-Vessel Composting
vator
User Manual (revised June 2010)
vator
The BIO
™ may even allow you to load only once a week, provided that the amount
loaded does not exceed the weekly rates specified in the BIO
™ weekly capacity. Of
course, you may add any amount of mortality less than that for daily or weekly averages.
vator
vator
As a rule of thumb, you may load the BIO
™ with more than its daily
capacity as long as weekly capacity is not exceeded.
•
•
•
vator™ is not rotating and that power is disconnected.
Depending on the size of mortalities, you may use one or both loading doors. The BIOvator™ may be set right on the ground to facilitate loading. However, for large size mortalities or if the BIOvator™ is placed on a higher elevation, you may use a loader to load mortalities.
Make sure the section of the BIOvator™ under the loading doors has enough area to accommodate the mortalities you are about to load. If this section is overcrowded, shut the doors, connect the power, and start rotating the BIOvator™ for as many rotations as are needed to Before loading, make sure the BIO
push the material forward and away from the loading area.
As a rule of thumb, do not load additional mortalities unless the area under the
loading doors is less than 50% full.
•
Add part of the required shavings or a combination of shavings and recycled compost on top of carcasses already existing in the BIO
™ before adding the new mortalities.
•
Add the new mortalities, and then cover with the balance of the required shavings or a combination of recycled compost and shavings.
•
If water is required, add uniformly.
vator
If no calculations were done, as a rule of thumb, add a 2” to 4” layer of shavings
(or a combination of shavings and recycled compost, 50/50) on top of old
carcasses. Then cover the new loaded mortalities with a 6” to 8” layer of
shavings (or a combination of shavings and recycled compost, 50/50), or make
sure that the flesh of different carcasses are separated and totally hidden in the
bulking material.
new loaded
carcasses
old carcasses
The #1 Name for In-Vessel Composting
User Manual (revised June 2010)
vator™
The reasons for turning the BIOvator™ are:
Second: Turning The BIO
1. Aeration, so that porosity of mix is enhanced and aerobic bacteria get enough oxygen to survive and do their job properly.
2. Moving materials towards the discharge opening.
3. Discharging compost. (from the discharge opening)
The following guidelines may be helpful in deciding how much rotation is needed:
•
If adding mortality is done regularly, with amounts reasonably close to that suggested in the capacities (e.g. adding 200 lb to 300 lb daily, or 1000 lb 2 to 3 times a week), you may rotate the BIO
™ for 4 to 8 revolutions per day (about 1 to 2 hours per day). This rate is found to be enough for aeration purposes.
•
If you need to add new mortalities and find the loading area overcrowded with old carcasses, you may rotate the BIO
™ as many times as necessary to clear this area before adding the new carcasses.
vator
vator
As a rule of thumb, with each complete revolution, the material inside the
BIO
™ moves 6” to 12” towards the discharge opening.
vator
vator™
BIO
vator™
It is a good practice not to keep the BIOvator™ more than 75% full with material. Therefore, once
the level of compost reaches the discharge opening at the back of the BIOvator™, it should be kept
open during rotation. As the BIOvator™ rotates, finished compost is scooped and pushed through the
Third: Discharging The Compost From The BIO
discharge opening.
As a rule of thumb, with each complete revolution, 5 lb to 10 lb of compost
(approximately 0.5 ft3 to 1 ft3) is pushed through the discharge opening.
3.3 Guidelines for Higher Than Average Mortalities
When dealing with grow/finish operations it is typical to have low mortality weights during the beginning of
a cycle with higher mortality weights as the animals get larger. Mortality amounts increase throughout the
grow/finish period and during disease breaks, occasionally creating capacity requirements in excess of the
BIO
™’s recommended daily capacity. However, the BIO
™ has been demonstrated to handle
mortality weights exceeding the weekly capacity for short periods of time during high mortality peaks.
vator
vator
The #1 Name for In-Vessel Composting
User Manual (revised June 2010)
vator
In order to effectively utilize the BIO
™ and comply with Provincial and State requirements for maintaining
a temperature of 130˚F/55˚C for a minimum of 5 days, the following procedures will be applied. Standard Operations for normal spikes in mortality during the grow/finish process:
vator
Continue to fill the BIO
™ to its rated capacity of mortality. As capacity requirements increase,
producers should increase the daily rotations of the BIO
™ (up to 24 revolutions), which will move
the product through faster and allow as much as double the daily recommended loading rate to be
placed in the BIO
™. Depending on the length of time and amount of overloading above weekly
capacities, the temperatures in the BIO
™ may drop below the 130˚F/55˚C standard, which may
result in an end product that is not in a mature state and will not have met the 5 days, 130˚F/55˚C
requirement.
vator
vator
vator
At this point, producers should store this product in a bin with additional fresh shavings so that it can
be recycled into the BIO
™ when mortality rates have decreased or ended due to the end of the
grow/finish cycle. This will ensure a complete composting process and allow the BIO
™ to remain
active, aerobic, and ready as producers await the next turn of animals, which in some cases may be
as long as 6 weeks. This procedure will ensure that the BIO
™ maintains constant mortality
consumption throughout the entire grow/finish process and that all mortalities will be disposed of
following the proper Provincial/State guidelines.
vator
vator
vator
Operation for higher than normal (catastrophic) mortality spikes in grow/finish process:
If a producer experiences mortality that exceeds a normal spike in mortalities, a static compost pile
should be started in an empty compost bin. Producers should put fresh shavings onto the floor of the
empty bin (12-18inches) and lay the mortalities side by side until that layer is complete. Repeat the
process for the next layer if needed or cover the pile with the fresh shavings. Producers with large
animals such as sows may find that 24 inches or more may be required on each layer to contain any
leachate from the mortalities.
Continue this procedure until the end of the grow/finish cycle or until mortality rates are within the
™’s normal loading recommendations. Producers may then begin putting the static pile back
BIO
into the BIO
™; however they may wish to leave the static pile for 30 days to avoid any leachate
or odor issues.
vator
vator
vator
Following this procedure will ensure that the BIO
™ maintains constant mortality consumption
through the entire grow/finish, and that all mortalities will be disposed of following the proper Provincial/
State guidelines.
vator™
Example situation: Poultry or Swine Operation with a 42’, 500 lb /day-3500 lb/week capacity BIO
during high mortalities or end of a grow/finish cycle.
As producers anticipate mortalities above 3500 lb. /week, begin increasing revolutions from the
standard rate of 12 revolutions per day to 14 when you approach 500 lb/day. Note: The rate you increase the rotations depends on how soon you anticipate higher mortality
rates. Don’t wait to increase revolutions until you are over the standard daily capacity.
For example:
At 400-500 lb/day. Rotations would remain at 12 revolutions (normal),
Anticipating: 500+ pounds a day increase to 14 revolutions
Anticipating: 600+ pounds a day increase to 16 revolutions
Anticipating: 700+ pounds a day increase to 18 revolutions
Anticipating: 800+ pounds a day increase to 22 revolutions The #1 Name for In-Vessel Composting
User Manual (revised June 2010)
vator
Anticipate higher mortality rates and speed up the BIO
™ in order to make additional room as
needed. As mortalities decrease, reduce the revolutions accordingly back to 12-14 per day and begin
recycling any compost that did not complete the minimum of the 5 days at 130˚F/55˚C requirement.
If any static compost piles were used, they should be recycled back into the BIO
™ during this
period.
vator
**It is important that producers clean out bins prior to new production cycles or during low mortality
periods in order to be prepared for unexpected spikes in mortality.
3.4. Winter Operation
As long as it is managed properly, composting continues consistently throughout the year. However, the
process can sometimes be quickly disrupted during cold weather, due to mismanagement. This disruption may
manifest itself in the form of compost temperature dropping below that required, or even total failure. Therefore,
the BIO
™ offers its users a unique advantage over other composting systems. Besides the R8 foam
insulation preventing loss of heat from the inside and the full enclosure of the vessel, the BIO
™ can be
set up close to any winter ventilation exhaust fan. The warm and moist air exhausted from the barn can greatly
contribute to maintaining conditions in and around the BIO
™ within reasonable levels.
vator
vator
vator
vator
BIO
™’s can be enclosed in buildings with proper ventilation to aid in cold climate operation but it is not
a necessity. Protection from prevailing winds is all that is required for continued operation of the BIO
™
year round.
vator
4. CONTROLLING COMPOSTING CONDITIONS
vator
Unlike any other mortality disposal methods, composting with the BIO
™ is a “forgiving” process as long
as a minimum level of management is provided. Such management is needed to control conditions inside
the BIO
™ and to eventually produce good quality compost in the shortest period of time. The following
sections present different ways of controlling the composting process:
vator
4.1. Temperature and Moisture Control
Remember, moisture level should be between 40% and 60%.
Note that the compost should appear moist, but not soggy. If moisture can be squeezed from a handful
of compost material, it is usually too wet for effective composting. Drier bulking material should be
added and mixed with the wet material. On the other hand, if compost looks dry, add water to obtain a
damp feel and appearance.
vator
As a rule of thumb, moisture at the first 1/3rd of the BIO
™ (at the loading
zone) should not exceed 60%, while moisture at the middle 1/3rd should be
between 40% and 50%. Maximum moisture at the end 1/3rd is 40%.
The #1 Name for In-Vessel Composting
User Manual (revised June 2010)
As for the temperature, remember that if it falls lower than 100˚F/38˚C, the process slows down. If higher than
150˚F/66˚C, there is a risk the composting microorganisms are being destroyed. Lower temperature is an
indication of lack of shavings, high C:N ratio, or too much moisture. It may also be due to lack of oxygen. It is
therefore important to maintain these parameters within the required limits. Unlike outdoor composting, the
BIO
™ has the advantage of rotation that allows the compost to aerate and maintain the temperature
within the required limits. Turning the BIO
™ for 5 to 10 turns every day achieves that. It is also suggested
that not more than 75% of the BIO
™ is kept full with compost material.
vator
vator
vator
vator
As a rule of thumb, temperature at the first 1/3rd of the BIO
™ (at the loading
zone) should be above 100˚F/38˚C. Temperature at the middle 1/3rd should be
above 110˚F/43˚C. The temperature of the compost (or material at the back 1/3rd)
may be between 80˚F/27˚C and 90˚F/32˚C.
The #1 Name for In-Vessel Composting
User Manual (revised June 2010)
vator
There are a number of ways to monitor both the temperature and moisture inside the BIO
™. The most
effective method is to use a 32” hay bale tester. The probe can be used to measure both temperature and
moisture of the compost. The frequency of monitoring temperature and moisture is dependent on:
o The frequency of adding mortalities: It is good practice to measure temperature and moisture every time before you add mortalities.
o
vator
The experience of the operator: As the BIO
™ operator gains “hands on” experience with compost and its conditions/requirements, measuring of temperature and moisture can be done bi-
weekly or monthly, unless problems happen (e.g. foul odour, flies, no sign/feeling of heat when opening any of the BIO
™ doors etc).
vator
When measuring, take the average of three readings. Record values on a data sheet similar to that shown in
Appendix II.
Monitoring and recording temperature and moisture ensures that the composting process is progressing
properly and will alert you to any problems in the process. These problems and how to rectify them are listed in
Appendix I (troubleshooting).
vator
The BIO
™ also comes with two thermometers installed in the wall of the drum (see photo below) to give
the operator a quick view of the temperatures at the loading and inspection zones. These are in place to alert
the operator of any drastic changes in operating temperature that could indicate a possible problem. These are
a guideline only, and do not necessarily represent the actual temperatures in the center of the compost mix.
Typically, temperatures will be higher in the center than the readings on the surface thermometers.
The #1 Name for In-Vessel Composting
User Manual (revised June 2010)
4.2. Bones
Some bones, such as large skulls, teeth, or ball joints, may not be fully composted in the same short time as
flesh and muscles. The BIO
™ has an optional bone screener attachment (see photo below) that prevents
the bones from exiting with the compost. Bones carry on to their own discharge pile. It is estimated that some
of the bones may take up to 3 months to break down and disappear. If longer periods of time are noticed to
break down these bones, look for reasons the process is being slowed. Many times it is because of not enough
shavings in the system.
vator
4.3. Odour
vator
Odour does not generate in a correctly managed BIO
™. The presence of odour is an indication of one,
some, or all of the following conditions: excessive load at the front part of the vessel, too low or high moisture
content, or lack of adequate shavings covering the carcasses. Odour can also be noticed if partially decaying
carcasses are added to the compost. Odour is more noticeable when opening the loading doors, inspection
doors or the discharge opening. It is unlikely to notice such odour outside The BIO
™, unless doors have
been kept open for long periods of time with such mismanaged conditions existing.
vator
Monitoring the compost temperature is a good check to avoid odour. Temperatures that are too low or do not
increase after loading indicate a problem with the process and forewarn of impending odour.
4.4. Flies, Insects, Vermin and Scavengers
vator
vator
Due to the complete confinement of the compost mixture inside the BIO
™, scavengers and vermin do
not exist. The heat produced combined with the turning of the BIO
™ also prevents development of insect
larvae or maggots. The continuous addition of dry shavings and recycled compost reduces the wet conditions
required for egg laying.
vator
Flies may appear around the BIO
™ during hot weather if doors were left open. Odour is generated due to
lack of shaving, or fluid is leaking from openings. If the latter is noticed, check the loading and inspection door
seals and make sure any leak is collected or cleaned from underneath the BIO
™.
vator
The #1 Name for In-Vessel Composting
User Manual (revised June 2010)
vator™ DEVICE
PART C: THE BIO
vator™
5. THE BIO
vator™ Set-up Instructions
5.1. The BIO
First: Selecting the BIO
vator™ Site:
vator
As long as composting is totally confined inside the BIO
™, and as long as all doors are sealed properly,
it can be located in close proximity to a building. In selecting the proper location, consider these factors:
•
Closeness to the feedstock supply.
•
Closeness to a winter exhaust fan.
•
Closeness to power and water outlets.
•
Closeness to wood shaving (or any bulk material) storage.
•
Leveled ground- concrete or gravel are preferred.
Second: Transporting, Unloading and Leveling:
vator
•
Exercise extreme caution while transporting and unloading the BIO
™ so that neither the exterior shell nor the driving components (chains, belts, motor, gearboxes, etc.) are damaged or moved.
•
The BIO
™ should be leveled on the ground. Avoid any sloping side to side, but a slight incline towards the discharge is acceptable to keep accumulation of liquids at the loading zone. Leveling will also prevent structural or mechanical damage due to impact when loading mortalities and to long-term stresses.
•
Avoid placing the BIO
™ skid right on the ground. Prevent direct contact with wet conditions and subsequent rusting by lifting the skid off the ground, using wood ties or 4 by 4 strips.
•
If placed on concrete blocks, piles or any similar supports, the BIO
™ frame must be supported below the end truss and below each set of rollers to prevent any excessive deflection of the skid.
•
Avoid stopping the BIO
™ drum with the doors at the bottom. If full, excessive weight may damage door latches. Fluids may also leak in this position.
vator
vator
vator
vator
5.2. Description of the Device
vator
The BIO
™ is a device and process for disposing of organic waste material. While Part B described the
process, this part of the manual covers the equipment details.
The device is a stationary composting vessel. The composting vessel consists of a slowly rotating steel drum
that has steel paddles mounted on the inside walls. The paddles are mounted in a spiral shaped pattern with
varying spacings to allow material to move in one direction at a certain speed inside the vessel.
The vessel has loading, inspection and discharge openings. The loading openings are used for loading carcasses and bulking material.
The #1 Name for In-Vessel Composting
User Manual (revised June 2010)
The vessel is supported on side nylon rollers and a front pillow block. Nylon rollers are supported by a steel
skid. The vessel rotates at a speed of 3 revolutions per hour (or 20 minutes per revolution approximately).
5.3. BIOvator™ Components & Technical Specifications
4
3
1
2
14
11
15
10
12
5
6
13
9
7
8
The #1 Name for In-Vessel Composting
User Manual (revised June 2010)
Component
Description
Technical
Specification
Model BIO316
Model BIO418
Model BIO430
Model BIO442
1
Steel drum
Spiral welded
Mild steel 1/4” thick
Two-part epoxy
coated
16 feet long
3’ dia
18 feet long
4’ dia
30 feet long
4’ dia
42 feet long
4’ dia
2
Inspection door
17 1/2” 24” opening
SS 304 construction
Foam insulated
Nitrile seal 1 3/4” x
3/4”
Ratchet type locking
device
no door
no door
1 door
2 doors
(1 vented)
3
Steel channel
6” x 10.5 pounds per 1 channel
foot
Welded to the drum
Hot dipped galvanize
1 channel
2 channels
3 channels
4
Loading door
24” x 90” opening (2
doors)
SS 304 construction
Foam insulated
Nitrile seal 1 3/4” x
3/4”
Ratchet type locking
device
1 door
2 doors
2 doors
2 doors
5
Steel sprocket
Bolted to center of
the loading end of
the rotary vessel
Fit #60 chain
99 teeth
Fit #100 chain
89 teeth
Fit #100 chain
89 teeth
Fit # 100 chain
89 teeth
6
Pillow block
SAP208-24 for
1.5” shaft
HCP211-32 for
2” shaft
HCP211-32 for
2” shaft
HCP211-32 for
2” shaft
7
Electric motor
110 volts single
phase Baldor farm
duty motor
0.5 HP 1725
RPM 60 Hz
1 HP 1725
RPM 60 Hz
1 HP 1725
RPM 60 Hz
1 HP 1725
RPM 60 Hz
8
Speed reducer
60:1
Synthetic gear box
oil
Frame #80
Frame #80
Frame #80
Frame #80
9
Speed reducer
60:1
Synthetic gear box
oil
Frame #80
Frame #120
Frame #120
Frame #120
10
Steel frame
Hot dipped galvanize 4” x 4” x .188
thick tubing
4” x 6” x .188
thick tubing
4” x 6” x .188
thick tubing
4” x 6” x .188
thick tubing
11
Nylon roller with
sealed bearings
6” dia x 3” wide 3/4”
bore
5,500 pound
capacity each
2
2
4
6
12
Foam Insulation
1 1/2- 2” thick sprayon insulation R-8,
Cover with SS 304
liner
1
1
1
1
13
Chain
Heavy duty roller
chain
#60
#100
#100
#100
14
Drive guard
All SS 304
1
1
1
1
15
Control box
EEMAC 4X
Fiberglass
enclosure, 120VAC
1 phase, 24 hour
automated time
switch with proximity
switch de-activation
1
1
1
1
The #1 Name for In-Vessel Composting
User Manual (revised June 2010)
Besides the main components of the BIO
added:
vator™, as listed in the table above, the following features may be
•
Temperature monitoring data logger: PLC based control system for continuous monitoring of temperatures in the vessel.
•
Bone Screener attachment: Powder Coated Steel option for screening bones and inorganic material from the finished compost.
The #1 Name for In-Vessel Composting
User Manual (revised June 2010)
vator™ Models and Capacities
5.4. BIO
vator
There are four main models currently available for the BIO
™, 316, 418, 430 and 442. These models
vary in sizes and capacities to process organic material. The capacity of the BIO
™ is defined as the
maximum amount of organic material that can be processed into compost within optimum time limits and with
the highest-possible consistency. The amount of organic material is based on weekly averages a facility may
produce under normal operation.
vator ™
BIO
MODEL
Diameter
D (ft)
Length
L (ft)
316
3
vator
Estimated
Average
Annual
Capacity (lb)
Estimated
Average
Weekly
Capacity (lb)
Estimated
Average
Daily
Capacity (lb)
Example Hog Operation
Less than
45,000
850
120
-2500 finishers
-200 sow, farrow to finish
-525 sow, farrow to wean
Less than
65,000
1,250
175
-4000 finishers
-300 sow farrow to finish
-800 sow, farrow to early wean
65,000 to
130,000
2,500
350
-7500 finishers
-750 sow, farrow to finish
-1500 sow, farrow to early
wean
130,000 to
200,000
3,750
500
-10000 finishers
- 1500 sow, farrow to finish
-2600 sow, farrow to early
wean
16
418
4 18
430
4
30
442
4
42
Estimated Average Capacities are equivalent for Swine, Poultry and Processing Plants. Pre-processed
organic waste and fish waste have capacities of up to two times these rates.
6. MAINTENANCE AND SERVICE GUIDE
6.1. Maintenance Guidelines
vator™ to run properly, the following checks need to be made routinely:
In order for the BIO
•
Gearboxes should be kept full of synthetic gear oil. There is a sight glass or a plug located on the side of the gearbox. The oil level should be somewhere between the top and bottom of the sight glass. The large gearbox should be filled to the top shaft level to allow proper lubrication.
•
The drive system contains two chains. A 50 series chain used to connect the two gearboxes together, and a 60/100 series chain used to turn the main drum. Both chains have adjustable idler sprockets to keep them tight (Figures 1 & 2). These idler sprockets may need to be adjusted over time to maintain proper tension in the chains. The chains should also be lubricated annually to prevent premature wear.
The #1 Name for In-Vessel Composting
User Manual (revised June 2010)
Figure 2 – 100 series idler sprocket
Figure 1 – 50 series idler sprocket
•
The drive system also has a v-belt connecting the motor to the first gearbox. This belt may need to be tensioned periodically. Loosening motor bolts, Figure 3, and sliding the motor horizontally can tension this belt.
Figure 3 – motor bolts
Figure 4 – support roller/nylon caster
The #1 Name for In-Vessel Composting
User Manual (revised June 2010)
Figure 6 – 1 ½” bearings with chain coupler
Figure 5 – 2” bearing in pillow block
•
The support roller wheels, Figure 4, are maintenance free with stainless steel sealed bearings. The drive bearings, Figures 5 & 6, have been greased from the factory but should be greased at least annually.
In addition to the above, the following maintenance guidelines are recommended for prolonging the
BIO
™’s life:
vator
•
Rubber seals: Make sure rubber seals are fastened to the doors at all times. Loosening these seals will allow liquids to seep through the doors.
•
Removing falling material: bulking material, remnants of loaded mortalities mixed with moisture could fall on the steel skid, door frames, chains and the rest of the driving components. It is a good practice to clean underneath the BIO
™ and remove these falling materials regularly. These materials would contribute to corrosion of steel parts as well as accumulation of flies and maggots.
•
Stainless steel outer shell: check regularly for damage. Repair cuts or openings to prevent moisture from entering the foam space, which could cause damage in cold conditions.
vator
The #1 Name for In-Vessel Composting
User Manual (revised June 2010)
APPENDIX I
FREQUENTLY ASKED QUESTIONS AND TROUBLESHOOTING GUIDE
(Mortalities Compost Management)
Frequently Asked Questions
Q. Does the composting action continue during winter months in cold climate areas?
A. If started during summer or early winter (not later than November), composting would continue
during the winter months, provided thicker layers of woodchips are added on top of the carcasses after
turning and hording is used to shelter the BIO
™. The barn’s warm exhaust air may be used to keep
the heat inside the BIO
™ above 100˚F/38˚C.
vator
vator
Q. vator™?
Does it stink around the BIO
A. vator
When properly managed and when carcasses inside the BIO
™ are totally covered with enough sawdust (straw), odours are sufficiently suppressed or absorbed. Using insufficient (less than 6” cover at any time) bulking material is the single greatest factor causing odours in and around the facility.
The #1 Name for In-Vessel Composting
User Manual (revised June 2010)
Q. Is cutting/dismembering required for large carcasses?
A. No. However, if facility managers wish to speed up the process and have the means to do it,
they may put a few holes or cuts in the carcasses. It should be noted large carcasses (400-600 lbs)
would take longer to decompose than smaller ones.
Q. What about diseases, flies and pathogens?
vator
A. The high compost temperatures, cover of sawdust and full enclosure of the BIO
™
are sufficient to restrict pathogen survival and fly incubation. No disease outbreaks attributable to
composting have been documented to date.
Q. What are other sources of bulking materials?
A. Any granular organic material with high carbon content should work. Long fibrous material,
such as hay or cornstalks, may be used. Lack of absorption, however, may be more evident with these
materials because of their poor moisture retaining qualities. Shredded paper has been used at some
facilities.
Q. What is the composition of the compost?
A. Generally speaking, compost includes the following nutrients: Nitrate, Ammonium, Calcium,
Phosphorous, Potassium, Magnesium, Iron, Manganese, Sodium and other salts. The amounts of these
nutrients in the compost will vary according to the age of the compost and management of the process.
Q: What is the compost material used for?
A. If properly managed, the qualities of the finished compost would resemble that of peat moss.
Therefore, compost can be used as a peat moss substitute in greenhouse and landscape applications,
such as:
•
For improvement of organic matter content and fertility of soil.
•
For increasing water holding capacity.
•
For increasing aeration and drainage of clay soils.
•
For erosion protection of lagoon banks.
The #1 Name for In-Vessel Composting
User Manual (revised June 2010)
Q. Are there any additives that can be used to speed up composting, even further?
A. Q. Some composting experiments where inoculants were used have been documented. The results were inconclusive in showing any advantage from use of such inoculants.
Does composting fail?
A. If not managed properly, compost may not heat enough particularly in wintertime, and may produce odours in summer. Composting is a biological process that depends on providing nutrients and an environment favorable for bacterial decomposition. Common mistakes are:
vator
•
Failure to provide enough shaving (or bulking material) inside the BIO
™ to provide for the bio-filter and to maintain an appropriate carbon source for the system to operate over time
•
Overloading the BIO
vator™ and creating a large anaerobic mass
Fortunately, rectifying strategies can be followed to reverse such failures. (Discussed in the trouble shooting
section)
Q. How can I tell when compost is cured?
A. If steam is emitting from the discharged pile, it is not fully cured. You may leave it in the pile
for more time, or recycle it back into the BIO
™. Once pile temperature is down to ambient
temperature and compost color is dark brown, it is cured.
vator
Q. How large a carcass can be put in the BIO
A. vator™?
vator™. Expect longer Mature sows and boars over 600 lb can be loaded in the BIO
composting time for larger carcasses.
The #1 Name for In-Vessel Composting
User Manual (revised June 2010)
Q. What about contaminants in the finished compost?
A. Again, if managed properly, the finished compost would have no contaminants. Tests
conducted on finished compost (provided in Appendix III) where composting conditions were within
the limits described in Part B, have shown no contaminants, such as Ecoli or Fecal Coliform present. If
proper compost recipes and operational protocol are followed, the BIO
™ will produce “Class A”
compost.
vator
Q. How do I add moisture?
A. The best way to uniformly distribute the water is to use a garden hose with a sprinkle/spray
head. Adding water with a pail would cause some parts to be very wet and others to remain dry. Be
careful not to over water and create anaerobic conditions.
Q. vator™?
Can finished compost be used as a full substitute for fresh shavings in the BIO
A. Experience to date indicates that up to 50% of the fresh shavings requirement may be
substituted with finished compost. The long-term viability of the process cannot be maintained if fresh
shavings are not added, because the source of carbon would eventually be exhausted. Advantages of
recycling finished compost include: less fresh shavings required, active bacteria and heat are available
in the finished compost, less finished compost to haul for spreading and speeding up the disappearance
of bones.
Q. What about maggots?
A. Generally, all kinds of earthworms are beneficial for composting. Large-sized maggots are
particularly beneficial for composting. The maggots to be concerned with are the small, pale-coloured
housefly larvae, which may present a public health problem. Usually, the main cause for harmful larvae
is lack of shavings inside the BIO
™ or leakage of fluids. Therefore, it is good practice to maintain
a sufficient cover of shavings on top of the carcasses and eliminate any leakage.
vator
The #1 Name for In-Vessel Composting
User Manual (revised June 2010)
Q. vator™ be set right on the ground?
Yes, the BIOvator™ may be set on gravel, concrete pads or supports.
Can the BIO
A. The #1 Name for In-Vessel Composting
User Manual (revised June 2010)
Mortality Composting Trouble Shooting Guide
Probable Symptom
Probable Cause
Other Clues
Suggestions for Remedy
Compost fails to heat
• Materials too dry
• Materials too wet
• Not enough nitrogen, or slow
decaying
• Too much turning
• Cold weather
• Cannot squeeze water from
material; or moisture reading is
below 30%
• Materials look and feel soggy;
mixture slumps; or moisture
reading is more than 60%
• C:N ratio greater than 50:1
large amount of woody materials
• Add water, liquid manure or wet
bulking agent
• Add dry bulking agent
• Add more carcasses, perhaps cut
or poke holes in them
• Stop rotation until heat is back
• Use external heat; add highly
degradable materials (manure)
Failure to maintain
temperature
• Compost has dried out
• Cold weather
• Too much moisture
• Looks very dry
• Looks soggy
• Open pile and add water or manure
• Ensure adequate cover with
bulking agent and avoid adding
frozen carcasses- use external heat
• Add fresh bulking agent to absorb
moisture
Failure to decompose carcass
tissues
• Improper C:N ratio
• Carcasses layered on top of
each other
• Carcasses placed on the inside
walls of the BIOvator™
• Carcass is intact even after
2-3 days of being added to the
BIOvator™
• Improper mix of ingredients or very
old shavings, sawdust or straw
• Make sure there is 4” -6” of bulking
material between layers
• Fill at least 6” of space between
carcass and inside wall of the
BIOvator™ with shavings
Smell of decaying flesh
• Inadequate cover of bulking
material over carcass
• Extended period of low
temperature
Pile overheating (temperature
greater than 150° F/66°C )
• Insufficient aeration in the
bulking agent layer
• Pile is too large
•Low moisture
• Pile is too moist
• BIOvator™ is more than 75% full
• Add drier material and start
rotation until well mixed with wet
material
• Start discharging
• Add water
Extremely high temperature
(greater than 170°F/77°C)
•Spontaneous combustion
• Low moisture content; pile
interior looks or smells charred
• Start rotation and discharging;
add water to charred or smoldering
sections
High temperatures or odours
in the curing pile
• Compost is not stable
•Pile is too large
• Higher than 6 ft
• Turn and mix pile until the
temperature and moisture are
within limits or recycle back into the
BIOvator™
• Decrease pile size
Ammonia odours coming from
the curing pile
• High nitrogen level or pH
Rotten-eggs odours coming
from the curing pile
• Anaerobic conditions
• Inadequate cover over
carcasses
Fly problems
• Poor sanitation conditions
• Failure to achieve desired
conditions
• Too high moisture
Compost does not reheat even
after turning
• Low moisture
• Composting near completion
• Cannot squeeze water from
material
• Approaching expected
composting time period
• Add water and mix
• None required- you may discharge
Compost contains lumps of
materials and large bones;
texture is generally not
uniform
• Poor mixing of materials or
insufficient mixing/turning for
materials ready for discharging
• Active composting not complete
• Visible raw material; lumps of
compost
• Curing pile heats or develops
odours
• Scoop and recycle back into the
BIOvator™
• Increase retaining time inside the
BIOvator™ or improve composting
conditions
The #1 Name for In-Vessel Composting
• Cover carcass with at least 1 ft of
bulking material
• Add manure and partially cut
carcasses and cover with ft of
bulking material
• Add more sawdust
• Low pile temperature
• Add dry shaving and mix
• Maintain 6” of cover
• Check for leaks from the doorskeep the surrounding site clean and
free of garbage or debris
• Follow as above
• Add more cover of bulking material
User Manual (revised June 2010)
APPENDIX II
Date
Approx.
weight of
mortality
or organic
waste added
Approx. Gal
of water
added
COMPOST CONTROL CONDITIONS MONITORING SHEET
Approx.
weight of
bulking
material
added
Pile Temperature & Moisture
Loading Zone
F˚/C˚
%
The #1 Name for In-Vessel Composting
Weather
Condition
Inspection Zone
F˚/C˚
%
Name of
Operator
Discharge Pile
F˚/C˚
%
User Manual (revised June 2010)
APPENDIX III
hog compost
l224759 contd...
page 4 of 5
Enviro - Test
analytical report
Sample Details/Parameters
Result Qualifier D.L.
Units
Extracted
Analyzed
By
Batch
3
3
MPN/gram
MPN/gram
10-NOV-04
10-NOV-04
10-NOV-04
10-NOV-04
10-NOV-04
10-NOV-04
HNT
HNT
HNT
R237806
R237805
R237807
1
3
0.03
0.6
0.04
0.06
0.02
7
0.02
0.01
0.1
0.2
6
7
2
0.03
0.02
2
0.2
0.05
0.1
4
0.02
0.03
0.2
0.006
0.006
2
mg/kg
mg/kg
mg/kg
mg/kg
mg/kg
mg/kg
mg/kg
mg/kg
mg/kg
mg/kg
mg/kg
mg/kg
mg/kg
mg/kg
mg/kg
mg/kg
mg/kg
mg/kg
mg/kg
mg/kg
mg/kg
mg/kg
mg/kg
mg/kg
mg/kg
mg/kg
mg/kg
mg/kg
15-NOV-04
15-NOV-04
15-NOV-04
15-NOV-04
15-NOV-04
15-NOV-04
15-NOV-04
15-NOV-04
15-NOV-04
15-NOV-04
15-NOV-04
15-NOV-04
15-NOV-04
15-NOV-04
15-NOV-04
15-NOV-04
15-NOV-04
15-NOV-04
15-NOV-04
15-NOV-04
15-NOV-04
15-NOV-04
15-NOV-04
15-NOV-04
15-NOV-04
15-NOV-04
15-NOV-04
15-NOV-04
16-NOV-04
16-NOV-04
16-NOV-04
16-NOV-04
16-NOV-04
16-NOV-04
16-NOV-04
16-NOV-04
16-NOV-04
16-NOV-04
16-NOV-04
16-NOV-04
16-NOV-04
16-NOV-04
16-NOV-04
16-NOV-04
16-NOV-04
16-NOV-04
16-NOV-04
16-NOV-04
16-NOV-04
16-NOV-04
16-NOV-04
16-NOV-04
16-NOV-04
16-NOV-04
16-NOV-04
16-NOV-04
DAG
DAG
DAG
DAG
DAG
DAG
DAG
DAG
DAG
DAG
DAG
DAG
DAG
DAG
DAG
DAG
DAG
DAG
DAG
DAG
DAG
DAG
DAG
DAG
DAG
DAG
DAG
DAG
R238805
R238805
R238805
R238805
R238805
R238805
R238805
R238805
R238805
R238805
R238805
R238805
R238805
R238805
R238805
R238805
R238805
R238805
R238805
R238805
R238805
R238805
R238805
R238805
R238805
R238805
R238805
R238805
55.4
30.4
0.5
0.1
%
lb/ton
17-NOV-04
16-NOV-04
17-NOV-04
17-NOV-04
HSL
JRB
R239495
R239093
5.4
6.3
2.7
6
39.3
20.7
0.019
1.85
0.061
0.075
0.4
0.4
0.4
1
0.4
0.4
0.004
0.004
0.004
0.004
lb/ton
lb/ton
lb/ton
lb/ton
lb/ton
lb/ton
lb/ton
lb/ton
lb/ton
lb/ton
19-NOV-04
19-NOV-04
19-NOV-04
19-NOV-04
19-NOV-04
19-NOV-04
19-NOV-04
19-NOV-04
19-NOV-04
19-NOV-04
19-NOV-04
19-NOV-04
19-NOV-04
19-NOV-04
19-NOV-04
19-NOV-04
19-NOV-04
19-NOV-04
19-NOV-04
19-NOV-04
BEM
BEM
BEM
BEM
BEM
BEM
BEM
BEM
BEM
BEM
R239907
R239907
R239907
R239907
R239907
R239907
R239907
R239907
R239907
R239907
L224759-3 SAMPLE #3 ENDPRODUCT
Sample Date: 10- NOV-04
Matrix:
Escherichia Coli
<3
Salmonella
<3
Not isolated
Metals
Silver (Ag)-Total
Aluminum (Al)- Total
Arsenic (As)- Total
Boron (B)-Total
Barium (Ba)- Total
Beryllium (Be) - Total
Bismuth (Bi)- Total
Calcium (Ca)- Total
Cadmium (Cd)- Total
Cobalt (Co) - Total
Chromium (Cr) - Total
Copper (Cu) - Total
Iron (Fe) - Total
Potassium (K) - Total
Magnesium (Mg) - Total
Manganese (Mn) - Total
Molybdenum (Mo) - Total
Sodium (Na) - Total
Nickel (Ni) - Total
Lead (Pb) - Total
Selenium (Se) - Total
Tin (Sn) - Total
Strontium (Sr) - Total
Titanium (Ti) - Total
Thallium (TI) - Total
Uranium (U) - Total
Vanadium (V) - Total
Zinc (Zn) - Total
<1
299
0.29
4.9
12.5
<0.06
<0.02
43700
0.04
0.51
3.7
18.1
1020
6080
24200
76.7
0.26
2690
3.1
0.58
0.7
<4
10.7
15.5
<0.2
0.129
1.30
67
RAMB
RAMB
RAMB
RAMB
RAMB
RAMB
RAMB
RAMB
RAMB
RAMB
RAMB
Solid Manure Package MS2
% Moisture
Total Kjeldahl Nitrogen
Total Nutrients (Complete List)
Phosphorus (P)
Potassium (K)
Sulfur (S)
Sodium (Na)
Calcium (Ca)
Magnesium (Mg)
Copper (Cu)
Iron (Fe)
Maganese (Mn)
Zinc (Zn)
Refer to Reference Information for Qualifiers
(if any) and Methodology.
The #1 Name for In-Vessel Composting
User Manual (revised June 2010)
vator™
BIO
LIMITED WARRANTY CERTIFICATE
SAVE THIS CERTIFICATE.
If your unit needs servicing, contact a qualified dealer or sales
representative. When requesting service, please have the model and
serial number from the unit readily available. If your dealer needs
assistance, Nioex Systems is available to provide support.
Fill in the installation date and model and serial numbers of the unit in
the space provided below and retain this Limited Warranty for your files.
GENERAL TERMS
The term of this Limited Warranty is one (1) year on workmanship, two
(2) years on motor and gearboxes and ten (10) years pro-rated on inner
steel barrel against perforation due to corrosion in normal use. The use
of acid material will cancel this warranty. All drive components are under
warranty from the manufacturer.
The warranty commences on the date the unit was invoiced to the
customer as shown on the customer invoice.
Installation Date ____________________
Model No. ______________.
Nioex Systems Inc.
Serial No. _______________.
171 Waverly Drive Brandon MB R7B 4A4
The #1 Name for In-Vessel Composting
User Manual (revised June 2010)
NOTES:
The #1 Name for In-Vessel Composting
User Manual (revised June 2010)
The #1 Name for In-Vessel Composting
User Manual (revised June 2010)