1
TaxWise
For Tax Year 2010
User Guide
T A X W I S E
User Guide
© 2010 CCH Small Firm Services. All rights reserved.
225 Chastain Meadows Court NW
Suite 200
Kennesaw, GA 30144
No part of this manuscript may be copied, photocopied, reproduced, modified or distributed in any form or by any
means without permission in writing from CCH Small Firm Services. Information in this manuscript is
subject to change without notice. Any software described in this manuscript is furnished under a license
agreement and may be used or copied only in accordance with the terms of the agreement.
CCH Small Firm Services is not engaged in rendering legal, technical, or other professional services. Use of this
manuscript or the information in this publication does not relieve the user of complete responsibility for the
operation and functionality of its computers and/or network, for the maintenance and backup of all user data, or
for the preparation, content, accuracy, and review of all forms.
THERE ARE NO WARRANTIES, EXPRESSED OR IMPLIED,
INCLUDING WARRANTIES OF MERCHANTABILITY OR FITNESS FOR A PARTICULAR PURPOSE, MADE WITH
RESPECT TO THESE MATERIALS OR ANY OTHER INFORMATION PROVIDED TO THE STUDENT.
All trademarks are the property of their respective owners.
November 2010
Version 25.00
Table of Contents
What's New in TaxWise 2010?
New Forms for Tax Year 2010
InterviewUsers Group in Security Manager
Select All button on Select Acks to Print Window
Make Extension e-files now available in Return Diagnostics
Ability to resend Check Print Notification records
IRS Publication 17 available from TaxWise toolbar
User Guide available from TaxWise toolbar
Ability to launch Non-Tax Products from within TaxWise
New Client Letter Variables
Ability to accept payments through iTransact
Installing and Configuring TaxWise
Installing TaxWise from the CD
Installing TaxWise from the Customer Support Site
Configuring a Network Installation
Carry Forward Setup Information from Prior Year
Configuring TaxWise Setup Options
Entering Company Information
The General Tab
The Printer Setup Tab
The Color Setup Tab
Registering TaxWise
Registering to Transmit for Multiple Locations
Getting Started
1
2
2
2
2
2
2
2
3
3
5
5
10
12
14
14
15
16
18
19
20
20
23
Starting TaxWise
Logging in to TaxWise
Return List Sort Options
Introducing the TaxWise Home Page
Tasks You Do Most Often
Creating Tabs
Creating a Tab for a Document
Using the TaxWise Menus
The
The
The
The
The
The
The
The
The
The
The
1
File Menu
Edit Menu
Form Menu
Letter Menu
View Menu
Bank Menu
Reports Menu
Communications Menu
Tools Menu
Non-Tax Products Menu
Help Menu
Getting Help in TaxWise
Using TaxWise Help
F1 Contextual Help
Context-Sensitive Help
IRS Instructions
Using Adobe® Reader®
Viewing TaxWise and Help at the Same Time
Visual Cues in TaxWise
Using Administrator Features
Assigning a Password to the Admin User
Carry Forward Previous Year Defaults for Admin
Configuring Defaults
Best Practices for Editing Tax Form Defaults
23
26
27
28
29
31
32
32
33
35
36
37
37
38
38
39
40
41
43
43
43
45
46
46
47
47
47
49
50
51
52
52
Editing Default Information on Forms
Changing Default Information
Printing a Client Letter with a Return
Using Client Letters as Stand-alone Cover Sheets
Using Client Letters as Slip Sheets
Working with User-defined History Lists
Understanding History Lists
Pre-defined History Lists
User-defined History Lists
Creating User-defined History Lists
Editing Return Stage Options
Locking Your Price Sheet
Exiting Edit Tax Form Defaults Mode
Modifying Print Defaults
Understanding Print Packets
Editing Print Packets
Watermark Options
Adding Forms to Print Packets
Selecting Print Packets for All Print Sessions
Change Print Packet Settings for One Print Session
Setting Print Defaults for the Client Organizer
Setting Print Defaults for Classic Print
Creating Private Forms Lists
Selecting and Using a Pre-Defined List
Creating a Custom Private Forms List
Removing a Saved Private Forms List
Working with Users and Groups
Understanding Security Manager
Opening Security Manager
Understanding Default Groups
Adding Groups
Modifying Groups
Deleting Groups
Understanding Default User Names
The Admin User
The Guest User
The Training User
Adding User Names
Modifying User Names
Deleting User Names
Restrict Report Access
Using Return Explorer
Opening Return Explorer
Return Explorer
Copy Files to Another Location
Delete Files
Move Files to Another Location
Rename a Return
Working with Tax Returns
Getting Started
Carrying Forward Prior Year Data
Loading Prior Year Data into a Current Tax Return
Prompt if Return not Carried Forward
Copying Data from One Computer to Another
Flagging Last Year's Clients
Starting a New Return
Working with the Main Information Sheet
Self-Select PIN Method
Entering Self-Select PIN Information
Practitioner PIN Method
53
55
55
56
56
56
56
56
57
57
59
60
61
61
61
62
62
63
64
65
66
67
68
68
69
70
71
71
72
73
74
75
75
76
76
76
77
77
79
80
81
85
85
86
88
89
90
91
93
93
94
97
97
98
100
102
103
103
104
105
Entering Practitioner PIN Information
Working with Forms
Adding a Form from the Find a Form List
Adding a New, Blank Copy of an Open Form
Linking to a Form
Working with Child and Parent Forms
Switching to a Different Parent Form
Opening and Linking a Form from Find a form
Opening a Form by Linking
Removing a Form
Moving Around in a Form
Scrolling Through the Forms in a Return
Saving Returns
Viewing Two Forms at One Time
Opening a Local Document in the Workspace
Working with Entries
106
107
107
108
108
109
110
111
111
112
113
113
114
114
116
116
Completing Entries on a Form
Understanding Color Coded Entries
Working with Calculated Entries
Working with Estimated Entries
Entering Correct Data in Estimated Entries
Using the Calculator
Using the ZIP Code Locator
116
117
118
118
119
119
120
Working with Statements and Scratch Pads
120
Using Statements
Inserting, Deleting, Sorting Lines on Statements
Using Scratch Pads
Printing a Scratch Pad
Using the Timer
Using Search and Query Features
Understanding the Query Results Information
Working with the Client Diary
Entering a Note from Query Results
Entering a Note from within a Tax Return
Performing a Quick Search for Return Status
Using the K1 Pass-Through Feature
Loading K1 Information into a New 1040 Return
Updating K1s in 1040 Returns after Changes
Using the Depreciation Worksheets
Understanding Electronic Filing
Benefits of MeF
Changes in TaxWise
Determining MeF Eligibility
Legacy vs. MeF in TaxWise
Working with Client Letters
Introducing the Client Letter
Using the Letter Menu
Using the Edit Menu
Working with Letter Toolbars
Client Letter Formatting Toolbar
Working with Client Letter Templates
Working with Standard Letter Templates
Adding a Client Letter Template
Adding More Letter Templates to a Return
Previewing the Letter Template
Printing Only the Letter Template
Removing a Letter Template
Modifying a Standard Letter Template
Printing Tax Returns
Printing a Single Return
120
121
122
123
123
125
125
126
126
127
128
130
130
130
130
133
133
133
134
134
135
135
136
136
137
138
138
138
141
142
142
143
144
144
145
145
Printing
Printing
Printing
Printing
an Open Return
a Closed Return
to a PDF file
to Document Manager
Printing Forms
Printing an Open Form
Printing a Blank Form
Printing a Mailing Label
Troubleshooting Font Problems
Working with Invoices and Payments
Setting Up Invoices
Setting Up the Price Sheet
Recording Payments
Entering Payments on the Price Sheet
Entering Payments in Query Results
Accepting Payments with iTransact
Printing an Invoice
Conducting Interviews
Understanding TaxWise Desktop Interview
Starting an Interview
145
147
149
150
150
150
150
151
152
155
155
155
157
157
158
160
161
163
163
163
Working with Bank Products
167
Introducing Bank Products
167
What is a RAL?
What is an ERC?
What is a DDRAL?
What is a DDR?
What is FeeCollect?
What is Audit Shield?
Understanding Bank Product Tasks
Aligning Checks
Printing Checks
Reprinting Checks
Requirements for Using Reprint Checks
Bank Authorization and Original Check Numbers
Correcting Rejected Bank Applications
Updating RAL Applications
Working with Reports
Using Management Reports
Running and Printing a Management Report
Printing Mailing Labels
Working with Non-Returning Clients
Printing the Non-Returning Client Log
Printing Non-Returning Client Mailing Labels
Backing up and Restoring Returns
Starting a New Backup
Adding to a Previous Backup
Restoring Returns
Exporting and Importing EIN Database
Exporting the EIN Database
Importing the EIN Database
Sending Mail With TaxWise
Introducing Mail
Sending Mail to SFS Support
Sending Client to Client Mail
Saving a Message
Addressing a Message to Multiple EFINs
Attaching a File to a Message
Moving a Return Sent by Another EFIN
Opening a Previously Saved Message
167
167
168
168
168
168
168
168
170
175
175
178
179
179
181
181
181
184
185
185
186
189
189
192
193
194
194
195
197
197
197
198
201
201
202
204
205
Printing a Message
Getting Acks, Mail and Updates
Importing Return Data
Client Write-Up Export and Import Procedures
Assigning Tax Lines in Client Write-Up
Importing Accounting Data
TaxWise Scan&Fill Export and Import Procedures
Exporting from TaxWise Scan&Fill
Importing TaxWise Scan&Fill Data
205
206
209
209
209
210
210
210
211
Chapter
1
What's New in TaxWise 2010?
Innovation in business is necessary to maintain the competitive edge; the new changes in
TaxWise, listed in this section, are designed to help you improve the speed and accuracy
with which you deliver your final product to the customer, thereby increasing the vitality
and relevance of your practice.
New Forms for Tax Year 2010
The 1040 package includes Form 5884-B, New Hire Retention Credit and Form 8941,
Credit for Small Employer Health Insurance Premiums.
The 1120 package includes Form 1120 Schedule UTP, Uncertain Tax Position Statement,
Form 5884-B, New Hire Retention Credit, Form 8838, Consent To Extend the Time to
Assess Tax Under Section 387 -- Gain Recognition Agreement and Form 8941, Credit for
Small Employer Health Insurance Premiums.
The 1120S package includes Form 926, Return by a U.S. Transferor of Property to a
Foreign Corporation, Form 5884-B, New Hire Retention Credit, Form 8838, Consent To
Extend the Time to Assess Tax Under Section 387 -- Gain Recognition Agreement, Form
8925, Report of Employer-Owned Life Insurance Contracts and Form 8941, Credit for
Small Employer Health Insurance Premiums.
The 1065 package includes Form 1098-C, Contributions of Motor Vehicles, Boats, and
Airplanes, Form 5884-B, New Hire Retention Credit, Form 8925, Report of EmployerOwned Life Insurance Contracts, and Form 8941, Credit for Small Employer Health
Insurance Premiums.
-1-
Chapter 1: What's New in TaxWise 2010?
InterviewUsers Group in Security Manager
The new InterviewUsers group has the same rights as a user assigned to the
SuperUser group. The difference between the two groups involves starting a new
return. When a user is assigned to the InterviewUsers group and starts a new return,
the Start Return in Interview Mode check box is selected and disabled on the
Enter Social Security Number dialog box. Once the user enters the Social Security
number the Tax Interview will open instead of a new return.
Select All button on Select Acks to Print Window
You can now click the Select All button on the Select Acks to Print window instead
of selecting each acknowledgement individually.
Make Extension e-files now available in Return
Diagnostics
You now have the ability to make extension e-files from inside an open return. You can
run diagnostics and create the extension e-file just like you would a regular e-file.
Ability to resend Check Print Notification records
Banks require that CPN (Check Print Notifications - DP record) be sent to the bank
when a check is printed. TaxWise does that automatically after a successful check
print session. However, there are times that the EFC may not have received the
transmission of the check print notification from TaxWise. With this menu option, you
have the ability to transmit check print data at will.
IRS Publication 17 available from TaxWise toolbar
You now have the ability to access IRS Publication 17 from a new button on the
TaxWise toolbar. Clicking this button allows you to open IRS Pub 17 from any location
within TaxWise.
User Guide available from TaxWise toolbar
You now have the ability to access the most up-to-date version of the User Guide from
a new button on the TaxWise toolbar. Clicking this button allows you to open the User
Guide from any location within TaxWise.
Ability to launch Non-Tax Products from within
TaxWise
If you purchased one of our Non-Tax Products such as the Client Accounting Suite,
Document Manager, Scan&Fill or Fixed Asset Manager, TaxWise displays the new
Non-Tax Products menu option. This menu allows you to select the product you want
to open and TaxWise opens it in a separate window.
-2-
Chapter 1: What's New in TaxWise 2010?
New Client Letter Variables
We have added new variables for use in the Client Letter. You now have the ability to
enter courtesy titles on the Main Information sheet of your 1040 and Puerto Rico
returns. With the new Greeting variable in Client Letters, TaxWise will automatically
enter the correct greeting on the Client Letter. We also added three new variables
relating to tax years. You can use current year, prior year and future year to further
customize your letters.
Ability to accept payments through iTransact
You receive client payments quickly and easily when you accept credit card payments
through the iTransact service. With an iTransact account, you can offer your clients
the option of using a credit card as a method of payment. Paying by credit card is
convenient for them and profitable for you! Payments are received without the risk of
insufficient funds associated with checks.
-3-
-4-
Chapter
2
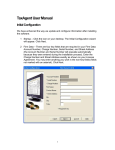
Installing and Configuring TaxWise
TaxWise is a commercial tax preparation software program produced by CCH Small Firm
Services.
There are several ways to install TaxWise, including the following:
l
Installing TaxWise from the CD
l
Installing TaxWise from the Customer Support Site
Installing TaxWise from the CD
To install TaxWise from the CD, use the following steps:
If this is a network installation from a workstation to the server, map a drive from
the workstation to a shared drive on the server before proceeding. Contact a local
computer technician for assistance in doing this.
1. Insert your TaxWise 2010 CD into your CD drive.
2. If the TaxWise installation program does not start automatically, click the Start
button on the Windows Taskbar and click Run.
Windows displays the Run dialog box.
3. Type D:\Startup in the Run dialog box and click OK.
-5-
Chapter 2: Installing and Configuring TaxWise
This step assumes that your CD drive is mapped to D:\. If this is not the case,
simply replace D:\ with the appropriate drive letter.
The following Installation screen displays:
4. Click Install TaxWise.
If the operating system is Windows Vista or Windows 7 a User Account
Control dialog box will display. You have to click Continue to give permission
for TaxWise to be installed.
Windows displays the Choose Language Setup dialog box:
5. Select English or Spanish from the drop-down list and click OK.
-6-
Chapter 2: Installing and Configuring TaxWise
The TaxWise 2010 – InstallShield Wizard displays:
6. Click Next to begin installing TaxWise 2010.
The Installation Wizard displays the License Agreement dialog box:
7. Read the license agreement and click the radio button indicating that you
accept the terms of the license agreement.
-7-
Chapter 2: Installing and Configuring TaxWise
8. Click Next to proceed.
The Installation Wizard displays the Destination Drive dialog box:
9. In the drop-down box, select the drive to which you wish to install TaxWise
2010, then do one of the following:
l
If this is a stand-alone install, simply click Next. By default, the No
radio button is selected for you.
l
If you are installing to a network drive or this is a server installation,
select the Yes radio button, enter a workstation number for this
installation (must be between 100 and 999), then click Next.
-8-
Chapter 2: Installing and Configuring TaxWise
The Installation Wizard displays the Ready to Install the Program dialog
box:
10. Confirm the designated drive/path and click Install to proceed. If you want to
review or change any of your installation settings, click Back. Click Cancel to
exit the InstallShield Wizard and end the install.
The installation program will run, installing TaxWise 2010 to the drive you selected.
When the installation is complete, click Finish.
-9-
Chapter 2: Installing and Configuring TaxWise
If this is the first time installing any year of TaxWise on this computer you will be
prompted to restart your computer when the installation is complete. You must restart
your computer before running TaxWise. Please note: If you attempt to run TaxWise
before restarting your computer, you will receive an error message and the program
will not run.
Installing TaxWise from the Customer Support
Site
To install TaxWise from the Support Site, use the following steps:
1. Login to the Customer Support Site (https://support.taxwise.com).
When logging in for the first time you will need your Client ID and your
Registration Code. You will need to enter Admin as the user name and your
Registration Code as your password. After clicking Log In, you will be prompted
to change the password.
2. Click the Download tab on the Customer Support Site.
3. From the Product Updates page, click TaxWise Software on the left of the
page.
4. Click the link under Current Year Software to begin the download.
Prior year software is also available for download.
Windows displays a File Download dialog box.
5. Click Save.
- 10 -
Chapter 2: Installing and Configuring TaxWise
Windows displays the Save As dialog box.
6. Navigate to the location to which you want to save the file and click Save. We
recommend you save the download to your Desktop, so the file is easy to find.
The default file name will be setup.exe.
Windows displays a Download complete dialog box.
7. Click Close.
8. Navigate to your Desktop or other location where you saved the downloaded
file.
9. Double-click the setup.exe file.
The Open File - Security Warning dialog box is displayed.
10. Click Run.
If the operating system is Windows Vista or Windows 7 a User Account
Control dialog box will display. You have to click Continue to give permission
for TaxWise to be installed.
The Choose Language Setup dialog box displays.
11. Select English or Spanish from the drop-down list and click OK.
The TaxWise 2010 - Install Wizard displays.
12. Click Next to begin installing TaxWise 2010.
The Installation Wizard displays the License Agreement dialog box.
13. Read the license agreement and click the radio button indicating that you
accept the terms of the license agreement.
14. Click Next to proceed.
The Installation Wizard displays the Destination Drive dialog box.
15. In the drop-down box, select the drive to which you wish to install TaxWise
2010, then do one of the following:
l
If this is a stand-alone install, simply click Next. By default, the No
radio button is selected for you.
l
If you are installing to a network drive or this is a server installation,
select the Yes radio button, enter a workstation number for this
installation (must be between 100 and 999), then click Next.
The Installation Wizard displays the Ready to Install the Program dialog
box.
16. Confirm the designated drive/path and click Install to proceed. If you want to
review or change any of your installation settings, click Back. Click Cancel to
- 11 -
Chapter 2: Installing and Configuring TaxWise
exit the InstallShield Wizard and end the install.
The installation program will run, installing TaxWise 2010 to the drive you selected.
When the installation is complete, click Finish.
If this is the first time installing any year of TaxWise on this computer you will be
prompted to restart your computer when the installation is complete. You must restart
your computer before running TaxWise. Please note: If you attempt to run TaxWise
before restarting your computer, you will receive an error message and the program
will not run.
Configuring a Network Installation
A workstation is a physical computer that is connected to a network. If you are
installing TaxWise on a network, you must configure workstations first. This puts the
TaxWise icons and fonts on each workstation, configures certain settings and informs
TaxWise that you are running on a network.
To configure a workstation to run TaxWise, the program must already be installed to
the server or another workstation acting as a server. The drive where you have
installed TaxWise must also be shared out with full control permission. Finally, you
must map to the drive to which you have installed TaxWise.
Do not map to the TaxWise folder; instead, map it to the root of the drive. For
Assistance, contact a local computer technician.
To configure a workstation to run TaxWise, use the following steps:
1. Double-click the My Computer icon on the desktop.
Windows displays the My Computer window.
2. Double-click the network drive to which you installed TaxWise.
3. Windows displays the network drive.
4. Double-click the UTS10 folder.
If you do not see the UTS10 folder on the network drive, your mapping may be
incorrect. Contact a local computer technician for help on mapping a network
drive.
5. Double-click the TWTech folder.
6. Double-click the setup.exe icon.
If the operating system is Windows Vista or Windows 7 a User Account
Control dialog box will display. You have to click Continue to give permission
for TaxWise to be installed.
- 12 -
Chapter 2: Installing and Configuring TaxWise
InstallShield completes the workstation setup and displays the TaxWise
Workstation Setup dialog box.
7. Click Next.
8. Click the radio button indicating that you accept the terms of the license
agreement, then click Next.
9. Enter the desired workstation number (this number must be between 100 and
999), then click Next.
10. Confirm the drive/path and click Install.
11. TaxWise places the TaxWise Icon on your desktop.
12. Double-click the icon to launch TaxWise.
- 13 -
Chapter 2: Installing and Configuring TaxWise
Carry Forward Setup Information from Prior Year
If you have last year’s TaxWise program installed on your computer, you will be given
the option to carry forward the following information from the previous year the first
time you start TaxWise:
l
Setup Information
l
Client Letters
l
Users and Groups
l
User-Specific Settings
You will only see the prompt to carry forward user-specific settings if you DO
NOT carry forward users and groups from last year. This gives you the option
to carry forward color settings for default users (Admin, Guest, and Training).
l
EIN Database
You only have the option of carrying forward your setup information and client letters
the first time you start TaxWise; however, if you choose not to carry forward your EIN
database or your users and groups, you can do so later.
Configuring TaxWise Setup Options
If you carried forward your setup files from last year, much of the information in
Setup Options is already complete. View the information on each tab to ensure that
all information is correct.
The first time you start TaxWise, you must complete the Setup Options dialog box
with information about your office and your system, such as network, printers and
more.
TaxWise uses the information in Setup Options in many ways; therefore, it is
critical that you enter this information accurately. If you are not sure the
information is correct, you should revisit Setup Options to verify and correct
the information.
- 14 -
Chapter 2: Installing and Configuring TaxWise
Entering Company Information
By default, TaxWise displays the Company tab of the Setup Options dialog box:
The Company tab allows you to define basic information about your office, such as
your name, address, contact information, Merchant Services Client ID, and EFIN.
To complete the Company tab, use the following steps:
1. Enter your EFIN in the EFIN (Electronic Filing Identification Number) or
Customer ID box and press the Tab key. An EFIN is assigned to you by the
IRS. If you do not have an EFIN, enter the Customer ID number assigned to you
by SFS.
Enter only your Main Office EFIN in this box and do not change it during tax
season. Changing the EFIN will corrupt your database. If you plan to transmit
returns for multiple EFINs from one location, please see the topic Registering
TaxWise to Transmit for Multiple Locations later in this user guide.
2. Enter the name of the primary contact person at your office in the Your
company’s contact name box and press the Tab key.
3. Enter the name of your company in the Your company’s name box and press
the Tab key.
4. Enter your street address in the Your company’s street address box and
press the Tab key.
5. Enter your city, state, and ZIP Code in the Your company’s city, sate, ZIP
Code box and press the Tab key.
Do not use any punctuation when you enter your city, state, and ZIP Code
information.
- 15 -
Chapter 2: Installing and Configuring TaxWise
6. Enter your area code and phone number in the Your company’s telephone
number box and press the Tab key.
Do not use any hyphens or parentheses when you enter your phone number.
TaxWise enters hyphens for you.
7. If you have an EIN, enter your EIN in the Your Company’s Federal Employer
Identification Number (EIN) box and press the Tab key. If you do not have
an EIN, skip this step.
8. If you are working with a service bureau, enter your service bureau in the
Name of your company’s Service Bureau box and press the Tab key.
9. Enter your user id for iTransact in the Your company's iTransact Client ID
box.
10. If you are using TaxWise on a network, select the Save as Workstation
Defaults check box to ensure that all of your settings carry over to each
workstation on the network.
This option is available on all the Setup Options tabs. If you skip this step
now, you can click the Save as Workstation Defaults check box at any point in
the setup process.
11. Click the Next button to proceed to the General tab.
The General Tab
TaxWise displays the General tab of the Setup Options dialog box.
The General tab allows you to configure your network options, set your current
Declaration Control Number, and determine your client invoicing settings. There are
also options to enable history list functions.
To complete the General tab, use the following steps:
1. Do one of the following:
l
If your computer is not attached to any other computer, select No
Network.
l
If you are using TaxWise over a network of any kind, select Network.
2. Enter the current DCN on the Current Declaration Control Number (DCN)
box by doing one of the following:
l
This number defaults to 1. Use the default if you use TaxWise on
multiple workstations on a network, you only use TaxWise on one standalone computer, or you do not e-file any returns.
l
If you are using multiple non-networked computers, you must pre-set
the DCN on each computer prior to tax season by estimating the number
of returns you will prepare on each machine and entering the current
DCNs far enough apart to prevent duplication. The number you pre-set
in this section cannot exceed five digits. The IRS will reject duplicate
DCNs.
- 16 -
Chapter 2: Installing and Configuring TaxWise
For example, if you have two non-networked computers in your office and a laptop that
you use in client’s homes and you estimate that you will complete no more than 1000
returns on each machine, logical settings for your DCNs might be as follows:
l
Computer 1 – enter 1000
l
Computer 2 – enter 2000
l
Computer 3 – enter 3000
If the computers are not networked, you must designate one computer as the
transmitting computer, send all your returns, and get all your
acknowledgements on that computer.
The Declaration Control Number (DCN) is the number containing your EFIN that
uniquely identifies each tax return. TaxWise assigns the DCN to a tax return the first
time you create the e-file. Assigning the DCN at this point is advantageous, as the DCN
prints on Form 8453/8879 if you create the e-file before you print the return. In
addition, the DCN does not change, regardless of how many times you edit and create
a new e-file for the return.
The number in the Current Declaration Control Number (DCN) box on the
General tab increases by one number every time you create a tax return e-file for a
new Social Security number.
3. Determine your client invoice numbering process by doing one of the
following:
l
If you want to enter invoice numbers on each price sheet manually, or if
you want to leave the invoice number blank, select Do NOT auto
number.
If you select this option, you must load the Price Sheet in Tax Form
Defaults. See Using Administrator Features for more information.
l
If you want to auto number only the invoices from the current computer,
select Auto number each invoice ONLY on my LOCAL COMPUTER
and enter the first invoice number you want to use in the Start my local
invoice number with box.
If you select this option, you should prevent duplicate invoice numbers by
entering a different starting number on each computer, similar to the way
you entered DCNs on each computer.
l
If you want to auto number all of your invoices on all machines, select
Auto number ALL invoices, making each UNIQUE across the
entire network.
If you select this option, TaxWise automatically begins your invoice number
sequences with 1.
- 17 -
Chapter 2: Installing and Configuring TaxWise
Select any or all of the following Miscellaneous options:
Option
Description
Allows you to type the first character or first few
Enable Auto-Complete for
characters of an entry and TaxWise auto-completes
entries with history lists
the entry for you.
By default, this option is the only one selected. This
Display User-Defined and option does not affect your ability to see and use
Auto-Populated history
pre-defined history lists, such as Relationship to
lists
You for dependents. This box must be checked for
user-defined history list to work.
Automatically display
history lists
Causes the history list to open automatically when you
are on the entry. Not checking this box causes users
to press space bar or click drop-down to get lists.
Prompt before closing
TaxWise
By default, this check box is selected and causes
TaxWise to display a confirmation box when you click
the X in the upper right hand corner of the program or
use any other Windows method of closing the
program. Selecting Yes will close TaxWise normally.
Selecting No will close the confirmation box and
return you to TaxWise. The confirmation box allows
you to select Do Not Show so that the box will not be
shown when you close the program. If you select this
checkbox, the Prompt before closing TaxWise
check box in Setup Options will be cleared.
4. Click the Next button to proceed to the Printer Setup tab.
The Printer Setup Tab
TaxWise displays the Printer Setup tab of the Setup Options dialog box.
The Printer Setup tab determines the print behavior of many TaxWise functions.
However, there are some print behaviors not controlled by the Printer Setup tab
include the following:
l
The E-file Submission Report always prints to screen first. You must
print a paper copy by clicking the print icon at the top of the Print
Preview screen.
l
Reports print to screen unless you change the destination on the Report
Criteria window.
To complete the Printer Setup tab, use the following steps:
1. To select a default printing method, do one of the following:
l
If you use an inkjet printer, or if you have no problems with Windows
printing, select Windows: Standard for the most common printers.
This is the default setting.
l
If you have experienced problems with Windows printing select PCL:
Use this method if you are experiencing printer problems.
- 18 -
Chapter 2: Installing and Configuring TaxWise
2. Select a default printer for each of the printing options by selecting a printer
from each respective drop-down list.
This list of printers is generated from the list of printers Windows recognizes
as being attached to your system.
By default, TaxWise displays your Windows default printer in each drop-down list. If
you need to select a different printer, or if you want to select different printers for each
item, select those from their respective drop-down lists.
3. Select from the following additional printing options:
Option
Description
Print blank page
after EACH tax
return or report?
Selecting this option inserts a blank sheet between returns
or reports when you print more than one.
Print tax returns in
ALL CAPITAL
LETTERS?
Some states require that form data be typed in all capital
letters. This option automatically prints your typed data in all
capitals, regardless of how you entered it.
If you have more
than one, print
each EFIN on
separate report
pages?
By default, returns are grouped by EFIN in management
reports. Selecting this option inserts a page break between
EFINs.
Print EACH rejected Selecting this option prints reject messages for each return
SSN on a separate
on a separate page when you print IRS acknowledgements
page?
that involve rejected returns.
Automatically print
form 9325 as each
IRS tax return is
acknowledged?
Selecting this option prints Form 9325 for each accepted
return at the time you process the acknowledgement.
If you select this option, acknowledgements will auto-print at
the conclusion of auto-processing. If this option is not
Automatically print
selected, TaxWise will not auto-print acknowledgement
acknowledgements?
reports. The acknowledgement files will still auto-process
and database and return status will be updated accordingly.
4. Click the Next button to proceed to the Color Setup tab.
The Color Setup Tab
TaxWise displays the Color Setup tab of the Setup Options dialog box.
The Color Setup tab allows you to change the on-screen colors of tax forms and
entries in TaxWise. The only setting that you can modify is My Custom Colors.
Color settings are workstation-specific. They only affect the workstation at
which you have made changes, even if you are using TaxWise on a network. All
users at a particular workstation will see the same color setting.
- 19 -
Chapter 2: Installing and Configuring TaxWise
To complete the Color Setup tab, use the following steps:
1. Select one of the following:
l
Default, the TaxWise view that includes color-coding.
l
Default without Color Coding, which is the TaxWise view that does
not include color coding.
l
Classic, which is the TaxWise view you used in 2005 and previous
years. We sometimes refer to this as Classic view.
l
DOS Classic, which is the TaxWise view you used prior to the release of
TaxWise for Windows.
l
Soothing, which was formerly called Soothing Gray and is a softer form
of Classic.
l
My Custom Colors, which allows you to change the setting to your
liking.
2. Click the Finish button to save your options.
TaxWise suggests that you change the background on your prior year software
to easily distinguish between current and prior year.
Registering TaxWise
Once you have completed Setup Options, TaxWise displays the Register Software
box:
To register TaxWise, use the following steps:
1. Verify your EFIN in the EFIN/Customer Number box and press the Tab key.
2. Enter your Registration Code in the Registration Code box.
Your Registration Code can be found on your Fulfillment Confirmation Slip.
3. Click OK.
TaxWise displays the login page.
Registering to Transmit for Multiple Locations
To register TaxWise to transmit for multiple EFINs, use the following steps:
1. Register your software with your EFIN and Registration Code for the
transmitting office.
- 20 -
Chapter 2: Installing and Configuring TaxWise
2. Click the Tools menu on the TaxWise home page.
3. Click Utilities/Setup Options.
TaxWise displays the Utility application.
4. On the Utility, click the Setup menu and select Register Software.
TaxWise displays the Register Software box.
5. Enter the EFIN for the next site in the EFIN/Customer Number box and
press the Tab key.
6. Enter the Transmit Code (also called the XMIT Code) in the Registration Code
box and press the Enter key.
You can get the XMIT code by calling TaxWise Customer Support.
An EFIN’s Transmit Code is not the same as the EFIN’s Registration Code.
7. Repeat these steps for each EFIN for which you will transmit returns.
DO NOT change the EFIN on the Company tab in Setup Options during tax
season! Do not attempt to transmit returns for another EFIN by changing the
EFIN in Setup Options. This will corrupt your TaxWise database.
- 21 -
- 22 -
Chapter
3
Getting Started
After you have completed the setup portion of your installation, you can log in to TaxWise
and begin maneuvering through out the program.
Starting TaxWise
If you are not at the Login page, double-click the TaxWise icon on your desktop:
- 23 -
Chapter 3: Getting Started
TaxWise displays the Login page:
To take full advantage of all the features on this page, you must have an active
Internet connection.
The following table describes the tabs on the Login page:
Tab
Description
Home
The Home tab takes you to the login page. If you are already
signed in, it automatically takes you to the home page where you
can access all your user and administrative features, including
creating and accessing returns, printing checks, sending mail,
etc.
TaxWise Web
Opens http://www.taxwise.com the CCH SFS Web site. Stay
updated on the latest in TaxWise tax and accounting packages,
training and CPE credits, and other professional resources
TaxWise offers.
IRS
Opens http://www.irs.gov, the official Web site of the Internal
Revenue Service.
Manage
Students
Allows the administrator to manage students in TaxWise
University.
Student
Lessons
Launches TaxWise University and shows available student
lessons.
- 24 -
Chapter 3: Getting Started
Tab
Description
Opens support.taxwise.com, the TaxWise Customer Support Web
Support
site. You should visit this site often for news from CCH SFS and
Site/Knowledge the IRS, to download state software and program updates and
Base
federal updates, and to search the Customer Support Knowledge
Base for answers to questions you may have.
In addition to the tabs, you can also use the Browser toolbar to navigate the Web
sites:
The following table describes the buttons on the Browser toolbar:
Button Description
Back
Displays the last page you visited.
Forward Displays the next page in the sequence.
Stop
Stops loading the current page.
Refresh
Reloads the current page in order to display any changes made to it since
it first loaded.
Home
Reopens the start page for the active tab.
The following table describes additional features on the login page:
Option
Description
Show Release
Notes link
Opens to the release notes sent with the initial release of
TaxWise.
Approval
Takes you to the Customer Support Web site for updated
Information link information on your status for e-filing.
The Approval Information link will only work if you are logged in to the
Customer Support Web site.
The final feature of the login page is the TaxWise Login box:
- 25 -
Chapter 3: Getting Started
Logging in to TaxWise
After you start TaxWise, you must log in by selecting a user name from the User
name drop-down list. By default, there are three user names in TaxWise:
l
Admin: has rights to all menu commands in TaxWise and the Utility,
including Security Manager, however, cannot Start a New Return.
l
Guest: has rights to all menu commands in TaxWise and the Utility
except Security Manager and Edit History List.
l
Training: allows you to prepare practice returns and connect to the
Training Electronic Filing Center.
To log in to TaxWise, use the following steps:
1. Select a user name from the User name drop-down list, and click OK.
TaxWise displays the Select Package window:
2. Double-click the tax package you want to open or highlight the package and
click OK.
If you use TaxWise to prepare mostly one type of return, choose the package by
clicking it once, select the Do Not Auto Show check box, and click OK. The
next time TaxWise opens, it will proceed to the TaxWise home page.
Each package contains all the forms necessary to prepare that particular type
of return. The Miscellaneous package contains a variety of tax forms that may
be used on occasion, but they do not belong to any one specific package.
If you do not want TaxWise to display the Return List dialog box each time you
log in to TaxWise or each time you change users, select the Do Not Auto
Show check box.
- 26 -
Chapter 3: Getting Started
Return List Sort Options
To change the return list sort options, use the following steps:
1. Press the Open an Existing Return link on the homepage or press Ctrl+O.
2. From the Return List window, press the Options button.
3. TaxWise displays the Return List Sort Options window.
Filter Options
The Filter Options are only available to the Admin user.
The Admin user has the ability to open and edit returns for all users. The Filter
Options section of this window allows you to filter by the following:
l
User Name
l
Package Type
l
EFIN
l
Show All returns
As you select a filter option, another field will become available to filter the Return
List further.
Sort Options
You have the ability to change the way the columns in the Return List are sorted. You
can sort the columns by the following:
l
SSN/TIN
l
Taxpayer Name
l
Spouse Name
l
Package
l
Edited
l
Telephone No.
l
Email Address
l
User Name
l
File Name
l
EFIN
l
Return Status
l
Return Stage
Alternating Row Color Options
You have the ability to change the highlight color of the alternating rows of returns in
the Return List. Click the drop-down arrow to select the color you wish to use.
- 27 -
Chapter 3: Getting Started
Introducing the TaxWise Home Page
The following illustration depicts the TaxWise home page:
The home page is your home base in TaxWise. It allows the user quick access to
frequently performed tasks.
All tasks are also available from the menus on the Menu bar, which will be
discussed in more detail later in this chapter. In many cases, there are shortcut
keys, such as pressing the Ctrl+N keys simultaneously to start a new return.
You can find a complete list of shortcuts in Help.
The TaxWise toolbar contains buttons for several of the most common tasks in
TaxWise:
The following table describes the buttons on the TaxWise toolbar:
Button
Description
Prev. Form
Displays the previous form in the return.
Next Form
Displays the next form in the return.
New Return
Starts a new return in the current user name and package.
- 28 -
Chapter 3: Getting Started
Button
Description
Open Return
Opens a return that was previously saved in the current
user name and package.
Close Return
Closes the open return, saving all changes, and takes the
user back to the TaxWise home page.
Forms Tree
Closes or opens the Tree of forms in the current return. This
Tree is on the left side of the TaxWise window. This is
selected by default to be on.
Print Return
Allows you to print a single return if you have a return open,
or allows you to print multiple returns from the home page.
Print Form
Allows you to print a single copy of the current form
Link Depr Wkst
Links you directly to a depreciation worksheet, provided you
have an appropriate parent form active.
Return Stage
Allows you to define the stage of a return, such as Ready to
Review, Missing W2, missing Spouse’s Signature, Ready to
Transmit, etc.
Interview
While inside a tax return, this button allows you to switch to
the Tax Interview for the client you have open.
Diagnostics
Runs Diagnostics for the open return.
IRS Pub 17
Opens the IRS Publication 17, Your Federal Income Tax in a
separate window for use when preparing returns.
User Guide
Opens the most up-to-date TaxWise User Guide.
The availability of certain buttons on the toolbar depends on what you have
open.
The Internet tabs to TaxWise Web (www.taxwise.com), IRS (www.irs.gov), and
Support Site/Knowledge Base (support.taxwise.com) are also available from the home
page. To go to any of these locations, simply click the appropriate tab. You can use the
Browser toolbar to navigate any of the Web sites.
Remember that you must have an active Internet connection for the tabs to
work.
Tasks You Do Most Often
On the left side of the TaxWise home page is a list of your most commonly used tasks.
The following table describes the tasks included in the Tasks You Do Most Often
list:
Task
Description
Start a New Return
Allows you to start a new return in the active tax package. If
you do not remember which package is active, look at the
Title Bar at the top of the home page.
- 29 -
Chapter 3: Getting Started
Task
Description
Open an Existing
Return
Opens a list of all the returns prepared by the active user
name. As with the package, TaxWise displays the active
returns for all tax packages. When you select a return from
a package that is different from the active package, TaxWise
Automatically switches to the appropriate package.
Change User
Allows you to log in as a different user. When you click this
link, TaxWise displays the Change User dialog box. Select
the desired user name from the User name drop-down list,
enter the password for that user, and click OK.
Change Package
Opens the Select Package window, from which you can
select a different task package to open. When you start a
new return, the return opens in the active package. For
example, 1040, 1065, 1120. etc.
Exit
Closes TaxWise. It is not necessary to log out prior to closing
TaxWise. A confirmation box will appear and you must
confirm that you wish to close TaxWise by selecting Yes.
Selecting No will close the confirmation box and return you
to TaxWise.
The following table describes the tasks included in the Incomplete Tasks list:
Task
Description
Checks Not Printed
Begins the check printing process. If there are no checks
available to print, TaxWise displays a message that indicates
this is the case when the link is selected.
e-files Not
Transmitted
Allows you to select returns to sent to the SFS Electronic
filing Center (EFC).
Bank Application
Corrections Needed
Allows you to correct bank applications about which you
have received a message from CCH SFS.
Bank Check
Corrections Needed
Allows you to correct bank checks about which you have
received a message from TaxWise.
The following table describes the tasks included in the Communication list:
Task
Description
Send Mail to SFS
Support
Allows you to create an e-mail message to send to SFS
Customer Support.
Send Client to
Client Mail
Allows you to create an e-mail message to send to another
EFIN (or multiple EFIN’s) that communicates with the CCH
SFS Electronic Filing Center (EFC).
Get Acks, Mail and
Updates
Allows you to download files from the CCH SFS EFC.
Send Federal/State
Returns
Allows you to select returns to send to the CCH SFS EFC.
This is the same task as e-files Not Transmitted on the
Incomplete Tasks list.
File Last Sent On
Displays the date on which you last transmitted e-files or
messages.
File Last Received
On
Displays the date on which you last received
acknowledgments.
- 30 -
Chapter 3: Getting Started
The other two items on the menu are:
l
Hot Topics: opens the Customer Support web page and displays the
latest information from CCH SFS. Remember that you must have an active
Internet connection for this page to display. You must also have a Client
ID and Registration Code for first-time entry. If you delete your cookies in
your Internet browser, you will have to enter your username and
password again. If you have your Windows Internet Options set to not
save passwords, you will have to enter your user name and password
each time you log into the Customer Support Web site.
l
Appointment Scheduler: opens the Appointment Scheduler offered by
TaxWise. You must have an active Internet Connection for this page to
display.
Creating Tabs
You can add one or more tabs that open web pages of your choosing. You must have
an active Internet connection before you begin.
To add a new tab, use the following steps:
1. Click the Tools menu, point to Browser Tabs, and click Add New Tab.
TaxWise displays the Add New Tab dialog box:
2. Enter the name for the new tab in the Tab Name box and press the Tab key.
If you add more tabs than TaxWise can display on a single line, TaxWise will
shorten the name on the tab. TaxWise recommends you use abbreviations,
when possible.
3. Enter the URL in the Starting URL box and press Enter.
For example, enter the Tab Name GA DOR and Starting URL
http://www.dor.ga.gov to create a tab for the Georgia Department of Revenue.
- 31 -
Chapter 3: Getting Started
TaxWise displays the new tab to the right of the existing tabs:
Creating a Tab for a Document
To create a tab for a document that you have on your hard drive, use the following
steps:
1. Click the Tools menu, point to Browser Tabs and click Add New Tab.
TaxWise displays the Add New Tab dialog box.
2. Enter the name for the new tab in the Tab Name box and press the Tab key.
3. Enter the path (for example, C:\P17.pdf) in the Starting URL box and press
Enter.
TaxWise displays the new tab to the right of the existing tabs.
Using the TaxWise Menus
Some options on the menus are unavailable because you can only perform
those commands under certain conditions.
- 32 -
Chapter 3: Getting Started
The File Menu
The following table describes each of the commands on the File menu:
Command
Description
Start a New
Return
Starts a new return in the current user name and package.
Open Return
Opens a previously saved return in the current user name.
Open Return
by SSN/EIN
Opens a return based on an entered Social Security number of
Taxpayer's Employer Identification Number.
Close Return
Closes the currently open return, saving all changes.
Save Return
Saves the open return but leaves it open for further use.
Apply for
ITIN
Allows you to prepare a return without a SSN and apply for an ITIN.
Return
Versions
Allows you to open previously saved versions of the return that is
currently open.
- 33 -
Chapter 3: Getting Started
Command
Description
Import
Import external data from another program such as Fixed Asset
Manager, Scan&Fill, or Client Write-Up.
"What If?"
Mode
Allows you to put TaxWise in "What If?" mode. With this tool, you
can test hypothetical tax scenarios for your clients.
"What If?"
Scenarios
Displays a list of scenarios you saved in "What If?" mode.
Split MFS
Return
Allows you to split a MFJ return for a client.
Tax Interview Opens TaxWise Desktop Interview.
Change User
Allows you to change from the current user to another available
user.
Change
Package
Allows you to change from the current package to another package
available to the current user.
Search/Query
Searches for information about a specific taxpayer's return.
for Taxpayer
Printer Setup Opens the printer setup window used when configuring TaxWise.
Print
Opens the Print menu allowing you to print the current return, a
specific form in the current return, another return, or a blank form.
Classic Print
Opens the Classic Print window, which allows printing of a
specific number of selected forms for a particular return. Also
contains an option to set defaults for Classic Print.
Exit
Exits the TaxWise Program.
- 34 -
Chapter 3: Getting Started
The Edit Menu
The following table describes each of the commands on the Edit menu:
Command
Description
Link
Links the current line on the current form to another form.
Auto Link
Depreciation
Worksheet
Automatically links you to a depreciation worksheet, if you have an
appropriate parent form open or active in the return.
Undo Entry
Text
Removes the last entry made in TaxWise.
Redo
Reverses the "Undo Entry Text" menu option.
Override
Overrides the current calculated entry with a manual entry. Use
extreme caution when overriding entries.
Un-override
Replaces the override with the original calculated entry.
Copy Entry
Text
Copy the information from an entry box for future placement
elsewhere within TaxWise.
Cuts the information from an entry box for future placement
Cut Entry Text elsewhere within TaxWise. This option removes the information
from the current entry box.
Paste Entry
Text
Pastes information copied or cut in a previous operation into the
current entry box.
Delete Entry
Text
Removes the information from the current text entry box.
- 35 -
Chapter 3: Getting Started
Command
Description
Select All
Selects all text.
Find
Used in the Client Letter to find certain key words.
Find Next
Used in the Client Letter to find the previously entered key word in
find.
Replace
Replaces current key word with a different key word.
Go to
Required
Entry
Goes to the next blank entry that is required for e-filing on the
current form.
Object
Properties
Assigns certain properties to images in the Client Letter.
The Form Menu
The following table describes each of the commands on the Form menu:
Command
Description
Add
Opens the Add Form list so an additional form can be added to the
Form/Display
current return.
Form List
Copy This
Form
Adds an additional form, up to the maximum number of copies, for
the current form. In some cases, the menu item may change to
reflect the name of the form you can copy (for example, K1 P/S).
Close This
Form
Closes the current form and displays the Find a Form list.
Show Second Opens a split window so that you can view two forms from the
Form
current return simultaneously.
Import K1
Form Data
Allows you to update a K1 in an individual return that you have
changed in a 1041, 1065, or 1120S return.
Remove Form Removes the current form from the open return.
Lock All
Entries
Allows the Admin user to lock all entries on a form in Tax Form
Defaults.
Unlock All
Entries
Allows the Admin user to unlock all entries on a form in Tax Form
Defaults.
- 36 -
Chapter 3: Getting Started
The Letter Menu
Please refer to the Client Letter chapter for more information.
The View Menu
The following table descries each of the commands on the View menu:
Command
Description
Go to Web
Opens the TaxWise web page at www.taxwise.com.
Edit Tax Form
Changes the size of the font in the workspace.
Size
Use Large
Icons
Allows you to use small or large icons on the toolbar.
Show Forms
Tree
Closes or opens the Tree of forms in the current return. This Tree
is on the left side of the TaxWise window.
Show Refund
Monitor
Closes or opens the Refund Monitor above the Tree of forms in
the current return.
- 37 -
Chapter 3: Getting Started
Command
Description
ContextSensitive
Help
Closes or opens the context-sensitive help pane at the bottom of the
current return.
The Bank Menu
The following table describes each of the commands on the Bank menu:
Command
Description
Print Checks
Prints checks for the first time after receipt from the bank.
Reprint Checks
Reprints a damaged check.
Allows you to correct or update a RAL application after the
Maintenance/Setup application has been submitted. Sets up the printer for use in
printing checks.
The Reports Menu
The following table describes each of the commands on the Reports menu:
Command
Description
Acknowledgements
Displays a list of acknowledgements and e-mail received from
the IRS, states, CCH SFS, and other EFINs.
Reports List
Allows you to create a number of reports predefined within
TaxWise. These reports can be displayed in TaxWise,
exported for display in other programs, or printed.
Mailing Labels
Prints mailing labels for a selected range of clients.
Non-Returning
Clients
Creates a log or set of labels for all clients for which you
completed tax returns last year but not started a return for
this year.
- 38 -
Chapter 3: Getting Started
Command
Description
Client Organizer
Creates organizers for use by your returning clients to
organize their tax information. Client organizers use the
previous year's tax return information and must be printed
from the previous year's final version of TaxWise.
The Communications Menu
The following table describes each of the commands on the Communications menu:
Command
Description
Send
Starts the communications procedure for sending Federal and
Federal/State State electronic returns to the IRS and state via the CCH SFS
Returns to…
Electronic Filing Center.
Starts the communications procedure to retrieve IRS, state and
Get Acks, Mail
bank acknowledgements, e-mail and software updates from the
and Updates
EFC.
Send Mail to
SFS Support
Allows you to create an e-mail message to send to SFS Customer
Support.
Send Client to Allows you to create an e-mail message to send to another EFIN (or
Client Mail
multiple EFINs) that communicates with the CCH SFS EFC.
Get Updates
Starts the communications procedure for retrieving software
updates from the EFC.
Transmit DB
Report
Use this command only under the direction of customer support.
- 39 -
Chapter 3: Getting Started
The Tools Menu
The following table describes each of the commands on the Tools menu:
Command
Description
Run Return
Diagnostics
Provides an extensive review of the current return including
electronic filing errors (for e-filed returns only), a list of forms to
be filed, return totals information, SSN verification (for the 1040
package only), warnings of inconsistencies in return, and lists of
any estimated or overridden entries.
Return Status
Examines the TaxWise database to determine the status of the
current return. This is only as current as your last database
update.
Switch to
Interview
While inside a tax return, this menu option allows you to switch to
the Tax Interview for the client you have open.
Client Diary
Allows you to enter a text entry about the current return. Entries
made here will carry forward to next year.
Calculator
Opens the calculator.
- 40 -
Chapter 3: Getting Started
Command
Description
Make e-files
Runs diagnostics and makes e-files for a group of returns selected
from a list. Returns cannot be edited using this option.
Make
Extension
e-files
Makes e-files for submission of extensions. You cannot edit
returns using this option.
Browser Tabs
Allows you to add new browser tabs to TaxWise. The default
browser tabs include www.irs.gov and the Customer Support
site/Knowledge Base. You can add as many new browser tabs as
you want.
Utilities/Setup Opens the Utility. Features of the Utility are discussed
Options
throughout the user guide.
Schedule Ack
Retrieval
Enables TaxWise to automatically connect to the Electronic Filing
Center and pick up any available acknowledgements at scheduled
intervals. (This option is only available to the Admin user.)
Edit Tax Form
Defaults
Allows you to enter information on tax forms that TaxWise will
automatically enter on every return you create after the change is
made. (This option is only available to the Admin user.)
Give the Admin user the ability to limit access to the reports in
Restrict Report
TaxWise for each user. (This option is only available to the Admin
Access
user.)
Lock/Unlock
Private Forms
Lists
Allows the Admin user to lock or unlock users from using the
Private Forms list that have been setup for them. (This option is
only available to the Admin user.)
Backup to Disk
Backs up returns and other information for security or for transfer
to another computer.
Restore from
Disk
Restores returns and other information previously backed up to
the original or another computer running TaxWise.
Export/Import
Employer
Database
Allows you to backup employer data without performing a backup
of a return. Also allows you to restore the data.
Carryforward
Allows you to bring basic information from the previous year's
version of TaxWise into the current year. Information for individual
taxpayers is made available for use in the current year's version of
TaxWise when a return is started. You can also bring forward the
previous year's Tax Form Defaults.
The Non-Tax Products Menu
The Non-Tax Products menu allows you to open Client Write-Up, Document
Manager, Fixed Asset Manager, and Scan&Fill with Document Manager from inside
- 41 -
Chapter 3: Getting Started
TaxWise. This menu is only visible if you have purchased one of the non-tax products.
Only the non-tax products that you have purchased will be available on the menu.
Other products that have not been purchased will be shown on the menu but grayed
out. The following table describes the options on the Non-Tax Products menu:
Command
Description
Client Write-Up
Opens Client Write-Up if this product has been purchased
and installed.
Document Manager
Opens Document Manager if this product has been
purchased and installed.
Fixed Asset Manager
Opens Fixed Asset Manager if this product has been
purchased and installed.
Scan&Fill with
Document Manager
Opens Scan&Fill with Document Manager if this product
has been purchased and installed.
- 42 -
Chapter 3: Getting Started
The Help Menu
Command Description
Help
Opens the TaxWise Help file, which contains step-by-step
instructions for using TaxWise and completing tax forms. The help
file contains the most current information available at the time of the
software release.
Keyboard
Shortcuts
Opens a list of shortcuts for quick reference.
Contacting
Customer
Service
Displays information on how to contact Customer Service and tips for
getting the quickest answers to your questions.
PPR
Support
Allows you to log in to Pay-Per-Return Customer Support. Normally,
only customers using TaxWise on a pay-per-return basis use the PPR
Support feature, but full customers can access it as well. You can get
all state updates at one time. You can use the PPR Support option to
restore authorization when a problem occurs with a return that has a
state product.
IRS VITA
Test
Launches the IRS VITA Testing program.
About
Displays a message window that indicates the version number of your
TaxWise software. You must have this information available when you
contact Customer Support. There is an option in this window for
System Snapshot. System Snapshot displays information about your
computer and system.
Getting Help in TaxWise
TaxWise Help is updated several times throughout the year. It is imperative that you
have the most current version of the Help file on your computer. Instructions for
downloading Help file updates are included in the Customer Support Site Help file.
TaxWise offers you a number of different ways to get help or answers to your
questions.
Using TaxWise Help
When you open TaxWise Help, you will see a window similar to the one below:
- 43 -
Chapter 3: Getting Started
The Help toolbar consists of four options:
l
Hide: hides the Tree view and changes to Show.
l
Back: takes you back to the next page.
l
Forward: takes you forward to the previously viewed page.
l
Print: prints the open help topic.
The tabs on the left pane – Contents, Index, Search, and Favorites – provide you
with four different ways to find information in Help. The Favorites enables you to
bookmark Help pages to which you want to refer again, but you must be outside of a
return.
Using the Contents Tab
To use the Contents tab, click the plus sign beside any book icon or double-click the
book icon itself to see the subjects covered in that book.
To display information for a particular topic, click the question mark icon to the left of
the topic. Note that when you click the question mark icon, TaxWise Help displays the
information for that topic in the right-hand pane.
Using the Index Tab
The index provides key terms that point you to specific locations where the information
is stored. Once you click the Index tab, you can enter the keyword for which you want
to search or scroll through the list. To view a topic in the list that TaxWise Help
displays, simply double-click that topic, and TaxWise Help displays the information in
the right pane.
Using the Search Tab
If you want TaxWise Help to search all the text in the help file, you must use the
Search tab. Once you click the Search tab, you can enter the keyword for which you
want to search. TaxWise Help displays a list of every possible match in the Help file.
- 44 -
Chapter 3: Getting Started
To view a topic in the list that TaxWise Help displays, simply double-click that topic,
and TaxWise Help displays the information in the right pane, as illustrated below:
Using the Favorites Tab
With the Favorites tab, you can bookmark topics you might use often.
To bookmark a Help page, navigate to the Help page you want to save and click the Add
button at the bottom of the window. TaxWise displays the topic title in the Topics pane
on the left side of the window, as illustrated below:
F1 Contextual Help
For TaxWise Help on a particular Federal or state tax form, you can click in any form
entry and press the F1 key, which is located on the top left portion of your keyboard.
- 45 -
Chapter 3: Getting Started
Depending on which page of a form you are viewing, TaxWise Help displays the topic
that corresponds to that particular page but not necessarily the current line. These
Help topics include frequently required codes or helpful links.
Press the F1 key while a state form is open to display the state’s general instructions.
Pick the specific form to display TaxWise Help for that form.
Context-Sensitive Help
Context-sensitive Help provides you with field-level help on many common forms.
The context-sensitive help pane displays at the bottom of the open form, as illustrated
below:
If the context-sensitive help does not display, click the View menu and click
Context-Sensitive Help.
As you move through the form, the instructions in the context-sensitive Help pane
change, providing you with detailed on-screen instructions.
IRS Instructions
IRS Instructions are included in all packages in Portable Document Format (PDF)
exactly as they are provided by the IRS. To access the IRS instructions, open a tax
form, click in an entry, press, hold the Shift key, and press the F1 key. Adobe®
Reader® opens and displays the related PDF file.
This opens IRS instructions for the open form in TaxWise. Accessing IRS instructions
from the Main Info page opens the main form instructions (1040, 1065, etc.).
- 46 -
Chapter 3: Getting Started
You must have Adobe® Reader® installed on your computer to read the PDF
files. If you do not have Adobe® Reader® installed, you can either install it
from the TaxWise CD or download and install it directly from the Adobe Web
site (http://www.adobe.com).
Using Adobe® Reader®
IRS instructions in PDF look exactly like the printed document.
You can use the buttons on the Adobe® Reader® toolbar to move from page to page,
enlarge or reduce the view, search the document, or print all or part of the document.
You can click a bookmark in the left pane to go directly to that section of the document.
Bookmarks have been added to some of the larger documents to help you find specific
locations quickly.
To search for specific key words in the IRS instructions, click the Edit menu in
Adobe® Reader®, and then click Find. Type the key word in the find box and click
Next. You can also search for key words by pressing Ctrl+F or by clicking the Search
button.
Viewing TaxWise and Help at the Same Time
It is possible to view TaxWise and TaxWise Help on-screen at the same time. If
TaxWise is currently covering your entire screen, click the Restore Down button in
the upper right corner of your screen.
This makes your window smaller and allows you to resize it. To resize your TaxWise
window, move your mouse over any corner or edge of the window until you see a twoheaded arrow.
When you see the arrow, click and hold the left mouse button and drag the corner or
edge of the window to make it smaller or larger.
To move the TaxWise window to a new location on the screen, hover your mouse
pointer in the Title bar, press and hold the left mouse button and drag the window to
a new location.
You can now open TaxWise Help, resize, and reposition the Help window in the same
way so that you can see both at the same time. If the screen is not large enough to see
both at the same time, you can place them so they overlap. To bring one of the
windows to the front for viewing, simply click anywhere in the window or Title bar.
Visual Cues in TaxWise
When a form is active, TaxWise displays several visual cues to help you complete the
form.
The following table describes some of the common visual cues:
Visual Cue
Description
Title bar
Displays the active TaxWise tax year, active package, user
name, and tax return SSN.
- 47 -
Chapter 3: Getting Started
Visual Cue
Description
Form shading
TaxWise applies a highlight or shade to the open form in the
Tree.
Focus box
and/or arrows
Indicates the line in the form where the cursor is currently
located. Whether you see a white focus box with a drop shadow
or a combination focus box with arrows depends on which view
you are using.
Status bar, left
Displays the form, batch and sequence numbers, which may
help you identify errors in rejected returns.
Status bar,
center
Displays the active SSN, current date, current time, and amount
of time the return has been open.
ContextSensitive Help
pane
Displays help for the fields on a form.
QuickLink Icon
Allows you to link from a field to a supporting form and is an
alternative to pressing the F9 key. Anywhere you see the
QuickLink icon you can link to another form.
Some visual cues are not available in certain color schemes.
- 48 -
Chapter
4
Using Administrator Features
The Admin user name gives complete control over TaxWise. The Admin user can perform
tasks that no other user can, including the following:
l
Setting global tax form and print defaults that will be used by all user names
in the system (this feature allows the administrator to set up these defaults
only once, rather than at the individual user level).
l
Using Security Manager to add user names and groups to TaxWise.
l
Restricting access to almost any task in TaxWise by creating groups,
assigning a limited number of actions to each group, and assigning user
names to the restricted groups.
l
Opening, editing, printing, and if applicable, creating e-files for and
transmitting the tax returns of all users (other users only have access to
their own returns).
l
Moving, renaming, and deleting all other users’ tax returns.
l
Moving, copying, or deleting other TaxWise files, such as Tax Form
Defaults, and print defaults.
l
Creating user-defined history lists (drop-down lists and return stages) for
any entry in TaxWise that does not already have a pre-defined list.
l
Limit access to the reports in TaxWise for each user. Access can be limited
for following types of reports: All reports, TaxWise reports, mailing labels,
non-returning client labels, non-returning client log, and query labels.
l
Schedule the automatic retrieval of available acknowledgements at regular
intervals for each workstation.
- 49 -
Chapter 4: Using Administrator Features
The Admin user cannot start new tax returns in TaxWise.
Before adding new user names, you should log in as Admin and create a password for
the Admin user, enter Tax Form Defaults, modify print packet defaults, and create
user-defined history lists in each package used at the site, if desired.
TaxWise uses the same print defaults as the Admin user unless the user modifies their
own print defaults. The same is true for user-defined history lists (only Admin can
create user-defined history lists). The standard print defaults delivered with TaxWise
will fit many business situations, but the Admin user can modify them as necessary.
Assigning a Password to the Admin User
The first task you should perform as the Administrator is to assign a password to the
Admin user name to prevent unauthorized personnel from opening Security Manager.
To assign a password to the Admin user, use the following steps:
1. If you are not already logged in as the Admin user, select the Admin user name
from the User name drop-down list and click OK.
TaxWise displays the Select Package window.
2. Double-click the tax package you want to open.
3. Click the Tools menu and click Utilities/Setup Options.
4. From the Utility, click the Setup menu and click Security Manager.
5. Click the Users tab.
6. Select the Admin user name and click Modify.
7. Enter a password for the Admin user in the Password box and click OK.
TaxWise returns to the Security Manager dialog box.
8. Click OK.
TaxWise closes the Security Manager dialog box and the Utility.
The next time you log in as the Admin user, you must use your new password.
You cannot recover the Admin user’s password, so be sure to write it down and put it
in a secure place. If you lose your Admin password, contact Customer Support for
assistance.
- 50 -
Chapter 4: Using Administrator Features
Carry Forward Previous Year Defaults for Admin
This feature enables you to bring forward the Admin user’s Tax Form Defaults from
the previous year’s version of TaxWise.
To carry forward the previous year’s defaults, use the following steps:
1. Click the Tools menu, point to Carry Forward, and click Prior Year Data.
TaxWise displays the Carry Forward Prior Year Data dialog box:
2. Make sure that 2009 Admin TaxWise Tax Form Defaults is selected.
TaxWise assumes that TaxWise 2009 and TaxWise 2010 are on the same drive.
If they are not, enter the correct drive letter followed by a colon in the
Directory containing files box (for example, D:\UTS09\USERS\Admin).
3. Click OK.
TaxWise carries forward tax form defaults for all packages. If you edited all the
tax form defaults in the previous version of the software and none of that
information has changed, no further editing is required at this point.
The following message displays once the carry forward process is complete:
- 51 -
Chapter 4: Using Administrator Features
Configuring Defaults
As the administrator, you can define several different default behaviors that you want
to carry over to all of you TaxWise users, including:
l
Entering your price per form and/or price per hour on the Price Sheet,
which allows TaxWise to calculate your fees and print an invoice with
each return.
l
Entering information on forms that you want included in all tax returns,
such as your office name and address and your EFIN on Form 8879, this
will save you from unnecessarily re-keying the same information on each
tax return.
l
Creating user-defined history lists.
l
Creating a list of Return Stage Options, which you can use to flag
returns that may be waiting for taxpayer information, not paid in full,
paid in full, or other designations that meet your business needs.
l
Adding a cover sheet or slip-sheet to print with every return.
l
Adding or creating a client letter to print with every return.
l
Creating Private Forms lists.
Not all of these tasks are required; however it is important for you to understand how
to perform each one.
Tax Form Defaults are specific to each tax package. You must create Tax Form
Defaults in each tax package used in your office.
Best Practices for Editing Tax Form Defaults
While there are many Tax Form Defaults you can edit, the following list describes the
most common forms that you should think about editing:
l
Main Information Sheet, which allows you to:
o Exclude or include income from Puerto Rico, depending on your
location.
o Select the check for no state return or enter a two letter state
abbreviation in the resident state box.
o Define your type of return, such as Bank products, E-file ONLY, or
Paper.
l
o
Select Bank, if applicable.
o
Enter preparer’s PIN information.
o
Change third party designee selection.
o
Enter your Paid Preparer information.
o
Edit preparer use fields.
Form 8879, which allows you to enter your EFIN and your ERO or
preparer information.
- 52 -
Chapter 4: Using Administrator Features
l
Price Sheet, which allows TaxWise to calculate the tax preparation fee for
each return based on the forms used in that return (the total price is
displayed at the bottom of the Main Information Sheet or main form in
individual, business, and specialty packages).
l
Client Letter, which allows you to define a client letter that prints with
every return.
l
Cover Sheets and Slip Sheets, which allow you to include items that are
compatible with folders and envelopes from Nelco (these items are
programmed as client letter templates, and you add them to your
defaults as you would a normal client letter).
Once you have state and bank software installed, you can enter defaults on the
state and bank forms.
l
Open any of the state forms you need and enter the required
information. Much of the state information flows from the information
entered for the Federal return.
You may lose the state default information if you change the state code while
you are editing Tax Form Defaults. Changing the state code within a
particular tax return, however, will not affect the state defaults.
l
Bank Application Forms, which allows you to enter your SFS fee and the
Service Bureau fee.
Editing Default Information on Forms
To edit Tax Form Defaults, use the following steps:
1. Click the Tools menu and click Edit Tax Form Defaults.
TaxWise displays the Edit Tax Form Defaults dialog box:
Notice that the background for Edit Tax Form Defaults is bright yellow.
- 53 -
Chapter 4: Using Administrator Features
2. Choose the package for which you want to edit Tax Form Defaults.
Remember that you should edit Tax Form Defaults for each package your
office uses before you add users.
TaxWise displays a message box similar to the following:
3. Click Yes.
TaxWise displays the default tax return for the package, as illustrated
below:
The default tax return looks like any other tax return except that the workspace
where TaxWise displays forms has a bright yellow background.
- 54 -
Chapter 4: Using Administrator Features
In packages that include a Main Information Sheet, TaxWise displays it by
default. From here, you can open any form in the default tax return to enter
default information.
Do not prepare an actual tax return while you are editing Tax Form Defaults.
If you prepare an actual tax return while editing Tax Form Defaults, TaxWise
saves the information and displays it automatically the next time you start a
return.
4. Using Tax Form Defaults, open any forms on which you want to enter default
information.
Be sure to enter your default information on the Price Sheet and Client Letter, if
you want these options included.
5. Periodically press the F2 key to save your defaults.
TaxWise automatically saves your defaults when you close Tax Form
Defaults.
6. When you finish editing Tax Form Defaults, click the Close Return button
on the toolbar.
You can also close the Tax Form Defaults by clicking the File menu and
clicking Close Return.
When you add a new user, TaxWise copies these tax form defaults to the new user.
When new users start a new return, TaxWise displays the forms with the default
information already entered.
Changing Default Information
Within each tax return, you can change the information as necessary. If a taxpayer
does not want to e-file their return, simply change the type of return to Paper on the
return.
The Admin user can also make changes to the defaults by clicking the Tools menu and
clicking Edit Tax Form Defaults. This option is useful if something you entered as a
default early in tax season changes, however, the changes only apply to new returns
started after the defaults are created. Editing the Tax Form Defaults in this manner
does not change the previously created returns.
Printing a Client Letter with a Return
If you want to print a client letter with every return, you must add it to the return as
you would any other tax form. To print a client letter with the return, you can do any of
the following:
l
Add it to the default tax return in Edit Tax Form Defaults mode by
typing letter from the Find a Form list.
l
Add the form to the Selected Forms list in the View/Edit Print
Packets dialog box for the print packet and tax package you are using.
- 55 -
Chapter 4: Using Administrator Features
The File Copy and Taxpayer Federal Copy print packets include the Client
Letter default.
Using Client Letters as Stand-alone Cover Sheets
TaxWise includes four client letter templates that are designed to be used as cover
sheets: one for individual returns in English, one for individual returns in Spanish,
one for business returns in English, and one for business returns in Spanish.
The file name of the individual cover sheets are:
l
Indiv Cover sheet.CL
l
Spanish Indiv Cover Sheet.CL
The file names of the business cover sheets are:
l
Business Cover Sheet.CL
l
Spanish Bus Cover Sheet.CL
These cover sheets should be used alone and not coordinated with any third-party
folders or envelopes. To print one of these cover sheets with all returns, you must add
a client letter to your default tax return while in Edit Tax Form Defaults mode.
Using Client Letters as Slip Sheets
TaxWise also includes several cover sheets and slip sheets that are compatible with
folders and envelopes from Nelco. They are programmed into TaxWise as client letter
templates.
You can identify them by the product numbers that TaxWise uses as part of the file
name for each one. For more information on using client letters as Slip Sheets, refer to
TaxWise Help.
Working with User-defined History Lists
Understanding History Lists
A history list is a drop-down list on a form entry that is either pre-defined, userdefined, or built as the user enters data. History lists that are built as you enter data
are very useful for entering occupations and other data that is repetitive throughout
your returns.
For example, each time you enter a different occupation in TaxWise, the occupation is
added to the history list. Depending on the view you choose (Default or Classic) and
the other options you choose in Setup Options, the behavior of the history lists may
change.
Pre-defined History Lists
Some form fields in TaxWise have pre-defined history lists (for example, the
Relationship field in the Dependent section of the Main Information sheet in the
1040 package). The IRS will only accept specific responses in these fields (son,
- 56 -
Chapter 4: Using Administrator Features
daughter, parent, etc.) therefore, TaxWise provides a pre-defined list of acceptable
options.
User-defined History Lists
The Admin user can create history lists for entries that do not already have a predefined history list. These lists are available to all user names in the system and can be
created at any time. User-defined history lists allow you to ensure that misspelled or
otherwise inaccurate data is not entered. It also speeds up data entry.
Creating User-defined History Lists
To create a user-defined history list, use the following steps:
1. Log in as the Admin user.
2. Click the Tools menu and click Edit Tax Form Defaults.
3. Double-click the tax package you want to use.
TaxWise displays the confirm message box, reminding you that changes
affect only subsequent returns.
4. Click Yes.
TaxWise displays the Main Information Sheet or page 1 of the main form.
5. Right-click the field for which you want to create a user-defined history list.
TaxWise displays a shortcut menu, which is similar to the following:
6. Click Edit History List.
The following illustrations depict creating a user-defined history list for the
Preparer’s Use field 3 on the Main Information Sheet of the 1040 package. You
can use the same steps to create a user-defined list for any field, provided the
field does not already have a pre-defined history list.
- 57 -
Chapter 4: Using Administrator Features
TaxWise displays the User Defined History List dialog box:
7. Type each item you want to add in the Add an item to the list box and click
Add.
TaxWise displays the items you added in the list:
8. Make any modifications to the list you have created by choosing from the
following options:
Option
Description
Up and
Down
arrows
Allow you to rearrange items while you create your list. To move an
item, select it in the list and click the Up or Down arrow to move it to
the desired location.
Replace
Allows you to replace an item by selecting the item in the list and
typing the replacement text in the Add an item to the list box.
When you finish typing the new entry, click the Replace button.
Delete
Allows you to delete an item from the list. To delete an item, select it in
the list and click the Delete button.
- 58 -
Chapter 4: Using Administrator Features
Option
Description
Allows you to lock a list, which prevents preparers from entering data
that is not on the list. TaxWise only accepts data that you include in
Lock
the list. If you leave a list unlocked preparers can choose from the list
List/Unlock or enter other values in the filed. Values they enter, however, will not
List
be added to the list. To lock a list, simply click the Lock List button.
Notice that the button changes to Unlock List at this point. If you
want to unlock the list, click the Unlock List button.
9. When you finish adding items to the list, click OK.
TaxWise closes the User Defined History List dialog box and returns you to the
open form in Edit Tax Form Defaults mode.
The illustration below shows the user-defined list created in this example:
TaxWise saves your user-defined lists in a file that can be copied, moved, or deleted
using Return Explorer. You can use Return Explorer to copy the file to or from a
removable disk, which enables you to copy the lists to other non-networked computers
in your office. A user-defined history list file is identified by the *.uhl extension.
You must create user-defined history lists in Edit Tax Form Defaults mode in order
for TaxWise to save the lists. The Edit History List feature is available in actual tax
returns to the Admin user, but TaxWise does not save any lists users create outside of
Edit Tax Form Defaults mode.
Editing Return Stage Options
You can create a special user-defined history list called the Return Stage Options
list. This list enables your preparers to assign a Stage to Stage Options list. This list
enables your preparers to assign a stage to a return, such as Missing W2, Missing
Spouse Signature, Paid in Full, or whatever meets your business needs.
TaxWise displays the Return Stage as a column on the Existing Tax Returns
window when you select returns for editing, printing, or creating e-files. TaxWise also
displays the Return Stage on the Query Results window for each tax return.
You must be logged in as the Admin user and be in Edit Tax Form Defaults
mode to create this list.
To create and edit the Return Stage List, us the following steps:
1. While you are in Edit Tax form Defaults mode, click the Return Stage
button, and click Edit Return Stage Options…
- 59 -
Chapter 4: Using Administrator Features
TaxWise displays the User Defined History List dialog box:
2. Enter and modify the options you want to add as you would any other userdefined history list.
Notice you do not have the Lock and Unlock button in this user-defined history
list.
3. When you finish entering and modifying list entries, click OK.
4. TaxWise adds your entries to the Return Stage Options.
Locking Your Price Sheet
Another feature of the Edit History List function is the ability to lock your price sheet.
For detailed instructions on setting up your price sheet, see the Setting Up
Invoices section in the Working With Invoices and Payments chapter.
To lock your price sheet, use the following steps:
1. Enter all your form prices in Edit Tax Form Defaults mode.
2. In the first four lines, enter any desired information to be printed on each price
sheet, such as business name, address, and contact information.
3. Create a locked history list on each price field.
Each history list only contains one item – the correct price for the form. This
prevents anyone from changing the per form price.
When you create new user names in Security Manager, be sure to copy the
Admin user’s Tax Form Defaults to the new users.
- 60 -
Chapter 4: Using Administrator Features
To prevent users from overriding the number of forms in the No. column and
changing the price that way, create a new group in Security Manager that does not
have the ability to use the override function then assign this group to the users you do
not want to use the override function. Because the attributes of the SuperUser group
override the rights of all other groups, and the SuperUser group can use the override
function, you cannot be a member of both the SuperUser group and a member of a
group that edits history lists. You will learn more about Security Manager later in
this user guide.
Exiting Edit Tax Form Defaults Mode
When you finish entering information, close and save the default return by clicking the
Close Return button or by selecting Close Return from the File menu.
You can go back to Edit Tax Form Defaults mode at any time to make changes to the
default information. The new defaults only affect new returns created from that point
forward. You will need to copy the new Tax Form Defaults to your user’s defaults in
Return Explorer, which will be covered later in this user guide.
Modifying Print Defaults
Understanding Print Packets
By default, TaxWise prints one copy of each form, schedule, worksheet statement,
scratch pad, and client letter in a tax return when you print the return. This is called a
print packet. If this default configuration meets your business needs, you do not have
to change the default print settings.
TaxWise includes the following print packets:
l
Signature Pages
l
File Copy
l
Taxpayer Federal Copy
l
Taxpayer State Copy
l
Federal Copy to be Mailed
l
State Copy to be Mailed
l
Organizer Packet
All packets print tax returns except the Organizer Packet, which prints Client
Organizers in the 1040 package. The Client Organizer is a packet of forms
created from the client’s current year 1040 tax return. The forms contain data
from the current year return and blank spaces for the next year’s data. Client
Organizers for 2010 are printed from the TaxWise 2009 final release.
You can change the print settings by editing the print packets. If you want to change
the print packet setting globally for all users on your network, you must log in to
TaxWise as the Admin user and change the print packet settings for Admin. By
default, TaxWise applies Admin’s print setting to all other users.
Other users can change the print packet settings for their user name while logged in
as themselves. TaxWise saves these settings in the individual users’ folders and
applies them only to those users’ tax returns.
- 61 -
Chapter 4: Using Administrator Features
Future changes made by the Admin user do not affect users who have modified
their own print packets
The Admin user can also copy, move, or delete a user’s print packet settings using
Return Explorer. The Admin user has the rights to copy or move files from any user
name to any other user name or to a removable disk or location on the network.
Individual users can only copy or move their own files to other users on the network.
By default, the File Copy packet is selected when you print returns. This
packet prints one copy of each Federal and state form used in a tax return, plus
the client letter, Main Information Sheet, worksheets, and scratch pads.
Editing Print Packets
There are four ways in which you can change the print packet defaults:
l
Change the print order of the forms
l
Change the number of copies that print
l
Add to or remove forms from the packet
l
Add default or custom watermarks to selected packet(s).
Remember, to change print packet defaults for all users, you must log in to TaxWise as
the Admin user. If you have not logged in as the Admin user, the changes you make
only affect your own settings.
Watermark Options
Use the Watermark Options to print watermarks on forms printed from TaxWise.
Watermarks will not print on any forms to be filed to IRS or a state.
Users can select the default watermark, or create custom watermarks. Custom
watermarks can be any alpha-numeric text, up to 20 characters.
- 62 -
Chapter 4: Using Administrator Features
Adding Forms to Print Packets
To add forms to packets, use the following steps:
1. Click the Tools menu and click Utilities/Setup Options.
TaxWise displays the Utility.
2. Click the Setup menu and click View/Edit Print Packets.
TaxWise displays the View/Edit Print Packets dialog box:
Changes you make in the View/Edit Print Packets dialog box affect all future
printed returns.
3. Select the packet you want to modify from the Packet drop-down list.
4. Select the package you want to modify from the Package drop-down list.
TaxWise displays the default forms for the selected packet and package in
the Selected Forms list.
5. Make sure you have not selected the Print Completed Forms check box.
If you selected the Print Completed Forms check box, you must clear it. This
will cause the Selected Forms box on the right to go blank. Now you can
manually add forms to the Selected Forms box.
6. Select the forms you want to add from the Available Forms list.
To select all federal forms, click US – Federal one time, then click Add. To
select all forms for a particular state, click the state name one time, then click
Add. To select specific forms, double-click either US – Federal or the state
name to display the forms. Press and hold the Ctrl key while you select the
forms you want to add and click Add.
7. Click the arrows beside the Copies box to increase or decrease the number of
copies set to print.
- 63 -
Chapter 4: Using Administrator Features
If you want to add all the forms in the list, you can skip steps 5 and 6 and
simply click Add All.
TaxWise adds the forms you selected to the bottom of the Selected Forms list.
You may need to scroll to the bottom of the list to see the forms you added.
8. Repeat steps 6 and 7 to add any other forms you want.
To remove a form, select it in the Selected Forms list and click Remove. To
remove multiple non-sequential forms, press and hold the Ctrl key while you
select forms in the Selected Forms list and click Remove. To remove multiple
sequential forms, select a form, press and hold the Shift key, select the last
form you want to remove and click Remove. To remove all the forms in the
Selected Forms list, click Remove All.
To change the order of the forms in the Selected Forms list, select the form
you want to move and use the up and down arrows to move it to its new
location.
9. When you finish adding forms, click Save.
TaxWise saves your changes and returns you to the Utility.
Selecting Print Packets for All Print Sessions
This option is only available to the users in the Administrators and Return
Manager group.
If you want to modify the defaults for a print packet for all printing sessions, use the
following steps:
1. Click the File menu, point to Print and click Print Return(s).
TaxWise displays the Select Returns to Print dialog box.
2. Select a return from the list and click OK.
- 64 -
Chapter 4: Using Administrator Features
TaxWise displays the TaxWise Print dialog box:
3. If you do not want the File Copy packet to print, clear the File Copy check box
and select the packet(s) you want to print.
4. Select the Global radio button under Save Options.
5. Click the Print Preview button.
TaxWise displays the return in the Print Preview dialog box.
6. Close the Print Preview dialog box.
The next time you print returns, you will notice that TaxWise saved the Print
Packets you selected on the TaxWise Print dialog box.
Change Print Packet Settings for One Print Session
If you want to modify the defaults for a print packet, but you do not want to save the
changes for future printing purposes, this option is particularly useful.
To change print packet settings for only on print session, use the following steps:
1. Click the File menu, point to Print and click Print Return(s).
TaxWise displays the Select Returns to Print dialog box.
2. Select the return(s) you want to print and click OK.
- 65 -
Chapter 4: Using Administrator Features
TaxWise displays the TaxWise Print dialog box.
Opening the View/Edit Print Packets dialog box in this way allows you to
choose whether you want to save the changes permanently or use them for only
this printing session.
3. Do one of the following under Save Options:
l
If you want to save the changes permanently, click Global. (This option
is only available to users assigned to the Administrators or Return
Manager group.)
l
If you only want to use these modifications for this print session, click
Print Job.
4. Click Options.
TaxWise displays the View/Edit Print Packets window where you can
view and change the contents of the print packets and edit watermark
options.
5. Make any changes you want and click Save.
TaxWise displays the TaxWise Print dialog box.
6. Click Print to execute the print job.
Setting Print Defaults for the Client Organizer
The Client Organizer is a packet of forms created from the client’s current year 1040
tax return. The forms contain data from the current year’s return and blank spaces for
the next year’s data. You can print Client Organizers and mail them to your clients to
help them collect their tax information and also to serve as a marketing tool for you
business.
Client Organizers that are customized to a taxpayer’s return are only available in the
1040 package and only in the final release of the software in the spring. You cannot
print Client Organizers from the December release of TaxWise.
Blank un-customized Client Organizers can be printed from the Print Blank
Forms option.
To set the print defaults for the Client Organizer, use the following steps:
1. Click the Tools menu and click Utilities/ Setup Options.
TaxWise displays the Utility.
2. Click the Setup menu and click View/Edit Print Packets.
TaxWise displays the View/Edit Print Packets dialog box.
Changes you make in the View/Edit Print Packets dialog box affect all future
printed returns.
- 66 -
Chapter 4: Using Administrator Features
3. Select Organizer Packet from the Packet drop-down list.
4. Add forms, remove forms, and/or change the number of copies of forms to be
printed using the steps described earlier in this section.
Setting Print Defaults for Classic Print
To set defaults for the Classic Print mode, use the following steps:
1. Click the File menu, point to Classic Print and click Set Classic Print
Defaults.
TaxWise displays the Select Print Defaults dialog box:
Notice that TaxWise displays the default number one (1) to the left of each form
name. If you accept the default, TaxWise prints one copy of each completed
from in the return. TaxWise does not print incomplete forms.
2. Select the form(s) for which you want to increase or decrease the quantities to
print.
Select multiple forms by holding down the Ctrl key while making your
selections.
3. Click the Increase/Decrease arrows to increase or decrease selected forms.
4. Click OK.
TaxWise saves the modified Classic Print defaults.
- 67 -
Chapter 4: Using Administrator Features
Creating Private Forms Lists
The Private Forms feature enables you to customize the list of available tax forms in a
tax return. For example, if you or other preparers in your office do mostly 1040A or
1040EZ returns, you can greatly reduce the number of forms on the Find a Form list
by using the pre-defined 1040A or 1040 EZ Private Forms lists.
Even if you prepare more complex returns, there may be many forms you seldom or
never use. By creating your own Private Forms list, you can eliminate those forms
from the Find a Form list.
With Private Forms, you can:
l
Select and use a pre-defined list
l
Modify and save a pre-defined list
l
Create and save your own unique list
You can open any form, regardless of whether it is on your Private Forms list, by
clicking the QuickLink icon or pressing the F9 key on the entry that the form
supports. This process, referred to as linking, opens a list of forms available to link, as
supporting forms, to the line and forms you link from. For example, you can open
Schedule B by clicking the QuickLink icon or pressing the F9 key of Form 1040, line
8a, or open Schedule C by clicking the QuickLink icon or pressing F9 on form 1040,
line 12.
You can also click Show All Forms at the top of the Find a Form list and TaxWise lists
all the available forms. To go back to your Private Forms list, click Use Private
Forms at the top of the Find a Form list.
Selecting and Using a Pre-Defined List
TaxWise comes with three pre-defined lists:
l
1040A, which contains only forms that you use in a 1040A return
l
1040EZ, which contains only forms that you use in a 1040EZ return
l
Bank, which contains basic individual return forms, but not bank
application forms
To use a pre-defined list, use the following steps:
1. Open the return on which you want to work.
2. Click the Add Form/Display Form List tab.
TaxWise displays the Find a Form list.
You can also press the Ctrl+F10 keys to display the Find a Form list.
3. Click Edit Private Forms.
- 68 -
Chapter 4: Using Administrator Features
TaxWise displays the [User name] Private Forms for [package] dialog
box
4. Select a Private Forms list from the drop-down list in the 3. You can start
with a pre-defined or saved Private Forms List box.
5. Click OK.
TaxWise returns you to the tax return you opened and displays only the list
you selected.
Creating a Custom Private Forms List
When creating a custom private forms list you have two options, the Admin user can
create a custom private forms list in Edit Tax Form Defaults or each user can create
their own from within a return. If the Admin user creates a private forms list in Edit
Tax Form Defaults they will have to be copied to the other users using Return
Explorer.
To create a Private Forms list from within a return, use the following steps:
1. Open the return on which you want to work.
2. Click the Add Form/Display Form List tab.
TaxWise displays the Find a form list.
You can also press Ctrl+F10 to display the Find a form list.
4. Below the Look for box, select Edit Private Forms.
TaxWise displays the [User] Private Forms for [package] dialog box.
5. Select the form(s) you want included in your Private Forms list from the
TaxWise Default List and click Add.
The TaxWise Default List includes all the forms available for the package you
choose.
TaxWise displays the forms you chose in the [User] Private Forms for
[package] dialog box.
If you want to add most of the forms to your Private Forms list, click Add All
and remove any forms you do not want by selecting them individually and
clicking Remove.
6. Do one of the following:
l
If you only want the Private Forms list to be available to your user
name, click OK.
l
If you want to be able to copy the Private Forms list to another user,
click Save List As…
- 69 -
Chapter 4: Using Administrator Features
7. Type a unique name for your list in the Enter a name for this Forms List…
box and click OK.
8. Click OK to close the [User] Private Forms for [package] dialog box.
When you close the [User] Private Forms for [package] dialog box,
TaxWise displays the name of the list you just saved under the Look For
box.
If you did not save the list using a unique name, TaxWise displays the list as
Use Private Forms: Default.
Removing a Saved Private Forms List
To remove a saved Private forms list, use the following steps:
1. Click the Add Form/Display Form List tab.
TaxWise displays the Find a form list.
You can also press the Ctrl+F10 keys to display the Find a form list.
2. Below the Look for box, select Edit Private Forms.
TaxWise displays the [User] Private Forms for [package] dialog box.
3. Click the Remove List button in the [User] Private Forms for [package] dialog
box.
TaxWise displays the Select Forms List to Remove dialog box.
4. Select the check box to the left of the list(s) you want to remove and click OK.
TaxWise removes the list(s) and displays a Status message box.
5. Click OK.
TaxWise returns you to the [User] Private Forms for [package] dialog box. It
changes to Default.
6. Remove the forms from the Your New Default List box and click OK.
TaxWise returns the Find a form list to the default view.
- 70 -
Chapter
5
Working with Users and Groups
TaxWise has powerful tools that will enable the network administrator to manage network
and program access efficiently thereby increasing productivity and maintaining
protections and security on your customer’s sensitive information.
Understanding Security Manager
Before adding new user names, the administrator should log in as Admin and enter Tax
Form Defaults, modify print packet defaults and create user-defined history lists. When
adding new user names, the administrator’s defaults are automatically copied to the new
user name.
Security Manager is the tool used by the administrator to:
l
Add user names to the system.
l
Assign, change, or remove user name passwords.
l
Create multiple groups with different levels of access to TaxWise menu
commands and actions.
l
Assign user names to the group or groups that give them the level of access
they need to perform their job tasks.
You do not have to create groups in TaxWise. By default, TaxWise assigns new user
names to the SuperUser group, which has access to everything in TaxWise except
Security Manager, Edit Tax Form Defaults, Schedule Ack Retrieval, Restrict
Report Access, and Edit History List. If you do not want to restrict your users’ access to
functions in TaxWise, simply accept this default setup.
- 71 -
Chapter 5: Working with Users and Groups
Similarly, you do not have to assign passwords to user names in TaxWise. The
password provides security by preventing anyone who does not know the password
from logging in to TaxWise with that user name and viewing or editing that user’s tax
returns. If you want to prevent unauthorized access, you should assign passwords to
all user names, including the default names Guest and Training.
Opening Security Manager
You must be logged in as the Admin user to open Security Manager. You cannot
assign access to Security Manager to any other user name.
To open Security Manager, use the following steps:
1. Click the Tools menu and select Utilities/Setup Options.
TaxWise displays the Utility.
2. Click the Setup menu and select Security Manager.
TaxWise displays the Security Manager dialog box:
Notice that TaxWise displays a list of existing groups and a short description of
each on the Groups tab.
You can assign a password to the Admin user name so that unauthorized users
cannot log in with that user name and make changes in Security Manager. Do
not forget the Admin user’s password there is no way to recover it if you forget
it. If you lose your Admin password, contact Customer Support for assistance.
- 72 -
Chapter 5: Working with Users and Groups
Understanding Default Groups
There are five default groups in TaxWise:
l
Administrators: Only the Admin user is or can be assigned to the
Administrators group. The Admin user has access to all commands and
actions except Start a New Return.
l
Demo: The Demo group is used by CCH SFS Sales personnel for
demonstration purposes to potential customers only. Do not assign user
names to the Demo group.
l
InterviewUsers: The InterviewUsers group has the same rights as a
user assigned to the SuperUser group. The difference between the two
groups involves starting a new return. When a user is assigned to the
InterviewUsers group and starts a new return, the Start Return in
Interview Mode check box is selected and disabled on the Enter
Social Security Number dialog box. Once the user enters the Social
Security number the Tax Interview will open instead of a new return.
l
ReturnManager: The ReturnManager group has the same rights as
SuperUser with the added ability to view and/or edit returns from any
user. This eliminates disclosing the password for Admin which keeps
Security Manager secure.
l
SuperUser: The SuperUser group has access to all the menu
commands and actions in TaxWise and the Utility except for Security
Manager, Edit Tax Form Defaults, Schedule Ack Retrieval,
Restrict Report Access, and Edit History List. By default, TaxWise
assigns all new users to the SuperUser group.
l
Training: The Training group has one default user name: Training.
You can assign user names you create to the Training group, which
allows each user to have a training user name for preparing practice
returns and submitting them to the Training EFC.
You cannot assign a user to the Training group and to another group at the
same time. TaxWise automatically removes user names from other groups
when you assign them to the Training group.
Remember, if you want to limit the actions to which new users have access, you must
create your own groups, assign the desired actions to the groups and assign user
names to the groups.
Users in other non-training groups cannot access returns prepared by users in the
Training group. Even if you reassign a user name from Training to another group, that
user cannot access the returns created while in the Training group. The SSN used to
start a return while using a user name assigned to the Training group must start with
three random numbers followed by the six-digit EFIN registered to that computer.
If you want to assign users both live and training user names at the same time, you
can easily identify the training user name by preceding it with a T or the word training.
For example, Mary Smith’s live user name might be Mary, while her training user name
might be TMary.
You cannot modify the actions of any of the default groups.
- 73 -
Chapter 5: Working with Users and Groups
Adding Groups
To add a group to TaxWise, use the following steps:
1. Click the Tools menu and click Utilities/Setup Options.
TaxWise displays the Utility.
2. Click the Setup menu and click Security Manager.
TaxWise displays the Groups tab of the Security Manager.
3. Click New.
TaxWise displays the New Group dialog box:
4. Type the new group name into the Group name box.
5. Type a brief description for the new group in the Description box.
6. Select the actions to which you want the group to have access from the
Available actions list and add them to the Group actions list by clicking the
Add button.
The Available actions list includes all of the securable menu commands and actions
in TaxWise and the Utility. TaxWise lists the menu commands and actions in
alphabetical order.
If you want the group to have any access to the Utility, you must move the
Utilities/Setup Options menu command from the Available actions list to the
Group actions list.
To remove an action from the Group actions list, do one of the following:
l
Select the action and click Remove.
l
Double-click actions to move them from one list to the other.
l
Drag and drop the actions from one list to the other.
To select and move multiple actions at one time, do one of the following:
- 74 -
Chapter 5: Working with Users and Groups
l
To select multiple, sequential items, select the first item you want to
move, press and hold the Shift key, scroll to the last item you want to
move and select it and click either Add or Remove.
l
To select multiple, non-sequential items, press and hold the Ctrl key
while you select the items you want to move and click either Add or
Remove.
7. Click OK to save your new group.
TaxWise displays the Security Manager with the new group listed.
8. Do one of the following:
l
To save your changes and close Security Manager, click OK.
l
To add more groups, click New.
Modifying Groups
To modify a group in TaxWise, use the following steps:
1. Click the Tools menu and click Utilities/Setup Options.
TaxWise displays the Utility.
2. Click the Setup menu and click Security Manager.
TaxWise displays the Groups tab of the Security Manager.
3. Select the group you want to change and click Modify.
TaxWise displays the New Group dialog box.
4. Make any necessary changes to the group and click OK.
TaxWise displays the Security Manager.
5. Click OK to save your changes.
Deleting Groups
Before deleting groups, make sure to move tax returns created by any users assigned
to that group.
To delete a group in TaxWise, use the following steps:
1. Click the Tools menu and click Utilities/Setup Options.
TaxWise displays the Utility.
2. Click the Setup menu and click Security Manager.
TaxWise displays the Groups tab of the Security Manager.
3. Select the group you want to delete and click Delete.
Note that the default groups, Administrators, Demo, Return Manager,
SuperUser and Training cannot be deleted.
- 75 -
Chapter 5: Working with Users and Groups
TaxWise displays the confirmation message box.
4. Click Yes to delete the group.
TaxWise displays the Security Manager.
5. Click OK to save your changes.
Understanding Default User Names
Before tax season starts, TaxWise recommends adding the name of each user at your
office to TaxWise. Users can only view and modify their own returns.
Some offices choose to create returns using the Guest user name. This is acceptable
but the following should be considered:
l
Creating more than a few hundred returns under a single user name can
seriously slow down your computer’s performance.
l
Using a single user name for multiple users reduces the security
provided by TaxWise by making all returns in the user name accessible
by other users of the same name.
The Admin User
Logging in as Admin allows you to set up system defaults and add the user names
from preparers and others in your office that will use TaxWise. The Admin user can
perform the following tasks in TaxWise:
l
Create Tax Form Defaults are copied to new user names when the
names are added to the system.
l
Modify print defaults that are automatically available to all users.
l
Use Security Manager to add user names, assign passwords, create
groups, and assign rights.
l
Open, edit, print, and create e-files for all users’ tax returns.
l
Move, rename, and delete all users’ returns.
l
Move, copy, and delete other users’ files in Return Explorer.
l
Limit access to the reports in TaxWise for each user.
The Admin user cannot start a new return.
The Guest User
The Guest user is the only user installed by default that can be used to start a new,
live tax return. The Guest user has unlimited access to TaxWise except for using
Security Manager, User-Defined History Lists, and Edit Tax Form Defaults.
- 76 -
Chapter 5: Working with Users and Groups
The Training User
Logging in as Training allows you to prepare practice returns and transmit them to
the Training EFC. The Training user has limited access within TaxWise.
You cannot prepare live tax returns when you are logged in as Training. The
primary SSN used in the Training user must start with three random numbers
followed by the six-digit EFIN. EINs must also start with three random numbers
followed by the six-digit EFIN.
Adding User Names
To add a user name to TaxWise, use the following steps:
1. Click the Tools menu and click Utilities/Setup Options.
TaxWise displays the Utility.
2. Click the Setup menu and click Security Manager.
TaxWise displays the Security Manager.
3. Click the Users tab.
TaxWise displays the Users tab of the Security Manager dialog box:
4. Click New.
- 77 -
Chapter 5: Working with Users and Groups
TaxWise displays the New User dialog box:
5. Type the new user name in the User name box.
6. If you want the user name password protected, type the user name’s password
in the Password box.
7. Do one of the following:
l
If you want to assign the user name to the default SuperUser group,
proceed to the next step.
l
If you want to assign the user name to the Training group, double-click
Training in the Available groups list. This action moves Training to
the Assigned groups list and moves SuperUser to the Available
groups list.
l
If you want to assign the user name to one or more groups you have
created, double-click the groups(s) in the Available groups list to
which you want the user name assigned. By default SuperUser will
already be in the Assigned groups box and will remain there unless you
select the Training group. You can remove the SuperUser name form
the Assigned Groups box by selecting it, then clicking on the Remove
button.
8. Click OK.
- 78 -
Chapter 5: Working with Users and Groups
TaxWise takes you back to the Security Manager dialog box and displays
the user name you added:
9. Do one of the following:
l
Click New to add another user name.
l
Click OK to save your changes and close the Security Manager dialog
box.
Modifying User Names
You can add, remove, or change a user’s password or change the group(s) to which a
user is assigned.
To modify a user name in TaxWise, use the following steps:
1. Click the Tools menu and click Utilities/Setup Options.
TaxWise displays the Utility.
2. Click the Setup menu and click Security Manager.
TaxWise displays the Security Manager dialog box.
3. Click the Users tab.
TaxWise displays the Users tab of the Security Manager.
4. Select the user name you want to change and click Modify.
- 79 -
Chapter 5: Working with Users and Groups
TaxWise displays the Modify User dialog box:
5. Make any necessary changes to the user name and click OK.
TaxWise displays the Security Manager dialog box.
6. Click OK to save your changes.
Deleting User Names
Before deleting a user name, you must move or delete all of that user’s live tax returns
using Return Explorer. TaxWise also suggests making a backup of all returns prior
to deleting them. If the user has only prepared training returns in the Training group,
you do not have to move or delete the returns before deleting the user name.
To delete a user name in TaxWise, use the following steps:
1. Click the Tools menu and click Utilities/Setup Options.
TaxWise displays the Utility.
2. Click the Setup menu and select Security Manager.
TaxWise displays the Security Manager dialog box.
3. Click the Users tab.
TaxWise displays the Users tab of the Security Manager.
4. Select the user name you want to delete and click Delete.
- 80 -
Chapter 5: Working with Users and Groups
TaxWise displays a message box similar to the following:
5. Click Yes to delete the user name.
TaxWise displays the Security Manager dialog box.
If the user name you are deleting contains returns, you will see the following
dialog box:
6. Click OK, delete or move the returns, and then follow these instructions to
delete the user.
7. Click OK to save your changes.
Restrict Report Access
The Admin user has the ability to restrict access to the reports in TaxWise for each
user.
The Admin user can also restrict report access for custom reports created for
your office.
To restrict access to reports, use the following steps:
1. Log in to TaxWise as the Admin user.
2. Click the Tools menu and select Restrict Report Access.
- 81 -
Chapter 5: Working with Users and Groups
TaxWise displays the Restrict Report Access window:
3. Click the drop-down arrow beside User: to select the user for which you want
to limit report access.
4. Click the drop-down arrow beside Type: to select the type of reports for which
you want to limit access. The list of available reports will change based on the
type of reports selected.
5. Select the reports in the Available Reports column for which you wish to limit
access and click the Add button. If you wish to limit access for all reports, click
the Add All button.
TaxWise moves the report(s) to the Denied Reports column:
6. To grant access to previously denied reports, select the reports in the Denied
Reports column for which you wish to grant access and click the Remove
button. If you wish to grant access for all reports, click the Remove All
- 82 -
Chapter 5: Working with Users and Groups
button.
7. Once you have finished with your changes, click the Close button.
TaxWise displays a message box similar to the following:
8. Click Yes to save settings and apply your changes.
Once the Admin user limits report access for users, the user will not see
denied reports in the list of available reports on the Select a Report to Print
window. All available reports will still be shown in the Select a Report to
Print window.
- 83 -
- 84 -
Chapter
6
Using Return Explorer
You can use Return Explorer to move, rename, and delete tax returns and copy, move and
delete other files. The admin user can copy and/or move files on the system to another. All
other users can only select their files in their own user sub-directories and copy or move
the files to another location on the system.
Opening Return Explorer
To open Return Explorer, use the following steps:
1. Click the Tools menu and select Utilities/Setup Options.
TaxWise displays the Utility.
2. Click the File menu and select Return Explorer.
- 85 -
Chapter 6: Using Return Explorer
TaxWise displays the Return Explorer dialog box:
Return Explorer
When you log in as the Admin user, you have access to files in all other users. If you
are logged in as any other user, you have access to perform operations on only those
files belonging to that user.
The following table describes the actions you can perform in Return Explorer:
Action Description
Copy
This action allows you to copy Tax Form Defaults, Private Forms lists,
Files to
Print Packet Forms lists, History lists, and User-Defined History
Another
lists. You cannot copy tax returns to another user. The Admin user can
Location
copy any type of user file except tax returns.
Delete
Files
This action allows you to delete tax returns and other files. When you
delete a file, you cannot recover it. TaxWise does not copy it to the
Windows Recycle Bin or any other location on your computer. If you are
deleting tax returns to free up hard drive space, make sure you have at
least one good backup copy of the returns you want to delete.
Move
Files to This action allows you to move tax returns and other files from one user to
Another another. When a file is moved it is no longer available in the original
Location location.
This action allows you to change the file name of an existing tax return.
Rename TaxWise automatically puts a two-character code at the beginning of a tax
a
return. This file name indication shows the tax year and tax package.
Return
When you rename a return, do not type this code as part of the new file
name.
- 86 -
Chapter 6: Using Return Explorer
The following table describes some of the file types you can copy, move, or delete in
Return Explorer:
File
Type
Description
The file name consists of 11 characters in the following format:
Number (tax year) + one character (tax package) + six zeros (remaining
file name info) + three zeros (extension)
Example file name: 0I000000.000, where the 0 represents tax year 2010
Tax
and the I represents the 1040 individual package.
Form
Defaults The tax package can be identified as follows:
I – Individual (1040), C – Corporate (1120), S – S-Corporate (1120S), P
– Partnership (1065), F – Fiduciary (1041), G – Gift Tax (709), E –
Estate Tax (706), X – Exempt Organization (990), B – Employee Benefits
(5500), M – Miscellaneous, U – Puerto Rico Individual, R – Puerto Rico
Corporaciones, D – Puerto Rico Sociedades
History
The .DAT extension identifies the History List built from like fields as
returns are prepared.
Example file name: HISTORY.DAT
Packet
Form
Lists
The .PFL extension identifies the Packet Form List files.
Example file name: Federal.PFL
The file name consists of 11 characters in the following format:
Userdefined
History
Lists
Number (tax year) + one character (tax package) + UserList (remaining
file name info) + .uhl (extension)
Example file name: 0IUserList.uhl, where the 0 represents tax year 2010
and the I represents the 1040 individual package.
The .PDF extension identifies the Private Forms list files.
Private
Forms
The .PFU extension identifies user created Private Forms list files.
Example file name: I1040A.pfd (forms for 1040A returns)
The file name consists of 11 characters in the following format:
Tax
Returns
Number (tax year) + one character (tax package) + the name you gave
the return (remaining file name info) + next three characters of the name
you gave the return.
Example file name: 0IMarySmith, where the 0 represents tax year 2010,
and the I represents the 1040 individual package, and the remaining nine
characters represent the file name you gave the return.
- 87 -
Chapter 6: Using Return Explorer
Copy Files to Another Location
This action allows you to copy Tax Form Defaults, Private Forms lists, Print
Packet Forms lists, History lists, and User-Defined History lists. You cannot
copy tax returns to another user. The Admin user can copy any type of user file except
tax returns.
To copy files to another location, use the following steps:
1. If you are logged in as the Admin user, select the user name containing the
file(s) you want to select from the Look in drop-down list.
The Admin user can select from any user name. Other user names will be able
to select files only from their own user folder and the Look in drop-down list
will be grayed out.
2. In the Show box, click the arrow to display a list of file types. Select the type of
file you are looking for. To display all files, select All. The files of the type you
selected will appear in the File List.
3. In the Action box, select Copy Files to Another Location.
4. Select the file(s) you wish to copy from the File List. To select all files press
Ctrl+A. To select sequential files, click the first file, hold down the Shift key,
then click the last file. To select non-sequential files, click the first file, hold
down the Ctrl key, then click the other files.
5. Select the user name to which you wish to copy the files from the Copy to
drop-down list.
6. To copy files to a location other than to a user folder, click the Browse option
from the Copy to drop-down list.
TaxWise displays the Select Destination Path dialog box:
7. Navigate to the location where you wish to save the file(s) and click OK.
8. Click the Copy button at the bottom left of the Return Explorer window.
- 88 -
Chapter 6: Using Return Explorer
TaxWise displays a status message:
Delete Files
This action allows you to delete tax returns and other files. When you delete a file, you
cannot recover it. TaxWise does not copy it to the Windows Recycle Bin or any other
location on your computer. If you are deleting tax returns to free up hard drive space,
make sure you have at least one good backup copy of the returns you want to delete.
To delete files, use the following steps:
1. If you are logged in as the Admin user, select the user name containing the
file(s) you want to select from the Look in drop-down list.
The Admin user can select from any user name. Other user names will be able
to select files only from their own user folder and the Look in drop-down list
will be grayed out.
2. In the Show box, click the arrow to display a list of file types. Select the type of
file you are looking for. To display all files, select All. The files of the type you
selected will appear in the File List.
3. In the Action box, select Delete Files.
4. Select the file(s) you wish to delete from the File List. To select all files press
Ctrl+A. To select sequential files, click the first file, hold down the Shift key,
then click the last file. To select non-sequential files, click the first file, hold
down the Ctrl key, then click the other files.
5. Click the Delete button at the bottom left of the Return Explorer window.
You will be asked to confirm that you want to delete the files. If you answer Yes
the files are immediately deleted. They are not sent to the Windows Recycle Bin
and cannot be recovered.
TaxWise displays a confirmation window:
6. Click Yes to delete the file(s) or No to stop the process.
- 89 -
Chapter 6: Using Return Explorer
If you click Yes, TaxWise displays a status message:
Move Files to Another Location
This action allows you to move tax returns and other files from one user to another.
When a file is moved it is no longer available in the original location.
To move files to another location, use the following steps:
1. If you are logged in as the Admin user, select the user name containing the
file(s) you want to select from the Look in drop-down list.
The Admin user can select from any user name. Other user names will be able
to select files only from their own user folder and the Look in drop-down list
will be grayed out.
2. In the Show box, click the arrow to display a list of file types. Select the type of
file you are looking for. To display all files, select All. The files of the type you
selected will appear in the File List.
3. In the Action box, select Move Files to Another Location.
4. Select the file(s) you wish to move from the File List. To select all files press
Ctrl+A. To select sequential files, click the first file, hold down the Shift key,
then click the last file. To select non-sequential files, click the first file, hold
down the Ctrl key, then click the other files.
5. Select the user name to which you wish to copy the files from the Move to
drop-down list.
6. To move files to a location other than to a user folder, click the Browse option
from the Move to drop-down list.
- 90 -
Chapter 6: Using Return Explorer
TaxWise displays the Select Destination Path dialog box:
7. Navigate to the location where you wish to save the file(s) and click OK.
8. Click the Move button at the bottom left of the Return Explorer window.
TaxWise displays a status message:
Rename a Return
This action allows you to change the file name of an existing tax return. TaxWise
automatically puts a two-character code at the beginning of a tax return. This file
name indication shows the tax year and tax package. When you rename a return, do
not type this code as part of the new file name.
To rename a return, use the following steps:
1. If you are logged in as the Admin user, select the user name containing the
file(s) you want to select from the Look in drop-down list.
The Admin user can select from any user name. Other user names will be able
to select files only from their own user folder and the Look in drop-down list
will be grayed out.
2. In the Show box, click the arrow to display a list of file types. Select the type of
file you are looking for. To display all files, select All. The files of the type you
selected will appear in the File List.
3. In the Action box, select Rename a Return.
- 91 -
Chapter 6: Using Return Explorer
4. Select the file you wish to move from the File List. You can only select one file
at a time.
5. Enter the new name for the return in the Rename to box.
6. Click the Rename button at the bottom left of the Return Explorer window.
TaxWise displays a status message:
- 92 -
Chapter
7
Working with Tax Returns
From beginning to end TaxWise is built to save you valuable time, that you can use to be
more productive and increase your business. TaxWise uses state of the art programming
and software tools to minimize the amount of time required to build a return, from getting
started to sending off the final product to the IRS.
Getting Started
TaxWise integrates Federal and state tax preparation in all packages. Information flows
automatically from the Federal return to the state return.
l
In the 1040 Individual package, TaxWise integrates Federal and state
electronic filing and bank products into the tax preparation process.
l
In the 1065 Partnership, 1120 “C” Corporation, 1120 “S”
Corporation, 1041 Fiduciary, and 5500 packages, TaxWise integrates
federal electronic filing into the tax preparation process.
l
Each client’s custom letter and/or slip-sheet and invoice are included
in his tax return file, but only if added in defaults.
When you finish entering all information into a tax return that you will file electronically,
you can immediately run diagnostics and create the electronic file (e-file). To transmit one
or more e-files, use the Send Federal/State Returns command on either the home page
or the Communications menu.
You can prepare an unlimited number of tax returns in the Federal and state packages you
purchase. You can also prepare returns in other Federal and state packages on a pay-perreturn basis. When you enter a state abbreviation for a state you have not licensed, or
- 93 -
Chapter 7: Working with Tax Returns
when you attempt to start a return in a package you have not licensed, TaxWise
prompts you to order a pay-per-return.
Before you prepare any live returns, you should log in as the Admin user and perform
the following tasks:
l
Edit your Tax Form Defaults for each tax package you plan to use.
l
Edit your Print Packets.
l
Create all the groups and user names for your office.
l
Run the Carry Forward Prior Year Data command on the Tools menu.
l
Flag any clients for whom you want to be alerted to specific data.
Remember, anytime you need help in TaxWise, you can:
l
Press the F1 key for TaxWise Help.
l
Press the Shift+F1 keys for IRS instructions.
l
Press the Shift+F1 keys while you are in a state form for state
instructions
l
Access the TaxWise Knowledge Base on the Customer Support Site,
for which you need an active Internet connection.
Carrying Forward Prior Year Data
The Carry Forward Prior Year Data command allows you to bring forward
information from last year’s return into the current year’s return. You do not have to
retype information that remains the same year after year.
The Carry Forward Prior Year Data command pulls data from last year’s return into
a file that is readable by the current version of TaxWise. When you start a new return
for a client, TaxWise displays a message that indicates prior year data exists. You can
load the prior year data into the tax return at that time.
Your 2009 TaxWise returns must be on your system, and you must know on which
drive you saved the returns if it is different from the drive on which you installed
TaxWise 2010.
To carry forward prior year data, use the following steps:
1. Click the Tools menu, point to Carry Forward, and select Prior Year Data.
- 94 -
Chapter 7: Working with Tax Returns
TaxWise displays the Carry Forward Prior Year Data dialog box:
If the previous year TaxWise files are located on a directory different than the
current year of TaxWise, enter the drive letter and a colon in the Directory
containing files box (i.e. D:\UTS09\USERS).
2. Click OK.
TaxWise displays the Select User Name dialog box:
If TaxWise displays a message box indicating that you did not select a user and
it is exiting the process, check to make sure that the Directory containing
files box contains the correct information.
3. Press and hold the Ctrl key while you select the user names whose return
information you want to carry forward.
4. Click OK.
- 95 -
Chapter 7: Working with Tax Returns
If there are no returns in one of the users names you selected, TaxWise
displays the following message:
5. Click OK.
TaxWise displays a list of returns from the first user name you selected:
Notice the Title bar shows the path with the User Name and in the example
above, 0/5 represents no returns have been selected out of three returns.
6. Do one of the following:
l
Click All Clients to carry forward the prior year data for all of the clients
for whom your office prepared tax returns under this user name, click
OK.
l
Press and hold the Ctrl key while you select the specific returns you
want to carry forward, and click OK. TaxWise displays the list of returns
for the next user name you selected. Repeat this process for all the users
you selected.
- 96 -
Chapter 7: Working with Tax Returns
When you finish selecting returns, TaxWise processes your request and
displays a dialog box similar to the following:
7. Click OK.
Loading Prior Year Data into a Current Tax Return
Each time you start a new return TaxWise searches for prior year data that has been
carried forward to the current year. If the prior year data exists for the SSN you
entered, TaxWise displays a dialog box similar to the following:
Do one of the following:
l
Click Yes to load the data into the new return.
l
Click No to start the return without loading the data.
Prompt if Return not Carried Forward
TaxWise has the ability to alert you if a return was created last year but has not been
carried forward for this year.
1. To enable this functionality, select the Prompt if Return not Carried
Forward check box on the Enter Social Security Number dialog box that
opens when you click Start a New Return from the TaxWise home page.
- 97 -
Chapter 7: Working with Tax Returns
2. Enter the Social Security number in the SSN field.
3. TaxWise scans the prior year directory to see if a return with this SSN existed.
If a prior year return is found, TaxWise displays a confirmation box:
4. If you select Yes, TaxWise carries forward the prior year information and
opens a new return in the current year.
5. If you select No, TaxWise allows you to start the return as you normally would.
Copying Data from One Computer to Another
To copy data you have carried forward from one computer to another, you must copy
the files to a removable disk and then copy them to the UTS10\Proforma folder on the
second computer.
To copy data from one computer to another, use the following steps:
1. Insert some form of removable media into the appropriate drive of your
computer.
2. Follow the steps to carry forward the data on the computer where the returns
are located.
3. On the same computer, click the Tools menu and click Utilities/Setup
Options.
TaxWise displays the Utility.
4. Click the File menu and click Copy Proforma Files.
- 98 -
Chapter 7: Working with Tax Returns
TaxWise displays the Select Proforma Directory dialog box.
5. Select the drive from which you are copying from the Drives drop-down list.
6. Select the folder from which you are copying from the Directories list.
The default location is UTS10\Proforma.
7. Click OK.
TaxWise displays the Select Proforma Destination dialog box.
8. Select the removable media or other desired drive form the Drives drop-down
list.
TaxWise cannot copy files to a CD unless it is formatted as a Direct CD. You
must use a CD-RW, meaning that it must have read-write capabilities.
TaxWise copies the proforma files to the location you specified and displays
the following message:
9. Click OK or Cancel to return to the Utility.
10. If you clicked OK, remove the removable media, carry it to the second
computer, and insert it into the appropriate drive.
11. Start TaxWise and log in.
12. Click the Tools menu and click Utilities/Setup Options.
TaxWise displays the Utility.
13. Click the File menu and click Copy Proforma Files.
TaxWise displays the Select Proforma Directory dialog box.
14. Select the drive from which you are copying from the Drives drop-down list.
15. Select the folder from which you are copying from the Directories
drop-down list.
16. Click OK.
17. Select the location to which you want to copy the files. For example,
X:\UTS10\PROFORMA, where X is the correct drive letter.
You do not have to select the files you want to copy.
- 99 -
Chapter 7: Working with Tax Returns
18. Click OK.
TaxWise copies the Proforma files to the new location.
Flagging Last Year's Clients
TaxWise provides a way to flag the Social Security number of specific clients for last
year. This feature is useful in providing helpful information to your preparers as they
work with your clients. For example, you might want to flag a client who still owes
preparer fees or who applied for a RAL that was not approved and thus became an ERC
last year.
To flag specific SSNs, you must create a text file and save it in the UTS09\Proforma
subdirectory called Flips.09. The file simply lists the SSNs of the clients you want to
flag and message that you write about that client.
You can use any text editor to create the file. The following instructions and
illustrations use Windows Notepad, but the steps are the same for other text editors.
To flag last year’s clients, use the following steps:
1. Click the Start button on the Taskbar, point to All Programs, point to
Accessories, and click Notepad.
Windows launches Notepad:
2. Type the SSN for each client you want to flag, followed by a message that
identifies why you flagged the SSN.
- 100 -
Chapter 7: Working with Tax Returns
The following illustration shows an example of how your list might look:
Enter one SSN per line, include dashes in the SSN, and remember that the
message must be to the right of the SSN.
3. Click the File menu and click Save.
Notepad displays the Save As dialog box.
4. Navigate to the UTS10\PROFORMA folder, type “flips.09” in the File name box,
and click Save.
You must include the quotation marks to prevent Notepad from adding a *.txt
extension to the file name.
When you start a new return for a SSN you flagged, TaxWise displays a
message box similar to the following:
5. Click OK to continue with the return.
TaxWise only displays this message when you start the return. It does not display it
again if you re-open the return for editing.
You can edit the Flips.09 file at any time to add or remove SSNs.
- 101 -
Chapter 7: Working with Tax Returns
Starting a New Return
Before starting a new return, make sure you are in the correct year and tax package
and logged in properly by looking at the Title bar, as illustrated below:
This information includes steps and illustrations for the 1040 individual package.
Some steps and illustrations may vary slightly, depending on the package you use.
To start a new return, use the following steps:
1. Do one of the following:
l
Click the Start a New Return link on the home page.
l
Click the File menu and click Start a New Return.
l
Press the Ctrl+N keys.
TaxWise displays the Enter Social Security Number dialog box:
2. Enter the primary Social Security Number for the tax return in the SSN box
and press the Tab key.
It is critical that the SSN be correct. Incorrect SSNs delay taxpayer refunds.
3. Enter the SSN again in the Re-key SSN box and click OK.
- 102 -
Chapter 7: Working with Tax Returns
If you carried forward prior year data for the SSN, TaxWise displays a
message box similar to the following:
4. Click Yes to load carry forward data.
If there is carry forward data and you select Yes to load it, the return loads at this
point and you do not have to re-key the SSN.
By default, the Use SSN to name file feature is enabled. If this check box
remains selected, TaxWise automatically inserts the SSN in the File name box.
If this check box is de-selected and the feature is disabled, you must enter a
different file name in the File name box.
By default, the Prompt if Return not Carried Forward feature is disabled. If
this check box remains deselected, you will not receive a prompt when starting
a new return with a taxpayer SSN that was used in a return last year, but not
carried forward. If this check box is selected and the feature is enabled, you
will be prompted when you start a new return with a taxpayer SSN that was
used last year.
5. Click Yes to carry forward and load data into the new return.
TaxWise displays the Main Information Sheet in the workspace.
Working with the Main Information Sheet
If the package includes a Main Information Sheet, you must complete it first – before
proceeding to any other form in the return. The information you enter on the Main
Information Sheet carries to other areas in the return.
Immediately after you complete the Main Information Sheet, complete all the income
statements for your return, such as W-2, K-1, 1099-R, or 1099-G. Then complete
other supporting forms and schedules.
Self-Select PIN Method
The Self-Select PIN method allows taxpayers to electronically sign their e-file tax
returns by entering a five-digit PIN. The five-digit PIN can be any five numbers except
- 103 -
Chapter 7: Working with Tax Returns
all zeros. The Self-Select PIN method requires the entry of each taxpayer’s date of
birth and prior year original adjusted gross income, which are used to authenticate
the taxpayer.
The following taxpayers are NOT eligible to use the Self-Select PIN:
l
Primary taxpayers under age 16 who have never filed
l
Secondary taxpayers under age 16 who did not file in the immediate
prior year
Taxpayers required to file the following forms which must be attached to Form 8453:
l
Form 1098C, Contributions of Motor Vehicles, Boats, and Airplanes
l
Form 3115, Application for Change in Account Method
l
Form 3468, Computation of Investment Credit
l
Form 4136, Credit for Federal Tax Paid on Fuels
l
Form 5713, International Boycott Report
l
Form 8283, Non-Cash Charitable contributions (if using Part B)
l
Form 8332, Release of Claim to Exemption for Children of Divorced or
Separated Parents
l
Form 8858, Information Return of U.S. Persons with Respect to Foreign
Entities
l
Form 8864, Biodiesel and Renewable Diesel Fuels Credit
l
Form 8885, Health Care Insurance Credit for Eligible Receipts
l
Schedule D transaction listing
l
Copy of Divorce or Separation Agreement
l
Revenue Procedure 2009-20 (Ponzi loss)
Entering Self-Select PIN Information
To enter Self-Select PIN information, use the following steps:
1. On the Main Information Sheet, enter the ERO PIN in the Self-Select and
Practitioner PIN(s) section.
2. Select the form you are e-filing using the PIN.
3. Enter the taxpayer’s original 2009 AGI or 2009 PIN and press the Tab key.
4. If necessary, enter the spouse’s original 2009 AGI or 2009 PIN and press the
Tab key.
- 104 -
Chapter 7: Working with Tax Returns
5. The taxpayer and spouse MUST enter their PINs.
l
The practitioner may NOT enter a PIN for a taxpayer using the Selfselect method.
l
The taxpayer must complete and sign Form 8879, IRS e-file signature
Authorization, BEFORE the return is transmitted. Form 8879 must be
kept on file for three years.
6. Enter the current date.
Do NOT use @t/od/ay.
Practitioner PIN Method
The Practitioner PIN method offers another signature option for use in preparing and
transmitting Forms 1040, 1040A, and 1040-EZ. This method also allows taxpayers to
sign their return using a five-digit PIN they select. It does not require entry of the
taxpayer’s date of birth and prior year original adjusted gross income.
There is no age restriction on who can use the Practitioner PIN method; everyone is
eligible.
Taxpayers who are required to file the following forms must attach them to Form
8453:
l
Form 1098C, Contributions of Motor Vehicles, Boats, and Airplanes
l
Form 3115, Application for Change in Account Method
l
Form 3468, Computation of Investment Credit
l
Form 4136, Credit for Federal Tax Paid on Fuels
l
Form 5713, International Boycott Report
l
Form 8283, Non-Cash Charitable contributions (if using Part B)
l
Form 8332, Release of Claim to Exemption for Children of Divorced or
Separated Parents
l
Form 8858, Information Return of U.S. Persons with Respect to Foreign
Entities
l
Form 8864, Biodiesel and Renewable Diesel Fuels Credit
l
Form 8885, Health Care Insurance Credit for Eligible Receipts
l
Schedule D transaction listing
l
Copy of Divorce or Separation Agreement
l
Revenue Procedure 2009-20 (Ponzi loss)
- 105 -
Chapter 7: Working with Tax Returns
Entering Practitioner PIN Information
To enter Practitioner PIN information, use the following steps:
1. On the Main Information Sheet, enter the ERO PIN in the Self-Select and
Practitioner PIN(s) section.
2. Select the check box for the Practitioner PIN method.
3. Select the form you are e-filing using the PIN.
4. Allow the taxpayer and spouse to enter their PINs or enter the PINs yourself.
If the taxpayer agrees, it is acceptable for the tax preparer to assign and enter the
taxpayer PIN. The taxpayer must complete and sign Form 8879, IRS e-file signature
Authorization, BEFORE the return is transmitted. Form 8879 must be kept on file for
three years.
5. Enter the current date.
Do NOT use @t/od/ay.
- 106 -
Chapter 7: Working with Tax Returns
Working with Forms
If you need to add a form to your return, you can do so by using one of several
methods:
l
While your cursor is in a tax form entry, click the QuickLink icon or
press the F9 key to link the form from which the entry’s data carries.
l
Click the Add Form/Display Form List tab in the workspace to open
the Find a form list.
l
Press the Ctrl+F10 keys to open the Find a form list.
l
Press the Shift+F10 keys to create a new, blank copy of the form that is
already open in the workspace.
l
Click the Copy This Form tab in the workspace to create a new, blank
copy of the form that is already open in the Workspace.
l
Right-click and select either Add Form/Display Form List or Copy
(current form) from the shortcut menu.
You can only do this for forms that allow more than one copy.
Adding a Form from the Find a Form List
To add a form from the Find a form list, use the following steps:
1. Do one of the following:
l
Press the Ctrl+F10 keys.
l
Click the Add Form/Display Form List tab in the Workspace.
TaxWise displays the Find a form list.
2. Type the shortcut for the form in the Look for box and press the Enter key.
l
For a numbered form, such as Form 2441, type the form number and
press the Enter key. For a lettered form, such as Schedule A, type the
form letter (A in this case) and press the Enter key. In most cases, you
only need to type one or two digits to find and select the form.
l
You can view a complete list of shortcuts in the Shortcut column of the
Find a Form list. The shortcut keys are highlighted in blue text.
l
You can also sort by clicking the Type or Description column. For
example, if you do not know the form number but you know the
description, click the Description column. The Look for box sorts by
description.
l
If you cannot find the form you need, click Can’t find it? Try Form
Filter List and search for the form. For more information on using the
Form Filter, refer to TaxWise Help.
3. Double-click the form to add the form to the current return.
- 107 -
Chapter 7: Working with Tax Returns
Adding a New, Blank Copy of an Open Form
When you complete a form, such as a W-2, in the workspace and you need to add a
new, blank copy to that form, do one of the following:
l
Press the Shift+F10 keys.
l
Click the Copy This Form tab.
l
Click the Forms menu and click Copy [Form Name].
l
Right-click on a form and select Copy [current form] from the
shortcut menu.
TaxWise opens the form in the workspace.
Some forms, such as the Main Information Sheet and the 1040 cannot be
duplicated.
Linking to a Form
You can add forms to a return by linking from the entry to which the form’s data will
carry. For example, to open Form W-2, click the QuickLink icon or press the F9 key
while your cursor is on line 7 of Form 1040.
TaxWise displays the Entry Links dialog box:
Select NEW W2 from the list and click OK.
l
Most of the time, regardless of how you open most forms, the data you
enter carries to the correct line of the tax return. However, the
recommended method is to link the form since there are some instances
that require linking. An example would be when entering depreciation
and depreciation worksheets.
l
You can also right-click inside a form entry and click Link in the
shortcut menu.
- 108 -
Chapter 7: Working with Tax Returns
Working with Child and Parent Forms
You can open most tax forms either by linking or by selecting the form directly from
the Find a Form list.
There are a few forms for which you must establish the link from the parent form to
the child form in order for TaxWise to use the data correctly. These include, but are
not limited to the forms described in the following table:
Child Form
Parent Form(s) to which it must
link
1099-Misc (Miscellaneous
Income)
Schedule C
Schedule C-EZ
Form 1040
Schedule E
Schedule F
Form 8919 TP
Form 8919 SP
Form 1040NR
Form 4835
Form 4562 (Depreciation)
Schedule C
Schedule E
Schedule F
Form 4835
Form 2106
Form 2106EZ
K-1 P/S
4562 summary
Depreciation Worksheets
Form 4562
Form 4797
Form 4835
Form 6252
Schedule A
Schedule C
Schedule F
4562 summary
Form 4852 Substitute W-2
1099-R
Form W-2
Form 1099-R
Form 6198 (At Risk Losses)
Schedule C
Schedule E
Schedule F
Form 4835
K-1 P/S
Form 8829 (Business Use of
Home)
Schedule C
Form 4684
Each preparer has a preferred method of opening forms. Some prefer to open forms
from the Find a form list, while others prefer to open a primary tax form (1040,
1120, etc.) and work their way down each line of the form, linking to supporting forms
as they go. TaxWise recommends linking to supporting forms to ensure everything
carries to the proper forms. Instructions for both methods are included on the
following pages.
- 109 -
Chapter 7: Working with Tax Returns
Switching to a Different Parent Form
In some cases, you may want to link a child form to a different parent form. In this
example, we will use an Asset Worksheet.
When you switch an Asset Worksheet from one parent to another, you must choose
another appropriate parent form. For example, you could move an Asset Worksheet
from one Form 4562 to another.
To switch an Asset Worksheet to a different parent form, use the following steps:
1. In the Tree, right-click the Asset Worksheet for which you want to change the
parent form.
TaxWise displays a shortcut menu similar to the following:
2. Click Change Parent Form.
3. TaxWise changes the cursor allowing you to select a different parent form in
the tree.
Once you select a new parent form in the tree, TaxWise displays a message
box similar to the following:
4. Click Yes.
TaxWise moves the Asset Worksheet to the new parent form.
When you perform this procedure for an Asset Worksheet, TaxWise does not allow you
to select a parent form to which depreciation does not apply. If you select a form that
cannot be the parent form, TaxWise displays a message box similar to the following:
- 110 -
Chapter 7: Working with Tax Returns
Opening and Linking a Form from Find a form
When you double-click one of these forms from the Find a form list, TaxWise displays a
list of possible parent forms to which you can link.
In the example below, TaxWise displays the possible parent forms for Form 4562:
Select the parent form you want to use and click OK. TaxWise adds both the parent
form and the child form to the return and opens the child from in the workspace.
TaxWise carries the totals from the child form to the parent form you selected.
Opening a Form by Linking
At times, you may want to open forms by linking from the parent form to the child
form, rather than by selecting a child form from the Find a Form list.
There are three ways you can open a child form by linking:
l
Click the QuickLink icon next to the entry on the parent form
l
Press the F9 key
l
Right-click an entry and selecting Link from the shortcut menu
- 111 -
Chapter 7: Working with Tax Returns
Removing a Form
To remove an unnecessary form from a return, use the following steps:
1. Open the form you want to remove.
2. Do one of the following:
l
Press the Shift+F9 keys
l
Click the Remove Form tab in the workspace
l
Right-click on the form and select Remove Form from the menu that
displays
TaxWise removes the form and returns you to the Find a form screen.
If you have attached scratch pads or supporting forms, TaxWise displays a message
window that lists the forms that will be removed and gives you the option to cancel the
removal:
Sometimes you cannot remove a form. For example, if you used the Interview form and
the answer to a question on the Interview caused TaxWise to load a particular form in
the return, you cannot delete the form until you change the answer on the Interview
form.
Similarly, if you marked an entry on one form that caused TaxWise to load a different
form in the return, you cannot remove the second form until you change the entry in
the first form. For example, if you select the Dependent Care check box for a
dependent on the Main Information Sheet, TaxWise loads Form 2441. You cannot
remove Form 2441 as long as the Dependent Care check box remains selected.
- 112 -
Chapter 7: Working with Tax Returns
Moving Around in a Form
The following table describes the keyboard shortcuts you can use to navigate a form in
TaxWise:
Key(s)
Moves you to the...
Ctrl+E
Next required entry
Enter
Tab
Right arrow
Next entry
Shift+ Enter
Shift+Tab
Left arrow
Previous entry
Ctrl+Home
First entry on the current page
Ctrl+End
Last entry on the current page
Home
First character in the current entry
End
Last character in the current entry
Ctrl+ Page
Down
Next form in the Tree
Ctrl+ Page Up Previous form in the Tree
Page Down
Next section of the page, or at the bottom of the page, opens the
next page
Page Up
Previous section of the page, or at the top of the page, opens the
previous page
You can also use the mouse to click the field to which you want to go.
Scrolling Through the Forms in a Return
There are four ways you can use the keyboard to scroll through the forms in a return:
l
Click a form in the workspace, and press the Ctrl+Page Down keys to
open the next form listed in the Tree or press the Ctrl+Page Up keys to
open the previous form.
l
Click in the Tree, and press the Down arrow key to move down the Tree
and open forms as you go, or press the Up arrow key to move up the
Tree and open forms as you go.
l
Click in the Tree and type the first character of the form you want to
open. Press the same character again to move to the next form that
starts with the same character.
l
Press the Shift+Page Up keys or the Shift+Page Down keys to open
each page of a single form.
- 113 -
Chapter 7: Working with Tax Returns
You can also use the mouse to scroll through the forms:
l
Click a form in the Tree to open it.
l
If a form has a plus sign (+) beside it, click the plus sign to view the
additional pages or supporting forms.
l
If a form has a minus sign (-) beside it, click the minus sign to hide the
additional pages or supporting forms.
l
Click the Prev Form and Next Form buttons on the toolbar to scroll
through the forms listed in the Tree.
Saving Returns
You should save your return frequently by pressing the F2 key. This command saves
data entered up to that point. When you close a return, TaxWise automatically saves
your data. You do not have the option to close a return without saving it.
Saving frequently protects the data in the event your computer should lose power
while you are preparing a return.
Viewing Two Forms at One Time
There are times when you may want to look at two forms at the same time to see how a
change to an amount on one form affects the other, when you want to look at a state
and Federal form, or when two states are attached.
To view two forms at once, use the following steps:
1. Open the first form you want to view.
2. Do one of the following:
l
Press the F6 key
l
Right-click the first form and click Show Second Form on the shortcut
menu
- 114 -
Chapter 7: Working with Tax Returns
TaxWise displays the first form in the bottom half of the Workspace and the
Find a form list in the top half of the Workspace:
3. Do one of the following:
l
Select the second form you want to open from the Find a form list
l
Click the second form you want to open in the Tree
TaxWise displays the second form in the top half of the workspace:
4. When you finish viewing the second form, do one of the following:
- 115 -
Chapter 7: Working with Tax Returns
l
Press the F6 key
l
Right-click the form you want to remain open and click Show Second
Form on the shortcut menu
TaxWise closes the second form you opened.
Opening a Local Document in the Workspace
You can open a local document (for example, Pub. 17) while you are working on a
form. To do this, use the following steps:
1. Click the View menu and click Go to Web.
You can also press the Ctrl+Alt+W keys to open Go to Web.
TaxWise displays the TaxWise Web browser tab.
2. Click the tab you created for you local document (Pub. 17).
TaxWise displays the document in the Workspace above the form.
3. To close the document, click the View menu and click Go to Web or press
Ctrl+Alt+W.
Working with Entries
Completing Entries on a Form
The following list describes several tips and shortcuts that help you complete entries
on TaxWise forms:
l
TaxWise rounds dollar amounts on IRS forms to the nearest whole dollar.
The IRS requires whole dollar amounts for e-filing.
l
To select a check box, you can either type the letter X or you can click it
with the mouse.
l
To undo the last action you performed, press the Ctrl+Z keys. For
example, you can press the Ctrl+Z keys to restore a previous entry, if
you accidentally delete or change it.
l
You can use standard Windows shortcuts to cut (Ctrl+X), copy
(Ctrl+C), and paste (Ctrl+V) data in entries.
l
Press the Backspace key or the Delete key to correct typing errors.
l
Press the F5 key from an entry to open the TaxWise calculator. TaxWise
copies the results for your calculation into the entry when you press the
Enter key, and you can close the calculator without copying the results
by pressing the Esc key.
l
Press the F9 key, right-click an entry and click Link on the shortcut
menu or click the QuickLink button to link to a supporting form.
l
Press the F10 key to take you back to the previous form from which you
linked.
- 116 -
Chapter 7: Working with Tax Returns
l
A down arrow to the right of an entry indicates that there is a drop-down
list available. You can click the arrow or press the Spacebar to display
and select from the drop-down list.
l
Right-click an entry to select commands from a shortcut menu that
offers options relevant to that entry, such as Link, Override, Unoverride, or Estimate.
Understanding Color Coded Entries
TaxWise uses color-coding to identify types of entries on forms. In the Default view,
entries on the Main Information Sheet and other forms are underlined in yellow, green,
or red, but the background colors do not vary. In Classic view, entries on the Main
Information Sheet and other forms are yellow, green, or red with varying background
colors.
The following table describes the default color-coding included with TaxWise:
Color
code
Description
Yellow
TaxWise calculates these entries with information from supporting
forms. You cannot type data directly into a calculated entry or delete
the calculated value unless you override the calculation.
Green
These entries are non-calculated, and you can type data directly into
them.
Red
These entries are required for e-filing. TaxWise marks certain entries
as required to assist you with preparing a complete and accurate tax
return. These entries must be complete for TaxWise to check off the
form as “complete” on the list of forms in the Tree. When you type data
in a required entry, TaxWise displays the text in green and converts
the entry to a non-calculated entry.
Gray
underline
These entries are calculated entries that have been overridden by the
or red text
preparer.
on a gray
background
White Text
on a red
These entries are entries that have been marked as estimated by the
background preparer. TaxWise does not check off a form that contains an
(Classic
estimated entry as “complete” on the list of forms in the Tree.
only)
Black text
in a yellow
These entries have scratch pads linked to them. To open the scratch
block
pad, press the F9 key while you are in the entry.
(Classic
only)
- 117 -
Chapter 7: Working with Tax Returns
Working with Calculated Entries
TaxWise calculates many entries on a tax form from supporting forms and schedules
in the return or from other entries on the same form. If you try to type an amount in a
calculated entry, TaxWise displays a message box indicating that the entry is
calculated.
You cannot delete a calculated entry, but you can override it.
Whenever possible, you should correct a calculated entry by correcting the supporting
form or schedule.
Be very careful when you choose to override entries. When you override an entry,
TaxWise assumes that your entry is correct and that the change is permanent. Any
other changes you make in the return that would normally affect that entry will not
change it.
To override a calculated entry, use the following steps:
1. Place the cursor in the entry and press the F8 key or right-click in the entry
and click Override on the shortcut menu.
TaxWise changes the entry from yellow to red text on a gray background.
2. Type the new amount into the entry and press the Enter key.
TaxWise overrides the entry.
TaxWise leaves the entry red on a gray background so that you can easily identify it.
Remember, the data in an overridden entry does not change, even if you later enter
data in the return that would ordinarily affect the entry.
To reverse an override and return it to its calculated value, place you cursor in
the entry and press the Shift+F8 keys or right-click the entry and click Unoverride on the shortcut menu.
Working with Estimated Entries
TaxWise allows you to flag entries as estimated, so that you can easily find them later
to correct the data.
To flag an entry as estimated, use the following steps:
1. Type the estimated data in the entry and press the Enter key.
2. Move your cursor back to the entry, press the F3 key, and press the Enter key.
- 118 -
Chapter 7: Working with Tax Returns
TaxWise displays the estimated entry with a red background.
Remember, TaxWise does not consider forms with estimated entries as “complete”.
Diagnostics displays a list of all estimated entries in a tax return.
Entering Correct Data in Estimated Entries
To enter correct information in an estimated entry, do one of the following:
l
Type the correct data in the entry and press the Enter key
l
Move the cursor to the entry, and press the F3 key
l
Move the cursor to the entry, and press the Shift+F3 keys
Pressing the F3 key turns the estimated status on and off. Pressing the
Shift+F3 keys changes an entry back to its original status and color(s).
Using the Calculator
The built-in calculator works like any standard calculator. Press the F5 key to open the
calculator:
You can also open the calculator by clicking the Tools menu and clicking
Calculator.
If you activate your Num Lock key, you can use the numeric keypad for entering
numbers, or you can use the mouse to click the number on the screen. Perform your
calculations and press the Enter key to carry the calculation to the entry from which
you started if that field was a non-calculated numeric entry field.
- 119 -
Chapter 7: Working with Tax Returns
If you do not want to carry the calculation to the entry, press the Esc key to
close the calculator without saving the data.
Using the ZIP Code Locator
On almost any form with address fields, you can go to a ZIP Code entry, type the ZIP
Code, and press the Enter key. TaxWise populates the City and State entries
automatically.
If TaxWise populates the city and state incorrectly or does not recognize the ZIP code
you provided, simply enter the correct name of the city or state in the appropriate field
within the form and press the Enter key.
TaxWise displays the Zipcode Change window:
The city, state, and zip code information you entered on the form will already be
entered in the City, State, and Zipcode fields within the Zipcode Change window. You
can make changes to these fields if necessary, then click Yes to confirm your changes
and save the new values. Changes made to city or state information will apply to all
subsequent returns when that zip code is entered.
Working with Statements and Scratch Pads
Using Statements
Some sections of a tax form require more lines than are available on the IRS form. In
this case, you must link to a statement and place all entries on it.
For example, Schedule B provides six lines for interest income information. If a
taxpayer has more than six payers, you must link to the statement and enter
information on all payers on the Interest Received statement. The IRS determines how
many items can be listed before a statement must be used. Statements are filed
electronically with the tax return.
Some forms in TaxWise indicate that statements are available on entries when needed,
as illustrated below on form 1040:
- 120 -
Chapter 7: Working with Tax Returns
This indictor may be abbreviated as Stmt Avail or F9 for Stmt.
TaxWise automatically totals all items on a statement and carries the total to the entry
from which you linked to the statement.
If you need more lines than the statement provides, you can press the
Shift+F10 keys to duplicate the current statement.
Some commonly used forms that often require the use of statements include:
l
Schedule B – more than six interest payers or more than ten dividend
payers
l
Form 1040, line 21 – more than one source of other income
l
1040, Dependents Section – more than four dependents
l
Form 2441 – more than two care providers
l
Schedule A, lines 8, 11, 21, 23, and 28 – multiple deductions
In some cases, using a statement when it is not required may cause e-file errors.
Specifically, you should not use the Additional Dependents statement unless you have
more than four dependents to list. In addition, do not use a statement to list Other
Expenses on Schedules C, E, and F unless you have more items than will fit on the
form. However, you can use the Schedule B Interest and Dividend statements
regardless of the number of items you must list. Schedule B Interest and Dividend
statements have additional fields for state adjustments, penalties, federal withholding,
etc., when needed.
Inserting, Deleting, Sorting Lines on Statements
To insert a line between two existing lines, move your cursor to the line below which
you want to insert a line and press the Alt+Insert keys. TaxWise inserts a line in the
space above your cursor.
You can also right-click the line and click Insert row on the shortcut menu.
TaxWise inserts a blank line:
Do not leave a blank line between two items. Blank lines cause calculation errors.
- 121 -
Chapter 7: Working with Tax Returns
To delete a line, move your cursor to the line you want to delete and press the
Alt+Delete keys.
You can also right-click the line and click Delete row on the shortcut menu.
TaxWise deletes the line and moves up any lines below it.
You can also sort the list of items in either ascending (A-Z, 0-9) or descending (Z-A,
9-0) order. Sort by placing the cursor in a field with an alpha or numeric value. Right
click with the mouse, then select either Sort Ascending or Sort Descending. TaxWise
bases the sort on the column in which the cursor is located. For example, if the sort is
performed with the cursor in the Description column, TaxWise sorts the items
alphabetically by the first letter of the description. If the sort is performed with the
cursor in the Amount column, TaxWise sorts the items numerically by their values.
This method also applies to scratch pads and to any section of a form that
TaxWise displays in table format, such as the Payer section of Schedule B and
Schedule E, Part II, page 2.
To sort the items in ascending order, press the Alt+F9 keys or right-click in an entry
and click Sort Ascending on the shortcut menu. To sort the items in descending
order, press the Alt+F10 keys or right-click in an entry and click Sort Descending
on the shortcut menu.
Using Scratch Pads
You can use a scratch pad when you want to include supporting data for an entry, but
there is no statement or supporting form available. The scratch pad provides
description and amount entries for 50 items and totals the amounts at the bottom of
the form. TaxWise carries the total from the scratch pad to the entry to which it links.
Once you create a scratch pad, TaxWise adds it to the Tree along with the other forms
in the return. It will be listed as attached to the parent form it was added to. You can
open it by clicking the form in the Tree.
Scratch pads are sometimes referred to as detail sheets, and TaxWise prints
the heading “Detail Sheet” at the top of each scratch pad.
TaxWise does not include scratch pads in the electronic file that is sent to the
IRS.
To create a scratch pad, click any numeric form entry and click the QuickLink icon or
press the F9 key.
You can also right-click any numeric entry, click Link and click NEW Scratch
Pad.
- 122 -
Chapter 7: Working with Tax Returns
TaxWise displays a scratch pad:
You can enter negative numbers in a scratch pad simply by typing a minus sign (-) in
front of the number.
To add more lines to a scratch pad, press the F10 key to close the scratch pad and
click the QuickLink icon or press the F9 key to create another scratch pad from the
same form entry.
Printing a Scratch Pad
You can print a scratch pad and attach it to a paper return. By default, TaxWise prints
the scratch pad when you print the parent form to which it links.
To print only the scratch pad, open the scratch pad and do one of the following:
l
Click the Print Form button on the toolbar
l
Right-click the form, not a field on the form, and click Print This Form
Using the Timer
TaxWise provides you with a timer that records the number of minutes you keep a tax
return open. The timer is useful in several ways, including the following:
l
If you bill by time rather than, or in addition to, by form, you can use the
timer to track the amount of time you worked on the return.
l
TaxWise calculates the average time in returns for each preparer (in the
Preparer Summary report).
- 123 -
Chapter 7: Working with Tax Returns
TaxWise displays the most up-to-date time in the status bar at the bottom,
right-hand corner of the TaxWise screen:
Note that there is a delay of approximately 54 seconds between when a return
is opened and when the time in return shows up.
TaxWise also displays the time in return for each return on the Main Information Sheet
(or page one of the primary tax form) and on the Payments tab of the Query Results
dialog box. The time in return calculation in these two places, however, does not
reflect the current amount until you save and close the return and reopen it.
TaxWise displays the time shown on the Main Information Sheet (or page one of the
primary tax form) as the total number of minutes (for example, 101 minutes).
TaxWise displays the time shown on the payments tab of the Query Results dialog
box as hour, minutes, and seconds (hh:mm:ss; for example, 01:41:11).
If you want to pause the timer to perform other tasks outside of the return you are
working on, press the Shift+F11 keys.
TaxWise displays a message box similar to the following:
You cannot continue working in the return or in TaxWise until you press the
Enter key or click OK to restart the timer.
- 124 -
Chapter 7: Working with Tax Returns
Using Search and Query Features
Understanding the Query Results Information
The Search/Query for Taxpayer feature allows you to search for a return in any
package in order to:
l
View the Query Results dialog box (the database record) to check on
the return’s status
l
Find the return file and open it
l
Display the location (path) of other types of files that relate to the return
You can interrupt a long search by clicking the Stop button and shorten the
search by selecting specific files types to search.
Search/Query for Taxpayer is not active from the Utility.
If you want to view specific information (such as demographics and income) or
determine the status of a return, you can use the Query Results dialog box.
To open the Query Results dialog box, press the F7 key while you are in a return or
click the Tools menu and click Return Status.
TaxWise displays the Query Results dialog box:
The Query Results dialog box displays information from the tax return database. To
print the information screen, click the Print button.
The Query Results dialog box includes taxpayer information, income and tax
information, and tracking information such as date created, date printed, etc. the
1040 Individual package includes additional information related to electronic filing.
- 125 -
Chapter 7: Working with Tax Returns
While you prepare one return, you can view the query results for another
return by pressing the Ctrl+Q keys or by selecting File then Search/Query
for Taxpayer. Enter the SSN for which you want to search, and click Search.
Opening the queried return closes the current return.
The following table describes the tabs of the Query Results dialog box:
Tab
Description
General
TaxWise displays the information on the General tab when you first
open the Query Results dialog box. General information includes
return information and e-file information.
Checks
The Checks tab displays information about checks printed for the client,
including bank authorization numbers, check amount, check numbers,
dates checks were printed, dates checks cleared, etc.
States
The States tab lists e-filed state returns with the dates that: you
created the e-file; sent the e-file to CCH SFS, the state accepted the
e-file, the state rejected the e-file (if applicable).
Extension
If you e-filed an extension for the return, TaxWise displays the
information pertaining to the extension status on the Extension tab.
Reject
If you e-filed the return and the IRS rejected it, the Reject tab displays
the IRS reject code and an explanatory message for the first reject. To
see the codes for all rejects in that return, print the corresponding IRS
acknowledgement.
Payments
On the Payments tab, you can view and post payments to the invoice
and print a copy of the invoice.
Diary
You can view notes and add notes about the client and the return of the
Diary tab. This is a convenient method for recording pertinent
information that would not otherwise be included in the client’s return.
TaxWise assigns each return a page in the client diary, and you can add
as many notes as you want for each return.
At any time, you can print the Query Results dialog box by clicking the Print button.
Working with the Client Diary
The client diary feature is a convenient method for recording pertinent information
that would not otherwise appear in the taxpayer’s return. Each return is assigned a
page in the Client Diary. You can add as many notes as you like to each return.
You can add a note to a Client Diary in two ways:
l
Click the Diary tab on the Query Results dialog box.
l
While the return is open, click the Tools menu and click Client Diary.
Entering a Note from Query Results
To enter a note from the Query Results dialog box, use the following steps:
- 126 -
Chapter 7: Working with Tax Returns
1. Click the Diary tab.
2. Click Add Note.
TaxWise automatically inserts the date, day, time, and user name:
3. Type your note.
4. Click Save Note.
In order to save the note, you must click the Save Note button before closing
the Query Results dialog box.
Entering a Note from within a Tax Return
To enter a note from within a tax return, use the following steps:
1. Click the Tools menu and click Client Diary.
TaxWise displays the Client Diary window:
2. Click the New Entry button to add a note.
- 127 -
Chapter 7: Working with Tax Returns
TaxWise automatically enters the date, time, and user name in the text box.
3. Type your note following the user name.
4. Click the Save Notes button to save the note.
5. To close the Client Diary, click the Exit button.
TaxWise always places new notes at the top of the text box.
Performing a Quick Search for Return Status
To perform a quick search, use the following steps:
1. Open TaxWise and log in.
2. With or without a return open, click the File menu and click Search/Query
for Taxpayer.
TaxWise displays the Search dialog box:
You can also press the Ctrl+Q keys to display the Search for Taxpayer dialog
box.
3. Do one of the following:
l
Enter all or part of the Social Security Number in the Taxpayer SSN
box.
l
Click the down arrow next to the Taxpayer SSN box to change to
Business EIN or Miscellaneous Return ID.
l
Enter the last name or a portion of the last name in the Taxpayer’s Last
Name box.
- 128 -
Chapter 7: Working with Tax Returns
l
Enter the Declaration Control Number in the Declaration Control
Number box.
l
Enter the taxpayer’s daytime telephone number in the Taxpayer
Daytime Telephone box.
l
Enter the database field in the Database Field box by selecting from
the drop-down list and entering the desired information in the Database
Field box.
You can change the Database Text field to Contains, Starts With, Exact
Match, or Ends With by using the drop-down list.
4. Click Search to start the search.
If TaxWise finds more than one match, the bottom of the Search dialog box displays
the files that match your search criteria. Select the one you want to view and press
Enter.
If TaxWise finds an exact match, TaxWise displays the Query Results dialog box
immediately.
The following illustration depicts the Query Results dialog box:
Notice that the focus box (dotted line) is on the OK button when the dialog box opens.
To perform another search immediately, press the Enter key or click OK to re-display
the Search dialog box. Then enter another name or SSN and click Search.
If TaxWise displays an enabled Edit Return button in the Query Results dialog box,
you can click it to open the return if you have user rights to the user name under
which the return originated. If it is disabled, it is because you have another return
open.
- 129 -
Chapter 7: Working with Tax Returns
Using the K1 Pass-Through Feature
Loading K1 Information into a New 1040 Return
To load a K1 into a 1040 return, use the following steps:
1. Complete a 1041, 1065, or 1120S return, including the appropriate K1(s).
2. Start a new 1040 return.
3. Add a K1 for the taxpayer.
4. Enter the business name and the EIN.
TaxWise displays a message box similar to the following:
5. Click Yes.
The information from the 1041, 1065, or 1120S return loads into the K1 in the 1040.
Updating K1s in 1040 Returns after Changes
To update an existing K1, use the following steps:
1. Make the changes to the K1 in the 1041, 1065, or 1120S return.
2. Open the existing 1040 return.
3. Click the Form menu and click Import K1 Form Data.
TaxWise displays a message box similar to the following:
TaxWise loads the new data into the 1040 return.
Using the Depreciation Worksheets
The depreciation worksheet allows you to enter asset info, choose depreciation method
and class and automatically choose the recommended depreciation method based on
the type of asset you select from a drop-down list of asset types.
- 130 -
Chapter 7: Working with Tax Returns
The illustration below depicts the depreciation (or business asset) worksheet, to
which you can link by clicking the Link Depr Wkst button on the toolbar.
- 131 -
- 132 -
Chapter
8
Understanding Electronic Filing
Please note that as of printing time, all changes relating to Modernized E-file (MeF) had not
been finalized. For the latest information, please see the TaxWise User Guide, available
from the toolbar in your software.
Modernized E-file (MeF) is available for 1040 returns after the IRS’ initial and limited
launch of the system in 2009. While 1040 Modernized E-file (MeF) is new, it isn’t new in
your tax software since TaxWise has been using MeF for corporate returns for years.
When you receive you Tax Year 2010 TaxWise tax software, it will be ready to e-file 1040s
using the modernized system.
Benefits of MeF
A benefit of MeF is that the acknowledgement will come within a couple of hours as
opposed to 24 to 48 hours in the previous “legacy” system. No more waiting for batch
processing, like in the legacy system. However, tax preparers should note that a quicker
acknowledgement does not result in a quicker refund since the IRS will continue to issue
refunds on its standard cycles.
When the acknowledgements come back with error codes in MeF, the codes will be more
specific. Instead of a reject stating there’s a math error in the return, the modernized
system will be more descriptive such as line 3 is not the total of lines 1 and 2.
Changes in TaxWise
Changes in the tax software will be minor. One change is that the modernized system does
not issue DCNs (Declaration Control Number). Instead the TaxWise software will generate
- 133 -
Chapter 8: Understanding Electronic Filing
a Submission ID number, which is usually 20 characters long containing both
numbers and letters.
Another difference is that “piggyback” state returns don’t exist in MeF. In the legacy
system, if federal and state returns were submitted and the federal return was
rejected, the state return was also rejected. In MeF, each federal and state return is
submitted separately and will have its own Submission ID. Even if the return does not
qualify for MeF the state return will not be sent "piggyback."
Determining MeF Eligibility
While the IRS is only supporting 23 forms and schedules for MeF for tax year 2010,
nearly 80 percent of returns will be eligible. The forms the IRS supports for MeF
include:
1040
1040 Sch A
1040 Sch B
1040 Sch C
1040 Sch D
1040 Sch E
1040 Sch EIC
1040 Sch M
1040 Sch R
1040 Sch SE
1099-R
2106
2210
2441
4562
4868
8283
8812
8829
8863
8880
8888
W-2
The "Clergy Worksheets" associated with Schedule C, SE and Form 2106 will also be
allowed.
Forms 1040A and 1040-EZ do not qualify. If you wish to e-file them through
the Modernized E-file system, you can select 1040 at the top of the Main
Information Sheet.
Legacy vs. MeF in TaxWise
The 2010 TaxWise tax program will determine whether a return should be e-filed with
the legacy system or with modernized e-file. Tax preparers will receive notification
stating in which format the return was sent.
For the states that do not yet support MeF, the IRS will require the returns be sent in
the legacy format. Check the TaxWise Customer Support Center to keep updated on
which states support MeF.
- 134 -
Chapter
9
Working with Client Letters
The TaxWise Client Letter feature enables you to print a client letter with each tax return.
TaxWise provides a standard letter template for each tax package except Miscellaneous. If
the standard letter template does not meet your needs, you can save it with a different file
name and edit it.
Introducing the Client Letter
In order for TaxWise to print a client letter with each tax return, you must add the letter to
your tax form defaults using Edit Tax Form Defaults on the Tools menu.
For information on creating custom client letters please refer to F1 Help.
TaxWise Client Letter includes:
l
Letter templates for each tax package in both English and Spanish
l
A cover sheet template for individual returns that is designed to be used
alone (not with a third party folder or envelope) in both English and Spanish
l
A cover sheet template for business returns that is designed to be used
alone (not with a third party folder or envelope) in both English and Spanish
l
A Puerto Rico letter template in English and Spanish
l
Envelope and mailer templates
l
Privacy Policy statement
- 135 -
Chapter 9: Working with Client Letters
The envelope and mailer templates are to be used with our third party
products. For more information, see www.taxwisesupplies.com.
Using the Letter Menu
The following table describes each of the commands on the Letter menu:
Command Description
Clear Letter Clears the existing text from the Workspace so you can type a letter of
your own. To save your changes, choose Save or Save As.
Open Letter Displays the Open dialog box so you can select a letter template to
add to your return.
Save Letter
Saves changes to the open letter. If the open letter is one of the
standard letter templates, TaxWise prompts you to give the letter a
new name.
Preview
Letter
Switches the letter from edit mode to print preview mode.
Edit Letter
Template
Switches the letter from print preview mode to edit mode.
Print Letter
Template
Prints the "edit mode" version of the letter template with variables
and all conditional paragraphs so you have a printed copy for your
files.
Insert
Select to insert a variable or picture in letter you are creating.
Format
Format the font’s size, color, and style of the selected text; format the
paragraph for indents, line spacing, and text alignment on the page;
print the letter in landscape.
Spell Check
Searches for misspelled words in the letter text.
Using the Edit Menu
When you have a letter open, TaxWise activates the following commands on the Edit
menu:
Command Description
Undo
Cancels the last editing action on the letter and reverts to the
previous value.
Redo
Reverses Undo.
Copy
Copies selected text to the clipboard.
Cut
Deletes selected text and places it on the clipboard.
Paste
Pastes the last text copied or cut into the letter.
Delete
Entry Text
Deletes the selected text.
Select All
Selects all text and objects in the letter.
Find
Searches for specified text in the letter.
Find Next
Repeats the last Find.
Replace
Searches for specified text and replaces it with different text.
- 136 -
Chapter 9: Working with Client Letters
Command Description
Object
Properties
Allows you to view the properties of images you have placed in your
letter. For example, you can select to view the image as editable
information or as an icon.
Working with Letter Toolbars
When you have a letter open, TaxWise displays the client letter standard toolbar and
formatting toolbar across the top of the workspace.
The table below describes the toolbar buttons and their actions:
Button
Description
Copy
Copies selected text to the clipboard. Does NOT
remove the existing text from the letter.
Cut
Deletes selected text from the letter and copies it to
the clipboard.
Paste
Undo
Redo
Find
Insert Variable
Spell Check
Save
Display Letter as if
Printed
Edit Template
Pastes the last text copied or cut into the letter.
Cancels the last editing action on the letter and
reverts to the previous value.
Reverses Undo.
Searches for the specific text in the letter.
Opens the Select Variable dialog box so you can
place variables in a letter you are creating or editing.
Searches for misspelled words in the letter text.
Saves changes to the open letter. If the open letter is
one of the standard letter templates, TaxWise asks
you to give the letter a new name. If the letter is not
one of the standard templates, TaxWise asks if you
want to replace the existing letter.
Switches the letter from edit mode to print preview
mode.
Switches letter from print preview mode to edit mode.
- 137 -
Chapter 9: Working with Client Letters
Client Letter Formatting Toolbar
Button
Description
Font and Size
Applies the font and size to selected text.
Formats selected text as bold, italic,
and/or underlined, or removes the
formatting.
Bold, Italic, Underline
Applies a different color to selected text.
Font Color
Applies a different background color to
selected text.
Background Color
Text Alignment
Aligns text with the left margin, the center
of the page, or the right margin.
Places a bullet character beside each
paragraph, or removes the bullet
formatting.
Bullets
Formats selected text as superscript
(above the baseline), or subscript (below
the baseline), or removes the formatting.
Superscript and Subscript
Working with Client Letter Templates
Working with Standard Letter Templates
TaxWise provides one or more letter templates for each tax package except
Miscellaneous.
Because of the unique nature of each form in the Miscellaneous package, there are no
letter templates associated with that tax package.
The table below describes each applicable current template and its intended use:
Template File
Name
Description
706 Letter.CL
Use with the 706 Estate tax returns. English version. This
letter handles state mailing addresses and payments.
709 Letter.CL
709 Gift tax returns. English version. This letter handles
state mailing addresses and payments.
990 Letter.CL
Use with the 990 Exempt Organization returns. English
version. This letter handles state mailing addresses and
payments.
1040 Letter.CL
Use with 1040, 1040A, 1040EZ, 1040NR, or 1040NR-EZ
returns, including returns where the taxpayer has a
foreign address. English version. This letter handles
estimated tax payments for 2010 and state mailing
addresses.
- 138 -
Chapter 9: Working with Client Letters
Template File
Name
Description
1041 Letter.CL
Use with 1041 Fiduciary returns. English version. This
letter handles state mailing addresses and payments.
1065 Letter.CL
Use with 1065 Partnership returns. English version. This
letter handles state mailing addresses and payments.
1120C Letter.CL
Use with 1120C Corporation returns. English version. This
letter handles state mailing addresses and payments.
1120S Letter.CL
Use with 1120S Corporation returns. English version.
5500 – 5500EZ
Letter.CL
Use with Form 5500 or 5500EZ. English version.
Bus 6x9 Mailer.CL
Coordinates with the 6" x 9" tax return filing envelope from
Nelco.
Bus EstPayEnv.CL
Coordinates with the estimate filing envelope from Nelco.
Bus Folder Cov-No
Pocket.CL
Coordinates with Folder 52 (no pocket) from Nelco.
Bus Folder CovPocket.CL
Coordinates with FL53 and FL55 pocket folders from Nelco.
Bus Lrg Env.CL
Coordinates with the 9" x 11-1/2" tax return filing envelope
from Nelco.
Business Cover
Sheet.CL
Use as a cover sheet for 1120C, 11205, 1041, 1065, 990,
5500, 5500EZ returns. Does not coordinate with any diecut folder. English version.
BusRetMailer-Tall.CL
Coordinates with the 9" x 11-1/2" (Tall) tax return filing
envelope from Nelco.
BusResMailerWide.CL
Coordinates with the 9" x 11-1/2" (Wide) tax return filing
envelope from Nelco.
Ind 6x9 Mailer.CL
Coordinates with the 6" x 9" tax return filing envelope from
Nelco.
Ind EstPayEnv.CL
Coordinates with the estimate filing envelope from Nelco.
Ind Folder Cov-No
Pocket.CL
Coordinates with Folder 52 (no pocket) from Nelco.
Ind Folder CovPocket.CL
Coordinates with FL53 and FL55 pocket folders from Nelco.
Ind Lrg Eng.CL
Coordinates with the 9" x 11-1/2" tax return filing envelope
from Nelco.
Ind Org Mailer.CL
Coordinates with the 9" x 11-1/2" organizer envelope from
Nelco.
Use as a cover sheet for 1040, 1040A, 1040EZ, 1040NR,
Indiv Cover Sheet.CL 706 or 709 returns. Does not coordinate with any die-cut
folder. English Version.
IndRetMailer-Tall.CL
Coordinates with the 9" x 11-1/2" (Tall) tax return filing
envelope from Nelco.
IndRetMailerWide.CL
Coordinates with the 9" x 11-1/2" (Wide) tax return filing
envelope from Nelco.
- 139 -
Chapter 9: Working with Client Letters
Template File
Name
Description
Privacy Policy.CL
Provides a privacy policy statement that preparers can use
for compliance with the Gramm-Leach-Bliley Act, Public
Law 106-102, effective November 12, 1999.
Puerto Rico Corp.CL
Use with Puerto Rico Corporation returns. English Version.
Puerto Rico
English.CL
Use with Puerto Rico Individual returns. English Version.
Puerto Rico Soc.CL
Use with Puerto Rico Partnership returns. English Version.
Puerto Rico
Spanish.CL
Use with Puerto Rico Individual returns. Spanish Version.
Spanish 706
Letter.CL
Use with 706 Estate tax returns. Spanish version. This
letter handles state mailing addresses and payments.
Spanish 709
Letter.CL
Use with 709 Gift tax returns. Spanish version. This letter
handles state mailing addresses and payments.
Spanish 990
Letter.CL
Use with 990 Exempt Organization tax returns. Spanish
version. This letter handles state mailing addresses and
payments.
Spanish 1040
Letter.CL
Use with 1040, 1040A, 1040EZ, 1040NR, or 1040NR-EZ
returns, including returns where the taxpayer has a
foreign address. Spanish version. This letter handles
estimated tax payments for 2010 and state mailing
addresses.
Spanish 1041
Letter.CL
Use with the 1041 Fiduciary tax returns. Spanish version.
This letter handles state mailing addresses and payments.
Spanish 1065
Letter.CL
Use with the 1065 Partnership tax returns. Spanish
version. This letter handles state mailing addresses and
payments.
Spanish 1120C
Letter.CL
Use with the 1120 Corporation tax returns. Spanish
version. This letter handles state mailing addresses and
payments.
Spanish 1120S
Letter.CL
Use with the 1120S Corporation tax returns. Spanish
version. This letter handles state mailing addresses and
payments.
Spanish 5500 –
5500EZ Letter.CL
Use with Form 5500 or 5500EZ. Spanish version.
Spanish Bus Cover
Sheet.CL
Use as a cover sheet for 1120, 1120S, 1041, 1065, 990,
5500, or 5500EZ returns. Does not coordinate with any
die-cut folder. Spanish version.
Spanish Indiv Cover
Sheet.CL
Use as a cover sheet for 1040, 1040A, 1040EZ, 1040NR,
706 or 709 returns. Does not coordinate with any die-cut
folder. Spanish Version.
Spanish Privacy
Policy.CL
Provides a privacy policy statement that preparers can use
for compliance with the Gramm-Leach-Bliley Act, Public
Law 106-102, effective November 12, 1999. Spanish
Version.
- 140 -
Chapter 9: Working with Client Letters
Template File
Name
Description
Spanish Puerto Rico
Corp.CL
Use with Puerto Rico Corporation returns. Spanish Version.
Spanish Puerto Rico
Soc.CL
Use with Puerto Rico Partnership returns. Spanish Version.
Adding a Client Letter Template
To add a template to the current return, use the following steps:
1. While you are in the client's tax return, click the Add Form/Display Form
List tab.
TaxWise displays the Find a form list.
2. Type letter in the Look for box and press the Enter key.
This automatically takes you to the letter list.
TaxWise displays the Open dialog box:
At this point, you have three options:
l
Open a standard letter template and use it as is.
l
Open a standard letter template, modify it to meet your business needs,
and save it with a different name.
l
Create and entirely new letter by typing your own text, inserting
variables, and creating conditions and conditional statements.
We recommend that you do not start your own letter from a blank letter. Instead, open
one of the standard templates, save it with a different name, then delete the existing
text, being careful not to also delete the margin settings. Then type your own text into
the template.
3. Select the letter template you want to use and click Open.
- 141 -
Chapter 9: Working with Client Letters
TaxWise displays the template you selected in the letter editor:
Most templates include conditional paragraphs that print only if they are appropriate to
the tax return. Variables, calculations, and "IF…THEN" conditions that customize the
letter for each client are enclosed in curly brackets; for example {COMPANY}.
4. Click another form in the Tree or click the Add Form/Display Form List tab
to open the forms list.
Notice that TaxWise lists the letter in the Tree with a blue check mark, indicating that it
is "complete." When you print the return, the letter prints just like other complete
forms in the return.
Adding More Letter Templates to a Return
To add another letter to a return, do the following:
l
Right-click on the existing letter in the Tree and click Copy Letter.
TaxWise opens a blank letter.
l
Click the Letter menu and click Open Letter on the shortcut menu to
open a second template.
You can also use the shortcut Shift+F10 while the existing letter is open to add a
new, blank letter to a return.
Previewing the Letter Template
You cannot preview the letter if you are in Edit Tax Form Defaults because there is
no client data to populate the variables.
To see how the letter template looks before you print it, click the Print Preview
button on the toolbar.
- 142 -
Chapter 9: Working with Client Letters
TaxWise displays the letter template in the Print Preview dialog box:
Close the Print Preview dialog box by clicking the Allow Letter to be Edited
button.
TaxWise checks off the letter template in the Forms list and in the Tree, indicating that
it is complete and that it will print with the return.
Printing Only the Letter Template
To print only the letter template and no other forms, use the following steps:
1. Click the Letter menu and click Print Letter Template. TaxWise displays the
TaxWise Print dialog box.
2. Do one of the following:
l
Click Print to send the letter to your printer.
l
Click Print Preview to view the letter on-screen.
- 143 -
Chapter 9: Working with Client Letters
Removing a Letter Template
To remove a letter template, do the following:
1. Right-click on the letter in the Tree and click Remove Form on the shortcut
menu.
TaxWise displays the following message:
2. Do one of the following:
l
Click Yes to remove the letter template.
l
Click No to keep the letter template in the return.
You can also use the shortcut Shift+F9 to remove a letter from the workspace.
Modifying a Standard Letter Template
To modify a standard letter, do the following:
1. Add one of the standard client letters to a tax return.
2. Click the Letter menu, point to Save Letter, and click Save As.
3. In the File name box, enter a different name for your letter, such as “My 1040
Letter."
4. After saving, edit the template to suit your tax practice.
Editing a client letter template is very similar to editing any word processing
document. You can cut, copy, paste, and type in text. You can use formatting tools on
the Letter toolbar and Letter menu to change the font, type size, color, and alignment
of text. You can use variables, calculations, conditions, and conditional statements to
add custom text in the letter for each client.
TaxWise Client Letters include state addresses for all states and all packages.
To learn more about customizing and creating letter templates, refer to F1
Help.
- 144 -
Chapter
10
Printing Tax Returns
After entering the information into the tax forms is done you will need to know the basics
of how to print the final product for the customers, the IRS, and for your own paper backup and archiving purposes.
Printing a Single Return
The TaxWise Print dialog box allows you to select one or more packets to print. A print
packet is a group of forms. The File Copy packet includes all completed forms,
schedules, worksheets, statements, scratch pads, client letters, and other forms that are
included in a return. If you want to print one copy of everything in the return, print the
File Copy packet.
This will not be true if you have modified the File Copy packet.
Printing an Open Return
To print a return when the return is open, use the following steps:
1. Do one of the following:
l
Click the Print Return button on the toolbar.
l
Press the Ctrl+P keys.
l
Click the File menu, point to Print, and click Print This Return.
- 145 -
Chapter 10: Printing Tax Returns
TaxWise displays the TaxWise Print dialog box.
2. Select the printer to which you want to print the return from the Name dropdown list.
You can change to a different printer than the default printer you chose in
Printer Setup.
3. If necessary, click Properties to change the printer properties.
You can change print packets and modify watermark options here if you need
to.
4. If necessary, click Options to open the View/Edit Print Packets window
where you can view and change the contents of the print packets and edit
watermarks options. Click Save to apply changes.
5. Choose the print packets you want to print by selecting the appropriate check
boxes under Select Packets.
TaxWise selects the File Copy packet by default. You can add or remove as
many packets as you want.
6. Select the number of copies of each packet to print by clicking the up and down
arrows in the Number of Copies box in the Copies section.
You must print more than one copy for the Collate option to be available.
Increasing the number of copies increases the number of copies of all packets printed.
For example, if you are printing a packet you have modified to include two copies of
every form, and you print two packets, then you will actually print four copies of every
form.
7. Do one of the following:
l
Click Global to save the print packet changes for all future print jobs.
(This option is only available to users assigned to the Administrators or
Return Manager group.)
l
Click Print Job to use the changed print packet settings for this print
job only.
8. Click Options to open the View/Edit Print Packets dialog box.
9. Click Print Preview to view the tax return on screen before printing.
TaxWise displays the Print Preview dialog box.
l
You can choose to print from the Print Preview dialog box by clicking
the printer icon.
l
You can move through the return by clicking the appropriate arrows and
using the scroll bar.
l
You can display either a larger or smaller image by clicking the
magnifying glass icons.
l
You can cancel the print job by closing the dialog box.
- 146 -
Chapter 10: Printing Tax Returns
TaxWise displays the page number of the total number of pages in the title bar.
10. Close Print Preview by clicking on the X in the top right-hand corner.
You can learn more about setting up print packets in Chapter 3: Using
Administrator Features.
11. Do one of the following:
l
Click Print to continue.
l
Click Cancel to cancel the print job.
Printing a Closed Return
The Admin user can access all users' returns for printing. Other users can print only
their own returns.
To print a closed return, use the following steps:
1. Do one of the following:
l
Click the Print Return button on the toolbar.
l
Press the Ctrl+P keys.
l
Open the File menu, point to Print, and click Print Return(s).
TaxWise displays the Select Returns to Print dialog box:
2. Select the check box(es) for the return(s) you want to print.
You can also type the SSN or EIN of the desired return in the SSN/EIN box.
TaxWise will highlight and select that return. You can use this feature to select
multiple returns if you know the SSN.
You can click the Select All button to select all returns in the list.
3. When you finish selecting returns, click OK.
- 147 -
Chapter 10: Printing Tax Returns
TaxWise displays the TaxWise Print dialog box.
4. Select the printer to which you want to print the return from the Name dropdown list.
You can change to a different printer than the default printer you chose in
Printer Setup.
5. If necessary, click Properties to change the printer properties.
6. Choose the print packets you want to print by selecting the appropriate check
boxes under Select Packets.
TaxWise selects the File Copy packet by default. You can add or remove as
many packets as you want.
7. Select the number of copies of each packet to print by clicking the up and down
arrows in the Number of Copies box in the Copies section.
Increasing the number of copies increases the number of copies of all packets printed.
For example, if you are printing a packet you have modified to include two copies of
every form, you will actually print four copies of every form.
8. Do one of the following:
l
Click Global to save the print packet changes for all future print jobs.
(This option is only available to users assigned to the Administrators or
Return Manager group.)
l
Click Print Job to use the changed print packet settings for this print
job only.
9. Click Options to open the View/Edit Print Packets window where you can
view and change the contents of the print packets and edit watermark options.
10. Click Print Preview to view the tax return on screen before printing.
TaxWise displays the Print Preview dialog box.
l
You can choose to print from the Print Preview dialog box by clicking the
printer icon.
l
You can move through the displayed return by clicking the appropriate
arrows and using the scroll bar.
l
You can display either a larger or a smaller image by clicking the
magnifying glass icons.
l
You can cancel the print job by closing the dialog box.
TaxWise displays the page number of total number of pages under the title bar.
You can learn more about setting up print packets in Chapter 3: Using
Administrator Features.
11. Do one of the following:
- 148 -
Chapter 10: Printing Tax Returns
l
Click Print to continue.
l
Click Cancel to cancel the print job.
Printing to a PDF file
TaxWise gives you the option to print a tax return to a .pdf (portable document format)
file. This allows you to open the tax return in Adobe Acrobat.
This option is not available if you have purchased and installed Document
Manager.
To print a return to a .pdf file, use the following steps:
1. Do one of the following:
l
Click the Print Return button on the tool bar.
l
Press the Ctrl+P keys.
l
Open the File menu, point to Print, and click Print Return(s).
TaxWise displays the Select Returns to Print dialog box.
2. Select the check box(es) for the return(s) you want to print.
You can also type the SSN of the desired return in the SSN/EIN box. TaxWise
will highlight and select that return. You can use this feature to select multiple
returns if you know the SSN.
You can click the Select All button to select all returns in the list.
3. When you finish selecting returns, click OK.
TaxWise displays the TaxWise Print dialog box.
4. Click the Print to PDF button.
TaxWise displays the Select File Prefix and location dialog box:
5. Click OK.
- 149 -
Chapter 10: Printing Tax Returns
TaxWise displays the following Status box:
A PDF of a tax return is not encrypted. You should not store the PDF outside of
the UTS10\SPOOLER directory or email the PDF via unencrypted e-mail.
Printing to Document Manager
Click the Print to Document Manager button on the TaxWise Print dialog box to
save the file to TaxWise Document Manager.
You will only see this button if you have purchased TaxWise Document
Manager.
Printing Forms
Printing an Open Form
To print the form that is currently open in TaxWise, use the following steps:
1. Do one of the following:
l
Click the Print Form button on the toolbar.
l
Right-click the form and click Print This Form.
l
Click the File menu, point to Print, and click Print This Form.
2. Do one of the following:
l
Click Print Current Form to print an IRS-acceptable copy of the form.
l
Click Print Screen Image to print data as it appears on the screen.
You also have the option to add related worksheets, scratch pads, etc.
3. Select the number of copies you want to print by clicking the up and down
arrows in the Copies section and click OK.
TaxWise prints the form.
Printing a Blank Form
You can print one or more blank copies of selected federal, state, bank, and Client
Organizer forms directly from TaxWise. Blank copies of scannable state forms should
not be printed, since they are intended only for computer-generated tax returns.
- 150 -
Chapter 10: Printing Tax Returns
Scannable forms completed by hand or with a typewriter are NOT acceptable for paper
filing.
To print blank forms, use the following steps:
1. Click the File menu, point to Print, and click Print Blank Forms.
TaxWise displays the Print Forms dialog box:
2. Select the package for which you want to print forms from the Package dropdown list.
TaxWise displays the available forms for the package in the Available
Forms list.
3. Click the desired form(s) under Available Forms and click the Add button.
TaxWise adds the form to the Forms to be Printed list.
To add multiple copies of a form, change the quantity in the Copies dialog box.
To select multiple forms in the list, press and hold the Ctrl key while selecting
the desired forms.
4. To remove a form, click it in the Forms to be Printed dialog box and click the
Remove button.
To remove all of the forms, click the Remove All button.
5. Click Print.
TaxWise prints the forms as you specified.
Printing a Mailing Label
You can print mailing labels for a client while the return is open. To print a mailing
label, use the following steps:
1. While the client’s return is open, press the F7 key.
- 151 -
Chapter 10: Printing Tax Returns
TaxWise displays the Query Results dialog box:
2. Click the Print Label button.
TaxWise opens the Label Criteria dialog box:
3. Select your label options and do one of the following:
l
Click Store to store your label for later printing
l
Click Print to print your label now
TaxWise prints a single label for this return to the printer you selected in Setup
Options for the label printer. For more information, see F1 Help.
Troubleshooting Font Problems
If you notice stray characters on your printed forms, tax fonts are not loaded to your
printer.
To correct this situation, use the following steps:
1. Click the Tools menu and click Utilities/Setup Options.
- 152 -
Chapter 10: Printing Tax Returns
TaxWise displays the Utility.
2. Click the Setup menu and click Setup Options.
TaxWise displays the Setup Options dialog box.
3. Click the Printer Setup tab.
TaxWise displays the Printer Setup tab of the Setup Options display box.
4. Do one of the following:
l
Select Windows as the default printing method in section 1.
l
If your printer does not print correctly, change the default printing
method to PCL and check the box in section 1 to Auto load soft fonts
each time a tax return is sent to the printer?
5. Click the Color Setup tab and click Finish to save your changes.
6. Try printing again.
7. If this does not solve the problem, you must load the soft fonts manually.
The fonts will be erased from your printer's memory every time you turn the printer off
and every time you print a document from a program other than TaxWise.
1. To load fonts manually, click the Tools menu and click Utilities/Setup
Options.
TaxWise displays the Utility.
2. Click the Tools menu and click Install Fonts.
TaxWise displays the Download Fonts to Printer dialog box:
3. Choose the printer to which to load the fonts and click OK.
- 153 -
- 154 -
Chapter
11
Working with Invoices and
Payments
TaxWise has powerful tools built into it which will help you with the invoicing and payment
process.
Setting Up Invoices
TaxWise generates an invoice with each return. It generates the invoice from the Price
Sheet, and payments can be posted either to the Price Sheet or to the Payments tab in
the Query Results dialog box.
Setting Up the Price Sheet
Changes to a price sheet effect only those returns created after the change was made to
the price sheet.
To make a price sheet that was changed after a return was created take effect for
that return, delete the old price sheet form and add it to the return again.
To edit the price sheet, use the following steps:
1. Click the Tools menu and click Edit Tax Form Defaults.
To edit Tax Form Defaults, you must be logged in as the Admin user.
- 155 -
Chapter 11: Working with Invoices and Payments
2. Choose the package for which you want to edit the price list and click OK.
TaxWise displays the Confirm dialog box:
3. Click OK.
4. Click the Add Form/Display Form List tab and type Price in the Look for
box.
The Price Sheet is highlighted in the forms list.
5. Double-click the price sheet or press Enter.
TaxWise adds the price sheet to the Tree under Misc Forms and opens the price sheet
in the workspace.
6. In the first four lines, enter any office information you want to print on each
invoice.
Possible entries include the name and address of the office and office telephone
number.
Do not make changes in the second set of four lines, nor in the section calling
for invoice number, invoice date, SSN and telephone number. TaxWise fills
these entries with information pulled from the tax return.
7. Enter your price for the various forms and lines on forms listed.
l
Enter only the $ - Prepared by columns.
l
Do not make changes to the No. column. TaxWise calculates this
number for you.
l
Enter the states you use most often in the State Returns section.
8. At the bottom of the page, enter your charge per hour in the Total charges by
time line, if applicable.
Do not enter the minutes charged. TaxWise calculates this number.
9. Enter the sales tax rate for your area in the Sales Tax line.
10. Leave all other entries blank for future use for the individual return.
11. Click the File menu and click Close Return or click the Close Return icon.
To number your invoices properly, use the following steps:
1. Click the Tools menu, and then click Utilities/Setup Options.
- 156 -
Chapter 11: Working with Invoices and Payments
TaxWise displays the Utility.
2. Click the Setup menu and click Setup Options.
TaxWise displays the Setup Options dialog box.
3. Click the General tab.
4. Determine your client invoice numbering process by doing one of the
following:
l
If you want to enter numbers on each price sheet manually, or if you
want to leave the invoice number blank, select Do NOT auto number.
l
If you want to auto number only the invoices from the current computer,
select Auto number each invoice ONLY on my LOCAL COMPUTER
and enter the first invoice number you want to use in the Start my local
invoice number with box.
If you select this option, you should prevent duplicate invoice numbers by
entering a different starting number on each computer, similar to the way you
entered DCNs on each computer.
l
If you want to auto number all of your invoices on all machines, select
Auto number ALL invoices, making each UNIQUE across the
entire network. This is the default when you first install TaxWise.
If you select this option, TaxWise automatically begins your invoice numbering
sequence with 1.
5. Click the Color Setup tab, and click Finish to save your changes.
Recording Payments
You can record payments in TaxWise two ways:
l
On the Price Sheet.
l
On the Payments tab of the Query Results dialog box.
Entering Payments on the Price Sheet
If you receive and post payments at the time you prepare a return, you may find it
easier to enter payments directly in the Price Sheet. Simply open the Price Sheet while
you are in the return and enter up to four payment amounts near the bottom of the
form.
TaxWise prints the payments you enter the next time you print an invoice.
- 157 -
Chapter 11: Working with Invoices and Payments
Entering Payments in Query Results
If you receive and post payments after you finish preparing returns, you can post the
payments in the Query Results dialog box. This method does not require that you
have the taxpayer's return open.
To enter payments in the Search/Query for Taxpayer dialog box, use the following
steps:
1. Click the File menu and click Search/Query for Taxpayer.
You can also press the Ctrl+Q keys.
TaxWise displays the Search dialog box.
2. Enter the taxpayer's SSN in the Taxpayer SSN box and click the Search
button.
TaxWise displays the Query Results dialog box:
3. Click the Payments tab.
- 158 -
Chapter 11: Working with Invoices and Payments
TaxWise displays the Payments tab:
4. Click the Edit button.
TaxWise makes the text boxes available for entry.
Note that after entering a payment amount, press Enter and TaxWise displays
the invoice number that corresponds to the return.
5. In the Payment Date box, do one of the following:
l
Type the date you received the payment.
l
Click the Calendar button to display a calendar from which you can
choose the date you received the payment.
6. In the Payment Type drop-down list, select the type of payment you received.
7. In the Payment Amount box, enter the amount of payment you received and
press Tab or Enter.
- 159 -
Chapter 11: Working with Invoices and Payments
TaxWise calculates the amount due and displays it in the Amount Due
column:
8. Click the Post button.
TaxWise posts the payment(s) you received against the taxpayer's invoice and also
carries any payment amounts you enter on the Price Sheet to the Query Results
dialog box.
Accepting Payments with iTransact
You receive client payments quickly and easily when you accept credit card payments
through the iTransact service. With an iTransact account, you can offer your clients
the option of using a credit card as a method of payment. Paying by credit card is
convenient for them and profitable for you! Payments are received without the risk of
insufficient funds associated with checks.
You must apply with iTransact on the TaxWise Customer Support Site in order to offer
this service.
Once you have be approved to offer this service, use the following steps to accept
payments:
Make sure your company's iTransact Client ID is entered on the Company
tab of Setup Options.
1. Click the iTransact link near the bottom of the Price Sheet in the applicable
return.
- 160 -
Chapter 11: Working with Invoices and Payments
TaxWise launches the Secure Payment Form in an Internet Explorer
window:
2. Complete all applicable information on form and click Submit Securely.
Printing an Invoice
There are two ways to print invoices in TaxWise:
l
From the Payments tab of the Query Results dialog box.
l
With a return.
To print an invoice from the Payments tab of the Query Results dialog box, simply
click the Print Invoice button.
To print an invoice with a return, you must first enter prices on the Price Sheet while
you are in Edit Tax Form Defaults. Once you do, TaxWise automatically prints the
invoice with every return.
You can also complete the Price Sheet while in a return even if you have not
made any entries in Tax Form Defaults.
- 161 -
- 162 -
Chapter
12
Conducting Interviews
The TaxWise Desktop Interview allows anyone on your staff to enter the detailed
information needed for every client, saving time and effort for you and your professional
tax preparers.
Please contact your Sales representative to purchase TaxWise Desktop Interview.
Understanding TaxWise Desktop Interview
TaxWise Easy Interview can save time for you and your clients. You can use it to:
l
Quickly determine whether a client qualifies for a refund.
l
Provide incentives for new customers or price shoppers by offering a free
tax interview to get people in your door.
l
Answer telephone queries from prospective customers who want an
estimate of their refund.
Starting an Interview
To start an interview, use the following steps:
1. Click the File menu and select Tax Interview.
You can also start an interview by selecting the check box Start Return in
Interview Mode on the Enter Social Security Number window.
- 163 -
Chapter 12: Conducting Interviews
TaxWise displays the New Interview dialog box:
2. Enter the primary taxpayer’s SSN, press the Tab key, enter the SSN again for
confirmation, and click OK.
TaxWise displays the Filing Status page of the interview:
3. Select the client’s filing status and click Next.
If you are not sure which filing status to select, click the Help Me button to
view the Filing Status Wizard.
4. Answer the questions and fill in information as necessary and click Next at the
bottom of each page.
Additional pages will load in the interview depending on how you answer the
questions.
For more information about the TaxWise Desktop Interview, see TaxWise F1
Help.
5. Click the Finish button at the bottom of the Finish page when you have
completed the interview.
- 164 -
Chapter 12: Conducting Interviews
The client data is stored as a proforma file. When you start a new return with interview
information, TaxWise displays a message box informing you that client data exists.
Click Yes to load the client data.
- 165 -
- 166 -
Chapter
13
Working with Bank Products
We work with the three leading tax lenders so that you will have the widest variety of bank
product options.
Taking advantage of these bank product options will not only benefit you through
substantial fee-based revenues, but they will benefit your clients as well. Bank products
enable you to get your clients their money quickly and securely. And bank products limit
your clients' out-of-pocket expenses by having their tax preparation fees automatically
deducted from the proceeds. (That also makes it easier for you to collect your fees.)
Introducing Bank Products
What is a RAL?
RAL is an acronym for Refund Anticipation Loan, which is a loan made to the taxpayer in
anticipation of the bank’s receiving a direct deposit refund from the IRS. The taxpayer
receives his refund loan check within a few days of filing the return. Your tax preparation
fees and the bank’s fees are withheld from the check. Some banks also offer Direct Deposit
RALs. In this case, the taxpayer receives the refund loan as a direct deposit to his personal
bank account instead of a paper check.
What is an ERC?
Instead of a RAL, the taxpayer can choose to receive an ERC (Electronic Refund Check). An
ERC is not a loan; the taxpayer receives his refund check, less fees, when the direct
deposit is made by the IRS.
- 167 -
Chapter 13: Working with Bank Products
What is a DDRAL?
A Direct Deposit Refund Anticipation Loan (DDRAL) is perfect for taxpayers who have
an immediate need for their tax loan proceeds and have a bank account. The bank will
lend funds on the anticipation of the taxpayer’s refund being deposited from the IRS to
cover the loan. Typically these loans are granted in 1-2 days. Once the loan is
approved, your prep fees are deposited into your bank account and the balance of the
loan proceeds are deposited into the taxpayer’s bank account.
What is a DDR?
A DDR is a Direct Deposit Refund, a product offered by several banks. A DDR is like an
ERC in that it is not a loan, and all fees are withheld. However, instead of receiving a
paper check, the taxpayer receives his refund, less fees, as a direct deposit to his
personal bank account.
What is FeeCollect?
FeeCollect allows you to have your fees deducted automatically from your client’s
refund and deposited directly into your bank account. The remainder of the refund is
deposited directly into your client’s bank account. All you have to do is electronically
file the return and have your client sign a simple authorization.
What is Audit Shield?
Audit Shield is an extended warranty program that provides your clients with up to
$2,500 of protection against penalties, interest, or additional taxes because of a tax
preparation error. The coverage costs your client a one-time fee that can be paid along
with your tax preparation fees, and it covers the return for up to three years.
Understanding Bank Product Tasks
TaxWise allows you to perform the following tasks related to bank products:
l
Align Checks to prepare your printer to print “live” checks.
l
Print checks.
l
Reprint a damaged check (certain restrictions apply).
l
Correct bank application information that was incorrect and caused the
bank to reject the application.
l
Update taxpayer address and telephone information for a bank product
application that the bank has already approved. (Only offered by Santa
Barbara Bank & Trust)
l
At the conclusion of both a check printing session and correcting bank
application records, TaxWise prepares the data for transmission to the
bank via the
Aligning Checks
Before you print real checks during tax season, you must run Align Checks and get
correct alignment as described in on-screen instructions.
- 168 -
Chapter 13: Working with Bank Products
After you have achieved correct alignment, do not run Align Checks again
unless you change printers, install TaxWise on a new computer, or reinstall
TaxWise again.
Do NOT run Align Checks on actual check stock.
The goal of Align Checks is to print a sample check on the Check Template with the
dollar amount grid and the authorized signature grid inside the correct boxes. Note
that these will not line up with the correct locations on real check stock.
Before aligning checks, you must print the Check Template. To print the Check
Template, use the following steps:
1. From the home page, click the File menu, point to Print, and click Print
Blank Forms.
2. Click Check Template (page 1) (located under Bank Forms) and click Add.
3. Click Print.
4. Put the check template in the paper tray of your printer.
To align checks, use the following steps:
1. Click the Bank menu, point to Maintenance/Setup, and click Align Checks.
TaxWise displays the Align Checks wizard:
2. Read the on-screen instructions and select the appropriate bank.
The defaulted TaxWise instructions are to Load the templates FACE UP and
SIGNATURE LAST – that is, printed side up with the signature line going into
the printer last.
3. Click the Print button.
TaxWise prints a simulated dollar amount and signature on one template.
- 169 -
Chapter 13: Working with Bank Products
4. Look at the template you just printed and select the option in the above dialog
box, which best describes how the signature and dollar amount printed.
5. Do one of the following:
l
If the dollar amount and signature print on the back of the template
and/or upside down, change the page orientation in the Paper Loading
Instructions box.
l
If the dollar amount and signature grids do not fit, click the small arrows
next to UP/DOWN and LEFT/RIGHT to move the grids and click
PRINT to print another template. Continue to make adjustments until
the grids fit.
l
If the dollar amount and signature grids fit inside the boxes as closely as
possible, click Finished.
Printing Checks
The following items must be complete before you print a check:
l
You must have received an acknowledgment containing a check print file
from your bank and you must have processed it.
l
You must have run Align Checks.
l
Your printer must be turned on and ready to print.
l
Your internet connection must be ready for transmitting check print
data.
To print a check, use the following steps:
1. Do one of the following:
l
Click the Bank menu and click Print Checks.
l
Press the Ctrl+H keys.
TaxWise displays a message box:
The instructions match the instructions you used to successfully print check
information on the template when you performed the Align Checks function.
2. Load check stock in your printer according to the instructions in the above
message box and click Yes.
- 170 -
Chapter 13: Working with Bank Products
TaxWise displays the Select Checks to Print dialog box:
3. Select the files for which you want to print checks and click OK.
To select multiple files, press and hold the Ctrl key while you click to select
multiple files.
TaxWise displays the Validate Check Number dialog box:
A check print file may contain more than one check print authorization record.
4. Verify that the check number shown in the Validate Check Number dialog
box matches the check number of the first actual check in your printer. If not,
change the displayed check number.
The numbers TaxWise prints on the checks start with the number indicated
and continue to print in numeric order.
If TaxWise displays a warning message even though you entered the correct
starting number, click Yes to have TaxWise accept the number you entered,
then continue as follows.
5. Click OK.
- 171 -
Chapter 13: Working with Bank Products
TaxWise displays a simulation of the first check and the data that will print in
the Check Display dialog box:
6. Verify the accuracy of the check number, name, SSN, and amount and do one
of the following:
l
If everything is accurate, click Print One Check if you have only one
check to print, or Continuous Print for multiple checks.
l
If there are errors, click Cancel to close the check print session, correct
the error(s), and repeat steps 1-5.
If you print checks one at a time, TaxWise displays each check before it prints.
If you select Continuous Print, TaxWise does not display the checks before
printing them.
Once you have printed a check, TaxWise records that the check number from
your check stock has been used and has a status of Printed, and the check
printing session cannot be ended until you transmit the check print data file to
the CCH SFS EFC, which forwards the information to the bank.
Once the check(s) are printed, TaxWise displays a confirmation box:
7. Again, verify the accuracy of the check(s) that were printed, then do one of the
following:
l
If everything is accurate and there are no checks that need to be voided
and/or reprinted, click No and proceed to step 11.
l
If there are errors and you need to void and/or reprint any check(s),
click Yes.
It is very important to void checks during the check print procedure, before the
check print data is transmitted
- 172 -
Chapter 13: Working with Bank Products
Do not attempt to reuse a check number. For example, if check information
prints on plain paper instead of check stock, you must void the check in
TaxWise and write “VOID” on the paper check stock on which the check
information should have printed. Print the check again using the next available
check number on the paper check.
TaxWise displays the Select Checks to VOID dialog box:
8. Select the check box(es) next to the check(s) that need to be voided, then click
OK.
TaxWise displays a confirmation box:
9. Click Yes to confirm and proceed with voiding the selected check(s), click No
to return to the Select Checks to VOID dialog box and make any necessary
changes.
TaxWise displays a Status message:
10. Click OK.
TaxWise will then bring you back to the Select Checks to Print dialog box (step 3).
- 173 -
Chapter 13: Working with Bank Products
You are instructed to write the word VOID on the bad checks. Some banks
require you to return voided checks to them and others require you to keep or
destroy voided checks. Follow your bank’s specific procedure. DO NOT attempt
to reuse voided check stock. TaxWise will not allow you to use a check number
that has been previously used.
11. Do one of the following:
l
If the checks were accurate or you fixed the problem that caused the
check to print incorrectly, repeat steps 3-8, and, if necessary, void
additional checks.
l
If you have not fixed the problem or cannot fix the problem at this time,
click Cancel to end the printing session and at a later time open Print
Check again to print checks for the current authorization records
marked Not Printed.
l
When you have finished making corrections and have printed your
checks successfully, TaxWise will display the following Status message:
12. Click OK.
TaxWise displays a Status message.
13. Click OK to transmit check information.
TaxWise immediately starts the communications session with the Electronic Filing
Center to transmit the check print data file for this check printing session.
Once the check print data file transmission starts, either it will be successful or
it can be canceled or interrupted.
One of the following occurs:
l
If the transmission is successful, TaxWise displays a message in the
bottom of the dialog box telling you that the transmission was successful
and to close the dialog box.
l
If the transmission is canceled or interrupted, TaxWise displays a
message that indicates that it is saving the transmission file for a later
transmission.
If the transmission file is saved for later, you cannot perform any check-related
functions until you have successfully transmitted existing check print data in
order to close the check printing session. The next time you click the Bank
menu and click Print Checks, TaxWise prompts you to transmit the existing
file.
After transmission, TaxWise displays the TaxWise Print dialog box.
- 174 -
Chapter 13: Working with Bank Products
14. Click Print to start printing the Check/Fee Log, Print Preview to preview
the Check/Fee Log, or Cancel to quit without printing the Check/Fee Log.
The Check/Fee Log is a record of everything you sent to the CCH SFS EFC in this
printing session. It should accurately reflect the check number and status of each
check you used during the printing session, whether it was printed or voided. It
consists of two reports: The Check Usage Log and the Fee Information Log. The
Check Usage Log lists Check Number, SSN, Taxpayer Name, Check Amount, and
Check Status for every check authorization record selected in the session. The Fee
Information Log shows the Check Number, Primary SSN, Check Type, Refund
Amount, Check Amount, Tax/RAL Prep(arer) Fees, and Other Fees (Bank and CCH SFS
fee) for every check record.
If a check is marked Printed on the Check/Fee Log for any check printing
session, but becomes unusable after the transmission is sent, you must use
the Reprint Checks command on the Bank menu to print a replacement
check.
Reprinting Checks
Reprint Checks allows you to reprint checks that are damaged after the printing
session; that is, after you have transmitted the check print data to the CCH SFS EFC.
For example, a check can be reprinted if coffee spills on it, or it was accidentally torn.
Reprint Checks can also be used to reprint checks that you did not realize were
unusable until you had closed check printing.
If you are careful to look at your checks and void checks that print incorrectly, you will
not have to use Reprint Checks often.
Requirements for Using Reprint Checks
You must have the original check in your possession, even if it has been damaged.
You must enter specific data from the original check, including:
l
Taxpayer SSN
l
Bank Authorization Number
l
Original check number
l
Original check amount
If you have exceeded the number of reprints for a check, the time has expired during
which you could reprint a check, or if the check has been lost, mislaid, stolen,
destroyed or misappropriated, you must follow your bank’s procedure for reissuing a
check.
To reprint checks, use the following steps:
1. Click the Bank menu and click Reprint Checks.
- 175 -
Chapter 13: Working with Bank Products
TaxWise displays the Check Identification dialog box:
2. Enter the SSN, Authorization Number, and the Check Amount for the check to
be reprinted (for information on locating the Bank Authorization Number see
the end of this section).
3. Click OK to proceed.
TaxWise displays the following confirmation box:
4. Load check stock in your printer according to the instructions in the above
message box and click Yes.
TaxWise displays the Validate Check Number dialog box:
5. Verify that the check number shown in the Validate Check Number dialog
box matches the check number of the first actual check in your printer. If not,
change the displayed check number.
6. Click OK.
- 176 -
Chapter 13: Working with Bank Products
TaxWise displays the Check Display dialog box:
7. Verify the accuracy of the check number, name, SSN, and amount and do one
of the following:
l
If everything is accurate, click Print One Check.
l
If there are errors, click Cancel to close the check print session, correct
the error(s), and repeat steps 1-6
TaxWise displays a Confirm box.
8. Again, verify the accuracy of the check that was printed, then do one of the
following:
l
If everything is accurate and the check was printed correctly, click Yes
and proceed to step 10.
l
If there are errors and you need to void and/or reprint this check, click
No.
TaxWise will display the following confirmation box:
9. Click Yes, void the check and repeat steps 7 and 8.
You are instructed to write the word VOID on the bad checks. Some banks
require you to return voided checks to them and others require you to keep or
destroy voided checks. Follow your bank’s specific procedure. DO NOT attempt
to reuse voided check stock. TaxWise will not allow you to use a check number
that has been previously used.
10. After you’ve made any necessary corrections and have reprinted your check
correctly, TaxWise will display a prompt asking you if wish to reprint another
check.
You can reprint as many checks as you need to at this time by clicking Yes and
repeating steps 2-10 until all necessary checks have been reprinted.
11. When you are finished reprinting checks, click No.
- 177 -
Chapter 13: Working with Bank Products
TaxWise will display the following message:
12. Click OK.
TaxWise will display a Status message stating check print data exists and is ready for
transmission.
13. Click OK and transmit check data to complete this session.
Bank Authorization and Original Check Numbers
The bank authorization number is the number assigned to the check authorization
record sent by the bank. The original check number is the number that TaxWise
printed on the check. Both are found on the Query Results dialog box for the tax
return.
To locate these two numbers, use the following steps:
1. Press the Ctrl+Q keys.
TaxWise displays the Search dialog box
2. Enter the taxpayer’s SSN and click Search.
TaxWise displays the Query Results dialog box.
3. Click the Checks tab.
- 178 -
Chapter 13: Working with Bank Products
TaxWise displays the Checks tab of the Query Results dialog box:
The Auth #, date printed, check number and check amount are displayed in the dialog
box at the bottom.
Correcting Rejected Bank Applications
Occasionally the bank will require that certain information on a bank application be
corrected before a bank product is approved. TaxWise notifies the customer in the
acknowledgement that a bank product application has been rejected by the bank.
To correct the application, use the following steps:
1. Do one of the following:
l
Click the Bank menu, point to Maintenance/Setup and click Fix
Rejected Bank Apps.
l
Click Incomplete Tasks on the home page and click Bank Application
Corrections Needed.
Look at the top of the form that opens for a message telling you which
information to correct.
2. Correct the required information.
TaxWise guides you through transmitting the new information to the EFC.
Updating RAL Applications
This feature is only available for Santa Barbara Tax Products Group customers.
- 179 -
Chapter 13: Working with Bank Products
This command on the Bank menu enables you to update addresses and phone
numbers for approved bank product clients and transmit the information to the bank
via the EFC.
The bank request that you update addresses and phone numbers even after the bank
product has been issued. Providing updated information will assist the bank should
there be a problem with the loan, and it might help lower your loan loss rate.
You cannot use this command to correct a rejected application. Click the Bank
menu and click Fix Rejected Bank Apps for that purpose.
To update a RAL application, use the following steps:
1. Click the Bank menu, point to Maintenance/Setup, and click Update RAL
Applications.
TaxWise displays the Enter Primary SSN dialog box.
2. Enter the SSN of the client and click OK.
TaxWise displays a message box, which indicates information currently
included in the bank application file.
3. Enter the correct information and click OK.
TaxWise displays a message box, prompting you to send the changes to the
banks.
4. Click Yes to flag the record and make it available for transmission.
If you click No, TaxWise deletes the changes and sends nothing.
TaxWise displays a message box, asking if you would like to choose another
file to modify.
5. Do one of the following:
l
If you need to update additional applications, click Yes and repeat steps
2-4.
l
If not, click No.
- 180 -
Chapter
14
Working with Reports
TaxWise Individual Package includes more than 30 standard management reports.
TaxWise Miscellaneous and Puerto Rico Packages include fewer reports.
You can customize each report by applying various filters and sort criteria. For example,
you can specify that a report include only returns created before or after a certain date, or
that a report include only returns created by a certain preparer.
Using Management Reports
Running and Printing a Management Report
To run and print a report, use the following steps:
1. Click the Reports menu and click Reports List.
- 181 -
Chapter 14: Working with Reports
TaxWise displays the Select a Report to Print dialog box:
2. Select the report and click OK.
TaxWise displays the Report Criteria dialog box:
The following table describes the various criteria from which you can choose:
Option
Description
Starting
date
The default starting date is January 1, 2011. Choose any other date
you want by clicking the Calendar button or by typing the date in the
starting date box.
The default ending date is December 31, 2011. Choose any other date
Ending date you want by clicking the Calendar button or by typing the date in the
ending date box.
Date
The default date criteria used is No Date Filter; however, you can
decide what type of date the starting date and ending date criteria will
use. Click the date drop-down list and choose the date filter you want.
User name
Enter a specific user name to generate a report of returns in the
subdirectory of this user only.
Preparer ID
Enter a Preparer ID to generate a report including only returns with
this Preparer ID in the Preparer ID entry.
- 182 -
Chapter 14: Working with Reports
Option
Description
State
e-files
To include only returns with a specific state e-file attached, type the
only?
state abbreviation in this entry.
Select state
The report includes information about all returns with this DCN or
higher. The default starting DCN is 000000-00000. The first six
digits are the EFIN and the last five numbers are the unique number
generated by TaxWise.
Starting
DCN
The report includes information about all returns with this DCN or
lower. The default ending DCN is 999999-99999. To run a report for
Ending DCN
a specific EFIN, enter the desired EFIN in the Starting DCN and
Ending DCN fields.
Print
Select Print summary information only if you want to see a
Summary
summary of the report instead of a full report. A summary includes
Information
subtotals and totals but not a listing of all returns.
only
Include
Erased
Returns
Select Include erased returns if you want to include returns that
have been erased using the delete function in Return Explorer even
though you can delete a return from TaxWise, the client's record is
never erased from the database.
Print Gray
Bar
Select Print gray bar if you want TaxWise to add a gray bar to
separate sections of the report to make reading easier.
Sort Order
The returns in each report can be sorted by primary SSN, primary
last name, or DCN. If you choose primary last name, TaxWise sorts
returns first by last name, then by SSN. That is, clients with the same
last name will be sorted by SSN, not by first name.
Label
Options
This applies to mailing labels only. When you select Mailing labels
from the Reports menu, this option allows you to print phone
numbers on the mailing labels.
More
Options
Select Print filter information on reports to print information
about the filter criteria selected on the report. Modify margins of
mailing labels by typing specific measurements in each respective
Top/left Margin box.
3. Enter the desired filter criteria and click OK.
4. Do one of the following:
l
If you want to print a paper copy of the report, click the Print button at
the top of the screen:
l
If you want to export the report, click the Export button and choose the
format you want to use:
- 183 -
Chapter 14: Working with Reports
TaxWise prints the report as you specified:
For a description of each report, see Management Reports in TaxWise F1 Help
then select one of the report description links OR click the Help button on the
Select a Report to Print dialog box.
Printing Mailing Labels
TaxWise provides two methods of printing mailing labels. One method, from the
Query Results dialog box, was covered in the Printing Tax Returns chapter. The
second method is covered here.
To print labels in TaxWise, use the following steps:
1. Click the Reports menu and click Mailing Labels.
TaxWise displays the Select a Report to Print dialog box.
2. Select the label sheet layout that matches the labels you are using and click
OK.
TaxWise displays the Report Criteria dialog box.
3. Select the report criteria and click OK.
Increasing the top margin moves the text down. Increasing the left margin
moves text to the right. If necessary, you can enter negative numbers.
If you accept the default report criteria, TaxWise prints labels for all the returns you
have created, in order of primary SSN (or EIN if you are working in a business
package).
- 184 -
Chapter 14: Working with Reports
Working with Non-Returning Clients
Printing the Non-Returning Client Log
The Non-Returning Client Log compiles a list of clients from the previous year for
whom no current year returns exist. It creates this list by scanning the
UTS09\Proforma subdirectory for prior year clients for whom you have not created a
current year return.
The Non-Returning Client Log must be run separately for each tax package.
You must first run Carry Forward Prior Year Data from the Tools menu in
order for the Non-Returning Client Log to work.
You should run Carry Forward Prior Year Data as soon as the TaxWise
software is installed and not run it again or the Non-returning Client Log will
be inaccurate.
To print the Non-Returning Client Log, use the following steps:
1. Click the Reports menu, point to Non-Returning Clients, and select NonReturning Client Log.
TaxWise displays the Select A Report To Print dialog box:
2. Select Non-Returning Client List and click OK.
TaxWise displays the Report Criteria dialog box.
3. Define your filter criteria and click OK.
Some options are unavailable because they do not apply. Click the Help button
for more information.
4. Click OK to print the report to the screen.
- 185 -
Chapter 14: Working with Reports
TaxWise prints the list to the screen:
The columns are SSN/EIN, Name, Telephone Number, File Name, and Prior Year
Return Created. The summary provides the total number of returns.
5. To print a paper copy, click the Print button at the top of the dialog box.
Printing Non-Returning Client Mailing Labels
This feature prints mailing labels for clients from the previous year for whom no
current year returns exist. It creates this list by scanning the Proforma database for
prior year clients for whom you have not created a current year return.
To print mailing labels for Non-Returning Clients, use the following steps:
1. Click the Reports menu, point to Non-Returning Clients and click NonReturning Client Mailing Labels.
TaxWise displays the Select a Report to Print dialog box:
2. Select the type of label you are using and click OK.
- 186 -
Chapter 14: Working with Reports
TaxWise displays the Report Criteria dialog box.
3. Define your filter criteria, click OK, and TaxWise opens the print preview
window.
- 187 -
- 188 -
Chapter
15
Backing up and Restoring Returns
TaxWise allows you to make backup copies of one or more tax returns by using the Backup
to Disk command.
Use this command to:
l
Copy tax returns and related files to a removable disk or network drive for
storage. You can simultaneously back up returns from multiple user names.
l
Copy tax returns and related files to removable disk for transfer to a
different computer.
l
Copy the files needed for e-filing to removable disk so you can transmit the
files electronically from a different computer.
The backup commands in TaxWise copy only tax returns and related files. We
suggest that you establish a separate regular backup procedure for your entire
hard drive or network drive. Contact a local computer technician for assistance.
Use the instructions in the following sections to perform the various types of backups.
You must use the Restore from Disk command on the Tools menu to restore
information from a backup file.
Starting a New Backup
To backup your returns, use the following steps:
1. Click the Tools menu and select Backup to Disk.
- 189 -
Chapter 15: Backing up and Restoring Returns
TaxWise displays the Backup Options dialog box:
2. Select Start a new backup and click OK.
TaxWise displays the Select User dialog box.
3. Select the user name(s) whose returns you want to back up and click OK.
To select multiple names, press and hold the Ctrl key and click the names.
TaxWise displays the Backing up from... dialog box:
The list displays the selected user's files consecutively.
4. Select the return(s) you want to back up from the list by doing one of the
following:
l
Click each individual file to be included in the backup and click OK.
l
To choose a list of sequential files, click the first one, press and hold the
Shift key, and click the last one and click OK.
l
To choose a list of non-sequential files, click the first one, press and hold
the Ctrl key, and click additional files and click OK.
l
Click the Select All button.
- 190 -
Chapter 15: Backing up and Restoring Returns
5. Click OK.
If you select multiple user names, repeat step 4. If this is the last user name,
proceed to the next step.
TaxWise displays the Select a directory dialog box:
6. Select the drive and directory where you want the backup to be saved, and
click OK.
You can type the complete path in the Location box or select a drive from the
Drives box (click the arrow for a drop-down menu of drives on your system)
and a directory from the Directories box.
During the backup process, TaxWise displays status messages in the bottom
left corner of the TaxWise status bar.
TaxWise displays an Information dialog box:
7. Click OK.
If an earlier backup exists you will receive a Confirm dialog box telling you the
files will be overwritten.
- 191 -
Chapter 15: Backing up and Restoring Returns
Adding to a Previous Backup
When you add to a previous backup, TaxWise copies the previous backup file to your
hard drive, adds the new returns, and copies the new backup files containing previous
AND new returns to the designated drive. The new backup file replaces the old backup
file.
To add to a previous backup, use the following steps:
1. Click the Tools menu and click Backup to Disk.
TaxWise displays the Backup Options dialog box.
2. Select Add to previous backup and click OK.
TaxWise displays the Select User dialog box.
3. Select the user name(s) whose returns you want to back up and click OK.
To select multiple names, press and hold the Ctrl key and click the names.
4. Select the returns you want to back up from the list by doing one of the
following:
l
Click each individual file to be included in the backup and click OK.
l
To choose a list of sequential files, click the first one, press and hold the
Shift key, and click the last one and click OK.
l
To choose a list of non-sequential files, click the first one, press and hold
the Ctrl key, and click additional files and click OK.
l
Click the Select All button.
5. Click OK.
If you select multiple user names, repeat step 4. If this is the last user name,
proceed to the next step.
6. Select the drive and directory where you backed up your files previously, and
click OK.
You can type the complete path in the Location box or select a drive from the
Drives box (click the arrow for a drop-down menu of drives on your system)
and a directory from the Directories box.
During the backup process, TaxWise displays status messages in the bottom
left corner of the TaxWise status bar.
- 192 -
Chapter 15: Backing up and Restoring Returns
TaxWise displays the Information dialog box:
7. Click OK.
If an earlier backup exists you will receive a Confirm dialog box telling you the
files will be overwritten.
Restoring Returns
A return restored from the backup will overwrite a return with the same name
on your hard drive. Any changes made to a return since the last backup will be
lost.
Use Restore from Disk to restore one or more files to your hard drive from a backup
disk.
Make a note of the user name to which you are restoring returns so you can find the
returns later when you need to edit them. To restore from a backup disk, use the
following steps:
1. Click the Tools menu and select Restore from Disk.
TaxWise displays the Select a directory dialog box.
TaxWise determines the type of restore procedure needed from the backup
file(s) on the backup disk.
2. Select the drive and directory where the backup is located and click OK.
TaxWise displays the Select User Name(s) dialog box.
3. Select the user name(s) whose returns you want to restore and click OK.
TaxWise displays the Restoring to: dialog box.
If you select more than one user name, each user's list of returns appears
consecutively.
4. Select the return(s) you want to restore from each user name and click OK.
A return must have a check mark beside it to be selected.
- 193 -
Chapter 15: Backing up and Restoring Returns
TaxWise displays the Restore Summary dialog box:
The Restore Summary dialog box shows you how many returns, e-files, RALs,
etc were restored.
5. Click OK.
TaxWise displays the Information dialog box:
6. Click OK.
Exporting and Importing EIN Database
The Export/Import EIN Database feature is most beneficial to sites with nonnetworked computers. This allows you to keep a complete employer database for all
non-networked machines in a central location, such as the transmitting computer.
Exporting the EIN Database
To export the EIN database, use the following steps:
1. Insert a removable disk in the drive.
2. On the Tools menu, click Export/Import EIN Database.
- 194 -
Chapter 15: Backing up and Restoring Returns
TaxWise displays the Export/Import dialog box:
3. In the Export to box, click the Browse
button.
TaxWise displays the Browse dialog box:
4. Navigate to the location to which you want to export the file and click Open.
5. Click Begin.
6. When the export is complete, take the removable media to the computer that
needs the database.
Importing the EIN Database
To import the EIN database, use the following steps:
1. Insert the removable media into the drive.
2. On the Tools menu, click Export/Import EIN Database.
- 195 -
Chapter 15: Backing up and Restoring Returns
TaxWise displays the Export/Import dialog box:
3. Select Import from file.
The Export to box changes to Import from.
4. In the Import from box, click the Browse
button.
TaxWise displays the Browse window:
5. Navigate to the location to which you exported your database and click Open.
6. Click Begin.
TaxWise saves the EIN database to the UTS10\Database directory.
- 196 -
Chapter
16
Sending Mail With TaxWise
TaxWise gives you the ability to communicate with SFS Support without having to launch
another email program, thereby streamlining the process of getting the vital information
you need to move on with completing returns and increasing the productivity of your
business.
Introducing Mail
You can use Send Mail to SFS Support or Send Client to Client Mail to create an
electronic mail message for the SFS Customer Support staff or another site that
corresponds with or transmits returns to the CCH SFS Electronic Filing Center.
Client to Client Mail goes to the CCH SFS Electronic Filing Center.
Sending Mail to SFS Support
To send a message to SFS Support, use the following steps:
1. Do one of the following:
l
Click the Communication link on the left side of the home page and click
Send Mail to SFS Support.
l
Click the Communications menu and click Send Mail to SFS Support.
- 197 -
Chapter 16: Sending Mail With TaxWise
TaxWise opens a separate browser window and displays the following:
2. Enter your email address, subject of the message and body of the message.
3. To attach a file to the mail message, click the Browse button.
TaxWise displays the Choose File window:
4. Browse to the location of the file you wish to attach and click Open.
TaxWise attaches the file to the mail message as shown below:
Only one file can be attached per mail message. If you need to attach multiple
files, they must be zipped into one.
5. Click Send.
You will receive a response from SFS Support to the email address you provided when
sending the mail message.
Sending Client to Client Mail
To send Client to Client Mail:
1. Do one of the following:
l
Click the Communication link on the left side of the home page and
click Send Client to Client Mail.
l
Click the Communications menu and click Send Client to Client
Mail.
- 198 -
Chapter 16: Sending Mail With TaxWise
TaxWise opens the Compose/Send Message window:
2. Enter the EFIN to which you wish to send the message, subject of the message
and body of the message.
3. To attach a file(s) to the mail message, click the Attach button.
TaxWise displays the Select File to Attach window:
4. Highlight the file you wish to attach and click Open.
- 199 -
Chapter 16: Sending Mail With TaxWise
TaxWise attaches the file to the mail message as shown below:
Options:
l
Open – Select Open to retrieve a previously saved message to resend or
send to a different recipient.
l
Save – Press Alt+S or click Save to save the message and the
addressee(s). You must give each message a unique name. You must
save the message in order to later retrieve it for reading, editing, and/or
sending to another addressee.
l
Address – Press Alt+A or click the Address button to enter additional
EFINs to which to send the message. Type each additional EFIN in the
Enter Additional Addresses box.
o As you type, the program creates a list of the EFINs. To delete an
EFIN from the list, point to it and click to select it, and click
Delete.
o
After creating the list, click OK.
o
The word MULTI will appear in the EFIN box, indicating that you
are sending this message to multiple EFINs.
l
Send – Select Send to connect to the CCH SFS Electronic Filing Center
and send the message.
l
Print – Select Print to print the message. TaxWise will send the
message to the print device you have designated in Printer Setup.
l
Cancel – Select Cancel to close without sending a message. If you have
created and saved a message before canceling, the message is saved.
l
Attach – Select Attach to attach a tax return or other file to the
message.
- 200 -
Chapter 16: Sending Mail With TaxWise
Saving a Message
To save a message for future use after the message has been created, use the
following steps:
1. Start and enter the subject and text for the message as you normally would.
2. Click Save.
TaxWise displays the File Name dialog box:
3. Enter a unique name for the message in the Enter File Name box.
In a valid file name, you cannot use spaces, asterisks, or question marks. The
characters can be numbers, letters, hyphens (-), underscores (_), tildes (~),
exclamation points (!), pound signs (#), percent signs (%), and ampersands
(&).
4. Click OK.
TaxWise saves your message.
Addressing a Message to Multiple EFINs
To send mail to more than one EFIN, use the following steps:
1. Start and enter the subject and text for the message as you normally would.
2. Click the Address button.
TaxWise displays the Add Additional Addresses dialog box:
3. Enter the EFINs in the Enter Additional Addresses box.
- 201 -
Chapter 16: Sending Mail With TaxWise
It is not necessary to press the enter key as you enter multiple EFINs. TaxWise
adds them to the list automatically after you type the sixth character, as
illustrated below:
4. When you finish entering EFINs, click OK.
TaxWise returns you to the Compose/Send Message dialog box and
displays MULTI in the Send To EFIN box:
5. Click Send.
TaxWise sends the message.
TaxWise prints the list of EFINs on the e-mail once it is processed.
Attaching a File to a Message
To attach a file or files to a message, use the following steps:
- 202 -
Chapter 16: Sending Mail With TaxWise
1. Start and enter the subject and text for the message as you normally would.
2. Click the Attach button.
TaxWise displays the Select File to Attach dialog box and defaults to open
in the user name you are currently in:
3. Select the files you want to attach by doing one of the following:
l
Click an individual file.
l
To choose a list of consecutive files, click the first one, press and hold
the Shift key, and click the last one.
l
To choose a list of non-consecutive files, click the first one, press and
hold the Ctrl key, and click additional files.
To attach a file not in the subdirectory of the active user name, navigate to the
user name that you want.
4. Click Open.
- 203 -
Chapter 16: Sending Mail With TaxWise
TaxWise attaches the file(s) to your message:
5. Click Send.
TaxWise sends your message and a copy of the file(s) you attached.
Moving a Return Sent by Another EFIN
TaxWise automatically puts returns sent by another EFIN into the Guest user name. To
move the returns from the Guest user name to a created user name, use the following
steps:
1. Log in as the Admin user.
2. On the Tools menu, click Utilities/Setup Options.
TaxWise displays the Utility.
3. On the File menu, click Return Explorer.
TaxWise displays Return Explorer.
4. Double-click USERS and click GUEST.
TaxWise displays the returns that are stored in the Guest user name in the
File name/Package column.
5. Select the returns you want to move.
6. In the Action: drop-down box, select Move Files to Another Location.
7. In the Move to: drop-down box, select the user to which you want to move the
returns.
8. Click Move.
You must start a new return with the SSN/EIN before the returns will be
available in the user name to which you moved them.
- 204 -
Chapter 16: Sending Mail With TaxWise
Opening a Previously Saved Message
To open a previously saved message, use the following steps:
1. Do one of the following:
l
Click the Communication link on the left side of the home page and
click Send Client to Client Mail.
l
Click the Communications menu and click Send Client to Client
Mail.
TaxWise displays the Compose/Send Message dialog box.
2. Click the Open button.
TaxWise displays the Select File to Retrieve dialog box:
For a message to be available in the Select File to Retrieve dialog box it must
first be saved. Click the message you want to open and click OK.
TaxWise displays the message in the Compose/Send Message dialog box.
3. Edit the message as necessary.
4. Add addressees as necessary.
5. Click Send.
Printing a Message
To print a message, create the message as you normally would, and click the Print
button. TaxWise sends the message to the default print device you selected in Printer
Setup.
- 205 -
Chapter 16: Sending Mail With TaxWise
Getting Acks, Mail and Updates
To get Mail, use the following steps:
1. Do one of the following:
l
Click the Communication link on the left side of the home page and
click Get Acks, Mail and Updates.
l
Click the Communications menu and click Get Acks, Mail and
Updates.
TaxWise displays the ELECTRONIC FILING CENTER dialog box:
2. When Disconnect changes to Connect, scroll to the bottom of the Session
Information to see the results.
3. Click Close.
4. If there is any unprocessed email from the EFC, TaxWise will display the
following message:
To view your email, click the Reports menu and select Acknowledgements. In the
Select Acknowledgement Files to Print dialog box, select the check box next to
any unprocessed EMAIL files and click OK to view them (unprocessed email files can
be distinguished by noting that the file info in the Printed column will be False and the
file info in the File Type column will be EMAIL as shown below).
- 206 -
Chapter 16: Sending Mail With TaxWise
- 207 -
- 208 -
Chapter
17
Importing Return Data
The Import Return Data feature enables you to import pertinent data from Client WriteUp, Fixed Asset Manager and Scan&Fill into an open tax return which will make preparing
tax returns for your clients easier, faster, and more accurate than ever before. In Client
Write-Up, you can assign specific accounts/balances to tax lines within the return. Once
you have entered you asset information in Fixed Asset Manager, you are able to import that
into TaxWise and your asset worksheets will be created automatically. Client Documents
and return data such as W-2s and 1099s can also be imported from your TaxWise
Scan&Fill software.
Client Write-Up Export and Import Procedures
Assigning Tax Lines in Client Write-Up
1. Open the desired client in Client Write-Up.
2. Click the Activities menu and select Tax Export.
Client Write-Up displays the General Ledger Tax Interface dialog box.
3. Confirm the Client Entity for that client (Individual, Corporation, Partnership,
Trust, Nonprofit).
4. Select TaxWise as the Tax Interface, then select the Tax Year.
5. Click Continue.
- 209 -
Chapter 17: Importing Return Data
Client Write-Up displays the Assign Tax Lines to General Ledger
Accounts dialog box.
6. Drag and drop the tax line assignments from the Select List to the
appropriate general ledger account in the Destination List.
7. Click Export (Client Write-Up selects the appropriate folder to export to).
8. Click OK.
Importing Accounting Data
Once you have assigned tax lines in Client Write-up, use the following steps to import
the accounting data into TaxWise:
1. Open TaxWise 2010.
2. Start a return for the client.
3. With the return open, click the File menu, point to Import, and select Import
Return Data.
TaxWise loads the data you imported from Client Write-Up into the open return.
TaxWise Scan&Fill Export and Import Procedures
Exporting from TaxWise Scan&Fill
Any scanned documents must be moved to the Active Clients directory before
being exported to your TaxWise software. Make sure that the document is
accurate and necessary editing corrections have been made before you export
the files. Also, before you export any scanned files to TaxWise, be sure that you
have first set up your Export Directory in the TaxWise Scan&Fill Settings
(under the Tools menu).
1. Click the top-level folder for the client whose data you wish to export.
You must be on the top-level folder before the Export option is available. If you
are on a folder below the top-level, you will not have the option to export. The
option will be grayed out.
2. Do one of the following:
l
Click the File menu, and select Export to TaxWise.
l
Click the Export icon on the taskbar.
l
Press Ctrl+J.
TaxWise Scan&Fill displays the Export dialog box.
3. Select the correct tax year from the Tax Year drop-down list.
4. Click Browse to select the correct export directory (UTS10/Import).
5. Once the directory is selected, click OK.
6. Click Export.
- 210 -
Chapter 17: Importing Return Data
Importing TaxWise Scan&Fill Data
To import scanned documents into TaxWise, use the following steps:
1. Open TaxWise.
2. Create a return for the client whose data you wish to import.
3. With the return open, click the File menu, point to Import and select Import
Return Data.
TaxWise loads the data you imported from Scan&Fill into the open return.
- 211 -
- 212 -
Index
A
Administrator Features
Adobe
Aligning Checks
49
47
168
B
Backup
189
adding to previous
starting a new
192
189
Bank Applications
correcting rejected
179
Bank Products
167
Audit Shield
DDR
DDRAL
ERC
FeeCollect
Instant RAL
RAL
tasks
168
168
168
167
168
167
167
168
Browser tabs
creating new
for documents
31
32
C
Calculator
Carry Forward
loading data into return
prompt if return not carried forward
Carry Forward Admin Defaults
Carry Forward Prior Year Setup Information
Checks
119
94
97
97
51
14
170
aligning
printing
reprinting
voiding
168
170
175
172
Client Diary
Client Letter
126
135
adding templates
edit menu
introducing
letter menu
modifying template
previewing template
printing template
removing template
standard templates
141
136
135
136
144
142
143
144
138
toolbars
137
Client Letters
Configuring TaxWise
135
5
E
EIN Database
194
exporting
importing
194
195
Electronic Filing
understanding
133
Entries
116
calculated
color coded
completing
estimated
118
117
116
118
F
Flagging Last Year's Clients
Font Problems
Forms
100
152
107
adding
child and parent
linking
moving around
removing
switching parent
107
109
108
113
112
110
G
Getting Started
Groups
23, 93
73
actions
adding
default
deleting
modifying
74
74
73
75
75
H
Help
contents tab
context-sensitive
F1 contextual
favorites tab
IRS instuctions
search tab
using help
History Lists
creating user-defined
pre-defined
43
44
46
45
45
46
44
43
56
57
56
understanding
user-defined
56
57
Home Page
28
communication
incomplete tasks
tasks you do most often
30
30
29
I
Importing Return Data
209
Client Write-Up
Scan&Fill
209
210
Installing TaxWise
5
from CD
from Customer Support Site
5
10
Interviews
163
starting
understanding
163
163
Invoices
155, 161
printing
setting up
setting up the price sheet
161
155
155
K
K-1 Pass Through
130
L
Logging In
Login Page
26
24
browser toolbar
tabs
25
24
M
Mail
addressing to multiple EFINs
attaching a file
getting mail
introducing
options
printing
saving a message
sending client to client
sending to SFS support
Mailing Labels
printing
Main Information Sheet
Management Reports
201
202
206
197
200
205
201
198
197
184
184
103
181
N
New Features
Non-returning clients
1
185
printing log
printing mailing labels
185
186
O
option
146
P
Passwords
50
admin user
50
Payments
155
entering on price sheet
entering on query results
157
158
Practitioner PIN
Price Sheet
105
60
locking
60
Print Defaults
61
adding forms
all print sessions
classic print
client organizer
editing
one print session
understanding
watermark options
63
64
67
66
62
65
61
62
Printing
blank form
closed return
forms
mailing labels
open form
open return
single return
tax returns
to Document Manager
to PDF
150
147
150
151
150
145
145
145
150
149
Private Forms Lists
68
creating
custom
pre-defined
removing
68
69
68
70
Proforma
94
Q
Query Results
entering notes
125
126
Quick Search
128
R
RAL Applications
179
updating
179
Registering TaxWise
20
multiple locations
20
Reports
181
report criteria
restrict access
running and printing
182
81
181
Restore
Restrict Report Access
Return Explorer
189, 193
81
86
actions
file types
opening
using
86
87
85
88
Return List
27
alternating row colors
filter options
sort options
27
27
27
Return Stage Options
59
S
Scratch Pads
122
printing
using
123
122
Search and Query
Security Manager
125
71
opening
72
Self-Select PIN
Sending Mail with TaxWise
Setup Options
103
197
14
color setup
company information
general tab
printer setup
19
15
16
18
Starting a New Return
Starting TaxWise
Statements
102
23
120
insert, delete, sort lines
using
121
120
T
Tax Form Defaults
best practices
changing
configuring
52
52
55
52
editing
printing client letters with returns
53
55
Timer
Toolbar
123
28
U
User Names
76
adding
admin
deleting
guest
modifying
training
77
76
80
76
79
77
V
Visual Cues in TaxWise
47
Z
ZIP Code Locator
change
120
120