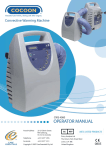
1
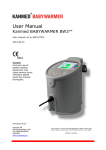
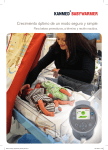
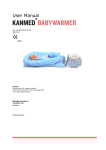
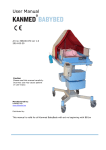
User Manual Kanmed BABYWARMER BW3™ User manual, art no BW3-070/2 2011 10 01 0413 Caution Incorrect use of patient heating equipment may cause serious injury. Therefore please study this manual thoroughly. Manufactured by: Kanmed AB Gårdsfogdevägen 18B SE-16866 BROMMA SWEDEN www.kanmed.se This manual is valid for Kanmed BabyWarmer BW3 system serial number 0026-11 and above, with Software version 1.0 or higher. Subject to changes. User Manual BW3-070/2 Contents 1 2 3 4 5 6 7 8 9 10 11 12 13 14 Kanmed BabyWarmer BW3 - Quick instruction ............................................................... 3 Safety Instructions ...................................................................................................... 4 General description ..................................................................................................... 5 Description of functions ............................................................................................. 11 Getting ready for the baby ......................................................................................... 15 Daily use and practical hints ....................................................................................... 15 Cleaning and maintenance ......................................................................................... 17 Alarm functions, indication and actions ........................................................................ 18 Control of Safety functions ......................................................................................... 21 Accessories, Spare parts and technical documentation ................................................. 22 Technical data ........................................................................................................ 23 Warranty ............................................................................................................... 25 Disposal ................................................................................................................. 25 EMC COMPATIBILITY STATEMENT ............................................................................. 26 NOTE: This user manual contains important safety information and must be read thoroughly before use, and must be saved for future reference. Kanmed BabyWarmer BW3 and the Kanmed Baby Bed The perfect combination Page 2 of 28 User Manual 1 BW3-070/2 Kanmed BabyWarmer BW3 - Quick instruction Leave the system constantly switched on - to be ready for instant use! Refer to the Users manual whenever in doubt. Filling the Water Mattress Fill the Water Mattress with warm water (about 350C). Fill to the Max H2O level mark. Check by holding the Water Mattress upright. Add one complete bottle of Kanmed Water Conditioner. Write the expiry date on the Water Mattress. (one year forward) There must be no air in the Water Mattress. Place the Water Mattress on a flat surface. Grip the open mattress hole to lift the mattress and press all air bubbles out. Lower the hole and close it properly. Using the Kanmed Gel Mattress If the Gel Mattress mode is selected, note that the heat transfer is less than that of water. Also note that the actual Gel surface temperature may vary from the displayed temperature setting. Inserting the Heating Pad and selected mattress into the Kanmed Baby Nest Place the selected mattress upside down on a flat surface. Insert the Heating Pad in the pocket with its printed text towards the mattress. Turn the mattress over again. Insert the mattress with Heating Pad into the Nest pocket. Use the opening in the head end of the Nest to assist in fitting the Nest to the mattress. You can use the BW3 without the Kanmed Baby Nest but it simplifies the positioning of the baby. Preparing the bed Ensure that the bed has drain-holes in the bottom (when the Water Mattress is used). Place the BabyWarmer nest package on the bed mattress. Protect the Nest with a sheet that is soft but not thick. Connecting the Control Unit Connect the mains power cable at the bottom of the Control Unit and hang it over the small hook. Connect the Heating Pad at the back of the Control Unit. Be gentle, and fit the connector the correct way. Tighten the connector screws gently. Place and secure the Control Unit in a safe place where the display can be clearly seen. Press the start button on the front panel and observe that the self test performs correctly. During the self test, check that the correct mattress mode (H2O or GEL) is set. Change mode if required. Placing the baby Only when the desired temperature is reached (green smiley-indication), should you place the baby on the mattress. Position the lightly dressed baby (nappy, long arm T-shirt, bare legs (and a cap on very small ones)) on its back in the Nest. Other positions are subject to approval from authorised staff and local protocols. Adjust the Nest size by pulling the string. Hide the string under the mattress. Cover the baby with suitable cover, such as 1-3 layers of soft cotton blankets. Temperature setting All babies are individuals and their temperature must be controlled frequently until you are familiar with the baby’s reaction to the set temperature. Overheating is often caused by covering the baby too much. When the Water Mattress is used, 370C- 37,50C is a good starting temperature for slightly hypothermic babies and for babies weighing about 1000g. 36.50C - 370C is the most common temperature for babies weighing more than 1200g As the baby’s weight increases, the temperature is primarily controlled by changing the amount of blankets that cover the baby and secondly by changing the set temperature. When the lightly dressed and covered baby is maintaining body temperature with a Water Mattress temperature of about 35.5 - 360C, then the baby is probably ready for a standard cot that has no additional warming. If the Gel Mattress is being used, try setting the temperature to 37-380C in order to compensate for the heat loss in the Gel Mattress. Otherwise the same operating instructions apply, but beware of the reduced warming efficiency of the Gel Mattress. Connecting a skin type temp sensor to the unit may be helpful in obtaining the right temperature. Maintenance Wash the re-usable Kanmed Nest at maximum 900C. Preferably 600C. Tumble dry it. Kanmed recommends changing the Baby Nest once a year. Disinfect the surface of the Mattress, the Control Unit, Gel Mattress and the Heating Pad. Check the water level in the Water Mattress frequently and remove any air. Replace the Water Mattress once a year. See the user’s manual for further maintenance instructions and periodical safety checks. Page 3 of 28 User Manual 2 BW3-070/2 Safety Instructions Please study this manual thoroughly and you will find the Kanmed BabyWarmer BW3 to be both safe and easy to use. Intended use The intended use of the Kanmed BabyWarmer BW3 is to keep newborn and premature babies normothermic. Kanmed BabyWarmer BW3 is designed for hospital use only. It must be used according to the instructions in the manual and according to established clinical routines and by qualified personnel. Essential Performance The automatic system supervision will safeguard any malfunction that may have influence on the performance of the system. If used according to this instruction manual, and if the warning information is taken into account, no unacceptable patient risks should occur. However, always monitor the patient's vital signs and adapt the use after the patient's actual requirements. Warning Proper Use. To ensure optimal performance and to prevent incorrect use, the user manual must be read completely before the system is being used. Only use genuine Kanmed BabyWarmer parts together with the BW3 control unit. System Malfunction. If the BabyWarmer BW3 self test does not perform correctly or the system displays an alarm or error message, or the Control Unit has been dropped, received mechanical damage etc., it must be examined by a qualified technician before being used. If it is suspected that the BabyWarmer BW3 is not operating properly, immediately consult a qualified technician for advice and do not use it. Never use the BabyWarmer BW3 without a Kanmed Water or Gel Mattress! Electrical Hazard The system must always be connected to a mains power outlet with proper protective grounding. Always remove the mains power cable before cleaning the Control Unit. Body temperature. The temperature monitor is intended for added safety purposes only, please use a dedicated hospital grade precision thermometer, and a method in accordance to hospital procedures for precise measurements of the patients actual body temperature. Never place a baby face down on the Kanmed Mattresses or in the BabyWarmer Nest unless this is ordered by responsible staff. A cold mattress, or a mattress which is cooling down due to the heating being switched off, will decrease the body temperature of the baby. Likewise, a too warm mattress can induce fever. Caution Be aware that the acoustic alarm has a reduced sound level of 55dBA (adapted for use in silent environments, e.g. a neonatal ward). Always fill the Water Mattress to the required level before the unit is brought into use. Preferably fill with lukewarm water at around 350C. Replace the Water Mattress periodically as indicated on the Water Mattress (after about 12 months of use). Don't fold or bend the Heating Pad sharply, don't pull the Heating Pad cable or use it for carrying the Heating Pad. Make sure that the text side of the Heating Pad is facing the Mattress. Make sure that there are at least 2 drain holes in the bottom of the bed if using the Water Mattress. Make sure that the adjusting string is placed outside the Baby Nest to prevent it from interfering with the baby. Check the mattress temperature regularly. Check the temperature of the baby regularly. Continue to use appropriate monitoring of vital signs. Before first use, please clean everything according to your standard hospital routines and to instructions in the user manual. Always wash a new re-usable Baby Nest before first use. Please note that the control unit BW3 shall be placed standing on a flat surface, or mounted with the front end up, having the display clearly visible. The BW3 may not be interfaced with any other electrical system. If this is done a new “system” is created per definition, and the safety classification of the BW3 may be effected. Please be aware that use of HF surgical instruments or similar devices may interfere with the BW3 and may require special precautions regarding potential equalization etc. The Kanmed Gel Mattress may not be used without its integrated aluminium-plate. Page 4 of 28 User Manual 3 BW3-070/2 General description Symbols Display the graph screen during operation. Move highlighted selection in MENU. Display the status screen during operation. Move highlighted selection in MENU. Also part of the keyboard lock. Decrease temperature, or change highlighted selection in MENU Increase temperature, or change highlighted selection in MENU. OK, ENTER, select highlighted item in MENU. High Temperature Alarm Limit for the temperature monitor. When pushed, the display changes to "adjust high alarm level screen" (Note: This function is only selectable when an external temperature sensor is connected). Low Temperature Alarm Limit for the temperature monitor. When pushed, the display changes to "adjust low alarm level screen". (Note: This function is only selectable when an external temperature sensor is connected). ON/OFF Information symbol (Read the Manual) The push button is part of the keyboard lock. Alarm Silence Menu. (Note: This function is only selectable the unit is in stand by!) Marking under the buttons related to the keyboard lock. Alarm LED Colour: Red/Yellow Power LED Colour: Green Page 5 of 28 Red flash = High Priority Alarms Yellow flash = Medium Priority Alerts Yellow constant light = A medium alarm has been silenced Off = No power connected Slow flash = Stand by mode Constant light = Active mode User Manual 60 o BW3-070/2 Risk of explosion in the presence of inflammable gases. Earth potential equalisation connection point. Safety class BF, Defibrillator safe. IPX7 Water proof Heating Pad. Machine washable at max. 60 0C 60 o No dry cleaning. Can be centrifuged at low speed. Tumble-dry Fulfils MDD93/42/ECC. (Notified Body 0413 = Intertek Semko AB, Sweden). 2 Disposable (single patient use only), shall not be reused. H2O Water (Heating Pad) /////// GEL (Heating Pad) System Description The Kanmed Baby Warmer BW3 standard kit consists of 4 major components: Control Unit Heating Pad Water or Gel Mattress Kanmed Baby Nest Control Unit, BW3-020 The Control Unit can be connected to any mains AC power supply voltage between 100 - 240 V AC at 50 or 60 Hz frequency, or can be powered from a 12 Volts battery. See the technical section for details. Page 6 of 28 User Manual BW3-070/2 Top Panel Layout 1. Display 2. Keyboard lock button 3. Menu button 4. Power indication, LED 5. ON/OFF button 6. Navigation Pad, with second keyboard lock button 7. Alarm silence button 8. Alarm indication LED 9. Temperature monitor Low alarm limit button 10. Temperature monitor High alarm limit button Front panel The YSI400 compatible temperature sensor (T) and optional earth potential equalisation grounding is connected here. Bottom Panel The Bottom Panel contains information about manufacturer, part number, serial number, voltage, etc. The mains power connector is located in the deep bottom of the unit. The Heating Pad connector and the battery power input are also accessible here. Page 7 of 28 User Manual BW3-070/2 The Heating Pad, BW3-003 The Heating Pad consists of an electric element with four integrated temperature sensors. The design and construction of the Heating Pad has reduced the magnetic and electrical fields to normal background levels and thereby making them harmless. The Heating Pad voltage is 24V DC. See technical data for information about warming up times. Location of the integrated temperature sensors. T1 and T3: temperature of the Mattress T2 and T4: temperature of the Heating element Explanation of the markings on the Heating Pad 1. Read the manual! 2. Always use a Kanmed Water (H2O) or Gel (//////) Mattress. Never place a baby directly on the Heating Pad! 3. The Heating Pad must be inserted in the pocket under the Mattress. (This is best done if the Mattress is placed upside down on a flat surface). The Water Mattress When filled to the level mark a standard Water Mattress contains about 4.2 litres of water. Always add Kanmed Water Conditioner when the Water Mattress is filled. The water level should be checked frequently and water must be added if required. Big air bubbles must be removed. When used for the first time, please write the date of expiry in the box (one year into the future). Explanation of the markings on the Water Mattress 1. Instructions for Kanmed Water Mattresses Fill with tap water up to the MAX indication line. Add one Bottle of Kanmed Water Conditioner BW50-029. Change water when the water is below the MIN level line and add one bottle of Kanmed Water Conditioner BW-50-029. Page 8 of 28 User Manual BW3-070/2 2. Fill the Water Mattress to the Max H2O level mark. Maximum water temperature 400C. Add carefully a whole bottle of Kanmed Water Conditioner. Follow the caution instruction on the Water Conditioner package. 3. Remove air bubbles, very important! Place the Water Mattress on a flat surface and lift the filling hole properly upwards.(20cm.) Press the air bubbles towards the filling hole repeatedly until all major air bubbles are expelled while at she same time lowering the filling hole. Fit the screw cork firmly. Check for major air bubbles on a regular basis. 4. Turn the Water Mattress upside down and insert the Heating Pad in the pocket with the markings facing the Water Mattress. The Water Mattress and the Heating Pad is inserted into the Kanmed Baby Nest. The Gel Mattress A Kanmed Gel Mattress may be used as an alternative to the standard Water Mattress. Please observe that when a Gel Mattress is used, the heating capacity of the Kanmed BabyWarmer system is reduced (compared to water). The indicated temperature is an estimated temperature value and may differ from actual spot temperature readings on the Gel Mattress surface. In GEL-mode there is a 2,0° C offset added to the Heating Pad temperature (compared to the set temperature) to compensate for the lesser heat conductivity of the Gel Mattress. Kanmed (extra soft pebble surfaced) Gel Mattress NOTE: The Gel Mattress may never be used without it's integrated aluminium-plate which must be situated under the Heating Pad Page 9 of 28 User Manual BW3-070/2 The Kanmed Baby Nest Several different types and sizes of Kanmed Baby Nests are available. Please check with your local supplier or on the internet www.kanmed.se The Kanmed Baby Nest is intended to facilitate correct positioning, and to create a tight and cosy environment for the baby. By pulling the strings one can adjust the collar from being wide open and flat to become a tight raised wall around the baby. The Baby Nest has a pocket into which the Mattress and Heating Pad is inserted. BW50-025 Blue, Yellow and Pink BW50-027 Twin BW50-200 Disposable BW50-250 Disposable Cover Page 10 of 28 BW50-025 XL User Manual 4 BW3-070/2 Description of functions Display indications - Normal Operating Mode Temp monitor symbols. Displayed only when sensor connected. YSI-sensor temperature Quick Indicator Green = OK Red = too warm Blue = too cold Set temperature High temp alarm level Quick Indicator Green = OK Red = > High alarm Blue = < Low alarm Low temp alarm level Mattress selection indicator Start and Self Test Quick Indicator Green = OK Red = > Set temp Blue = < Set temp Heating Power indicator Every time the Control Unit is switched on it performs a Self Test of all functions and the internal safety circuits. If the Control Unit does not detect any faults, the warming will start automatically at the factory pre-set temperature of 37 OC. The warming will not start if any errors are detected. See section 9 for full information If the unit does not perform the Self Test exactly as described in this manual - do not use the device! Connect the control unit to mains power supply and to the Heating Pad, check that the mains indicator LED blinks. Press Start/Standby and check that the Self Test performs as described in section 9. Page 11 of 28 User Manual BW3-070/2 Normal operation When the self test has been successfully performed, the warming will automatically commence. Make sure that the correct mattress type is selected (H2O or GEL). If an incorrect mattress type is chosen, the heating performance will either be reduced, or a Heating Pad alarm will be activated after some time of operation. Adjust the set temperature as required. The running conditions are showed by the colours of the icons. Temperature settings When temperature settings below 35°C or above 37°C are to be selected, the unit will alert the operator by prompting for confirmation (press LEFT or/RIGHT key and OK for confirmation) Key lock function After 30 sec of operation, the key lock function will activate (if selected ON in the set up menu) and the key lock symbol will be displayed in the bottom left corner of the display. This is a safety feature implemented to prevent involuntary changes of any operation setting. In order to unlock the keyboard and change any setting, or to turn the unit off, please press one of the two key lock buttons once, and within 5 seconds press the other key lock button. The key symbol in the bottom left corner of the display will then disappear and the unit will accept any command. Temperature Monitor The temperature monitor function will automatically be activated as soon as an YSI400 compatible (skin) temperature sensor is fitted to the 6,3 mm phono type (T) front intake. The temperature of the sensor will be displayed in the upper left corner of the display. BW3-099 YSI Skin Temperature Sensor Place the temperature sensor according to your standard routines. It is possible to set high- and low temperature alarm levels. The high level default setting is 42 °C and the low setting is OFF (--- = low temp alert not activated). If the sensor-temperature exceeds the upper temp limit, the thermometer icon flashes red, the alarm LED flashes yellow and an acoustic signal is emitted. If the sensor-temperature falls below the set low temp limit, the thermometer icon will flash blue, the alarm LED flash yellow and an acoustic signal is emitted. The acoustic alarm may be silenced for 2 minutes by pressing the Alarm key. During the time of silenced alarm, the yellow alarm LED will be on. Note: If the temperature sensor initially is colder than the low alarm level, the thermometer icon will display blue, but the alarm will not be activated (the alarm will only trigger when the YSI temperature is falling, from a reading higher than the LOW alarm limit. Page 12 of 28 User Manual BW3-070/2 Setting alarm limits for the temperature monitor The upper temp alert limit is accessed by pressing the High Temp alarm key. Change the value using the left/right keys. Confirm the setting by pressing the "OK" button. The Low temp alert limit is accessed by pressing the Low Temp alarm key. Change the value using the left/right buttons. Confirm the setting by pressing the "OK" button. Alarms Please see section 8 Alarms Menu Mode The "Menu Mode" is selectable only when the Control Unit is in stand by. Select function. Move the red box with the UP/DOWN/LEFT/RIGHT arrows, press OK to select. 1 Technical status 3 Temp Histogram 2 Settings 4 Alarm LOG Data 1 Technical Status T1 – T4: Temperature sensor readings R2 – R2: Internal reference UT: Internal CU temperature YSI: YSI sensor temperature. Vin: Heating Pad voltage DC: Heating Pad Current Note: Heating Pad Current is always 0 A in MENU mode. Press right arrow one time for a 5 sec long heating pulse. The reading should display 2,0 ± 0,2 A Runtime: Accumulated running hours of the CU. Program: Main SW version End the session by pressing MENU Note: Technical status screen also accessible in operating mode. Just press the DOWN key. Page 13 of 28 User Manual 2 Settings Select function with the up/down keys (moves the red box), change selected parameter with the left/right keys (move the blue boxes). - Mattress type selection - Key lock On/Off - Alarm sound Hi/Low - Display back light level (A = screen saver function off) End the session by pressing MENU. 3 Temp Histogram A graphical diagram of the temperature curves from the last 4 hours of operation. Press RIGHT key for the colour guide. End the session by pressing MENU Note: Temp Histogram also accessible in operating mode. Just press UP key. Red: Mattress temperature reading Black: Set temperature Blue: Temperature sensor reading 4 Alarm Log Data, page 1 Display a log record of alarms and recent events. Press RIGHT key for page 2 Press DOWN key (repeatedly) to display older events. YSI temperature alarms are coded as 30 and 31 End the session by pressing MENU Alarm Log Data, page 2 Press LEFT key for page 1 Press DOWN key (repeatedly) to display older events. End the session by pressing MENU Page 14 of 28 BW3-070/2 User Manual 5 BW3-070/2 Preparing the Kanmed BabyWarmer Ensure that all parts are available and in good working condition. Study the safety instructions in this manual The unit shall always be left switched on so that it is ready for the next baby. Always place the Kanmed BabyWarmer Nest package on the standard mattress of a baby cot, or any other heat insulating surface. Inserting the Heating Pad and selected Mattress into the Kanmed Baby Nest Place the selected mattress upside down on a flat surface. Insert the Heating Pad in the pocket with its printed text towards the mattress. Turn the mattress over again. Insert the mattress with Heating Pad into the Kanmed Bay Nest pocket. Use the opening in the head end of the Nest to assist in fitting the Nest to the mattress. You may use the Kanmed BabyWarmer without a Kanmed Nest but the Nest facilitates correct positioning of the baby. Preparing the bed Ensure that the bed has drain-holes in the bottom if you use the Water Mattress Always place the BabyWarmer nest package on an insulating bed mattress. Protect the Nest with a sheet that is soft but not too thick. Connecting the Control unit Connect the mains power cable at the bottom of the Control Unit and guide the cable over the small hook. Connect the Heating Pad at the bottom of the Control Unit. Be gentle, and fit the connector correctly. Tighten the connector screws gently. Place and secure the Control Unit in a safe place where its display can be seen. Press the start button on the front panel and observe that the self test performs correctly. During the self test, check that the correct mattress type (H2O or GEL) is set. Change mode if required by pressing the RIGHT or LEFT key during the Self Test. 6 Mattress selction, Adjustments and Areas of use Kanmed Water Mattress Suitable for all babies until very little warming is needed. The Water Mattress is superior in conducting warmth to the baby thereby ensuring optimal weight gain. It should therefore be the first choice. The warm soft Water Mattress has a calming and relaxing effect on the baby and ensures better sleep quality. Its softness prevents skin damage and many customers reports that it helps to form a nice shape of the babies head. The Water Mattress is also a heat buffer and will only loose about 1,5°C per hour in case of power interruption Kanmed (special soft pebble surfaced) Gel Mattress The Kanmed Gel Mattress is for new born or near full term babies in need of some additional warming. The heat conduction is not as good as water. It is not as soft as the Water Mattress. Therefore attention shall be paid to the baby’s temperature and to its weight gain. Note: The Gel Mattress must not be used without the integrated aluminium plate. Only Kanmed Gel Mattress will function with the BW3 Warning: If the Gel Mattress is covered with several layers of material, to make the bed softer, then the heat transfer will be greatly reduced - which in turn may reduce the warming efficiency therefore probably affecting the baby's weight gain. Placing the baby Only when the desired set temperature is reached (indicated by a green smiley), you should place the baby in the Nest. Position the lightly dressed baby (nappy, long arm T-shirt, bare legs and a cap on very small ones) on its back (unless otherwise prescribed by responsible medical staff) in the Nest. Adjust the Nest size by pulling the string. Hide the cord under the mattress. Cover the baby with suitable cover, such as 1-3 layers of suitable blankets. Page 15 of 28 User Manual BW3-070/2 Temperature setting All babies are individuals and their temperature must be controlled frequently until you are familiar with the baby’s reaction to the set temperature. Overheating is often caused by covering the baby too much. When the Water Mattress is used, 37-370C is a good starting temperature for slightly hypothermic babies and for babies weighing about 1000g. 36.50C - 370C is the most common temperature for babies weighing more than 1200g As the baby’s weight increases, the temperature is primarily controlled by changing the amount of blankets that cover the baby and secondly by changing the set temperature. When the lightly dressed and covered baby is maintaining body temperature with a Water Mattress temperature of about 35.5 - 360C, then the baby is most often ready for a standard cot that has no warming. If the Gel Mattress is being used, try setting the temperature to 37-380C in order to compensate for the heat loss in the Gel Mattress. Otherwise the same operating instructions apply, but beware of the reduced warming efficiency of the Gel Mattress. Connecting a skin type temp sensor to the unit may be helpful in obtaining the right temperature Neonatal intensive care units, Level II units, Intermediate care units, Step down units, etc. In the neonatal care the Kanmed BabyWarmer with the Water Mattress is used to ensure an optimal warming of all babies, from 800 g and up 3000g or untill the baby gets too warm. Optimal warming also ensures optimal growth rate. Kanmed BabyWarmer can replace the incubator when the baby is mainly in need of the warming. Vital signs monitoring, oxygen support or CPAP can easily be continued on the Kanmed BabyWarmer and the Kanmed Baby Bed The Kanmed BabyWarmer with Water Mattress can also be used inside an incubator to help obtain correct and stable body temperature, especially in older single wall units and on “modern” units where the whole top goes up. NOTE : Using the Kanmed BabyWarmer inside an incubator is the sole responsibility of the hospital. The function and temperature regulation of the Kanmed BabyWarmer is not influenced by the incubator. Delivery Wards Kanmed BW3 can be used to warm children that for different reasons have lost heat post delivery. Kanmed BW3 is also perfect for keeping newborn babies warm until the mother is able to / wants to warm the baby herself. Try the Water Mattress for children in need of a soft warm support, for instance children suffering from hydrocephalus, fractures, pain after delivery with a forceps or a suction device, colicky pains, etc. In rooms with low temperatures the Kanmed BabyWarmer will help keeping the baby warm.. If only modest heating is needed then the Gel Mattress is and ideal alternative to the Water Mattress. Maternity Wards Low birth weight or premature babies that do not need all the resources of an intensive care department but need support to stay warm can thanks to the Kanmed BW3 be kept with the mother in the ward. Babies with a weight between 1800gram and 2500 gram, born around pregnancy week 35 - 38, are often not capable of maintaining a normal body temperature during their first days after birth. The Kanmed BabyWarmer keeps them at normal body temperature and assists them to stay with their mothers. Unsettled, stressed and screaming babies can often find a soothing and relaxing environment on the warm Water Mattress thereby relieving the staff and the parents. The Gel Mattress can also be used but be aware of the limited warming capacity compared to the Water Mattress. NIDCAP, Developmental Care and Kangaroo care In these treatment modalities the sleeping, rest and positioning of the baby plays an essential role. The warm soft Water Mattress resembles the warmth of a mother’s skin therefore making the Kanmed BabyWarmer the ideal tool to ensure quality sleep. Photo therapy Kanmed BabyWarmer is well suited for Photo therapy using an overhead lamp, and especially for new blue LED lights that does not radiate any heat. Using the Kanmed Gel Pad is a practical option if the warming capacity is considered enough – otherwise choose the Water Mattress. Transport of babies inside the hospital using the Water Mattress If the child is normally covered and in a standard cot, the Water Mattress temperature will only drop about 1.50 C per hour when the power is disconnected and under normal temperature conditions. Please note: A Gel Mattress cools of much faster (>50 C / h). When transporting in an ambulance (ground or air) The Kanmed BabyWarmer can be powered with the Kanmed battery cable kit. During transport it will keep the baby warm and the Water Mattress will provide a soft shock-absorbing support. Note that local restrictions and rules may apply for transport of patients. Page 16 of 28 User Manual 7 BW3-070/2 Cleaning and maintenance Cleaning and disinfecting The user of Kanmed equipment must not use any methods for cleaning and decontamination other than those recommended by Kanmed. If necessary then check with Kanmed that these methods may not harm the equipment. However Kanmed equipment withstands all cleaning and disinfection agents commonly used on hospital equipment. Do not autoclave any parts. Protect yourself according to hospital routines. Control Unit Remove the mains cable and the Heating Pad. Wipe with a cloth moistened with cleaning and disinfectant liquid that you normally use for technical equipment. Always be careful, especially when using flammable agents (e.g. alcohol) so that no liquid unintentionally enters the Control Unit. Always clean between patients or according to hospital routines. Water Mattress Add Kanmed Water Conditioner from day one! Clean with water and wipe off with a cloth moistened with the cleaning and disinfectant liquids normally used for plastics. If HIV or Hepatitis is suspected cleaning can be done with much stronger agents such as ethyl alcohol (50 %), formaldehyde or chloramines. Always clean between patients or according to hospital routines. Gel Mattress Use same method as for the Water Mattress. Always clean between patients or according to hospital routines. Heating Pad Use same method as for the Water Mattress. Avoid fluids in the connector. Always clean between patients or according to hospital routines. Kanmed Baby Nest (re-usable type). Normally machine washed at temperatures up to 60OC. Centrifuge at low to medium speed. Always dry tumble. If needed, the Nest can withstand 90 degree washing but this will shorten the lifetime. Check for damages after washing. Always wash between patients or per your own routines. Kanmed Baby Nest (single patient type). Check for damages before use. Always replace between patients. Periodical exchanges The Water Mattress The Water Mattress should be changed at least every year to avoid leakages. Do not forget to add a bottle of Kanmed Water Conditioner when filling the Water Mattress, when you change water or add more water. Kanmed Baby Nest The Baby Nest is a consumable. The Kanmed Baby Nest must be changed as soon as it shows signs of damage or wear, or at least after one year of use. Disposable Nests (single patient type) are also available, please contact your local distributor or visit www.kanmed.se for more information. Page 17 of 28 User Manual BW3-070/2 Periodical Checks Recommended checks To be done by Interval Water level in the Water Mattress, Heating Pad, Baby Nest - are they clean and undamaged? Cables and connectors - clean and undamaged? Correct self test at start Check of safety systems as per chapter 9 Electronics safety test (as per hospital routine) Temperature check as below The user Every time the bed is made At each start At each start Every year Every year Every year or when in doubt The user The user Technician or user Technician Technician or user Temperature Check To perform the temperature check a precision thermometer preferably with a skin type sensor is needed. The built in temperature monitor with an YSI400 type sensor (having an specified accuracy better than ±0,2°C) may be used. Note: In this procedure the standard type Kanmed Water Mattress must be used. Make up the bed as for normal use and place the temperature sensor in the centre on top of, and fixed in direct contact with the Water Mattress (e.g. using a surgical tape or similar). Cover the sensor with some insulating material. Check that there is no air in the Water Mattress. Set the temperature to 37 OC and allow the system to settle temperature in steady state (note, this may take several hours). Check that the precision thermometer (or the built in temperature monitor) and the Control Unit displays the same reading, allowed difference ± 0.7OC. 8 Alarm functions, indication and actions Temperature monitor alerts These alerts relates to the built in temperature monitor, and does not effect the function of the BabyWarmer. The temperature monitor is only activated when an YSI400 compatible temperature sensor is connected. If a temperature monitor alarm condition is detected, the alarm is activated, indicated on the display by a flashing thermometer icon, audio signal and the yellow LED. After pressing the alarm button, the alarm will be silenced for 2 minutes. If the alarm condition remains, the alarm will return. Indication Description / Operator action High temperature. The measured sensor temperature is higher than the set high alarm limit (FLASHING) Action: Check the settings and the patient's actual body temperature. Remember that the Water Mattress cools slowly. Temperature OK! (Normally displayed). The measured sensor temperature is in between the High- and Low alarm limits. Low temperature. The measured sensor temperature is lower than the set low alarm limit. (FLASHING) Page 18 of 28 Action: Check that the temperature sensor is properly applied to the patient. Check that the BabyWarmer system is working in a correct way, and that right temperature settings are used. If the sensor temperature is rising, but not yet reached up to the Low alarm level, the indicator indicates blue but not flashing (no alarm condition!). User Manual BW3-070/2 Quick indications Informative system messages only, the system will continue operation as normal. The colour of the face icon depends on a combination of the mattress temperature and the YSI400 temperature sensor. Indication Description / Operator action Excess heat / Slow cooling / High temp alarm. The mattress has a higher temperature than the set value or the temperature monitor YSI400 sensor is warmer than the Hi temp alarm level Action: Will normally occur after the set value has been reduced from a higher value. The settings should always be checked, and if found necessary, the patient may be temporary removed (and cooled down). Within limits! Set temperature has been reached and the temperature monitor is within the alarm levels (if a sensor is connected). The system is ready for use provided that a correct set temperature has been chosen. Low heat / Slow heating / Low temp alarm. The mattress has not reached the set temperature or the temperature monitor YSI400 sensor is colder than the Lo temp alarm level (if a sensor is connected). Will normally occur when a cold start is being performed. Action: Check the temperature monitor sensor. All settings should be checked. If a cold start has been performed, the patient should not be placed on the mattress before the indication has turned green. High mattress temperature. The calculated temperature is more than 0,8°C warmer than the set value. The mattress temperature is displayed in the icon. Within limits! The calculated temperature is within ±0,8°C of the set value. Low mattress temperature. The calculated temperature is lower than 0,8°C below the set value. The mattress temperature is displayed in the icon. Medium priority errors and alarms When a medium priority error is detected, the alarm is activated (error code on display, audio signal and the error LED blinks yellow.). After pressing the alarm button, the unit will continue to operate normally for 2 minutes. If the error condition remains, the alarm will return. Code Description Action Note 20 Low H2O Temp alarm. The calculated Water Mattress temperature is more than 1°C below the set value. Reset the alarm. Check the actual Water Mattress temperature. If there is a logical explanation (e.g. a heavy thermal load on the Pad, an extra large Water Mattress being used etc), then make necessary corrections. Restart the system. If the alarm re-occurs, the system should be analyzed and/or replaced. This alarm is only activated in H2Omode 4 hours after system start or after any set temp adjustment. 21 Low GEL Temp alarm. The calculated Gel Mattress temperature is more than 1°C below the set value. Reset the alarm. Check the actual Gel Mattress temperature. If there is a logical explanation (e.g. a heavy thermal load on the Pad), then make necessary corrections. Restart the system. If the alarm re-occurs, the system should be analyzed and/or replaced. This alarm is only activated in GELmode 4 hours after system start or after any set temp adjustment. 22 High Temp alarm. The calculated Gel- or Water Mattress temperature exceeds the set value by 1°C or more. Reset the alarm. If there is a logical explanation (e.g. the set value lower than the room temperature, the mattress effected by a radiant warming light or similar), then make the necessary corrections. Restart the system. If the alarm re-occurs, the system should be analyzed and/or replaced. This alarm is only activated 4 hours after system start or after any set temp adjustment. 23 Error in the temperature monitor interface. The system should be analyzed and/or replaced. 24 Defect YSI400 temperature sensor The external temperature sensor needs to be replaced. Page 19 of 28 User Manual BW3-070/2 High priority alarms If a high priority error is detected, the heating is switched off and the alarm is activated (the error code is displayed, audio signal emitted and the red LED flashing). After pressing the Alarm button, the unit goes to stand by. If a restart is performed, please carefully observe that a correct self test is being performed. Code Description Action 01 Power loss has occurred during normal operation. The power alarm can be silenced by the operator by pressing the alarm button for about 2 seconds. When power is restored, reset the alarm and restart the unit . 02 High H2O temp alarm: The calculated H2OMattress temperature (thermistor T1 or T3) has exceeded 41°C for more than 30 sec. Reset the alarm. Check the actual Water Mattress temperature. If there is a logical explanation (e.g. a external heat source affecting the Heating Pad), then make necessary corrections. Restart the unit. Check that the self test performs OK. If the alarm re-occurs, the system should be analyzed and/or replaced. 03 Measuring error: The independent Hard Ware based safety circuit has detected that the H2O thermistor T3 render a higher reading than 42°C or the element thermistor T4 more than 43°C, or the internal reference deviates more than 1 %. Reset the alarm. Check the actual Water Mattress temperature. If there is a logical explanation (e.g. an external heat source affecting the Heating Pad), then make necessary corrections. Restart the unit. Check that the self test performs OK. If the alarm re-occurs, the system should be analyzed and/or replaced. 04 High GEL temp alarm: The calculated Gel Mattress temperature (thermistor T2 or T4) has exceeded 45°C (peak reading). Reset the alarm. Check the actual mattress temperature. If there is a logical explanation (e.g. an external heat source affecting the heating pad), then make necessary corrections. Restart the unit. Check that the self test performs OK. If the alarm re-occurs, the system should be analyzed and/or replaced. 05 Sensor error A: Thermistor T1 or T2, or the measuring circuit is faulty (open loop). Reset the alarm. Replace the Heating Pad. Restart the system. Check that the self test performs OK. If the alarm re-occurs, the system should be analyzed and/or replaced. 06 Sensor error B: Thermistor T3 or T4, or the measuring circuit is faulty (open loop). Reset the alarm. Replace the Heating Pad. Restart the system. Check that the self test performs OK. If the alarm re-occurs, the system should be analyzed and/or replaced. 07 Sensor error C: Thermistor T1, T2, T3 or T4, or the measuring circuit is faulty (rendering a value grater than 49°C). Reset the alarm. Replace the Heating Pad. Restart the system. Check that the self test performs OK. If the alarm re-occurs, the system should be analyzed and/or replaced. 08 Regulator error: The heating Pad output has been active (or inactive) for more than 120 consecutive sec, indicating an error in the output circuit. The Control Unit should be replaced and the faulty unit analyzed by an authorized technician. 09 High internal temperature: The Control Unit's internal temperature has exceeded 60°C. Reset the alarm. If there is a logical explanation (e.g. an external heat source affecting the Control Unit), then make necessary corrections. Restart the unit. Check that the self test performs OK. If the alarm reoccurs, the system should be analyzed and/or replaced. 10 Safety relay malfunction: The safety relay does not operate properly. The Control Unit must be replaced and the faulty unit analyzed by an authorized technician. 11 Too high current in the Heating Pad: Internal short circuit detected in the PAD. The Control Unit and the Heating Pad must be replaced and the faulty system analyzed by an authorized technician. 12 Uneven Heating Pad temp in H2O mode: Unnatural temperature differences (> 1,4° C ) measured between the two H2O thermistors T1 and T3. Reset the alarm. If there is a logical explanation (e.g. a heavily tilted bed during warming up phase, low water level in the Water Mattress, external heat source or high thermal load affecting one of the thermistors), then make necessary corrections. Restart the unit. Check that the self test performs OK. If the alarm re-occurs, the system should be analyzed and/or replaced. 13 DC power error. The Heating Pad voltage is either lower than 9 V, or higher than 28 V. If the control unit is fed by external DC batteries, check the external supply voltage and the adapter. If the unit is fed by mains AC Power and this alarm occurs, the control unit should be analyzed and/or replaced. 14 Uneven Heating Pad temp in GEL mode: Unnatural temperature differences measured between the two H2O thermistors T1 and T2, OR between T3 and T4. During the first two hours after a cold start, the maximum allowed temperature difference is 8° C, thereafter 4° C. Reset the alarm. If there is a logical explanation (e.g. a Gel Mattress without aluminium plate is used, external heat source or high thermal load affecting the Heating Pad), then make necessary corrections. Restart the unit. Check that the self test performs OK. If the alarm reoccurs, the system should be analyzed and/or replaced. Page 20 of 28 User Manual 9 BW3-070/2 Control of Safety functions Test instructions Self test at start Connect the Control Unit to mains supply and connect the Heating Pad. Check that the mains indicator LED blinks. Press Start/Standby and check that the following happens in the order described below. 1. 2. 3. 4. 5. 6. The selected mattress mode is displayed. Clicking from the safety relay can be heard The Control Unit symbol turns green The Heating Pad symbol turns green A short "beep" is emitted The system starts operating at 37oC 1) Self test in progress. The selected mattress mode is displayed (GEL or H2O). NOTE: Change of mode is now possible by pressing LEFT or RIGHT arrow, as indicated on the display. If the mattress mode is changed the unit will re-start the self test. 2) Self Test Ready. The Control Unit and the Heating Pad symbol turns green A short "beep" is emitted and the red alarm LED flashes one time. The Control Units software version is displayed. Testing the uneven Heating Pad temperature alarm in H2O mode. Start the system in H2O-mode, at 37°C without any mattress placed on the Heating Pad. The Alarm 12 should be received within 15 minutes. (Note: Alarm 08 can sometimes occur as a consequence of the first alarm). Testing the uneven Heating Pad temperature alarm (GEL mode). Start the system in GEL-mode, at 37°C without any mattress placed on the heating Pad. The Alarm 14 should be received within 15 minutes. (Note: Alarm 08 can sometimes occur as a consequence of the first alarm). Mains Power failure alarm This test is performed on a system with Mattress and a Heating Pad. 1. Start the warming 2. After about one minute, select a temperature different from 37oC and make a note of it. 3. Wait about 2 minutes and then disconnect the supply voltage by pulling out the mains plug. 4. Check that the Control Unit alarm indicator starts to blink and that the acoustic alarm beeps intermittently for at least 10 minutes 5. Switch on supply voltage again and check that the Power alarm is displayed. Press the alarm button. 6. Restart and check that the warming starts at the set temperature selected before the power interruption. Page 21 of 28 User Manual 10 BW3-070/2 Accessories, Spare parts and Technical documentation Other accessories, mattress types and sizes may be available. Your local supplier has all information about available accessories or log on to www.kanmed.se User Manuals in other languages can also be downloaded from the Kanmed web page. Article number Description Quantity BW3-001 BW3-020 BW3-003 BW-50-003 BW-50-029 GE-602815 BW-50-025 BW-50-025-P BW-50-025-Y BW-50-25XL BW-50-200 BW-50-250 BW3-070 BW3-079 BW3-007 BW3-0837 BW3-099 Complete Kanmed Baby Warmer kit with Water Mattress Control Unit BW3 Heating Pad Water Mattress 4,5 litre (standard) 600 x 270 mm Kanmed Water Conditioner 118 ml Gel Pad with pocket 600 x 280 x 15 mm Baby Nest blue (re-usable) 650/400 x 350 mm Baby Nest pink (re-usable) 650/400 x 350 mm Baby Nest yellow (re-usable) 650/400 x 350 mm Baby Nest Extra Large Baby Nest white disposable (single patient) 650 x 350 mm Disposable Baby Nest cover 600 x 850 mm Instruction manual, English Service manual, English Battery Cable (power adapter) for 12 V batteries Pole Clamp YSI Temperature Sensor 1 1 1 1 20 1 1 1 1 10 100 1 1 1 1 1 Spare parts Kanmed or your local distributor will provide a spare part price list as well as a service manual that contains all information necessary to perform diagnostics, maintenance and repairs to the extent permitted by Kanmed. Please note, no repairs of the PCBs are permitted, exchange units only. 699-1171 Mains Cord 230V (Swedish plug) 1 400-009 Power supply unit 1 400-005 Heating Pad and Power interface board 1 400-003 YSI-sensor interface board 1 400-001 Main PCB 1 400-020 Top assembly, including the display panel 1 400-0152 Plastic bottom part 1 400-017 Label set 1 400-0194 Back cover plate 1 400-007 LED-Display 1 400-023 Internal Cable kit 1 Page 22 of 28 User Manual 11 BW3-070/2 Technical data Heating Pad, BW3-003 Voltage 24 Volt DC from Control Unit BW3 when powered from mains power, or 12/24 V DC when powering from 12/24V battery source Power consumption 50 Watt, 10 Watt when the Control Unit is powered from a 12 Volt battery Dimensions and Weight 580 x 250 mm / 0,5 kg Length of connection cable 1,2 m Material cover PVC Watertight Yes Conductivity - surface Not electrically conductive Radiation No measurable magnetic and electrical fields Life expectancy The lifetime for the BW3 Heating Pad is expected to be more than 2 years. This is under the condition that the pad has been handled and maintained according to the user manual. Control Unit, BW3-020 Mains power / Frequency 100 - 240V AC / 50/60 Hz Battery power 24V DC 12V DC (with limited warming capacity) Power consumption Max 100 VA (peak value). Average consumption, approximately 15 VA Temperature settings available 25 OC - 35 OC in steps of 0,5 OC 35 OC - 38 OC in steps of 0,1 OC Regulating accuracy Better than ±1.0 OC Display resolution 0.1 OC Auditory Alarm 55 dBA normal, 45 dBA reduced sound level at 1 m horizontally Note: Sound level is adapted to a quiet environment, delivery- or maternity ward etc. Over temperature alarm At a water temperature of 39.5 0,5 OC, in GEL mode 40,0 1 OC Dimensions and Weight Height 200 mm, Width 140 mm, Diameter 150 mm. Weight 1400 g Fuses Primary fuses; built in to the power supply Secondary fuses; built in to the Heating Pad interface board Mode of operation Designed for continuous use Water protection Drip proof when installed according to instructions Life expectancy Kanmed warrants a safe lifetime for the BW3 Control unit of 10 years from first day of use. This is under the condition that the unit has been used and serviced according to the user and or service manual and that the unit has not been modified or changed in any way or for any reason. Water Mattress, BW-50-003 Dimensions and Weight Length 600 mm, With 270 mm, Height 30 mm, Other sizes might be available. Please contact your local supplier. Weight about 0.2 kg (not filled), about 4.5 kg (filled with water) Material Medical Grade PVC Kanmed Water Conditioner recommended Kanmed Bottle 118 ml fluid Contents: Active ingredients: N-Alkyl,N-Didecyl-N,N-dimethyl ammonium chloride (BTC8358), CAS No:68424-85-1: 13% Inaktiv substans 87% Life expectancy The safe lifetime for the Water Mattress is at least 1 year from first day of use. This is under the condition that the Water Mattress has been handled and maintained according to the user manual. Gel Mattress, GE-602815 Dimensions and Weight Length 600 mm, With 280 mm, Height 15 mm, Weight about 2,3 kg. Material AKTON viscoelastic polymer sealed in a polyether urethane (PU) film. Life expectancy The safe lifetime for the Gel Mattress is several years from first day of use. This is under the condition that the Gel Mattress has been handled and maintained according to the user manual and that the surface is unbroken. Page 23 of 28 User Manual BW3-070/2 Kanmed Baby Nest BW50-025 (re-usable type) Dimensions and weight Length 650 mm, Width 450 mm Height 50 mm flattened. About 600g Material Cover: High quality ÖKOTEX grade cotton and polyester Filling of collar: Polyester fibre. Recommended temperature 600C, Can tolerate 900C but this will shorten lifetime Always tumble dry Various colours, sizes and materials are available. Please contact your local supplier. Washing Kanmed Baby Nest BW50-200 (disposable type) Dimensions Length 650 mm, Width 450 mm Height 50 mm Cover: Non woven spunbond polypropylene, 40 g / m2 Filling of collar: Thermoloft DW, Libeltex AB, Bredaryd. Various sizes and types may be available. Please contact your local supplier. Material Warming Capacity Std. Kanmed Water Mattress (It is recommended to fill the Water Mattress with luke warm water) About 4-6 0C per hour. (Room temperature about 22 0C and filled with 4,5 litres of water and placed on the mattress of a baby bed and covered with a double sheet. Connected to mains ACpower, or directly to a 24V battery, or with the BW3-007 Battery Cable (12 to 24 V DC power adapter). Gel Mattress About 8-10 0C per hour. (Room temperature about 22 0C and placed on the mattress of a baby bed and covered with the Nest and a sheet. Connected to mains AC-power, or to a 24V battery, or with the BW3-007 Battery Cable (12 to 24 V DC power adapter). Safety Standards Standards EN 60 601-1 , EN 60 601-1-2, EN 60 601-2-35 Protection type BF, Defibrillator safe Class I CE marking Fulfils MDD 93/42 EEC. MDD class IIB. (EC 0413= Intertek SEMKO, Sweden) Environmental Conditions, normal use Temperature / Humidity +10 to + 34 OC / 10 - 90%, non condensing Environmental Conditions, storage and transport Temperature / Humidity - 25 to + 50 OC / 10 - 100%, non condensing EMC Guidelines The Kanmed BW3 Baby Warming system should not be used adjacent to, or stacked with other equipment. If adjacent or stacked use is necessary, the Kanmed BW3 Baby warming system should be observed to verify normal operation in the configuration in which it is used. Additional EMC information is found in the user manual and in the service manual Connection to battery If the Control Unit is to be connected to a battery (12V DC, from a vehicle etc.) use the Kanmed Battery Cable BW3-007 that increases the voltage to 24V DC. Connect the battery cable to the Battery inlet below the Heating Pad connector on the Control Unit. Connect the other end (fitted with a DIN 4165 plug) to the vehicles cigarette lighter socket or similar outlet. If the Control Unit is powered directly from a 24 V battery source, then note that the centre pin of the DC power inlet is + (positive). Make sure that the power outlet is able to supply minimum of 3 A DC. (The 2,5/5,5 mm power inlet of the BW3 Control Unit is internally fuse-, and polarity protected.) Modifications Any modifications on the Control Unit, Heating Pad, Gel- or Water Mattress will void Kanmed’s responsibilities totally and are not allowed without the written consent of Kanmed. Page 24 of 28 User Manual 12 BW3-070/2 Warranty Kanmed warrants the purchaser that the Control Unit BW3 and/or Heating Pad BW3-003 are free from defects in material and workmanship for a period of 12 month from the date of delivery. The Kanmed Baby Nest, Water and Gel Mattresses and other associated parts are warranted to be free of defects at the time of delivery. The sole obligation of Kanmed with respect to any such defect is limited to the repair with new or remanufactured parts or, at the discretion of Kanmed, replacement of the equipment or refunding of the purchase price. This warranty shall not apply if the product has been modified, adjusted or repaired other than by Kanmed or by organisations authorised by Kanmed or modified, adjusted or repaired not in accordance with written instructions provided by Kanmed. Neither shall the warranty apply if the equipment has been subject to misuse, negligence or accident. These warranties are made on the condition that prompt notification of a defect is given to Kanmed or its authorised dealers within the warranty period. Kanmed shall have the sole right to determine whether a defect exists. Kanmed shall not in any case be liable for special or consequential damages arising from the breach of warranty, breach of contract, negligence or any other legal theory. 13 Disposal When the Kanmed BabyWarmer have reached end of life, it should be recycled in accordance with the EU 2002/96/EC (WEEE) directive if applicable. Page 25 of 28 User Manual 14 BW3-070/2 EMC COMPATIBILITY STATEMENT EMC Guidelines for the BabyWarmer BW3 system Portable and mobile RF communications equipment can affect MEDICAL ELECTRICAL EQUIPMENT. The Kanmed BabyWarmer BW3 system should not be used adjacent to, or stacked with other equipment. If adjacent or stacked use is necessary, the Kanmed BabyWarmer BW3 system should be observed to verify normal operation in the configuration in which it is used. Guidance and manufacturer’s declaration - electromagnetic emissions The Kanmed BabyWarmer BW3 system is intended for use in the electromagnetic environment specified below. The customer or the user of the Kanmed BabyWarmer BW3 should assure that it is used in such an environment. Emission test Compliance Electromagnetic environment - guidance Group 1 Kanmed BabyWarmer BW3 system uses RF energy only for its internal function. Therefore, its RF emissions are very low and are not likely to cause any interference in nearby electronic equipment. RF emissions CISPR 11 RF emissions CISPR 11 Class B Harmonic emissions IEC 61000-3-2 Class B Voltage fluctuations/ flicker emissions IEC 61000-3-3 Complies The Kanmed BabyWarmer BW3 system is suitable for use in all establishments, including domestic establishments and those directly connected to the public low-voltage power supply network that supplies buildings used for domestic purposes. Recommended separation distances between portable and mobile RF communications equipment and the Kanmed BabyWarmer BW3 system. The Kanmed BabyWarmer BW3 system is intended for use in the electromagnetic environment in which radiated RF disturbances are controlled. The customer or the user of the Kanmed BabyWarmer BW3 system can help prevent electromagnetic interference by maintaining a minimum distance between portable and mobile RF communications equipment (transmitters) and the Kanmed BabyWarmer BW3 system as recommended below, according to the maximum output power of the communications equipment. Rated maximum output power of transmitter W Separation distance according to frequency of transmitter m 150 kHz to 80 MHz d = 1,17 √ P 80 MHz to 800 MHz d = 1,17 √ P 800 MHz to 2,5 GHz d = 2,33 √ P 0,01 0,2 m 0,2 m 0,3 m 0,1 0,4 m 0,4 m 1,6 m 1 1,2 m 1,2 m 2,3 m 10 3,7 m 3,7 m 7,4 m 100 11,7 m 11,7 m 23,3 m For transmitters rated at a maximum output power not listed above, the recommended separation distance d in metres (m) can be established using the equation applicable to the frequency of the transmitter, where P is the maximum output power rating in watts (W) according to the transmitter manufacturer. Note 1: At 80 MHz and 800 MHz, the separation distance for the higher frequency range applies. Note 2: These guidelines may not apply in all situations. Electromagnetic propagation is affected by absorption and reflection from structures, objects and people. Guidance and manufacturer’s declaration - electromagnetic immunity The Kanmed BabyWarmer BW3 system is intended for use in the electromagnetic environment specified below. The customer or the user of the Kanmed BabyWarmer BW3 system assures that it is used in such an environment. Electromagnetic immunity test IEC 60601 test level Compliance level environment - guidance Electrostatic discharge (ESD) Floors should be wood, IEC 61000-4-2 ±6 kV contact ±6 kV contact concrete or ceramic tile. If ±8 kV air ±8 kV air floors are covered with synthetic material, the Page 26 of 28 User Manual Electrical fast transient/burst IEC 61000-4-4 Surge IEC 61000-4-5 Voltage dips, short interruptions and voltage variations on the power supply input lines IEC 61000-4-11 Power frequency (50 Hz) magnetic field IEC 61000-4-8 Note: ±2 kV for power supply lines ±1 kV for input/output lines ±1 kV differential mode ±2 kV common mode <5% UT (>95% dip in UT ) for 0,5 cycle ±2 kV for power supply lines ±1 kV for input/output lines ±1 kV differential mode ±2 kV common mode <5% UT (>95% dip in UT ) for 0,5 cycle 40% UT (60% dip in UT ) for 5 cycles 40% UT (60% dip in UT ) for 5 cycles 70% UT (30% dip in UT ) for 25 cycles 70% UT (30% dip in UT ) for 25 cycles <5% UT (>95% dip in UT ) for 5 sec <5% UT (>95% dip in UT ) for 5 sec 3 A/m BW3-070/2 relative humidity should be at least 30% Mains power quality should be that of a typical commercial or hospital environment Mains power quality should be that of a typical commercial or hospital environment. If continued operation during power mains interruptions, it is recommended that the Kanmed BabyWarmer BW3 system be powered from an uninterruptible power supply unit (UPS) Power frequency magnetic fields should be at levels characteristic of a typical location in a typical commercial or hospital environment 3 A/m UT is the AC mains voltage prior to application of the test level Guidance and manufacturer’s declaration - electromagnetic immunity The Kanmed BabyWarmer BW3 system is intended for use in the electromagnetic environment specified below. The customer or the user of the Kanmed BabyWarmer BW3 system should assure that it is used in such an environment. Immunity test IEC 60601 test level Compliance level Electromagnetic environment - guidance Portable and mobile RF communications equipment should be used no closer to any part of the Kanmed BabyWarmer BW3 system, including cables, than the recommended separation distance calculated from the equation applicable to the frequency of the transmitter. Recommended separation distance d = 1,17 √ P Conducted RF IEC 61000-4-6 Radiated RF IEC 61000-4-3 3 Vrms 150 kHz to 80 MHz 3 V/m 80 MHz to 2,5 GHz 3 Vrms 3 V/m d = 1,17 √ P d = 2,33 √ P 80 MHz to 800 MHz 800 MHz to 2,5 GHz Where P is the maximum output power rating of the transmitter in watts (W) according to the transmitter manufacturer and d is the recommended separation distance in metres (m). Field strengths from fixed RF transmitters, as determined by an electromagnetic site survey*, should be less than the compliance level in each frequency range** Interference may occur in the vicinity of equipment marked with the following symbol: Note 1: At 80 MHz and 800 MHz, the higher frequency range applies. Note 2: These guidelines may not apply in all situations. Electromagnetic propagation is affected by absorption and reflection from structures, objects and people. * Field strengths from fixed transmitters, such as base stations for radio (cellular/cordless) telephones and land mobile radios, amateur radio, AM and FM radio broadcast and TV broadcast cannot be predicted theoretically with accuracy. To access the electromagnetic environment due to fixed RF transmitters, an electromagnetic site survey should be considered. If the measured field strength in the location in which the Kanmed BabyWarmer BW3 system is used exceeds the applicable RF compliance level above, the Kanmed BabyWarmer BW3 system should be observed to verify normal operation. If abnormal performance is observed, additional measures may be necessary, such as reorienting or relocating the BW3. ** Over the frequency range of 150 kHz to 80 MHz, field strength should be less than 3 V/m. Page 27 of 28 User Manual Kanmed AB Gårdsfogdevägen 18B SE-168 66 BROMMA – Stockholm Sweden Telephone Telefax +46 8 56 48 06 30 +46 8 56 48 06 39 E-Mail: [email protected] Web page: www.kanmed.se Distributed by: Page 28 of 28 BW3-070/2