1
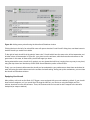
stop playback.
Additionally, you can click the shuttle slider and drag it to quickly jump around in the playback.
To return to the flight, either press Alt (Option) + ‘r’ again, or open the Aircraft menu and click Toggle Replay Mode
once again.
Replaying a Flight from a Flight Data Recorder (FDR)
The final method of visualizing a flight is to load a information from a flight data recorder (FDR). This is useful
primarily in accident investigation and re-creation. In that case, you would need to take the data from the “black box”
of the aircraft you’re interested in and put it in a format that X-Plane can read. That format is the Flight Data Recorder
(or ‘.fdr’) format. This is plain text file formatted in a particular way, which means that you can make your own FDR
files relatively easily from the data you have and then re-create the flight in X-Plane.
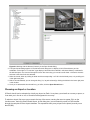
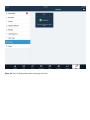
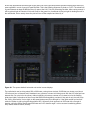
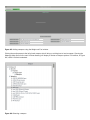
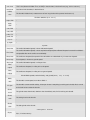
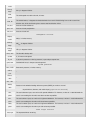
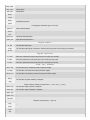
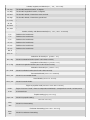
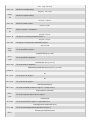
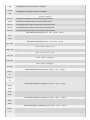
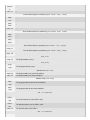
The FDR file specification can be found in X-Plane by moving the mouse to the top of the screen, click on the File
menu, and clicking Load Flight Data Recorder File. The lower half of this dialog box lists both the preceding data
values (file version, aircraft, tail number, and so on) that are required, as well as each of the 100 or so data values that
each instant in the flight data can have. These include the time stamp of that instant, the aircraft’s location (in
latitude, longitude, and altitude), the indicated airspeed, and more.
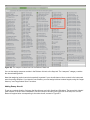
You can use the scroll bar above the dark gray file specification box to look through all the data values, and you can
mouse over individual values to get a description of them. Note that even if your instantaneous “snapshots” of the
aircraft do not use a given parameter (such as the engine pressure ratio, perhaps), your data file must use a dummy
value as a placeholder.
After formatting your data for X-Plane as an FDR file, you can load it using the Load Flight Data Recorder File dialog
box. Click the silver square labeled “Flight Data Recorder file,” navigate to your file, and double click on. Then, when
you close the dialog box, you will be greeted with the standard replay shuttle buttons with which you can replay the
flight.
Viewing the Behind-the-Scenes Flight Model
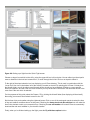
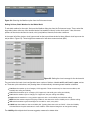
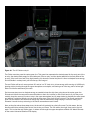
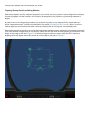
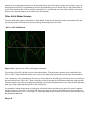
X-Plane models flight by breaking an aircraft down into a number of little pieces and finding the forces acting on each
piece. By clicking the Show Flight Model option from the Special menu (or by pressing Ctrl + ‘m’ on the keyboard)
and moving to an outside view (e.g., by pressing Shift + 8 on the keyboard for the chase view), you can actually see
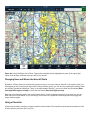
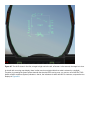
all the forces calculated on each piece of the craft, as illustrated in Figure 5.7. With some wind and turbulence turned
on in the Weather screen, you can even see the pseudo-random velocity vector flow field around the airplane. The
velocity vectors seen are the actual vectors interacting with the aircraft, and the force vectors (the green lines coming
off the plane) are the actual forces acting on the plane—nothing is just for show here. This is the actual work that XPlane is doing.