Transcript
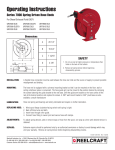
Procedure for Replacement of
Internal Stand Mounting Brackets
Within your sunbed bench are six internal stand mounting
brackets which provide a stable connecting surface for the
stand legs. These brackets consist of the steel bracket itself and
a nut, secured to the bracket, which receives the bolt from the
stand legs. This kit contains the necessary hardware to replace
up to six brackets.
Place the bench unit up-side down on the floor. If you haven’t
done so already, remove all bolts and washers intended for
securing the stand legs (refer to your User Manual). If you are
having difficulty removing a bolt due to a broken internal
bracket try applying upward pressure to the bolt head while
turning. This will create friction on the nut within the bench
and allow the bolt to be removed. As a last resort you may
need to cut the bolt with a hacksaw or bolt cutter.
Once all bolts are removed use a flat, blunt object, such as a
putty knife, to pry off the colored profile strips, located on
either side of the bench, which hold the cover in place. Start in
the middle and work towards the ends. Once the latching
action of the strips is loosened the strips should snap out using
your fingers. Now remove the cover by bending slightly to
allow the ends to come out of the endcaps.
You will now see the six pyramid-like brackets. Notice that
they are not all the same size and the four outer brackets have
four mounting holes and a fifth that must point to the center
bracket (figure A). This service kit includes the four outer
brackets, two center brackets, six hex socket bolts and six
washers, however you may only choose to replace one or two.
Remove the four Phillips-head screws which hold the affected
bracket in place. Replace the bracket with a new bracket.
Make sure the new bracket matches the size of the one
removed. Secure the bracket in place with the four screws
removed. Repeat for the other brackets as needed.
Once all necessary brackets are replaced reinstall the cover by
inserting the end flanges into the endcaps and seating in place.
Make sure the power connection and all cooling fan openings
line up with their respective apparatus. Snap the colored profiles back in place by reversing the above directions, starting at
the ends and working in to the center until they are secure.
Now refer back to your User Manual to attach the legs to the
bench. Use the hex socket bolts and washers to replace any
that were damaged during the dissassembly process. Feel free
to call the ETS Service Department if you experience any difficulty with this procedure.
STAND LEG
To center
bracket
figure A
INTERNAL STAND
MOUNTING BRACKETS
COVER
COLORED PROFILE STRIP
COLORED PROFILE STRIP
ENDCAP
22357A