1
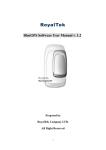
RoyalTek
Bluetooth GPS
Datalog Receiver
MBT-1100
User Manual
V1.0
Published on March 2008 by RoyalTek Company Ltd.
(Design and specifications are subject to change without notice.)
1
Content
1. Product Introduction ................................................................ 3
1.1 Overview..........................................................................................................3
1.2 Main Features...................................................................................................3
1.3 Product Notification.........................................................................................3
1.4 Application .......................................................................................................3
1.5 Specification ....................................................................................................4
1.6 Logger function................................................................................................5
2. Before Start .............................................................................. 7
2.1 Check the Package Content .............................................................................7
2.2 Power Button (Right View)..............................................................................7
2.3 LED Display ....................................................................................................8
2.4 Hardware Features ...........................................................................................8
2.4.1. Power Button .......................................................................................8
2.4.2. Bluetooth Status LED (Blue) ...............................................................8
2.4.3. GPS Status LED (Green) .....................................................................8
2.4.4. Memory Status LED (Red) ..................................................................9
2.4.5. Battery Status LED (Amber/Yellow) ...................................................9
2.5. Getting Started ................................................................................................9
2.5.1. STEP 1: Turn on Receiver and Wait for GPS Fix ................................9
2.5.2. STEP 2: Connect to Bluetooth-Enabled Devices.................................9
2.5.3. STEP 3: Connect to your Navigation Software ...................................9
2.6 How to use Car Charger to charge your handheld device..............................10
3. Utility Installation .................................................................. 11
3.1 Install USB Driver (Windows
2000/XP/2003) or (Windows
Vista family)..................................................................................................12
3.2 Install Data download Utility.........................................................................14
3.3 Transfer data to your PC or Notebook ...........................................................18
3.3.1 Connect MBT-1100.............................................................................18
3.3.2 Download Data ...................................................................................19
3.3.3 Get and Set MBT-1100 Device Status ................................................20
3.3.4 Get the Data Logger Data Downloader revision information.............22
2
1. Product Introduction
1.1 Overview
The MBT-1100 is equipped with the latest GPS solution for fast and accurate fix
on GPS signals. This latest round of technology advancements gives the users
an “instant on” feel, and the experience in navigation becomes more natural.
The dimension of 69.5(L) x 23(W) x 20(H) and weight only 38g, making it an
ideal solution to carry everywhere.
1.2 Main Features
NMEA0183 compliant protocol
Extreme fast TTFF at low signal level.
Adopt TCXO as GPS core clock source
Industrial Standard
Selectable Baud Rate
WAAS / ENGOS is supported
1.3 Product Notification
Charger operating temperature range 0 ºC to +50 ºC
Discharger operating temperature range -20 ºC to +60 ºC
Battery Storage temperature range -20 ºC to +60 ºC
10hr at full charge continuous operation mode.
Humidity range up to 95% no condensing
1.4 Application
PDA and Cellular Phone Navigation
Consumer wireless GPS
Automotive Vehicle Tracking
Personal Positioning
Sporting and Recreation
3
1.5 Specification
GPS receiver
1
Frequency
L1 1575.42MHz.
2
Code
C.A. Code.
3
Chipset Sensitivity
-158dBm (tracking)
4
Chipset cold start
36 sec @ open sky
5
Chipset warm start
33 sec @ open sky
6
Chipset hot start
1 sec @ open sky
7
Reacquisition
Less than 1s
8
Position accuracy
Without aid: 3.0m 2D-RMS
DGPS (WAAS, EGNOS, MASA, RTCM): 2.5m
9
Maximum altitude
18000 m
10
Maximum velocity
515 meter/second maximum
11
Update rate
Continuous operation: 1Hz
12
Dimension (L x W x H)
69.5 x 23 x 20mm
Interface
13
I/O Pin
8pin
Mechanical requirements
14
Weight
38±1g
Power consumption
15
Vcc
5V
16
Current
- Fix:55mA @ 5.0V (Avg.)
- Acquisition: 70mA @ 4.2V from battery (Avg.)
Environment
17
Temperature
- For charge: 0 ~ +50℃ (under 5hrs)
- For discharge: -20 ~ +60℃
- Storage:-20 ~ +60℃
Humidity
≦95%
19
Operation Time
≧ 10 hours (avg.)
20
Battery
Li-on 550mAh, rechargeable
21
Replaceable
No
22
Connector
Mini USB 8pin
18
Battery
External GPS Antenna Connector
23
Type
None
Backup Battery
24
Backup Battery
None
LED Indicator
4
25
Status
26
Original Display
LEDs showing GPS, Bluetooth, Power, Memory status
1 Yellow LED indicates power is in charging
2 Blinking Amber LED indicates Battery Low
3 Glowing Green LED indicates position is fixed
Blinking Green LED indicates position not fixed
4 Glowing RED LED indicates Memory Full (GPS Green
LED off)
Erased memory data, RED LED Blinking
5 Glowing Blue LED indicates Bluetooth is connected
Blinking Blue LED indicates Bluetooth is not fixed
Location Log
27
Data logger
Yes
28
Flash Type
64Mb Serial Flash
29
Data Type
Data Type
Records
1:UTC Time, Longitude, Latitude
Greater than 360,000
2:UTC Time, Longitude, Latitude, Altitude
Greater than 300,000
3:UTC Time, Longitude, Latitude, Altitude, Velocity
Greater than 260,000
4:All Data
Greater than 80,000
Bluetooth
Bluetooth Operating
Frequency
Bluetooth certified
Bluetooth UART port
support data rate
Bluetooth distance
2401~2479 MHz
BT 2.0
115200
≧ 10m
1.6 Logger function
MBT-1100 provides “Log On Demand.” (LOD) as factory default, the
receiver will log the position only when the Green LED glowing (GPS fix)
and push the power button when the 3 LEDs (Green, Blue, Red) blink
then the current position will be saved.
If the Green LED blinks then MBT-1100 will not save the current position.
There are two modes for the log function, one is “log by push button only
(LOD)”, the other is “log by time”, and default is LOD only. If you need
MBT-1100 log the position by time interval, you should use Data
Download utility to change the log method to log by time. Please read
page 21 for the operation.
Power on/off need to push the power button for 5 seconds
2. Before Start
2.1 Check the Package Content
Before you start using MBT-1100, please check out if your package includes the
following items. If any item is damaged or missed, please contact your reseller at
once.
● MBT-1100 Bluetooth GPS datalog receiver
● Car Charger
● CD
● AC Adapter (optional)
● USB cable
● PU GRIP PAD
2.2 Power Button (Right View)
Power On/Off
button
2.3 LED Display
1
2
3
4
5
1
2
3
Yellow LED indicates power is in charging
Blinking Amber LED indicates Battery Low
Glowing Blue LED indicates Bluetooth is connected
Blinking Blue LED indicates Bluetooth is not fixed
4
Glowing Green LED indicates position is fixed
Blinking Green LED indicates position not fixed
5
Glowing RED LED indicates Memory Full
Erased memory data, RED LED Blinking
2.4 Hardware Features
2.4.1. Power Button
Power ON / Power OFF
2.4.2. Bluetooth Status LED (Blue)
Glowing - Bluetooth is on and ready to transmit.
2.4.3. GPS Status LED (Green)
Glowing - Position is fixed.
Steady light – Device is on but position is not fixed.
2.4.4. Memory Status LED (Red)
Glowing – Memory is full.
2.4.5. Battery Status LED (Amber/Yellow)
None - Battery has adequate power supply.
Amber - Power is low. Charging immediately is required.
Yellow - Connected to power charger, charging.
LED off - Battery is fully charged.
2.5. Getting Started
2.5.1. STEP 1: Turn on Receiver and Wait for GPS Fix
If the position has not been fixed yet, the Green LED will be still. If the
position has been fixed, the Green LED will be Glowing.
You are ready to connect to your Bluetooth-enabled mobile device and use
your GPS application.
2.5.2. STEP 2: Connect to Bluetooth-Enabled Devices
From your Bluetooth-enabled handheld device, execute Bluetooth
application software to search MBT-1100 and then connect it to your device.
If the connection between your device and MBT-1100 is successful, the
Blue LED will be Glowing.
Note: Type in pin code=0000 during configuration.
2.5.3. STEP 3: Connect to your Navigation Software
Load your GPS mapping or routing software, along with the
corresponding maps of the areas that you are occupying or plan to
travel to.
Start the application. Make sure the application is set for the COM port
that your Bluetooth-enabled mobile device will use for serial
communication. Now you should be ready to use your GPS application
as directed by the user documentation that came with the software.
More configurations may be necessary.
Refer to the following software application user manual to set up the
parameters of the device via Bluetooth radio.
2.6 How to use Car Charger to charge
your handheld device
Connect car charger into your adapter connector of MBT-1100.
Plug adapter connector into handheld device connector and plug car
charger into cigar-lighter.
10
3. Utility Installation
The Main Menu of Installation CD shows as above.
Click the Install USB Driver (Windows 2000/XP/2003) or Install USB
Driver (Windows Vista family) to install the USB Driver, which is needed
when you connect the MBT-1100 to your PC or Notebook.
Click the PC Software to install the software application.
Click the User Manual to open the user manual of MBT-1100.
Click the View Royaltek Website to link our http://www.royaltek.com,
please make sure your PC connects to Internet first.
Click the Browse CD Contents to open the explorer to browse the files
within the CD.
3.1 Install USB Driver
(Windows
2000/XP/2003) or (Windows Vista
family)
Install the USB Driver from CD.
When screen shows the installation window as follows:
Click “Next> to next page”, or click”<Back” to back last stage or
“Cancel” to give up installation.
Please click “Finish” to finish the Installation.
12
For USB Driver Vista version, if re-install, please click”<YES>”
to remove the driver. If click ”<NO>”, install may occur hand
up problem.
3.2 Install Data download Utility
Click “Next> to next page”, or click”<Back” to back last stage or
“Cancel” to give up installation.
To the License Agreement page: Click “ I accept the terms in the
license agreement” then click “Next>” to next page, or click”<Back”
to back last stage or “Cancel” to give up installation.
14
Click “Install” to start installation. Or click”<Back” to back last stage
or “Cancel” to give up installation.
Start installation.
Please click “Finish” to finish the Installation.
16
Finally you will see the icon on windows desk.
17
3.3 Transfer data to your PC or Notebook
Usage Notes:
(1) When you turn on the power button, it starts to search the GPS
Signal. After the GPS position fixed, it will begin to record and save
the position data.
(2) If you want to stop recording the GPS data, just turn the power
off.
(3) When download or erase data form MBT-1100, Receiver still
continues record and save the position data.
(4) The time of the log data of MBT-1100 is UTC Time. User doesn’t
need to adjust the Clock setting of a camera.
3.3.1 Connect MBT-1100
Turn on the power of MBT-1100 and use the USB cable to connect to
the USB port on PC.
Check the COM port of MBT-1100 first. Click “Start” “Control
Panel”
”Performance and Maintenance”
“System”, and you will
see the System Properties dialog box; click on “Hardware” tab and
then the “Device Manager” button. Expand the “Ports (COM & LPT)”
item, and the “Prolific USB-to-Serial Com Port” is the COM port of
your MBT-1100.
Open data download Utility
For the First using
Step 1: Open the designated serial port and the button show “Connect”.
18
3.3.2 Download Data
Step 1: Change page to “Data Download” menu bar.
Step 2: Press “Get Data” button and select NMEA output folder.
Step 3: When download finish, there will be a warning message to ask for
erasing memory.
3.3.3 Get and Set MBT-1100 Device Status
Step1: Change to “Device Status” menu bar
Step 2: You can review the MBT-1100 default setting configuration.
◆Time Interval (user adjustable)
Default setting is 1secs
1secs ~ 60secs, user adjustable
◆Data Type (user adjustable)
There are 4 options for user to choose these data items to be saved in the
MBT-1100.
1: UTC Time, Longitude, Latitude, will be saved.
2: UTC Time, Longitude, Latitude, Altitude, will be saved.
3: UTC Time, Longitude, Latitude, Altitude, Velocity will be saved.
4: All data will be saved.
◆Memory Full Option (user adjustable)
The default memory operation setting is “Stop”.
If the memory is full then the system will stop to record.
◆ Memory Erase
Erase all memory.
◆ Log Method
Check the log will save when button pushed.
Log by time
Log by button pushed only
◆ Log config
Show the Flash Usage.
Step 3: User adjustable: Memory Full Option, key in the Time Interval.
When you done the configuration setup, press the “Set Log Config.”
button to save the setting to the receiver.
Finally, these setting take effect.
3.3.4 Get the Data Logger Data Downloader revision
information
Step1: Change to “About” menu bar
User can get the Royaltek Data Logger Data Downloader version.
FCC Notices
This device complies with Part 15 of the FCC Rules. Operation is subject to the
following two conditions:
(1) This device may not cause harmful interference, and
(2) This device must accept any interference received, including interference
that may cause undesired operation.
23
Revision History
Data
Revision
Note
March, 2008
V1.0
Final Release
Contact information
Headquarters
1071 Chung Cheng RD., Suite 9F-1
Tao Yuan City, Taiwan.
Tel: 886-3-356-9666
FAX: 886-3-358-0050
Http://www.royaltek.com
Sales: Http://www.royaltek.com/contact
FAE: [email protected]
24