Transcript
WalletFinder Quick Installation Guide For iPhones
1
Download App and enable Bluetooth
a. On your iOS device running iOS 6 and above (iOS device includes iPhones,
iPad 3/4, mini, air, and iPod Touch}
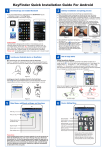
Download the free iStuffFinder App as illustrated in Figure 1 from
the iTunes App store. Apps for iPhone or Safari.
b. Enable Bluetooth on your iOS device as illustrated in Figure 2.
2
Battery Installation
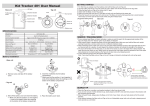
Place the provided battery as illustrated in Figure 3 below.
IMPORTANT NOTE: BE SURE TO INSERT THE BATTERY BETWEEN THE
UPPER AND LOWER CONTACTS WITH the – VE SIDE OF THE BATTERY
FACING UP.
Placing the battery on top of the contact and closing the battery compartment lid
may cause damage to the battery terminal and invalidate your warranty.
a. Slide the battery cover open as shown in point 1 (Figure 3).
b. Insert the battery with the negative sign (-) pointing upwards, as shown in
point 2 (Figure 3).
c. Replace the battery cover as shown in point 3 (Figure 3).
d. Turn “ON” the Wallet Reminder by sliding the recessed Power Switch to the
“ON” position as illustrated in Figure 4 below.
App Store
Front
Back
1
Status LED
Power off
iStuffFinder
Power Switch
Figure 1
Figure 2
Airplane Mode
The WalletFinder is designed with travellers in mind allowing users to
efficiently disable the WalletFinder by simply enabling “airplane mode” on
your mobile device. At this time, all connected tags will flash a few times,
enter “Sleep mode”, and stop transmitting. Your tags will auto connect when
“Airplane mode” on your mobile device is disabled.
Please note: On disabling airplane mode, it may take up to 1 minute for each
tag to reconnect.
3
Pairing and Locating your iOS device
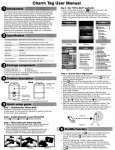
a. Run the iStuffFinder application on your iOS device by tapping the
iStuffFinder icon and then tap the search button
(See figure 5 below) to
discover all available devices (Up to a maximum of four).
b. The App will then present you with a Bluetooth pairing request (See figure 6
below) and Select “Pair” for each device (Up to a maximum of four). The
device will then enter paired mode (connected) and the green LED will blink
once every 5 seconds.
Figure 5
Figure 6
Testing and finding your missing iPhone / iPad / iPod
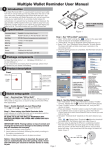
Press for 1 second release the “Find Me” button as illustrated in Figure 7.
Your iOS device will emit an audible signal for approximately 5 seconds.
FindMe Button
CR2016
Main Menu and additional settings and functions
2
3
4
Alarm Sensitivity Settings
To select the proximity distances you’d like to be alerted on when out of range,
tap the
icon to the right of each paired device list. Once tapped, the
images to the left will appear.
Green Far / low sensitivity,
Red Near /
High sensitivity,
Grey / Off or no sensitivity.
When the tagged item is beyond the set range, your iOS device will emit
an audible tone.
In safe range
6
Device Setting Menu
Remove the tag
Change device name
Battery indicator
Alert sensitivity
Change device icon
Signal strength
Alarm sound
Device name
Enter setting menu
Figure 4
Out of range alerts
Enter help menu
Add a tag
The
side
facing upwards
Figure 3
Figure 7
5
Power on
Last seen
Map location
Remote shutter
Out of range