1
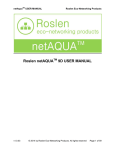
netAquaTM QUICK START GUIDE
Roslen Eco-Networking Products
netAQUATM 9D Quick Start Guide
This document will guide you through the basic steps necessary to begin using the netAQUA 9D.
Package Contents
•
•
•
•
•
•
•
netAQUA 9D
24VAC power brick, if you purchased the netAQUA with transformer
Combination phillips and flat blade screwdriver
Six cable ties
Ethernet cable
Resource CD
Quick Start Guide
Note: We recommend checking for the latest updates to software, the User Manual and other
documentation on the Roslen Eco-Networking Products website at http://roslen.com.
Overview of operation
There are two user interfaces:
• A web-browser based control and monitoring interface for accessing the unit from your
computer, tablet or smartphone.
• An integrated local control and monitoring interface on the netAQUA unit consisting of an LCD
screen with 4 buttons and two LEDs along the bottom of the enclosure.
v1.0.00
© 2013 by Roslen Eco-Networking Products. All rights reserved
Page 1 of 4
netAquaTM QUICK START GUIDE
Roslen Eco-Networking Products
The web-browser interface is a point-and-click interface that everyone is familiar with. Hopefully you
will find both ways of working with the netAQUA intuitive, but to get you started on the local interface,
LCD screen navigation uses the four control buttons (labeled at the bottom, inside the enclosure).
Program and Enter are used for programming. Scroll Up and Scroll Down are used to navigate
between pages and items on a page. The buttons are activated with either a “Press” or a “Hold”. A
“Press” is a short button push. A “Hold” is a long button push, about 2 seconds.
•
•
•
•
Press Scroll Down or Scroll Up to move between pages at the same menu level.
Hold Scroll Down to move down one menu level.
Hold Scroll Up button to move up one menu level.
Hold both Scroll Down and Scroll Up together to get help information on any page that
shows a flashing “?” in the upper right corner. Hold Scroll Up to exit the help mode.
There are two indicator LEDs to the left of the four control buttons. The LED closer to the back of the
netAQUA is the WiFi LED, and the other is the STATUS LED. Each is used to indicate:
•
•
STATUS:
o Green color ON: watering enabled, not active
o Green color slow blink: watering disabled
o Green color fast blink: watering active
o Red color fast blink: temperature sensor error, or LCD error.
WiFi:
o LED OFF: WiFi not enabled
o Green color ON: WiFi connected
o Red color slow blink: WiFi enabled but no WiFi network detected
o Red color fast blink: WiFi error
INSTALLATION
You’ll need to set-up the device to work on your network. Whether you have a WiFi or Ethernet
version of the netAQUA, initial set-up requires an Ethernet connection. We recommend that you do
the network set-up in a convenient place with Ethernet access to your router before installing the
netAQUA near your irrigation system connections. This will allow you to verify that the netAQUA is
operating correctly, and set it up to run on your network. Here’s what to do next:
1. Prepare the power connection:.
a. Connect the power cable to the 24VAC power brick. Note that there are 3 wires in the
power cable, black, green and white. The 3 power brick terminals are labeled AC, GND,
and AC. The green wire must connect to GND (Ground) on the power brick. It does not
v1.0.00
© 2013 by Roslen Eco-Networking Products. All rights reserved
Page 2 of 4
netAquaTM QUICK START GUIDE
2.
3.
4.
5.
6.
7.
8.
9.
Roslen Eco-Networking Products
matter which of the two wires (black or white) of the power cable is connected to which
AC terminal of the power supply. Or…
b. Connect the netAQUA to a 24VAC power source of your choice, if you did not purchase
a transformer. But remember, the green wire must connect to Ground, and the white
and black wires connect to the AC terminals of the power supply.
Power up the netAQUA:
a. Plug in the 24VAC power supply. After a few seconds, you should see that the LCD
display will light up and show start-up progress as the unit comes to life. When you see
the “Main Control Page”, the netAQUA is ready to operate.
Connect the netAQUA to your network via Ethernet cable:
a. Remove the clear front cover. Connect the included Ethernet cable to the Ethernet port
on the netAQUA. Connect the other end of the Ethernet cable to an available port on
your router or network switch.
Identify the IP address of the netAQUA:
a. Use the LCD interface to see what IP address has been assigned to the netAQUA by
your router. To see the IP address, press the Scroll Down button on bottom of the
netAQUA a few times to change to the System Status page on the LCD screen.
Open the netAQUA Control Panel on your computer or tablet:
a. Open your favorite browser (IE, Firefox, Chrome, Safari, etc.) on your computer or tablet
on your network. You can then type that exact address (for example,
http://192.168.1.150) into the browser address bar (where you would normally see a
website address) and press enter. Note that for some Internet Explorer configurations,
it may be necessary to view the netAQUA Control Panel using the Compatibility View
mode, which is selected on the right side of the address bar, next to the page reload
symbol.
b. The netAQUA Control Panel will open on the Status page. You’ll see the other available
tabs:
i. Watering Settings: this is where you set-up the various watering options
ii. System Settings: this is where you configure the network interfaces, including
WiFi settings, and select netAQUA functions
iii. Firmware: you can download firmware updates to the netAQUA through this
page.
Once you configure the netAQUA and the watering controls, you can unplug the device and
install it in its permanent location.
Mount the netAQUA .
If you are connecting to your network via Ethernet, feed the Ethernet cable through the cable
grommet on the bottom of the enclosure.
Feed the zone control wires through the cable grommet on the bottom right of the enclosure.
Cut to length, strip and connect the colored wire from each watering zone pair to the
appropriate Zone terminal. Connect the white common wires from each watering zone control
v1.0.00
© 2013 by Roslen Eco-Networking Products. All rights reserved
Page 3 of 4
netAquaTM QUICK START GUIDE
Roslen Eco-Networking Products
cable to the Common terminals. Wires can be organized and bundled along the right side of
the enclosure with the zip ties included in the netAQUA package.
10. Plug in the 24VAC power supply.
11. The netAQUA is now ready to control your irrigation system.
More detailed installation and operation instructions are provided in the User Manual that is
included on the Resource CD. We recommend checking for the latest updates to software, the
User Manual and other documentation on the Roslen Eco-Networking Products website at
http://roslen.com.
v1.0.00
© 2013 by Roslen Eco-Networking Products. All rights reserved
Page 4 of 4