1
67281 – 67282
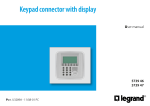
Local Display
User Manual
07/12-01 PC
2
1 Introduction6
1.1 Your Local Display: use it immediately!
6
1.1.1 General description
6
1.1.2 Display notifications
6
2 Use8
2.1 Operating mode
2.1.1Scenarios
8
9
2.1.2 Sound system
12
2.1.3 Alarm clock, Date/Time, and Audio
13
2.1.4 Temperature control (4 zones)
16
2.1.5 Temperature control (99 zones)
18
2.1.6 Stand-alone temperature control
(without central unit)
19
2.1.7 Consumption display
20
2.1.8 Load management
25
3
User Manual
Local Display
4
Introduction
1.1
Your Local Display: use it immediately!
6
5
User Manual
Local Display
1 Introduction
1.1 Your Local Display: use it immediately!
1.1.2 Display notifications
1.1.1 General description
In case of abnormal operation, the following notification icon will be
displayed at the centre of the screen
Local Display is a device for the control of up to four different functions.
These can be selected among automation (scenarios), sound system,
temperature control, consumption display, and load management
functions of the MY HOME system. The functions are configured and
set up by the operator.
Thanks to text instructions and graphic icons, the use of Local Display
is very easy and intuitive. A simple touch will enable you to send commands, and interrogate your home automation system; for further
information on how to make the most of the available functions, refer
to the configuration section.
6
Contact your installer to resolve the problem.
Use
2.1
Operating mode
8
7
User Manual
Local Display
2 Use
2.1 Operating mode
Local Display has five operating mode:
• Scenario mode: this mode can be used to check/change the four
set scenarios.
• Sound system mode: this mode can be used to set a sound source
for the sound system. This mode can also be used to set the alarm
clock function.
• Temperature control mode: the display shows the temperature of
the zone where the system is installed. It can be used to adjust the set
temperature, change the operating mode (automatic, thermal protection/antifreeze, or off ), and adjust the speed of the fan-coil (if present).
• Consumption display mode: the display shows the energy consumption. Up to 10 rows/items can be displayed. It can be used to set the
threshold levels, with a visual or audible signal being generated when
they are exceeded.
• Load management mode: this mode controls up to a maximum of
20 energy loads, taking into account their priorities levels, defining
which device should be disconnected in case of overload. It also gives
the possibility of enabling/disabling the loads, and in some cases it
displays their total consumption.
Using Local Display it is possible to manage up to four or five
operating modes (these are: scenarios, sound system, temperature control, consumption display, load management modes).
For example, when the last four modes above are selected, the
opening screen of Local Display will be as follows:
The five operating systems are explained in this manual (scenario
mode, sound system mode, temperature control mode, consumption display mode, load management mode).
8
Sound
system
Temperature
control
Consumption
Display
Load
management
To access the desired mode press the corresponding icon.
To return to the start screen slide your finger diagonally from the top
right of the screen to the bottom left (see figure).
2.1.1Scenarios
Scenario programming (for the scenario module)
This mode is used to activate, set, or delete the scenarios saved in the
scenario module, or in the scenario programmer.
To program a scenario, touch the icon the scenario must be associated
to for three seconds. An audible signal notifies the start of the learning
stage, and the display shows the name and icon of the selected scenario.
The learning page is displayed:
Home page
Scenario
name
Scenario 1
NIGHT
Scenario 2
Scenario
icon
Scenario 3
Scenario 4
Activate scenario
To activate the desired scenario simply touch the corresponding icon
on the screen. A click will be heard, which confirms the selection.
“Learning
procedure being
completed” bar
You can now create a scenario using the automation, temperature control, sound system functions etc. Once done, simply touch the display
to confirm. The device will return to the Home Page.
It is important that the system scenario module is correctly
enabled for programming.
If the device does not receive any commands within 30 seconds from
the start of the learning procedure, programming will automatically be
interrupted, and the screen will return to the Home Page.
9
User Manual
Local Display
2 Use
Erasing a scenario
To erase a scenario, touch the corresponding icon for 10 seconds. An
audible signal will be heard, and the screen will display a message
confirming that the scenario has been erased:
Message
ERASE
Local Display will return to the Home Page.
In the next page, your installer will fill the table of the scenarios associated to your Local Display.
10
SCENARIO
ICONS
CORRESPONDING SCENARIO
SCENARIO
ICONS
CORRESPONDING SCENARIO
11
User Manual
Local Display
2 Use
2.1.2 Sound system
This mode can be used to switch the system on or off, to control the
volume, to scroll through the selected sources (maximum four), and
to manage them.
Preset source – Radio:
Home page
If the associated amplifier is off, the following page is displayed:
Volume level
Associated amplif ier ON/OFF
and increase/
decrease volume
OFF
Cycle
through
the sources
(Radio/Aux)
RDS
Radio
frequency
106.70
Active source
Select the radio
station among
the stored ones
Amplifier
status
Preset source – AUX:
When the amplifier is switched on, the page of the preset source is
displayed (set using the LocalDisplayNewConfig software)
AUX
Change track
12
2.1.3 Alarm clock, Date/Time, and Audio
Alarm clock status setup
To access to screen for setting the alarm clock and date/time function,
touch the
icon of the Home Page for 3 seconds.
OFF
00:00
The following alarm clock function page will appear. Touch the
icons to scroll through the sections (Alarm clock page, Time/Date page,
and Audio page).
Touch the
icon to enable the change. The currently selected row is
highlighted in blue.
To scroll through the rows touch the
icon.
The
icons can be used to change the values, while icon
is
used to save the changes made, switching the screen directly to the next page.
OFF
change the status of the
alarm clock
The selected row appears in blue
ONBEEP
select the alarm clock
status (OFF/ AUDIO ON / BEEP ON)
00:00
confirm the selection and go
to the alarm clock time setup
Alarm clock status:
Alarm clock page
Change Alarm Clock page
OFF
Alarm clock off.
OFF
OFF
00:00
00:00
AUDIO ON
At the set time, the preset sound source comes on (only on the loudspeaker associated to the device). Its volume will increase every 10
seconds, up to the highest level. Touch the screen to stop the volume
increasing.
BEEP ON
At the set time, Local Display will emit an audible signal. Touch the
screen to stop the signal. The audible signal will automatically stop
after 2 minutes if the display is not touched.
13
User Manual
Local Display
2 Use
Setting the alarm clock time
ONBEEP
00:00
ONBEEP
07:00
Setting the Time
Alarm clock times are displayed
in blue
increase and decrease
by one unit the alarm clock hour
confirm the selection and go
to the alarm clock minutes selection
00:00
01/01/00
08:00
increase and decrease
the hour by one unit
01/01/00
confirm the selection and go
to the minutes selection
The alarm clock minutes are displayed
in blue
ONBEEP
07:15
increase and decrease
by one unit the alarm clock minutes
confirm the selection and go
to the Time/Date page
Hours are displayed in blue
Minutes are displayed in blue
08:25
01/01/00
increase and decrease
the minutes by one unit
confirm the selection and go
to the date selection
When setting the “alarm clock time”, “date and time”, and “audio”, if the screen of Local Display is not touched for one minute
the device will automatically return to the main page, and all
changes will be lost.
In case of temporary power cut, the alarm clock function will
be disabled.
14
Setting the Date
08:25
Audio programming
This function is used to adjust the playback volume of the set alarm.
Days are displayed in blue
01/01/00
08:25
10/01/00
confirm the selection and go
to the month selection
Months are displayed in blue
08:25
increase and decrease
the month by one unit
10/08/00
confirm the selection and go
to the year selection
The year is displayed in blue
10/08/08
The volume is displayed in blue
VOL: 50%
increase and decrease
the days by one unit
08:25
AUDIO
increase and decrease
the year by one unit
AUDIO
VOL: 90%
ONBEEP
07:15
the volume
increase and decrease
confirm the selection
To return to the previous screen,
slide your finger diagonally from
the top right of the screen to the
bottom left.
confirm the selection and go
to the Audio page
15
User Manual
Local Display
2 Use
2.1.4 Temperature control (4 zones)
Temperature adjustment
It can be used to set the local temperature, set anti-freeze/thermal
protection, or switch the operating mode OFF.
Use the arrow icons to change the temperature locally (-3) – (+3) °C.
Home page
Increase the
temperature
Set temperature
Fan-Coil
adjustment
21.0°
20.5°
Decrease the
temperature
16
Temperature
measured
Change the
operating
mode
21.0°
20.5°
Temperature variation
indication (-3) – (+3) °C
Fan-coil speed
Operating mode
Touch the fan-coil icon on the screen to gradually increase the speed
of the fan-coil connected to the Local Display system.
Touch the “change operating mode” icon
, to select one of the
three operating modes, cycling through OFF, Anti-freeze/Thermal
protection, and automatic.
21.0°
20.5°
Fan-coil speed (from
automatic to speed 3)
System status
Fan-Coil operation
Operating mode
7.0°
15.0°
System status
Winter
Summer
Operating mode
OFF
Antifreeze
Thermal protection
Automatic
17
User Manual
Local Display
2 Use
2.1.5 Temperature control (99 zones)
Timed manual operation
Differently from the 4 zone system, with the 99 zone central unit, in
automatic mode it is possible to use Local Display to set the desired
temperature value using the arrow icons directly.
It is possible to set any temperature value, with 0.5 °C increase/
decrease steps.
Home page
Increase the
temperature
Set temperature
Fan-Coil
adjustment
20.0°
20.0°
Decrease the
temperature
18
Temperature
measured
Change the
operating
mode
20.5°
Temporary automatic
mode
20.0°
When the temperature profile set in the central unit is changed, Local
Display will return to the standard automatic operating mode.
2.1.6 Stand-alone temperature control (without central unit)
Operating mode
If Local Display has been installed as room thermostat (without temperature control central unit), it is possible to simply use its icons to
control the status of the system:
Touch and keep your finger on the
summer and winter.
icon to switch between
Home page
Increase the
temperature
Set temperature
Fan-Coil
adjustment
22.0°
20.5°
Decrease the
temperature
Temperature
measured
7.0°
System status
15.0°
Operating mode
Change the
operating
mode
System status
Winter
Summer
Operating mode
OFF
Antifreeze
Thermal protection
Manual
19
User Manual
Local Display
2 Use
2.1.7 Consumption display
This function can be used to monitor energy consumptions by displaying the following rows/items: electricity, water, gas, sanitary hot
water, heating/cooling.
While scrolling through the display modes, the daily/monthly/yearly
information shown is cumulative.
It is also possible to set two different thresholds, to warn the user when
energy consumption reaches a certain level.
If no threshold has been reached, the value is displayed in green.
If the lower threshold has been reached, the value is displayed in yellow.
When both thresholds have been reached, the value is displayed in red.
If the beep is enabled, a sound will notify the user when a threshold
has been reached.
Cumulative
consumption
value
Home page
Scroll through
rows/items
Rows / items for
the display of
consumptions
Change the
mode of
consumption
display (W or
€/h)
20
Total
Electricity
0.0
w
Scroll through
instantaneous/
daily/monthly/
yearly display
Consumption
value
Enter the
settings menu
320.1
Type of display:
day (D), month
(M), year (Y)
kwh
Information displayed:
Daily
Monthly
Annual
Tariff setup
Local Display gives the possibility of setting a tariff, so that consumption
data may be displayed as financial costs.
To access the tariff setup screen press the
until an audible signal is heard.
The following page appears.
Use the
icons to change the tariff value.
Tariff increase
Consumption
value shown
as cost
Tariff decrease
icon for a few seconds,
Save the tariff
and return to
the Home Page
0.030
€/kW
Exit without
saving
21
User Manual
Local Display
2 Use
Programming menu
The programming menu can be used to set the current date and time,
set the electric consumption threshold levels, and enable/disable the
audible signal that notifies the user when these thresholds are exceeded.
To access the programming menu press the
icon.
The following page appears. Touch the
icons to scroll through
the pages (Time/Date page, Thresholds and Levels page, Beep page).
Touch the
icon to enable changes. The currently selected row is
highlighted in blue.
To scroll through the rows touch the
icon.
The
icons can be used to change the values, while icon
is
used to save the changes made, and go directly to the next page.
Threshold levels page
2800
3000
Beep setup page
Date and time page
15:20
06/01/12
22
BEEP
OFF
Setting the time
00:00
01/01/00
00:00
Setting the Date
change the hour
Hours are displayed in blue
01/01/00
08:25
Days are displayed in blue
01/01/00
08:25
increase and decrease
the days by one unit
10/01/00
confirm the selection and go
to the month selection
Months are displayed in blue
08:00
increase and decrease
the hour by one unit
01/01/00
confirm the selection and go
to the minutes selection
08:25
increase and decrease
the month by one unit
10/08/00
confirm the selection and go
to the year selection
The year is displayed in blue
Minutes are displayed in blue
08:25
01/01/00
increase and decrease
the minutes by one unit
confirm the selection and go
to the date selection
08:25
10/08/08
increase and decrease
the year by one unit
confirm the selection and go
to the threshold level page setup
23
User Manual
Local Display
2 Use
Threshold setup
2000
2500
Beep setup
The upper threshold is displayed
in blue
2800
increase and decrease
the threshold value by one unit
2500
confirm the selection and go
to lower threshold selection
BEEP
The beep status is displayed in blue
OFF
BEEP
ON
beep
enable / disable the
confirm the selection
The lower threshold is displayed
in blue
2800
2500
increase and decrease
the threshold value by one unit
confirm the selection and go
to the Beep page
08:25
10/08/08
24
To return to the previous screen,
slide your finger diagonally from
the top right of the screen to the
bottom left
2.1.8 Load management
This function can be used to display the energy loads and the corresponding priorities, as well as to enable and disable them.
Home page
If the load is active, the following page is displayed, with the
disabled, to indicate that the load is already in operation.
Priority load
6
Oven
Forces the load
activation *
icon
Scroll through
the loads
If the load is disabled, the following page is displayed, showing the
icon, to indicate that the load management central unit has
detected a system overload, therefore disabling the load.
Note: The central unit always disables the load with the lowest priority.
Force the
activation of
the load
Oven
Load name
Access the page
containing
information
relating to the
loads
6
This icon is no
longer enabled
* When performing this action, the load is no longer controlled by the
load management central unit.
25
User Manual
Local Display
2 Use
Load information display
Menu Setup
If an advanced actuator is connected to the system, Local Display gives
the possibility to display the current load absorption.
To access this function press the
icon.
The following page opens:
The setup menu can be used to set the current date and time, and to
enable/disable the notification beep emitted to warn that the load
management central unit has disabled a load.
To access the settings menu press the
icon.
Scroll between
W and W/h
w
Reset the
absorption
meters to zero
26
Absorption
value
Return to the
Home Page
The following page appears. Touch the
icons to scroll through
pages (Time/Date page, Thresholds and Levels page, Beep page).
Touch the
icon to enable changes. The currently selected row is
highlighted in blue.
To scroll through the rows touch the
icon.
The
icons can be used to change the values, while icon
is used to save the changes made, switching the screen directly
to the next page.
Date and time page
Beep setup page
15:20
BEEP
06/01/12
OFF
Setting the time
00:00
01/01/00
00:00
Setting the Date
change the hours
Hours are displayed in blue
01/01/00
08:25
Days are displayed in blue
01/01/00
08:25
increase and decrease
the days by one unit
10/01/00
confirm the selection and go
to the month selection
Months are displayed in blue
08:00
increase and decrease
the hour by one unit
01/01/00
confirm the selection and go
to the minutes selection
08:25
increase and decrease
the month by one unit
10/08/00
confirm the selection and go
to the year selection
The year is displayed in blue
Minutes are displayed in blue
08:25
01/01/00
increase and decrease
the minutes by one unit
confirm the selection and go
to the date selection
08:25
10/08/08
increase and decrease
the year by one unit
confirm the selection and go
to the threshold level page
27
User Manual
Local Display
2 Use
Beep setup
BEEP
The beep status is displayed in blue
OFF
BEEP
ON
08:25
10/08/08
28
beep
enable / disable the
confirm the selection
To return to the previous screen,
slide your finger diagonally from
the top right of the screen to the
bottom left.
World Headquarters and
International Department
87045 LIMOGES CEDEX FRANCE
: 33 5 55 06 87 87
Fax : 33 5 55 06 74 55
www.legrand.com
Legrand reserves at any time the right to modify the contents of this booklet and to communicate in any form and modality,
the changes brought to the same.