1
www.embedinfo.com/en
Embest Emlink for ARM Cortex-M3
User Manual
(Getting Started)
Version: 1.09.7.06
1/8
www.embedinfo.com/en
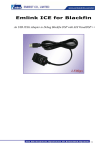
Emlink for ARM Cortex-M3
--- High Speed USB Adapter work with Keil RealView MDK & IAR EWARM
250KBytes/s
Emlink for ARM is a new-generation high-speed real time JTAG adapter, debugs the ARM
Cortex-M3 processors through Keil Realview MDK and IAR EWARM. Emlink connects the
JTAG interface from target board (ARM processors) to PC USB port, supports source level
debugging and Flash programming.
Features:
¶ Supports ARM Cortex-M3 devices (ST STM32 series, Luminary Stellaris series, NXP
LPC1700 series, Toshiba TMPM series etc.)
¶ Download and debug speed up to 250 KBytes/s (about 2Mbps) *
¶ 20-pin JTAG interface (convert to support 8-pin, 14-pin), does not support SWD.
¶ Wide target voltage range compatible: 3.3V to 5V
¶ No power supply required, powered through USB
¶ Easy to install using a single setup program
¶ Integrates seamlessly into Keil RealView MDK and IAR Embedded Workbench
¶ Supports hardware and software breakpoints
*
Measured with STM32F103 at 72Mhz, 6MHz JTAG speed
Integrate Development Environment (IDE) support is available in:
¶ Keil Realview MDK 3.20 or higher
¶ IAR Embedded Workbench 4.42A
2/8
www.embedinfo.com/en
System connection:
Host Requirement
Hardware
Architecture
Intel x86 32-bit
Operating Systems
Windows XP
Windows 2000
Windows Server 2003
Support Software
Keil RealView MDK, IAR Embedded
Workbench ARM 4.42, which licensed
from their provider.
Software driver
Emlink driver*
EMLINK-AH
ST
STM32
NXP
LPC1700
Luminary
Stellaris
Toshiba
TMPM
Other
Cortex-M3
Cortex-A
/Cortex-R
Supported
Supported
Supported
Supported
Not test
Not support
* Please visit our website to know more about the driver supported release.
* Emlink driver is using for Keil RealView MDK and IAR EWARM 4.42, downloading and
debugging program on the board through JTAG interface.
* The setup program is accompanied with CDROM\Drivers\.
* There is no need to uninstall before re-install this anytime on same PC.
3/8
www.embedinfo.com/en
Hardware signals and ports
Emlink has two sides, one is connected to PC through an USB port (Host), another
is JTAG port to connect to your target board’s JTAG port. Emlink can be power supplied
via PC’s USB port.
Emlink JTAG Signal 20pins
JP1_S
J1
TMS
TDO
TDI
TCK
nTRST
EMU
GND
Vsupply
1
2
3
4
5
6
7
8
DSP8
Vref
nTRST
TDI
TMS
TCK
TDO
nSRST
EMU
1
3
5
7
9
11
13
15
17
19
2
4
6
8
10
12
14
16
18
20
ARM10X2
Vsupply
GND
GND
GND
GND
GND
GND
GND
GND
JTAG20-14-8 Module
JP3_D
GND
GND
1
3
5
7
9
11
13
2
4
6
8
10
12
14
EMU
GND
TMS
TCK
nTRST
TDI
TDO
DSP7X2
Emlink JTAG Signal Definition
NOTES for JTAG signal designed:
- It is recommended to design your target board as 20pins, then Emlink
can be plugged in directly.
- If designed to other pins (only connect the active signals’ pin), then
user has to connect correct signal to Emlink JTAG port.
- All signal ‘GND’ should be connect to target board ground, 0V.
- Take attention to the nTRST has pulled up inside, there is recommended
no need to pulled down nTRST on your board side, avoid of infecting the reset
signal of JTAG during debugging phase.
4/8
www.embedinfo.com/en
Package List
#
Items
Qty.
Descriptions
1
Emlink for ARM
1
USB2.0/1.1 to PC, JTAG 20pins 1.54mm female to
target system.
2
JTAG20-14-8 Convert
Module
1
A tiny board, translate the signal JTAG 20pins to 14pins
& 8pins.
3
JTAG 14Pins Cable
1
Pin to Pin, IDC14, 15cm, JTAG signal
4
JTAG 8Pins Cable
1
Pin to Pin, 1.0mm, JTAG signal
1
Include Emlink driver installation files and user manual.
NOTES: EMLINK-AH driver and user manual can also be
downloaded via internet using the IP address we shall
e-mail you if necessary.
5
CDROM
5/8
www.embedinfo.com/en
Driver Installation
Prepare to Setup
For each set of the Emlink package, there is accompanied with a PID number, which
maybe print and glue inside the box, also can be applied by sending e-mail to Embest
if you could not see or lost it. This PID is the only keyword to exchange the PSN
(Product Serial Number) to install the driver to certain PC. There are several ways to
get the PSN as following:
- Visit online website http://www.embedinfo.com/en/Emlink, login as any user
name, submit the PID, click ‘Activation PSN’ to return the corresponding PSN.
- Drop an E-mail to [email protected], use the PID in subject, feel free to tell
us more about your company and/or your project information, if possible. Then wait for
the system return the PSN in 24hours.
- Click to run CDROM\Driver\EmlinkforARM.exe to setup the driver;
- Click Next, then select the check box to accept the License Agreement;
- Click Next to continue, input the PSN which acquired from Embest;
- Click Next, select the check box before the driver name ‘Driver for RealView
MDK’ and ‘Driver for IAR’, you can select only one or both of them at same time.
- Plug the Emlink USB port to your PC, click Next to continue, the driver will be
installed to ether Keil RealView MDK or IAR EWARM 4.42, which should be installed on
your PC first;
- Click Install, wait for information like 'Press Enter' in the rejected MS-DOS
window, press Enter to close the MS-DOS window;
- Click Finish to end of the installation.
There are screen shot of installation of the EmlinkforARM under CDROM\Driver\.
6/8
www.embedinfo.com/en
Emlink Debugger Configuration
Keil RealView MDK (v3.20+, recommend but not limit)
-------------------------------------------------------------------------- after finished the installation, you will find a new debugger device named 'Emlink
Cortex Debugger' shown as following.
- if can not find the new debugger device, please check and modify the TOOLS.INI
under the Keil install folder, add this command line in the block '[ARMADS]':
TDRV19=BIN\Emlink-A.dll ("Emlink Cortex Debugger")
Notes: the '19' in 'TDRV19' is the greatest number in the list, subjected to your
drivers list.
7/8
www.embedinfo.com/en
IAR Embedded Workbench ARM v4.42
-------------------------------------------------------------------------- after finished the installation, you will find a new driver named 'Emlink-IAR.dll'
under the EWARM install folder.
- easy to add to use the Emlink driver only right click the project name and select
'Option', goto Debugger item, click to add the 'IAR debugger driver' with compelet
directory and driver name shown as following.
8/8