1
12
13
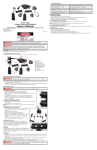
Color Index Table
G Button
IE
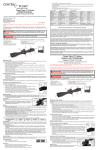
Diopter adjustment provides additional focus adjustment to adapt the
scope to your eyesight.
FULL
Diopter adjustment ring is located at the ocular end of the scope.
Aim the scope at your target, hold still and turn the dial ring
clockwise or counter-clockwise until both the crosshair and the
target are in the sharpest focus.
36 COLORS
Color
1.
R Button
e. adjusting diopter (Eye Piece Adjustment)
Note: Different individuals will have different eye focus which will result in
different diopter setting. A person will use different diopter settings with or
without eye glasses.
F. installing battery (For Reticle Intensified Models Only)
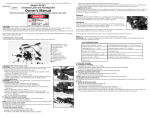
1. The battery is housed inside the EZTAP Battery housing or the side wheel
Red/Green Illumination Rheostat.
Intensity
Magenta
Thistle
Plum
Violet
Orchid
Purple
Pink
Rosy
Brown
Coral
Crimson
Brown
Maroon
Golden
Chocolate
Rod
Yellow
Khaki
Orange
Law
Ngreen
Plae
green
Spring
Green
Olive
Drab
Sea
Green
Forest
Green
Cyan
Azure
Turquoise
Cadet
Blue
Dark
Cyan
Teal
Blue
Skyblue
Dodger
Blue
Indigo
Midnight
Blue
Navy
Olive
H. Adjusting Magnification (For Variable Power Scopes Only)
2. Firmly hold the housing or the
Rheostat with 2 fingers.
1. For variable power scopes, there is a power ring in front of the eyepiece
3. Use your other hand to open the
battery compartment by unscrewing
the top cap.
assembly. To change magnification, turn the ring to align the desired
number on the ring with the index dot on the main tube.
4. Remove the battery (if there is one)
and install a new one. Make sure the
positive (+) side is facing up.
F-1. EZ-TAP
F-2. Side Rheostat
2. The lower power provides wider field of view for quick aiming at close
5. Replace the cap and screw it clockwise to tighten.
range. The higher power is for precise long-range aiming. When the
g. adjusting Reticle Illumination
numbers on the ring is not visible under low light condition, turn the ring
H-1. Adjusting Power Ring
left to increase the power, or turn the ring right to decrease the power.
(For Reticle Intensified Models Only)
3. Note: Never loosen the screw in the power ring. Doing so will break the
sealing of the scope and destroy the fogproof feature. The power ring
can’t be disassembled and don’t try to lubricate it.
Any such action will void the warranty.
H-2. Power Ring Screw
G-1. Standard Rheostat
G-2. Compact Rheostat
G-3. EZ-TAP® Console
G-1 and G-2 Illumination Adjustment
i. adjusting Parallax and Focus (For Models with AO Only)
Dial the Rheostat to turn on the illumination and verify its color and brightness at each position.
G-3 Illumination Adjustment (RGB Models or IE Models)
Memory Feature
When turned on, G-3 illuminated reticle shows the same color and brightness you last used.
G
R
G OR R
Turn On/Off
1. Press either the G or
R button to turn on
the light.
2. Press and hold either
the G or R button for
1 second to turn off
the light.
3. Light will go off after 1
hour with no action.
G
R
G
R
G OR R
G AND R
Operating in the RGB
Mode
1. Press the R button to
turn the red light on or
to change brightness
of the red light.
2. Press the G button
to turn the green
light on or to change
brightness of the
green light.
Switching between
RGB and Multi-Color
Modes for IE Models
1. Press BOTH G & R
buttons at the same
time for less than 1
second.
G
R
G OR R
Operating in Multi-Color
Mode for IE Models
1. Press the R button to
change the color along
the color axis in the
Color Index Table.
2. Press the G button to
change the color along
the intensity axis in the
Color Index Table.
I-1. Front AO Adjustment
I-2. Side Wheel Adjustable
Turret(SWAT) AO
I-3. SWAT AO Big Wheel
(Optional)
1.
Find the proper type of dial from the images above.
2.
Aim the scope at your target.
3.
Adjust the eyepiece until both the crosshair and the target are in sharpest focus.
4.
Dial the Parallax Adjustment Ring, Side Wheel or Big Wheel, depending on what is available on
your model, to the desired distance setting until the target is in the sharpest focus and the center
of the crosshair stays on the target while you examine the image by slightly moving your head.