1
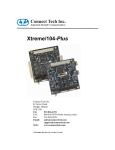
Connect Tech Titan/104-Plus User’s Manual
2.
Hardware Installation
Installation involves the physical connection of the Titan/104-Plus within your
computer’s PC/104-Plus stack. (Please note that you should configure any jumper
settings, such as ID or electrical interface, if required, prior to installing the board.)
3.
Software/Driver installation
Load the appropriate driver for your Operating System, as found on the accompanying
CD. Installation guides are also available on the CD to aid you in this process.
Hardware Configuration
Interrupts and Memory Address Selection
The Titan/104-Plus board is a PCI card, so the host computer’s BIOS will automatically set
interrupts and memory addresses when you reboot after installation.
ID Selection
Up to four Titan/104-Plus boards can reside within a single PC/104-Plus module stack. Each
card within the stack must have a unique ID ranging from zero to three.
Depending on your Titan/104-Plus model, you will be required to set either a pair of jumpers or
a rotary switch to specify where your card is located within the stack. (Ensure that no two boards
share an ID number.)
In systems designed prior to the PC/104-Plus 2.0 specification, the fourth ID was reserved for
target only devices and did not support bus mastering. Since the Titan/104-Plus is not a bus
mastering device, an assignment is recommended along with a stack location of ID 3. This
ensures that all three of the bus mastering capable IDs in the PC/104-Plus stack are available for
bus mastering devices.
In systems designed post PC/104-Plus 2.0 specification, all four IDs support bus mastering;
therefore, there is no advantage to setting the Titan/104-Plus ID to 3. Please note that regardless
of which PC/104-Plus specification version the system is using, the Titan/104-Plus will work
with any ID selected as long as no other device in the system is using the same ID.
ID selection using the Rotary Switch
If your Titan/104-Plus is equipped with a rotary switch, turn the knob on the switch so that the
arrow points at the ID you would like to use. (See Figure 2 for the location of the rotary switch
on the board).
Use the following settings to set your Titan/104-Plus adapter’s location (or ID) within the stack:
Module Slot
1
2
3
4
Switch Position
0 or 4
1 or 5
2 or 6
3 or 7
Figure 2: Rotary switch ID selection
ID Selection using the Jumper Block
If your Titan/104-Plus is equipped with a jumper block for ID selection, set your board’s
location by changing jumper positions Figure 3 depicts the jumper settings required for each ID.
Revision 0.01
7