1
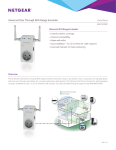
Support
Installation Guide
After installing your device, locate the serial number on the label of your product
and use it to register your product at https://my.netgear.com.
You must register your product before you can use NETGEAR telephone
support. NETGEAR recommends registering your product through the
NETGEAR website. For product updates and web support, visit
http://support.netgear.com.
NETGEAR recommends that you use only the official NETGEAR support
resources.
For the current EU Declaration of Conformity, visit
http://support.netgear.com/app/answers/detail/a_id/11621/.
ReadyDATA OS 1.3 Desktop Storage Systems
Package Contents
Thank you for purchasing this NETGEAR product.
You need the following
items from your package
to set up your
ReadyDATA® system:
1. ReadyDATA system
2
2. Resource CD
1
3. Power cord (varies by
model)
4. Ethernet cable
For more information
about setting up,
configuring, and using
your system, see the
appropriate software and
hardware manuals.
NETGEAR, Inc.
350 East Plumeria Drive, San Jose CA 95134 USA
March 2013
NETGEAR, the NETGEAR logo, and Connect with Innovation are
trademarks and/or registered trademarks of NETGEAR, Inc. and/
or its subsidiaries in the United States and/or other countries.
Information is subject to change without notice. Other brand and
product names are registered trademarks or trademarks of their
respective holders. © NETGEAR, Inc. All rights reserved.
For indoor use only. Valid for sale in all EU member states, EFTA
states, and Switzerland.
4
3
Links to these manuals are included on the resource CD that came with your
system and are also available at http://downloadcenter.netgear.com or through a
link in the product’s user interface.
IMPORTANT: Read all safety warnings in the hardware manual for your system
before connecting the system to the power supply.
Basic Setup
Follow these instructions to begin using your ReadyDATA system. These
instructions assume that at least one disk is installed in the system.
Note: If you have a diskless system, you must install at least one disk before
following these instructions. For information about installing disks, see the
hardware manual for your system.
To set up your storage system:
1. Place your system in a location that provides adequate ventilation.
High-capacity disks can produce considerable heat. It is important to ensure
that the fan exhausts are unobstructed. For a complete list of placement
considerations, see the hardware manual for your system.
2. Connect the power cord to the back of the system and plug the other end
into a wall outlet or power strip. Make sure that the power switch on the
back panel is in the ON position.
3. Use an Ethernet cable to connect an Ethernet port on the storage system
to your network.
4. If necessary, press the Power button to turn on the system.
It takes about a minute to start up. The IP address is retrieved using DHCP.
5. Install and run the RAIDar utility on a computer that is connected the same
local area network (LAN) as your ReadyDATA system.
RAIDar is on the resource CD that came with your system. It includes
versions for Windows, Mac, and Linux operating systems.
RAIDar detects and displays the ReadyDATA system or systems on your
network.
6. Select your ReadyDATA system from the list of detected devices and click
the Setup button.
An SSL certificate security warning displays. This warning ensures an
encrypted authentication and secure access to the local admin page for your
storage system.
7. Accept the certificate.
A login prompt displays.
8. Enter admin for the user name, enter password for the password, and
click the OK button.
Both the user name and password are case-sensitive.
Tip: You can change these credentials when you configure your
system. NETGEAR recommends that you change your password as
soon as possible.
The ReadyDATA local admin page displays in your browser.
For information about configuring, managing, and maintaining your
ReadyDATA system, see the software manual for your system.


![ハードウェアユーザーマニュアル [PDF:963KB] (日)](http://vs1.manualzilla.com/store/data/006680430_3-5785324c8844caf7579de839c4e3cbde-150x150.png)