1
6. When the set temperature is reached,
the buzzer sounds and the heater lamp
at the lower right of the temperature
display starts blinking.
NOTE:
Once the two tips are inserted into the handpiece, heat control begins.
Both tips of the set must be inserted or the
handpiece will not heat.
● Operating instructions
1. Set the Temperature
CAUTION:
Never set the temperature to any value over
400°C (750°F). Doing so may damage the
station. Set the temperature according to the
type of work to be done.
2. Apply solder or flux
If there is insufficient solder on the PWB,
or the soldered area is too small, apply
solder or flux to the PWB. Solder may
also be applied to the tip.
CAUTION:
The tip is very hot during operation.
Do not touch the tip or the metal parts near
the tip.
CAUTION:
Very high tip temperatures may damage the
printed circuit board, possibly causing the
printed pattern to become detached. HAKKO
recommends setting the tip temperature below 300°C (572°F) for all normal work. Using
the lowest possible effective temperature not
only helps protect parts that are sensitive to
heat, it also helps protect the tip from deterioration caused by heat.
3. Melt the solder
Place the tip on the soldered part and
melt the solder. Confirm that the solder is
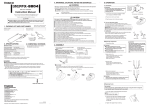
fully melted. See sketch “A”.
Solder
A
4. Remove the component
After confirming that the solder is fully
melted, lightly squeeze the handpiece to
grasp the component and lift to remove
the component. See sketch “B”.
5
B
Component