Transcript
89.5
DIMENSIONS(mm):
CAUTION
39.0
Dome (Ø89.5)
RISK OF ELECTRIC SHOCK
DO NOT OPEN
24.0
CAUTION! TO REDUCE THE RISK OF ELECTRIC SHOCK, DO NOT REMOVE
COVER (OR BACK). NO USER-SERVICEABLE PARTS INSIDE.
REFER SERVICING TO QUALIFIED SERVICE PERSONNEL.
SPECIFICATIONS:
Explanation of two Symbols
The lightning flash with arrowhead symbol, within an equilateral
triangle, is intended to alert the user to the presence of un-insulated
"dangerous voltage" within the product's enclosure that may be of
sufficient magnitude to constitute a risk of electric shock to persons.
The exclamation point within an equilateral triangle is intended to
alert the user to the presence of important operating and maintenance(servicing) instructions in the literature accompanying the appliance.
THE GRAPHIC SYMBOLS WITH SUPPLEMENTAL MARKING ARE ON THE BOTTOM
OF THE SYSTEM.
"WARNING-TO PREVENT FIRE OR SHOCK HAZARD, DO NOT EXPOSE THE UNIT
TO RAIN OR MOISTURE"
PRECAUTION:
!
All the warnings and instructions of this manual should be followed.
Remove the plug from the outlet before cleaning. Do not use liquid
aerosol detergents. Use water damped cloth for cleaning.
To reduce the risk of fire or electric shock, do not expose this appliance
to rain or moisture.
Do not place anything on top of the unit that might spill or fall into it.
Do not attempt to service this unit yourself as opening or removing
covers may you to dangerous voltage or other hazards. Please refer
all servicing to qualified service personnel.
Keep enough space around the unit for ventilation.
Slots and openings on the monitor should not be blocked.
During flashes of lightning or cracks of thunder, or when the system
is not used for a long time, unplug the system power supply to
protect the unit from lightening or power surges.
INSTALLATION:
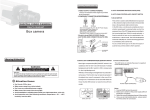
This manual explains the installation and operating method for the
color dome camera. Before installation, make sure you are familiar
with this product's special features and proper operating technique.
1
Stick the guide pattern
on the wall or ceiling.
2
Fix the camera to a
ceiling using two screws.
3
After fixing it, adjust its
pan base and tilt base
properly.
Model
Signal System
Scanning System
Scanning Frequency (H)
Scanning Frequency (V)
Image Sensor
Effective Pixels No.
S/N Ratio
Resolution
Video Output Level
Lens
Focus
Sync. System
Min. Illumination
113.0
HIGH RESOLUTION
NORMAL RESOLUTION
NTSC
PAL
NTSC
PAL
2 : 1 Interlace
NTSC - 15.734 kHz / PAL - 15.625 kHz
NTSC - 59.94 Hz / PAL - 50 Hz
1/3 inch High Sensitivity CCD
768(H)x494(V) 752(H)x582(V) 510(H)x492(V) 500(H)x582(V)
50dB Min.(AGC off)
600 TV Lines
400 TV Lines
1.0 Vp-p (75 Ohms, composite)
Fixed Lens(f=3.8mm, 6.0mm Selectable)/ Pin Hole Lens
Manual
Internal
0.05 Lux
(F1.2, 30IRE, AGC Max.)
After adjust them, fixed
the dome cover.
CCD Color
Camera
Digital DSP Color
color camera
Changes in this user manual can
be made without notice, in order
to improve the product quality.
COMPOSITION:
Dome Camera
Ceiling
1/3" High
Sensitivity CCD
0.01 Lux
Electronic Shutter
NTSC - 1/60~120,000 Sec. / PAL - 1/50~120,000 Sec.
White Balance
Auto
AGC
Auto
Input/Output Connector
Power(Red Jack), Video(Yellow Jack)
Audio(Option Available on select model(s) only)
3 Vp-p (max), 45dB (typ.)
Supplied Voltage
12VDC (10V~15V)
Power Consumption
Less than 180mA
Dimensions (ØxH)
89.5 x 63mm
Weight
Approx. 157g
LENS .Fixed
.Pin Hole
TROUBLESHOOTING:
If you have trouble operating your camera, refer to the following.
If the guidelines do not enable you to solve the problem,
contact an authorized technician.
Guide Pattern
Guide Pattern
4
P/N:3810-0083C ver.1002E
USER INFORMATION:
The image does not
appear on the screen.
Check the power source for the monitor
and camera and ensure that the voltage
and polarity are properly connected and
being supplied correctly.
The image on the
screen is dim.
Check if the lens is stained. If dirty,
clean the lens with a soft, clean cloth.
Mounting Screw
Owner's Manual
Dome Base
CONNECTION:
Adjust the Back Focus of the lens again.
Mounting
Screw
#1
Video
(Yellow)
Video Output
Power(+)
GND
Dome Cover
#2
NOTE
Insert coin to the side hole and
remove the dome cover by twist coin.
Power
(Red)
GND
※Recommendable
Power Supply
(12VDC / Over 0.3A Power Adapter)
No.
Function
Terminal Color
#1
Video Output
Yellow
#2
Power Input
Audio Output
Red
※
White (Option Available on select model(s) only)
The camera does not
work properly, the
surface of the camera
case is hot, and a
black line appears on
the screen.
Check if you have connected the camera
to a proper power source and If there is
no problem with the power, turn the unit
off immediately and seek assistance from
our Customer Service department.
The screen blinks a lot.
Check if the camera is pointed toward
the sun or a fluorescent lamp.
Adjust the angle or location of the
camera if too much light is coming into
the screen.