1
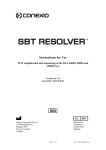
TM
UTI Controls
1.
INTENDED USE
TM
The MICROPRO UTI control kit consists of eight different UTI pathogens, each available in a lyophilized
TM
format for the validation of MICROPRO Broth Culture System.
2.
INTRODUCTION
MICROPROTM Broth Culture System (BCS), a novel method for diagnosis of UTI infection, detects and
enumerates the UTI organisms in less than 4 hours. This method uses a proprietary broth culture medium,
the Barcoded Cuvettes (A) and the Test Vials (B), for the growth of the UTI organisms. For samples that are
positive, significant bacteriuria in the broth culture medium, the causative UTI pathogen can be identified
TM
biochemically within twenty-five minutes using the MICROPRO ID kit.
TM
The MICROPRO UTI control kit consists of eight different UTI pathogens/ controls for performing quality
control of
TM
(1) MICROPRO BCS Broth culture media - the Barcoded Cuvettes (A) and Test Vials (B)
TM
(2) MICROPRO ID reagents
(3) Assay procedure of both broth culture system and identification system.
TM
(4) MICROPRO BCS Analyzer
80C
20C
REF
Store at
0
2-8 C
Manufacturer
Catalogue
Number
Consult
Instructions
for use
LOT
3.
TEST PRINCIPLE
The properties of the UTI lyophilized control reagents, when reconstituted with an appropriate buffer
media, are similar to the UTI positive specimen. As these UTI controls have assigned values, when
substituted in place of specimen they serve as reagent and procedure quality control for both,
MICROPROTM Broth culture and MICROPROTM ID assays.
4.
KIT CONTENTS
TM
The MICROPRO UTI control kit (Cat No. MSQC01) consists of the following :
PS
Batch
Number
EC REP
Authorised Representative
1.
MICROPROTM UTI Controls
- red cap (0.5 ml)
Eight different UTI Controls (lyophilized) for
Quality Control
8 Nos.
2.
Buffer Media (5 ml)
Media for reconstitution of lyophilized UTI Controls
2 Nos.
3.
1 ml Microtips
Sterile microtips for dispensing Buffer Media in UTI
10 Nos.
Controls
STORAGE AND STABILITY
Store the UTI Controls and the Buffer Media at 2-8 ºC.
DO NOT FREEZE. Avoid exposure to light.
The shelf life of the UTI Control kit and the Buffer Media is as per the expiry date mentioned on respective
carton/ bottle packaging.
6.
MATERIAL REQUIRED BUT NOT PROVIDED WITH THE KIT
1 ml pipette, 100 µl micropipette, 300 µl micropipette, Soybean Casein Digest Agar or Mueller Hinton Agar
Plates, Bacteriological Incubator set at 35-37ºC, Marker Pen, Tissue Paper, 70% IPA, Bactericidal
Handrub, Gloves and Mask.
PS
Manufacturing Unit:
Plot No. S-126, Phase III B, Verna Ind.
Estate, Verna, Goa - 403 722, INDIA.
REP
Qarad b.v.b.a. Cipalstraat 3, B-2440 Geel, Belgium
Page 8 of 8
Qty.
5.
A Division of
EC
Component
Production Site
Use by
Registered Office:
Gitanjali, Tulip Block, Dr. Antonio Do Rego Bagh, Alto
Santacruz, Bambolim Complex P.O., Goa-403 202, India.
E-mail: [email protected]
Purpose
S.No.
Page 1 of 8
7.
PRECAUTIONS
(a) For laboratory use only.
(b) Bring all the reagents to room temperature (20 - 300C) before use.
(c) Do not use the kits beyond expiry date.
(d) Carefully read the User Manual and package insert before use.
(e) Take Universal Precautions. Treat all reagents and controls as potentially infectious.
(f) Always be prepared for any accidental spillage. In case of accidental spillage clean the area
thoroughly and wipe with 70% IPA at least three times.
(g) It is recommended that basic Personal Protective Equipment like gloves and masks are used at all
times.
(h) Use a potent Handrub before and after test procedure.
(i) Visually examine the UTI Control kit and the Buffer Media to ensure there is no physical damage,
microbial contamination, discoloration, precipitation, evaporation or other signs of deterioration. If
any of these is observed, do not use these reagents and contact Service provider immediately.
(j) The UTI Control vial and the Buffer Media vial with tight caps should be opened carefully to avoid
injury due to breakage of glass.
(k) Do not open the UTI Control vial and the Buffer Media vial until ready to use.
(l) Minimize exposure to light.
8.
CLEANING AND DECONTAMINATION
(a). Spills of potentially infectious material should be cleaned up immediately with absorbent tissue paper
and the contaminated area should be decontaminated with disinfectants such as 0.5% freshly
prepared sodium hypochlorite (10 times dilution of 5% sodium hypochlorite (household bleach)
before continuing work.
(b). Sodium hypochlorite should not be used on an acid-containing spill unless the spill-area is wiped dry
first. Materials used to clean spills, including gloves, should be disposed off as potentially
biohazardous waste e.g. in a biohazard waste container.
9.
TEST PROCEDURE
TM
A). Quality Control of MICROPRO Broth Culture System
a) Reconstitution of UTI Controls
Note: The UTI Controls kit consists of eight different UTI controls/ pathogens available in
lyophilized form. For reconstitution of UTI controls, maintain a sterile environment, while working
in Laminar Air flow or in between two Bunsen burners.
1. Open the red cap and rubber stopper of one UTI control vial and place them on a sterile
area.
2. Using 1 ml pipette and a sterile microtip provided with the kit, reconstitute the UTI control
with 1 ml Buffer Media and then pipette in and out several times to ensure proper dispensing
and mixing of lyophilized cultures in the Buffer Media.
3. After reconstitution, using the same tip, perform streaking on Soybean Casein Digest Agar
or Mueller Hinton Agar Plates to check for contamination.
4. Discard the tip in 0.5% freshly prepared sodium hypochlorite solution and put the rubber
stopper and red cap back on the UTI control vial.
5. Gently swirl the vial to ensure proper mixing of lyophilized cultures in the broth.
6. Using a fresh tip repeat steps 1 to 5 for rest of the UTI control vials.
7. Place the reconstituted UTI Controls kit along with the stand in bacteriological Incubator set
at 35-37°C for 16 hours.
b) Inoculation of the UTI Controls into the Barcoded Cuvette (A) and the Test Vial (B)
1. After 16 hours of incubation, retrieve and place the eight reconstituted UTI Controls to be
tested on flat clean table top.
Page 2 of 8
Page 7 of 8
6)
7)
8)
9)
10)
11)
12)
13)
14)
15)
16)
Dean AJ, Lee DC. Bedside laboratory and microbiologic procedures. In: Roberts JR, Hedges JR, eds.
Clinical Procedures in Emergency Medicine. 5th ed. Philadelphia, Pa: Saunders Elsevier; 2009:chap
68.
MacFaddin, Jean F. "Biochemical Tests for Identification of Medical Bacteria." Williams & Wilkins,
1980, pp 173 – 183.
Bachoon, Dave S., and Wendy A. Dustman. Microbiology Laboratory Manual. Ed. Michael Stranz.
Mason, OH: Cengage Learning, 2008. Exercise 15, "Normal Flora of the Intestinal Tract" Print.
Bergey's Manual of Systematic Bacteriology, Vol. 1. Baltimore, Williams and Wilkins, 1984.
Nicola F1, Centorbi H, Bantar C, Smayevsky J, Bianchini H., Utility of pyrrolidonyl-arylamidase
detection for typing Enterobacteriaceae and non-fermenting Gram-negative bacteria, Rev Argent
Microbiol. 1995 Oct-Dec;27(4):204-9.
Gordon J, McLeod JW. Practical application of the direct oxidase reaction in bacteriology. J Pathol
Bacteriol 1928; 31:185-90.
Koneman EW, Allen SD, Janda WM, Schreckenberger PC, Winn WC Jr. Color atlas & textbook of
diagnostic microbiology. 5th ed. Philadelphia: JB Lippincott, 1997.
L Essers and K Radebold, Rapid and reliable identification of Staphylococcus aureus by a latex
agglutination test. J Clin Microbiol. Nov 1980; 12(5): 641–643.
Kloos, W.E. and P.B. Smith. Staphylococci. 1980. Manual of Clinical Microbiology, 3rd ed. E.H.
Lennette, A. Balows, W.J. Hausler, Jr. and J.P. Truant, ed. ASM, Washington, D.C.
Finegold, S.M. and E.E. Sweeney. 1961. New Selective and Differential Medium for CoagulasePositive Staphylococci Allowing Rapid Growth and Stain Differentiation. J. Bacteriol.; 81:636-641.
Data on file: Microxpress (P) Ltd.
2.
Retrieve eight sets of Barcoded Cuvettes (A)- black cap and the Test Vials (B)- green cap,
as one set of Barcoded Cuvette (A)- black cap and Test Vial (B)- green cap is to be used for
one reconstituted UTI control.
3. Label each of the Barcoded Cuvette (A)- black cap and the Test Vial (B)- green cap set with
UTI control name.
4. Retrieve 8 pouches of 100 µl micropipette tips. The individual microtip pouches must be
opened just before the inoculation process so as to minimize contamination risk.
5. Open the black cap of one of the Barcoded Cuvette (A) and the green cap of its
corresponding Test Vial (B) and keep aside. Do not remove the yellow coloured rubber
stopper.
6. Remove the cap and rubber stopper of the respective UTI Control vial, pipette out 100 µl of
the well mixed reconstituted UTI Control and transfer it into the opened Barcoded Cuvette
(A) by piercing the microtip through the rubber stopper.
7. While removing out the microtip from the Cuvette, hold the rubber stopper tight so that the
rubber stopper does not come out along with the microtip. Discard the microtip. Ensure that
the UTI Control mixes well with the broth by gently swirling the vial.
8. Using another fresh microtip, pipette out the remaining 100 µl of reconstituted UTI control
from the same UTI Control vial and transfer it to the corresponding opened Test Vial (B) by
piercing the micropipette tip through the stopper of the Test Vial. Again ensure that the UTI
Control mixes well with broth in theTest Vial (B) by gently swirling the vial.
9. Repeat step (5-8) for the rest of the reconstituted UTI controls. Use fresh microtips each
time.
10. The Barcoded Cuvettes (A) and the Test Vials (B) can then be recapped with their original
black and green cap respectively and placed in the Cuvette stand (card board fitment)
supplied with the kit.
Note: For the rest of the procedure, namely
c) Blanking of the MICROPROTM BCS Analyzer
d) Measuring Initial Absorbance (A0)
e) Incubation of the inoculated Barcoded Cuvettes (A) and the Test Vials (B)
f) Final Absorbance (A1) of the Barcoded Cuvettes (A).
Follow the procedure from the MICROPROTM, Broth Culture System pack insert, refer
Segment- 10. TEST PROCEDURE, Section (B), (C), (D)& (E)
g). Result interpretation of Barcoded Cuvettes (A)-black cap inoculated with UTI controls
The, difference in the final (A1) and initial (A0) OD readings of the UTI controls, i.e, Delta-OD
TM
Values obtained in the Results of the MICROPRO BCS Analyzer for each of the Barcoded
Cuvettes (A) with different UTI Controls should match with the Expected Delta-OD Values
given in the following table (Table -1) for the eight different UTI Controls.
Table - 1
UTI Controls
E. coli
Page 6 of 8
Expected Values
CFU/ml
UTI Controls
Expected Values
CFU/ml
10*3 < 10*8 CFU/ml
Proteus spp.
10*3 < 10*8 CFU/ml
Enterococcus faecalis
10*3 < 10*8 CFU/ml
Pseudomonas aeruginosa
10*3 < 10*8 CFU/ml
Streptococcus pyogenes
10*3 < 10*8 CFU/ml
Citrobacter spp.
10*3 < 10*8 CFU/ml
Proteus mirabilis
10*3 < 10*8 CFU/ml
Klebsiella pneumoniae
10*3 < 10*8 CFU/ml
Page 3 of 8
B)
TM
Quality Control of MICROPRO ID System
TM
Note: A MICROPRO ID well strip consists of twelve breakable wells. Six wells are required to
perform the six tests for identifying a single UTI Control. (refer Table 2)
Table-2: Well Nos and Tests
W1
W2
W3
W4
W5
W6
Catalase
test
Voges-Proskauer
(VP) test
Pyrrolidonyl Arylamidase
(PYR) test
Oxidase
test
Tryptophan deaminase
(TDA) Test
Indole
test
TM
For identifying eight UTI Controls, use four MICROPRO ID well strips and break each strip equally
into two to get eight of 6-well strips.
a ) Reagent Addition
TM
1. Place the eight (6 wells) strips in the MICROPRO ID Well stand in a row.
2. Paste a Removable Sticker at the end of the each well strip row in the well stand to write the
UTI Control name.
TM
3. Retrieve the eight MICROPRO ID reagents and place it on the table. Allow it to attain room
temperature.
4. As shown in Table 3, to the First well strip, Dispense
2 drops of R1 reagent into first well.
2 drops of Reagent R-2.1, R-2.2 & R-2.3 each to well No.2
2 drops of Reagent R-3 to well No.3
2 drops of Reagent R-4 to well No.4
2 drops of Reagent R-5 to well No.5
2 drops of Reagent R-6 to well no.6.
11. Using the 300 µl Fixed Volume Pipette dispense 300 µl of the growth from the Test Vial (B),
in to the next 3 wells of the same ID well strip.
12. Recap the Test Vial (B) with its green cap along with the stopper tightly, place it back in the
cuvette stand.
13. Repeat the steps (8-13) for rest of the UTI Control Barcoded Cuvette (A) and the Test vial
(B) sets.
14. Start the timer. Read the results after 25 minutes.
c) Result Interpretation:
Check the results of the UTI Controls as shown below
Result Interpretation of wells
UTI
Controls
W6
Indole
Test
Positive results
in wells
-
Pink ring
1&6
-
-
-
2&3
Dark
cherry
red
-
-
-
3
-
Salmon color
-
-
1&5
Bubbles
-
Salmon color
-
Pink
ring
1, 5 & 6
Pseudomonas
aeruginosa
Bubbles
-
Salmon color
Blue to
Purple
-
-
1&4
Citrobacter spp.
Bubbles
-
Dark
cherry
red
-
-
-
1&3
Klebsiella
pneumoniae
Bubbles
Light
Dark
Pink
Salmon color
-
-
-
1&2
W1
Catalase
Test
W4
W5
Oxidase
TDA Test
Test
W2
VP Test
W3
PYR Test
Bubbles
-
Salmon color
-
Enterococcus
faecalis
-
Light
Dark
Pink
Dark
cherry
red
Streptococcus
pyogenes
-
-
Proteus
mirabilis
Bubbles
Proteus spp.
E. coli
The corresponding well number is also mentioned on each ID reagent bottle labels.
Table 3
Well Nos
MICROPRO ID
Reagents
Reagent
Volume
5.
W1
R1
2 drops
W2
R2 2.1
R2 2.2
R2 2.3
2 drops
2 drops
2 drops
W3
R3
2 drops
W4
R4
2 drops
W5
R5
2 drops
W6
R6
2 drops
Continue Step No 4.for the next seven well strip rows.
b) Sample Addition
6. From the Cuvette stand, retrieve one set of Barcoded Cuvette (A) incubated with UTI control
and its corresponding Test Vial (B). Check the UTI control name on the Barcoded Cuvette
(A) and note it down on the removable sticker of the first row of the well strip.
7. Remove the black cap and the rubber stopper of the Barcoded Cuvette (A) and place it on a
clean surface.
8. Using a 300 µl Fixed Volume Pipette dispense 300 µl of the growth from Barcoded
Cuvette (A) into the first 3 wells of the first ID well strip.
9. Recap the Barcoded Cuvette (A) with black cap along with the stopper tightly, place it back
in the cuvette stand.
10. Retrieve the Test vial (B) green cap of the same UTI Control, open the green cap and
rubber stopper placing them on a clean surface.
Page 4 of 8
Light
Dark
Brown
Light
Dark
Brown
Note: - represents no change
Salmon color represents negative result.
13. REFERENCES
1) Practical Medical Microbiology, Mackie and MacCartney, Vol 2, 13 th ed, Churchill Livingston 1989,
Edited by J,G Collee Duguid, A.G. Fraser, B.P. Marmion.
2) Detection, Prevention and Management of Urinary Tract infections, C.M Kunin, 4th Edition, 1987,
3) McPherson RA, Ben-Ezra J. Basic examination of urine. In: McPherson RA, Pincus MR, eds. Henry's
Clinical Diagnosis and Management by Laboratory Methods. 22nd ed. Philadelphia, PA: Elsevier
Saunders; 2011:chap 28.
4) Hooton TM, Bradley SF, Cardenas DD, et al. Diagnosis, prevention, and treatment of catheterassociated urinary tract infection in adults: 2009 International Clinical Practice Guidelines from the
Infectious Diseases Society of America. Clin Infect Dis. 2010; 50(5):625-663.
5) Ban KM, Easter JS. Selected urologic problems. In: Marx JA, Hockberger RS, Walls RM, et al, eds.
Rosen's Emergency Medicine: Concepts and Clinical Practice. 7th ed. Philadelphia, Pa: Mosby
Elsevier; 2009: chap 97.
Page 5 of 8