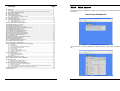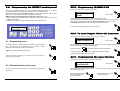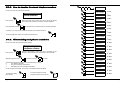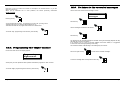
1
3i SECURITY with i-mode™ Welcome to the future of security. Today with your i-mode™ telephone you have full control of your home and automobile even when you are not present. You may see directly on your i-mode™ telephone the images from 16 micro-cameras located in the protected area and remotely control all appliances you desire. Commercial office Via Leopoldo Micucci, 11/B 00173 Roma Tel. +39 06.72.34.018 Fax +39 06.72.36.154 Factory plant Via Quarto Negroni, 32 00040 Ariccia (Roma) Tel. +39 06.93.42.244 Fax +39 06.93.42.525 www.3isecurity.it e-mail: [email protected] Last revision 24-01-06 Made in Italy Summary Page 1.0. 2.0. Description .................................................................................................................................................. 3 SIM card....................................................................................................… .............................................. 4 2.1. How to program the telephone numbers and the remote access password on the SIM card .......... 4 3.0. Registration with I-mode provider ............................................................................................................ 5 4.0. Mains power connection ........................................................................................................................... 6 5.0. Control panel battery ................................................................................................................................ 6 6.0. Terminal block connections ..................................................................................................................... 7 6.1. Input activation with negative command ............................................................................................ 8 7.0. Keychain transmitter ................................................................................................................................. 8 8.0. Description of the zones ............................................................................................................................ 9 9.0. Programming the Unisat control panel .................................................................................................... 10 9.1. Programming menu ........................................................................................................................... 10 9.2. Principal features of the menu ........................................................................................................... 10 10.0. Programming the keychain transmitter .................................................................................................. 12 11.0. Programming the "Day" sensors ............................................................................................................. 13 12.0. Planning the "Night" sensors ................................................................................................................. 14 13.0. Programming entrance and exit time ...................................................................................................... 15 14.0. Programming the wireless home automation outlets ........................................................................... 15 15.0. Programming temperature sensors ........................................................................................................ 16 16.0. Programming the hardwire zones ........................................................................................................... 17 17.0. Recording voice alarm trigger messages ............................................................................................... 18 18.0. To listen to the recorded messages ........................................................................................................ 19 19.0. Radio Frequency test of wireless sensors ............................................................................................. 20 20.0. To visualize programmed e-mail addresses .......................................................................................... 20 21.0. Visualization of internet parameters ...................................................................................................... 21 22.0. To modify user I.D. .................................................................................................................................... 21 23.0. How to visualize the stored telephone numbers ................................................................................... 22 24.0. Memorizing telephone numbers .............................................................................................................. 22 25.0. Programming IR-CAM 3i 04 ...................................................................................................................... 23 26.0. To send images follow the sequence ...................................................................................................... 23 27.0. Programming the siren function ............................................................................................................. 23 28.0. Functioning test of IR-CAM 3i-04 ............................................................................................................ 24 29.0. Functioning procedure of Unisat during alarm trigger ......................................................................... 24 29.1. Alarm time .......................................................................................................................................... 25 29.2. Alarm memory .................................................................................................................................... 25 29.3. Alarm triggered during remote interrogation ..................................................................................... 25 29.4. Handling simultaneous alarms .......................................................................................................... 25 29.5. Hold-up alarm .................................................................................................................................... 25 29.6. Sensor low battery trigger .................................................................................................................. 25 29.7. Tamper of sensor and control panel .................................................................................................. 25 29.8. By-pass of the sensor ........................................................................................................................ 25 30.0. Arming the system .................................................................................................................................... 26 30.1. Total arming (Day mode) ..................................................................................................................... 26 30.2. Partial arming (Night mode) ............................................................................................................... 26 30.3. Disarming ............................................................................................................................................ 26 31.0. Wireless home automatic devices ........................................................................................................... 27 32.0 Programming wireless siren TLM-21VRP ................................................................................................ 27 33.0. Message format .......................................................................................................................................... 28 33.1. SMS sent only to Master number ...................................................................................................... 28 33.2. SMS sent to memorized numbers ..................................................................................................... 28 34.0. Functions governed by portable telephone ............................................................................................. 28 34.1. Password change (only by Master telephone) ................................................................................... 28 34.2. Remote activations ............................................................................................................................ 29 34.3. Visualizing the telephone numbers memorized in the SIM card and request of SIM card left over credit ........ 29 34.4. To cancel telephone numbers memorized on the SIM card ............................................................. 30 35.0. Monitoring station ...................................................................................................................................... 30 36.0. Web server ................................................................................................................................................ 31 Page 2 Unisat GPRS Video instruction manual 36.0. Web server Home automation and visualization of images can be executed from any internet portal using the address: www.unisat.it/webserver You must contact 3i Security International to obtain the access codes and the conditions of use. Unisat GPRS Video instruction manual Page 31 34.4. To cancel telephone numbers memorized on the SIM card To cancel the first 5 telephone numbers memorized on the SIM card, send an SMS message, using the following format to the telephone number of the Unisat SIM card. password(8 characters)WRNR1#0 password(8 characters)WRNR2#0 password(8 characters)WRNR3#0 password(8 characters)WRNR4#0 password(8 characters)WRNR5#0 For the 1st telephone Number (Master) For the 2nd telephone Number For the 3rd telephone Number For the 4th telephone Number For the 5th telephone Number Example: Supposing that the inserted password is 12345678, to cancel the "3 number", the SMS message to send is: rd Telephone 12345678!WRNR3#0 35.0. Monitoring station The Unisat GPRS Video has been created to function as a standalone or with a monitoring station. On request, availability of both software and hardware of monitoring station can be found at a near by 3i distributor. For the location of the nearest distributor please check the site: www.3isecurity.it Introduction Compliments for having chosen the UNISAT GPRS Video. The Unisat is the most complete alarm control panel ever manufactured, it allows the end user to: VISULIZE, KEEP SECURE and HOME AUTOMATE directly from his portable telephone, it includes water and temperature control in the protected area. It transmits images from 16 television cameras located in the protected area over the local GPRS network. It allows you to remotely control 18 appliances completely wireless through a remote tel. It is also a 42 zone wireless and 6 zone hardwire control panel for protection of homes, offices, factories, etc. 1.0. Description The Unisat GPRS Video control panel is tamper protected and uses the “PEGASO” self-learning sensors and remote keyfob, all zones can be programmed as DAY or NIGHT (immediate or delayed). The control panel incorporates a GPRS dual band modem 900-1800 MHz for transmission and reception. of all SMS and e-mail messages. Remote management allows: • Total arming and disarming of the system (also by keychain transmitter) • Interrogation to know the status of the system. The status of: all sensor installed, appliances being automated and temperature of the area protected. • To know the status of arming/disarming of the 16 wireless outlets • To know the status of 2 hard wire home automation relays output • To know the status of installed sensor by-passed. When an alarm is triggered, the outdoor sirens are activated along with the dry contact relays and an SMS message is sent to 6 different tel. numbers. The pre-programmed messages sent may be as follows: • • • • • • • • • Burglary alarm with zone indication Fire alarm with zone indication Gas alarm with zone indication Water alarm with zone indication Panic alarm or medical distress Tamper alarm of control panel and all sensor (with indication of the zone) Low battery in control panel Low battery in sensors with zone indication Mains cut-off (if there is 10 minutes of continuous interruption) When an alarm is triggered, the Unisat GPRS Video will sends to a maximum of 3 e-mail addresses, images from maximum 16 micro-cameras installed in the protected area. Remote monitoring of all cameras my be executed through the site I-modeTM 3i Video surveillance, or from the website www.unisat.it or by a dedicated monitoring station which will act based on the agreed contract. The Unisat GPRS VIDEO also has an LCD display which helps the end user to better understand all the functions of the control panel. The Unisat also offer many possibilities of expansion due to the vast amount of sensors available. Page 30 Unisat GPRS Video instruction manual Unisat GPRS Video instruction manual Page 3 2.0. SIM CARD 34.2. Remote activation Before installing the SIM card, it is necessary to follow the instruction on this page. You must first purchase a SIM card from any sales outlet of your local GSM/GPRS provider. Be sure that the company you choose can provide you with GPRS service and have them assign you an e-mail address. ATTENTION: The i-mode users may utilize the link present on the home page. This is specially personalized for home automation your appliances and to request images in real time. NOTE: Cancel the memorized PIN code. To execute the operations below, send an SMS message to the telephone number of the SIM card inside the Unisat GPRS Video. The SMS messages must be as follows. password(8 characters)STON Total arming of the system password(8 characters)STOF Disarming of the system password(8 characters)PWST Control panel and Relay 1 status password(8 characters)RNPXX#YY Activation of outlet XX for YY hours password(8 characters)RNPXX#00 Activation of outlet XX Example: Example: Example: 2.1. How to program the telephone numbers and the remote access password on the SIM card To send and receive e-mails, it is necessary to set the internet parameters on the SIM card installed in the Unisat control panel. For this reason, after having inserted the SIM card, the end user must send 3 SMS command messages to the telephone number of the SIM card in the Unisat. For SIM card WIND the format of the SMS message is the following: password(8 characters)PARA<e-mail address>< >< > Example: 12345678PARA<[email protected]>< >< > password(8 characters)APN<1,"IP","internet. wind","0.0.0.0",0,0> password(8 characters)SMTP<0,25,"mail.libero.it"> For SIM card TIM the format of the SMS message is the following: password(8 characters)PARA<e-mail address><num. tel><password> Example: 12345678PARA<[email protected]><33312345678><xxxxxx> password(8 characters)APN<1,"IP","uni.tim.it","0.0.0.0",0,0> password(8 characters)SMTP<0,25,"mail.posta.tim.it"> For SIM card VODAFONE the format of the SMS message is the following: password(8 characters)PARA<e-mail address>< >< > Example: 12345678PARA<[email protected]>< >< > password(8 characters)APN<1,"IP","web.omnitel.it","0.0.0.0",0,0> password(8 characters)SMTP<0,25,"smtp.net.vodafone.it"> Example: Example: 12345678STON 12345678STOF 12345678PWST 12345678RNP05#24 12345678RNP12#00 (XX = 01→08) (YY = 01→48) (XX = 09→16) password(8 characters)RFPXX Deactivation of outlet XX password(8 characters)STPXX Status of outlet XX Example: Example: 12345678RFP12 12345678STP12 (XX = 01→16) (XX = 01→16) password(8 characters)RL01 Activation of Relay 4 password(8 caracters)RS01 Deactivation of Relay 4 password(8 characters)RL02 Activation of Relay 3 password(8 caracters)RS02 Deactivation of Relay 3 password(8 characters)DELS#XX By-pass of sensor XX password(8 characters)STEXXYY Selection of temperature (high/low) password(8 characters)TTEM Request of last temperature reading password(8 characters)FOTO#XX Request of image in real time password(8 characters)FOTR#XX Request of image memorized Example: XX is last image memorized by IR-CAM no. 1 to 16 and sent Example: Example: Example: Example: Example: Example: Example: Example: 12345678RL01 12345678RS01 12345678RL02 12345678RS02 12345678DELS#12 12345678STE3010 12345678TTEM 12345678FOTR#01 12345678foto#01 (XX = 01→42) (XX = Temp. maximum) (YY = Temp minimum) (if active) XX Is image captured by IR-CAM no. 1 to 16 and sent 34.3. Visualizing the telephone numbers memorized in the SIM card and request of SIM card left over credit To change the first 5 tel. numbers memorized on the SIM card, send an SMS message using the following format to the SIM card inside the Unisat: password(8 characters)WRNRX#NUMBER ATTENTION: For programming the telephone numbers in the control panel, refer to paragraph 24.0. The telephone number programmed in position “1” is called “ The Master number”. The 8 digits telephone number programmed in position “7” is “The remote access password”. (X) corresponds to the position of the number to be changed Example: To change the 2° telephone number to (3381122136), the SMS message to be sent is : 12345678WRNR2#3381122136 To request the left over credit on the SIM card in the Unisat, digit: password(8 characters)PREP Example: 12345678PREP Page 4 Unisat GPRS Video instruction manual Unisat GPRS Video instruction manual Page 29 33.0. Message format To install the Unisat with the 3 e-mail addresses to which it must send both messages and images, it is necessary to send an SMS message to the telephone number associated to the SIM card inserted using the following format: Below you will find the format of SMS messages that the Unisat GPRS Video will send to the Master number and all other programmed tel. numbers. password(8 numbers)MAIL<E-MAIL1><E-MAIL 2><E-MAIL 3> Example: If the password inserted is 12345678 and to receive the images you wish to use the e-mail address [email protected], [email protected], [email protected], the message to send is: 12345678MAIL<[email protected]><[email protected]><[email protected]> 33.1. SMS sent only to Master number LOW BAT. SEN. XX (XX indicates the zone in which sensor is located) LOW BATTERY UNISAT MAINS FAILURE 230 V UNISAT 3.0. Registration with i-mode provider In your country, if you have an “I-mode” provider and you own an i-mode telephone, you may use a personalized menu for home automation and video surveillance which is available directly on your i-mode tel. All you must do is register with the portal of the i-mode provider: I-mode 33.2. SMS sent to memorized numbers 1 I-Menu 2 3 ALARM SENSOR (wireless or hardwire) XX (Day or Night) (XX indicates the zone in which the sensor is installed) FIRE ALARM (wireless or hardwire) ZONE XX GAS ALARM (wireless or hardwire) ZONE XX WATER ALARM (wireless or hardwire) ZONE XX HOLD-UP ALARM TAMPER ALARM (wireless or hardwire) ZONE XX (“TAMPER ALARM IN ZONE”00” indicates Unisat control panel tamper alarm) Click on the "I-MODE" key Click on the "I-MODE" link I-mode 1 I-Menu 2 3 34.0. Functions governed by portable telephone 34.1. Password change (only by Master telephone) To change the remote access password send an SMS message to the tel. number of the SIM card installed in the Unisat GPRS Video using the following format: password(8 characters)CHIDnew password(8 characters) Example: If the password inserted is 12345678 and you desire to change it to 22334455, the SMS message to send is: 12345678CHid22334455 Page 28 Unisat GPRS Video instruction manual Click on “salute e società” link Click on video security link Home page video security Insert the requested data in each position and click on the confirmation key. ATTENTION: The numeric password must be the same as the number memorized on the SIM card. Registrazione Codice prodotto Password E-mail If you access the personalized page of you own configuration, the data inserted is memorized on the data base of the 3i server and it may be changed at any time directly on your portable telephone. Unisat GPRS Video instruction manual Benvenuto Mario Sala da pranzo Vedi Sala da pranzo Lavatrice ON OFF Chiedi stato Page 5 4.0. Mains power connection 31.0. Wireless home automatic devices Power to the Unisat GPRS Video is supplied by a rechargeable battery. The power supply incorporated, keeps this battery constantly under charge. Therefore you must plug the power cable to any 230 volt a. c. source. On the alphanumerical display, you will see an indication showing that mains power is present. If there is a mains cut-off, this will also be indicated on the display. If the mains cut-off is more than 10 minutes, a factory programmed, SMS message will be sent to the Master tel. Number. (if this function is inserted on the SIM card). During the transmission of the SMS message indicating (Mains cut-off), on the display will appear “b1”. THE CONTROL PANEL INCORPORATES A SWITCHING POWER SUPPLY 12 V 1.8 AMPERE DIRECT CURRENT WHICH WILL SUPPLY POWER TO THE UNISAT GPRS VIDEO AND KEEP THE BATTERY CHARGED. By sending SMS messages to the Unisat SIM card or by using the prepared link to video surveillance of i-mode it is possible to activate and deactivate 16 wireless outlet. These outlets may be used to govern heating, air conditioning systems, lighting etc., all of which function at 230 Vac. The SMS format to be used to activate and deactivate the home automation devices is described in paragraph 34.2. of Page 29. The outlets have 2 selectors situated on the back side. Rear view O Channel selection C E K Mains at 230 Vac A M I G 15 1 3 13 11 Front view 5 9 7 Outlet selection The left switch is to select a transmission channel, The switch on the right is to select the outlet to be switched “ON” or “OFF”. You may select 16 different channels. It is not necessary to use all channels available. If you use “A” to “I”, the channels “J” to “P” remain free. ATTENTION In all the outlets installed, you must select the same channel which is programmed in the control unit. Note: A 16 channel keychain transmitter PEG-100 is also available. 32.0. Programming wireless siren TLM-21VRP 1) 5.0. Control panel battery Normal battery voltage is 13.8 V. In the case of mains cut-off, a 2.2 Ah battery will guarantee control panel functions for 5 days. A 7 Ah battery will guarantee all functions for 15 days. When the battery voltage goes below 10.5 V, a message will be seen on the display and an SMS message will be sent to the Master tel. number and the monitoring station if this function has been programmed on the SIM card inserted. If the problem persists, call the 3i central assistance centre or send an e-mail to: [email protected] Page 6 Unisat GPRS Video instruction manual Remove all siren covers and position dip-switch 5 on “ON” and dip-switches 6, 7 and 8 on “OFF”. 2) With the tamper switch open, power up the siren. A beep and a flash is emitted about ever 5 second. 3) Arm the Unisat GPRS Video with the keychain transmitter by pressing button number “1”. This operation must take place with the tamper button of the control panel “not triggered”. 4) At the end of the control panel exit time, the siren emits 3 beep and 3 flashes. This confirms that the control panel has learned the code of each siren and is ready to operate. 5) Position dip switch 5 0n “OFF”. 6) Remove all power to siren (battery and power supply). 7) Enter into the programming mode of the control panel and select a wireless zone to associate with the siren tamper (normally zone 42 is chosen for this function). The number of the chosen zone starts flashing. 8) Power up the siren leaving the siren tamper triggered. 9) Close the siren tamper. The siren will emit 3 beeps and 3 flashes and send a tamper alarm to the control panel, which will be self learned. As confirmation of this, the zone number that was once flashing is know always on fixed. 10) Exit the programming mode. 11) Proceed to install the siren following the instructions manual included in the siren. Unisat GPRS Video instruction manual Page 27 30.0. Arming the system 6.0. Terminal block connections It is not possible to go directly from "DAY" to "NIGHT" arming. You must follow the sequence shown bellow. PANEL ARMED DAY PANEL DISARMED F3 = 2 A F1 = 2 A F2 = 2 A 1 2 3 4 5 6 7 8 9 10 11 12 13 14 15 16 17 18 19 20 21 22 23 24 25 26 27 28 29 L6 ■ With the key in off position and the control panel disarmed, press the button no. 1 on the keychain transmitter. During the exit time the control panel tamper alarm and the hold-up alarm will function based on the contents of paragraph 29.0. of Page 24. After the exit time countdown, the control panel is armed in “DAY” mode and all functions are in operation. All sensor configured "DAY" or "NIGHT" are armed and the panel functions based on the discription in paragraph 29.0. of Page 24. 30.2. Partial arming (Night mode) ■ The control panel will emit a beep and a countdown of the exit time will be shown on the display (15, 30 or 45 seconds). ■ During this exit time the control panel tamper alarm and the hold-up alarm will function as described in paragraph 29.0. of Page 24. At this point the control panel is armed in “ NIGHT” mode and is in full operation. All sensors configured as “Night” will trigger an alarm as described in paragraph 29.0. of Page 24. ■ With the control panel armed in ”DAY” or “NIGHT”, by pressing “button 1 or 2” on keychain transmitter. ■ The control panel will emit 2 beeps which indicate that it has been disarmed. The display will show the last zone that has gone into alarm and will continue to do so until the control panel is rearmed. ■ With the control panel disarmed, the following sensors remain armed: fire, gas, temperature, water, hold-up and control panel tamper alarm is also active. Unisat GPRS Video instruction manual L3 L2 B A L1 NC NO C NC NO C NC NO C NC NO C Normally closed lines Relay 4 Relay 3 Relay 2 Relay 1 BUS 2 - Direct current output 12 Vdc - (Imax 2 A). 3 4 - L6 - Normally closed trigger (NC). Negative toward positive. Opening this line will trigger an alarm. - Positive output 5 4 - L5 - Normally closed line (NC). Line is closed toward positive. Opening this line will trigger an alarm. 6 7 - L4 - Normally closed line (NC). Line is closed toward positive. Opening this line will trigger an alarm. - Positive output 8 7 - L3 - Normally closed line (NC). Line is closed toward positive. Opening this line will trigger an alarm. 9 10 - L2 - Normally closed line (NC). Line is closed toward positive. Opening this line will trigger an alarm. 11 10 - L1 - Line normally closed (NC). Line is closed toward positive. Opening this line will trigger an alarm. 10 - Positive output. 12,13,14 - Normally closed (NC) - Normally open (No) - Common (C). Volt free relay contact no. 4 - (Imax 1 A). This relay has ON/OFF function. To activate see paragraph 34.2 on page 29. 4 14 Vdc power Normally closed (NC) - Normally open (No) - Common (C). Volt free relay contact no. 3 - (Imax 1 A). This relay has ON/OFF function. To activate see paragraph 34.2 on page 29. 15,16,17 30.3. Disarming L4 1 7 ■ With the key in OFF position and the control panel disarmed, press “button 2” on the keychain transmitter. L5 Negative +12 Vdc auxiliary ■ The control panel will emit a beep and on the display will start a count down of the exit time programmed (15, 30 or 45 seconds). Page 26 Power fuse (Terminals 28-29) Auxiliary output fuse (Terminals 1-2) Battery fuse PANEL ARMED NIGHT 30.1. Total arming (Day mode) ■ F1 = 2 A = F2 = 2 A = F3 = 2 A = UNISAT GPRS VIDEO 18,19,20 - Normally closed (NC) - Normally open (NO) - Common (C). Volt free relay contact no. 2 - (Imax 1 A). This relay is triggered in case of alarm and remains triggered for the entire alarm time. 21,22,23 - Normally closed (NC) - Normally open (NO) - Common (C). Volt free relay contact no. 1 - (Imax 1 A). This relay will be activated when the control panel is armed and will be deactivated when the control panel is disarmed. 24,25,26,27 - Bus RS-485 for connection of all “IR-CAM 3i 04” 28 29 - Power input 14 Vdc. F1 F2 F3 - Power fuse to protect inputs (Terminals 28 and 29) - (2 A retarded) Auxiliary output fuse - (2 A retarded) Fuse protection against polarity inversion - (2 A retarded) Unisat GPRS Video instruction manual Page 7 6.1. Input activation with negative command 29.1. Alarm time 3 To activate the inputs with a negative signal, it is necessary: √ √ Close to positive the input with a 1 K ohm resistor (on the example on the right, line L6 has been used). Applying the negative as indicated, will trigger an alarm. During an alarm trigger, the alarm time is not always the same, but it is about 150 seconds. This is due to the fact that the alarm time depends on the response time of the GSM/GPRS server which is not always the same. The reply time of the SMS message server depends on amount of traffic at the moment of the alarm trigger. 4 L6 Application of negative command R = 1 K ohm → 29.2. Alarm memory In the case of an alarm trigger, when the control panel is disarmed, on the display will be indicated the zone that has caused the trigger. In the case of more than one alarm, only the last alarm triggered will be shown. 29.3. Alarm triggered during remote interrogation If an alarm is triggered during remote interrogation the Unisat GPRS will give priority to the alarm and start the alarm cycle. 7.0. Keychain transmitter 29.4. Handling simultaneous alarms The Unisat GPRS Video is supplied with two 3 channel keychain transmitter which allow you to: In the case of more alarms together, they will be handled in the order of arrival. FIRE alarm, however, has priority on all alarm triggers. Arm and disarm the control panel in DAY mode - Button 1 (total arming). All sensors are armed regardless of being (Day or Night) - (delay or immediate). Arm and disarm the control panel in Night mode - Button 2 (partial arming). Only the sensors which are programmed for Night are armed (immediate & delayed). With Button 3 you activate the hold-up / panic alarm or medical stress alarm. THE CONTROL PANEL MAY LEARN THE CODES OF 10 DIFFERENT KEYCHAIN TRANSMITTERS. 29.5. Hold-up alarm The Unisat GPRS is designed to request help in a dangerous situation or in case of medical distress. To activate this function you must press the “3 button” on your keychain transmitter. You may access this button by pushing the silver slide downward. During normal use this slide covers the button to avoid the possibility of a false trigger. Activation of this alarm will provoke what described on paragraph 29.0. 29.6. Sensor low battery trigger Button 2 Button 1 Total arming (Day mode arming) Partial arming (Night mode arming) Slide Button 3 29.7. Tamper of sensor and control panel In the case of tamper alarm from control panel or any sensor, an SMS will be sent to the Master tel. number and to the monitoring station (if this number has been programmed on the SIM card). 29.8. By-pass of the sensors Activation of hold-up alarm Page 8 When the battery level of a sensor has gone below the level programmed for each sensor (see instruction manual of each sensor), an SMS message is sent to the Master number and to the monitoring station (if this number has been programmed on the SIM card). By sending SMS messages, it is possible to by-pass one or more sensors. The sensors by-passed become active once again when the control panel is re-armed. Unisat GPRS Video instruction manual Unisat GPRS Video instruction manual Page 25 28.0. Functional test of IR-CAM 3i 04 8.0. Description of the zones Let the menu flow until the text below appears: The Unisat GPRS Video has 42 wireless zones and 6 hardwire zones. The sensors installed in each zone maybe programmed as: Programming test ir-cam Press the key: z Press the key “1” to see on the display the cameras present and active. By press the key no. “4” a camera will be requested to send out a forced image to the electronic post address inserted in the SIM cards e-mail address memory. By pressing the number “5” key the cameras will be deactivated. To exit the programming mode of the IR-CAM 3i 04 press the key: F 29.0. Functioning procedure of Unisat during alarm trigger In case of an alarm triggered burglary, gas, fire, water, hold-up, tamper or temperature the Unisat GPRS Video will memorize the images of all cameras installed and send out an alarm cycle. 1) On the display will appear “ALARM” with the number of the zone in which the alarm took place. The wireless sirens start sounding if Relay 2 is active. 2) The Unisat GPRS Video sends SMS messages related to the type of alarm triggered to all the number memorized in the control panel. 3) After the SMS messages have been sent, the Unisat GPRS Video calls the Master number for 20 seconds to inform the Master of an SMS message in memory. When the master replays the playback of the pre-recorded voice message will start. 4) During the alarm trigger, the alarm may be interrupted by pressing the “1 key” on the keychain transmitter or if the Master number calls, or through an SMS sent always by the Master number to the Unisat GPRS Video control panel. 2 beeps are emitted, the sirens stop sounding, the "Relay 2" will be deactivate and the Unisat GPRS will be disarmed. 5) If the alarm is not interrupted, the Unisat GPRS Video will transmit the alarm signal over the GPRS network by sending to the programmed e-mail addresses both the alarm and images of what has taken place in the protected area. 6) If the control panel has been programmed not to send out the images, a 60 second countdown will start during which time the siren may be switched off. 7) The Unisat GPRS Video is now ready for the next alarm trigger. In the case of a hold-up alarm trigger, the same alarm procedure as above will take place. Page 24 Unisat GPRS Video instruction manual Immediate “DAY” z Delayed “DAY” with entrance and exit time retarded (15 , 30 or 45 seconds) z Immediate “NIGHT” z Delayed “NIGHT” with entrance and exit times programmable (15, 30 or 45 seconds). Violation of this zone will cause a count down (shown on the display) of the programmed entrance time. At the end of the entrance time, if the control panel is not disarmed, an alarm will be triggered. During the exit time, no alarm trigger signals are accepted, with exception of the control panel tamper alarm. The Unisat GPRS Video may be armed in: “DAY” or “NIGHT” mode: z To arm in “DAY” mode, press the “button 1” of the keychain transmitter. A beep will be emitted and the installation will be armed. All sensors “Day and Night” (immediate and delayed) will be activated along with tamper of control panel and sensors installed. Also active will be the low battery alarm for both control panel and sensors installed. z To arm in “NIGNT” mode, press “button 2” of the keychain transmitter. The installation is partially armed. All sensors programmed for "Night" are armed along with the tamper protection of both control panel and sensors installed The following sensors are always armed: GAS - WATER - SMOKE - TEMPERATURE regardless of the status of the control panel. Also always armed is the TAMPER and HOLD-UP alarms, both in "Day" and "Night" arming and also if control panel is totally disarmed. Unisat armed “DAY” Unisat armed “NIGHT” Unisat “DISARMED” Burglary zones (wireless & hardwired) “DAY” Immediate and delayed ARMED DISARMED DISARMED Burglary zone (wireless & hardwired) "NIGHT" immediate & delayed ARMED ARMED DISARMED TEMPERATURE-GAS-WATER & SMOKE DETECTORS ARMED ARMED ARMED PANIC OR HOLD-UP ALARM ARMED ARMED ARMED CONTROL PANEL AND SENSOR TAMPER PROTECTION ARMED ARMED ARMED LOW BATTERY ALARM OF SENSORS AND CONTROL PANEL ARMED ARMED ARMED Unisat GPRS Video instruction manual Page 9 9.0. Programming the UNISAT control panel 25.0. Programming IR-CAM 3i 04 Once the control panel is switched “ON” and the SIM card has been inserted, on the display will be shown GSM network presence and the name of the local GSM operator. Also shown is the level of the GSM coverage. A number will appear from “00” (no GSM signal) to “31” which indicates the maximum GSM signal available. Let the menu flow until the following text is shown: SMS messages can be transmitted with signal level as low as “02”, ”03”. Values of 10 and above guarantee that the messages are transmitted. “00” and “99” indicate no GSM. signal present. The letter “G” indicates the presence of GPRS signal. See example below: Programming ir-cam Press the key: On the display will be indicated the number of the first free position. Move the dip switch of IR-CAM to position “ON” and press the "F" key on the control panel. The camera code will automatically be learned and memorized by the control panel. A maximum of 16 different cameras may be installed and memorized. To exit the IR-CAM programming menu, press the key: Line ok vodafone Signal GSM: 15 G 26.0. To send images follow the sequence Let the menu flow until the following text is shown on the display: Programming image transmission 9.1. Programming menu To program the sensors installed (keychain transmitter, smoke detectors etc.) you must access the programming menu by entering a 4 digit password code followed by pressing the start button: Press the key: With this operation it is possible to choose if, in the case of an alarm trigger, the images should be sent automatically or by SMS message request. By pressing the key it is possible to select between the 2 options. (1234 is the factory programmed password). To exit the program of how to send the images (automatically or on SMS message request) press the key on the right: The menu titles are 19 and they may be seen on the LCD display by pressing the forward button: 27.0. Programming the siren function Let the menu flow until the display shows the following text: Programming siren function 9.2. Principal features of the menu From every menu title, you may enter into programming by pressing the start button: With this operation it is possible to select if, in the case of an alarm trigger, the siren must be active and start sounding. By repeatedly pressing the key it is possible to select the feature desired. Page 10 Unisat GPRS Video instruction manual Press the key: Unisat GPRS Video instruction manual To exit the siren programming mode press the key: Page 23 23.0. How to visualize the stored telephone numbers 1 2 3 4 Let the menu flow until it shows the following: ****** Programming the Keyfob transmitter 1st Menu Programming the Day sensors 2nd Menu Programming the Night sensors 3rd Menu Programming arming time 4th Menu Programming the remote outlets 5th Menu Programming temperature sensors 6th Menu Programming hardwire zones 7th Menu Programming message recording 8th Menu 24.0. Memorizing telephone numbers Programming listen of message 9th Menu Let the menu flow until the following text appears: Programming R.F. Sensor test 10th Menu Programming e-mail 11th Menu Programming SIM card parameters 12th Menu Programming end user code 13th Menu Programming visual number 14th Menu Programming number to be memorized 15th Menu Programming IR-CAM 3i 04 16th Menu Programming to send images 17th Menu Programming sirens Outdoor / indoor 18th Menu Programming IR-CAM 3i 04 (test) 19th Menu Programming visual numbers Press the key: Press repeatedly the key Enter the position of the number you wish to see on the display and it will then be possible to see the tel. number displayed. to visualize the tel. numbers present in the other positions. In position 7 you may see the password necessary for the SMS commands. To exit the telephone number menu press the following key: Programming telephone numbers Press the key: Repeatedly press the key Enter first the position in which you wish to memorize the tel. Number (1 to 6) and then enter the number to be memorized. to confirm or the key to cancel. The first three telephone numbers can be programmed in 3 modes: 0. Only SMS transmission 1. Only voice messages transmission 2. Both SMS and voice messages transmission On the top right of the display the number of the selected option will appear. To modify the setting, press the key: Page 22 To exit the telephone number programming menu press the key: F Unisat GPRS Video instruction manual Unisat GPRS Video instruction manual Page 11 10.0. Programming the keychain transmitter 21.0. Visualization of internet parameters Allow the menu titles to flow until the below message appears: Let the menu flow until the following message appears: Programming keychain transmitter Programming SIM card Press the key: Press the button: The display will indicate the number corresponding to the first free position. If, for example, in memory no keychain transmitters are present, you will see the number “1”. If in memory there is already 2 keychain transmitter memorized, then the number “3” will be seen. On the display you will see the end users name, the password and e-mail address of the SIM CARD inserted in the control panel. Press "Button 1" on the keychain transmitter for programming. The code will be automatically learned and memorized by the control panel. As a confirmation that the keychain transmitter has been memorized, you will see that the number on the display increased by “1”. For example: 1 will become 2. If the number on the display does not increase, it is an indication that the keychain transmitter has already been memorized. To exit the internet parameters mode press the key: F Repeat this operation for all keychain transmitter you wish to memorize (maximum 10). 22.0. To modify user I.D. By pressing the key “0”, you return to the previous position for example from 4 you will go to 3 and if you press again you will go from 3 to 2 and so on. If you return to a previous position the codes memorized are not cancelled, but it is possible to memorize in the position of the numbered shown a new keychain transmitter. If this is done the previous keychain transmitter will be cancelled. To exit the keychain transmitter programming mode, press the key: F Let the menu flow until the following text is shown: Programming end user code Press the key: After having entered the new user I.D., the display will request confirmation of the new end user I.D. Note: The factory programmed end user code is 1234. To exit the end user code menu press the key: Page 12 Unisat GPRS Video instruction manual Unisat GPRS Video instruction manual Page 21 19.0. Radio Frequency test of wireless sensors 11.0. Programming the "Day" sensors Let the menu flow until the below appears on the display: Let the menu titles flow on the display until the following is shown: Programming rf sensor test Programming Day sensors Press the key: The term "sensors" include: IR-32 VRP infrared sensor - MG-1P magnetic contact - MG-3P multi use transmitter - SM-2P smoke detector - GA-12/15VRP gas detector and the water alarm sensor WD-03. To trigger an alarm with the sensor to be tested. For each alarm triggered the control panel emits a beep and on the display is shown the zone in which the sensor is located. Repeat this operation for each sensor or keychain transmitter that must be tested. The Unisat GPRS Video can memorize up to 42 of the above sensors for both Day and Night application. By pressing the key “0” you will see the status of the hardwire zones: 1 = indicates zone triggered 0 = indicates zone not triggered Press the key: To exit the menu of R:F: test of keychain and sensors press the key: The display will indicate the first free number. If, for example, there are no sensors memorized, the number “01” will be seen. If in memory there are already 15 sensors memorized between Day and Night, then the number “16” will flash. 20.0. To visualize programmed e-mail addresses To make a programmed sensor become "delayed", before programming the sensor you must press the key on the right. On the lower right hand corner of the display the letter “R” will appear. Let the menu flow until the below message is shown: If the sensor must remain as "immediate", this operation must not be executed. Programming e-mail address Pressing the key on the display you may see the first e-mail programmed. • IR-32VRP Select the function “Test RF” and send out an alarm signal. This must be done with the tamper switch of the sensor closed. • • • • MG-1P/ MG-3P Press the bottom on the front cover of each sensor. SM-2P Press the transparent button on sensor cover. GA-12/15VRP Simulate an alarm trigger. WD-03 Simulate an alarm trigger by placing the bottom of the sensor in water. The codes of each sensor that triggers an alarm will be automatically learned and memorized by the control panel. To see the other 2 press the key: NOTE: When a new sensor is memorized the progressive number will increase. Maximum of 3 e-mail addresses may be memorized. To exit the e-mail address menu press the key: Page 20 F Unisat GPRS Video instruction manual If the progressive number does not increase, it is an indication that the code has already been memorized. Repeat this operation for all sensors that must be configured as “DAY” for a maximum of 42. After 42 have been memorized the display will start again with “01”. Unisat GPRS Video instruction manual Page 13 Press the “0” key to go back one number. For example, if the number shown is 4, you will return to 3 and so on. When you go backward one or more positions, the sensor previously memorized will be cancelled. 18.0. To listen to the recorded messages Let the menu flow until the below message is shown: Listen to voice messages Pressing the key: Press the key: You go forward with the zones. For example: if you are at 03, you will go to 04. This will continue up to 42 and then begin again from “01”. This allows the end user to program each sensor in a desired zone. Let the messages recorded flow as desired: To exit the “Day” programming of the sensors, press the key: F Press the key: The playback of the recorded message is activated. During the message playback the display will show the 10 second countdown. If for example, only 5 of the 10 seconds available have been utilized, it is suggested to re-record the voice message speaking more slowly. This will allow a better understanding of the message by the receiver. 12.0. Programming the "Night" sensors Let the menu flow until on the display appears: Press once again the key to listen to the recorded messages. Programming Night sensors To exit the message listen mode press the below key: At this point you must repeat the same operation executed to program the "DAY” sensors. To exit the "Night" programming of the sensors, press the key: Page 14 F Unisat GPRS Video instruction manual Unisat GPRS Video instruction manual Page 19 17.0. Recording voice alarm trigger messages 13.0. Programming entrance and exit time It is possible to record 3 different messages: • Burglary alarm message common to all wireless and hardwire zones. Allow the menu to flow until the following show on the display: • • Programming exit entrance time Fire - Water or Gas alarms (only 1 of the 3 may be used). Panic - Hold-up or Medical distress alarms (only 1 of the 3 may be used). Allow the menu to flow until the following appears: Pressing the key the display will indicate an entrance time of 15 seconds. Recording voice messages Pressing repeatedly the key it will be possible to select the times 15, 30 or 45 seconds. Press the key: Allow the different alarm messages to flow on the display: Press the key: F 14.0. Programming the wireless home automation outlets The microphone is activated to record the desired message. At this point you can record a message of 10 seconds. On the display you will see the 10 sec. count down. Be sure that there is no back ground noise where you are located. The microphone is very sensitive. You must speak slowly (loud and clear) and try to evenly divide the message with-in the 10 seconds available. Press once again the key To exit the time programming mode press the key: to re-record the message. Allow then menu to flow until on the display is shown: Programming remote outlets Pressing the key the display will indicate Channel 1 By repeatedly pressing the key it is possible to select between 9 wireless channels. To exit the voice recording mode press the key: Having the possibility of 9 different transmission channels, will help avoid that in a single building, 2 or more installations will interfere with each other. To exit the remote outlet programming mode press the key: Page 18 Unisat GPRS Video instruction manual Unisat GPRS Video instruction manual F Page 15 15.0. Programming temperature sensors 16.0. Programming the hardwire zones It is possible to program up to 4 temperature sensors with the Unisat GPRS Video control panel. These sensors will transmits to the control panel at regular intervals the temperature of the area in which it is installed. The Unisat will confront this temperature with that programmed and if the temperature is not with-in the established limits, the Unisat will activate the wireless outlet number 16. Let the menu flow until on the display appears: Example: If the Unisat has the temperature limits programmed (-2°) and (+5°), when the temperature goes to –2° the remote outlet no. 16 will automatically switch “ON” and when the temperature goes up to +5° the outlet automatically switches “OFF”. Programming hardwire zones Press the key: To configure the method of how each zone must function, press more times the key: Allow the menu to flow until the display shows: It will be possible to select one of the following configurations: Programming temperature sensors Press the key: The control panel is now in position to self learn the temperature sensors to be installed. The display will indicate the first free position. For example: If there are no sensors stored in memory, you will see “01” on the display. If in memory there are 2 sensors present, the number “03” will be seen and so on. Transmitting with the sensor to be programmed allows the Unisat GPRS Video to learn and memorize the code. As a confirmation that the control panel has learned the code, the display number will increase by “1”. For example from “01” it will go to “02” If the number does not increase, this is an indication that the sensor has already been programmed and present in memory. Repeat this sequence for every sensor to be programmed (maximum of 4 sensors). Press the key “0”, to return to the previous position, for example from 4 to 3. Pressing again “0”, from 3 you will go to 2 and so on. When you go backward 1 or more positions, the memorized code will not be cancelled, it is however possible to override a memorized sensor by memorizing a new sensor in the same position. By so doing the previous sensor memorized will be cancelled from the memory. • • • • • Zone “OFF” Zone "DAY" immediate Zone "DAY" delayed Zone "NIGHT" immediate Zone "NIGHT" delayed Repeat this operation for each zone letting the menu flow by pressing the key: The Zone 5 can be programmed as a 24 hours tamper zone. To exit the programming mode of the hardwire zones press the key: To exit the temperature sensor programming mode press the key: Page 16 Unisat GPRS Video instruction manual Unisat GPRS Video instruction manual Page 17