1
IMAGO ICN-x1P1 NW 2.8 (W) – Quick Installation Guide
Notice
•
•
•
•
•
•
•
•
•
•
•
•
•
•
•
•
•
The camera should be stored in a dry environment
Do not turn on the camera and do not work with voltage in a humid environment
Do not install cameras in a high humidity environment
Do not install your camera on unstable or vibrating surfaces or brackets
To remove the camera housing, use the included tools
Do not use excessive force during the installation – you might damage the device
If water gets into the camera, immediately disconnect it from the network and voltage supply
Do not touch the camera during a thunderstorm
Do not insert any objects in the camera
Do not perform any other mechanical modifications than those listed in this guide or user manual
Do not replace / adjust components on the printed circuit board and wiring of connectors
Do not use the camera with signs of damage or defects and/or with damaged cables
Do not repair your camera yourself; in case of failure, contact the supplier of your camera
Clean the camera with a cloth dampened with water - do not use chemicals, avoid abrasive materials when
cleaning; to clean lenses use a clean dry cloth designed specifically for cleaning lenses and photo equipment
Connect the camera using the UTP or STP cable category 5 or higher, with the RJ-45 connector
The manufacturer is not liable for damages that were caused by unusual or unforeseeable circumstances and
the force majeure
Do not throw the camera in the trash; after the end of life of the equipment it is necessary to dispose of the
product according to your applicable local law. Use the collection points for WEEE in your area, ensuring the
environmentally friendly disposal or return the product to a vendor of electrical equipment
The physical installation of the camera
•
•
•
•
•
•
•
•
•
•
•
2
The camera can be mounted on horizontal surfaces and vertical structures (ceilings, walls, etc.) Choose a
location to install the camera
Use a template to drill the mounting holes. When installing the camera on a brick structure, drill the wall plug
holes of ø 6 mm and insert the wall plugs into the holes.
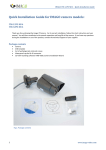
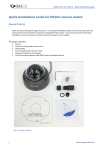
Dismantle the camera bracket into 3 parts by unscrewing the leg of the bracket from its base - see Fig. 2
Use the attached screws to fix the bracket base to the surface
Assemble the bracket and tighten it be screwing the leg of the bracket
Screw the camera to the leg of the bracket and secure it against turning by tightening the white plastic nut
toward the camera - see Fig. 3 and Fig. 4
On the leg of the bracket unscrew the 2-wing plastic nut, point the camera as desired and re-tighten the nut
No need to focus the camera as it has been focused by the manufacturer
Check the direction of the camera in a Web browser (see the next chapter) or adjust its direction - avoid the Sun
in the camera view
Connect the camera to a data switch using the UTP or STP cable with the RJ-45 end - the camera is powered via
PoE - Power over Ethernet according to IEEE 802.3af standard; for power only use elements that meet this
international standard
If you do not have Power over Ethernet available, you can use the power adapter with the 12VDC/1A output (not
included)
www.imago-video.com