1
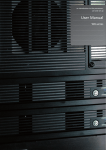
SDA-01A USER MANUAL
1. Attention before use
1).Only professional technicians are allowed to do maintainence of the transmitter
2).Please set anti-thunder protections during bad weather(thunder, storm.etc)
3). Please don’t turn on the transmitter without connecting the antenna well.
4).Please don’t use the transmitter in the explosive environment(gas station, steam, etc)
5).Pleae don’t use the transmitter in very damp/dusty/high temperature environment.
6). Please use the transmitter following the local wireless adminitration regulations.
2.
Menu
1) Features
2) Configurations
3) The picture of front and back panel
4) Knob and buttons description
5) Operation Steps
6) Technical Specification
7) Troubleshooting
8) PC control software description
3.Product Features
SDA-01A is a new advanced FM transmitter with excellent and stable performance, easy operation,
high definity sound quality and other outstanding features. It has exquisite design and professional
look.
Main Features:
1). Wide frequency range: 76~108MHZ
2). Optional Channels: STEREO/MONO
3). Count down Power ON/OFF function
4). Power output is adjustable from 0~1w.
5). One button to control all the functions. Easy to operate.
6). Adopting several protection methods, it has strong empty load protection ability.
7).PC control of the transmitter easily through the software SDA-01A PC CONTROL.
8). Working status lighting: When the transmitter is OFF, the backlight of the knob is red. When the
transmitter is working, the backlight of the knob is blue.
4. Product Configuration
No.
Name
Description
Quantity
Unit
Port
1
The transmitrer
SDA-01A
1
pcs
NO
2
Helical antenna
L/TNC connector
1
pcs
ANT
3
Power adapter
DC12V/1A
1
set
12.0V-1.0A
4
USB cable
USB male to male
1
pcs
PC Control
5
Audio cable 1
1to2 3.5mm to the
Lotus plug
1
pcs
LINE IN
6
Audio cable 2
3.5mm connector
male to male
1
pcs
7
Microphone
3.5mm connector,
Electret
1
set
8
Manual
Hardware
and
software manual
2
pcs
5. The Front and Back Panel of The Transmitter
1.Front Panel
2.Back Panel
NO
6.Knob Description
No.
1
2
Operation
Turn
Short press
Function
Description
Adjust
Shifting between the main page and parameter
adjusting pages, (clockwise direction means
increase, Counterclockwise means reduce)
Confirm
1、Enter/Exit the adjusting page
2、Restart the transmitter by short press the button
at standby status.
1、On the main page, press and hold the knob, the
transmitter will shift to standby status.
2、At standby status, press and hold the knob to
enter the setting page
3
Holding press
Confirm
4
Knob backlight
Showing
working status
1、 The light is red when standby
2、 The light is blue when working normally
7. Operation Steps
1) Main page display
After power on the transmitter, the screen will show the following:
2) Main page symbol explanation
NO
SYMBOL
NAME
DESCRIPTION
1
xxx.xMHz
Frequency
The current broadcasting frequency is
xxx.xMHz
Power Output
Level
The current power output is x x level
Line-in
Volume Level
The volume of line in is x x level.
3
Stereo
The audio channel is Stereo
4
Mono
The audio channel is Mono
2
5
xx
Remark: x stands for numerals
Remind: In the adjusting pages, if there is no action in 30seconds, the screen will
automatically goes back to main page.
3) Line-in Volume
When the screen is on main page(Piture-01), turn the knob between 00~
30 level to adjust the volume.
Picture-01
4) When the screen is on main page, press the knob to enter the parameter adjusting pages,
there are 6 pages in total. When the screen shows 【6 MENU EXIT】, press the knob to exit
and go back to main page.
5) Frequency adjusting【1 MENU FREQ】
At the page of【1 MENU FREQ】on the screen(Picture-02), press the knob to enter frequency
adjusting page (Picture-03). Turn the knob between 76M~108M to set the frequency, press the
knob to go back to the page of【1 MENU FREQ】.
Picture-02
Picture-003
6) Microphone Volume Adjust【2 MENU MIC】
At the page of【2 MENU MIC】(Picture-04),press the knob to adjust the microphone volume
between 00~30 levels(picture-05), press the knob to go back to【2 MENU MIC】after setting.
Picture-04
Picture-05
7). Scheduled Power ON/OFF【3 MENU APO】
a) At the page of【3 MENU APO】(Picture-06),press the knob to enter scheduled Power OFF
setting page,(picture-07), the time range is from 00:00:00~9:59:59(hour:minute:second).After
setting, press the knob to go back to 【3 MENU APO】page.
Picture-06
Picture-07
b) When the screen is showing OFF, it is in the standby status (piture-08), press and hold the
knob to enter scheduled power ON page, the setting range is 00:00:00~9:59:59(hour:minute:
second)
,after setting, press the knob to confirm. The transmitter will begin scheduling power ON.
Picture-08
Picture-09
8). Audio channel shifting【4 MENU ST OR MO】
At the page of【4 MENU ST OR MO】(picture-10), press the knob to enter MONO/STEREO
shifting page(picture-11, picture-12). Turn the knob to set the channel and press it to confirm and
go back to Menu page.
Picture-10
Picture-11
Picture-12
9). Power Output Adjusting【5 MENU POWER】
At the page of 【 5 MENU POWER 】 (Picture-13), press the knob to the power setting
page(picture-14), turn the knob between level 00-15 to set the power output and press to confirm,
then go back to the menu page.
Picture-13
Picture-14
10).Back to main page【6 MENU EXIT】
At the page of【6 MENU EXIT】(picture-15), press the knob to confirm and go back to main
page.
Picture-15
11). Power OFF/ON
a) At the main page, press and hold the knob to turn OFF the transmitter (picture-16).
Picture-16
b)When the transmitter is OFF, press the knob, the transmitter will return to previous working
status.
8. Technical Specification
No.
Item
Specification
1
Working Voltage
DC12V
2
Working Current
﹤0.5A
3
Frequency Range
76~108MHz
4
Frequency Stability
±10PPM
5
Frequency Stepping
100KHz
6
Environment Temperature
-10℃~50℃
7
Output Impedance
50Ω
8
RF power output
0W~1W
9
Harmonics, spurious
radiation
≤-50dB
10
Audio distortion
≤0.3%
11
Frequency Response
50Hz~15000Hz
12
Seperation
≥40 dB
13
Input level
≤-15 dBV
14
Frequency Modulation
±75KHZ
15
SNR
≥60 dB
16
Size
140 ㎜(L)*105 ㎜(W)*43 ㎜
(H)
(Excluding protrusions )
17
Weight
550g
9. Troubleshooting
No.
Problems
1
The transmitter can’t
be turned ON
1)The socket is not with electricity;
2)Power adapter is not plugged well;
3)Power adapter is not standard 12V1A。
2
Very short
transmitting range
1)Working environment is not good;
2)Power output is at small value;
3)The antenna is placed too low;
4)The frequency of transmitter doesn’t match
that of antenna;
5)The reception of receiver is not good.
3
No power output
1)The power output needs to be adjusted;
2)The transmitter is in OFF status.
4
Line-in with no sound
1)The line-in volume is at low value
2)The line-in signal is not normal;
3)The audio cable is not connected well.
5
Microphone with no
sound
1)The microphone is not working well;
2)The microphone volume is at low value;
3)The microphone is not Electret.
Audio quality is low
1)The microphone has low quality;
2) The audio cable has weak performance in
anti-jamming;
3)The audio input effect is not good;
4)The antenna is not well installed;
5)The volume of audio
input/transmitter/receiver is not adjusted
properly.
6
Possible Reasons
10. PC Control software
When the transmitter is working well, use the USB cable(male to male) to connect the
transmitter and computer. Run the execute file, the transmitter will be under control of the software.
Please go to relative website to download the software and corresponding manual.
Attention: Since the antenna will be directed plugged on the transmitter, it is very near to the
controlling computer, there might be interference to the computer and possibly cause non-function
of the software. Thus if this problem happens, please change to another computer with higher
configuration, or use other indoor antennas to keep away from the transmitter and computer.
SDA-01A Software Manual
1. Install, connect and run the software
1、 Save the following file folder to the computer.
2、 Connect the computer usb port with SDA-01A PC CONTROL port via the USB(male to
male) cable we provided, the computer will start connecting the transmitter.
Reminder: If the computer can’t find the transmitter, please install this USB driving
program:PC control USB Driver.
3、 Click the folder of SDA-01A PC Control Software, run the file of SDA-01A PC control,the
software interface will pop up, which means the connection is successful. Now you can control
the transmitter by the software on computer:
Reminder: When the software interface pops up,the connection between the SDA-01A and the
computer will be OFF, you can click the ON/OFF in the control bar to reconnect them.
2. Software Interface
Status indicating area
3. Software Operation Instruction
1、Indicators
(1)Frequency Adjusting
Drage the FREQ indicator between76M~108M to set the frequency, you can also
click the button
to adjust the frequency by more specific stepping.
(2)Power Adjusting
Drage the POWER indicator between00~15 grade to set the power output, you can also
click the button
to adjust the power output by more specific stepping.
(3)Audio Volume Adjusting
Drag the LINE indicator between 00~30 grade to set the audio volume, you can also click the
button
to adjust the audio volume by more specific stepping.
(4)Microphone Volume Adjusting
Drag the MIC button between 00~30 grade to set the microphone volume, you can also
click the button
to adjust the microphone volume by more specific stepping.
2、ON/OFF, Function key area
(1)
〖ON/OFF〗
Click〖ON/OFF〗,the transmitter will stop working. Click it again, it will restart running in the
parameters as before.
(2)〖ST/MONO〗
Click〖ST/MONO〗, the transmitter’s audio channel will be shift to STEREO/MONO.
(3)
〖Back Light〗
Click〖Back Light〗to turn ON/OFF the backlight on the screen.
(4)
〖LOCK/UNLOCK〗
Click〖LOCK/UNLOCK〗, all the function keys will be in the status of LOCK/UNLOCK(not
including the following keys:〖LOCK/UNLOCK〗
、
〖ON/OFF〗
、
〖Scheduled Task〗
、
〖DEVICEINFO〗)
(5)
〖Scheduled Task〗
Click〖Scheduled Task〗, you can set the time to schedule transmitter power ON/OFF.
Date setting
Time setting
ON/OFF setting
One-time
setting
Repeat
setting
(6)
〖DEVICEINFO〗
Click〖DEVICEINFO〗,you can see the device information like the serial number, this is an
important way to define a genuine product.
4. Troubleshooting
NO.
Problem description
Possible reason
1
NO connection between
transmitter and computer
1、The USB port of computer is not working well
2、USB driving program needs to be installed.
2
The connection between
transmitter and computer
can’t
work
normally
sometimes,
or
the
computer crashes down
1. The signal generated by antenna has affected the
computer, which has weak anti-jamming capability.
We suggest you use a better computer, or use other
antenna to keep away from the computer and
transmitter.
2. USB data cable is not well connected.