1
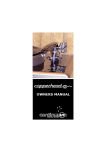
MANUAL
THE PUG TONEARM
Congratulations
on the purchase of your Roksan The Pug tonearm.
Your audio component is designed and manufactured to
the highest specifications and rigorously tested to offer
many years of reliable and high quality musical enjoyment.
Correct installation and operation of the product will have a
significant influence on the performance of your audio system and ensure many years of trouble-free listening.
ROKSAN THE PUG TONEARM
MANUAL
Instructions for Use and Installation
Thank you for purchasing the Roksan PUG tonearm. Please read these instructions thoroughly
and carefully and your PUG will reward you with many years of listening pleasure.
Warranty
Your pub tonight is guaranteed free for manufacturing defects for a period of two years from
the date of purchase. Please ensure that your product warranty is registered online. This warranty does not cover damage caused by the user through mishandling or misuse.
Contents
Inside the packing you will find the following:
1x PUG tonearm
1x baseplate (attached to arm in packing)
1x locking nut (attached to arm in packing)
1x Roksan high-definition arm cable
1x Counterweight (attached to arm in packing - for cartridges 5– 9.5 grams)
1x Subsidiary counterweight (for cartridges weighing > 9.5 grams)
1x Roksan alignment protractor
1x Allen key (for VTA adjustment screw on baseplate)
1x anti-skate weight
1x Roksan stylus balance
1x Roksan keyring
ROKSAN THE PUG TONEARM
MANUAL
Unpacking and Assembly
Carefully remove the PUG tonearm from its packing and check there are no signs of mishandling of damage. This is best achieved by carefully but firmly holding the end of the arm tube
(where the moulded recess sections are) with your left hand and taking an equally firm hold of
the counterweight and locking nut end of the arm assembly with your right hand (see image
below). Then lift securely from the moulded packaging. Your PUG tonearm comes ready assembled for simple and fuss-free fitting to your turntable’s Roksan arm board.
ROKSAN THE PUG TONEARM
MANUAL
Fitting the Cartridge
Next fit your desired cartridge. Please note for the best performance, the stylus should be
ideally centered below the small hole at the end of the headshell. We recommend to use good
quality 2.5 mm socket cap screws and nuts to mount the cartridge. Do not fully tighten the nuts
until cartridge alignment has been completed.
Carefully connect the cartridge tags as per the manufacturer‘s instructions. The
high-quality Cardas internal wiring of the PUG is colour-coded to make this process easier.
NOTE: Ensure you have the relevant counterweight for your cartridge weight attached to the
rear of the arm. The smaller weight is for cartridges weighing 5 grams - 9.5 grams and the larger
counterweight for those cartridges weighing greater than 9.5 grams (please refer to the manufacturer’s specifications for the relevant cartridge weight)
Positioning the Baseplate
The baseplate should now be fitted to the armboard of the turntable. The circular raised ridge
of the hexagonal locknut should face towards the underside of the armboard. Fit the baseplate
so that the arm pillar clamping screw hole faces the right hand side to facilitate easier adjustment of the arm height (see image below.
NOTE: Image is to demonstrate the correct position of clamping hole screw, the armboard is not yet fitted to the plinth in this example). Align the position of the baseplate relative
to the turntable spindle using the alignment protractor provided. Place the hole marked ‘0‘ over
the spindle and place the position ‘X‘ over the baseplate. Adjust the position of the baseplate
in the hole until the centre is aligned with point ‘W’. Tighten the lock nut using a 32 mm spanner
and ensure that the baseplate does not rotate by holding it firm with the Allen key inserted into
the socket capscrew.
ROKSAN THE PUG TONEARM
MANUAL
Positioning the Tonearm and Aligning the Cartridge
NOTE: The Roksan high-definition arm cable is connected to the arm by inserting the 5-pin
plug at the end of the cable into the socket located at the bottom of the vertical pillar.
Fit the PUG into the baseplate positioning the arm tube parallel to the right edge of
the turntable. Ensure the counterweight is fitted to the arm to prevent cartridge damage. To
adjust the tracking force ensure that the adjustable section of the counterweight is unscrewed
slightly so that it is not flush against the main section of the counterweight mechanism. To adjust the tracking force either turn the counterweight to the left or the right to either decrease or
increase the pressure.
Check the Manufacturers recommended tracking weight and place the weight on the
appropriate notch. When using the supplied Roksans stylus balance, remove the turntable mat
and place the stylus balance on the platter. Sent the tracking fource of the cartridge in accordance with the manufacturers instructions. The white section of the gauge should be flush with
the holder at the rear of the balance (see image below)
NOTE: Azimuth Adjustment
The Azimuth is initially set slightly to the outer side. If you wish to adjust there are 2 screws at
the base (see picture). The rear screw should be loosened lightly to allow movement, and the
inner screw is used to set the position. If cartridge is leaning inside, adjust azimuth to outside
and vice versa.
Adjusting the Arm Height (VTA)
Place the turntable mat and the flat record on the turntable platter. The parallel lines marked
on the alignment protractor provided should be used to ensure the arm tube is parallel to the
record surface. Use a pen to make a small indent in points C and D on the protractor with the
relevant counterweight fitted. Move the cartridge along the slots in the headshell - forward
or back - until the cartridge body aligns perfectly with the lines on the protractor. Tighten the
cartridge bolts to prevent the cartridge from moving.
The arm should be aligned so that when it is in the rest position be on tube is parallel
to the edge of the turntable. When you have achieved the correct position tighten the 4 mm
socket cap screw in the side of the base plate with the Allen key provided.
ROKSAN THE PUG TONEARM
MANUAL
Adjusting the Anti-skate Weight
Please refer to the table and image below to match the relevant cartridge tracking weight to the
correct antiquate position on the bar.
NOTE: A, B & C notches are the three notches positioned closest to the counterweight of the
PUG arm (as shown in image).
Tracking Weight
Position A-C
< 1.4 grams
no weight
1.4 - 1.7 grams
C
1.7 - 2.0 grams
B
> 2.0 grams
A
ROKSAN THE PUG TONEARM
MANUAL
C
B
A
Specifications / Technical Data
Effective length240 mm
Overhang17.5 mm
Headshell offset angle
22.9 degrees
Effective mass14 grams
Mounting hole diameter
23 mm (28 mm max.)
Armboard board thickness
19 mm nominal
Recommended cartridge weights
5 - 9.5 grams
Recommended tracking force
1.2 - 3.0 grams
roksan audio
limited
+44 (0)20 8900 6801
www.roksan.co.uk
Jubliee Close
Townsend Lane
London, NW9 8TR
United Kingdom
All specifications are liable to change without notice. E&OE