1
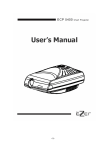
LUXVISION - LCP-2600
Please read and know this operating manual inside out, in prior to use of this equipment.
Table of Contents
Introduction
1
Package Contents
1
Classifications
Designated Symbols
.. 2
3
Safety Instructions
4
Instrument Components
6
Installation
. ,9
Focusing
..10
Operating Instructions
..11
Charts Description
...13
LUXVISION - LCP-2600
Maintenance
....16
Basic Trouble Shooting
. … 19
Transportation
. . . .19
Technical Specifications
..20
LUXVISION - LCP-2600
Introduction
Congratulations on your purchase of the LCP-2600 Auto Chart Projector.
In the area of subjective refraction, the LCP-2600 is best used for measuring visual
acuity.
It is fully recommended that you carefully read, understand and follow the
steps in this manual in order to ensure safe operation, optimum performance and a
longer service life from your new instrument.
Please retain this manual for future
reference.
Package Contents
LCP-2600 and accessories were carefully checked and packed prior to the shipment.
However, please check condition and contents upon delivery. In addition to LCP-2600,
this shipment includes:
1
metal Screen (400mm x 350mm)
1
Power Cord
LUXVISION - LCP-2600
1
Dust Cover
1
Remote Control
1
Pair polarized glasses
2
Spare fuses [1A, 250V]
2
AA-sized batteries
Classifications
[ Classification under the provision of 93/42/EEC(MDD)] ClassⅠ
LCP-2600 is classified into ClassⅠ system.
[Protection method against electric shock] ClassⅠ
LCP-2600 is Classified into ClassⅠ instrument.
ClassⅠ instrument in which protection against electric shock does not rely
on basic insulation only, but which includes an additional safety precaution
with the provision of the connection of the instrument to the protective
earth conductor in fixed wiring of the installation in such a way that any
accessible conductive parts cannot become live in the event of a failure
LUXVISION - LCP-2600
of the basic insulation.
[Degree of protection against ingress of liquids] IPX0
LCP-2600 is the ordinary instrument (enclosed instrument without
protection against ingress of liquids). Be careful not to splash water
on the instrument.
[Degree of protection against flammability]
LCP-2600 is classified as an equipment not suitable to be used in a
Potentially flammable anesthetic mixture with air or with oxygen
or nitrous oxide.
Do not use near flammable materials.
[Mode of operation]
Continuous operation
Designated Symbols
Symbol
Description
This symbol indicates a protective earth
LUXVISION - LCP-2600
This symbol indicates that important operating and maintenance
Instructions are included in this User’s Guide.
This symbol on the main switch indicates that the power is OFF.
This symbol on the main switch indicates that the power is ON.
Manufacturer
Date of Manufacturer
This symbol indicates a fuse.
Safety Instructions
LUXVISION - LCP-2600
At Operation
- Never disassemble or touch the inside of the instrument.
This may result in an electric shock or instrument malfunction.
-Never yank the power cord to disconnect from wall outlet but hold the plug while
disconnecting.
This can weaken the metal core of the cord and may result in a short circuit or
an electric shock.
At Storage
- Do not store the instrument in a place where it may get wet or where
poisonous gas or liquid is stored.
- Avoid storing the instrument in an area with excessive heat, humidity, or dust.
Recommended ranges:
Temperature range within
Relative humidity range within
Atmospheric pressure range within
-10℃ to +70℃
30% to 85%
500 to 1060hPa
At Installation
- Do not install the instrument near water.
If water gets into the internal structure, there is the possibility of electrical
Shock or instrument malfunction.
LUXVISION - LCP-2600
- Install the instrument in a stable and level place where vibration or
shock does not occur.
The instrument may not perform observation correctly or may malfunction.
Also, if the instrument is tripped over because of any accidental shock,
it may result in possible injury.
After Use
- If the instrument is not be used for a long time, disconnect the power cord from
the wall outlet.
Otherwise, it may cause a tire.
- Remove batteries from the battery case of the remote controller when
the remote controller will not be used for a long time.
At Disposal
- Follow local governing ordinances and recycling plans regarding disposal
or recycling of device components.
Check the specified disposing method for the specific waste in advance,
LUXVISION - LCP-2600
1. Upper Case
2. Projection Lens
3. Window for remote detection
4. Table stand
5.
Focusing Wheel
7.
Power Switch
6. Pilot Lamp
LUXVISION - LCP-2600
5.
8.
RS-232C Connector
10. Fuse Holders
9.
Power Connector
LUXVISION - LCP-2600
11
12
18
13
19
14
15
20
16
21
17
11. Inflated ray transmitter
12. Letters chart
17. Vertical, horizontal line, single
Letter Masking
13. Number chart
18. Children chart
14. Snellen chart
19. Vectograph chart
15. Program
20. Red/Green Test
16. Lamp ON/OFF
21. Direction
LUXVISION - LCP-2600
INSTALLATION
The LCP-2600 should be installed according to the following procedures:
1. If using a wall mount, it is best to locate a wall stud to support the weight of
instrument.
2. Determine the refracting distance (form the patient’s eye to the screen) and
install the projection screen.
3. Position the instrument at the same distance from the screen to the patient
within the range between 2m and 7m.
To obtain longer refracting distances in
small rooms, a mirror or systems of mirrors can be used. In this case, a high
quality front surface mirror is required.
LUXVISION - LCP-2600
4. Check the three-dimensional alignment of the system.
The instrument is
optimized when the projection screen is angled to direct light to the patient’s
head.
Place a mirror on the screen.
patient’s head would be.
The light should project where the
LUXVISION - LCP-2600
FOCUSING
To obtain the correct focus:
1. Measure the distance from the patient to the screen (refracting distance).
2. Turn the Auto Chart Projector on, and using the remote control, project the 0.05
“K” onto the screen.
3. If using a wall mount, it is best to locate a wall stud to support the weight of
instrument.
4. Adjust the position of the instrument forward or backward for sizing.
5. Adjust for sharpness and clarity by turning the focusing wheel left or right as
needed.
LUXVISION - LCP-2600
OPERATING INSTRUCTIONS
1. Turn on the power switch of the instrument.
The projection lamp lights and the chart for 0.05 vision shall be viewed in 3
seconds.
2. Changing the chart
Press the appropriate chart button on the remote controller.
The charts have 31 selections.
3. Isolating the visual acuity chart
■ To use Vertical line masking:
Press
☞ To move the position right or left
Press
or
☞ To move the position up or down
Press
or
■ To use Horizontal line masking:
Press
☞ To move the position right or left
Press
or
☞ To move the position up or down
Press
or
■ To use Single letter masking:
Press
☞ To move the position right or left
Press
or
LUXVISION - LCP-2600
☞ To move the position up or down
Press
or
■ To use Red/Green filter:
Press
■ To release masking and filter:
Press any chart button
4. Programmed operation
■ To install Program “A”
1)
2)
Make sure press the button of “LAMP” to turn off the lamp.
Keep pressing the left button to be heard buzzer
sound 4 times. Then, start the mode of program A.
3) Press one of the chart buttons to memorize.
4)
And then, press the right button and heard buzzer sound
1 time to memorize the selected chart.
5) Repeat the process ③, ④to memorize the selection you want.
6)
Press the left button and heard buzzer sound 3 times to
complete the installation of Program A.
■ To install Program “B”
1)
2)
Make sure press the button of “LAMP” to turn off the lamp.
Keep pressing the right button to be heard buzzer
sound 4 times. Then, start the mode of program B.
3) Press one of the chart buttons to memorize.
LUXVISION - LCP-2600
4)
And then, press the right button and heard buzzer sound
1 time to memorize the selected chart.
5) Repeat the process ③, ④to memorize the selection you want.
6)
Press the left button and heard buzzer sound 3 times to
complete the installation of Program B.
■ Programmed Operation
1)
Turn on LCP-2600, press the button of “RESET” to select the
program A or B.
2)
After operate the program, change the chart by the button of
‘PROGRAM’. (Left : move to previous chart / Right : move to next chart)
CHARTS DESCRIPTION
A-TYPE
letters
Duochrome Balance
Cross Cylinder Dots
LUXVISION - LCP-2600
Snellen
Number
Children
Red / Green
Astigmatism Clock Dial
Worth For Dot
Phoria
Fixation
Phoria with Fixation
Schober
Coincidence
Cross Grid
Minute Stereo
Binocular Balance
LUXVISION - LCP-2600
B-TYPE
letters
Snellen
Children
Binocular Balance
Duochrome Balance
Cross Cylinder Dots
Landolt
Number
Red / Green
Astigmatism Clock Dial
Worth For Dot
Phoria with Fixation
Fixation
Coincidence
LUXVISION - LCP-2600
Schober
Minute Stereo
Cross Grid
C-TYPE
letters
Horizontal Line
Snellen
Red / Green
Cross Cylinder Dots
Worth For Dot
Astigmatism Clock Dial
Fixation
Phoria
LUXVISION - LCP-2600
Schober
Phoria with Fixation
Cross Grid
Coincidence Vertical
Children
Binocular Balance
Minute Stereo
Children
Vertical Line
Number
MAINTENANCE
Risk of electric shock. Always disconnect the power cord from the wall and
the instrument prior to performing any of the following procedures.
■ Maintenance
There is no periodic or routine user maintenance required.
LUXVISION - LCP-2600
■ Cleaning
There are no cleaning requirements other than regular office housekeeping, such
as dusting.
☞ Cleaning the main body
< Projection Lens >
1) Blow dusts with a blower brush.
2) If it is not clean enough, wipe with lens cleaning paper.
< Cover and Screen >
1) Wipe with a dry and soft cloth.
2) If for some reason the instrument becomes soiled, wipe it with the damp
lint-free cloth and mild detergent. Then, wipe off with a dry cloth to finish.
■ Disassembling the upper case
1) Turn off the power and pull out the power cord.
2) Unfasten the screw in counterclockwise at the back side of case
3) Disassemble the Upper Case by lifting it.
4) In case of reassembling, place the Upper case on the main body and
adjust the front position. Then, fasten the screw in clockwise.
■ Replacement of lamp
LUXVISION - LCP-2600
The lamp may be HOT!
Do not touch the Lamp directly and allow the
sufficient amount of time to cool down the heat.
1) Unfasten the screw at the Lamp Cover.
2) Disassemble the Lamp Cover by lifting it and pull out the Lamp.
3) Place the new Lamp at the hole of Lamp Holder.
4) Turn on the power switch.
5) Place the white paper in front of the projection lens in order to project the
filament image of lamp.
LUXVISION - LCP-2600
6) Adjust the filament image at the center of paper with the screw at the lamp
plate.
(Note : Do not look into the lamp directly)
7) Place the Lamp Cover and fasten the screw.
8) Turn off the power switch.
■ Replacement of Fuses
1) Turn off the power switch and disconnect the power cord.
2) Push and turn the fuse holder a quarter counterclockwise with your finger
and remove it.
3) Pull out the fuse from the fuse holder and check the condition.
4) Replace the fuse with the provided spare or equivalent as specified below.
VOLTAGE
FUSE
100V ~ 240V
1A 250V ; T1AL
5) Simply return it with the fuse holder to the socket. Push and turn it a
LUXVISION - LCP-2600
quarter clockwise to lock.
Basic Trouble Shooting
Note : Risk of electric shock. Always disconnect the power cord from the wall and
the instrument prior to performing any of the following procedures.
■ If the instrument does not function at all:
1) Check the facility power source. (Circuit Breakers)
2) Check the electrical connections. (Power Cord)
3) Check the main fuse located on the rear of the unit.
■ If the projector lamp does not light:
1) Check the main On/Off Switch.
2) Replace the lamp with the spare lamp.
The lamp may be HOT!
Do not touch the Lamp directly
the sufficient amount of time to cool down the heat.
■ If the projector turns on but does not function:
1) Check the batteries in the remote control.
Transportation
and
allow
LUXVISION - LCP-2600
■ Make sure the instrument is disconnected from the power source.
■ If the instrument was installed on a custom mount, please remove the unit from the
mount.
■ Pack the instrument in a sturdy carton with suitable packing materials.
■ After packing, do not hurl and impact cause of breakable goods.
- Do not use this machine near by other machines or electric bulb (ex. Halogen lamp),
it will improperly operate on the effect of electronic waves.
Technical Specifications
Chart
Chart selection speed
31 Selections
Average 0.3 sec.
1 open
Mask
3 horizontal lines
3 vertical lines
Filter
Red/Green
Projection distance
2.0m~7.0m (3m is standard)
Projection magnification
30 x (at 5m)
Projection size
φ252mm and 330mm(W) x 225mm(H) (at 5m)
Tilt angle
Ball joint (±10 degree)
Lamp
6V 20W(Halogen)
Power source
AC 100~240V 50/60Hz
Power consumption
80VA
Auto-Off function
5~10minutes after
LUXVISION - LCP-2600
Dimensions
Net weight
Main body
: 265(H) x 230(W) x 360(D)mm
Remote controller : 20(H) x 64(W) x 195(D)mm
Main body : 6.0Kg
Remote controller : 180g
1 dust cover
Accessories
1 metal screen (400mm x 350mm),
1 Pair of
polarizing spectacles
2 spare fuses
wall bracket
Optional accessories
floor stand
red/green glasses
8-pin connector for simultaneous control
Interface
of chart, mask and R/G filter by a
motorized refractor's control unit.