1
Installation and configuration guide
Installation Business
& Configuration
guide
Analyze 4.0
Business Analyze 4
2002-2011 Business Analyze AS, all rights reserved.
Page 1 of 86
© Business Analyze. All rights reserved.
Business Analyze grants you the right to use the software and make one backup copy. All other
copying is prohibited. It is prohibited to reproduce, adapt or translate documentation without
written permission produced by Business Analyze granting you that right. Any rights granted to you
by your civil statues or national jurisdictions are unaffected.
Microsoft, Microsoft Office, Microsoft Internet Information Server, SQL Server and Windows are
registered Trademarks of Microsoft Corporation. Oracle is a registered Trademark of Oracle
Corporation.
Idea: Business Analyze AS.
Documentation: Business Analyze AS.
Internet: www.businessanalyze.com
2002-2011 Business Analyze AS, all rights reserved.
Page 2 of 86
Innhold
INNHOLD............................................................................................................ 3
PREREQUISITES / REQUIREMENTS .................................................................... 6
SERVER - OPERATING SYSTEM REQUIREMENTS ................................................................ 6
Installation in Windows 2003 Server environment ................................................ 8
Installation in Windows 2008 Server environment .............................................. 10
CLIENT - REQUIREMENTS ........................................................................................ 13
Browsers ...................................................................................................... 13
DATABASE – MICROSOFT SQL SERVER ....................................................................... 14
COMMON PREPARATION FOR ALL OPERATING SYSTEM – MS NET FRAMEWORK............................ 15
QUICK CHECKLIST BEFORE INSTALLATION ...................................................... 17
CHECK LIST ........................................................................................................ 17
Installing the software .................................................................................... 18
Requirements for running the setup wizard ....................................................... 18
UPGRADE SCENARIO .............................................................................................. 18
SETUP STEP THROUGH - INSERTING THE CD/START SCREEN ............................................... 19
Installation warnings ...................................................................................... 19
First page in the installation process ................................................................ 20
Select installation folder ................................................................................. 20
Running the installation .................................................................................. 21
Server Validation ........................................................................................... 21
Installing old reports packages (Reports) .......................................................... 22
Setting virtual directory .................................................................................. 22
Connect to the database server ....................................................................... 23
Installing the Business Analyze system database and cache database .................. 23
Database login .............................................................................................. 24
E-mail server settings .................................................................................... 24
Language settings ......................................................................................... 25
Licenses ....................................................................................................... 25
Installing the files .......................................................................................... 25
Optional – Old Report Packages Configuration ................................................... 25
Data source for the licensed editions ................................................................ 26
SETUP TIPS & TRICKS ...................................................................................... 28
IMPORTING LICENSES ............................................................................................ 28
Assigning licenses to users.............................................................................. 29
THE BUSINESS ANALYZE USER IMPORT UTILITY .............................................................. 29
Import type – SuperOffice .............................................................................. 30
Importtype – Advanced .................................................................................. 33
CONTROLLING SESSION TIMEOUT .............................................................................. 35
Edit web.config .............................................................................................. 35
IIS Settings .................................................................................................. 35
SELECTING AN IIS AUTHENTICATION METHOD ................................................................ 36
Standard authentication (default) .................................................................... 36
Windows authentication .................................................................................. 36
Access on Common and Chartfiles folders ......................................................... 37
RECOMMENDED SETTINGS IN MICROSOFT INTERNET EXPLORER ............................................ 41
Turn off Caching ............................................................................................ 41
Delete temporary files on browser close ........................................................... 41
BUSINESS ANALYZE SUPEROFFICE EDITION .................................................................. 42
Verify the table owner property (for licensed editions) ........................................ 42
2002-2011 Business Analyze AS, all rights reserved.
Page 3 of 86
How to make the Business Analyze Budget module work on Windows 2003 Server
(SuperOffice Edition) ...................................................................................... 43
Currencies: what needs to be done in the SO admin client? ................................ 44
BUSINESS ANALYZE INTERNAL DATABASE CONNECTION .................................................... 45
UNINSTALL ...................................................................................................... 45
MANUAL UNINSTALL .............................................................................................. 45
Remove virtual directory ................................................................................ 45
Delete application files ................................................................................... 46
Delete database and database login ................................................................. 46
Remove objects in the Business Analyze database ............................................. 46
Remove objects in the SuperOffice database ..................................................... 46
Removing objects in ERP database ................................................................... 46
BUSINESS ANALYZE DISTRIBUTION ENGINE ................................................... 48
GENERAL ........................................................................................................... 48
CONFIGURATION .................................................................................................. 48
Single Sign On .............................................................................................. 48
IIS changes .................................................................................................. 48
Windows user................................................................................................ 49
Business Analyze user .................................................................................... 49
Configure Distribution Engine Service ............................................................... 50
Start the service ............................................................................................ 52
Create distributions........................................................................................ 52
BUSINESS ANALYZE SELF MANAGEMENT MODULE ............................................................ 53
Requirements ................................................................................................ 53
Important setup tasks .................................................................................... 53
Edit web.config .............................................................................................. 53
Known configuration pitfalls ............................................................................ 53
BUSINESS ANALYZE SCORECARDS SERVICE ..................................................... 54
GENERAL ........................................................................................................... 54
CONFIGURATION .................................................................................................. 54
BUSINESS ANALYZE SALES BELL AND ACTIVITY BELL ...................................... 56
GENERAL ........................................................................................................... 56
REQUIREMENTS ................................................................................................... 56
Client ........................................................................................................... 56
Server .......................................................................................................... 56
Predefined Sales Bell for SuperOffice CRM ........................................................ 56
Licences ....................................................................................................... 57
INSTALLATION ..................................................................................................... 57
CONFIGURATION .................................................................................................. 57
Customized configuration for a customer .......................................................... 57
Customization of sound (MP3) ......................................................................... 58
Customization of dataset(query) for left and right list ......................................... 58
Configuration of Sales Bell in Business Analyze grid / tab.................................... 59
Setup Sales Bell by using the “Active Desktop” .................................................. 61
DEVELOPMENT ..................................................................................................... 62
SuperOffice CRM customization ....................................................................... 62
CURRENTLY NOT SUPPORTED .................................................................................... 63
BUSINESS ANALYZE DATA COLLECTOR ............................................................. 64
GENERAL ........................................................................................................... 64
CONFIGURATION .................................................................................................. 64
HARDWARE RECOMMENDATION ....................................................................... 65
2002-2011 Business Analyze AS, all rights reserved.
Page 4 of 86
WEB SERVER ...................................................................................................... 65
DATABASE SERVER................................................................................................ 65
WEB SERVER & DATABASE SERVER RUNNING ON SAME COMPUTER ......................................... 65
APPENDIX A: FRAMEWORK CONFIGURATION .................................................. 67
APPENDIX B: SCORECARDS CONFIGURATION .................................................. 70
CONFIGURATION OF PRE AGGREGATION FUNCTIONS ......................................................... 70
Background .................................................................................................. 70
Configuration of SQL Server job for SQL Server 2005 ......................................... 70
SCORECARDS SERVICE CONFIGURATION ...................................................................... 73
APPENDIX C: DATA COLLECTOR CONFIGURATION ........................................... 75
CONFIGURATION APPLICATION .................................................................................. 75
IIS Webserver Instance .................................................................................. 75
IIS Virtual Directory ....................................................................................... 75
CONFIGURATION FILE – WEB.CONFIG .......................................................................... 75
APPENDIX D: DISTRIBUTION ENGINE SERVICE CONFIGURATION ................... 77
CONFIGURATION KEYS ........................................................................................... 77
APPENDIX E: CURRENCY ISSUES IN SUPEROFFICE .......................................... 81
GENERAL ........................................................................................................... 81
REQUIREMENTS ................................................................................................... 81
THE USER MAPPING REPORT ..................................................................................... 83
APPENDIX F: SYSTEM SETTINGS ...................................................................... 84
ANALYSIS .......................................................................................................... 84
INPUT MODULE .................................................................................................... 85
REPORTS ........................................................................................................... 86
SCORECARD ....................................................................................................... 86
SYSTEM ............................................................................................................ 87
SUPEROFFICE EDITION .......................................................................................... 88
APPENDIX G: INSTALLATION AND CONFIGURATION BA KAM .......................... 92
POST INSTALL TASKS IF INSTALLED WITH SETUP.............................................................. 92
MANUAL INSTALLATION .......................................................................................... 93
IM Configuration ............................................................................................ 94
Database scripts ............................................................................................ 94
SRDF files ..................................................................................................... 94
Customer License .......................................................................................... 94
Configuration of dashboard / SO Admin Client ................................................... 94
APPENDIX H: OLD COMPONENTS NEED FOR 2.X FUNCTIONALITY .................... 95
MDAC ............................................................................................................. 95
MICROSOFT DIRECTX ............................................................................................ 95
MICROSOFT OFFICE XP WEB COMPONENTS .................................................................. 97
2002-2011 Business Analyze AS, all rights reserved.
Page 5 of 86
Note! There is a new version of our installation guide online. This document has some obsolete
information but can be used if you need to install and configure modules and packages prior to
Business Analyze version 4.0.
See online install guide at our community website.
Prerequisites / Requirements
In order to successfully install and run Business Analyze there are several
prerequisites/requirements that will have to be met. The requirements are listed in this section.
Server - Operating System Requirements
The minimum OS requirement for the Business Analyze 4.0 Framework is Windows 2003 Server or
newer.
Business Analyze 4.0 has been tested on the following operating systems:
HOW
TO
Microsoft Windows Server 2003
Microsoft Windows Server 2003 R2
Microsoft Windows Server 2008
Microsoft Windows Server 2008 R2
On the web server: Start the file browser and right click My Computer. Select Properties.
The text under System should reveal the OS version.
2002-2011 Business Analyze AS, all rights reserved.
Page 6 of 86
2002-2011 Business Analyze AS, all rights reserved.
Page 7 of 86
Installation in Windows 2003 Server environment
Before you go on and install the software in a Windows 2003 Server you need to install the Internet
Information Services if it is not installed.
HOW
TO
CHECK
Before installing Business Analyze, please ensure that the Internet Information Service (IIS)
is installed and running by performing the two steps below:
1. Click Start -> Settings -> Control Panel -> Administrative Tools -> Services (or click
Start -> Run, type “services.msc” and press Enter). This will bring up a list of the
services installed on your computer. Look for a service named World Wide Web
Publishing Service near the bottom of the list. If this item exists in the list, the
Internet Information Service (IIS) service is installed.
2. Check to see if the Internet Information Server (IIS) service is started. If the status
column does not indicate that the service is started, right click on the service in
Service Manager, and select Start. Alternatively, you can start the service from a
command window or from Start -> Run by typing “net start w3svc”.
HOW
TO
ENABLE
IIS
If you need to install it following these steps:
Click Start -> Settings -> Control Panel -> Add or Remove Programs -> Add/Remove
Windows Components
2002-2011 Business Analyze AS, all rights reserved.
Page 8 of 86
Check the “Application Server” and click on the details and check also “ASP.NET”:
Before you can continue with the setup you need to install the Microsoft .Net Framework 4.0 if not
installed.
HOW
TO
CHECK
Check if the Microsoft .Net Framework 4.0 is installed:
1. Click Start -> Settings -> Control Panel -> Add or Remove Programs -> Add/Remove
Windows Components
For information about how to install the .Net framework. See the section “Common
preparation for all operating system”.
2002-2011 Business Analyze AS, all rights reserved.
Page 9 of 86
Installation in Windows 2008 Server environment
Before you go on and install the software in a Windows 2008 Server you need to install the
Application Server and Web Server (IIS) if it is not installed.
You can obtain this from:
Start -> Control Panel -> Administrative Tools -> Server Manager
HOW
TO
INSTALL
How to install the Application Server and Web Server (IIS):
Click Start -> Control Panel -> Administrative Tools -> Server Manager -> Add Roles
2002-2011 Business Analyze AS, all rights reserved.
Page 10 of 86
Click Add Required Features:
Check the “ASP.NET” under the Application Development below Web Server:
Add Required Role Services:
2002-2011 Business Analyze AS, all rights reserved.
Page 11 of 86
Activate the authentication models in Web Server (IIS):
2002-2011 Business Analyze AS, all rights reserved.
Page 12 of 86
Client - Requirements
Browsers
Business Analyze have been tested on the following browser versions:
Google Chrome 8.0 (Recommended!)
Mozilla Firefox 3.6
Microsoft Internet Explorer 8.0 / 9.0
Opera 10.x/11.x
Safari 5.0
If you are using Microsoft Internet Explorer we recommend using Windows Update
(http://windowsupdate.microsoft.com) to update your system to the latest version. Internet
Explorer 6.0/7.0 is not supported any more.
HOW
TO
On the client: Start Microsoft Internet Explorer. Go to Help -> About Internet Explorer. See
the dialog that appears:
2002-2011 Business Analyze AS, all rights reserved.
Page 13 of 86
Database – Microsoft SQL Server
The Business Analyze Framework database requires Microsoft SQL Server 2005 or later. The
Microsoft SQL Server 2005 instance you install onto must be running in Mixed mode, Windows and
SQL Server authentication mode. During the installation of the Business Analyze a separate login may
be created. This login is used by the application to access the system database.
NOTE
The Business Analyze will not run on a Microsoft SQL Server instance running in Windows
authentication only mode.
TIP
Before running the Business Analyze installation make sure you have the username and
password of the System Administrator user (SA user), or a user with similar administrative
rights on your Microsoft SQL Server instance. You will be asked to provide credentials
during the installation.
It is always a good idea to update your database software with the latest available patches or service
packs. They can be downloaded from Microsoft at http://msdn.microsoft.com/sql/
HOW
TO
Connect to the database server with a SQL client tool and execute the command below:
Business Analyze setup will create all databases and logins needed for the application to run.
When you configure logins in Data Central you should be aware of problems regarding “Default login
language”.
2002-2011 Business Analyze AS, all rights reserved.
Page 14 of 86
Login should have “Default language” set to English to prevent errors in querying the database. This
is because Data Central uses in some scenario date functions in the database.
Example for Ms SQL Server 2008 – login properties:
Common preparation for all operating system – Ms Net Framework
The Business Analyze application is based on the Microsoft.NET Framework 4.0.
Setup will check if this is installed in the server computer. If not, you can download it from here
http://go.microsoft.com/fwlink/?LinkID=186913 .
If you have not installed the .Net 4.0 framework this dialog will appear when you start the setup.
2002-2011 Business Analyze AS, all rights reserved.
Page 15 of 86
If you installed the .Net framework before you installed the Internet Information Services then you
need to activate the ASP.NET.
HOW
TO
Click Start -> Run -> cmd.exe -> cd "C:\WINDOWS\Microsoft.NET\Framework\v4.0.30319"
-> aspnet_regiis.exe -i
2002-2011 Business Analyze AS, all rights reserved.
Page 16 of 86
Quick Checklist before installation
Check list
Gather information required for the installation:
License files
Component licenses
(Business Analyze Framework and Business Analyze
Analysis are required for licensed editions)
Optional:
.lic file for licensed editions. This is for older version 3.x
packages using the Reports module.
Logins
Logins to the database(s) with full administrative rights. The
setup procedure needs to create databases, logins, tables,
other objects. If any of the required privileges are absent
the installation will be corrupted, incomplete and is likely to
fail.
Connection data for external data
bases (CRM or ERP)
Server name/IP address
Name of instance
Name of database
Login with admin-rights / password
Schema/object owner
SQL Server version
OS version
Does the server comply with hardware requirements for
Business Analyze?
Connection data for Business
Analyze database
Server name/IP address
Name of instance
Name of database
Login with admin-rights / password
Schema/object owner
SQL Server version
OS version
Does the server comply with hardware requirements for
Business Analyze?
Web-server
Windows login with administrator rights
Server name/IP address
OS version
2002-2011 Business Analyze AS, all rights reserved.
Page 17 of 86
Security policy
Is any other production software installed on the server
– which?
Is Microsoft Sharepoint installed in same server? Check
issue with support.
Has the server been rebooted since last patches from
Microsoft?
Does the server have any other roles or is it a dedicated
web-server?
Does the server comply with hardware requirements for
Business Analyze?
Single sign-on is recommended.
Installing the software
Requirements for running the setup wizard
The following services must be installed, configured and running on the server before the setup can
function:
Coordinated transaction service
World Wide Web Publishing service
Remote Procedure Call (RPC)
Security Accounts Manager
It is of vital importance, that the security context that these services run under, are set up correctly
according to the security policy of the system. If these settings deviate from the default settings it
may cause the web-server to fail and/or behave in a strange manner and Business Analyze may not
work and/or be possible to install.
The windows user that you use for running the setup should be a local administrator or a domain
administrator.
Please verify that this is OK before proceeding.
Upgrade scenario
When upgrading from v 3.x or later you should first make a backup (copy), then you can uninstall
and start a new installation.
When upgrading from a version prior to 2.6 you will need assistance from a Business Analyze
certified consultant.
If you’re going to upgrade you must install to the same path as the earlier version was installed to
else you need to move the files that is left back when uninstalled.
2002-2011 Business Analyze AS, all rights reserved.
Page 18 of 86
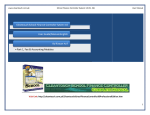
Setup step through - Inserting the CD/start screen
When you insert the Business Analyze CD a splash screen should automatically open. On some
systems the auto play feature may be turned off. If it does not open automatically, open Windows
Explorer and double-click the file setup_x86.hta from the root of the installation CD.
Click “Business Analyze Dashboard and Analysis” to start installing the Business Analyze application.
Before starting the installation, ensure that your Windows user context have sufficient permissions
to install software on the target system.
Installation warnings
When you start the installation a popup dialog in Internet Explorer may occur. This is a warning that
you are starting active content from within Internet
Explorer.
The reason is that the start screen is implemented as a
HTML application.
You will get the question if you want to run or save the file.
Select “Run” to start the installation.
You may also get a warning saying that the publisher of the
software is unknown.
Select “Run”.
2002-2011 Business Analyze AS, all rights reserved.
Page 19 of 86
First page in the installation process
The first page you see in the installation is a
standard welcome page.
Press “Next”.
Select installation folder
Enter the path to the folder where you want the
Business Analyze application to be installed, or
click the Browse button to select the folder of
your choice.
Click Next to continue.
The Business Analyze application files will now be
copied to the selected directory.
Confirm the installation
Click “Next”.
2002-2011 Business Analyze AS, all rights reserved.
Page 20 of 86
Read the installation notes
Before you go on, carefully read the latest
installation notes. This document contains
important information that you must understand
in order to have a successful installation
experience.
Click “Next” when you have read the
installation notes.
Running the installation
Wait while the setup program installs the
application.
This may take a few minutes.
Server Validation
Before going on with configuration the
application we need to validate that the server is
correct installed.
We validate if the Application Server is ok. Web
Server (IIS) is installed. .Net Framework installed
and activated in Web Server.
On IIS 7.0 we also validate if authentication is
activated.
Click “Validate” and follow the guidelines. If all is ok Click “Next”.
If validation failed then you can check if all is installed correct according to the prerequisites section
and add missed components. Click on “Validate” again.
2002-2011 Business Analyze AS, all rights reserved.
Page 21 of 86
Installing old reports packages (Reports)
If you want to install an old reports package, you
must provide a license file by check the checkbox
and clicking on the “Browse”-button and select the
file. In most cases, the name of the license file
ends with .lic. When the file is selected;
Click continue.
If you do not want to provide a license file for this
installation, press “Next”.
Packages based on the new Analysis platform do
not use this option. This is only for compatibility with older version of Business Analyze.
Setting virtual directory
Select a website and a virtual directory. This is the
address to the Business Analyze application.
The list IIS Web server Instance contains the
existing websites on your server.
Choose the preferred website.
You can also select which application pool you
want the virtual server to be created in. Default
Business Analyze creates its own application pool
during the setup.
Choose the preferred Application Pool.
The list IIS Virtual Directory contains the existing virtual directories on the server instance you
selected previously. Select one of the existing virtual directories to re-use it for this installation.
If you wish to create a new virtual directory for this installation, type the desired name.
Choose or create the virtual directory
Click Next.
TIP
If you set the virtual directory name to businessanalyze, the URL used when accessing the
Business Analyze application will be:
http://<specified website>/businessanalyze
2002-2011 Business Analyze AS, all rights reserved.
Page 22 of 86
Connect to the database server
This dialog sets up a connection to the server
that will be hosting the Business Analyze
database. This must be a Microsoft SQL
Server. See own section which describes the
requirements for SQL Server.
Expand the SQL Server list to see the existing
servers on your local network. If the server
you desire isn’t in the list, simply type the
name or IP-address.
Select or type the server name
Select Authentication method, and provide credentials if required.
Click “Next”.
TIP
Verify that the connection works by clicking the Test Connection button.
Installing the Business Analyze system database and cache database
The database you specify in this dialog will be the system database for the Business Analyze
application.
If this is a new installation select “Install to a new database”.
Type the desired name for the system
database.
Type the desired name for the cache
database.
Click “Next”
The system database will be created and
populated with initial values.
If you want to upgrade an existing database,
select “Upgrade an existing database”. Select
the existing Business Analyze system database from the dropdown list.
You can also select an existing database to use for cache.
Click “Next” and the Business Analyze database and tables will be upgraded to the latest version.
Please be patient, database installation may take several minutes.
2002-2011 Business Analyze AS, all rights reserved.
Page 23 of 86
Database login
The Business Analyze application needs to
connect to the database you just installed. A
SQL Server login will be needed for this purpose,
you can use an existing database login, or create
a new. This login will be used by the Business
Analyze application when reading, writing or
updating data in its internal system database
and cache database.
To use an existing login, select the login name
from the Username dropdown list, and type the
password for this login in the Password field.
Click “Next” to check the credentials and use this login.
To create a new login, enter the username in the Username field, enter the desired password in the
Password field. Confirm the password by entering it again in the Confirm password field. Click
Continue and the database login will be created on your database server.
E-mail server settings
This dialog allows the user to specify connection
settings used by the Business Analyze system for
sending e-mails.
Enter the host name or IP address to your
mail server.
If your mail server requires you to connect to
a specific port, enter it in the “Optional Port”
field.
If your mail server requires authentication, check
the “Use authentication” checkbox and enter the credentials.
Click Continue.
TIP
To test the e-mail configuration, type a valid e-mail address in the E-mail recipient field,
and click Test connection.
2002-2011 Business Analyze AS, all rights reserved.
Page 24 of 86
Language settings
This dialog enables you to configure the language
settings.
Select the default language for the user
interface in the top box.
Select the active languages for this installation
in the Select active languages list.
Click Next
Licenses
Click the Add button and select your license
files.
Click Next
Installing the files
A dialog will show the installation process.
Installation finished!
Access the application from the Start Menu -> Business
Analyze -> Business Analyze
Optional – Old Report Packages Configuration
2002-2011 Business Analyze AS, all rights reserved.
Page 25 of 86
Data source for the licensed editions
Select an edition (report group)
Click Configure to go to the data source dialog.
NOTE
If two or more report groups use the same data source, only create it once. Attempting to
create duplicate data sources will cause an exception.
Select or enter the SQL Server containing the
database you want to connect to.
Choose an authentication method and enter
credentials if required.
Select the source database from the list.
Enter the credentials that Business Analyze will
use when connecting to this data source.
If the login exists it will be used. Otherwise it will be
created.
Note! Remember that Sql Server 2005/2008 and
newer usually have certain requirements for the
password used when creating new logins.
For Sql Server 2005:
1) The password does not contain all or part of the account name of the user. Part of an account
name is defined as three or more consecutive alphanumeric characters delimited on both ends by
white space such as space, tab, and return, or any of the following characters: comma (,), period (.),
hyphen (-), underscore (_), or number sign (#).
2) The password is at least eight characters long.
3) The password contains characters from three of the following four categories:
* Latin uppercase letters (A through Z)
* Latin lowercase letters (a through z)
2002-2011 Business Analyze AS, all rights reserved.
Page 26 of 86
* Base 10 digits (0 through 9)
* Non-alphanumeric characters such as: exclamation point (!), dollar sign ($), number sign (#), or
percent (%).
Complete article:
http://msdn.microsoft.com/en-us/library/ms161959.aspx
TIP
Test the data source by clicking the Test Connection button. This will only work for logins
that already exist on the server.
Click Next
This will bring you back to the previous dialog.
Once the data source is configured the row is
marked with a green background color.
Click Next
Now you need to add platform licenses. Go to licence section for more information.
SuperOffice Edition and ERP Edition requires licenses for Business Analyze Reports and Business
Analyze Framework
2002-2011 Business Analyze AS, all rights reserved.
Page 27 of 86
SETUP tips & tricks
Importing licenses
To import licenses manually, click Start -> Business Analyze -> Import License. This will start the
Business Analyze License Import Utility.
Alternatively, type the following address in Internet Explorer:
http://localhost/<virtualdir>/licimport.aspx
Where <virtualdir> is the name you gave the Business Analyze virtual directory during the
installation.
Use baadmin as username and bauser as password when logging on the first time. On the first
login, you must set a new password. Choose a strong password for the baadmin (Business Analyze
Administrator) account.
Two steps are performed for each of the component licenses shipped with the product:
1) Select a license file.
Click the Browse button and browse to find the Business Analyze license file that was shipped with
your product or received by e-mail. Each of the license files contains a two-letter prefix which
identifies the module it belongs to. In order to make your solution run you will have to minimum
import the Framework license file prefixed with fw_.
Click Upload to upload the license file to the server.
2) Confirmation.
When the license import utility has successfully updated the Business Analyze database with the
uploaded license data, a confirmation screen will appear on the screen. This screen shows
information about the license, including the name of the licensed component, name of the license
holder, and license version. Click Import License to import the more licenses.
NOTE
You need a license for every Business Analyze component you wish to use.
2002-2011 Business Analyze AS, all rights reserved.
Page 28 of 86
Assigning licenses to users
When you have registered your users, one of the administrative tasks to do is to assign component
licenses to the users. This way you can control who gets access to the different components.
Start the Business Analyze application: Click Start -> All Programs -> Business Analyze -> Business
Analyze.
Log on with an administrator account (baadmin is the built-in administrator account).
Once logged on, click the
icon in the top-right corner of the screen – this will take you to the
System Administration module.
On the left side of the screen is the System Administration Menu.
Click Licenses and Component. From this window you can control which users have access to a
component. Select the component you wish to administrate licenses for and click Get licensees.
Two lists will appear: one containing Users and one containing Licensees. A licensee is a user that is
assigned a license to the chosen component. Assign a new license to a user by selecting the user
from the Users list, then click the -> button to move it to the Licensees list, and click Register. You
can assign multiple users at the same time.
Repeat the steps mentioned above for each of the Business Analyze components/modules.
NOTE
All users must at least be granted a license to the Business Analyze Framework module.
Before you can assign license to a user, a user must be created.
The Business Analyze User Import utility
The Business Analyze User Import utility allows the user to import users from a third-party
application into the Business Analyze database. The utility supports two modes, SuperOffice and
Advanced. The first, SuperOffice, allows the user to import users from SuperOffice, and the second,
Advanced, allows the user to import users using a view or a table that resides in the Business Analyze
database.
2002-2011 Business Analyze AS, all rights reserved.
Page 29 of 86
Import type – SuperOffice
In order to make the SuperOffice import type operate, you will have to set up a database connection
to the SuperOffice database and the Business Analyze database.
1. Click the Set Connectionstring button next to the SuperOffice text field. (The text field
displays a prototype of the connection string being used when connecting to the data
source.) This will display the Data Link Properties dialog
which allows you to specify the type of data you wish to
connect to. Select Microsoft Ole DB Provider for SQL Server
If you are connecting to a Microsoft SQL Server 2000
database server or SQL Native Client if you are connecting
to a Microsoft SQL Server 2005 database server.
On the second page of the Data Link Properties dialog, select the
name or IP-address of the server you wish to connect to – that
being the one hosting the SuperOffice database.
NOTE: If you choose the Use a specific user name and password
authentication option, make sure the Allow saving password
checkbox is checked.
Select the SuperOffice database, click Test Connection to verify
that you are able to connect to the specified datasource and then click OK.
If the group doesn’t exist, you will be prompted if you want the group to be created.
2002-2011 Business Analyze AS, all rights reserved.
Page 30 of 86
If you run out of licenses during the import, some users
will not be granted necessary licenses and you will have
to perform this task manually later.
2. Click the Set Connectionstring button next to the
Business Analyze textfield in order to configure
the connection being used when connecting to
the Business Analyze database. Repeat the steps
described earlier, but now select the server
hosting the Business Analyze database and
specify the credentials used to connect to this
database. (This will be the Business Analyze login
you created during the setup.)
3. Under the Business Analyze Options optionsgroup, select the desktop that will be assigned to
the imported users and the locale that will be the default locale/language that will be set for
all the imported users.
Optional: If you are using Windows authentication the imported users’ username will have
to be prefixed with the domainname. Type in the name of your domain in the Domain name
textfield.
4. In the SuperOffice Options optionsgroup, specify the Tableowner and the Groups to import.
The Tableowner textfield is being automatically populated with the table-/objectowner for
the specified SuperOffice database.
The Groups to import list is populated with the SuperOffice groups. Choose which groups to
import users from by selecting one or more groups.
5. Click Import in order to start the user import. During this session you will be asked if you
want to create the groups that you
have chosen to import in the Business
Analyze database. We suggest you say
Yes to this. Creating the similar groups
in the Business Analyze database
means that it is easier to recognized
the function for each user.
6. When the import routine has finished,
a summary will displayed with data for
each user imported, the number of
users imported etc. The same
information will also be available in the
System Log under the Business Analyze Administration and in a separate logfile. The logfile is
2002-2011 Business Analyze AS, all rights reserved.
Page 31 of 86
located in the application’s directory under the Logs folder and named with the current date
and time, e.g.: 20060608_1333.log.
2002-2011 Business Analyze AS, all rights reserved.
Page 32 of 86
Importtype – Advanced
The Advanced import type allows the user to import users from a 3rd party application using a table
or a view that resides in the Business Analyze database. If you choose to use the provided table
FW_USERIMPORT, the table needs to be populated with values from the 3rd party application before
running the Business Analyze User Import utility.
Note: When importing users using the Advanced import method, the data is verified against a
schema based on the specifications on the following page. This is done to avoid corrupted data.
2002-2011 Business Analyze AS, all rights reserved.
Page 33 of 86
For greater flexibility you may want to create a view instead based on the following specifications:
Column
id
username
fullname
email
groupname
Type
PK, INT, NOT NULL
NVARCHAR(80), NOT NULL
NVARCHAR(255), NOT NULL
NVARCHAR(255), NOT NULL
NVARCHAR(80), NOT NULL
locale
NVARCHAR(10), NOT NULL
orgunit
INT, NULL
ud1
ud2
ud3
active
NVARCHAR(255), NULL
NVARCHAR(255), NULL
NVARCHAR(255), NULL
INT, NOT NULL
Description
Primary Key column
User-/login name for the user
User’s full name
User’s e-mail address
Name of the user’s primary group. If it does not exist in
Business Analyze, you will be asked if you want it to be
created during the import.
User’s locale according to the installed locale in Business
Analyze
The ID of the Organizational Unit the user should be related
to. Only relevant if you plan to use your users with Business
Analyze Scorecards.
Userdefined field 1, used to apply additional data.
Userdefined field 2, used to apply additional data.
Userdefined field 3, used to apply additional data.
Used to specify whether the user should be activated
immediately or not.
1 = User is active
0 = User is inactive
1. Establish a connection to the Business Analyze database by clicking the Set Connectionstring
button next to the Business Analyze textfield. This will display the Data Link Properties
dialog. (See the Importtype – SuperOffice chapter on how to use this dialog.)
2. Once the connection is established, the Available tables/views list will be populated with
available tables and views in the Business Analyze database. Choose the table/view you wish
to import users from by selecting an element from the list.
3. In the Business Analyze Options options group, select the desktop that will serve as the
default desktop for the users being imported and the default locale that will be set for each
of the imported users.
Optional: If you are using Windows authentication the imported users’ username will have
to be prefixed with the domain name. Type the name of your domain in the Domain name
text field.
4. Click the Continue >> button to continue with the import. This will display and activate a new
tab Data that will give you a preview of the data being imported.
Note: Since this is a preview only some of the users to import will be displayed.
5. Click Import to import the users to the Business Analyze database.
6. When the import routine has finished, a summary will displayed with data for each user
imported, the number of users imported etc. The same information will also be available in
the System Log under the Business Analyze Administration and in a separate logfile. The
logfile is located in the application’s directory under the Logs folder and named with the
current date and time, e.g.: 20060608_1333.log.
2002-2011 Business Analyze AS, all rights reserved.
Page 34 of 86
Controlling Session Timeout
How to control session timeout is described in detail below.
Edit web.config
To select this method edit the required lines in the web.config as shown below:
Locate the line starting with <sessionState … timeout="20" … />
Change the timeout setting to best suit your needs. The unit for the setting is minutes of inactivity.
The three dots on the same line represent other settings and are not relevant in this setting.
IIS Settings
The Budget, module included in SuperOffice Edition 3, is
not affected by the settings in web.config. Alter the
settings in the IIS management application to change its
timeout. Go to Administrative tools -> Internet
Information Services -> Right click the web-site or virtual
directory and select Properties -> Click the Configuration
button -> Select the Options tab.
2002-2011 Business Analyze AS, all rights reserved.
Page 35 of 86
Selecting an IIS authentication method
Standard authentication (default)
This method is default when you install the product. The user must always enter his username and
password in order to gain access. The session timeout setting controls the duration of inactivity
before you need to reenter your username and password.
Edit web.config
To select this method edit the required lines in the web.config as shown below:
<add key="fw_singlesignon" value="false"/>
<authentication mode="Forms">
This file is case sensitive so it’s important the settings are exactly as shown.
Edit IIS settings
Enable anonymous access as shown.
Windows authentication
It’s important to realize that the user must be authenticated in a windows domain and have a
corresponding user name in Business Analyze. Create your own user and grant yourself
administrative privileges before enabling this authentication method.
Edit web.config
To select this method edit the required lines in the web.config as shown below:
<add key="fw_singlesignon" value="true"/>
<authentication mode="Windows">
This file is case-sensitive so it’s important the settings are exactly as shown.
2002-2011 Business Analyze AS, all rights reserved.
Page 36 of 86
Access on Common and Chartfiles folders
If you experience problems with charts not being rendered correctly in your reports on the
dashboard or in the distributions you are sending out, there are probably something wrong with the
access rights on some folders in the virtual directory.
Please make sure anonymous access is enabled on the following directories in IIS:
/virtualpath/common
/virtualpath/chartfiles
2002-2011 Business Analyze AS, all rights reserved.
Page 37 of 86
You should also check the NTFS file access too.
Give full access for Everyone to the ChartFiles folder:
Give full access for Everyone to the Common folder:
2002-2011 Business Analyze AS, all rights reserved.
Page 38 of 86
Set session timeout in IIS
You may also need to alter this setting in IIS. See below:
Go to IIS and navigate to the virtual directory for Business Analyze
Right-click and select Properties
Click the Configuration button
Select the Options tab.
Enter the number of minutes you desire in the Session
Timeout setting.
NOTE
If the web server is low on memory the situation will become worse if you increase this
setting.
2002-2011 Business Analyze AS, all rights reserved.
Page 39 of 86
Edit IIS settings
Go to IIS and navigate to the virtual directory for Business
Analyze
Right click and select Properties
Select Directory Security tab
Click the Edit button under Anonymous access and
directory control section
Enable Integrated Windows authentication and disable
Anonymous access.
NOTE
When doing this, do not apply changes to the common and charfiles directories. They
must still allow anonymous access. You should verify that they do before continuing.
Edit Microsoft Internet Explorer settings
Go to the Tools menu and select Internet Options
Select the Advanced Tab
Check the Enable Integrated Windows Authentication
option.
Enabling this setting is required for windows
authentication to work.
2002-2011 Business Analyze AS, all rights reserved.
Page 40 of 86
Recommended settings in Microsoft Internet Explorer
Turn off Caching
Go to the Tools menu -> Internet Options
Select the General Tab
Press the Settings button (the dialog below is displayed)
These settings will prevent undesirable caching in the browser. These
settings will also prevent the accumulation of files in your local file
system.
For Microsoft Internet Explorer 7 the minimum amount of cache is 8
MB.
Delete temporary files on browser close
Go to the Tools menu -> Internet Options
Select the Advanced Tab
Enabling this setting will improve the performance of the local file
system.
2002-2011 Business Analyze AS, all rights reserved.
Page 41 of 86
Business Analyze SuperOffice Edition
Verify the table owner property (for licensed editions)
When installing Business Analyze SuperOffice Edition, the tableowner in the SuperOffice database is
usually “crm5”. If this is not your table owner, you may have to change it. On the System
Administration menu navigate to System Data Source. Select the desired data source and enter
the proper owner.
NOTE
No reports or other components using the data source will function properly until this
property is correct.
2002-2011 Business Analyze AS, all rights reserved.
Page 42 of 86
How to make the Business Analyze Budget module work on Windows 2003 Server
(SuperOffice Edition)
1) Open up the Internet Information Services window (found under Administrative tools from
the start menu, or by clicking Start -> Run and typing: inetmgr)
2) Select Web Service Extensions in the left menu.
3) Select Active Server Pages and click the Allow button.
2002-2011 Business Analyze AS, all rights reserved.
Page 43 of 86
Currencies: what needs to be done in the SO admin client?
1. Disable any currencies that you won’t be using
2. Set the preferred order in which you want them to appear
3. Verify that the rate and unit settings are correct for the active currencies
Setting the order and activating / deactivating the currencies
Start the SuperOffice admin client and press the Lists button and double currencies. It should look
something like the screen shot below. Make the adjustments necessary and press the Save button.
Use the arrows to set he
order in which the
currencies shall appear.
Note: Please verify the rates of the currencies that are active are close to the actual rate of the
currency.
Double-click each active currency to verify that the currencies
have sensible settings for Rate and Unit. Example:
SQL Quick fix to deactivate rare currencies:
update crm5.currency
set deleted=1
where name not in ('NOK','SEK','DKK','USD','EUR','GBP')
2002-2011 Business Analyze AS, all rights reserved.
Page 44 of 86
Business Analyze Internal Database Connection
During the installation a data source and login named Business Analyze INTERNAL was created in the
Connection Manager (learn more on this from the Business Analyze User manual). The login and
data source are used by Statistical reports in system administration and the Scorecard module.
If you want to move the Business Analyze system database to another server, change the name of
the database, or alter login credentials, this data source and/or login must be updated.
NOTE
If the Business Analyze system database is moved or authentication is altered, you must
update the connection string in web.config as well.
Uninstall
Uninstalling Business Analyze is a two-step procedure. The first step is automatic and the second
step is manual.
Manual uninstall
The manual part of the uninstall procedure removes the IIS virtual directory, the Business Analyze
database and (optionally) the database login.
Perform the steps in the following order:
1. The automatic part removes all the application and configuration files from the server. Use
the Add/Remove Programs applet in the Microsoft Windows® Control Panel to remove the
program automatically
2. Remove the virtual directory created under IIS
3. Delete the application files
4. Delete database and database login for the Business Analyze application.
Remove virtual directory
To remove the virtual directory created under IIS, do the following:
Start the Internet Information Server Management Console by clicking
Start -> Settings -> Control Panel ->Administrative Tools -> Internet Services Manager.
Browse to the correct virtual folder under Default Web Site, Right-click and choose Delete.
2002-2011 Business Analyze AS, all rights reserved.
Page 45 of 86
Delete application files
NOTE: you only need to do this step if you did not perform the automatic uninstall procedure in
section 4.1.
Click Start -> Settings -> Control Panel -> Add/Remove Programs
Browse through the list and locate Business Analyze click Remove, this will remove the application
files from your computer.
Delete database and database login
In order to delete the Business Analyze database and database login, start Microsoft SQL Server
Enterprise Manager (Microsoft SQL Server 2000) or Microsoft SQL Server Management Studio
(Microsoft SQL Server 2005).
Choose the correct SQL server and browse to the Business Analyze database.
Right-click and choose Delete from the appearing menu, this will delete the database.
How to
To delete the database login, from the context-menu of the previously selected SQL
server, click Security -> Logins. Right-click on the login you want to delete and choose
Delete from the appearing menu. NOTE: only do this if you created a new login during
installation of Business Analyze. If you delete a login that is used by other applications, it
will cause the affected applications to fail.
Remove objects in the Business Analyze database
Visit Business Analyze Online Services to download a SQL script that will remove installed Business
Analyze object from the database:
http://services.businessanalyze.com/baservices/repository/SQL/uninstall_BA_objects.txt
Remove objects in the SuperOffice database
Several objects are created in the SuperOffice database. Object types include tables, views,
procedures and functions. However they can easily be identified by their names:
Objects installed with SuperOffice Editions are all prefixed with ba_
Objects installed with Input module are all prefixed with ba_im
Objects installed with KAM module are all prefixed with ba_kam
Removing objects in ERP database
Several objects are created in the database. Object types include tables, views, procedures and
functions. However they can easily be identified by their names:
2002-2011 Business Analyze AS, all rights reserved.
Page 46 of 86
Objects installed with ERP Edition are all prefixed with BAERP_
2002-2011 Business Analyze AS, all rights reserved.
Page 47 of 86
Business Analyze Distribution Engine
General
The Business Analyze Distribution Engine Service must be installed on the same server as Business
Analyze web application. Therefore technical requirements are the same. The Distribution Engine
send out reports from the old Report module.
Configuration
The BA.DistributionEngine.Service.Exe.config file controls the behavior of the Business Analyze
Distribution Engine Service. The settings in this file are read by the service when it starts. Any
changes to the file will not be made effective until the service is restarted. The file is a regular XML
file and may be edited with a simple text editor like notepad or any XML editor.
Once the service has been installed and configured it is ready to run. By default the service is set to
be started manually. If you plan to use the features of the Business Analyze Distribution Engine
module, configure the service to start automatically. This will start the service automatically if the
server, for some reason, is rebooted.
To use Business Analyze Distribution Engine you need to do the following steps:
Single Sign On
Set Business Analyze to run in Single Sign On mode (windows authentication). See Windows
authentication (page 36).
IIS changes
In IIS you must turn on Integrated Windows
authentication and Basic Authentication.
Important! Do not apply these settings to the
common and chart files directories. They still
need anonymous access enabled. Please verify
that they do before continuing.
Basic Authentication should only be turned on for
the Reports folder.
2002-2011 Business Analyze AS, all rights reserved.
Page 48 of 86
Windows user
Create a windows user (or use an existing one) that will be used by the Distribution Engine Service to
access the Business Analyze application. This can be one dedicated user in the domain or a local user
if the Business Analyze server is not in a domain.
Business Analyze user
After the user is added to the Windows domain / local computer, a corresponding user in Business
Analyze must be created.
2002-2011 Business Analyze AS, all rights reserved.
Page 49 of 86
Configure Distribution Engine Service
Then you can run the configuration utility for the Distribution Engine Service. This application is
found in the folder you installed the service.
Business Analyze info
Click “BA path” to select the path to the Business Analyze virtual directory.
Click “BA ConnectionString” to select the path to the Business Analyze database.
In the text field, enter the full URL to your Business Analyze virtual directory.
Important! This must be the exact URL, so use computer name or IP address (i.e.
http://myserver/businessanalyze).
BA user for downloading reports
The distribution engine needs a user that has access to read the Business Analyze reports. This
windows user must also be a user in the Business Analyze application. Business Analyze must also
run in single sing on mode (see Windows authentication page 36)
Distribution engine properties
Preferred language: This is the language the reports will use when sent out to the resipients.
Debug mode: Check this if you want the Distribution to work in debug mode. In this mode the
distributions will only be sent to the debug mail address.
Forced run mode: Check this if you want to force the Distribution Engine to run all active
distributions when the windows service is started/restarted, regardless of what start date and time
2002-2011 Business Analyze AS, all rights reserved.
Page 50 of 86
of day that are set on the distribution. When all distributions are sent, the service stop sending until
the service is restarted.
Run interval: Seconds between each run.
Agent mode
Click the checkbox to turn the agent mode on or off.
If agent mode is on, the date period the reports use is set to 1.1 in the current year and the end date
is set to the current date (date of the first execution). The next time the distribution is run, the date
period from each definition (users own settings) is used to generate the reports.
Use First offset and Last offset to set the start and end date of the 1st e-mail.
Distribution Message Settings
From e-mail address: This is the e-mail address the messages will appear to come from.
Send all e-mails to a BCC address: If this is set, all e-mails sent will also be sent to this address.
Use distribution/definitions owners e-mail address: Check this if you want the sender of the e-mails
to be the owner of the distribution/definitions, and not the global one set above.
Mail format: Select which format the e-mail shall use. Plain text messages will not contain images,
formatted text and links.
Mail subject mode: Select whether the e-mail subject field shall display the distributions name or
the text entered in the mail subject field below, or a combination of both.
Mail subject: This message will be the subject all e-mails.
Enable use of banner: Check this if you want to use image banners in the distributions.
Enable use of template: Check this if you want to use another than the standard template for you emails.
Enable unsubscribe support: Check this if you want the recipients to be able to unsubscribe to the
messages sent out by the distribution engine.
URL to the unsubscribe server: URL to the Business Analyze Data collector application.
Enable use of recipients private:
True – the from address displayed is the e-mail to the person added the recipient.
False – the from address displayed is the e-mail to owner of the distribution (system
administrator)
Rendering
Set default layout: Select which Business Analyze layout the reports shall use to format the e-mail
(color of text, tables etc). You might want to use the same layout as you do in your Business Analyze
application.
2002-2011 Business Analyze AS, all rights reserved.
Page 51 of 86
Mail gateway settings
Enter the name of your e-mail host. If you want to or have to use a specific user, you can also fill out
the optional fields. To test the connection, enter an e-mail in the text field and click the button.
Logging
Select a windows directory you want the Distribution engine to store all logged files.
Click Verify and save and save and exit the application.
See Appendix D: Distribution Engine Service Configuration for more details about the keys in the
configuration file.
Start the service
Now you can start the BA Distribution Engine Service.
Create distributions
Now you can log on to Business Analyze and create distributions.
Tips
If you want to test the distributions you have created, set the Distribution Engine Service
to run in Debug mode and Forced run mode. Apply your e-mail as Debug mail.
(Use the configuration utility show in step 5 to achieve this).
Whenever you restart the BA Distribution Engine Service, all active distributions will be ran
and sent to, and only to, the debug mail address.
Turn off Debug mode and Forced run mode and restart the service to set it back to
normal mode.
2002-2011 Business Analyze AS, all rights reserved.
Page 52 of 86
Business Analyze Self Management module
Business Analyze Self Management is an automatic reporting tool for collecting verbal commenting
of existing reports. For example by this tool you can automatically send out a set of sales reports to
your sales team and ask them to report status for each of these reports.
Requirements
1) Business Analyze Distribution Engine Service must be installed and configured.
2) You need a user license with access to framework and reports licenses.
3) All users that are to receive reports for comments need a user license.
4) You need a license for the Self Management module.
Important setup tasks
You need to set up the distribution engine as specified in the section for installation the Distribution
Engine.
To ensure the users get access to the commented reports it is important to be aware of:
URL to BA web should not be typed with localhost. Here you should use a FULL URL accessible from
other computers.
Example:
http://MYSERVER/businessanalyze
MYSERVER = full public dns address if it should be accessible from Internet or only the name of the
server if it should only be accessible within your network. You can also use IP-address.
It is important to change the path in Business Analyze web application to
Edit web.config
Edit the required lines in the web.config as shown below:
<add key="fw_vfullroot" value="http://MYSERVER/businessanalyze"/>
Known configuration pitfalls
Access to the chartfiles and common folders is wrong. This result in charts not being rendered in
reports sent out to the recipients, nor will they be rendered when the reports are displayed in
Business Analyze. See the IIS section above on how to set this correct.
2002-2011 Business Analyze AS, all rights reserved.
Page 53 of 86
Business Analyze Scorecards Service
General
The Business Analyze Scorecards Service may be installed on any server that has access to the
Business Analyze database.
Software requirements:
- Windows 2003 Server or newer.
- Microsoft .NET Framework v3.5 with SP1
- Ole Db driver for the databases it is expected to communicate with (MDAC 2.8 or later is
recommended).
Configuration
The BA.Scorecards.Service.Exe.config file controls the behavior of the Business Analyze Scorecards
Service. The settings in this file are read by service when it starts. Any changes made to the file will
not be made effective until service is restarted. The file is a regular XML file and may be edited with
a simple text editor like notepad or any XML editor.
(See
2002-2011 Business Analyze AS, all rights reserved.
Page 54 of 86
Appendix B: Scorecards configuration for more details)
NOTE
Any errors or problems detected by the Business Analyze Scorecards Service will be written
to the Business Analyze systemlog. The log is available in the System Administration.
TIP
The connectionstring key must be set to point to the Business Analyze database. Copy the
fw_connectionstring key from the web.config file in the Business Analyze application
folder.
2002-2011 Business Analyze AS, all rights reserved.
Page 55 of 86
Business Analyze Sales bell and Activity bell
General
Business Analyze Sales Bell is an activator to motivate sales person to sell more. It visualizes the
ongoing sales activities and replaces the manual sales bell in the organization. By setting this up on
big screens or every locale computer all can get noticed about what’s happening in sales. The bell
can also display activities such as booked meetings.
Requirements
Client
Browser: Internet Explorer 6.0 or better/Mozilla/Opera/Safari with Adobe Flash player support (This
is automatically installed if connected to the Internet).
Server
Business Analyze 3.0 Hotfix 6 or Business Analyze 3.5 or higher
Also see the requirements for Business Analyze application.
Predefined Sales Bell for SuperOffice CRM
This is included in Business Analyze Hotfix 6 and is the default startup bell.
It requires Microsoft SQL Server 2000 or better.
2002-2011 Business Analyze AS, all rights reserved.
Page 56 of 86
If other database than SuperOffice CRM is used, Business Analyze need to customize the queries.
Sales Bell could also be customized to work with other databases / software’s. See the development
chapter for more information.
Licences
1) You will need licenses to Business Analyze Framework for all users that should have access
to the bell.
2) A license for Business Analyze Sales Bell server.
Installation
Install Business Analyze 3.0 Hotfix 6 by following the installation guide.
1. Add licenses.
2. Configure the data source for CRM_SO.
After the installation you will get access to the Sales Bell by the following URL on the server:
http://localhost/businessanalyze/common/flash/salesclock.aspx
Access from other clients:
http://SERVER/BAPATH/common/flash/salesclock.aspx
Where SERVER is your server address (name or IP) and where BAPATH is the virtual directory for
Business Analyze (default is businessanalyze).
Configuration
The default Sales Bell configuration file is placed in the following directory:
C:\Program Files\Business Analyze\vdir\Common\XML\flash\salesclock.xml
Customized configuration for a customer
To change settings in the configuration file, best practice is to copy this to the custom folder of the
BA-application. This folder is not upgraded when new versions is installed. Place the copy here:
Example:
%bapath%\custom\salesclock\ newsalesclock.xml
%bapth% - replace with your path. Normal C:\Program Files\Business Analyze\vdir
The new URL for using this configuration is:
http://localhost/businessanalyze/common/flash/salesclock.aspx?xmlfile=newsalesclock.xml
2002-2011 Business Analyze AS, all rights reserved.
Page 57 of 86
Customization of sound (MP3)
It is possible to change the sound for the bell. If you want it to play a melody or some other sort of
sounds. You can copy the selected MP3 file into the custom folder.
Example:
%bapath%\custom\salesclock\ FILENAME.mp3
%bapath% - replace with your path. Normal C:\Program Files\Business Analyze\vdir
FILENAME – your new sound file.
The new URL for using this configuration is with melody.mp3:
http://localhost/businessanalyze/common/flash/salesclock.aspx?xmlfile=newsalesclock.xml&soundf
ile=melody.mp3
Customization of dataset(query) for left and right list
It is possible to rewrite the query or add new query section in the file.
Example of customized file:
Startup parameters for this customized file is:
Parameter name
Cleft
Value
Id from the clockleft section from the
XML file.
Description
Examples:
Newsales
Newsalestoday
plannedsales
Cright
Id from the clockright section from the
XML file.
Examples:
Example:
Example:
-
Xmlfile
Filename from custom folder.
soundfile
Filename from custom folder.
Topsales
Topmonthsales
topyearsales
newsalesclock.xml
melody.mp3
2002-2011 Business Analyze AS, all rights reserved.
Page 58 of 86
Example of custom xmlfile, sound and query section:
http://localhost/businessanalyze/common/flash/salesclock.aspx?cleft=newsalestoday&cright=topm
onthsales&xmlfile=newsalesclock.xml&soundfile=melody.mp3
Configuration of Sales Bell in Business Analyze grid / tab
Adding the Sales Bell to a grid
When you create the Sales Bell or Activity Bell grid then it is possible to reuse the grid on several
tabs.
Click on the “Custom” grid content and select “Add custom Grid”.
for Sales Bell: Write this in the Minimized URL text field:
http://BASERVER/businessanalyze/common/flash/salesclock.aspx
for Activity Bell: Write this in the Minimized URL text field:
http://BASERVER/busienssanalyze/common/flash/salesclock.aspx
And this in the Minimized URL parameters text field:
?cright=topactivity&cleft=newactivity
Parameters must be typed in “minimized/maximized URL parameters”.
2002-2011 Business Analyze AS, all rights reserved.
Page 59 of 86
Adding the Sales Bell to a tab
Best practice is to create a grid before you add it to a tab. Then it will be possible to use the grid you
created for the Sales Bell or the Activity Bell as a template for setting up a tab. You will get the
setting which is defined for the grid copied to the tab.
If you want to create one grid which use the whole screen available in Business Analyze, do this:
1. Select “Use 1 grid/URL”
2. Select the Sales Bell or Activity Bell you created from the grid elements.
3. Register
2002-2011 Business Analyze AS, all rights reserved.
Page 60 of 86
Setup Sales Bell by using the “Active Desktop”
To enable it on every screen you need to create a HTML file which points to your solution since
Active Desktop only support HTML-pages.
Create the file clock.html, and add this text/code:
<html>
<frameset cols="100%">
<frame src="http://SERVER/DIRECTORY/common/flash/salesclock.aspx" width="1024"
height="768" border="0" />
</frameset>
</html>
Place the file on a network share where all users have
access.
Right click on your desktop and select “Properties”. Then
go to the tab “Desktop” and select customize desktop.
Click on “New”.
Type in the address/URL to the clock.html file you just
created and click OK.
Click OK and the active desktop will start to synchronize.
2002-2011 Business Analyze AS, all rights reserved.
Page 61 of 86
Development
You can create your own SQL-queries and you can change the way the existing works.
SuperOffice CRM customization
Customization of query to support user defined fields:
<usr1t> = associate_id in SuperOffice CRM for the active user
<usr2t> = group_id in SuperOffice CRM for the active user
<usr3t> = person_id in SuperOffice CRM for the active user
When you want to use this we recommend you to import all users which are going to use the Sales
Bell by using the BA User Import. Then this user defined fields will automatically be correct for users
in BA.
We also recommend to establish single sign on per default else the user need to logon to see the
Sales Bell.
If you want create a grid based on the users group you can do like this:
1. Create a new query line for each bell (right and left)
2. Customize SQL to only support users primary group in CRM:
Add this to the where statement of the query
and g.usergroup_id <usr2t>
Example:
2002-2011 Business Analyze AS, all rights reserved.
Page 62 of 86
In this example only sales from the user’s primary group in SO will be displayed.
Currently not supported
We do not support parameters as from a normal Reports (example grp=11&asc=222). This is planned
to be implemented in a future release of Business Analyze. Date is not set.
2002-2011 Business Analyze AS, all rights reserved.
Page 63 of 86
Business Analyze Data Collector
General
The Business Analyze Data Collector is the application that accepts the data being sent by a user
when receiving measure values by e-mail is selected in the Business Analyze Scorecards module or
when a user unsubscribe from a Distribution.
Configuration
After the installation procedure has completed, you will have to make some manual adjustments in
order to make the application run correctly.
See Appendix C: Data Collector Configuration for more information.
2002-2011 Business Analyze AS, all rights reserved.
Page 64 of 86
Hardware recommendation
Web server
< 20 Users
> 20 Users
CPU
1 x Intel Xeon or
1 x AMD Opteron
(min. 4 cores total)
CPU
2 x Intel Xeon or
2 x AMD Opteron
(min. 8 cores total)
Memory
16 GB RAM
Memory
16+ GB RAM
Disk OS/Softw.
2 x 100GB (Raid 1)
Disk OS/Softw.
2 x 100GB (Raid 1)
Disk DB – Data
-
Disk DB – Data
-
Disk DB – Log
-
Disk DB - Log
-
Database server
For Business Analyze and Customer’s database
< 20 Users
> 20 Users
CPU
1 x Intel Xeon or
1 x AMD Opteron
(min. 4 cores total)
CPU
2 x Intel Xeon or
2 x AMD Opteron
(min. 8 cores total)
Memory
16+ GB RAM
Memory
32 GB RAM
Disk OS/Softw.
2 x 100 GB Raid 1
Disk OS/Softw.
2 x 100GB Raid 1
Disk DB – Data
3 x 100 GB Raid 5
Disk DB – Data
Disk DB – Log*
3 x 100 GB Raid 5 or
4 x 100 GB Raid 10
2 x 100 GB Raid 1
Disk DB – Log*
4 x 100 GB Raid 10
Web server & database server running on same computer
< 20 Users
CPU
> 20 Users
2 x Intel Xeon or
2 x AMD Opteron
(min. 8 cores total)
Memory
16+ GB RAM
Disk OS/Softw.
2 x 100GB Raid 1
Disk DB – Data
3 x 100 GB Raid 5 or
4 x 100 GB Raid 10
Disk DB – Log*
Not recommended
4 x 100 GB Raid 10
2002-2011 Business Analyze AS, all rights reserved.
Page 65 of 86
Database server
The desired specs of the database server will greatly depend on the load of the customer’s production database and the
amount of data it contains. The general rule is “The more RAM, the better the response times”. The use of SSD disks and/or
cacheing RAID controllers will also have a very positive effect on performance.
* RAID 5 and DB Log
Never use Raid 5 for database log files. This will severely reduce database performance since write operations are slow on
Raid 5, and the database log is continuously written to.
2002-2011 Business Analyze AS, all rights reserved.
Page 66 of 86
Appendix A: Framework configuration
All configuration variables in the application’s web.config configuration file that are prefixed with
fw_ are related to the Business Analyze Framework and described in the table below.
ConnectionStrings
Key name
Key type
Legal values
Description
BusinessAnalyzeConnecti
onString
String
SQL conn.
string
SQL Native Client connection string
to the BA system database.
BusinessAnalyzeDataMart
ConnectionString
String
SQL conn.
string
SQL Native Client connection string
to the BA cache database.
Key name
Key type
Legal values
Description
ba_version
String
Version string
Set the version of the BA app.
fw_debug
Boolean
True | False
Turns on or off Debug Mode for the
Business Analyze application.
fw_singlesignon
Boolean
True | False
Turns on or off Single Sign-On for
the Business Analyze application.
AppSettings
See separate chapter “Selecting an
authentication method”
fw_vadmin
String
Virtual path
Virtual path to the Business Analyze
administration module.
fw_markerlinecolor
String
HEX encoded
RGB color
value or
named color
Color of the highlighting used when
the user moves the cursor over a
row.
Example: To define the highlighting
as black, use “#000000” (hex
encoding) or “Black” (named color).
fw_destinationdirectory
String
Physical path
The physical path to the directory
where uploaded files is stored.
fw_xslfilesdirectory
String
Physical path
Physical path to the directory
containing the Business Analyze XSL
files.
fw_layoutsdirectory
String
Physical path
The physical path to the Layouts
directory. This directory contains
layout and style definitions for the
Business Analyze application.
fw_rdfdirectory
String
Physical path
Physical path to the directory
containing the Business Analyze
RDF-files. Report Definition Files
(RDF) defines reports.
fw_rdfxsd_directory
String
Physical path
Physical path to the directory
containing the Business Analyze RDF
2002-2011 Business Analyze AS, all rights reserved.
Page 67 of 86
XSD Schemas.
fw_admmenudir
String
Physical path
The physical path to the
administration menu directory.
fw_chartfilesdirectory
String
Physical path
The physical path to the Chartfiles
directory. This directory contains
chart images generated by the
Business Analyze Reports module.
fw_xmlfilesdirectory
String
Physical path
Physical path to the directory
containing the XML files used by the
Business Analyze application.
fw_errormessagesfile
String
Physical path
The physical path to the Error
Messages file. This file contains error
messages displayed by the Business
Analyze application.
fw_vlayouts
String
Virtual path
Virtual path to the Layouts directory.
fw_vscripts
String
Virtual path
Virtual path to the Business Analyze
Scripts directory.
fw_vfoldermenu
String
Virtual path
Virtual path to the Folder Menu.
fw_languagefile
String
Physical path
The physical path to the language
file. This file contains localized UI
strings used by the Business Analyze
application.
fw_vadminmenu
String
Virtual path
Virtual path to the administration
menu.
fw_vcharts
String
Virtual path
Virtual path to the Chart files
directory.
fw_vfullroot
String
Virtual path
This is the full path to the Business
Analyze application root.
Example:
http://localhost/businessanalyze
fw_vroot
String
Virtual path
Virtual path to the Business Analyze
application root.
fw_vhelp
String
Virtual path
Virtual path to the Business Analyze
help documentation.
fw_vhelpdirectory
String
Physical path
Physical path to the Business
Analyze help documentation.
fw_connectionstring
String
ADO
Connection
string
Specifies the connection string for
connecting to the Business Analyze
database.
fw_preferredlanguage
String
“no” | “en-gb”
Language code for the preferred UI
language for the Business Analyze
application.
dc_datamart_collation
String
String
Collation used by the datamart.
2002-2011 Business Analyze AS, all rights reserved.
Page 68 of 86
System.net/mailSettings
Key name
Key type
Legal values
Description
host
String
DNS name |
DNS name or IP address of the SMTP
server to use for sending e-mail from
the system.
IP address
username
String
Optional:
Defines the username to use when
connecting to a mail server that
requires authentication.
password
String
Optional:
Defines the password to use when
connecting to a mail server that
requires authentication.
port
String
Optional port if used.
2002-2011 Business Analyze AS, all rights reserved.
Page 69 of 86
Appendix B: Scorecards configuration
All configuration variables in the application’s web.config configuration file that are prefixed with sc_
are related to the Business Analyze Scorecard module and described in the table below.
Key name
Key type
Legal values
Description
sc_datecolumn
String
“dov” |
“created”
Defines the column to use for
report date values in the Business
Analyze Scorecards module.
sc_debug
Boolean
True | False
Defines the Debug Mode setting for
the Business Analyze Scorecards
module.
sc_defaultperiod
String
Valid values for
this setting
may be found
in the
"timesheet.xml"
file.
Defines the default period setting
for the Business Analyze
Scorecards module.
sc_mode
String
“standard” |
Defines the mode (standard or
extended) for the Business Analyze
Scorecards module.
“extended”
Configuration of pre aggregation functions
Background
Business Analyze 3.5 Scorecards reporting is based on several tables containing pre aggregated data
in the time dimension.
The data are still stored in a normalized fashion in the original table sc_target. In order to see the
data in the reports, a t-sql job must be run to populate the sc_Target[Frequency] tables. This job
must be configured to run on the sql-server to populate data from manually collected data or data
collected by email.
The job is automatically executed after every import job in scorecards (SQL-Auto).
Configuration of SQL Server job for SQL Server 2005
The aggregation of the numbers in sc_target is achieved using a stored procedure called
sc_TargetAggregate.
This procedure takes one input parameter: @lastrun (int)
@lastrun = 0
Aggregates all data.
2002-2011 Business Analyze AS, all rights reserved.
Page 70 of 86
@lastrun = 1
Aggregates all new data.
We recommend setting up 2 types of jobs, depending on the precision required:
-
Complete aggregation every night
Incremental aggregation on a timely basis as needed.
Use the methods described here to set up these jobs:
1) Start MS SQL Server Management Studio and connect to the Business Analyze database.
2) Expand the node ’SQL Server Agent’ and choose ’New job...’ from right click menu on the
’Jobs’-node.
3) Fill in desired name and description on the ‘General’ – dialog.
2002-2011 Business Analyze AS, all rights reserved.
Page 71 of 86
4) Create a new step in the ’Steps’- dialog:
5) Enter name of job to be run and the command itself. F.ex.
Complete aggregation
Exec sc_TargetAggregate @lastrun=0
Incremental aggregation
Exec sc_TargetAggregate @lastrun=1
Click ’OK’ to save setting in this step.
2002-2011 Business Analyze AS, all rights reserved.
Page 72 of 86
6) Create a new Job schedule in the New Job Scedule - dialog:
If you want to run it every night select daily and set the time where the least amount of load
is expected on the server. Click ’OK’ to save settings.
You have now configured a job to aggregate all your data for your scorecards every night.
Create a new job that run more often and does an incremental aggregation in order to
achieve more accurate and timely data in the scorecard reports.
To ensure that the jobs are actually executed correctly, add a warning that sends an email to
an appropriate address if anything fails.
Scorecards Service Configuration
Configuration keys specific for the Business Analyze Scorecards Service is described in the table
below.
Key name
Key type
Legal values
Description
fw_languagefile
String
Physical path
The physical path to the
language file. This file
contains localized UI
strings used by the
Business Analyze
application.
fw_connectionstring
String
ADO
Connection
string
Specifies the connection
string for connecting to
the Business Analyze
database.
fw_debug
Boolean
True | False
Turns on or off Debug
Mode for the Business
2002-2011 Business Analyze AS, all rights reserved.
Page 73 of 86
Analyze application.
sc_sql_active
Boolean
True | False
Turns on or off sqlimport in the scorecard
service.
sc_dc_active
Boolean
True | False
Turns on or off the
DataCollector service .
sc_dc_due_active
Boolean
True | False
Turns on or off the
DataCollector Warning.
sc_debug
Boolean
True | False
Turns on or off Debug
Mode for the Business
Analyze Scorecards
Service.
sc_connectionstring
String
ADO
Connection
string
Defines the connection
string used when the
Business Analyze
Scorecards Service
communicates with the
Business Analyze
database.
sc_system_db_reconnect_interval
Integer
Number of
seconds
Defines the database
reconnect interval
setting for the Business
Analyze Scorecards
Service.
sc_sleep
Integer
Number of
seconds
sc_pause
Integer
Number of
seconds
sc_scorecard_user
String
Defines the username for
the Business Analyze
Scorecards Service
daemon-user, used when
communicating with the
Business Analyze
database.
sc_sql_period
Integer
Define when it should
sample. 0 is today, 1 is
after today..
2002-2011 Business Analyze AS, all rights reserved.
Page 74 of 86
Appendix C: Data Collector Configuration
To configure the Data Collector you can, in addition to edit the web.config-file, use the configuration
application found in the directory you installed the Data Collector.
Configuration application
You can find this application on the Start menu on the server Business Analyze is installed.
IIS Webserver Instance
Website name: Select website.
Application Pool: Select the application pool where the Business Analyze virtual directory is in.
IIS Virtual Directory
Virtual Directory name: Select the virtual directory for Business Analyze Data collector.
Do not change this unless you are upgrading to a newer version of data collector.
Configuration file – web.config
All configuration variables in the application’s web.config configuration file that are prefixed with
dc_ are related to the Business Analyze Data Collector and described in the table below.
Key name
Key type
Legal values
Description
fw_languagefile
String
Physical path
The physical path to the language
file. This file contains localized UI
strings used by the Business Analyze
application.
fw_connectionstring
String
ADO
Connection
string
Specifies the connection string for
connecting to the Business Analyze
database.
fw_debug
Boolean
True | False
Turns on or off Debug Mode for the
Business Analyze application.
dc_debug
Boolean
True | False
True, the application is running in
debug mode, False, the application
is not running in debug mode.
dc_mailfrom
String
Valid e-mail
address
Exposes the value that will be used
in the “from” field of the e-mails
sent by the Business Analyze Data
Collector module.
dc_mailsubject
String
dc_preferredlayoutname
String
Exposes the value that will be used
in the “subject” field of the e-mail
sent by the Business Analyze Data
Collector module.
Name of a
valid Business
Analyze
layout folder.
Exposes the name of the preferred
layout used by the Business Analyze
Data Collector module.
2002-2011 Business Analyze AS, all rights reserved.
Page 75 of 86
dc_replacenan
Boolean
True | False
dc_replacenanvalue
Integer
dc_vlayoutdir
String
Virtual path
Exposes the virtual path to the
folder containing the layouts used
by the Business Analyze Data
Collector module.
dc_xslfilesdir
String
Absolute path
Exposes the absolute path to the
XSL-files used by the Business
Analyze Data Collector module.
dc_mailserver
String
DNS name |
DNS name or IP address of the SMTP
server to use for sending e-mail
from the system.
The value that will replace a NANvalue in the e-mail fields.
IP address
dc_mailserverauthentication
Boolean
dc_mailserverusername
String
If True, fields with no values are
filled with the value specified by the
dc_replacenanvalue key.
True | False
Defines if the mail server (as set in
dc_mailserver) requires
authentication.
Defines the username to use when
connecting to a mail server that
requires authentication.
Note: This is only used if the
dc_mailserverauthentication key is
turned on.
dc_mailserveruserpwd
String
Defines the password to use when
connecting to a mail server that
requires authentication.
Note: This is only used if the
dc_mailserverauthentication key is
turned on.
2002-2011 Business Analyze AS, all rights reserved.
Page 76 of 86
Appendix D: Distribution Engine Service Configuration
Configuration keys specific for the Business Analyze Distribution Engine Service is described in the
table below. These settings can be set either by opening the WebConfig-file or starting the
application DistributionConfig. Both can be found in the directory the Distribution Service is
installed.
Configuration keys
Important: In the application you can set a user that is allowed to download reports before sending.
This is a windows user, locally or domain. Business Analyze must be set to single sign-on and Basic
authentication must be turned on in IIS.
Key name
Key type
Legal values
Description
de_preferredlanguage
String
“no”
Sets the preferred
language for the
Business Analyze
Distribution Engine
Service.
“en-gb”
de_connectionstring
String
ADO
Connection
string
Connection string used
when the Business
Analyze Distribution
Engine Service
communicates with the
Business Analyze
database.
de_debug
Boolean
True | False
Turns on or off Debug
mode for the Business
Analyze Distribution
Engine Servicde.
de_forcedrun
Boolean
True | False
True - Service sends
distributions
immediately and then
terminates.
False - Service is running
as normal.
de_debugmail
String
Valid e-mail
address
When the service is
running in Debug Mode,
all e-mails are sent to
this address.
de_runinterval
Integer
Time in
seconds
Seconds it should pause
between each running.
de_agentmode
Boolean
True | False
Turns on or off Agent
Mode. In Agent Mode,
the periodical value in
the 1st e-mail sent by
the Business Analyze
Distribution Engine is set
start at 01.01.YYYY and
2002-2011 Business Analyze AS, all rights reserved.
Page 77 of 86
end at the current date.
The 2nd email has the
periodical value set to
"last seven days".
Use First offset and Last
offset to set the start
and end date of the 1st
e-mail.
de_ownermail_as_sender
Boolean
True | False
When true, the
distribution owner’s email address is the
sender of the e-mail.
When false, the sender
is set to the e-mail
address specified by the
de_from_mail config
key.
de_from_mail
String
Valid e-mail
address
E-mail address to be
used as the sender of
the e-mail.
de_mailserver
String
DNS name |
The address of the SMTP
server that the Business
Analyze Distribution
Engine Service will use
for sending e-mails.
IP address
de_mailserver_use_authentication
Boolean
True | False
de_mailserver_username
String
Specifies the username
used for connecting to
the mail server. (If it
requires authentication.)
de_mailserver_pwd
String
Specifies the password
used for connecting to
the mail server. (If it
requires authentication.)
de_mailsubject
String
The subject of the mail
being sent from the
Business Analyze
Distribution Engine
Service.
de_mailsubject_overrides_distrname
Integer
0|1
Indicates if the specified
mailserver requires
authentication.
If 1 the value specified
in the de_mailsubject
key will appear as the
subject of e-mails that
are sent.
If 0 the distribution
name will appear as the
subject.
de_bannerenabled
Boolean
True | False
Enables or disables email banners.
de_templateenabled
Boolean
True | False
Enables or disables email templates.
de_unsubscribe_enabled
Boolean
True | False
Turns on or off
unsubscribe links in e-
2002-2011 Business Analyze AS, all rights reserved.
Page 78 of 86
mails.
Note: Requires
installation and
configuration of the
Business Analyze Data
collector application.
de_baurl
String
URL
URL to the Business
Analyze web application.
de_reportapplication
String
URL
URL to the Business
Analyze Reports module.
This is used for
rendering distribution
reports.
de_unsubscribeserver
String
URL
URL to the Business
Analyze Data collector
application.
de_vchartfiles
String
Virtual path
Virtual path to the
Chartfiles directory. This
directory contains chart
images created during
report generation.
de_vlayouts
String
Virtual path
Virtual path to the
Layouts directory. This
directory stores layout
templates.
de_vscripts
String
Virtual path
Virtual path to the
Scripts directory. This
directory stores script
files used in the
Business Analyze User
Interface.
de_debugdir
String
Physical
path
Physical path to the
debug output directory
for the Business Analyze
Distribution Engine
Service.
de_logdir
String
Physical
path
Physical path to the log
files directory for the
Business Analyze
Distribution Engine
Service.
de_reportrenderdir
String
Physical
path
Physical path to the
report rendering
directory. Rendered
reports will be stored
here.
de_chartfiles
String
Physical
path
Physical path to the
Chartfiles directory. This
directory contains chart
images created during
report generation.
de_bannerdir
String
Physical
path
Physical path to the
directory where the
banner files will be
stored.
2002-2011 Business Analyze AS, all rights reserved.
Page 79 of 86
de_templatedir
String
Physical
path
Physical path to the
template directory. This
directory contains e-mail
templates.
de_languagefile
String
Physical
path
Physical path to the
locale.xml language file.
This file contains
localized UI strings.
de_xmlfiles
String
Physical
path
Physical path to the XML
directory.
de_xsltfiles
String
Physical
path
Physical path to the XSL
directory.
de_layoutsdir
String
Physical
path
Physical path to the
Layouts directory. This
directory contains style
and design information
for the Business Analyze
user interface
de_renderformat
Integer
0|1
If 0, reports are
rendered as inline HTML
in the e-mails being
sent.
If 1, reports are
rendered as PDF-files
and attached to the emails being sent.
2002-2011 Business Analyze AS, all rights reserved.
Page 80 of 86
Appendix E: Currency issues in SuperOffice
General
Business Analyze 2.7.x or higher supports currencies in SuperOffice. This enables the users to select
the currency they wish the figures to be displayed in. Business Analyze will perform the calculations
necessary to convert the figures from the source currency to the currency the user has according to
the preferences in SuperOffice.
To make this determination Business Analyze needs to know which SuperOffice user corresponds to
which user in Business Analyze. This linking is achieved by assigning the corresponding associate_id
in the usr1t more-field in the user administration of Business
The system will try to use the SO preferences OwnCurrency or BaseCurrency first. If they aren’t
found, then the system setting “currency_default” will be used.
The system setting currency_preference determines which SuperOffice preference is used to
determine the default currency.
Requirements
For this to work there are some requirements:
More-fields must be populated with correct data
Objects in the SuperOffice database must exist and have proper rights
If you have users that don’t have their own SuperOffice user then leave these fields blank.
The access management system in SuperOffice edition will grant these users full access to
the entire database.
2002-2011 Business Analyze AS, all rights reserved.
Page 81 of 86
The following rights are required for the login that Business Analyze uses to gain access to the
SuperOffice database:
Objects
All tables in SuperOffice
database
ba_budget
ba_cur_conv
ba_grp
ba_asc
ba_scale
ba_date
ba_preference
ba_leap_year
ba_p_main
SELECT
x
DELETE
UPDATE
x
x
x
x
x
x
x
x
x
x
x
Database mapping used in SuperOffice editioin:
SuperOffice database
associate.associate_id
associate.group_idx
person.person_id
EXECUTE
Business Analyze database
fw_user.er1t
fw_user.er2t
fw_user.er3t
2002-2011 Business Analyze AS, all rights reserved.
Page 82 of 86
The User mapping report
This report has been added to make it easier to verify that the more-fields are populated with
correct values. The easiest way of ensuring this, is to use the Business Analyze User Import utility. If
you are adding users manually you may use this report to find the necessary IDs.
If you have a version of Business Analyze SuperOffice Edition installed, you will find the report here:
Go to the admin-menu: SO Edition -> SO Users
If you have Business Analyze 4.x or newer and installed the Analyze SuperOffice package, you can
find the report here:
Start the desktop named “Analyze SuperOffice System” and select the “SuperOffice users” tab.
Remember to grant yourself access to this desktop in order for it to appear in the main menu.
2002-2011 Business Analyze AS, all rights reserved.
Page 83 of 86
Appendix F: System settings
Analysis
actiontoolbar_elements
Enables the desired runtime actiontoolbar elments in a visualization element.
Possible values: Columns, Grouping, Duplicate Element, Parameters, ColumnFilter, Charts, Gauges,
Visualization, Email
async_param_treshold_list
Defines the maximum number of options before a list parameter becomes an asyncronous list
Possible values: Freetext (INTEGER)
async_param_treshold_tree
Defines the maximum number of options before a tree/hierarchyal parameter becomes an
asyncronous tree
Possible values: Freetext (INTEGER)
async_paramsearch_delay
Defines the idle time the dynamic dropdown list waits before executing the callback to filter
dropdown list items.
Possible values: Freetext (INTEGER)
async_paramsearch_minchars
Defines the minimum number of characters the user has to provide to search a asyncronous
dropdown list
Possible values: Freetext (INTEGER)
chart_axis_label_angle
Defines the label angle for labels in charts
2002-2011 Business Analyze AS, all rights reserved.
Page 84 of 86
Possible values: Freetext (INTEGER)
chart_axis_label_length
Defines the maximum label length for a chart label
Possible values: Freetext (INTEGER)
chart_font_type
Defines the fonttype for charts
Possible values: Verdana, Tahoma, Arial
fiscalyear_start
Defines the start of year for fiscal years (mmyy)
Possible values: list of dates
max_pagesize
Defines is the maximum allowed pagesize for a visualization element. If pagesize in element is set to
a value below 1 and above this setting, this pagesize is forced on the element
Possible values: Freetext (INTEGER)
Input Module
im_default_db
Defines the active database where the Input Module is installed. Data schemas users have access to
in this database are linked up in the desktop IM menu
Possible values: list of data sources
im_make_dynamic_ddls
This setting turns searchable dropdown lists on / off.
This setting will only affect dropdown lists with more than 100 rows initially
Possible values: Enabled | Disabled
2002-2011 Business Analyze AS, all rights reserved.
Page 85 of 86
Reports
async_parameterlist_delay
This setting defines the idle time the dynamic dropdown list waits before executing the callback to
filter dropdown list items.
The setting is given in ms (milliseconds)
Possible values: Positive integer (free text)
async_parameterlist_minChars
This setting defines the minimum number of characters the user has to provide to search a
async/dynamic dropdown list
Possible values: Positive integer (free text)
async_parameterlist_treshold
This setting defines the number of options threshold for sending entire list to client in a database
parameter list when the parameter attribute asynchronous is unset.
If a database parameterlist has more options than this threshold the list will be rendered as a
searchable input (as long as the RDF parameter attribute asynchronous is not set)
Possible values: Positive integer (free text)
Scorecard
add_training_to_competence
Enable user to add existing trainings to competence profile
Possible values: Yes | No
enable_competence
Enable training and competence system in scorecard.
Possible values: Yes | No
icon_template
Defines which set of icons to be used in the Scorecard reports
2002-2011 Business Analyze AS, all rights reserved.
Page 86 of 86
Possible values: standard | faces| flags
initiative_enable_subtasks
Enable subtasks for an initative.
Possible values: Yes | No
initiative_fullaccess
Enable user to add/change all initiatives.
Possible values: Yes | No
measure_chart_size
Define the default chart size for the charts viewed in measure details.
Example (width * height):
500x350
Possible values: enter desired size (free text)
treemenu_fullaccess
Give users full access to all scorecards and consolidated scorecards.
Possible values: Yes | No
tremenu_department_access
Give users access to department he is a member of.
Possible values: Yes | No
System
central_services_path
Location where the central Business Analyze services are located
Possible values: list of data sources
2002-2011 Business Analyze AS, all rights reserved.
Page 87 of 86
desktop_tabs_menu
Enable / disable tabs menu below breadcrumb when viewing dashboards
Possible values: list of data sources
ie_document_mode
Identifies which document mode Internet Explorer should use when rendering the Business Analyze
desktop. This setting is required to downgrade IE9 to IE8 rendering since they do no longer support
different rendering modes in iframes/objects.
Possible values: list of emulation modes
SuperOffice Edition
access_group
Select the groups that may be accessed. Users own group is always accessible.
Possible values: list of user groups in SuperOffice (multiple select)
IMPORTANT NOTE!
Use this setting to assign access privileges to users that do not have their own SuperOffice user. The
rights granted here will stay the same independent of the access_mode setting.
access_mode
Adjust access mode based on groups.
PS! The privileges granted by access_group come in addition to privileges granted here.
Possible values:
0=Open, user can see everything
1=Restricted, user can see data belonging to his own groups
2=Tight, user can only see data from his primary group
3=Private, user can only see his own data
client_type
2002-2011 Business Analyze AS, all rights reserved.
Page 88 of 86
Select wether to use windows client or web client for owl-link integration.
Possible values: Windows | Web
currency_default
This currency becomes the default if the preference selected prefereance in SO isnt defined.
Possible values: list of active currencies in SuperOffice
currency_preference
The default currency can be fetched from either the SuperOffice preference BaseCurrency or the
OwnCurrency. National will give the user his national currency.
Possible values: OurCurrency | BaseCurrency | National
date_format
Select the prefered date format.
Possible values: list of date formats supporten in SQL Server
link_target
Force a target setting in the achor tag. Relevant only for Six.web.
Possible values: target (free text)
2002-2011 Business Analyze AS, all rights reserved.
Page 89 of 86
max_rows_returned
The maximum number of rows returned by the query.
Possible values: threshold (free text)
relation_definition_id
The identificator of the relation type used as basis for KAM reports. The relation which describes
which contact owns which contact.
Possible values: list of defined relationtypes in SuperOffice
string_inactive_element
Defines a suffix indicating that the element is no longer active in SuperOffice. It can be a person or a
category amoung others.
Possible values: string (free text)
string_max_length
Some column can be quite large. Strings longer than this setting will not be truncated at the given
setting.
Possible values: threshold (free text)
string_not_available
Defines a string that is displayed when the data for that column/row cannot be retreived from the
database. F.ex. if a contact has no category.
Possible values: string (free text)
url_web
Url using SO protocol for web client.
Possible values: url with substitution tags (free text)
url_windows
2002-2011 Business Analyze AS, all rights reserved.
Page 90 of 86
Url using SO protocol for windows client.
Possible values: string with substitution tags (free text)
2002-2011 Business Analyze AS, all rights reserved.
Page 91 of 86
Appendix G: Installation and configuration BA KAM
This module consists of four reports (.srdf files) with multiple report levels. The reports make use of
file reference drilldowns so all files must be scrambled (.srdf extention).
All users must have the three more-fields (usr1t-usr3t) matched with SO user to make the reports
work.
We also strongly recomends that BA is configured to use the single sign on feature.
Post install tasks if installed with setup
If install a fresh Business Analyze installation or upgrade an existing application, this section
describes the tasks you have to complete to make use of your BA KAM module.
ATTN! This section presupposes that you have completed the Business Analyze application setup
with a reportlicense.lic file containing the BA KAM report group.
If you haven’t done so, please install your BA KAM module by following the steps in the section
Manual installation below.
After setup has completed all reports should exist in your Business Analyze installation and the only
thing left to do is to set up the Business Analyze Input Module with the Budget sheet.
Make sure that the Business Analyze Input Module is installed in your SuperOffice database.
To do this go to the following Business Analyze menu path:
System Administration -> Budget/InputModule
Select the datasource “CRM_SO” at the top right.
Install/Upgrade InputModule in the database if you get a message that the Inputmodule is not
present or outdated in this database before proceeding to the next step
To complet your BA KAM setup go to the following URL:
http://[servername]/[BAApplicationVDIR]/upgrading/configuration.aspx
2002-2011 Business Analyze AS, all rights reserved.
Page 92 of 86
You should be presented with the following dialog:
Check the “SuperOffice KAM View Budget” checkbox and input DBUser, DBPassword, Schema
Owner and Login name.
Make sure that your “CRM_SO” datasource is selected before you click the “Update database”
button.
Manual installation
If you wish to install the BA KAM report group without upgrading or installing the Business Analyze
application, this section should be completed.
2002-2011 Business Analyze AS, all rights reserved.
Page 93 of 86
IM Configuration
Make sure the the IM installation is up to date by entering the SYSADMIN->Budget/Input Module
page and setting datasource to CRM_SO.
Upgrade the database if required.
Database scripts
Run the script ’1 Business Analyze INTERNAL.sql’ with the BA datasource.
This script creates the ’relation_definition_id’ system setting with default value = 1
This variable holds which relation type to be used in the KAM reports.
Run the script ’2 CRM_SO.sql’ with the SuperOffice datasource.
This script creates all KAM db functions used in the reports.
ATTN! REPLACE all ’<owner>’ tags with correct SO schema (crm5 is default)
Run the script ’3 CRM_SO IM.sql’ with the SuperOffice datasource.
This script creates the budget data sheet to be used to store budget values in the KAM
reports and updates the getBudget function with correct IM column IDs.
ATTN! REPLACE all ’<owner>’ tags with correct SO schema (crm5 is default)
SRDF files
Copy all .srdf-files into the RDF rootfolder.
ATTN! The files has to be of type .srdf and must be located in the RDF rootfolder to make drilldowns
from TOPLevel reports work!
Customer License
The KAM reports has its own report group license which has to be issued to the customer from the
BA License manager.
New bareports.lic file has to be placed in the application root folder. The IIS has to be restarted
(WorldWide Web Publ... service) for the changes to take effect.
Configuration of dashboard / SO Admin Client
The KAM10/20 reports are meant to be published in the BA Application. Create new grids in the BA
Application to publish these reports.
We recommend setting the following parameters in grid-admin for the KAM10/20 reports:
periodical=year
ourAss=<usr1t>
We recommend setting the following parameters for linking the KAM11/21 reports into SuperOffice:
periodical=year
ourAss=<usr1t>
conSingle=<cid>
--customer_id in SuperOffice
The parameter ’currency’ can aslo be set if you want all users to see the numbers (KAM10/11) in the
same currency. If this parameter is not set, the default parameter for the SO user is used.
2002-2011 Business Analyze AS, all rights reserved.
Page 94 of 86
Appendix H: Old components need for 2.x
functionality
MDAC
If the server is not running SQL-Server, it may be necessary to install MDAC (Microsoft Data Access
Components), version 2.8 or later. This component may be downloaded from the Microsoft web site
at the following URL:
http://msdn2.microsoft.com/en-us/data/aa937730.aspx
TIP
Use this article from Microsoft to determine the version of MDAC on the web-server.
http://support.microsoft.com/kb/301202
Microsoft DirectX
The Business Analyze Reports module requires Microsoft DirectX 8.1 or later on the web-server. The
Business Analyze Reports and Business Analyze Scorecards modules use the Microsoft Office XP Web
Components, which depends on Microsoft DirectX to render the charts.
This is only required if you intend to use reports with graphs that were created prior to v. 3.0
The Microsoft DirectX component may be downloaded from the following URL:
http://msdn2.microsoft.com/en-us/xna/aa937788.aspx
NOTE
Make sure you install Microsoft DirectX before installing the Microsoft Office XP Web
Components otherwise the Business Analyze Reports Charts will not work.
HOW
TO
On the web-server. Go to Start -> Run… and execute dxdiag:
2002-2011 Business Analyze AS, all rights reserved.
Page 95 of 86
2002-2011 Business Analyze AS, all rights reserved.
Page 96 of 86
Microsoft Office XP Web Components
The Business Analyze Reports and Business Analyze Scorecards modules render charts for graphical
data presentation to the end-user. Both of these components use the Microsoft Office XP Web
Components to render the chart.
In order to make the modules work this component must be installed on your server.
The Office Web Components requires a valid license for Microsoft Office XP. You will be prompted
for this license during the component installation.
This is only required if you intend to use reports with graphs that were created prior to v. 3.0
A copy of the Microsoft Office XP Web Components may be obtained from Microsoft by following the
URL below: http://office.microsoft.com/downloads/2002/owc10.aspx
HOW
TO
On the web-server: Go to Start -> Control panel-> Add /Remove Programs:
2002-2011 Business Analyze AS, all rights reserved.
Page 97 of 86
2002-2011 Business Analyze AS, all rights reserved.
Page 98 of 86