1
13) DO NOT USE SOAPS OR DETERGENTS WHEN CLEANING THIS DEVICE. THOROUGHLY CLEAN AND RINSE WITH WARM WATER AND MAKE SURE THE DEVICE IS COMPLETELY DRY BEFORE CONNECTING.
14) DO NOT DISASSEMBLE THE U.V. LAMP WHILE CONNECTED TP POWER OR TURNED
ON.
15) DO NOT LOOK DIRECTLY INTO THE U.V. LAMP WHEN PLUGGED IN, SINCE UV LIGHT
MAY DAMAGE YOUR EYESIGHT. ALWAYS KEEP COVER ON WHEN UV LIGHT IS IN USE.
16) KEEP THIS PRODUCT AWAY FROM CHILDREN
Note: Always disconnect power to unit before performing any
maintenance or bulb replacement.
Set-Up & Assembly Guide
How the CF Canister Filter Works
Unfiltered aquarium water comes into the CF Canister via the input/intake line
and passes by the U.V. Sterilizing Bulb first. (The CF-300 does not come with a U.V.
Sterilizing Bulb but assembles and filters in the exact same manner as the
CF-400 and CF-500.) The water moves down the stack of vertical cylinder
cutouts and to the bottom of the CF unit. The water is then pushed up through
the filter compartments, the bottom compartment first, the middle compartment second, and the top compartment third. The filtered aquarium water then
returns from the CF Canister and back into the aquarium via the output/return
line.
Note: Check unit for any signs of damage. If signs of damage are
present, return to original place of purchase.
1) Remove CF Canister Filter from the AQUATOP box and set the extras aside. Face
the canister unit toward yourself with the power cord running out the back.
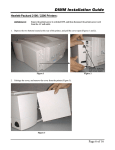
2) To remove the barrelhead you must first unhinge the clips that are in front
and back of the unit. These two clips are attached to the bottom of the unit. Next
unhinge the clips that are left to right. These two clips are attached to the
barrelhead. Remove the barrelhead by pulling it up vertically. (Be careful of
the U.V. Sterilizing bulb when removing or securing the barrelhead on the
CF-400UV & CF-500UV.)
(See Figs. 1 &2)
6) Stack the Filtration Compartments from the bottom up. The bottom/first
compartment should receive the Sponge Filter on the bottom with a Cotton
Filter on top. The middle/second compartment should receive a Cotton Filter
on the bottom with the Carbon Filter(s) on top. The top/third compartment
should receive a Cotton Filter on the bottom with Bio-Balls or AQUATOP’s
ceramic rings on top. The top/third compartment receives the Filter Compartment Cover.
7) The barrelhead goes back on top (be careful of the U.V. Sterilizing Bulb). The
clips attached to the barrelhead must be hinged into place first. (Give a light
downward push on the barrelhead to engage the bottom half of the unit.) Next,
the clips attached to the bottom portion on the unit must be hinged into place.
(See Figs 1 &2.)
8) To secure the input and output valve, you must pull up on the lever located
between the input and output nozzles. Next insert the valve into designated
area on top of the barrelhead. Push into place firmly and push lever down. The
input and output valve is now open and secured to the canister filter.
(See Fig 3.)
9) How to secure intake and return tubing to the CF Canister Filter: First slip
the tubing over the nozzles located on top of the input and output valve. Slip
the tubing on until it can go down no further. Next turn the fasteners, located
at the base of the nozzles, until they have covered the tubing. The two fasteners secure the tubing by crimping them down onto the nozzles for a watertight
effect. Finally give a slight tug on the tubing to see if they are attached well.
(See Fig. 3)
10) Next assemble the intake and return lines and hang on the aquarium walls
where desired. Secure the two items with the suction cups and clips provided.
(These items are disassembled in the white box that comes with the CF Canister
Filter.
(See Fig. 4)
11) Place CF Canister Filter (with attached/secured tubing) where desired. Cut
vinyl tubing to appropriate length and attach to the appropriate assembled
input and output fittings. The output line running from the canister filter will
attach to the horizontally mounted Spray Bar. The input line running from the
canister filter will attach to the vertically mounted Input Bar that has the
Input Cover.
(See Fig 4.)
12) Before plugging in your CF Canister Filter you must fill it using the Prime
Pump. The Prime Pump fills the canister filter and tubing by creating a siphon
(gravity fed). The Prime Pump is a round button located on the top of the
barrelhead. Your aquarium must be filled with water to do this. With a filled
aquarium, compress and depress the Prime Pump to remove air from the canister filter and to draw in water into the canister filter. Once water is present in
the filter and in the tubing, you are ready to go.
FIG.1
FIG.2
FIG.3
FIG.4
3) Remove all filter compartments. Note how the filter compartments are
stacked to support the U.V. Sterilizing Bulb. The vertical cylinder cutouts of
the filter compartments are to be stacked one on top of another and act as a
sheath for the U.V. Sterilizing Bulb.
4) Rinse all filtration compartments and all filtration media (sold separately):
Cotton Filter(s), Sponge Filter, and Bio-Balls. Important: Rinse the Carbon
Filter(s) until the run-off water is clear. The carbon may take a few minutes to
rinse clear.
5) Rinse out the bottom portion of the CF unit.
2