1
GE Measurement & Control Flow PanaFlow HT User’s Manual 910-294U Rev. A September 2012 PanaFlow HT Ultrasonic Liquid Flowmeter User’s Manual 910-294U Rev. A September 2012 www.ge-mcs.com ©2012 General Electric Company. All rights reserved. Technical content subject to change without notice. [no content intended for this page] ii Contents Chapter 1. Introduction 1.1 1.2 1.3 Overview. . . . . . . . . . . . . . . . . . . . . . . . . . . . . . . . . . . . . . . . . . . . . . . . . . . . . . . . . . . . . . . . . . . . . . . . . . . . . . . . . . . . . . . . . . . . . . . 1 Theory of Operation . . . . . . . . . . . . . . . . . . . . . . . . . . . . . . . . . . . . . . . . . . . . . . . . . . . . . . . . . . . . . . . . . . . . . . . . . . . . . . . . . . . . 2 1.2.1 Transit-Time Flow Measurement . . . . . . . . . . . . . . . . . . . . . . . . . . . . . . . . . . . . . . . . . . . . . . . . . . . . . . . . . . . . . . . . . . . 2 1.2.2 Active Temperature Compensation. . . . . . . . . . . . . . . . . . . . . . . . . . . . . . . . . . . . . . . . . . . . . . . . . . . . . . . . . . . . . . . . . 2 SIL Application . . . . . . . . . . . . . . . . . . . . . . . . . . . . . . . . . . . . . . . . . . . . . . . . . . . . . . . . . . . . . . . . . . . . . . . . . . . . . . . . . . . . . . . . . 3 Chapter 2. Installation 2.1 2.2 2.3 2.4 2.5 2.6 Introduction . . . . . . . . . . . . . . . . . . . . . . . . . . . . . . . . . . . . . . . . . . . . . . . . . . . . . . . . . . . . . . . . . . . . . . . . . . . . . . . . . . . . . . . . . . . . 5 Unpacking . . . . . . . . . . . . . . . . . . . . . . . . . . . . . . . . . . . . . . . . . . . . . . . . . . . . . . . . . . . . . . . . . . . . . . . . . . . . . . . . . . . . . . . . . . . . . 6 2.2.1 Identification. . . . . . . . . . . . . . . . . . . . . . . . . . . . . . . . . . . . . . . . . . . . . . . . . . . . . . . . . . . . . . . . . . . . . . . . . . . . . . . . . . . . . . 6 2.2.2 Transport . . . . . . . . . . . . . . . . . . . . . . . . . . . . . . . . . . . . . . . . . . . . . . . . . . . . . . . . . . . . . . . . . . . . . . . . . . . . . . . . . . . . . . . . . 7 Site Considerations . . . . . . . . . . . . . . . . . . . . . . . . . . . . . . . . . . . . . . . . . . . . . . . . . . . . . . . . . . . . . . . . . . . . . . . . . . . . . . . . . . . . . 8 2.3.1 Meter Body Location . . . . . . . . . . . . . . . . . . . . . . . . . . . . . . . . . . . . . . . . . . . . . . . . . . . . . . . . . . . . . . . . . . . . . . . . . . . . . . 8 2.3.2 Electronics Enclosure Location (Remote Mount) . . . . . . . . . . . . . . . . . . . . . . . . . . . . . . . . . . . . . . . . . . . . . . . . . . . . . 9 2.3.3 Cable Lengths. . . . . . . . . . . . . . . . . . . . . . . . . . . . . . . . . . . . . . . . . . . . . . . . . . . . . . . . . . . . . . . . . . . . . . . . . . . . . . . . . . . . . 9 2.3.4 Transducer Cables . . . . . . . . . . . . . . . . . . . . . . . . . . . . . . . . . . . . . . . . . . . . . . . . . . . . . . . . . . . . . . . . . . . . . . . . . . . . . . . . 9 Mounting the Electronics. . . . . . . . . . . . . . . . . . . . . . . . . . . . . . . . . . . . . . . . . . . . . . . . . . . . . . . . . . . . . . . . . . . . . . . . . . . . . . .10 Making Electrical Connections . . . . . . . . . . . . . . . . . . . . . . . . . . . . . . . . . . . . . . . . . . . . . . . . . . . . . . . . . . . . . . . . . . . . . . . . .11 2.5.1 Preparing for Wiring . . . . . . . . . . . . . . . . . . . . . . . . . . . . . . . . . . . . . . . . . . . . . . . . . . . . . . . . . . . . . . . . . . . . . . . . . . . . . .12 2.5.2 Wiring Analog Outputs . . . . . . . . . . . . . . . . . . . . . . . . . . . . . . . . . . . . . . . . . . . . . . . . . . . . . . . . . . . . . . . . . . . . . . . . . . .13 2.5.3 Wiring Digital Outputs . . . . . . . . . . . . . . . . . . . . . . . . . . . . . . . . . . . . . . . . . . . . . . . . . . . . . . . . . . . . . . . . . . . . . . . . . . . .14 2.5.4 Wiring the Modbus/Service Port. . . . . . . . . . . . . . . . . . . . . . . . . . . . . . . . . . . . . . . . . . . . . . . . . . . . . . . . . . . . . . . . . . .19 2.5.5 Wiring the Calibration Port. . . . . . . . . . . . . . . . . . . . . . . . . . . . . . . . . . . . . . . . . . . . . . . . . . . . . . . . . . . . . . . . . . . . . . . .20 2.5.6 Wiring the Line Power . . . . . . . . . . . . . . . . . . . . . . . . . . . . . . . . . . . . . . . . . . . . . . . . . . . . . . . . . . . . . . . . . . . . . . . . . . . .21 Wiring Transducers (Remote Mount Cable). . . . . . . . . . . . . . . . . . . . . . . . . . . . . . . . . . . . . . . . . . . . . . . . . . . . . . . . . . . . . .22 2.6.1 Remote Mount Wiring Instructions . . . . . . . . . . . . . . . . . . . . . . . . . . . . . . . . . . . . . . . . . . . . . . . . . . . . . . . . . . . . . . . .23 PanaFlow HT User’s Manual iii Contents Chapter 3. Initial Setup and Programming 3.1 3.2 3.3 3.4 3.5 3.6 3.7 3.8 iv Introduction. . . . . . . . . . . . . . . . . . . . . . . . . . . . . . . . . . . . . . . . . . . . . . . . . . . . . . . . . . . . . . . . . . . . . . . . . . . . . . . . . . . . . . . . . . .25 User Restrictions . . . . . . . . . . . . . . . . . . . . . . . . . . . . . . . . . . . . . . . . . . . . . . . . . . . . . . . . . . . . . . . . . . . . . . . . . . . . . . . . . . . . . .25 PanaFlow HT Enclosure Magnetic Keypad . . . . . . . . . . . . . . . . . . . . . . . . . . . . . . . . . . . . . . . . . . . . . . . . . . . . . . . . . . . . . .27 Display Programming . . . . . . . . . . . . . . . . . . . . . . . . . . . . . . . . . . . . . . . . . . . . . . . . . . . . . . . . . . . . . . . . . . . . . . . . . . . . . . . . .29 3.4.1 Changing Value for One or Two-Variable Screens . . . . . . . . . . . . . . . . . . . . . . . . . . . . . . . . . . . . . . . . . . . . . . . . . .29 3.4.2 Changing Measurement Type for One or Two-Variable Screens. . . . . . . . . . . . . . . . . . . . . . . . . . . . . . . . . . . . .30 3.4.3 Changing Measurement Type or Value for Totalizer Screens . . . . . . . . . . . . . . . . . . . . . . . . . . . . . . . . . . . . . . . .33 3.4.4 Starting or Stopping Totalizer Measurement . . . . . . . . . . . . . . . . . . . . . . . . . . . . . . . . . . . . . . . . . . . . . . . . . . . . . . .35 3.4.5 Resetting the Totalizer. . . . . . . . . . . . . . . . . . . . . . . . . . . . . . . . . . . . . . . . . . . . . . . . . . . . . . . . . . . . . . . . . . . . . . . . . . . .35 Entering the Main Menu (Lock Button) . . . . . . . . . . . . . . . . . . . . . . . . . . . . . . . . . . . . . . . . . . . . . . . . . . . . . . . . . . . . . . . . . .36 3.5.1 Display Format. . . . . . . . . . . . . . . . . . . . . . . . . . . . . . . . . . . . . . . . . . . . . . . . . . . . . . . . . . . . . . . . . . . . . . . . . . . . . . . . . . .37 3.5.2 Keypad Lockout. . . . . . . . . . . . . . . . . . . . . . . . . . . . . . . . . . . . . . . . . . . . . . . . . . . . . . . . . . . . . . . . . . . . . . . . . . . . . . . . . .37 3.5.3 Program/Program Review . . . . . . . . . . . . . . . . . . . . . . . . . . . . . . . . . . . . . . . . . . . . . . . . . . . . . . . . . . . . . . . . . . . . . . . .38 3.5.4 Program Review . . . . . . . . . . . . . . . . . . . . . . . . . . . . . . . . . . . . . . . . . . . . . . . . . . . . . . . . . . . . . . . . . . . . . . . . . . . . . . . . .38 3.5.5 Program . . . . . . . . . . . . . . . . . . . . . . . . . . . . . . . . . . . . . . . . . . . . . . . . . . . . . . . . . . . . . . . . . . . . . . . . . . . . . . . . . . . . . . . . .39 User Preferences . . . . . . . . . . . . . . . . . . . . . . . . . . . . . . . . . . . . . . . . . . . . . . . . . . . . . . . . . . . . . . . . . . . . . . . . . . . . . . . . . . . . . .40 3.6.1 Settings. . . . . . . . . . . . . . . . . . . . . . . . . . . . . . . . . . . . . . . . . . . . . . . . . . . . . . . . . . . . . . . . . . . . . . . . . . . . . . . . . . . . . . . . . .41 3.6.2 Flow Units . . . . . . . . . . . . . . . . . . . . . . . . . . . . . . . . . . . . . . . . . . . . . . . . . . . . . . . . . . . . . . . . . . . . . . . . . . . . . . . . . . . . . . .43 3.6.3 Meter Setup. . . . . . . . . . . . . . . . . . . . . . . . . . . . . . . . . . . . . . . . . . . . . . . . . . . . . . . . . . . . . . . . . . . . . . . . . . . . . . . . . . . . . .47 3.6.4 Password . . . . . . . . . . . . . . . . . . . . . . . . . . . . . . . . . . . . . . . . . . . . . . . . . . . . . . . . . . . . . . . . . . . . . . . . . . . . . . . . . . . . . . . .49 3.6.5 Display . . . . . . . . . . . . . . . . . . . . . . . . . . . . . . . . . . . . . . . . . . . . . . . . . . . . . . . . . . . . . . . . . . . . . . . . . . . . . . . . . . . . . . . . . .50 Input/Output . . . . . . . . . . . . . . . . . . . . . . . . . . . . . . . . . . . . . . . . . . . . . . . . . . . . . . . . . . . . . . . . . . . . . . . . . . . . . . . . . . . . . . . . . .51 3.7.1 Output A Option Board . . . . . . . . . . . . . . . . . . . . . . . . . . . . . . . . . . . . . . . . . . . . . . . . . . . . . . . . . . . . . . . . . . . . . . . . . . .51 3.7.2 Analog Output B (Non-SIL) . . . . . . . . . . . . . . . . . . . . . . . . . . . . . . . . . . . . . . . . . . . . . . . . . . . . . . . . . . . . . . . . . . . . . . . .54 3.7.3 Programming Digital Outputs . . . . . . . . . . . . . . . . . . . . . . . . . . . . . . . . . . . . . . . . . . . . . . . . . . . . . . . . . . . . . . . . . . . . .57 3.7.4 Modbus/Service Port A . . . . . . . . . . . . . . . . . . . . . . . . . . . . . . . . . . . . . . . . . . . . . . . . . . . . . . . . . . . . . . . . . . . . . . . . . . .69 SIL Testing . . . . . . . . . . . . . . . . . . . . . . . . . . . . . . . . . . . . . . . . . . . . . . . . . . . . . . . . . . . . . . . . . . . . . . . . . . . . . . . . . . . . . . . . . . . .72 3.8.1 Accessing the SIL Testing Menu . . . . . . . . . . . . . . . . . . . . . . . . . . . . . . . . . . . . . . . . . . . . . . . . . . . . . . . . . . . . . . . . . . .72 3.8.2 Testing the Min/Max Output . . . . . . . . . . . . . . . . . . . . . . . . . . . . . . . . . . . . . . . . . . . . . . . . . . . . . . . . . . . . . . . . . . . . . .73 3.8.3 Testing the Output Analog Switch . . . . . . . . . . . . . . . . . . . . . . . . . . . . . . . . . . . . . . . . . . . . . . . . . . . . . . . . . . . . . . . . .73 3.8.4 Viewing the On Board Temperature . . . . . . . . . . . . . . . . . . . . . . . . . . . . . . . . . . . . . . . . . . . . . . . . . . . . . . . . . . . . . . .73 3.8.5 Performing a Watchdog Test . . . . . . . . . . . . . . . . . . . . . . . . . . . . . . . . . . . . . . . . . . . . . . . . . . . . . . . . . . . . . . . . . . . . .73 PanaFlow HT User’s Manual Contents Chapter 4. Error Codes and Troubleshooting 4.1 4.2 4.3 User Restrictions . . . . . . . . . . . . . . . . . . . . . . . . . . . . . . . . . . . . . . . . . . . . . . . . . . . . . . . . . . . . . . . . . . . . . . . . . . . . . . . . . . . . . .75 Error Display in the User Interface . . . . . . . . . . . . . . . . . . . . . . . . . . . . . . . . . . . . . . . . . . . . . . . . . . . . . . . . . . . . . . . . . . . . . .75 4.2.1 Error Header . . . . . . . . . . . . . . . . . . . . . . . . . . . . . . . . . . . . . . . . . . . . . . . . . . . . . . . . . . . . . . . . . . . . . . . . . . . . . . . . . . . . .75 4.2.2 Communication Error String . . . . . . . . . . . . . . . . . . . . . . . . . . . . . . . . . . . . . . . . . . . . . . . . . . . . . . . . . . . . . . . . . . . . . .76 4.2.3 Flow Error String . . . . . . . . . . . . . . . . . . . . . . . . . . . . . . . . . . . . . . . . . . . . . . . . . . . . . . . . . . . . . . . . . . . . . . . . . . . . . . . . .76 4.2.4 SIL Error String . . . . . . . . . . . . . . . . . . . . . . . . . . . . . . . . . . . . . . . . . . . . . . . . . . . . . . . . . . . . . . . . . . . . . . . . . . . . . . . . . . .79 Diagnostics . . . . . . . . . . . . . . . . . . . . . . . . . . . . . . . . . . . . . . . . . . . . . . . . . . . . . . . . . . . . . . . . . . . . . . . . . . . . . . . . . . . . . . . . . . .80 4.3.1 Introduction. . . . . . . . . . . . . . . . . . . . . . . . . . . . . . . . . . . . . . . . . . . . . . . . . . . . . . . . . . . . . . . . . . . . . . . . . . . . . . . . . . . . . .80 4.3.2 Flowcell Problems . . . . . . . . . . . . . . . . . . . . . . . . . . . . . . . . . . . . . . . . . . . . . . . . . . . . . . . . . . . . . . . . . . . . . . . . . . . . . . . .80 4.3.3 Transducer/Buffer Problems . . . . . . . . . . . . . . . . . . . . . . . . . . . . . . . . . . . . . . . . . . . . . . . . . . . . . . . . . . . . . . . . . . . . . .82 Appendix A. Specifications A.1 Operation and Performance . . . . . . . . . . . . . . . . . . . . . . . . . . . . . . . . . . . . . . . . . . . . . . . . . . . . . . . . . . . . . . . . . . . . . . . . . . .83 A.2 Meter Body/Transducer. . . . . . . . . . . . . . . . . . . . . . . . . . . . . . . . . . . . . . . . . . . . . . . . . . . . . . . . . . . . . . . . . . . . . . . . . . . . . . . .84 A.3 Electronics . . . . . . . . . . . . . . . . . . . . . . . . . . . . . . . . . . . . . . . . . . . . . . . . . . . . . . . . . . . . . . . . . . . . . . . . . . . . . . . . . . . . . . . . . . . .85 Appendix B. Menu Maps Appendix C. Modbus Map C.1 C.2 C.3 C.4 C.5 Frequently Used Modbus Addresses . . . . . . . . . . . . . . . . . . . . . . . . . . . . . . . . . . . . . . . . . . . . . . . . . . . . . . . . . . . . . . . . . . . .97 User Group Definitions. . . . . . . . . . . . . . . . . . . . . . . . . . . . . . . . . . . . . . . . . . . . . . . . . . . . . . . . . . . . . . . . . . . . . . . . . . . . . . . . .98 Modbus Map . . . . . . . . . . . . . . . . . . . . . . . . . . . . . . . . . . . . . . . . . . . . . . . . . . . . . . . . . . . . . . . . . . . . . . . . . . . . . . . . . . . . . . . . . .99 Modbus Unit Codes . . . . . . . . . . . . . . . . . . . . . . . . . . . . . . . . . . . . . . . . . . . . . . . . . . . . . . . . . . . . . . . . . . . . . . . . . . . . . . . . . . 124 Modbus Protocol . . . . . . . . . . . . . . . . . . . . . . . . . . . . . . . . . . . . . . . . . . . . . . . . . . . . . . . . . . . . . . . . . . . . . . . . . . . . . . . . . . . . 127 Appendix D. HART Menu Maps D.1 HART Connection . . . . . . . . . . . . . . . . . . . . . . . . . . . . . . . . . . . . . . . . . . . . . . . . . . . . . . . . . . . . . . . . . . . . . . . . . . . . . . . . . . . . D.1.1 Wiring to the HART Circuit . . . . . . . . . . . . . . . . . . . . . . . . . . . . . . . . . . . . . . . . . . . . . . . . . . . . . . . . . . . . . . . . . . . . . . D.1.2 Write Mode Switch . . . . . . . . . . . . . . . . . . . . . . . . . . . . . . . . . . . . . . . . . . . . . . . . . . . . . . . . . . . . . . . . . . . . . . . . . . . . . D.1.3 Use Force High with HART . . . . . . . . . . . . . . . . . . . . . . . . . . . . . . . . . . . . . . . . . . . . . . . . . . . . . . . . . . . . . . . . . . . . . . D.2 Root Menu . . . . . . . . . . . . . . . . . . . . . . . . . . . . . . . . . . . . . . . . . . . . . . . . . . . . . . . . . . . . . . . . . . . . . . . . . . . . . . . . . . . . . . . . . . D.3 HART Service Map for General Users . . . . . . . . . . . . . . . . . . . . . . . . . . . . . . . . . . . . . . . . . . . . . . . . . . . . . . . . . . . . . . . . . D.4 HART Service Menu for SIL Users . . . . . . . . . . . . . . . . . . . . . . . . . . . . . . . . . . . . . . . . . . . . . . . . . . . . . . . . . . . . . . . . . . . . . D.5 Review Menu . . . . . . . . . . . . . . . . . . . . . . . . . . . . . . . . . . . . . . . . . . . . . . . . . . . . . . . . . . . . . . . . . . . . . . . . . . . . . . . . . . . . . . . . 129 129 129 130 130 131 132 133 Appendix E. Special Applications E.1 E.2 Pig Detection. . . . . . . . . . . . . . . . . . . . . . . . . . . . . . . . . . . . . . . . . . . . . . . . . . . . . . . . . . . . . . . . . . . . . . . . . . . . . . . . . . . . . . . . 135 Path Error Handling. . . . . . . . . . . . . . . . . . . . . . . . . . . . . . . . . . . . . . . . . . . . . . . . . . . . . . . . . . . . . . . . . . . . . . . . . . . . . . . . . . 136 Appendix F. Data Records F.1 F.2 F.3 Service Record . . . . . . . . . . . . . . . . . . . . . . . . . . . . . . . . . . . . . . . . . . . . . . . . . . . . . . . . . . . . . . . . . . . . . . . . . . . . . . . . . . . . . . F.1.1 Data Entry . . . . . . . . . . . . . . . . . . . . . . . . . . . . . . . . . . . . . . . . . . . . . . . . . . . . . . . . . . . . . . . . . . . . . . . . . . . . . . . . . . . . . Initial Settings . . . . . . . . . . . . . . . . . . . . . . . . . . . . . . . . . . . . . . . . . . . . . . . . . . . . . . . . . . . . . . . . . . . . . . . . . . . . . . . . . . . . . . . Diagnostic Parameters . . . . . . . . . . . . . . . . . . . . . . . . . . . . . . . . . . . . . . . . . . . . . . . . . . . . . . . . . . . . . . . . . . . . . . . . . . . . . . PanaFlow HT User’s Manual 139 139 141 143 v Contents Appendix G. CE Mark Compliance G.1 Introduction. . . . . . . . . . . . . . . . . . . . . . . . . . . . . . . . . . . . . . . . . . . . . . . . . . . . . . . . . . . . . . . . . . . . . . . . . . . . . . . . . . . . . . . . . 145 G.2 Wiring . . . . . . . . . . . . . . . . . . . . . . . . . . . . . . . . . . . . . . . . . . . . . . . . . . . . . . . . . . . . . . . . . . . . . . . . . . . . . . . . . . . . . . . . . . . . . . 145 vi PanaFlow HT User’s Manual Preface Information Paragraphs • Note paragraphs provide information that provides a deeper understanding of the situation, but is not essential to the proper completion of the instructions. • Important paragraphs provide information that emphasizes instructions that are essential to proper setup of the equipment. Failure to follow these instructions carefully may cause unreliable performance. • Caution! paragraphs provide information that alerts the operator to a hazardous situation that can cause damage to property or equipment. • Warning! paragraphs provide information that alerts the operator to a hazardous situation that can cause injury to personnel. Cautionary information is also included, when applicable. Safety Issues WARNING! It is the responsibility of the user to make sure all local, county, state and national codes, regulations, rules and laws related to safety and safe operating conditions are met for each installation. Auxiliary Equipment Local Safety Standards The user must make sure that he operates all auxiliary equipment in accordance with local codes, standards, regulations, or laws applicable to safety. Working Area WARNING! Auxiliary equipment may have both manual and automatic modes of operation. As equipment can move suddenly and without warning, do not enter the work cell of this equipment during automatic operation, and do not enter the work envelope of this equipment during manual operation. If you do, serious injury can result. WARNING! Make sure that power to the auxiliary equipment is turned OFF and locked out before you perform maintenance procedures on the equipment. Qualification of Personnel Make sure that all personnel have manufacturer-approved training applicable to the auxiliary equipment. Personal Safety Equipment Make sure that operators and maintenance personnel have all safety equipment applicable to the auxiliary equipment. Examples include safety glasses, protective headgear, safety shoes, etc. Unauthorized Operation Make sure that unauthorized personnel cannot gain access to the operation of the equipment. PanaFlow HT User’s Manual vii Preface Environmental Compliance Waste Electrical and Electronic Equipment (WEEE) Directive GE Measurement & Control is an active participant in Europe’s Waste Electrical and Electronic Equipment (WEEE) take-back initiative, directive 2002/96/EC. The equipment that you bought has required the extraction and use of natural resources for its production. It may contain hazardous substances that could impact health and the environment. In order to avoid the dissemination of those substances in our environment and to diminish the pressure on the natural resources, we encourage you to use the appropriate take-back systems. Those systems will reuse or recycle most of the materials of your end life equipment in a sound way. The crossed-out wheeled bin symbol invites you to use those systems. If you need more information on the collection, reuse and recycling systems, please contact your local or regional waste administration. Visit http://www.ge-mcs.com/en/about-us/environmental-health-and-safety/1741-weee-req.html for take-back instructions and more information about this initiative. viii PanaFlow HT User’s Manual Chapter 1. Introduction Chapter 1. 1.1 Introduction Overview Thank you for purchasing the PanaFlow HT ultrasonic flowmeter. PanaFlow HT is a wetted ultrasonic flow meter that is SIL certified (IEC61508 pending) by design to give you confidence in your flow measurement and to provide reliable flow meter operation for both safety and process control systems. In addition to the peace of mind that SIL certification brings, PanaFlow HT also has all the advantages of ultrasonic flow measurement over other traditional technologies-no measurement drifting, no periodic calibration requirement, no restriction in the pipe, minimal pressure drop, no maintenance, and no moving parts. The PanaFlow HT consists of the new XMT900 electronics, the field proven BWT transducers system, FTPA buffers and a meter body. It is available in both a local or remote mount configuration based on convenience and process temperature requirements. XMT900 Electronics Transducer Cable BWT Transducers and Junction Box Figure 1: PanaFlow HT (Local Mount) PanaFlow HT User’s Manual 1 Chapter 1. Introduction 1.2 Theory of Operation 1.2.1 Transit-Time Flow Measurement In this method, two transducers serve as both ultrasonic signal generators and receivers. They are in acoustic communication with each other, meaning the second transducer can receive ultrasonic signals transmitted by the first transducer and vice versa. In operation, each transducer functions as a transmitter, generating a certain number of acoustic pulses, and then as a receiver for an identical number of pulses. The time interval between transmission and reception of the ultrasonic signals is measured in both directions. When the liquid in the pipe is not flowing, the transit-time downstream equals the transit-time upstream. When the liquid is flowing, the transit-time downstream is less than the transit-time upstream. The difference between the downstream and upstream transit times is proportional to the velocity of the flowing liquid, and its sign indicates the direction of flow. Figure 2: Flow and Transducer Paths 1.2.2 Active Temperature Compensation Ultrasonic flowmeters use transit time to determine the liquid or gas flow in a pipeline. Measured transit time consists not only of the time the ultrasonic signal spends in a fluid, but also of a portion of “dead time,” being the time that the electrical signal is converted into an acoustical signal and the time the acoustic signal travels inside the transducer. To allow for the utmost accuracy, PanaFlow HT uses pulse echo to actively measure the dead time. By sending a pulse and measuring its reflection, the dead time is measured in real time rather than using a preset value. As a result of this GE invention, PanaFlow HT maintains its accuracy as process temperature conditions dynamically change. 2 PanaFlow HT User’s Manual Chapter 1. Introduction 1.3 SIL Application PanaFlow HT is a SIL2 ultrasonic flowmeter (sensor) with the capability of providing a SIL3 system in a redundant design configuration. PanaFlow HT is IEC61508 certified through a complete design validation from a third party organization. By achieving a third party certification, we have proven the required design rigor through the product safety lifecycle, and the implementation of functional safety management. This added design, manufacturing, and control rigor ensures that the GE PanaFlow HT is the optimal ultrasonic flowmeter for your safety or process control system. PanaFlow HT User’s Manual 3 Chapter 1. Introduction [no content intended for this page] 4 PanaFlow HT User’s Manual Chapter 2. Installation Chapter 2. 2.1 Installation Introduction To ensure safe and reliable operation of the PanaFlow HT, the system must be installed in accordance with the established guidelines. Those guidelines, explained in detail in this chapter, include the following topics: • Unpacking the PanaFlow HT system • Selecting suitable sites for the electronics enclosure and the meter body • Installing the meter body • Installing the electronics enclosure (remote mount option) • Wiring the electronics enclosure WARNING! The PanaFlow HT flow transmitter can measure the flow rate of many fluids, some potentially hazardous. The importance of proper safety practices cannot be overemphasized. Be sure to follow all applicable local safety codes and regulations for installing electrical equipment and working with hazardous fluids or flow conditions. Consult company safety personnel or local safety authorities to verify the safety of any procedure or practice. !ATTENTION EUROPEAN CUSTOMERS! To meet CE Mark requirements, all cables must be installed as described in Appendix G, CE Mark Compliance. PanaFlow HT User’s Manual 5 Chapter 2. Installation 2.2 Unpacking Before removing the PanaFlow HT system from the crate, please inspect the flowmeter. Each instrument manufactured by GE Measurement & Control is warranted to be free from defects in material and workmanship. Before discarding any of the packing materials, account for all components and documentation listed on the packing slip. The discarding of an important item along with the packing materials is all too common. If anything is missing or damaged, contact GE Customer Care immediately for assistance. Please note that your PanaFlow HT system may come in one of the three common configurations as shown below or a custom design system. Also, the electronics may be in a separate box from the meter body for a remote mount configuration. Figure 3: PanaFlow HT Configurations 2.2.1 Identification The PanaFlow HT meter has up to three separate labels for identification, depending on configuration. The system can be either mounted as a single unit (local mounting) or as two separate pieces (remote mounting). 2.2.1a XMT900 Transmitter Identification Figure 4: XMT Transmitter Label (example) 6 PanaFlow HT User’s Manual Chapter 2. Installation 2.2.1b Meter Body Identification FLOW DIRECTION XMT900 PanametricsTM Ultrasonic Liquid Flowmeter TAG # : (SEE NOTE 3) PART # : (FILL IN PER ORDER) ASSEMBLY DATE : (MM-YYYY) SERIAL # : (FLOWCELL SERIAL #) P1/P2 : / INCHES L1/L2 : / INCHES OPER. TEMPERATURE: [See Note 5] F TO C TO MAX. OPER. PRESS. : [See Note 5] PSIG/BARG @ 100 F/38 C PSIG/BARG @ F/ C F C METER SIZE: FLANGE CLASS: METER BODY MATERIAL: DRY WEIGHT: [See Note4] [See Flange Rating] [See Note 6] [See Table 3] DISPENSATION: FLOW CELL MFG: MFG SERIAL NO.: NOBO IDENT. NO.: [See Note 7] [See Note 8] Figure 5: Flowcell Identification (example) 2.2.2 Transport Figure 6 below indicates the proper way to cinch the lifting straps to the flowmeter. This is the only approved way to hoist the flowmeter into position in the pipeline. Figure 6: Hoisting PanaFlow HT PanaFlow HT User’s Manual 7 Chapter 2. Installation 2.3 Site Considerations Because the relative location of the meter body and the electronics enclosure is important, use the guidelines in this section to plan the PanaFlow HT installation. 2.3.1 Meter Body Location Ideally, choose a section of pipe with unlimited access; for example, a long stretch of pipe that is above ground. However, if the meter body is to be mounted on an underground pipe, dig a pit around the pipe to facilitate installation or removal of the transducers. Please do not tighten the FTPA buffer bolts on the meter body since they are factory set. 2.3.1a Transducer Location For a given fluid and pipe, the PanaFlow HT’s accuracy depends on the location and alignment of the transducers. In addition to accessibility, when planning for transducer location, adhere to the following guidelines: • Locate the meter body so that there are at least 10 pipe diameters of straight, undisturbed flow upstream and 5 pipe diameters of straight, undisturbed flow downstream from the measurement point. Undisturbed flow means avoiding sources of turbulence in the fluid such as valves, flanges, expansions, and elbows; avoiding swirl; and avoiding cavitation. Flow Direction Figure 7: Flow Direction • Locate the transducers on a common axial plane along the pipe. Locate the transducers on the side of the pipe, rather than the top or bottom, since the top of the pipe tends to accumulate gas and the bottom tends to accumulate sediment. Either condition will cause increased attenuation of the ultrasonic signal. There is no similar restriction with vertical pipes as long as the flow of fluids is upward to prevent free falling of fluids or a less than full pipe. Good Bad Good Good Bad Figure 8: Good and Bad Transducer Locations CAUTION! 8 Do not place insulation on or around the transducer or junction box. The transducer and junction box act as a heat sink that protects the transducer from high and low temperatures. PanaFlow HT User’s Manual Chapter 2. Installation 2.3.2 Electronics Enclosure Location (Remote Mount) The standard PanaFlow HT electronics enclosure is a powder-coated, aluminum, IP67 explosion-proof enclosure. Typically, the enclosure is mounted as close as possible to the transducers. When choosing a site for remote mount installation, make sure the location permits easy access to the electronics enclosure for programming, maintenance and service. The maximum distance is 100 feet (30 meters). Note: For compliance with the European Union’s Low Voltage Directive (2006/95/EC), this unit requires an external power disconnect device such as a switch or circuit breaker. The disconnect device must be marked as such, clearly visible, directly accessible, and located within 1.8 m (6 ft) of the PanaFlow HT. 2.3.3 Cable Lengths Locate the electronics enclosure as close as possible to the transducers, preferably directly on the flowcell. However, GE can supply transducer cables up to 100 ft (30 m) in length for remote location of the electronics enclosure. If longer cables are required, consult the factory for assistance. 2.3.4 Transducer Cables When installing the transducer cables, always observe established standard practices for the installation of electrical cables. Do not route transducer cables alongside high amperage AC power lines or any other cables that could cause electrical interference. Also, protect the transducer cables and connections from the weather and corrosive atmospheres. PanaFlow HT User’s Manual 9 Chapter 2. Installation 2.4 Mounting the Electronics The standard PanaFlow HT electronics package is housed in an IP67 weather-resistant enclosure suitable for indoor or outdoor use. See Figure 9 below for the mounting dimensions (remote mount only) and weight of the XMT900 electronics. M20 Plug 13.58 [345] M25 Plug 12.08 [306.8] 8.03 [204] 10.54 [267.65] 16.54 [420.05] NOTES: 1. WEIGHT: AROUND 13.9LBS (6.3 KG) FOR WHOLE ASSEMBLY. Figure 9: PanaFlow HT Electronics Package (dwg. 712-1795) 10 PanaFlow HT User’s Manual Chapter 2. Installation 2.5 Making Electrical Connections This section contains instructions for making all the necessary electrical connections to the XMT900 flow transmitter. Refer to Figure 10 for a complete wiring diagram. !ATTENTION EUROPEAN CUSTOMERS! To meet CE Mark requirements, all cables must be installed as described in Appendix G, CE Mark Compliance. Refer to Figure 10 below and prepare the XMT900 for wiring by completing the following steps: Terminal Block - Input/Output Connections PIN Label 1 A2 A+ 3 B4 B+ 5 C6 C+ 7 D8 D+ Description Analog Output A:4-20mA/HART Output(SIL) Negative Analog Output A:4-20mA/HART Output(SIL) Positive Analog Output B:4-20mA Negative Analog Output B:4-20mA Positive Digital Output C Negative Digital Output C Positive Digital Output D Negative Digital Output D Positive Terminal Block - Power Connection(AC) PIN Label 1 L2/N 2 L1 Description Neutral Connection Live Power Connection AC Wiring Shown DC Wiring PIN Label Description Negative 1 2 + Positive GROUNDING 4 Terminal Block -Modbus/Calibration Connections PIN Label 1 MOD2 MOD+ 3 CAL4 CAL+ GROUNDING 3 A GROUNDING 2 Description Modbus/Service Port Negative Modbus/Service Port Positive Calibration Port Negative Calibration Port Positive GROUNDING 1 DETAIL A SCALE 1 : 1 Figure 10: Wiring Diagram (Dwg. 702-1312) WARNING! Proper grounding of the PanaFlow HT chassis is required to prevent the possibility of electric shock. See Figure 10 above to locate the chassis grounding screw. All ground screws should be hand tightened only. Do not over-torque. Maximum torque is 2.5 N-m (22 in-lbs). PanaFlow HT User’s Manual 11 Chapter 2. Installation 2.5 Making Electrical Connections (cont.) WARNING! Always disconnect the line power from the PanaFlow HT before removing either the front cover or the rear cover. This is especially important in a hazardous environment. 1. Disconnect any previously wired power line from the unit. 2. Loosen the set screw on the wiring cover. 3. Place a rod or long screwdriver across the cover in the slots provided, and rotate the cover counterclockwise until it comes free from the enclosure. 4. Install any required cable clamps in the appropriate conduit holes on the opposite side of the enclosure. 5. Note the labels inside the rear cover to assist in wiring the power and option connections. Proceed to the appropriate section of this chapter to make the desired wiring connections. 2.5.1 Preparing for Wiring Wiring any option set requires completion of the following general steps: 1. Disconnect the main power to the unit and remove the wiring cover. 2. Install a cable clamp in the chosen conduit hole on the side of the electronics enclosure and feed a standard twisted-pair cable through this conduit hole. 3. Locate the terminal block shown in Figure 10 on page 11 and wire the option as indicated on the label inside the wiring cover (see Figure 2.5 on page 11). Secure the cable clamp. !ATTENTION EUROPEAN CUSTOMERS! To meet CE Mark requirements, all cables must be installed as described in Appendix G, CE Mark Compliance. 4. If wiring of the unit has been completed, reinstall the wiring cover on the enclosure and tighten the set screw. For more specific instructions on particular output configuration, proceed to the appropriate sub-section(s) that follow. 12 PanaFlow HT User’s Manual Chapter 2. Installation 2.5.2 Wiring Analog Outputs The standard configuration of the PanaFlow HT flow transmitter includes one isolated 4-20 mA analog output with HART. Connections to these outputs may be made with standard twisted-pair wiring, but the current loop impedance for these circuits must not exceed 600 ohms. A second analog output is available as an option. To wire the analog outputs, complete the following steps: 1. Disconnect the main power to the unit and remove the wiring cover. 2. Install the required cable clamp in the chosen conduit hole on the side of the electronics enclosure. 3. Refer to Figure 10 on page 11 for the location of the terminal block and wire the analog output as shown. Secure the cable clamp. !ATTENTION EUROPEAN CUSTOMERS! To meet CE Mark requirements, all cables must be installed as described in Appendix G, CE Mark Compliance. Note: Analog Output A carries a HART signal. Whenever this becomes an open circuit or the load exceeds specifications, the output will go to 0 mA and the HART signal will be lost. This can happen if one disconnects the HART communicator while the circuit is live (hot swap). To restore HART communication, one must reset the unit. This can be done by power cycling the instrument, or by entering Configure mode and then exiting without making a change. (Select No at the “Save Changes?” prompt.) Analog Output A carries an active HART signal. Do not supply a 24 V supply to this circuit. The circuit is powered by the flowmeter. 4. If wiring of the unit has been completed, reinstall the wiring cover on the enclosure and tighten the set screw. WARNING! Make sure all covers, with their o-ring seals, are installed and the set screws tightened before applying power in a hazardous environment. Note: Prior to use, the analog output must be set up and calibrated. Proceed to the next section to continue the initial wiring of the unit. Note: Upon applying power to the instrument, the analog outputs will go to 24 mA before settling on a measurement value. This initial state of 24 mA is intended to signal to the Operator that the instrument is powered up and executing the initial self-test routines. The 24 mA state normally lasts only for a few seconds until we start measuring flow. Note: See Appendix A, Specifications, for the load and voltage requirements. PanaFlow HT User’s Manual 13 Chapter 2. Installation 2.5.3 Wiring Digital Outputs Wiring any option set requires completion of the following general steps: 1. Disconnect the main power to the unit and remove the wiring cover. 2. Install the required cable clamp in the chosen conduit hole on the side of the electronics enclosure. 3. Refer to Figure 10 on page 11 for the location of the terminal block and wire the digital output (C and D) as shown. Secure the cable clamp. !ATTENTION EUROPEAN CUSTOMERS! To meet CE Mark requirements, all cables must be installed as described in Appendix G, CE Mark Compliance. 4. If wiring of the unit has been completed, reinstall the wiring cover on the enclosure and tighten the set screw. Note: Prior to use, the option must be set up and calibrated. For more specific instructions on output configuration, proceed to the appropriate sub-section(s) that follow. Note: Digital Outputs can be configured as a totalizer pulse, frequency, alarms or control output. 14 PanaFlow HT User’s Manual Chapter 2. Installation 2.5.3a Wiring as a Totalizer (Pulse) Output Wire this option in accordance with the connections shown on the label in the rear cover (see Figure 10 on page 11). Figure 11 shows a sample wiring diagram of a totalizer output circuit. Refer to Appendix A, Specifications for the load and voltage requirements. Volts Common Load Pulse Counter Figure 11: Wiring a Totalizer (Pulse) Output PanaFlow HT User’s Manual 15 Chapter 2. Installation 2.5.3b Wiring as a Frequency Output Wire this option in accordance with the connections shown on the label in the rear cover (see Figure 10 on page 11). Figure 12 below shows a sample wiring diagram of a frequency output circuit. Refer to Appendix A, Specifications for the load and voltage requirements. Common IN Frequency Counter Figure 12: Wiring a Frequency Output 16 PanaFlow HT User’s Manual Chapter 2. Installation 2.5.3c Wiring as Alarms When configured as Alarms, the Digital Output acts as an active, two state output. The Alarm toggles from one state to the other based on a measurement condition. The “open” condition is 0 VDC and the “closed” condition is 5 VDC.The maximum electrical ratings for the relays are listed in Appendix A, Specifications. Each of the alarm relays can be programmed as either Normally Open (NO) or Normally Closed (NC). In setting up an alarm relay, it may be programmed for either conventional or fail-safe operation. In fail-safe mode, the alarm relay is held at “closed” (5 VDC), except when it is triggered or a power failure or other interruption occurs. Connect each alarm relay in accordance with the wiring instructions shown in Figure 13 below (see Figure 10 on page 11).Refer to Appendix A, Specifications for the load and voltage requirements. Normally Open Configuration +NO -C Conventional Not Triggered State - XMT900 + Alarm Device Conventional Triggered State Normally Closed or Fault Configuration +NC -C Wiring Conventional Not Triggered State XMT900 - + Alarm Device Conventional Triggered State XMT900 XMT900 Alarm Device Alarm Device - + - + Figure 13: Wiring Alarm Outputs PanaFlow HT User’s Manual 17 Chapter 2. Installation 2.5.3d Wiring as Control Output The purpose of the Control Output is to generate a signal that can be used to control an external device based on a totalized measurement in the flowmeter. The Control State can be set to Normally Open or Normally Closed. The setting depends on the device being connected to the control output. The Control State indicates whether the Operator wants that switch to be Open or Closed until the point where the measured total threshold is reached. Once the flow totals reach the threshold level, the meter will switch the Control Output to the opposite state. If the system calls for the Control to be Open (0 VDC) until a certain flow level is reached, the Operator should set the Control to Normally Open. At the measured threshold, the flowmeter will change the Control to Closed (5 VDC). If the system calls for the Control to be closed until a certain flow level is reached, the Operator should set the Control to Normally Closed. At the measured threshold, the flowmeter will change the Control to Open. Connect each control output in accordance with the wiring instructions shown on the label inside of the rear cover and below on Figure 14. Normally Open Configuration +NO -C Conventional Not Triggered State - XMT900 + Control Device Conventional Triggered State Normally Closed Configuration +NC -C Wiring Conventional Not Triggered State XMT900 - + Control Device Conventional Triggered State XMT900 XMT900 Control Device Control Device - + - + Figure 14: Control Output Connections 18 PanaFlow HT User’s Manual Chapter 2. Installation 2.5.4 Wiring the Modbus/Service Port The XMT900 flow transmitter is equipped with a Modbus communication port for either a connection to Vitality (PC software) or to a separate control system. The port is an RS485 interface. IMPORTANT: The maximum cable length for RS485 is 4000 ft (1200 m). To wire to this RS485 serial port, refer to Figure 10 on page 11 and complete the following steps: 1. Disconnect the main power to the unit and remove the rear cover. 2. Install the required cable clamp in the chosen conduit hole on the side of the electronics enclosure. 3. Feed one end of the cable through the conduit hole, wire it as shown in Figure 15 below. 4. If wiring of the unit has been completed, reinstall the wiring cover on the enclosure and tighten the set screw. Note: Prior to use, the serial port must be programmed. WARNING! Make sure all covers, with their O-Ring seals, are installed and the set screws tightened before applying power in a hazardous environment. Terminal Block -Modbus Connections PIN Label Description 1 2 Modbus/Service Port Negative Modbus/Service Port Positive MODMOD+ Figure 15: Modbus Connections PanaFlow HT User’s Manual 19 Chapter 2. Installation 2.5.5 Wiring the Calibration Port The XMT900 flow transmitter is equipped with a calibration port specifically designed for calibrating the PanaFlow HT. It is wired for a frequency output. Note: Performing calibration of the meter requires entering a Service-level password. To wire to this port, refer to Figure 16 shown below and complete the following steps: 1. Disconnect the main power to the unit and remove the rear cover. 2. Install the required cable clamp in the chosen conduit hole on the side of the electronics enclosure. 3. Feed one end of the cable through the conduit hole, wire it to the terminal block. 4. If wiring of the unit has been completed, reinstall the wiring cover on the enclosure and tighten the set screw. WARNING! Make sure all covers, with their O-Ring seals, are installed and the set screws tightened before applying power in a hazardous environment. Terminal Block -Calibration Connections PIN Label Description 3 4 Calibration Port Negative Calibration Port Positive CALCAL+ Figure 16: Calibration Connections 20 PanaFlow HT User’s Manual Chapter 2. Installation 2.5.6 Wiring the Line Power The PanaFlow HT may be ordered for operation with power inputs of 100-240 VAC or 15-30 VDC. The label on the side of the electronics enclosure lists the meter’s required line voltage and power rating. The fuse size is listed in Appendix A, Specifications. Be sure to connect the meter to the specified line voltage only. Note: For compliance with the European Union’s Low Voltage Directive (2006/95/EC), this unit requires an external power disconnect device such as a switch or circuit breaker. The disconnect device must be marked as such, clearly visible, directly accessible, and located within 1.8 m (6 ft) of the PanaFlow HT. Refer to Figure 10 on page 11 to locate the terminal blocks and connect the line power as follows: WARNING! Improper connection of the line power leads or connecting the meter to the incorrect line voltage may damage the unit. It may also result in hazardous voltages at the flowcell and associated piping as well as within the electronics enclosure. 1. Prepare the line power leads by trimming the line and neutral AC power leads (or the positive and negative DC power leads) to a length 0.5 in. (1 cm) shorter than the ground lead. This ensures that the ground lead is the last to detach if the power cable is forcibly disconnected from the meter. 2. Install a suitable cable clamp in the conduit hole. If possible, avoid using the other conduit holes for this purpose, to minimize any interference in the circuitry from the AC power line. !ATTENTION EUROPEAN CUSTOMERS! To meet CE Mark requirements, all cables must be installed as described in Appendix G, CE Mark Compliance. 3. Route the cable through the conduit hole and connect the line power leads to the power terminal, using the pin number assignments shown in Figure 10 on page 11. 4. Leaving a bit of slack, secure the power line with the cable clamp. 5. If the unit has been completed, reinstall the wiring cover on the enclosure and tighten the set screw. WARNING! Make sure all covers, with their O-ring seals, are installed and the set screws tightened before applying power in a hazardous environment. CAUTION! The transducers must be properly wired before applying power to the meter. PanaFlow HT User’s Manual 21 Chapter 2. Installation 2.6 Wiring Transducers (Remote Mount Cable) For a PanaFlow HT remote mounting version, only the remote mount cable must be connected between the meter body junction box and the XMT900 junction box. See Figure 17 below. Transducer wiring to the meter body junction box and XMT900 electronics wiring to the XMT900 junction box is completed at the factory. After installing the meter body and XMT900 electronics, you must wire the remote cable. Figure 17: Remote Cable Wiring Before wiring the PanaFlow HT remote mount cable, complete the following steps: • Disconnect the main power from the XMT900 electronics enclosure. • Install required adapters on the enclosure. 22 PanaFlow HT User’s Manual Chapter 2. Installation 2.6.1 Remote Mount Wiring Instructions WARNING! Be sure to remove power before performing these steps! In the lower chamber of the enclosure is the Transducer Junction box. In the case of remote mount, a duplicate box is mounted on the pipe stand. Follow these instructions to connect the two junction boxes using the remote mount cable supplied. 1. Loosen the set screw on the junction box cover and remove the cover. 2. Inside the wiring area of these two enclosures is a round printed circuit board with two mounting screws. Loosen the mounting screws, insert your fingers in the two 1-cm round holes, and twist the board counter-clockwise (in the direction of the arrows) approximately 2 cm to release it from the enclosure. The board will remain wired to the system, but with enough slack to pull the board out about 5 cm. The transducer connections are on the other side of the board. Figure 18: Removing the Board 3. Make the mechanical connection between the remote cable and the junction boxes. Install the cable into the wiring port on each enclosure end and tighten the cable glands per manufacturer instructions. 4. At the Flowcell end, connect MCX cables from the remote mount cable to MCX connectors MCX-J1 (Ch1 Up) and MCX-J11 (Ch1 Dn). For a 2-channel system, also connect to MCX-J3 (Ch2 Up) and MCX-J9 (Ch2 Dn). 5. At the Electronics end, connect BNC cables from the remote mount cable to BNC connectors BNC-J1 (Ch1 Up) and BNC-J6 (Ch1 Dn). For a 2-channel system also connect to BNC-J2 (Ch2 Up) and BNC-J5 (Ch2 Dn). PanaFlow HT User’s Manual 23 Chapter 2. Installation 2.6.1 Remote Mount Wiring Instructions (cont.) Figure 19: Wiring the Cable 6. In each case, check all BNC and MCX connections to be sure they are securely fastened. Then turn the board over, pushing the wires back into the enclosure with a counterclockwise twisting motion. Figure 20: Replacing the Board 7. Finally, engage the two mounting screws with the washers on top of the board and securely fasten the board to the enclosure. Replace the cover and you are finished connecting transducers. Engage the set screw on the enclosure for security. WARNING! Make sure all covers, with their o-ring seals, are installed and the set screws tightened before applying power in a hazardous environment. 24 PanaFlow HT User’s Manual Chapter 3. Initial Setup and Programming Chapter 3. 3.1 Initial Setup and Programming Introduction This chapter provides instructions for programming the PanaFlow HT flowmeter to place it into operation. Before the PanaFlow HT can begin taking measurements, the User Preferences, Inputs/Outputs, and SIL testing must be entered and tested. 3.2 User Restrictions If a Dangerous Detected state occurs, the flowmeter will put the SIL Output in the DD state and remain that way until an Authorized User intervenes. The DD state can be cleared by executing a reset of the flowmeter. There are two methods for clearing the DD state: 1. Enter the Program menu at SIL user access level. Then exit without making any changes. The flowmeter will execute a soft reset. 2. Turn off power, wait 1 minute, turn power back on. Display Note: Display either 1 variable, 2 variables, or totalizer. Main Menu Program Locked Password xxxx General SIL Service Factory (Service Access Level) SIL Testing No Active Settings Sensor Setup Commissioned Settings Calibration Advanced Factory Factory Settings Display Figure 21: High Level Menu Map PanaFlow HT User’s Manual 25 Chapter 3. Initial Setup and Programming 3.2 User Restrictions (cont.) Notice that, at the bottom of Figure 18, there are four options for “Save Changes?”. Selecting “No” will discard any program changes and reset the instrument to restart Measure mode. The other three options are Active Settings, Commissioned Settings, and Factory Settings. They allow the instrument to store three complete sets of program data. Note: The option to save as Commissioned Settings is only available if the operator has Service or Factory access level. The option to save as Factory Settings is only available from the Factory access level. The purpose of these extra data sets is to allow the instrument to be restored to those saved settings as a troubleshooting measure. If at any point there is an error in the Active Data Set (the set of parameters used in Measure mode), the Authorized User may revert the Active Data Set to the Commissioned Data Set. This will return the flowmeter to a known working condition, the way it was programmed when a GE Service Professional first commissioned the product on site. As a secondary redundant measure, the Authorized User may revert the Active Data Set to the Factory Data Set if there is an issue with the Commissioning Data Set. This returns the instrument to the way it was programmed when it was calibrated. Since the integrity of the SIL Output is so critical, the flowmeter maintains all three data sets in memory as a backup in case of error. 26 PanaFlow HT User’s Manual Chapter 3. Initial Setup and Programming 3.3 PanaFlow HT Enclosure Magnetic Keypad The window at the top of the PanaFlow HT enclosure includes the components shown in Figure 22. Figure 22: The Enclosure Window IMPORTANT: The PanaFlow HT’s magnetic keypad enables programming of the instrument through the glass faceplate without removing the cover. Thus, all programming procedures may be performed while the unit is installed in a hazardous area. Above the display, the red light is for power indication and the green light is for system health indication. Once system power is applied, the red light will stay on until power is lost. The green light will only be on when system is measuring without error. If the instrument detects any error, the green light will turn off. Also, when the Operator enters Configure mode, the instrument stops measuring, so the green light will be off. Six keys on the magnetic keypad enable users to program the PanaFlow HT: • [] - confirms the choice of a specific option and data entry within the option • [] - enables users to exit from a specific option without entering unconfirmed data • [] and [] - enable users to highlight a specific window in the display option or to scroll through a list of options (parameters, letters, and numbers 0-9 as well as the negative sign and decimal point) in a menu • [] and [] - enable users to scroll to a specific option, among choices in an option, or to a character in a text entry. PanaFlow HT User’s Manual 27 Chapter 3. Initial Setup and Programming 3.3 PanaFlow HT Enclosure Magnetic Keypad (cont.) When the PanaFlow HT is powered up, the initial screen display appears, followed by a display of measurement parameters. Velocity INITIALIZE . . . XMT 900 9.3 m/s As a guide in following the programming instructions in this chapter, the relevant portions of the Model PanaFlow HT menu map have been reproduced in Figure 31 on page 93 and Figure 32 on page 94. IMPORTANT: If the keypad has not been pressed for 10 minutes, the PanaFlow HT exits the Keypad Program and returns to displaying measurements. The meter discards any configuration changes. Changes can only be retained after the user commits them. 28 PanaFlow HT User’s Manual Chapter 3. Initial Setup and Programming 3.4 Display Programming The XMT900 has three types of displays: one variable, two variables, and totalizer as shown below. From this display, you can scroll to and change either the measurement type or value decimals with either the [] or []buttons. Velocity 10.5 Velocity 65535 Soundspeed 234.0 m/s Total m^3 m/s m/s Fwd Batch Rev Batch 0.00 0.00 E0 3.4.1 Changing Value for One or Two-Variable Screens An outline of a typical one- or two-variable screen appears below. Measurement Type Velocity Value 10.5 m/s Value Units Error Code Figure 23: One-Variable Screen To change the number of decimal places in the value: From the display screen, press either the [] or [] buttons until the value is highlighted Velocity 10.5 m/s Once the value is highlighted, press [] to open the Display/Decimal option. Velocity 10.5 m/s Use the [] and [] buttons to scroll to the appropriate value. (Available options include 0, 1, 2, 3, 4, and Sci (Scientific Notation). Press [] to select the value, and then [] again to confirm the selection or [] to cancel the selection. PanaFlow HT User’s Manual Display/Decimal 0 1 2 3 4 29 Chapter 3. Initial Setup and Programming 3.4.2 Changing Measurement Type for One or Two-Variable Screens To change the measurement type: From the display screen, press either the [] or [] buttons until the measurement type is highlighted Velocity 10.5 m/s Once the value is highlighted, press [] to open the Display/Measurement Type option. Velocity 10.5 m/s Display/Measurement Type The screen changes to Display/Measurement Type. Press the [] and [] buttons to Velocity Volumetric (Actual) Volumetric (Std) Mass scroll to the appropriate parameter. Available parameters include: velocity, volumetric (actual) and volumetric (standard), mass, batch and inventory total, soundspeed, KFactor, Reynolds number, and diagnostics. Once you have chosen the type, press [] to select the value, and then [] again to confirm the selection or [] to cancel the selection. Note: To select a particular measurement unit, go to “Flow Units” on page 43. Parameter Velocity Units m/s Imperial meters/sec ft/s feet/sec Liters per Second GAL/S Gallons per Second L/M Liters per Minute GAL/M Gallons per Minute L/H Liters per Hour GAL/H Gallons per Hour ML/D Mega Liters per Day GAL/D Gallons per Day m3/S Cubic Meter per Second ft3/S Cubic Feet per Second m3/M Cubic Meter per Minute ft3/M Cubic Feet per Minute m3/H Cubic Meter per Hour ft3/H Cubic Feet per Hour m3/D Cubic Meter per Day ft3/D Cubic Feet per Day BBL/S Barrels per Second BBL/S Barrels per Second BBL/M Barrels per Minute BBL/M Barrels per Minute BBL/H Barrels per Hour BBL/H Barrels per Hour Volumetric (Actual) L/S 30 Table 1: Available Parameters and Units Metric Unit PanaFlow HT User’s Manual Chapter 3. Initial Setup and Programming Table 1: Available Parameters and Units (cont.) Units Metric Unit Parameter Volumetric (Standard) Mass Flow Imperial BBL/D Barrels per Day BBL/D Barrels per Day KGAL/M Kilo gallons per Minute KGAL/M Kilo gallons per Minute KGAL/H Kilo gallons per Hour KGAL/H Kilo gallons per Hour KGAL/D Kilo gallons per Day KGAL/D Kilo gallons per Day KBBL/M Kilobarrels per Minute KBBL/M Kilobarrels per Minute KBBL/H Kilobarrels per Hour KBBL/H Kilobarrels per Hour KBBL/D Kilobarrels per Day KBBL/D Kilobarrels per Day SL/S Standard Liters per Second SCFH standard cubic feet per hour SL/M Standard Liters per Minute SCFM standard cubic feet per minute SL/H Standard Liters per Hour SML/D Standard Mega Liters per Day Sm3/S Standard Cubic Meter per Second Sm3/M Standard Cubic Meter per Minute Sm3/H Standard Cubic Meter per Hour Sm3/D Standard Cubic Meter per Day KG/S Kilograms per Second LB/S Pounds per Second KG/M Kilograms per Minute LB/M Pounds per Minute KG/H Kilograms per Hour LB/H Pounds per Hour KG/D Kilograms per Day LB/D Pounds per Day TNE/S Metric Tons (1000 KG) per KLB/S Second KiloPounds per Second TNE/M Metric Tons (1000 KG) per KLB/M Minute KiloPounds per Minute TNE/H Metric Tons (1000 KG) per KLB/H Hour KiloPounds per Hour TNE/D Metric Tons (1000 KG) per KLB/D Day KiloPounds per Day PanaFlow HT User’s Manual SHTN/S short tons per second SHTN/M short tons per minute SHTN/H short tons per hour SHTN/D short tons per day 31 Chapter 3. Initial Setup and Programming Table 1: Available Parameters and Units (cont.) Units Metric Unit Parameter Volumetric (Actual) L Totals Imperial Liters MGAL Mega U.S. Gallons ML Mega Liters ft3 Cubic Feet m3 Cubic Meter BBL Barrels BBL Barrels MBBL Mega Barrels MBL Mega Barrels AC-IN Acre-inches KG Kilograms AC-FT Acre-feet Tonnes Metric Tons (1000 KG) LB Pounds SL Standard Liters Sft3 Standard Cubic Feet Sm3 Standard Cubic Meter kg kilograms LB pounds t Tonnes Density kg/m3 kilograms per cubic meter LB/ft3 pounds per cubic foot Temperature K Kelvin F degree Fahrenheit C degree Celsius R degree Rankine m meter ft feet mm millimeter in inch s second ms Milli second us Micro second h Hour Hz Hertz MHz Mega Hertz kHz Kilo Hertz amp Ampere ma Milli ampere Volumetric (Std) Totals Mass Totals Dimension Time Frequency Current 32 PanaFlow HT User’s Manual Chapter 3. Initial Setup and Programming 3.4.3 Changing Measurement Type or Value for Totalizer Screens The totalizer screen appears similar to Figure 24 below. Totalizer Units (See Section 3.5) Start/Stop Totalizer Reset Totalizer Total m^3 Totalizer Measurement Type Fwd Batch Rev Batch 0.00 0.00 Values E0 Error Code Figure 24: The Totalizer Screen To change the number of decimal places in the value of a totalizer screen: Total m^3 Fwd Batch Rev Batch 0.00 0.00 From the display screen, press either the [] or [] buttons until the value is highlighted E0 Once the value is highlighted, press [] to open the Display/Decimal option. Total m^3 Fwd Batch Rev Batch 0.00 0.00 E0 Use the [] and [] buttons to scroll to the appropriate value. (Available options include 0, 1, 2, 3, 4, and Sci (Scientific Notation). Press [] to select the value, and then [] again to confirm the selection or [] to cancel the selection. PanaFlow HT User’s Manual Display/Decimal 0 1 2 3 4 33 Chapter 3. Initial Setup and Programming 3.4.3 Changing Measurement Type or Value for Totalizer Screens (cont.) To change the totalizer measurement type: From the display screen, press either the [] or [] buttons until the measurement type is highlighted. Total m^3 Fwd Batch Rev Batch 0.00 0.00 E0 Once the value is highlighted, press [] to open the Display/Measurement Type option. Total m^3 Fwd Batch Rev Batch 0.00 0.00 E0 Display/Measurement Type Forward Batch Reverse Batch Net Batch Batch Time The screen changes to Display/Measurement Type. Press the [] and [] buttons to scroll to the appropriate parameter. Available parameters include: Forward Batch (Fwd Batch), Reverse Batch (Rev Batch), Mass Batch and Batch Time. Once you have chosen the type, press [] to select the value, and then [] again to confirm the selection or [] to cancel the selection. If you select Batch Time, you can also select the time measurement units: seconds, minutes, hours or days. To choose the appropriate unit, from the highlighted measurement type, press the [] or [] buttons until the measurement unit is highlighted. Once the unit is highlighted, press [] to open the Display/Measurement Unit option. Total m^3 Batch Time Rev Batch 0.00 0.00 E0 Display/Unit m^3 ft^3 GAL MGAL 34 Press the [] and [] buttons to scroll to the appropriate unit, and press [] to select the unit, and then [] again to confirm the selection or [] to cancel the selection. Note: If you have selected “Batch Time,” the available units are seconds, minutes, hours and days. PanaFlow HT User’s Manual Chapter 3. Initial Setup and Programming 3.4.4 Starting or Stopping Totalizer Measurement To start or stop totalizer measurements: From the display screen, press either the [] or [] buttons until the Start/Stop icon (either an arrow icon for Start or a two-bar icon for Stop) is highlighted. Total m^3 Fwd Batch Rev Batch 0.00 0.00 E0 Once the value is highlighted, press [] to start or stop totalizing. Total m^3 Fwd Batch Rev Batch 0.00 0.00 E0 The icon then changes to the other alternative (start or stop). Total m^3 Fwd Batch Rev Batch 0.00 0.00 E0 3.4.5 Resetting the Totalizer To reset the totalizer: From the display screen, press either the [] or [] buttons until the Reset icon (a partial circle with an arrow) is highlighted. Total m^3 Fwd Batch Rev Batch 0.00 0.00 E0 Once the Reset icon is highlighted, press [] to reset the totalizer to 0. Total m^3 Fwd Batch Rev Batch 0.00 0.00 E0 PanaFlow HT User’s Manual 35 Chapter 3. Initial Setup and Programming 3.5 Entering the Main Menu (Lock Button) Figure 25: Main Menu Map 36 PanaFlow HT User’s Manual Chapter 3. Initial Setup and Programming 3.5.1 Display Format To begin programming your meter, you must select the system units as discussed below. Refer to Figure 31 on page 93 and remember to record all programming data in Appendix F, Data Records. The Display Format submenu is used to set up the type of format to be used in representing information. On the initial screen, use the arrow keys to highlight the lock symbol and press []. The following screen appears. Velocity 9.3 m/s Main Menu Display Format Program Program Review Keypad Lockout Display Format One Variable Two Variable Totalizer Use the arrow keys to highlight Display Format and press []. The following screen appears. Use the [] and [] arrow keys to highlight the desired format setup and press []. The window returns to the previous screen. 3.5.2 Keypad Lockout Main Menu Display Format Program Program Review Keypad Lockout Lockout/ Keypad Lockout Unlock Lock To lock or unlock the keypad for security, on the Main menu, select Keypad Lockout and press []. A screen similar to the following appears. To lock the display, press []or [] to highlight Lock and press [] and the screen returns to the previous display. To unlock the display, press [] or [] to highlight Unlock and press [] and the screen returns to the previous display. Note: When the keypad is locked, press [], [], [] to open the password screen. Then enter either a General User, SIL User, Service or Factory password to unlock. PanaFlow HT User’s Manual 37 Chapter 3. Initial Setup and Programming 3.5.3 Program/Program Review The Program and Program Review menus enables the setting up or viewing of several categories of information at different security levels (see Figure 26 below). As discussed previously, the ability to edit parameters will depend on the access level. The next section will explicitly state which access is required to edit parameters. To view all parameters without editing, select Program Review. Display Note: Display either 1 variable, 2 variables, or totalizer. Main Menu Program General SIL Service Factory (Service Access Level) SIL Testing No Active Settings Sensor Setup Commissioned Settings Calibration Advanced Factory Factory Settings Display Figure 26: Programming/Program Review Menu Map 3.5.4 Program Review The Program Review menu requires no user password. However, it provides view-only access to the screens. To change any setting or parameter, you must enter the Program Menu and supply a password at the appropriate level. 38 PanaFlow HT User’s Manual Chapter 3. Initial Setup and Programming 3.5.5 Program IMPORTANT: The measurement will stop and the SIL output will go to dangerous detected level (error level) when you enter Program (configure) mode. Figure 27: Warning Screen for SIL 3.5.5a Enter Programming Display/ Lockout Display Format Program Program Review Keypad Lockout 3.5.5b To enter the Programming menu, on the Display/Lockout menu, use the arrow keys to highlight Programming and press []. The following screen appears. Access Levels Main Menu/Program Gen User SIL User Services Factory Enter the password ] ] 9999 ]SAVE ]MOVE ]QUIT ]MODE ] ] PanaFlow HT User’s Manual There are four levels of information access: General, SIL, Service and Factory. Each level requires that a password be entered. Use the arrow keys to highlight the appropriate level and press []. The following screen appears. To enter the password, use the [] or [] arrow key to select each digit to be changed and the [] or [] arrow keys to change the value of each number. When the password number is correct, press []. The following screen appears. Note: If you enter an incorrect password, the meter will not respond when you press the check mark. 39 Chapter 3. Initial Setup and Programming 3.6 User Preferences CAUTION! Changing program parameters could result in an inaccuracy in the flow measurement, which could violate the functional safety of the product. Always use caution when changing parameters at the SIL User Level. These parameters, which are functional safety related, shall be entered and validated by a suitably skilled and qualified person (Authorized User). Note: Any changes made at SIL User Level must be followed by a validation step. There are two components to the validation process. 1. Review parameter changes before committing them to the flowmeter. This process happens automatically by the programming interface (display/keypad, Vitality software, or HART). Be sure program parameters are correct before issuing the Commit command. 2. After returning to Measure mode, review the measurement parameters in Table 2 below to verify they are in an acceptable range. This completes the validation process. Table 2: Criteria for SIL Requirements Expected Actual Criteria Measurement Ch1 Sound Speed < 0.5% difference Ch1 Velocity < 0.5% difference Ch1 Up Amp Discriminator > 14 and < 32 Ch1 Dn Amp Discriminator > 14 and < 32 Ch1 SNR Up > 10 >5 Ch1 SNR Dn > 10 >5 Verdict (P/F) Ch1 Active TWup Within ±15% of the static TW value. Ch1 Active TWdn Within ±15% of the static TW value. Ch1 Error Status 0x00000000 0x00000000 Ch1 Error # 0 <8 Ch2 Sound Speed < 0.5% difference Ch2 Velocity < 0.5% difference Ch2 Up Amp Discriminator > 14 and < 32 Ch2 Dn Amp Discriminator > 14 and < 32 Ch2 SNR Up > 10 >5 Ch2 SNR Dn > 10 >5 Ch2 Active TWup Within ±15% of the static TW value. Ch2 Active TWdn Within ±15% of the static TW value. Ch2 Error Status 0x00000000 0x00000000 Ch2 Error # 0 <8 Composite Velocity < 0.5% difference Composite Volumetric < 0.5% difference SIL Output mA 4 mA <= x <= 20 mA 40 PanaFlow HT User’s Manual Chapter 3. Initial Setup and Programming 3.6.1 Settings To check and/or change the desired settings, under User Preference, select Settings and press []. The following screen appears. To change the language being used, highlight Language and press []. ‘The following screen appears. System Date Use the [] or [] arrow keys to select the desired language and press [] twice. (Only English is currently available.) The screen returns to the previous display. To check the Meter Tag and/or Label, highlight your choice on the UserPref/Setting menu and press []. Press [] to return to the previous screen. Note: You can only change the Meter Tag and Label data using Vitality software. System Date System Date To check and/or change the date/time, highlight System Date and press []. The following screen appears. System Date PanaFlow HT User’s Manual 41 Chapter 3. Initial Setup and Programming 3.6.1 Settings (cont.) Use the arrow keys to select the correct response and press []. The screen returns to the previous display. The next option is for SIL Limits. There are four flow limits related to functional safety that the operator may choose to set. In most cases, the default values for these limits do not need to be changed. System Date SIL Limits To enter the SIL Limits option, highlight SIL Limits and press []. Note: To enter this option, you must enter a SIL User or higher level password. SIL Limits Low Sil -12.2000m/s Low Warn -12.2000m/s Up Warn 12.2000 m/s Up Sil 12.2000 m/s UserPref/ Setting System Date SIL Limits Density Kinematic Viscosity Use the arrow keys to enter the limits and press []. The four SIL limits are the Lower Functional Limit (LFL), Lower Warning Limit (LWL), Upper Warning Limit (UWL), and Upper Functional Limit (UFL). The LFL and UFL are defaulted to the design limits of the system and do not need to be changed unless the operator chooses to set an upper and lower flow rate that is critical to the safety of the SIS. The LWL and UWL only need to be set if the LFL and UFL are used. The Safety Manual describes SIL limits in much greater detail. After SIL Limits, select Density to set static and reference density. Mass Flow is calculated by multiplying the measured value of Volumetric Flow by the static density. Standardized Volumetric Flow is calculated by multiplying the measured value of Volumetric Flow by the ratio of static density to reference density. Finally, enter a static value for Kinematic Viscosity, in centistokes. This value is used to determine the Reynolds number correction factor for the flow measurement. 42 PanaFlow HT User’s Manual Chapter 3. Initial Setup and Programming 3.6.2 Flow Units To check and/or change flow units, under User Preference, use the [] or [] arrow key to select Flow Units and press [] The following screen appears. 3.6.2a Velocity To check and/or change velocity flow units, under UserPref/Flow Units, use the [] or [] arrow key to select Velocity and press [] The following screen appears. Note: If a flow unit is not selectable in this section, it will not appear later in the programming. If you don’t want Velocity, select No, press [], If you want to display Velocity, select Yes, press[] twice, and the following screen appears. If no change is desired, press [] twice and the screen returns to the UserPref/Flow Units menu. To change the measurement type, select the desired option, press [] twice, and a screen similar to the following appears. Confirm the units, press [] three times and return to the UserPref/Flow Units menu. PanaFlow HT User’s Manual 43 Chapter 3. Initial Setup and Programming 3.6.2b Volumetric and Mass To check and/or change actual volumetric flow units, under UserPref/Flow Units, use the [] or [] arrow key to select Volumetric (Actual) and press []. The following screen appears. To remove Volumetric from the display menus, select No, press []. If change is desired, select Yes, press [] twice, and the following screen appears. If no change is desired, press [] and a screen similar to the following appears. To change the measurement type, select the desired option, press [] twice, and a screen similar to the following appears. If the highlighted units are correct, press [] three times and return to the UserPref/Flow Units menu. To change the units, use the [] or [] arrow key to select the desired option, press [] twice, and the display returns to the previous screen. Press the [] key twice to return to the UserPref/Flow Units screen. Note: Use the above procedure to check and/or change the standard volumetric (Volumetric (Std)) flow units and the mass (Mass) flow units. 44 PanaFlow HT User’s Manual Chapter 3. Initial Setup and Programming 3.6.2c Totalizer To check and/or change totalizer measurement units, under UserPref/Flow Units, use the [] or [] arrow key to select Totalizer and press []. A screen similar to the following appears. To remove Totals from display menus, use the [] or [] arrow key to select No and press []. The screen returns to the previous display. To continue setting up the Totalizer, select Yes, press Enter, and a screen similar to the following appears. Totalizer / Totalizer Use the [] or [] arrow key to select Actual, Standard or Mass totals, press[] twice, and a screen similar to the following appears. Volumetric (Act) Volumetric (Std) Mass If no change is required, press []. If change is required, select the appropriate measurement category, and press [] twice. A screen similar to the following appears. If no change is required, press []. If change is required, select the appropriate measurement type, press [], and the display returns to the previous screen. Press the [] key twice to return to the UserPref/Flow Units screen. PanaFlow HT User’s Manual 45 Chapter 3. Initial Setup and Programming 3.6.2d Density To calculate Mass Flow, you must enter Actual Density. To measure Volumetric (Std.), you must enter Actual Density and the Reference Density. To check and/or change density values, under UserPref/Flow Units, use the [] or [] arrow key to select Density and press []. The following screen appears. To exit the Totalizer setup procedure, use the [] or [] arrow key to select No and press []. The screen returns to the previous display. To continue setting up the Totalizer, select Yes, press [] and a screen similar to the following appears. If no change is required, press []. If change is required, select the appropriate measurement category, and press Enter. A screen similar to the following appears. Density / Density Lb/Ft^3 46 If no change is required, press []. If change is required, select the appropriate measurement type, press [], and the display returns to the previous screen. Press the [] key twice to return to the UserPref/Flow Units screen. PanaFlow HT User’s Manual Chapter 3. Initial Setup and Programming 3.6.3 Meter Setup Note: The Meter Setup category is accessed by either the SIL User, Service or Factory passwords. 3.6.3a Zero Cutoff To set up the meter, under User Preference, use the [] or [] arrow key to select Meter Setup and press []. The following screen appears. Select Zero Cutoff, press [], and a screen similar to the following appears. Note: Zero cutoff is based on velocity. To set the zero cutoff, press [] and a screen similar to the following appears. When the flow rate drops below the zero cutoff level, the flow will be forced to 0.00. This is to avoid measurement fluctuations near the zero point. 0.500 PanaFlow HT User’s Manual Use the[] and [] arrow keys to select each digit to be changed and the [] or [] arrow keys to change the digit value, then press []. Press the [] key to return to the Meter Setup screen. 47 Chapter 3. Initial Setup and Programming 3.6.3 Meter Setup (cont.) Note: The Meter Setup category is accessed by either the SIL User, Service or Factory passwords. 3.6.3b Tau Value The Tau value determines how quickly the meter responds to a change in flow rate. A small Tau responds quickly to flow changes, but is very erratic. A high Tau value dampens a response to changes for a smooth transition, but a slower one. Under Meter Setup, use the [] or [] arrow key to select Tau Value. Press [] and a screen similar to the following appears. The default Tau value is 0.001 sec or 1 msec. To set the Tau value, press [] and a screen similar to the following appears. 0.001 3.6.3c Use the[] and [] arrow keys to select each digit to be changed and the [] or [] arrow keys to change the digit values, then press []. Press [] twice to return to the Meter Setup screen. Path Error Handling 2-path Error Handling behaves differently in the SIL product than it does in non-SIL products. For a SIL product, 2-path Error Handling is only applicable to a three-path system. This flowmeter version is not available for sale at the time of this writing, but could become available in the future. If 2-path Error Handling is enabled for a 2-path flowmeter, it will have no effect. Please refer to Appendix E for details. To turn the Path Err Handing ON or OFF, select the desired status and press []. The screen returns to the previous display. Note: The default for Path Error Handling is ON. For a complete explanation of path error handling, refer to Appendix E. 48 PanaFlow HT User’s Manual Chapter 3. Initial Setup and Programming 3.6.4 Password 3.6.4a General User This option is used to change the General User password to a custom value. To set up a password, under User Preference, use the [] or [] arrow key to select Password and press []. The following screen appears. Note: If the password used to access programming was Gen User, only Gen User will appear on the next screen. To provide a general user password, select Gen User, press [], and a screen similar to the following appears. Note: If the access level is General User, the SIL User option will not be available. Also, a SIL User will be able to reset the General User password. Use the [] or [] arrow key to change the digit value and press []. Press the [] key to return to the UserPref/Password screen. 9999 3.6.4b SIL User Use the above procedure to change a SIL User password from its default. Note: If the password used to access programming was Gen User, SIL User is not accessible. Note: If the SIL User password is lost, a service engineer must reset the password. PanaFlow HT User’s Manual 49 Chapter 3. Initial Setup and Programming 3.6.5 Display 3.6.5a Backlight To turn the backlight OFF or ON, under User Preference, use the [] or [] arrow key to select Display and press []. The following screen appears. Select Backlight, press [], and a screen similar to the following appears. Select OFF or ON, press [] twice and the screen returns to the previous display. 3.6.5bTimeout To provide a timeout,.under Display, select Timeout and press []. A screen similar to the following appears. Note: The default value for the timeout is 0, so users must set a timeout if they wish one. Press [] again and a screen similar to the following appears. Use the [] or [] arrow key to change the digit value and press []. Press [] three times to return to the User Preference screen. 10 50 Second: PanaFlow HT User’s Manual Chapter 3. Initial Setup and Programming 3.7 Input/Output 3.7.1 Output A Option Board 3.7.1a Accessing the Analog Output Menu To access the Analog Output menu, on the initial screen, highlight the lock symbol and press []. The following screen appears. Display/ Lockout Display Format Program Program Review Keypad Lockout Select Program and press []. The following screen appears. Select a password level (SIL User, Service or Factory) other than General User from the Program Menu and press Enter. The following screen appears. To enter the password, use the Left and Right arrow keys to select the digit to be changed, use the [] or [] arrow keys to change the value of each digit, and press []. The following screen appears. 9999 In the User Preference menu, select Setting, then press the right arrow key. A screen similar to the following appears. The screen shows what option is installed: either A or B. Select Option A and press []. The following screen appears. PanaFlow HT User’s Manual 51 Chapter 3. Initial Setup and Programming 3.7.1 Analog Output A (cont.) 3.7.1b Setting Analog Measurements SIL Out Analog Output (SIL/HART) Analog Output B To set up the SIL analog output, select Analog Output (SIL) and press []. The following screen appears. Note: If the General User password was used, the Analog Output (SIL) is not accessible. Select Measurement and press []. The following screen appears. Measurement Velocity Volumetric (Act) Volumetric (Std) Mass 3.7.1c In the Output (SIL) Analog menu, select the type of analog output to be used, and press []. The screen returns to the previous display. Setting Base Value and Full Value Base Value is the flow rate represented by 4 mA, and Full Value is the flow rate represented by 20 mA.In the Analog Output menu, select Base Value or Full Value and press [] A screen similar to the following appears. Press [] again and a screen similar to the following appears. Note: The units that appear will be the units selected in “Flow Units” on page 43. 0.00000 52 m^3/s Use the[] and [] arrow key to select the digit to be changed, use the [] or [] arrow key to change the Base Value or Full Value setting, and press []. Repeat these steps to set the Full Value setting. Press [] to return to the Analog Output menu. PanaFlow HT User’s Manual Chapter 3. Initial Setup and Programming 3.7.1 Analog Output A (cont.) 3.7.1d Calibrate the Output Use the Calibrate menu to trim the SIL output to your measurement system. In the Analog Output (SIL) menu, select Calibrate and press []. The following screen appears. Select 4 mA to trim the 4 mA level, 20 mA to trim the 20 mA level, or Percentage of Scale to test linearity. Select the appropriate option and press []. A screen similar to the following appears. Use the [] or [] arrow key to change the Calibrate setting value and press []. Press [] to return to the Analog Output menu. 4.00 mA If you do not see 4 mA at your measurement system, enter the value that you see. Press [] and the meter will make an adjustment. Then continue until you see 4 mA at your measurement input. Repeat the above process to set and/or change other options. 3.7.1e Setting Error Handling To specify the error handling status, in the Analog Output menu select Err Handling and press []. The following screen appears. Selecting Low will force the SIL Output to 3.6 mA or below in case of a SIL error, while High will force it to 21.0 mA or above in case of a SIL error. Select the appropriate status and press []. PanaFlow HT User’s Manual 53 Chapter 3. Initial Setup and Programming 3.7.2 Analog Output B (Non-SIL) 3.7.2a Accessing the Analog Output Menu To access the Analog Output Menu, on the initial screen, highlight the lock symbol and press []. The following screen appears. Select Program and press []. The following screen appears. Keypad Lockout Select any password level from the Program Menu and press []. The following screen appears. 8888 To enter the password, use the Left and Right arrow keys to select the digit to be changed, use the Up and Down arrow keys to change the value of each digit, and press []. The following screen appears. In the User Preference Menu, select Setting, then press the right arrow key. A screen similar to the following appears. Option B appears. Press []. The following screen appears. 54 PanaFlow HT User’s Manual Chapter 3. Initial Setup and Programming 3.7.2 Analog Output B (Non-SIL) (cont.) 3.7.2b Setting the Analog Measurements I/O / SIL Out Analog Output (SIL/HART) Analog Output B Digital Output Modbus/Service Port Analog Output B (NSIL) Measurement Velocity Volumetric (Act) Volumetric (Std) Mass 3.7.2c To set up the SIL analog output, select Analog Output (SIL) and press []. The following screen appears. Note: If the General User password is used, the Analog Output (SIL) is not accessible. Select Measurement and press []. The following screen appears. In the Output (SIL) Analog menu, select the type of analog output to be used, and press []. The screen returns to the previous display. Setting the Base Value and Full Value Base Value is the flow rate represented by 4 mA, and Full Value is the flow rate represented by 20 mA.In the Analog Output menu, select Base Value or Full Value and press [] A screen similar to the following appears. Press [] again and a screen similar to the following appears. Note: The units that appear will be the units selected in “Flow Units” on page 43. 0 PanaFlow HT User’s Manual Use the[] and [] arrow key to select the digit to be changed, use the [] or [] arrow key to change the Base Value or Full Value setting, and press []. Repeat these steps to set the Full Value setting. Press [] to return to the Analog Output menu. 55 Chapter 3. Initial Setup and Programming 3.7.2 Analog Output B (Non-SIL) (cont.) 3.7.2d Selecting the Calibration Value Use the Calibrate menu to trim the SIL output to your measurement system. In the Analog Output (SIL) menu, select Calibrate and press []. The following screen appears. Calibrate 4mA Calibrate 20mA Select 4 mA to trim the 4 mA level, 20 mA to trim the 20 mA level, or Percentage of Scale to test linearity. Select the appropriate option and press []. A screen similar to the following appears. Use the [] or [] arrow key to change the Calibrate setting value and press []. Press [] to return to the Analog Output menu. 0 If you do not see 4 mA at your measurement system, enter the value that you see. Press [] and the meter will make an adjustment. Then continue until you see 4 mA at your measurement input. Repeat the above process to set and/or change other options. 3.7.2e Setting the Error Handling To specify the error handling status, in the Analog Output menu select Err Handling and press []. The following screen appears. Selecting Low will force Output B to 4.0 mA in case of Error. High will force it to 20.0 mA. Hold will cause the analog output to remain at whatever mA level it is when the error occurs. Other allows the Operator to select a mA value to represent a fault condition, allowing the Operator to force the output to Namur error levels or another custom value. Select the appropriate status and press []. Error Handling Other If you select Other, use the [] or [] arrow key to change the Other setting value and press []. Press [] to return to the Analog Output menu. Other 0.0 ] ] ] ] 56 ]SAVE ]MOVE ]QUIT ]MODE Note: An “Error” state is any state that produces an error code on the LCD screen. Please see Chapter 4 for more details on errors. PanaFlow HT User’s Manual Chapter 3. Initial Setup and Programming 3.7.3 Programming Digital Outputs Digital Outputs are output circuits that are designed to be used as Pulse Outputs, Frequency Outputs, Alarms, or Control Outputs. They have a flexible circuit design that can be modified by programming commands to perform these different functions. The sections that follow describe how to set up each type of function. Note: In each function area, there is a way to change behavior based on an Error Condition. The User Manual, Chapter 4, mentions several types of error conditions in the flowmeter. It may not be clear which errors will trigger the Error Handling function. The guideline is that when an error message appears on the LCD, the Error Handling function will trip. 3.7.3a Accessing the Digital Output Menu To access the Digital Outputs menu from the initial screen, use the arrow keys to highlight the lock symbol and press []. A screen similar to the following appears. Use the arrow keys to select Program and press []. The following screen appears. Select a security level and press []. The following screen appears. 8888 Enter the appropriate password. Use the [] or [] arrow key to select each digit to be changed, and the [] or [] arrow key to change the digit value. Then press []. The following screen appears. Select Setting and press the right arrow key. The following screen appears. PanaFlow HT User’s Manual 57 Chapter 3. Initial Setup and Programming 3.7.3a Accessing the Digital Output Menu (cont.) The screen now indicates the installed option card, either A or B. Press [] and a screen similar to the following appears. To set up the Digital Output, select it on the screen and press []. A screen similar to the following appears. Output C Output D 58 Select the desired Digital Output number and press []. The following screen appears. PanaFlow HT User’s Manual Chapter 3. Initial Setup and Programming 3.7.3 Programming Digital Outputs (cont.) 3.7.3b Setting the Pulse Output Digital Outputs can be programmed as Pulse, Frequency, Alarm or Control Outputs, or turned off. The Pulse output will put out a square wave pulse for each unit of flow that passes through the pipeline. Select Pulse and press []. The following screen appears. Select Pulse Value and press []. A screen similar to the following appears. gal The Pulse Value, the amount of flow represented by one pulse, is displayed. (For example, 1 pulse = 10 gallons.) To change the existing number, press [] and a screen similar to the following appears. Note: The units that appear will be the units selected in “Flow Units” on page 43. To change the Pulse Value, use the [] or [] arrow key to provide a new number and press [] to save. Press [] to return to the Pulse menu. 0 m/s To view and/or change another Pulse characteristic, select the desired sub-category and follow the procedure: •To enter the Minimum Pulse ON Time (Min Pulse), you set the width of the pulse in seconds. •To test the pulse output, enter a number of pulses and the instrument will send that many out. Note on your measurement system that the right number of pulses were received. • If Error Handling is selected, a different procedure is required. See the next page. PanaFlow HT User’s Manual 59 Chapter 3. Initial Setup and Programming 3.7.3b Setting the Pulse (cont.) To change the Error Handling status, select it on the screen and press []. The following screen appears. Select Hold or Stop. Hold directs the meter, in case of a flow measurement error, to keep sending the pulses sent at the last good reading. Stop directs the meter, in case of measurement error, to stop pulsing. Press [], and the screen returns to the previous display. Press [] to return to the Digital Output Menu. 3.7.3c Setting the Frequency Frequency sends out a continuous square wave, with the frequency proportional to a measured value. To set the Digital Output as a frequency output, in the Digital Output Menu select Frequency and press []. The following screen appears. To set the measurement type, select Measurement and press []. The following screen appears. Select the type of measurement to be used and press []. The screen returns to the Frequency display. Two examples are shown on the next page. 60 PanaFlow HT User’s Manual Chapter 3. Initial Setup and Programming 3.7.3 Digital Output C (cont.) 3.7.3c Setting the Frequency (cont.) Example 1: Base: 0 m/s = 0 Hz Full: 10 m/s = 100 Hz Then y Hz = x (m/s) ● 10 Hz Example 2 Base: 10 kg = 0 Hz Full: 20 kg = 10 Hz Then y Hz =(x kg -10) ● 1000 To check the current frequency value, on the Frequency display select Frequency Value and press []. A screen similar to the following appears. To change the current value, press [] and proceed as in Setting the Pulse on page 59. The Base Value is the measurement value represented by 0 Hz. To check the current base value, on the Frequency display select Base Value and press []. A screen similar to the following appears. PanaFlow HT User’s Manual 61 Chapter 3. Initial Setup and Programming 3.7.3c Setting the Frequency (cont.) To change the current value, press [] and proceed as in Setting the Pulse on page 59. Note: The units that appear will be the units selected in “Flow Units” on page 43. The Full Value is the measurement value represented by the full frequency.To check the current full value, on the Frequency display select Full Value and press []. A screen similar to the following appears. Note: The units that appear will be the units selected in “Flow Units” on page 43. To change the current value, press [] and proceed as in Setting the Pulse on page 59. The Full Frequency is the maximum Hz, which represents the Full Value of measurement. To check the current full frequency, on the Frequency display select Full Frequency and press []. A screen similar to the following appears. Hz To change the current full frequency, press [] and proceed as in Setting the Pulse on page 59. To check the current test frequency status, on the Frequency display select Test Frequency and press []. A screen similar to the following appears. 62 PanaFlow HT User’s Manual Chapter 3. Initial Setup and Programming 3.7.3c Setting the Frequency (cont.) To change the current test frequency, press []. Set a Hz value. The meter will set the digital output to this value. Then verify at your measurement system that you see the frequency you entered. You can repeat this procedure with several frequencies. To check the current error handling status, on the Frequency display select Err Handling and press []. A screen similar to the following appears. To change the current error handling status, select the option desired and press []. The screen returns to the previous display.You have four options for error handling in case of a measurement error: •Hold — hold last good value. •Low —show 0 Hz. •High — show Full Frequency. Note: If Other is selected, a screen similar to the following appears. Enter the Hz value you want to appear for error. (For example, if Full = 1 kHz, you may want to set Error to 2 kHz.) Press [] again, and a screen similar to the following appears. 0 PanaFlow HT User’s Manual Hz Use the [] or [] arrow key to change the Other value and press [] to save the number. Press [] to return to the previous screen. 63 Chapter 3. Initial Setup and Programming 3.7.3d Setting the Alarm The alarm can be an open or a short circuit, depending on the error condition. To check the alarm and/or change its settings, in the Digital Output menu select Alarm and press []. The following screen appears. To check and/or change the alarm status, select Alarm State and press []. A screen similar to the following appears. Three alarm states are available: •Close — Short circuit when no error, open when alarm •Open — Normally open, close for alarm •Fail Safe — Close To change the state of the alarm, select the desired status and press []. The screen returns to the previous display. To check and/or change the type of alarm, select Alarm Type and press []. A screen similar to the following appears. You can choose from three alarm types: •Low —No alarm if measurement is greater than the threshold, alarm if measurement is less than or equal to the threshold Fault •High — No alarm if measurement is less than the threshold, alarm if measurement is greater than or equal to the threshold •Fault — No alarm if no errors, alarm if errors. To change the type of alarm, select the appropriate type and press []. The screen returns to the previous display. 64 PanaFlow HT User’s Manual Chapter 3. Initial Setup and Programming 3.7.3 Digital Output C (cont.) 3.7.3d Setting the Alarm (cont.) To check and/or change the type of alarm measure, select Measurement and press []. A screen similar to the following appears. Select the type of measure desired, press [], and the screen returns to the previous display. The Alarm Value is the threshold that trips the alarm. (This parameter does not apply to Fault Alarms.) To check and/or change the alarm value, select Alarm Value and press []. A screen similar to the following appears. Press [] again, and a screen similar to the following appears. Note: The units that appear will be the units selected in “Flow Units” on page 43. Use the [] or [] arrow key to change the Alarm Value setting. Press [] to save the number and press [] to return to the previous screen. 0 PanaFlow HT User’s Manual 65 Chapter 3. Initial Setup and Programming 3.7.3d Setting the Alarm (cont.) To test the alarms, in the Alarm menu select Test Alarms and press []. A screen similar to the following appears. Select OFF to turn the alarm off, or ON to turn it on. To begin testing, select ON and press []. To stop testing, press []. Note: Be sure to select OFF when you end the test. 3.7.3e Setting the Control Output The Control Output can drive an actuator to control a process. It deactivates until a threshold is reached, and activates when it is reached. To check the control output and/or change its settings, in the Digital Output menu select Control Output and press []. The following screen appears. To check and/or change the control output status, select Control Output State and press []. A screen similar to the following appears. The Close option is 0 V when deactivated, 3.3 V when activated. Open is 3.3 V when deactivated, 0 V when activated. To change the state of the control output, select the desired status and press []. The screen returns to the previous display. 66 PanaFlow HT User’s Manual Chapter 3. Initial Setup and Programming 3.7.3 Digital Output C (cont.) 3.7.3e Setting the Control Output (cont.) To check and/or change the type of control output, in the Control Output menu, select Control Output Type and press []. The following screen appears. The Low control output activates when the measurement is less than or equal to a threshold, while the High control output activates when the measurement is greater than or equal to a threshold. Low is useful for draining applications, and High for filling applications. To change the type of control output, select the desired type and press []. The screen returns to the previous display. To check and/or change the measurement setup, in the Control Output menu, select Measurement and press []. The following screen appears. Batch Total supports fill and reset operations. The Inventory Total activates after a user-specified number of kg of usage: for example, at 1000 kg, then 2000 kg, etc.To change the measurement style, select the desired style and press []. The following screen appears. Select Forward or Reverse totalizer, depending on the flow direction, or Net for both filling and draining. To change the measurement direction, select the desired direction and press []. The screen returns to the previous display. PanaFlow HT User’s Manual 67 Chapter 3. Initial Setup and Programming 3.7.3e Setting the Control Output (cont.) To check and/or change the control value, in the Control Output menu, select Control Value and press []. A screen similar to the following appears. Press [] again, and a screen similar to the following displays the threshold value to activate. Use the [] or [] arrow key to change the Control Value setting. Press [] to save the number and press [] to return to the previous screen. 0 Note: The units that appear will be the units selected in “Flow Units” on page 43. To test the actuator, in the Control Output menu select Test Control and press []. A screen similar to the following appears. To begin testing, select ON and press []. To stop testing, select OFF and press []. Press [] to return to the Control Output menu. Note: Be sure to select OFF when you end the test. 68 PanaFlow HT User’s Manual Chapter 3. Initial Setup and Programming 3.7.4 Modbus/Service Port A To set up the Modbus/Service Port, select it on the Option A screen and press []. The following screen appears. 3.7.4a Selecting the Baud Rate To set the baud rate, in the Modbus/Service menu select Baud Rate and press []. A screen similar to the following appears. The default baud rate is 115200. Select the appropriate baud rate and press []. The screen returns to the previous display. PanaFlow HT User’s Manual 69 Chapter 3. Initial Setup and Programming 3.7.4b Setting the Modbus Parity To set the modbus parity, in the Modbus/Service menu select Modbus Parity and press []. A screen similar to the following appears. Select the appropriate characteristic and press []. The screen returns to the previous display. 3.7.4c Selecting the UART Bits To set the UART bits, in the Modbus/Service menu select UART Bits and press []. A screen similar to the following appears. Select the appropriate description and press []. The screen returns to the previous display. 70 PanaFlow HT User’s Manual Chapter 3. Initial Setup and Programming 3.7.4d Setting the Modbus/Service Port Address To set the address, in the Modbus/Service menu select Address and press [] A screen similar to the following appears. Press [] again, and a screen similar to the following appears. Use the [] or [] arrow key to change the address number (from 1 to 254 —not 0) and press []. Press [] to return to the previous screen. 1 3.7.4e Setting the Number of Modbus Stop Bits To set the number of stop bits, in the Modbus/Service menu select Modbus Stop Bits and press []. A screen similar to the following appears. Select the appropriate number and press []. The screen returns to the previous display. PanaFlow HT User’s Manual 71 Chapter 3. Initial Setup and Programming 3.8 SIL Testing Note: To enter the SIL Testing menu, you must enter a SIL User, Service or Factory password. 3.8.1 Accessing the SIL Testing Menu To access the Analog Output menu, on the initial screen, highlight the lock symbol and press []. The following screen appears. Select Program and press []. The following screen appears. Select a password level (SIL User, Service or Factory) other than General User from the Program Menu and press Enter. The following screen appears. To enter the password, use the Left and Right arrow keys to select the digit to be changed, use the [] or [] arrow keys to change the value of each digit, and press []. The following screen appears. 9999 In the User Preference menu, select Setting, then press the right arrow key twice. A screen similar to the following appears. The screen shows the four option selections. Select SIL Output Min/Max and SIL Testing press []. The following screen appears SIL Output Min/Max SIL Output Analog Switch On Board Temperature Watchdog Test 72 PanaFlow HT User’s Manual Chapter 3. Initial Setup and Programming 3.8.2 Testing the Min/Max Output SIL Output Min/Max Fire Low Fire High Percentage of Scale Percentage of Scale UNIT: % To test the minimum or maximum output, use the arrow keys to select Fire Low (minimum), Fire High (maximum) or enter a Percentage of Scale, and press []. If you have selected Percentage of Scale, the following screen appears: Use the arrow keys to enter the desired percentage, and press []. Press [] to return to the SIL Testing menu. 0.00 3.8.3 Testing the Output Analog Switch SIL Output Analog Switch Open Switch Close Switch From the SIL Testing menu, select SIL Output Analog Switch and press []. Use the arrow keys to select Open Switch or Close Switch, and press []. Press [] to return to the SIL Testing menu. See the Safety Manual for more information. 3.8.4 Viewing the On Board Temperature On Board Temperature 28.75 To check the on board temperature, select On Board Temperature and press []. The screen displays the current temperature. See the Safety Manual for more information. C 3.8.5 Performing a Watchdog Test Watchdog Test No Yes CAUTION! To conduct a watchdog test, select Watchdog Test and press []. Use the arrow keys to select Yes and press []. The program runs the Watchdog Test, and displays the results on the screen. Press [] to return to the active display. See the Safety Manual for more information. The Watchdog Test will reset the flowmeter and discard any program parameter changes. Do not execute this test if you have changed parameter settings. PanaFlow HT User’s Manual 73 Chapter 3. Initial Setup and Programming [no content intended for this page] 74 PanaFlow HT User’s Manual Chapter 4. Error Codes and Troubleshooting Chapter 4. 4.1 Error Codes and Troubleshooting User Restrictions If a Dangerous Detected state occurs, the flowmeter will put the SIL Output in the DD state and remain that way until an Authorized User intervenes. The DD state can be cleared by executing a reset of the flowmeter. There are two methods for clearing the DD state: 1. Enter the Program menu at SIL user access level. Then exit without making any changes. The flowmeter will execute a soft reset. 2. Turn off power, wait 1 minute, turn power back on. 4.2 Error Display in the User Interface The bottom line of the LCD displays a single, top priority error message during Measurement Mode. This line, called the Error Line, includes two parts: Error header and Error String. The Error header indicates the error pattern and error number, while the Error string gives a detailed description of the error information 4.2.1 Error Header Error Pattern PanaFlow HT User’s Manual Table 3: Error Header Error Header Communication error Cn(n is error number) Flow error En(n is error number) SIL error Sn(n is error number) XMIT error Xn(n is error number) OPT error On(n is error number) 75 Chapter 4. Error Codes and Troubleshooting 4.2.2 Communication Error String The PanaFlow HT flowmeter electronics includes two independent sub-systems. The purpose of the Communication error string is to convey to the operator an issue with communication between these two sub-systems. Table 4: Communication Error String Error Header Error Message C1 UMPU Comm error Figure 28: Communications Error String 4.2.3 Flow Error String Flow errors are errors detected by the UMPU (Ultrasonic Measurement Processing Unit) in the course of making a flow measurement. These errors can be caused by disturbances in the fluid, such as excessive particles in the flow stream or extreme temperature gradients. The errors could also be caused by an empty pipe or other such issue with the fluid itself. Flow errors are typically not caused by a malfunction of the flow measurement device, but by an issue with the fluid itself. Error Header 76 Table 5: Flow Error String Error Message Explanation E29 VelocityWarning E29 indicates that the flow rate has exceeded the range of the LWL (lower warning limit) or UWL (upper warning limit). The purpose of this warning is to alert the operator that the flow rate is approaching the LFL (lower functional limit) or the UFL (upper functional limit). At the Warning Limit threshold, the flowmeter will continue to measure flow and drive the SIL output, but if the flow rate reaches the Functional Limit threshold the SIL output will go to the Dangerous Detected state until an Authorized User intervenes. E29 gives the operator a chance to correct the situation before going to the DD state. E22 SingleChAccuracy E22 indicates that an error was detected on one of the flow channels. This applies to multiple channel systems only. For example, there may be an issue in the channel 1 measurement but not the channel 2 measurement. E23 MultiChAccuracy E23 indicates an error on multiple channels. PanaFlow HT User’s Manual Chapter 4. Error Codes and Troubleshooting Table 5: Flow Error String (cont.) E15 indicates an error with the active Tw measurement. This may be caused by a transducer error, a parameter programming error, or extreme process temperatures. The error means that the measurement of how long it is taking the ultrasonic signal to pass through the bundled waveguide is outside reasonable limits. E15 ActiveTw E6 CycleSkip E6 indicates that a cycle skip has occurred in the signal processing measurement. This is usually due to poor signal integrity, possibly because of bubbles in the pipeline, sound absorption by very viscous fluids, or cavitation. E5 Amplitude E5 indicates an amplitude error in the signal processing measurement. The signal amplitude is either excessively high or low. This is also due to poor signal integrity, much like an E6 error. E4 SignalQuality E4 indicates a Signal Quality error. This means the signal shape, upstream to downstream reciprocity, or signal correlation value is poor. The cause is usually the same as E6 or E5. E3 VelocityRange E3 is a velocity range error, meaning that the calculated velocity is outside the velocity limits defined for this application. The velocity we are measuring is not reasonable for the fluid and pipe size programmed in the data set. This could be a programming error, a poor signal, or an actual flow condition that is unexpectedly high in the positive or negative direction. E2 SoundSpeed E2 is a sound speed error. One benefit of ultrasonic flow measurement is that the process can determine the sound speed of the fluid. If this sound speed is beyond the limits set for the programmed application, an E2 error is set. This can alert the operator that the wrong fluid is in the pipe, or that the program parameters are out of date. It may also occur if signal quality is poor. E1 SNR E1 indicates a low signal to noise ratio (SNR). This means the flowmeter is not getting very much acoustic signal from the process. This could be due to bubbles or other fluid conditions, an empty pipe, or other possible causes that are listed in the Diagnostics section. PanaFlow HT User’s Manual 77 Chapter 4. Error Codes and Troubleshooting E28 SIL E31 NotCalibrated Table 5: Flow Error String (cont.) E28 is a SIL (Safety Integrity Level) error, which means we have a measurement condition that could lead to a false reading and we must stop providing a flow measurement to the SIL output. This will drive the SIL output to the DD state and stop providing flow readings to the SIS. E31 is an indication that the flowmeter has not been calibrated. This means we cannot be sure of flow measurement accuracy. The flow errors in Table 4 are listed in order of increasing priority. For troubleshooting tips, see “Diagnostics” on page 80. 78 PanaFlow HT User’s Manual Chapter 4. Error Codes and Troubleshooting 4.2.4 SIL Error String Note: Few of these errors will appear on the LCD. The LCD only shows the top priority error at any time. Vitality software will list these error conditions in addition to the top priority error, as the PC display can show more information. SIL errors are generally faults detected during internal device monitoring of the flow measurement circuitry. To ensure functional safety integrity, we must have absolute confidence in the integrity of our measurement hardware. These errors show that we do not have full confidence in some part of the hardware, and must stop providing a measurement to the SIS. More details and corrective actions are listed in the Functional Safety Manual. Under normal operation, only S1 - “In Config Mode” is likely to appear on the error line. This is an indication that the instrument is currently not measuring flow, because the instrument is in the Configuration mode. It also warns the Operator that the SIL Output is not to be used as part of the SIS while in this mode of operation. For troubleshooting details and more information on S errors, consult the Safety Manual. PanaFlow HT User’s Manual 79 Chapter 4. Error Codes and Troubleshooting 4.3 Diagnostics 4.3.1 Introduction This section explains how to troubleshoot the PanaFlow HT if problems arise with the electronics enclosure, the flowcell, or the transducers. Indications of a possible problem include: • display of an error message on the LCD display screen, Vitality PC software, or HART. • erratic flow readings • readings of doubtful accuracy (i.e., readings that are not consistent with readings from another flow measuring device connected to the same process). If any of the above conditions occurs, proceed with the instructions presented in this chapter. 4.3.2 Flowcell Problems If preliminary troubleshooting with the Error Code Messages and/or the Diagnostic Parameters indicates a possible flowcell problem, proceed with this section. Flowcell problems fall into two categories: fluid problems or pipe problems. Read the following sections carefully to determine if the problem is indeed related to the flowcell. If the instructions in this section fail to resolve the problem, contact GE for assistance. 4.3.2a Fluid Problems Most fluid-related problems result from a failure to observe the flowmeter system installation instructions. Refer to Chapter 2, Installation, to correct any installation problems. If the physical installation of the system meets the recommended specifications, it is possible that the fluid itself may be preventing accurate flow rate measurements. The fluid being measured must meet the following requirements: 1. The fluid must be homogeneous, single-phase, relatively clean and flowing steadily. Although a low level of entrained particles may have little effect on the operation of the PanaFlow HT, excessive amounts of solid or gas particles will absorb or disperse the ultrasound signals. This interference with the ultrasound transmissions through the fluid will cause inaccurate flow rate measurements. In addition, temperature gradients in the fluid flow may result in erratic or inaccurate flow rate readings. 2. The fluid must not cavitate near the flowcell. Fluids with a high vapor pressure may cavitate near or in the flowcell. This causes problems resulting from gas bubbles in the fluid. Cavitation can usually be controlled through proper installation design. 3. The fluid must not excessively attenuate ultrasound signals. Some fluids, particularly those that are very viscous, readily absorb ultrasound energy. In such a case, an error code message will appear on the display screen to indicate that the ultrasonic signal strength is insufficient for reliable measurements. 4. The fluid sound speed must not vary excessively. The PanaFlow HT will tolerate relatively large changes in the fluid sound speed, as may be caused by variations in fluid composition and/or temperature. However, such changes must occur slowly. Rapid fluctuations in the fluid sound speed, to a value that is considerably different from that programmed into the PanaFlow HT, will result in erratic or inaccurate flow rate readings. Refer to Chapter 3, Initial Setup and make sure that the appropriate sound speed is programmed into the meter. 80 PanaFlow HT User’s Manual Chapter 4. Error Codes and Troubleshooting 4.3.2b Pipe Problems Pipe-related problems may result either from a failure to observe the installation instructions, as described in Chapter 2, or from improper programming of the meter. By far, the most common pipe problems are the following: 1. The collection of material at the transducer location(s). Accumulated debris at the transducer location(s) will interfere with transmission of the ultrasound signals. As a result, accurate flow rate measurements are not possible. Realignment of the flowcell or transducers often cures such problems, and in some cases, transducers that protrude into the flow stream may be used. Refer to Chapter 2, Installation, for more details on proper installation practices. 2. Inaccurate pipe measurements. The accuracy of the flow rate measurements is no better than the accuracy of the programmed pipe dimensions. For a flowcell supplied by GE, the correct data will be included in the documentation. For other flowcells, measure the pipe wall thickness and diameter with the same accuracy desired in the flow rate readings. Also, check the pipe for dents, eccentricity, weld deformity, straightness and other factors that may cause inaccurate readings. Refer to Chapter 3, Initial Setup, for instructions on programming the pipe data. In addition to the actual pipe dimensions, the path length (P) and the axial dimension (L), based on the actual transducer mounting locations, must be accurately programmed into the flowmeter. For a GE Sensing flowcell, this data will be included with the documentation for the system. If the transducers are mounted onto an existing pipe, these dimensions must be precisely measured. 3. The inside of the pipe or flowcell must be relatively clean. Excessive build up of scale, rust or debris will interfere with flow measurement. Generally, a thin coating or a solid well-adhered build up on the pipe wall will not cause problems. Loose scale and thick coatings (such as tar or oil) will interfere with ultrasound transmission and may result in incorrect or unreliable measurements. PanaFlow HT User’s Manual 81 Chapter 4. Error Codes and Troubleshooting 4.3.3 Transducer/Buffer Problems Ultrasonic transducers are rugged, reliable devices. However, they are subject to physical damage from mishandling and chemical attack. The following list of potential problems is grouped according to transducer type. Contact GE if you cannot solve a transducer-related problem. 1. LEAKS: Leaks may occur around the transducer buffers and/or the flowcell fittings. Repair such leaks immediately. If the leaking fluid is corrosive, carefully check the transducer and cables for damage, after the leak has been repaired. 2. CORROSION DAMAGE: If the transducer buffer material was not properly chosen for the intended application, they may suffer corrosion damage. The damage usually occurs either at the electrical connector or on the face. If corrosion is suspected, remove the transducer from the flowcell and carefully inspect the buffer electrical connector and the transducer face for roughness and/or pitting. Any transducer damaged in this manner must be replaced. Contact GE for information on transducers in materials suitable for the application. 3. INTERNAL DAMAGE: An ultrasonic transducer consists of a ceramic crystal bonded to the transducer case. The bond between the crystal and the case or the crystal itself may be damaged by extreme mechanical shock and/or temperature extremes. Also, the internal wiring can be corroded or shorted if contaminants enter the transducer housing. 4. PHYSICAL DAMAGE: Transducers may be physically damaged by dropping them onto a hard surface or striking them against another object. The transducer connector is the most fragile part and is most subject to damage. Minor damage may be repaired by carefully bending the connector back into shape. If the connector can not be repaired, the transducer must be replaced. IMPORTANT: Transducers must be replaced in pairs. Refer to Chapter 3, Initial Setup, to program the new transducer data into the meter. If the instructions in this section fail to resolve the problem, contact GE for assistance. 82 PanaFlow HT User’s Manual Appendix A. Specifications Appendix A. Specifications A.1 Operation and Performance Fluid Types: Liquids: Acoustically conductive fluids, including most clean liquids, and many liquids with limited amounts of entranced solids or gas bubbles. Flow Measurement Patented Correlation Transit-Time™ mode. Meter Sizes Standard: 3 to 16 in. (80 to 600 mm) Optional: up to 36 in. (900 mm) available upon request. Accuracy ±0.5% of reading Range: 3 to 40 ft/s (0.91 to 12.19 m/s) Calibration Fluid: Water (2 Points) Final installation assumes a fully developed flow profile (typically 10 diameters upstream and 5 diameters downstream of straight pipe run) and single phase fluids. Applications with piping arrangements that induce swirl (e.g., two out-of-plane elbows) may require additional straight run or flow conditioning. Repeatability ±0.2% of reading Range: 3 to 40 ft/s (0.91 to 12.19 m/s) Range (Bidirectional) 0.1 to 40 ft/s (0.03 to 12.19 m/s) Rangeability (Overall) 400:1 SIL Certification (Pending) IEC61508 certified pending SIL2 certification with single set of electronics SIL3 achievable with redundant design system PanaFlow HT User’s Manual 83 Appendix A. Specifications A.2 Meter Body/Transducer Meter Body Materials Carbon Steel (ASTM A106 Gr. B - ASTM A105) Stainless Steel (ASTM A312 Gr 316/316L - A182 Gr. 316/316L) 9Cr-1Mo (ASTM A335 Gr. P9 - ASTM A182 Gr. F9) Transducer System and Material Bundle Waveguide Technology™ System transducer and holder - 316L stainless steel Optional: Other materials available upon request Transducer Temperature Ranges Normal temperatures: –310° to 600°F (–190° to 315°C) Liquids, high temperatures: –310° to 1112°F (–190° to 600°C) Pressure Range Up to maximum allowable flange operating pressure at temperature or 3480 psi (240 bar) Transducer Classifications US/Canada - Explosion-proof Class I, Division 1, Groups B, C, & D ATEX - II 2 G Ex d IIC Tx Gb IECEx - Ex d IIC Tx Gb Transducer Cables Integrated cables: Armored cable with ATEX/IECEx-certified cable glands or potted mineral insulated cable Remote cables: Armored cable with or without ATEX/IECEx-certified cable glands. Option without cable glands requires conduit or other means to meet local codes. 84 PanaFlow HT User’s Manual Appendix A. Specifications A.3 Electronics Enclosures Epoxy coated, copper free, aluminum, weatherproof (IP67) Electronics Classifications (Pending) USA/Canada- Explosion-proof Class I, Division 1, Groups B, C, & D ATEX - Flameproof II 2 G Ex d IIC T6 Gb IECEx - Flameproof Ex d IIC T6 Gb ROHS compliance (Category 9 Exemption) CE (EMC directive 2004/108/EC, LVD 2006/95/EC) WEEE Compliance Note: The electronics package includes an installed battery which shall only be replaced at a GE Service center. Replacement involves de-soldering battery contacts, which could lead to a breach of Functional Safety. Please contact GE Service to get this battery replaced. Electronics Mounting Local Mounting (on meter body) Remote Mounting (up to 100 ft / 30.4 m). Recommended for process temperatures exceeding 150°C. Channels One or Two (two channels for two-path averaging) Display Languages English Keypad Built-in magnetic, six-button keypad, for full functionality operation Inputs/Outputs Option A: One analog output/SIL with HART**, two digital* outputs, service/Modbus(RS485) output, calibration output Option B: One analog output/SIL with HART**, one additional analog output**, two digital* outputs, service/Modbus(RS485) output, calibration output *Digital outputs are programmable as either pulse, frequency, alarm, or control outputs **Analog outputs are NAMUR NE43 compliant PanaFlow HT User’s Manual 85 Appendix A. Specifications A.3 Electronics (cont.) Table 6: I/O Terminal Block I/O Type Connection Specifications Output A SIL Analog Output + HART Active Output Output current: 0-22 mA Max load: 600 Output B (Option B only) Analog Output Active Output Output current: 0-22 mA Max load: 600 Output C Pulse, Frequency, Alarm or Control Active Output Output voltage: 5 VDC Max. voltage with light load: 7 VDC Includes integrated current limit resistor. Customer current limitation not required. Output D Pulse, Frequency, Alarm or Control Active Output Output voltage: 5 VDC Max. voltage with light load: 7 VDC Includes integrated current limit resistor. Customer current limitation not required. I/O Type Table 7: Modbus/Cal Terminal Block Connection Specifications Modbus RS485 RS485 Communications Standard RS485 communications port Cal Out Frequency Output Passive Output Max customer supply voltage:30 VDC Max current draw: 200 mA Recommended load: 300 Power Supplies Standard: 100-240 VAC (50/60 Hz) Optional: 12 to 28 VDC Power Consumption 10 Watts maximum Wiring Connection All conduit entries are M20 or M25. ¾” NPT can be ordered (with adapter) Operating Temperature –40° to 140°F (–40° to +60°C) Note: The LCD display is only visible down to -13°F (-25°C). 86 PanaFlow HT User’s Manual Appendix A. Specifications A.3 Electronics (cont.) Storage Temperature –40° to 158°F (–40° to 70°C) Data Logging Requires Vitality Software XMT900 logging PanaFlow HT User’s Manual 87 [no content intended for this page] 88 PanaFlow HT User’s Manual Appendix B. Menu Maps Appendix B. Menu Maps PanaFlow HT User’s Manual 89 Appendix B. Menu Maps 90 PanaFlow HT User’s Manual Appendix B. Menu Maps Press √ to enter the Display Measurement menu. Soundspeed Forward Reverse Net Time (Days) Flow Value usec PanaFlow HT Ultrasonic Liquid Flowmeter User’s Manual 1 Signal Process nsec 2 System Status Chx Up Signal Quality Chx Dn Signal Quality Ch x Active TWup Ch x Active TWdn Ch x Peak Up Ch x Peak Dn unitless unitless usec usec unitless unitless Ch x Peak% Up Ch x Peak% Dn Ch x Gainup Ch x Delta T m/s or ft/s Channel Signal Quality usec Diagnostic Inventory Total Mass Ch x Velocity m/s or ft/s Reynolds KFactor dB unitless unitless Chx SNR Dn Chx SNR Up Ch x Error Status unitless unitless unitless (enum) Ch x Gaindn Figure 29: Display Measurement Menu Map Velocity dB Report Error Ch x Error# unitless (enum) 91 Appendix B. Menu Maps Display Note: Display either 1 variable, 2 variables, or totalizer. Main Menu Program Password xxxx General SIL Service Factory SIL Testing Sensor Setup Calibration Advanced Factory Figure 30: Meter Programming Overview Locked Typical Access* No Active Settings Commissioned Settings Factory Settings General User Access (GEN) SIL User Access Service Access Factory Access Program Review *See exact section for specific access Display PanaFlow HT Ultrasonic Liquid Flowmeter User’s Manual 92 Appendix B. Menu Maps Display Main Menu Program Unlocked 1 Variable 2 Variables Totalizer Locked (See Service Manual) Password INPUT/OUTPUT USER PREFERENCES SIL TESTING SENSOR SETUP CALIBRATION Password Display ADVANCED FACTORY Setting Flow Units Figure 31: Display Menu Map Net Total Backlight Meter Tag Off On Label System Date *Not included under password level "General User" English SIL Limits Timeout Low SIL *Not included under password level "General User" Low Warn Velocity Mass Totalizer Density Up Warn Up SIL Confirmation Density No Yes KV Value Units Metric PanaFlow HT Ultrasonic Liquid Flowmeter User’s Manual English 93 Appendix B. Menu Maps Display To enter the Input/Output menu, on the initial screen, highlight the lock symbol and press [¥]. Select Program and press [¥@. Then enter a SIL or higher level password. In the User Preference menu, select Setting, then press the right arrow key. Main Menu Program (See Service Manual) Password INPUT/OUTPUT USER PREFERENCES CALIBRATION SENSOR SETUP SIL TESTING Analog Output A Full Value Modbus / Service Port Analog Measurement Analog Measurement Base Value Mass Full Value Calibrate 4 mA Figure 32: Input / Output Menu Map See Figure 27 See Figure 25 Base Value FACTORY ADVANCED Alarm Velocity Mass Pulse Close Batch Total 4 mA Hold High 20 mA Low 2400 4800 9600 19200 Ch1 Pulse Value High Min Pulse 38400 57600 8 no 8 odd Failsafe Reverse Ch 2 Channel 8 even Address 115200 Forward Diagnostic Other Low Open Soundspeed Low Hold DO D OFF Calibrate 20 mA Bits/Parity Baud Rate DO C 1 Stop Measurement 2 Alarm Value Net Measurement Velocity Test Alarms High Other Value Fwd Batch See Diagnostic Screen List for Parameters Mass Rev Batch Batch Total Frequency Net Batch Diagnostic Soundspeed Velocity Control Output Channel Ch1 Flow Value Full Value Open Measurement Low Batch Total High Soundspeed Control Value Test Control Batch Total Off Forward PanaFlow HT Ultrasonic Liquid Flowmeter User’s Manual Mass Control State Ch 2 Close See Diagnostic Screen List for Parameters Base Value Reverse Net Diagnostics Ch1 On Hold Low High Other See Diagnostic Screen List for Parameters Ch 2 Channel Flow Value 94 Appendix B. Menu Maps Display Main Menu Password Level (See Service Manual) Password USER PREFERENCES INPUT/OUTPUT SIL Output Min/Max SIL TESTING SENSOR SETUP CALIBRATION ADVANCED SIL Output Analog Switch Fire Low Fire High Open Switch Close Switch Show Temperature FACTORY Figure 33: SIL Testing Menu Map Program No Yes Percentage of Scale PanaFlow HT Ultrasonic Liquid Flowmeter User’s Manual 95 Appendix C. Modbus Map Appendix C. Modbus Map C.1 Frequently Used Modbus Addresses Table 8: Frequently Used Modbus Addresses Register (in Hex) Register (in Decimal) Access Level Variable Units Read Only/ Read Write Format 5C0 1472 Gen User Meter Tag 18 RW CHAR * 16 5C8 1480 Gen User Long Tag 18 RW CHAR * 32 740 1856 VIEWER master error 18 RO INT32 Master Error: See error code tables. 8200 33280 VIEWER Composite Velocity 20 RO (IEEE 32 bit) 8202 33282 VIEWER Composite Volumetric 1 RO (IEEE 32 bit) 8204 33284 VIEWER Composite Mass Flow 9 RO (IEEE 32 bit) 8206 33286 VIEWER Composite Fwd Batch Totals 17 RO (IEEE 32 bit) 8208 33288 VIEWER Composite Rev Batch Totals 17 RO (IEEE 32 bit) 820A 33290 VIEWER Composite Totalizer Time 16 RO (IEEE 32 bit) 821A 33306 VIEWER Composite Standard Volumetric 14 RO (IEEE 32 bit) 821C 33308 VIEWER Composite Net Batch Totals 17 RO (IEEE 32 bit) 604 1540 VIEWER Composite Net Inventory Totals 17 RO (IEEE 32 bit) 8220 33312 VIEWER Composite SIL Analog Out Drive Current 8 RO (IEEE 32 bit) 8302 33538 VIEWER Composite SIL errors: epSIL_Value_Health_Code_I: Use dropdown 18 RO INT32 8304 33540 VIEWER Composite most significant error (see Error Tables) 18 RO INT32 820C 33292 VIEWER Composite Sound Speed 20 RO (IEEE 32 bit) 8602 34306 VIEWER Ch_1 Sound Speed 20 RO (IEEE 32 bit) 8A02 35330 VIEWER Ch_2 Sound Speed 20 RO (IEEE 32 bit) 8618 34328 VIEWER Ch_1_SNR on UP channel 18 RO (IEEE 32 bit) 861A 34330 VIEWER Ch_1_SNR on DOWN channel 18 RO (IEEE 32 bit) 8A18 35352 VIEWER Ch_2_SNR on UP channel 18 RO (IEEE 32 bit) 8A1A 35354 VIEWER Ch_2_SNR on DOWN channel 18 RO (IEEE 32 bit) PanaFlow HT User’s Manual 97 Appendix C. Modbus Map C.2 User Group Definitions Unit Group Group Name Table 9: User Group Definitions Valid Unit Codes (See “Unit Codes for XMT900” on page 124) 1 Actual Volumetric 1347, 1348, 1349, 1350, 1351, 1352, 1353, 1354, 1356, 1357, 1358, 1359, 1362, 1363, 1364, 1365, 1371, 1371, 1372, 1372, 1373, 1373, 1374, 1374, 1454, 1454, 1462, 1462, 1485, 1485, 1489, 1489, 1493, 1493, 1548, 1548 2 Day 1060 3 dB 1383 4 Density 1097, 1100, 1103, 1104, 1106, 1107, 1108 5 Dimension 1013, 1019 6 Hz 1077 7 Viscosity 1160, 1164 8 mA 1211 9 Mass 1322, 1323, 1324, 1325, 1326, 1327, 1328, 1329, 1330, 1331, 1332, 1333, 1334, 1335, 1336, 1337, 1641, 1642, 1643, 1644 10 Milliseconds 1056 11 Nanoseconds nsec (pending) 12 Percent 1342 13 Seconds 1054 14 Standard Volumetric 1361, 1360, 1537, 1538, 1539, 1540, 1527, 1528, 1529, 1530 15 Thermal 1001, 1002 16 Totalizer time 1054, 1058, 1059, 1060 17 Totalizer 1034, 1038, 1043, 1051, 1051, 1053, 1088, 1092, 1094, 1526, 1536, 1645, 1664, 1664, 1665, 1666, 1667 18 Unitless 1615 19 Microseconds 1057 20 Velocity 1061, 1067 21 Reynolds number 1615 98 PanaFlow HT User’s Manual Appendix C. Modbus Map C.3 Modbus Map Table 10: XMIT Modbus Map Register (in Hex) Register (in Decimal) Access Level Variable Read Only/ Unit Group Read Write Format Health Check and Identification Registers 20 512 System Error Bits 18 RO INT32 202 514 Live Runtime 18 RO INT32 204 516 Transmitter Status 0: Measurement; 1: Calibration; 18 RO INT32 210 528 Product Type 18 RO INT32 NONE 212 530 NONE Product Code 18 RO CHARx16 222 546 NONE MPU serial number 18 RO CHARx16 22A 554 NONE Analog Board revision 18 RO CHARx16 232 562 NONE Application Software Version 18 RO CHARx16 23A 570 NONE Boot Loader Software Version 18 RO CHARx16 242 578 NONE I/O Board type 18 RO INT32 250 592 SERVICE MPU baud rate (fixed) 18 RW INT32 252 594 SERVICE MPU parity (fixed) 0: Even, 1: Odd, 2: No 18 RW INT32 254 596 SERVICE MPU number of stop bits (fixed) 0: no stop bits, 1: one stop bits, 2: two stop bits 18 RW INT32 256 598 SERVICE MPU Modbus node ID (fixed) 18 RW INT32 258 600 SERVICE MPU number of bits per character (fixed) 18 RW INT32 25A 602 SERVICE MPU is this a termination node? (fixed) 18 0: Not a termination, 1: Is a termination RW INT32 System Integer Read/Write 500 1280 Gen User Global Unit group 1 for Actual Volumetric 18 RW INT32 502 1282 Gen User Global Unit group 2 for Day 18 RW INT32 504 1284 Gen User Global Unit group 3 for dB 18 RW INT32 506 1286 Gen User Global Unit group 4 for Density 18 RW INT32 508 1288 Gen User Global Unit group 5 for Dimension 18 RW INT32 50A 1290 Gen User Global Unit group 6 for Hz 18 RW INT32 50C 1292 Gen User Global Unit group 7 for Viscosity 18 RW INT32 50E 1294 Gen User Global Unit group 8 for mA 18 RW INT32 510 1296 Gen User Global Unit group 9 for Mass 18 RW INT32 512 1298 Gen User Global Unit group 10 for Milli Second 18 RW INT32 514 1300 Gen User Global Unit group 11 for Nano Second 18 RW INT32 516 1302 Gen User Global Unit group 12 for Percent 18 RW INT32 518 1304 Gen User Global Unit group 13 for Second 18 RW INT32 PanaFlow HT User’s Manual 99 Appendix C. Modbus Map Table 10: XMIT Modbus Map (cont.) Register (in Hex) Register (in Decimal) Access Level Variable Read Only/ Unit Group Read Write Format 51A 1306 Gen User Global Unit group 14 for Standard Volumetric 18 RW INT32 51C 1308 Gen User Global Unit group 15 for Therm 18 RW INT32 51E 1310 Gen User Global Unit group 16 for Totalizer time 18 RW INT32 520 1312 Gen User Global Unit group 17 for Totalizer 18 RW INT32 522 1314 Gen User Global Unit group 18 for Unitless 18 RW INT32 524 1316 Gen User Global Unit group 19 for Micro Second 18 RW INT32 526 1318 Gen User Global Unit group 20 for Velocity 18 RW INT32 528 1320 Gen User Global Unit group 21 for Reynolds 18 RW INT32 52A 1322 Gen User Reserved Global Unit group 22 18 RW INT32 52C 1324 Gen User Reserved Global Unit group 23 18 RW INT32 52E 1326 Gen User Reserved Global Unit group 24 18 RW INT32 540 1344 VIEWER system request level 18 RW INT32 580 1408 SERVICE PC MODBUS baud rate 18 RW INT32 582 1410 SERVICE PC MODBUS parity 18 RW INT32 584 1412 SERVICE PC MODBUS stop bits 18 RW INT32 586 1414 SERVICE PC MODBUS meter addr 18 RW INT32 588 1416 SERVICE PC MODBUS bits per character 18 RW INT32 58A 1418 SERVICE PC MODBUS termination 18 RW INT32 5C0 1472 Gen User Meter Tag 18 RW CHAR * 16 5C8 1480 Gen User Long Tag 18 RW CHAR * 32 5D8 1496 FACTORY Option Board Type 18 RW INT32 System Real Read Only 600 1536 VIEWER inventory fwd totals 17 RO (IEEE 32 bit) 602 1538 VIEWER inventory rev totals 17 RO (IEEE 32 bit) 604 1540 VIEWER inventory net totals 17 RO (IEEE 32 bit) 606 1542 VIEWER inventory totals time 16 RO (IEEE 32 bit) System Integer Read Only 100 700 1792 VIEWER NetworkID_Max 18 RO INT32 702 1794 VIEWER NetworkID_Min 18 RO INT32 704 1796 VIEWER General user password 18 RO INT32 706 1798 VIEWER MCU serial number 18 RO INT32 708 1800 VIEWER MCU bootloader version 18 RO INT32 70A 1802 VIEWER MCU Software version 18 RO INT32 70C 1804 VIEWER MCU Hardware version 18 RO INT32 70E 1806 VIEWER Option Software version 18 RO INT32 710 1808 VIEWER Option Hardware version 18 RO INT32 712 1810 VIEWER MCU flash CRC 18 RO INT32 740 1856 VIEWER master error Master Error: See error code tables. 18 RO INT32 PanaFlow HT User’s Manual Appendix C. Modbus Map Table 10: XMIT Modbus Map (cont.) Register (in Hex) Register (in Decimal) Access Level Variable Read Only/ Unit Group Read Write Format 742 1858 VIEWER MCU error MCU error: See error code tables. 18 RO INT32 744 1860 VIEWER Option error Option error: See error code tables. 18 RO INT32 746 1862 VIEWER MCU startup error MCU startup error: See error code tables. 18 RO INT32 748 1864 VIEWER Option startup error Option startup error: See error code tables. 18 RO INT32 Display Integer Read Write 900 2304 Gen User Display Language 18 RW INT32 902 2306 VIEWER Display Variable_1 Register Address 18 RW INT32 904 2308 VIEWER Display Variable_1 Unit Code Address 18 RW INT32 906 2310 VIEWER Display Variable_2 Register Address 18 RW INT32 908 2312 VIEWER Display Variable_2 Unit Code Address 18 RW INT32 90A 2314 VIEWER Display Totalizer_1 Register Address 18 RW INT32 90C 2316 VIEWER Display Totalizer_1 Unit Code Address 18 RW INT32 90E 2318 VIEWER Display Totalizer_2 Register Address 18 RW INT32 910 2320 VIEWER Display Totalizer_2 Unit Code Address 18 RW INT32 912 2322 VIEWER Display Graph_1 Register Address 18 RW INT32 914 2324 VIEWER Display Graph_1 Unit Code Address 18 RW INT32 916 2326 Gen User select the velocity 18 RW INT32 918 2328 Gen User select the Actual Volumetric 18 RW INT32 91A 2330 Gen User select the Standardized Volumetric 18 RW INT32 91C 2332 Gen User select Mass 18 RW INT32 91E 2334 Gen User select Totalizer 18 RW INT32 920 2336 Gen User select Density 18 RW INT32 922 2338 VIEWER Select Decimal 18 RW INT32 924 2340 VIEWER the type of DISPLAY 18 RW INT32 926 2342 Gen User TimeOut for DISPLAY 13 RW INT32 928 2344 Gen User BackLight Control 18 RW INT32 92A 2346 VIEWER Lock menu 18 RW INT32 92C 2348 Gen User Unit type for velocity 0: for Metric, 1: for English 18 RW INT32 92E 2350 Gen User Unit type for actual volumetric 0: for Metric, 1: for English 18 RW INT32 930 2352 Gen User Unit type for standard volumetric 0: for Metric, 1: for English 18 RW INT32 932 2354 Gen User Unit type for mass 0: for Metric, 1: for English 18 RW INT32 934 2356 Gen User Unit type for totalizer 0: Avol, 1: Svol, 2:Mass 18 RW INT32 PanaFlow HT User’s Manual 101 Appendix C. Modbus Map Table 10: XMIT Modbus Map (cont.) Register (in Hex) Register (in Decimal) Access Level Variable Read Only/ Unit Group Read Write Format 936 2358 Gen User Unit type for Actual volumetric of totalize 0: for Metric, 1: for English 18 RW INT33 938 2360 Gen User Unit type for Standard volumetric of totalizer 0: for Metric, 1: for English 18 RW INT34 93A 2362 Gen User Unit type for Mass of totalizer 0: for Metric, 1: for English 18 RW INT35 93C 2364 Gen User Unit type for Density 0: for Metric, 1: for English 18 RW INT32 Display Integer Read Only B00 2816 VIEWER Maximum TimeOut for DISPLAY 18 RO INT32 B02 2818 VIEWER Minimum TimeOut for DISPLAY 18 RO INT32 Log Integer Read Write D00 3328 Gen User Log control / status 18 RW INT32 D02 3330 Gen User Log interval 13 RW INT32 D04 3332 Gen User Logging time 13 RW INT32 D06 3334 Gen User Number of variables to log 18 RW INT32 D40 3392 Gen User variable address array 18 RW INT32 D80 3456 Gen User Variable unit code array 18 RW INT32 N/A Number of records 18 RO INT32 Analog Out 2 Error Handling Value 8 RW (IEEE 32 bit) Log Integer Read Only F00 3840 Analog Out 2 Real Read Write 1000 4096 Gen User 1002 4098 Gen User Analog Out 2 Zero 8 RW (IEEE 32 bit) 1004 4100 Gen User Analog Out 2 Span 8 RW (IEEE 32 bit) 1006 4102 Gen User Analog Out 2 Test Value (Percent of Span) 12 RW (IEEE 32 bit) 1008 4104 Gen User Analog Out 2 Base Value 18 RW (IEEE 32 bit) 100A 4106 Gen User Analog Out 2 Full Value 18 RW (IEEE 32 bit) 18 RW INT32 Analog Out 2 Integer Read Write 1180 4480 Gen User Analog Out 2 Operating Mode 1182 4482 Gen User Analog Out 2 Type 18 RW INT32 1184 4484 Gen User Analog Out 2 Measurement Register Address 18 RW INT32 1186 4486 Gen User Analog Out 2 Error Handling 18 RW INT32 1188 4488 Gen User Analog Out 2 Unit code 18 RW INT32 Analog Out 2 Max Real Read Only 102 1600 5632 VIEWER Maximum Analog Out 2 Error Handling 8 Value RO (IEEE 32 bit) 1602 5634 VIEWER Maximum Analog Out 2 Zero 8 RO (IEEE 32 bit) 1604 5636 VIEWER Maximum Analog Out 2 Span 8 RO (IEEE 32 bit) PanaFlow HT User’s Manual Appendix C. Modbus Map Table 10: XMIT Modbus Map (cont.) Register (in Hex) Register (in Decimal) Access Level Variable Read Only/ Unit Group Read Write Format 1606 5638 VIEWER Maximum Analog Out 2 Test Value (Percent of Span) 12 RO (IEEE 32 bit) 1608 5640 VIEWER Maximum Analog Out 2 Base Value 18 RO (IEEE 32 bit) 160A 5642 VIEWER Maximum Analog Out 2 Full Value 18 RO (IEEE 32 bit) Analog Out 2 Min Real Read Only 1A00 6656 VIEWER Minimum Analog Out 2 Error Handling 8 Value RO (IEEE 32 bit) 1A02 6658 VIEWER Minimum Analog Out 2 Zero 8 RO (IEEE 32 bit) 1A04 6660 VIEWER Minimum Analog Out 2 Span 8 RO (IEEE 32 bit) 1A06 6662 VIEWER Minimum Analog Out 2 Test Value (Percent of Span) 12 RO (IEEE 32 bit) 1A08 6664 VIEWER Minimum Analog Out 2 Base Value 18 RO (IEEE 32 bit) 1A0A 6666 VIEWER Minimum Analog Out 2 Full Value 18 RO (IEEE 32 bit) Digital Out 1 Real Read Write 2000 8192 Gen User Output_1 Pulse Value 18 RW (IEEE 32 bit) 2002 8194 Gen User Output_1 Pulse Time 10 RW (IEEE 32 bit) 2004 8196 Gen User Output_1 Frequency Base Value 18 RW (IEEE 32 bit) 2006 8198 Gen User Output_1 Frequency Full Value 18 RW (IEEE 32 bit) 2008 8200 Gen User Output_1 Alarm Value 18 RW (IEEE 32 bit) 200A 8202 Gen User Output_1 Control Output Value 18 RW (IEEE 32 bit) 18 RW INT32 Digital Out 1 Integer Read Write 2100 8448 Gen User Output_1 Test Pulse Value 2102 8450 Gen User Output_1 Frequency Full Frequency 6 RW INT32 2104 8452 Gen User Output_1 Test Frequency Value 6 RW INT32 2106 8454 Gen User Output_1 Frequency Error Handling Value 6 RW INT32 2180 8576 Gen User Output_1 type 18 RW INT32 2182 8578 Gen User Output_1 Pulse Value Unit Code 18 RW INT32 2184 8580 Gen User Output_1 Pulse Error Handling 18 RW INT32 2186 8582 Gen User Output_1 Frequency Measurement Register Address 18 RW INT32 2188 8584 Gen User Output_1 Frequency Error Handling 18 RW INT32 218A 8586 Gen User Output_1 Frequency Unit code 18 RW INT32 218C 8588 Gen User Output_1 Alarm State 18 RW INT32 218E 8590 Gen User Output_1 Alarm Type 18 RW INT32 2190 8592 Gen User Output_1 Alarm Measurement Register 18 Address RW INT32 2192 8594 Gen User Output_1 Alarm Unit code 18 RW INT32 2194 8596 Gen User Output_1 Test Alarm 18 RW INT32 2196 8598 Gen User Output_1 Control Output State 18 RW INT32 2198 8600 Gen User Output_1 Control Output Type 18 RW INT32 PanaFlow HT User’s Manual 103 Appendix C. Modbus Map Table 10: XMIT Modbus Map (cont.) Register (in Hex) Register (in Decimal) Access Level Variable Read Only/ Unit Group Read Write Format 219A 8602 Gen User Output_1 Control Output Measurement 18 Register Address RW INT32 219C 8604 Gen User Output_1 Control Output Unit code 18 RW INT32 219E 8606 Gen User Output_1 Test Control Output 18 RW INT32 21A0 8608 Gen User Output_1 Reserved 18 RW INT32 21A2 8610 Gen User Output_1 Test Mode 0: Test Off; 1: Test On 18 RW INT32 21A4 8612 Gen User Output_1 Pulse Measurement Register Address 18 RW INT32 Digital Out 2 Real Read Write 2400 9216 Gen User Output_2 Pulse Value 18 RW (IEEE 32 bit) 2402 9218 Gen User Output_2 Pulse Time 10 RW (IEEE 32 bit) 2404 9220 Gen User Output_2 Frequency Base Value 18 RW (IEEE 32 bit) 2406 9222 Gen User Output_2 Frequency Full Value 18 RW (IEEE 32 bit) 2408 9224 Gen User Output_2 Alarm Value 18 RW (IEEE 32 bit) 240A 9226 Gen User Output_2 Control Output Value 18 RW (IEEE 32 bit) Digital Out 2 Integer Read Write 104 2500 9472 Gen User Output_2 Test Pulse Value 18 RW INT32 2502 9474 Gen User Output_2 Frequency Full Frequency 6 RW INT32 2504 9476 Gen User Output_2 Test Frequency Value 6 RW INT32 2506 9478 Gen User Output_2 Frequency Error Handling Value 6 RW INT32 2580 9600 Gen User Output_2 type 18 RW INT32 2582 9602 Gen User Output_2 Pulse Value Unit Code 18 RW INT32 2584 9604 Gen User Output_2 Pulse Error Handling 18 RW INT32 2586 9606 Gen User Output_2 Frequency Measurement Register Address 18 RW INT32 2588 9608 Gen User Output_2 Frequency Error Handling 18 RW INT32 258A 9610 Gen User Output_2 Frequency Unit code 18 RW INT32 258C 9612 Gen User Output_2 Alarm State 18 RW INT32 258E 9614 Gen User Output_2 Alarm Type 18 RW INT32 2590 9616 Gen User Output_2 Alarm Measurement Register 18 Address RW INT32 2592 9618 Gen User Output_2 Alarm Unit code 18 RW INT32 2594 9620 Gen User Output_2 Test Alarm 18 RW INT32 2596 9622 Gen User Output_2 Control Output State 18 RW INT32 2598 9624 Gen User Output_2 Control Output Type 18 RW INT32 259A 9626 Gen User Output_2 Control Output Measurement 18 Register Address RW INT32 259C 9628 Gen User Output_2 Control Output Unit code 18 RW INT32 259E 9630 Gen User Output_2 Test Control Output 18 RW INT32 25A0 9632 Gen User Output_2 Phase Shift 18 RW INT32 PanaFlow HT User’s Manual Appendix C. Modbus Map Table 10: XMIT Modbus Map (cont.) Register (in Hex) Register (in Decimal) Access Level Variable Read Only/ Unit Group Read Write Format 25A2 9634 Gen User Output_2 Test Mode 0: Test Off; 1: Test O 18 RW INT32 25A4 9636 Gen User Output_2 Pulse Measurement Register Address 18 RW INT32 Digital Out Max Real Read Only 2A00 10752 VIEWER Maximum Output_1 Pulse Value 18 RO (IEEE 32 bit) 2A02 10754 VIEWER Maximum Output_1 Pulse Time 10 RO (IEEE 32 bit) 2A04 10756 VIEWER Maximum Output_1 Frequency Base Value 18 RO (IEEE 32 bit) 2A06 10758 VIEWER Maximum Output_1 Frequency Full Value 18 RO (IEEE 32 bit) 2A08 10670 VIEWER Maximum Output_1 Alarm Value 18 RO (IEEE 32 bit) 2A0A 10762 VIEWER Maximum Output_1 Control Output Value 18 RO (IEEE 32 bit) 2A80 10880 VIEWER Maximum Output_2 Pulse Value 18 RO (IEEE 32 bit) 2A82 10882 VIEWER Maximum Output_2 Pulse Time 10 RO (IEEE 32 bit) 2A84 10884 VIEWER Maximum Output_2 Frequency Base Value 18 RO (IEEE 32 bit) 2A86 10886 VIEWER Maximum Output_2 Frequency Full Value 18 RO (IEEE 32 bit) 2A88 10888 VIEWER Maximum Output_2 Alarm Value 18 RO (IEEE 32 bit) 2A8A 10890 VIEWER Maximum Output_2 Control Output Value 18 RO (IEEE 32 bit) Digital Out Max Integer Read Only 2B00 11008 VIEWER Maximum Output_1 Test Pulse Value 18 RO INT32 2B02 11010 VIEWER Maximum Output_1 Frequency Full Frequency 6 RO INT32 2B04 11012 VIEWER Maximum Output_1 Test Frequency Value 6 RO INT32 2B06 11014 VIEWER Maximum Output_1 Frequency Error Handling Value 6 RO INT32 2B80 11136 VIEWER Maximum Output_2 Test Pulse Value 18 RO INT32 2B82 11138 VIEWER Maximum Output_2 Frequency Full Frequency 6 RO INT32 2B84 11140 VIEWER Maximum Output_2 Test Frequency Value 6 RO INT32 2B86 11142 VIEWER Maximum Output_2 Frequency Error Handling Value 6 RO INT32 Digital Out Min Real Read Only 2E00 2 VIEWER Minimum Output_1 Pulse Value 18 RO (IEEE 32 bit) 2E02 512 VIEWER Minimum Output_1 Pulse Time 10 RO (IEEE 32 bit) 2E04 131072 VIEWER Minimum Output_1 Frequency Base Value 18 RO (IEEE 32 bit) 2E06 33554432 VIEWER Minimum Output_1 Frequency Full Value 18 RO (IEEE 32 bit) PanaFlow HT User’s Manual 105 Appendix C. Modbus Map Table 10: XMIT Modbus Map (cont.) Register (in Hex) Register (in Decimal) Access Level Variable Read Only/ Unit Group Read Write Format 2E08 8589934592 VIEWER Minimum Output_1 Alarm Value 18 RO (IEEE 32 bit) 2E0A 11786 VIEWER Minimum Output_1 Control Output Value 18 RO (IEEE 32 bit) 2E80 VIEWER Minimum Output_2 Pulse Value 18 RO (IEEE 32 bit) 2E82 VIEWER Minimum Output_2 Pulse Time 10 RO (IEEE 32 bit) 2E84 VIEWER Minimum Output_2 Frequency Base Value 18 RO (IEEE 32 bit) 2E86 VIEWER Minimum Output_2 Frequency Full Value 18 RO (IEEE 32 bit) 2E88 VIEWER Minimum Output_2 Alarm Value 18 RO (IEEE 32 bit) VIEWER Minimum Output_2 Control Output Value 18 RO (IEEE 32 bit) 2E8A 11914 Digital Out Min Integer Read Only 2F00 12032 VIEWER Minimum Output_1 Test Pulse Value 18 RO INT32 2F02 12034 VIEWER Minimum Output_1 Frequency Full Frequency 6 RO INT32 2F04 12036 VIEWER Minimum Output_1 Test Frequency Value 6 RO INT32 2F06 12038 VIEWER Minimum Output_1 Frequency Error Handling Value 6 RO INT32 2F80 12160 VIEWER Minimum Output_2 Test Pulse Value 18 RO INT32 2F82 12162 VIEWER Minimum Output_2 Frequency Full Frequency 6 RO INT32 2F84 12164 VIEWER Minimum Output_2 Test Frequency Value 6 RO INT32 2F86 12166 VIEWER Minimum Output_2 Frequency Error Handling Value 6 RO INT32 12544 VIEWER Hart unit code 18 RW INT32 3000 12288 VIEWER Flow Monitoring log 18 RO 3001 12289 VIEWER Error log 18 RO HART Integer Read Write 3100 Files Flow Measurement Registers Configurations (Holding Registers) Composite Channel Real - FF Terminal Block 2 106 8000 32768 SERVICE Composite Span value for frequency output 1, 14 or 20 RW (IEEE 32 bit) 8002 32770 SERVICE Composite Pipe Inner Diameter 5 RW (IEEE 32 bit) 8004 32772 SERVICE Composite Pipe Outer Diameter 5 RW (IEEE 32 bit) 8006 32774 SERVICE Composite Pipe Wall Thickness 5 RW (IEEE 32 bit) 8008 32776 SERVICE Composite Velocity Warn High limit Alarm limits- Normal operation 20 RW (IEEE 32 bit) 800A 32778 SIL USER Composite Analog out percent scale 12 RW (IEEE 32 bit) PanaFlow HT User’s Manual Appendix C. Modbus Map Table 10: XMIT Modbus Map (cont.) Register (in Hex) Register (in Decimal) Access Level Variable Read Only/ Unit Group Read Write Format 800C 32780 SIL USER Composite Static Density 4 RW (IEEE 32 bit) 800E 32782 SERVICE Composite Acceleration Limit 18 RW (IEEE 32 bit) 8010 32784 SERVICE Composite Amplitude discriminator min 18 limit RW (IEEE 32 bit) 8012 32786 SERVICE Composite Amplitude discriminator max limit 18 RW (IEEE 32 bit) 8014 32788 SIL USER Composite Kinematic Viscosity 7 RW (IEEE 32 bit) 8016 8018 32790 32792 SERVICE SIL USER Composite Calibration Factor Composite Zero Cutoff 18 20 RW RW (IEEE 32 bit) (IEEE 32 bit) 801A 32794 SIL USER Composite Response Time 13 RW (IEEE 32 bit) 801C 32796 SIL USER Composite Analog Output Low Limit point as entered in the system 1, 9, 14 RW (IEEE 32 bit) 801E 32798 SIL USER Composite Analog Output High Limit as 1, 9, 14 entered in the system RW (IEEE 32 bit) 8020 32800 SIL USER Composite Zero Set point as entered into 8 the system by user RW (IEEE 32 bit) 8022 32802 SIL USER Composite Span Set point as entered into the system by user 8 RW (IEEE 32 bit) 8024 32804 SIL USER Composite Velocity Low limit - Used for Volumetric low limit calculation 20 RW (IEEE 32 bit) 8026 32806 SIL USER Composite Velocity High limit - Used for Volumetric High limit calculation 20 RW (IEEE 32 bit) 8028 32808 SIL USER Composite Velocity Warn Low limit Alarm limits- Normal operation 20 RW (IEEE 32 bit) 802A 32810 SIL USER Composite Velocity Warn High limit Alarm limits- Normal operation 20 RW (IEEE 32 bit) 802C 32812 SIL USER Composite Reference Density for Standard volumetric calculation 4 RW (IEEE 32 bit) 802E 32814 SERVICE Composite Base value for frequency output 1, 14, 20 RW (IEEE 32 bit) 8030 32816 SIL USER Composite Analog Input Zero Set point 8 as entered into the system by user RW (IEEE 32 bit) 8032 32818 SIL USER Composite Analog Input Span Set point 8 as entered into the system by user RW (IEEE 32 bit) 9000 36864 SERVICE Composite MultiK VelRey_1 18, 20 RW (IEEE 32 bit) 9002 36866 SERVICE Composite MultiK VelRey_2 18, 20 RW (IEEE 32 bit) 9004 36868 SERVICE Composite MultiK VelRey_3 18, 20 RW (IEEE 32 bit) 9006 36870 SERVICE Composite MultiK VelRey_4 18, 20 RW (IEEE 32 bit) 9008 36872 SERVICE Composite MultiK VelRey_5 18, 20 RW (IEEE 32 bit) 900A 36874 SERVICE Composite MultiK VelRey_6 18, 20 RW (IEEE 32 bit) 9400 37888 SERVICE Composite MultiK KFactor_1 18 RW (IEEE 32 bit) 9402 37890 SERVICE Composite MultiK KFactor_2 18 RW (IEEE 32 bit) 9404 37892 SERVICE Composite MultiK KFactor_3 18 RW (IEEE 32 bit) 9406 37894 SERVICE Composite MultiK KFactor_4 18 RW (IEEE 32 bit) PanaFlow HT User’s Manual 107 Appendix C. Modbus Map Table 10: XMIT Modbus Map (cont.) Register (in Hex) Register (in Decimal) Access Level Variable Read Only/ Unit Group Read Write Format 9408 37896 SERVICE Composite MultiK KFactor_5 18 RW (IEEE 32 bit) 940A 37898 SERVICE Composite MultiK KFactor_6 18 RW (IEEE 32 bit) Composite Channel Integer - FF Terminal Block 2 108 8100 33024 SERVICE Composite Reynolds Correction: 0: Off, 18 1: On RW INT32 8102 33026 VIEWER Composite Command to capture a new set of signal files: 0: Write - ERROR, Read - Not Ready, 1: Write - Capture, Read - Ready 18 RW INT32 8104 33028 SERVICE Composite Path Configuration: 0: single 18 path diameter, 1: single path mid radius, 2: two path diameter, 3: two path mid radius, 4: three path RW INT32 8106 33030 FACTORY Composite Hardware revision 18 RW INT32 8108 33032 FACTORY Composite Software revision 18 RW INT32 810A 810C 33034 33036 FACTORY VIEWER Composite UMPU board serial number Composite Totalizer Command: 0: Batch Reset 1: Batch Start, 2: Batch Stop, 3: Inventory Reset 18 18 RW RW INT32 INT32 810E 33038 SERVICE Composite Command: 0: Off, 1: Commissioned, 2: Factory 18 RW INT32 8110 33040 SIL USER Composite Which test to run: 0: None, 1: Watchdog Test, 2: Open SIL Output switch, 3:Close SIL Output switch 18 RW INT32 8112 33042 SIL USER Composite Service 18 RW INT32 8114 33044 SIL USER Composite Factory 18 RW INT32 8116 33046 SIL USER Composite User 18 RW INT32 8118 33048 SIL USER Composite AnalogOut Command (for 18 trim): 0: Trim Off, 1: Low Set, 2: High Set, 3: Zero trim 4: Span trim 5: Percent Set RW INT32 811A 33050 FACTORY Composite Sensor serial number 1 18 RW INT32 811C 33052 FACTORY Composite Sensor serial number 2 18 RW INT32 811E 33054 SERVICE Composite Tracking Windows: 0: Off, 1: 18 On RW INT32 8120 33056 SERVICE Composite MultiK Active: 0: Off, 1: On 18 RW INT32 8122 33058 SERVICE Composite MultiK Type: 0: Velocity, 1: 18 Reynolds RW INT32 8124 33060 SERVICE Composite MultiK Pairs RW INT32 8126 33062 SERVICE Composite KV Input Selection 18 RW INT32 8128 33064 SIL USER Composite System Command (such as commit, accept, halt): 0: Init, 1: Halt, 2:Cancel, 3: Submit, 4: Commit, 5: Commit as Factory, 6: Commit as Commissioned, 7: Password Change request 18 RW INT32 812A 33066 SERVICE Composite Active TW: 0: Disabled, 1: Enabled 18 RW INT32 18 PanaFlow HT User’s Manual Appendix C. Modbus Map Table 10: XMIT Modbus Map (cont.) Register (in Hex) Register (in Decimal) Access Level Variable Read Only/ Unit Group Read Write Format 812C 33068 SIL USER Composite Selection for FireLow/ Fire High during fault: 0: Fire-Low, 1: Fire-High 18 RW INT32 812E 33070 SIL USER Composite Analog Output Selection: 0: 18 Mass Flow, 1: Actual Volumetric, 2: Standard Volumetric RW INT32 8130 33072 SERVICE Composite Calibration Mode Selection: 18 0: Off 1: Gate Input, 2: Frequency Output RW INT32 8132 33074 SERVICE Composite Base Frequency for frequency Output 6 RW INT32 8134 33076 SERVICE Composite Span Frequency for frequency Output 6 RW INT32 8136 33078 SERVICE 18 Composite Frequency Output Unit Selection: 0: Velocity, 1: Volumetric, 2: Mass Flow RW INT32 8138 33080 SERVICE Composite Frequency Output Error State Selection: 0: Force Low, 1: Force High, 2: Hold Last 18 RW INT32 813A 33082 SERVICE Composite Path Error Handling: 0: Off, 18 1: On RW INT32 813C 33084 SIL USER Composite Unit Type Dimension (see Unit Table, C.2) 18 RW INT32 813E 33086 SIL USER Composite Unit Type Density (see Unit 18 Table, C.2) RW INT32 8140 33088 SIL USER Composite Unit Type Mass Flow (see Unit Table, C.2) 18 RW INT32 8142 33090 SIL USER Composite Unit Type Volumetric (see Unit Table, C.2) 18 RW INT32 8144 33092 SIL USER Composite Unit Type Velocity (see Unit 18 Table, C.2) RW INT32 8146 33094 SERVICE Composite Test Frequency for Frequency Output 6 RW INT32 8148 33096 FACTORY Composite Sensor serial number 3 18 RW INT32 814A 33098 FACTORY Composite Sensor serial number 4 18 RW INT32 814C 33100 FACTORY Composite Sensor serial number 5 18 RW INT32 814E 33102 FACTORY Composite Sensor serial number 6 18 RW INT32 8150 33104 FACTORY Composite Flowmeter/System serial number 18 RW INT32 8152 33106 SIL USER Composite Unit Type Time (see Unit Table, C.2) 18 RW INT32 8154 33108 SIL USER Composite Unit Type Viscosity (see Unit Table, C.2) 18 RW INT32 8156 33110 SIL USER Composite Unit Type Standard Volumetric (see Unit Table, C.2) 18 RW INT32 8158 33112 FACTORY Composite Standard BWT buffer 1 serial number 18 RW INT32 PanaFlow HT User’s Manual 109 Appendix C. Modbus Map Table 10: XMIT Modbus Map (cont.) Register (in Hex) Register (in Decimal) Access Level Variable Read Only/ Unit Group Read Write Format 815A 33114 FACTORY Composite Standard BWT buffer 2 serial number 18 RW INT32 815C 33116 FACTORY Composite Standard BWT buffer 3 serial number 18 RW INT32 815E 33118 FACTORY Composite Standard BWT buffer 4 serial number 18 RW INT32 8160 33120 FACTORY Composite Standard BWT buffer 5 serial number 18 RW INT32 8162 33122 FACTORY Composite Standard BWT buffer 6 serial number 18 RW INT32 8164 33124 FACTORY Composite UMPU receiver serial number 18 RW INT32 Channel 1 Real - FF Terminal Block 4 8400 33792 SERVICE Ch_1 Chord Wt factor 18 RW (IEEE 32 bit) 8402 33794 SERVICE Ch_1 Time Buffer Offset 19 RW (IEEE 32 bit) 8404 33796 SERVICE Ch_1 Time in wedge 19 RW (IEEE 32 bit) 8406 33798 SERVICE Ch_1 Path Length P 5 RW (IEEE 32 bit) 8408 33800 SERVICE Ch_1 Axial Length L 5 RW (IEEE 32 bit) 840A 33802 SERVICE Ch_1 delay between successive transmits 19 RW (IEEE 32 bit) 840C 33804 SERVICE Ch_1 DeltaT Offset 19 RW (IEEE 32 bit) Channel 1 Integer - FF Terminal Block 4 8500 34048 SERVICE Ch_1 Pct of Peak 12 RW INT32 8502 34050 SERVICE Ch_1 Min Peak% 12 RW INT32 8504 34052 SERVICE Ch_1 Max Peak% 12 RW INT32 8506 34054 SERVICE Ch_1 Reynolds correction selection: 0: Off, 1: On 18 RW INT32 8508 34056 SERVICE Ch_1 enum of transducer type (ex. T5): 18 0: BWT RW INT32 850A 34058 SERVICE Ch_1 Transducer Freq: 500000: 500kHz, 1000000: 1MHz 6 RW INT32 850C 34060 SERVICE Ch 1 Errors Allowed 18 RW INT32 Channel 2 Real - FF Terminal Block 5 8800 34816 SERVICE Ch_2 Composite Coefficient 18 RW (IEEE 32 bit) 8802 34818 SERVICE Ch_2 Time Buffer Offset 19 RW (IEEE 32 bit) 8804 34820 SERVICE Ch_2 Time in wedge 19 RW (IEEE 32 bit) 8806 34822 SERVICE Ch_2 Path Length P 5 RW (IEEE 32 bit) 8808 34824 SERVICE Ch_2 Axial Length L 5 RW (IEEE 32 bit) 880A 34826 SERVICE Ch_2 delay between successive transmits 19 RW (IEEE 32 bit) 880C 34828 SERVICE Ch_2 DeltaT Offset 19 RW (IEEE 32 bit) 12 RW INT32 Channel 2 Integer - FF Terminal Block 5 8900 110 35072 SERVICE Ch_2 Pct of Peak PanaFlow HT User’s Manual Appendix C. Modbus Map Table 10: XMIT Modbus Map (cont.) Register (in Hex) Register (in Decimal) Access Level Variable Read Only/ Unit Group Read Write Format 8902 35074 SERVICE Ch_2 Min Peak% 12 RW INT32 8904 35076 SERVICE Ch_2 Max Peak% 12 RW INT32 8906 35078 SERVICE Ch_2 Reynolds correction selection: 0: Off, 1: On 18 RW INT32 8908 35080 SERVICE Ch_2 enum of transducer type (ex. T5): 18 0: BWT RW INT32 890A 35082 SERVICE Ch_2 Transducer Freq: 500000: 500kHz, 1000000: 1MHz 6 RW INT32 890C 35084 SERVICE Ch_2 Errors Allowed 18 RW INT32 Composite Velocity 20 RO (IEEE 32 bit) Measurements (Input Registers) Composite Channel Real 8200 33280 VIEWER 8202 33282 VIEWER Composite Volumetric 1 RO (IEEE 32 bit) 8204 33284 VIEWER Composite Mass Flow 9 RO (IEEE 32 bit) 8206 8208 33286 33288 VIEWER VIEWER Composite Fwd Batch Totals Composite Rev Batch Totals 17 17 RO RO (IEEE 32 bit) (IEEE 32 bit) 820A 33290 VIEWER Composite Totalizer Time 16 RO (IEEE 32 bit) 820C 33292 VIEWER Composite Sound Speed 20 RO (IEEE 32 bit) 8214 33300 VIEWER Composite Current Correction Factor 18 RO (IEEE 32 bit) 8216 33302 VIEWER Composite Current Reynolds Number 18 RO (IEEE 32 bit) 8218 33304 VIEWER Composite Current operating temperature read from temperature sensor 15 RO (IEEE 32 bit) 821A 33306 VIEWER Composite Standard Volumetric 14 RO (IEEE 32 bit) 821C 33308 VIEWER Composite Net Batch Totals 17 RO (IEEE 32 bit) 8220 33312 VIEWER Composite SIL Analog Out Drive Current 8 RO (IEEE 32 bit) 8222 33314 VIEWER Composite SIL Analog Out Monitored Current 8 RO (IEEE 32 bit) Composite Channel Int 8300 33536 VIEWER Composite status bit map 18 RO INT32 8302 33538 VIEWER Composite SIL errors: epSIL_Value_Health_Code_I: Use dropdown 18 RO INT32 8304 33540 VIEWER Composite most significant error (see Error Tables) 18 RO INT32 8306 33542 VIEWER Composite Gate Input State bitmap: 0: Open, 1: Closed 18 RO INT32 Channel 1 Real - FF Terminal Block 4 8600 34304 VIEWER Ch_1 Velocity 20 RO (IEEE 32 bit) 8602 34306 VIEWER Ch_1 Sound Speed 20 RO (IEEE 32 bit) 8604 34308 VIEWER Ch_1 Transit Time Up 19 RO (IEEE 32 bit) 8606 34310 VIEWER Ch_1 Transit Time Dn 19 RO (IEEE 32 bit) PanaFlow HT User’s Manual 111 Appendix C. Modbus Map Table 10: XMIT Modbus Map (cont.) Register (in Hex) Register (in Decimal) Access Level Variable Read Only/ Unit Group Read Write Format 8608 34312 VIEWER Ch_1 DeltaT 19 RO (IEEE 32 bit) 860A 34314 VIEWER Ch_1 Time in buffer on Dn channel 19 RO (IEEE 32 bit) 860C 34316 VIEWER Ch_1 Up Signal Quality 18 RO (IEEE 32 bit) 860E 34318 VIEWER Ch_1 Dn Signal Quality 18 RO (IEEE 32 bit) 8610 34320 VIEWER Ch_1 Up Amp Disc 18 RO (IEEE 32 bit) 8612 34322 VIEWER Ch_1 Dn Amp Disc 18 RO (IEEE 32 bit) 8614 34324 VIEWER Ch_1 Signal Gain Up 3 RO (IEEE 32 bit) 8616 34326 VIEWER Ch_1 Signal Gain Down 3 RO (IEEE 32 bit) 8618 34328 VIEWER Ch_1_SNR on UP channel 18 RO (IEEE 32 bit) 861A 34330 VIEWER Ch_1_SNR on DOWN channel 18 RO (IEEE 32 bit) 861C 34332 VIEWER Ch_1 Time in buffer on Up channel 19 RO (IEEE 32 bit) Channel 1 Integer - FF Terminal Block 4 8700 34560 VIEWER Ch_1 status bit map 18 RO INT32 8702 34562 VIEWER Ch_1 most significant error (see Error Tables) 18 RO INT32 8704 34564 VIEWER Ch_1 Up +- Peak 18 RO INT32 8706 34566 VIEWER Ch_1 Dn +- Peak 18 RO INT32 8708 34568 VIEWER Ch_1 dynamic threshold on UP channel 12 RO INT32 870A 34570 VIEWER Ch_1 dynamic threshold on DOWN channel 12 RO INT32 870C 34572 VIEWER Ch_1 #Errors of Last 16 18 RO INT32 Channel 2 Real - FF Terminal Block 5 8A00 35328 VIEWER Ch_2 Velocity 20 RO (IEEE 32 bit) 8A02 35330 VIEWER Ch_2 Sound Speed 20 RO (IEEE 32 bit) 8A04 35332 VIEWER Ch_2 Transit Time Up 19 RO (IEEE 32 bit) 8A06 35334 VIEWER Ch_2 Transit Time Dn 19 RO (IEEE 32 bit) 8A08 35336 VIEWER Ch_2 DeltaT 19 RO (IEEE 32 bit) 8A0A 35338 VIEWER Ch_2 Time in buffer on Dn channel 19 RO (IEEE 32 bit) 8A0C 35340 VIEWER Ch_2 Up Signal Quality 18 RO (IEEE 32 bit) 8A0E 35342 VIEWER Ch_2 Dn Signal Quality 18 RO (IEEE 32 bit) 8A10 35344 VIEWER Ch_2 Up Amp Disc 18 RO (IEEE 32 bit) 8A12 35346 VIEWER Ch_2 Dn Amp Disc 18 RO (IEEE 32 bit) 8A14 35348 VIEWER Ch_2 Signal Gain Up 3 RO (IEEE 32 bit) 8A16 35350 VIEWER Ch_2 Signal Gain Down 3 RO (IEEE 32 bit) 8A18 35352 VIEWER Ch_2_SNR on UP channel 18 RO (IEEE 32 bit) 8A1A 35354 VIEWER Ch_2_SNR on DOWN channel 18 RO (IEEE 32 bit) 8A1C 35356 VIEWER Ch_2 Time in buffer on Up channel 19 RO (IEEE 32 bit) Channel 2 Integer - FF Terminal Block 5 112 8B00 35584 VIEWER Ch_2 status bit map 18 RO INT32 8B02 35586 VIEWER Ch_2 most significant error (see Error Tables) 18 RO INT32 PanaFlow HT User’s Manual Appendix C. Modbus Map Table 10: XMIT Modbus Map (cont.) Register (in Hex) Register (in Decimal) Access Level Variable Read Only/ Unit Group Read Write Format 8B04 35588 VIEWER Ch_2 Up +- Peak 18 RO INT32 8B06 35590 VIEWER Ch_2 Dn +- Peak 18 RO INT32 8B08 35592 VIEWER Ch_2 dynamic threshold on UP channel 12 RO INT32 8B0A 35594 VIEWER Ch_2 dynamic threshold on DOWN channel 12 RO INT32 8B0C 35596 VIEWER Ch_2 # Errors of Last 16 18 RO INT32 Composite Channel Real Max A200 41472 VIEWER Maximum Composite Velocity 20 RO (IEEE 32 bit) A202 41474 VIEWER Maximum Composite Volumetric 1 RO (IEEE 32 bit) 9 A204 41476 VIEWER Maximum Composite Mass Flow RO (IEEE 32 bit) A206 41478 VIEWER Maximum Composite Fwd Batch Totals 17 RO (IEEE 32 bit) A208 41480 VIEWER Maximum Composite Rev Batch Totals 17 RO (IEEE 32 bit) A20A 41482 VIEWER Maximum Composite Totalizer Time RO (IEEE 32 bit) 2 A20C 41484 VIEWER Maximum Composite Sound Speed 20 RO (IEEE 32 bit) A20E 41486 VIEWER Maximum Composite Inventory Fwd Totals 17 RO (IEEE 32 bit) A210 41488 VIEWER Maximum Composite Inventory Rev Totals 17 RO (IEEE 32 bit) A212 41490 VIEWER Maximum Composite Inventory Totalizer Time 2 RO (IEEE 32 bit) A214 41492 VIEWER Maximum Composite Current Correction Factor 18 RO (IEEE 32 bit) A216 41494 VIEWER Maximum Composite Current Reynolds 18 Number RO (IEEE 32 bit) A218 41496 VIEWER Maximum Composite acceptable operating temperature reading from temperature sensor 15 RO (IEEE 32 bit) A21A A21C A21E A220 41498 41500 41502 41504 VIEWER VIEWER VIEWER VIEWER Maximum Composite Standard Maximum Composite Net Batch Totals Maximum Composite Net Inventory Maximum Composite SIL Analog Out Drive Current 14 17 17 8 RO RO RO RO (IEEE 32 bit) (IEEE 32 bit) (IEEE 32 bit) (IEEE 32 bit) A222 41506 VIEWER Maximum Composite SIL Analog Out Monitored Current 8 RO (IEEE 32 bit) Composite Channel Integer Max A300 41728 VIEWER Maximum Composite status bit map 18 RO INT32 A302 41730 VIEWER Maximum Composite SIL errors 18 RO INT32 A304 41732 VIEWER Maximum Composite most significant error 18 RO INT32 A306 41734 VIEWER Maximum Composite Gate Input State bitmap: 0: Open, 1: Closed 18 RO INT32 PanaFlow HT User’s Manual 113 Appendix C. Modbus Map Table 10: XMIT Modbus Map (cont.) Register (in Hex) Register (in Decimal) Access Level Variable Read Only/ Unit Group Read Write Format Composite Channel Real Min A600 42496 VIEWER Minimum Composite Velocity 20 RO (IEEE 32 bit) A602 42498 VIEWER Minimum Composite Volumetric 1 RO (IEEE 32 bit) 9 A604 42500 VIEWER Minimum Composite Mass Flow RO (IEEE 32 bit) A606 42502 VIEWER Minimum Composite Fwd Batch Totals 17 RO (IEEE 32 bit) A608 42504 VIEWER Minimum Composite Rev Batch Totals 17 RO (IEEE 32 bit) A60A 42506 VIEWER Minimum Composite Totalizer Time 16 RO (IEEE 32 bit) A60C 42508 VIEWER Minimum Composite Sound Speed 20 RO (IEEE 32 bit) A60E 42510 VIEWER Minimum Composite Inventory Fwd Totals 17 RO (IEEE 32 bit) A610 42512 VIEWER Minimum Composite Inventory Rev Totals 17 RO (IEEE 32 bit) A612 42514 VIEWER Minimum Composite Inventory Totalizer Time 2 RO (IEEE 32 bit) A614 42516 VIEWER Minimum Composite Current Correction Factor 18 RO (IEEE 32 bit) A616 42518 VIEWER Minimum Composite Current Reynolds 18 Number RO (IEEE 32 bit) A618 42520 VIEWER Minimum Composite acceptable operating temperature reading from temperature sensor 15 RO (IEEE 32 bit) A61A A61C A61E A620 42522 42524 42526 42528 VIEWER VIEWER VIEWER VIEWER Minimum Composite Standard Minimum Composite Net Batch Totals Minimum Composite Net Inventory Minimum Composite SIL Analog Out Drive Current 14 17 17 8 RO RO RO RO (IEEE 32 bit) (IEEE 32 bit) (IEEE 32 bit) (IEEE 32 bit) A622 42530 VIEWER Minimum Composite SIL Analog Out Monitored Current 8 RO (IEEE 32 bit) Composite Channel Integer Min A700 42752 VIEWER Minimum Composite status bit map 18 RO INT32 A702 42754 VIEWER Minimum Composite SIL errors 18 RO INT32 A704 42756 VIEWER Minimum Composite most significant error 18 RO INT32 A706 42758 VIEWER Minimum Composite Gate Input State bitmap: 0: Open, 1: Closed 18 RO INT32 RO (IEEE 32 bit) RO (IEEE 32 bit) RO (IEEE 32 bit) Composite Channel Real Max 114 A000 40960 VIEWER A002 40962 VIEWER A004 40964 VIEWER Maximum Composite Frequency Output 1, 14, 20 Span Value Maximum Composite Pipe Inner 5 Diameter Maximum Composite Pipe Outer Diameter 5 PanaFlow HT User’s Manual Appendix C. Modbus Map Table 10: XMIT Modbus Map (cont.) Register (in Hex) Register (in Decimal) Access Level Variable Read Only/ Unit Group Read Write Format A006 40966 VIEWER Maximum Composite Pipe Wall Thickness 5 RO (IEEE 32 bit) A008 40968 VIEWER Maximum Composite Velocity Warn High limit - Alarm limits- Normal operation 20 RO (IEEE 32 bit) A00A 40970 VIEWER Maximum Composite Analog out percent scale 12 RO (IEEE 32 bit) A00C 40972 VIEWER Maximum Composite Static Density 4 RO (IEEE 32 bit) A00E 40974 VIEWER Maximum Composite Acceleration Limit 18 RO (IEEE 32 bit) A010 40976 VIEWER Maximum Composite Amplitude discriminator min limit 18 RO (IEEE 32 bit) A012 40978 VIEWER Maximum Composite Amplitude discriminator max limit 18 RO (IEEE 32 bit) A014 40980 VIEWER Maximum Composite Kinematic Viscosity 7 RO (IEEE 32 bit) A016 40982 VIEWER Maximum Composite Calibration Factor 18 RO (IEEE 32 bit) A018 40984 VIEWER Maximum Composite Zero Cutoff 20 RO (IEEE 32 bit) A01A 40986 VIEWER Maximum Composite Response Time 13 RO (IEEE 32 bit) A01C 40988 VIEWER Maximum Composite Analog Output 1, 9, 14 Low Limit point as entered in the system RO (IEEE 32 bit) A01E 40990 VIEWER Maximum Composite Analog Output High Limit as entered in the system RO (IEEE 32 bit) A020 40992 VIEWER Maximum Composite Zero Set point as 8 entered into the system by user RO (IEEE 32 bit) A022 40994 VIEWER Maximum Composite Span Set point as 8 entered into the system by user RO (IEEE 32 bit) A024 40996 VIEWER Maximum Composite Velocity Low limit 20 RO (IEEE 32 bit) A026 40998 VIEWER Maximum Composite Velocity High limit 20 RO (IEEE 32 bit) A028 41000 VIEWER Maximum Composite Velocity Warning 20 Low limit RO (IEEE 32 bit) A02A 41002 VIEWER Maximum Composite Velocity Warning 20 High limit RO (IEEE 32 bit) A02C 41004 VIEWER Maximum Composite Reference Density RO (IEEE 32 bit) A02E 41006 VIEWER Maximum Composite Frequency Output 1, 14, 20 Base Value RO (IEEE 32 bit) A030 41008 VIEWER Maximum Composite Analog Input 8 Zero Set point as entered into the system by user RO (IEEE 32 bit) A032 41010 VIEWER Maximum Composite Analog Input 8 Span Set point as entered into the system by user RO (IEEE 32 bit) A034 41012 VIEWER Maximum Composite VelRey individual 18, 20 value RO (IEEE 32 bit) PanaFlow HT User’s Manual 1, 9, 14 4 115 Appendix C. Modbus Map Table 10: XMIT Modbus Map (cont.) Register (in Hex) A036 Register (in Decimal) 41014 Access Level VIEWER Variable Read Only/ Unit Group Read Write Format Maximum Composite KFact individual 18 value RO (IEEE 32 bit) Composite Channel Integer Max 116 A100 41216 VIEWER Maximum Composite Reynolds Correction 18 RO INT32 A102 41218 VIEWER Maximum Command to capture a new set of signal files 18 RO INT32 A104 41220 VIEWER Maximum Composite Path Configuration 18 RO INT32 A106 A108 A10A A10C 41222 41224 41226 41228 VIEWER VIEWER VIEWER VIEWER Maximum Composite Hardware Maximum Composite Software revision Maximum Composite UMPU board Maximum Composite max range of command 18 18 18 18 RO RO RO RO INT32 INT32 INT32 INT32 A10E 41230 VIEWER Maximum Composite Command 18 RO INT32 A110 41232 VIEWER Maximum Composite Which test to run 18 RO INT32 A112 41234 VIEWER Maximum Composite Service 18 RO INT32 A114 41236 VIEWER Maximum Composite Factory 18 RO INT32 A116 41238 VIEWER Maximum Composite User 18 RO INT32 A118 41240 VIEWER Maximum Composite AnalogOut Command (for trim) 18 RO INT32 A11A 41242 VIEWER Maximum Composite Sensor serial number 1 18 RO INT32 A11C 41244 VIEWER Maximum Composite Sensor serial number 2 18 RO INT32 A11E 41246 VIEWER Maximum Composite Tracking Windows 18 RO INT32 A120 41248 VIEWER Maximum Composite MultiK Active 18 RO INT32 A122 41250 VIEWER Maximum Composite MultiK Type 18 RO INT32 A124 41252 VIEWER Maximum Composite MultiK Pairs 18 RO INT32 A126 41254 VIEWER Maximum Composite KV Input Selection 18 RO INT32 A128 41256 VIEWER Maximum Composite System Command 18 (such as commit, accept, halt) RO INT32 A12A 41258 VIEWER Maximum Composite Enable Active TW 18 RO INT32 A12C 41260 VIEWER Maximum Composite FireLow/ Fire High during fault 18 RO INT32 A12E 41262 VIEWER Maximum Composite Analog output selection 18 RO INT32 A130 41264 VIEWER Maximum Composite Calibration Mode 18 Selection RO INT32 A132 41266 VIEWER Maximum Composite Base Frequency for frequency Output 6 RO INT32 A134 41268 VIEWER Maximum Composite Span Frequency for frequency Output 6 RO INT32 PanaFlow HT User’s Manual Appendix C. Modbus Map Table 10: XMIT Modbus Map (cont.) Register (in Hex) Register (in Decimal) Access Level Variable Read Only/ Unit Group Read Write Format A136 41270 VIEWER Maximum Composite Frequency Output 18 Unit Selection RO INT32 A138 41272 VIEWER Maximum Composite Frequency Output 18 Error State Selection RO INT32 A13A 41274 VIEWER Maximum Composite Path Error 18 RO INT32 A13C 41276 VIEWER Maximum Composite Unit Type Dimension 18 RO INT32 A13E 41278 VIEWER Maximum Composite Unit Type Density 18 RO INT32 A140 41280 VIEWER Maximum Composite Unit Type Mass Flow 18 RO INT32 A142 41282 VIEWER Maximum Composite Unit Type Volumetric 18 RO INT32 A144 41284 VIEWER Maximum Composite Unit Type Velocity 18 RO INT32 A146 41286 VIEWER Maximum Composite test frequency for 6 frequency output RO INT32 A148 41288 VIEWER Maximum Composite Sensor serial number 3 18 RO INT32 A14A 41290 VIEWER Maximum Composite Sensor serial number 4 18 RO INT32 A14C 41292 VIEWER Maximum Composite Sensor serial number 5 18 RO INT32 A14E 41294 VIEWER Maximum Composite Sensor serial number 6 18 RO INT32 A150 41296 VIEWER Maximum Composite Flowmeter/System serial number 18 RO INT32 A152 41298 VIEWER Maximum Composite Unit Type Time 18 RO INT32 A154 41300 VIEWER Maximum Composite Unit Type Viscosity 18 RO INT32 A156 41302 VIEWER Maximum Composite Unit Type Standard Volumetric 18 RO INT32 A158 41304 VIEWER Maximum Composite Standard BWT buffer 1 serial number 18 RO INT32 A15A 41306 VIEWER Maximum Composite Standard BWT buffer 2 serial number 18 RO INT32 A15C 41308 VIEWER Maximum Composite Standard BWT buffer 3 serial number 18 RO INT32 A15E 41310 VIEWER Maximum Composite Standard BWT buffer 4 serial number 18 RO INT32 A160 41312 VIEWER Maximum Composite Standard BWT buffer 5 serial number 18 RO INT32 A162 41314 VIEWER Maximum Composite Standard BWT buffer 6 serial number 18 RO INT32 A164 41316 VIEWER Maximum Composite UMPU receiver serial number 18 RO INT32 PanaFlow HT User’s Manual 117 Appendix C. Modbus Map Table 10: XMIT Modbus Map (cont.) Register (in Hex) Register (in Decimal) Access Level Variable Read Only/ Unit Group Read Write Format Composite Channel Real Min 118 A400 41984 VIEWER Minimum Composite Velocity Warn High limit - Alarm limits- Normal Minimum Composite Pipe Inner Diameter 1, 9, 20 RO (IEEE 32 bit) A402 41986 VIEWER 5 RO (IEEE 32 bit) A404 41988 VIEWER Minimum Composite Pipe Outer Diameter 5 RO (IEEE 32 bit) A406 41990 VIEWER Minimum Composite Pipe Wall Thickness 5 RO (IEEE 32 bit) A408 41992 VIEWER Minimum Composite Velocity Warn High limit - Alarm limits- Normal operation 20 RO (IEEE 32 bit) A40A 41994 VIEWER Minimum Composite Analog out percent scale 12 RO (IEEE 32 bit) A40C 41996 VIEWER Minimum Composite Static Density 4 RO (IEEE 32 bit) A40E 41998 VIEWER Minimum Composite Acceleration Limit RO (IEEE 32 bit) A410 42000 VIEWER Minimum Composite Amplitude discriminator min limit 18 RO (IEEE 32 bit) A412 42002 VIEWER Minimum Composite Amplitude discriminator max limit 18 RO (IEEE 32 bit) A414 42004 VIEWER Minimum Composite Kinematic Viscosity 7 RO (IEEE 32 bit) A416 42006 VIEWER Minimum Composite Calibration Factor 18 RO (IEEE 32 bit) A418 42008 VIEWER Minimum Composite Zero Cutoff 20 RO (IEEE 32 bit) A41A 42010 VIEWER Minimum Composite Response Time 13 RO (IEEE 32 bit) A41C 42012 VIEWER Minimum Composite Analog Output 1, 9, 14 Low Limit point as entered in the system RO (IEEE 32 bit) A41E 42014 VIEWER Minimum Composite Analog Output High Limit as entered in the system 1, 9, 14 RO (IEEE 32 bit) A420 42016 VIEWER Minimum Composite Zero Set point as entered into the system by user 8 RO (IEEE 32 bit) A422 42018 VIEWER Minimum Composite Span Set point as 8 entered into the system by user RO (IEEE 32 bit) A424 42020 VIEWER Minimum Composite Velocity Low limit Min 20 RO (IEEE 32 bit) A426 42022 VIEWER Minimum Composite Velocity High limit Min 20 RO (IEEE 32 bit) A428 42024 VIEWER Minimum Composite Velocity Warning 20 Low limit Min RO (IEEE 32 bit) A42A 42026 VIEWER Minimum Composite Velocity Warning 20 High limit Min RO (IEEE 32 bit) A42C 42028 VIEWER Minimum Composite Static Density 4 RO (IEEE 32 bit) A42E 42030 VIEWER Minimum Composite Velocity Warn High limit - Alarm limits- Normal operation 1, 14, 20 RO (IEEE 32 bit) PanaFlow HT User’s Manual Appendix C. Modbus Map Table 10: XMIT Modbus Map (cont.) Register (in Hex) Register (in Decimal) Access Level Variable Read Only/ Unit Group Read Write Format A430 42032 VIEWER Minimum Composite Analog Input Zero 8 Set point as entered into the system by user RO (IEEE 32 bit) A432 42034 VIEWER 8 Minimum Composite Analog Input Span Set point as entered into the system by user RO (IEEE 32 bit) A434 42036 VIEWER Minimum Composite VelRey individual 18, 20 value RO (IEEE 32 bit) A436 42038 VIEWER Minimum Composite KFact individual value 18 RO (IEEE 32 bit) Composite Channel Integer Min A500 42240 VIEWER Minimum Composite Reynolds Correction 18 RO INT32 A502 42242 VIEWER Minimum Command to capture a new set of signal files 18 RO INT32 A504 A506 A508 A50A 42244 42246 42248 42250 VIEWER VIEWER VIEWER VIEWER Minimum Composite Path Minimum Composite Hardware revision Minimum Composite Software revision Minimum Composite UMPU board serial number 18 18 18 18 RO RO RO RO INT32 INT32 INT32 INT32 A50C 42252 VIEWER Minimum Composite Ceiling of the absolute value of correlation 18 RO INT32 A50E 42254 VIEWER Minimum Composite Command 18 RO INT32 A510 42256 VIEWER Minimum Composite Which test to run 18 RO INT32 A512 42258 VIEWER Minimum Composite Service Password 18 RO INT32 A514 42260 VIEWER Minimum Composite Factory Password 18 RO INT32 A516 42262 VIEWER Minimum Composite User Password 18 RO INT32 A518 42264 VIEWER Minimum Composite AnalogOut Command (for trim) 18 RO INT32 A51A 42266 VIEWER Minimum Composite Sensor serial number 1 18 RO INT32 A51C 42268 VIEWER Minimum Composite Sensor serial number 2 18 RO INT32 A51E 42270 VIEWER Minimum Composite Tracking Windows 18 RO INT32 A520 42272 VIEWER Minimum Composite MultiK Active 18 RO INT32 A522 42274 VIEWER Minimum Composite MultiK Type 18 RO INT32 A524 42276 VIEWER Minimum Composite MultiK Pairs 18 RO INT32 A526 42278 VIEWER Minimum Composite KV Input Selection 18 RO INT32 A528 42280 VIEWER Minimum Composite System Command 18 (such as commit, accept, halt) RO INT32 A52A 42282 VIEWER Minimum Composite Enable Active TW 18 RO INT32 A52C A52E 42284 42286 VIEWER VIEWER Minimum Composite FireLow/ Fire Minimum Composite Analog output RO RO INT32 INT32 PanaFlow HT User’s Manual 18 18 119 Appendix C. Modbus Map Table 10: XMIT Modbus Map (cont.) Register (in Hex) 120 Register (in Decimal) Access Level Variable Read Only/ Unit Group Read Write Format A530 42288 VIEWER Minimum Composite Calibration mode 18 RO INT32 A532 42290 VIEWER Minimum Composite Base Frequency 6 RO INT32 A534 42292 VIEWER Minimum Composite Span Frequency 6 RO INT32 A536 42294 VIEWER Minimum Composite Frequency Output 18 RO INT32 A538 42296 VIEWER Minimum Composite Frequency Output 18 RO INT32 A53A 42298 VIEWER Minimum Composite Path Error Handling 18 RO INT32 A53C 42300 VIEWER Minimum Composite Unit Type Dimension 18 RO INT32 A53E 42302 VIEWER Minimum Composite Unit Type Density 18 RO INT32 A540 42304 VIEWER Minimum Composite Unit Type Mass Flow 18 RO INT32 A542 42306 VIEWER Minimum Composite Unit Type Volumetric 18 RO INT32 A544 42308 VIEWER Minimum Composite Unit Type Velocity 18 RO INT32 A546 42310 VIEWER Minimum Composite test frequency for 6 frequency output RO INT32 A548 42312 VIEWER Minimum Composite Sensor serial number 3 18 RO INT32 A54A 42314 VIEWER Minimum Composite Sensor serial number 4 18 RO INT32 A54C 42316 VIEWER Minimum Composite Sensor serial number 5 18 RO INT32 A54E 42318 VIEWER Minimum Composite Sensor serial number 6 18 RO INT32 A550 42320 VIEWER Minimum Composite Flowmeter/System serial number 18 RO INT32 A552 42322 VIEWER Minimum Composite Unit Type Time 18 RO INT32 A554 42324 VIEWER Minimum Composite Unit Type Viscosity 18 RO INT32 A556 42326 VIEWER Minimum Composite Unit Type Standard Volumetric 18 RO INT32 A558 42328 VIEWER Minimum Composite Standard BWT buffer 1 serial number 18 RO INT32 A55A 42330 VIEWER Minimum Composite Standard BWT buffer 2 serial number 18 RO INT32 A55C 42332 VIEWER Minimum Composite Standard BWT buffer 3 serial number 18 RO INT32 A55E 42334 VIEWER Minimum Composite Standard BWT buffer 4 serial number 18 RO INT32 A560 42336 VIEWER Minimum Composite Standard BWT buffer 5 serial number 18 RO INT32 A562 42338 VIEWER Minimum Composite Standard BWT buffer 6 serial number 18 RO INT32 A564 42340 VIEWER Minimum UMPU receiver serial number 18 RO INT32 PanaFlow HT User’s Manual Appendix C. Modbus Map Table 10: XMIT Modbus Map (cont.) Register (in Hex) Register (in Decimal) Access Level Variable Read Only/ Unit Group Read Write Format CH Real Max A800 43008 VIEWER Maximum Channel Composite Coefficient 18 RO (IEEE 32 bit) A802 43010 VIEWER Maximum Channel Time Buffer Offset 19 RO (IEEE 32 bit) A804 43012 VIEWER Maximum Channel Time in Wedge 19 RO (IEEE 32 bit) A806 43014 VIEWER Maximum Channel Path Length P 5 RO (IEEE 32 bit) A808 43016 VIEWER Maximum Channel Axial Length L 5 RO (IEEE 32 bit) A80A 43018 VIEWER Maximum Channel delay between successive transmits 19 RO (IEEE 32 bit) A80C 43020 VIEWER Maximum Channel DeltaT Offset 19 RO (IEEE 32 bit) CH Integer Max A900 43264 VIEWER Maximum Channel Pct of Peak 12 RO INT32 A902 43266 VIEWER Maximum Channel Min Peak% 12 RO INT32 A904 43268 VIEWER Maximum Channel Max Peak% 12 RO INT32 A906 43270 VIEWER Maximum Channel Reynolds correction 18 selection RO INT32 A908 43272 VIEWER Maximum Channel enum of transducer type (ex. T5) 18 RO INT32 A90A 43274 VIEWER Maximum Channel Transducer Freq 6 RO INT32 A90C 43276 VIEWER Maximum Channel Errors Allowed 18 RO INT32 AC00 44032 VIEWER Minimum Channel Composite Coefficient 18 RO (IEEE 32 bit) AC02 44034 VIEWER Minimum Channel Time Buffer Offset 19 RO (IEEE 32 bit) AC04 44036 VIEWER Minimum Channel Time in Wedge 19 RO (IEEE 32 bit) AC06 44038 VIEWER Minimum Channel Path Length P 5 RO (IEEE 32 bit) AC08 44040 VIEWER Minimum Channel Axial Length L 5 RO (IEEE 32 bit) AC0A 44042 VIEWER Minimum Channel delay between successive transmits 19 RO (IEEE 32 bit) AC0C 44044 VIEWER Minimum Channel DeltaT Offset 19 RO (IEEE 32 bit) 12 RO INT32 CH Real Min CH Integer Min AD00 44288 VIEWER Minimum Channel Pct of Peak AD02 44290 VIEWER Minimum Channel Min Peak% 12 RO INT32 AD04 44292 VIEWER Minimum Channel Max Peak% 12 RO INT32 AD06 44294 VIEWER Minimum Channel Reynolds correction 18 selection RO INT32 AD08 44296 VIEWER Minimum Channel enum of transducer type (ex. T5) 18 RO INT32 AD0A 44298 VIEWER Minimum Channel Transducer Freq 6 RO INT32 AD0C 44300 VIEWER Minimum Channel Errors Allowed 18 RO INT32 43520 VIEWER Maximum Channel Velocity 20 RO (IEEE 32 bit) CH Real Max AA00 PanaFlow HT User’s Manual 121 Appendix C. Modbus Map Table 10: XMIT Modbus Map (cont.) Register (in Hex) Register (in Decimal) Access Level Variable Read Only/ Unit Group Read Write Format AA02 43522 VIEWER Maximum Channel Sound Speed 20 RO (IEEE 32 bit) AA04 43524 VIEWER Maximum Channel Transit Time Up 19 RO (IEEE 32 bit) AA06 43526 VIEWER Maximum Channel Transit Time Dn 19 RO (IEEE 32 bit) AA08 43528 VIEWER Maximum Channel DeltaT 19 RO (IEEE 32 bit) AA0A 43530 VIEWER Maximum Channel Time in buffer on DOWN channel 19 RO (IEEE 32 bit) AA0C 43532 VIEWER Maximum Channel Up Signal Quality 18 RO (IEEE 32 bit) AA0E 43534 VIEWER Maximum Channel Dn Signal Quality 18 RO (IEEE 32 bit) AA10 43536 VIEWER Maximum Channel Up Amp Disc 18 RO (IEEE 32 bit) AA12 43538 VIEWER Maximum Channel Dn Amp Disc 18 RO (IEEE 32 bit) AA14 43540 VIEWER Maximum Channel Signal Gain Up 3 RO (IEEE 32 bit) AA16 43542 VIEWER Maximum Channel Signal Gain Down 3 RO (IEEE 32 bit) AA18 43544 VIEWER Maximum Channel_SNR on UP channel 18 RO (IEEE 32 bit) AA1A 43546 VIEWER Maximum Channel_SNR on DOWN channel 18 RO (IEEE 32 bit) AA1C 43548 VIEWER Maximum Channel Time in buffer on UP channel 19 RO (IEEE 32 bit) CH Integer Max AB00 43776 VIEWER Maximum Channel status bit map 18 RO INT32 AB02 43778 VIEWER Maximum Channel Up +- Peak 18 RO INT32 AB04 43780 VIEWER Maximum Channel Dn +- Peak 18 RO INT32 AB06 43782 VIEWER Maximum Channel most significant error 18 RO INT32 AB08 43784 VIEWER Maximum Channel dynamic threshold on UP channel 12 RO INT32 AB0A 43786 VIEWER Maximum Channel dynamic threshold on DOWN channel 12 RO INT32 AB0C 43788 VIEWER Maximum Channel #Errors of Last 16 18 RO INT32 AE00 44544 VIEWER Minimum Channel Velocity 20 RO (IEEE 32 bit) AE02 44546 VIEWER Minimum Channel Sound Speed 20 RO (IEEE 32 bit) AE04 44548 VIEWER Minimum Channel Transit Time Up 19 RO (IEEE 32 bit) AE06 44550 VIEWER Minimum Channel Transit Time Dn 19 RO (IEEE 32 bit) CH Real Min 122 AE08 44552 VIEWER Minimum Channel DeltaT 19 RO (IEEE 32 bit) AE0A 44554 VIEWER Minimum Channel Time in buffer on DOWN channel 19 RO (IEEE 32 bit) AE0C 44556 VIEWER Minimum Channel Up Signal Quality 18 RO (IEEE 32 bit) AE0E 44558 VIEWER Minimum Channel Dn Signal Quality 18 RO (IEEE 32 bit) AE10 44560 VIEWER Minimum Channel Up Amp Disc 18 RO (IEEE 32 bit) AE12 44562 VIEWER Minimum Channel Dn Amp Disc 18 RO (IEEE 32 bit) AE14 44564 VIEWER Minimum Channel Signal Gain Up 3 RO (IEEE 32 bit) AE16 44566 VIEWER Minimum Channel Signal Gain Down 3 RO (IEEE 32 bit) PanaFlow HT User’s Manual Appendix C. Modbus Map Table 10: XMIT Modbus Map (cont.) Register (in Hex) Register (in Decimal) Access Level Variable Read Only/ Unit Group Read Write Format AE18 44568 VIEWER Minimum Channel_SNR on UP channel 18 RO (IEEE 32 bit) AE1A 44570 VIEWER Minimum Channel_SNR on DOWN channel 18 RO (IEEE 32 bit) AE1C 44572 VIEWER Minimum Channel Time in buffer on UP 19 channel RO (IEEE 32 bit) CH Integer Min AF00 44800 VIEWER Minimum Channel status bit map 18 RO INT32 AF02 44802 VIEWER Minimum Channel Up +- Peak 18 RO INT32 AF04 44804 VIEWER Minimum Channel Dn +- Peak 18 RO INT32 AF06 44806 VIEWER Minimum Channel most significant error 18 RO INT32 AF08 44808 VIEWER Minimum Channel dynamic threshold on UP channel 12 RO INT32 AF0A 44810 VIEWER Minimum Channel dynamic threshold on DOWN channel 12 RO INT32 AF0C 44812 VIEWER Minimum Channel #Errors of Last 16 18 RO INT32 Ultrasonic Files A000 40960 VIEWER Channel 1 Raw Up 18 RO signed short A001 40961 VIEWER Channel 1 Raw Down 18 RO signed short A002 40962 VIEWER Channel 1 Correlate Up 18 RO signed short A003 40963 VIEWER Channel 1 Correlate Down 18 RO signed short A004 40964 VIEWER Channel 1 CrossCorrelation 18 RO signed short A010 40976 VIEWER Channel 2 Raw Up 18 RO signed short A011 40977 VIEWER Channel 2 Raw Down 18 RO signed short A012 40978 VIEWER Channel 2 Correlate Up 18 RO signed short A013 40979 VIEWER Channel 2 Correlate Down 18 RO signed short A014 40980 VIEWER Channel 2 CrossCorrelation 18 RO signed short PanaFlow HT User’s Manual 123 Appendix C. Modbus Map C.4 Modbus Unit Codes Many of the items in the Modbus map have a unit of measure. The codes for these unit types are listed in Table 11 below. These are the standard Foundation Fieldbus unit codes. Value Table 11: Unit Codes for XMT900 Unit Codes Symbol Description Temperature 1000 K Kelvin 1001 C degree Celsius 1002 F degree Fahrenheit 1003 R degree Rankine 1010 m meter (default) 1013 mm millimeter 1018 ft feet 1019 in inch 1034 m3 cubic meter 1038 L liter 1042 in3 cubic inch 1043 ft3 cubic feet 1048 gal US gallon 1051 BBL barrel 1667 MGAL Mega Gallons 1663 MFT3 Mega Cubic Feet 1664 MBBL Mega Barrels 1645 ML Mega Liters 1668 Mm3 Mega Cubic Meters 1088 k kilogram 1092 t metric ton 1094 LB pound (mass) 1095 SHTN short ton 1097 kg/m3 Kilograms per cubic meter (default) 1107 LB/ft3 pounds per cubic foot 1322 KG/S kilogram per second (default) Dimension Volume Mass/Weight Density Mass Flow 124 PanaFlow HT User’s Manual Appendix C. Modbus Map Value Table 11: Unit Codes for XMT900 Unit Codes Symbol Description 1323 KG/M kilogram per minute 1324 KG/H kilogram per hour 1325 KG/D kilogram per day 1326 TNE/S metric ton per second 1327 TNE/M metric ton per minute 1328 TNE/H metric ton per hour 1329 TNE/D metric ton per day 1330 LB/S pound per second 1331 LB/M pound per minute 1332 LB/H pound per hour 1333 LB/D pound per day 1334 SHTN/S short ton per second 1335 SHTN/M short ton per minute 1336 SHTN/H short ton per hour 1337 SHTN/D short ton per day 1644 KLB/S Kilo pound per second 1643 KLB/M Kilo pound per minute 1642 KLB/H Kilo pound per hour 1641 KLB/D Kilo pound per day Volume Flow (also called Actual Volumetric Flow) PanaFlow HT User’s Manual 1347 m3/S cubic meter per second (default) 1348 m3/M cubic meter per minute 1349 m3/H cubic meter per hour 1350 m3/D cubic meter per day 1351 L/S liter per second 1352 L/M liter per minute 1353 L/H liter per hour 1354 L/D liter per day 1356 ft3/S cubic feet per second 1357 ft3/M cubic feet per minute 1358 ft3/H cubic feet per hour 1359 ft3/D cubic feet per day 1362 GAL/S US gallon per second 1363 GAL/M US gallon per minute 1364 GAL/H US gallon per hour 1365 GAL/D US gallon per day 125 Appendix C. Modbus Map Value Table 11: Unit Codes for XMT900 Unit Codes Symbol Description 1371 BBL/S barrel per second 1372 BBL/M barrel per minute 1373 BBL/H barrel per hour 1374 BBL/D barrel per day 1454 KGAL/M kilo US gallon per minute 1458 KGAL/H kilo US gallon per hour 1462 KGAL/D kilo US gallon per day 1485 KBBL/M kilobarrel per minute 1489 KBBL/H kilobarrel per hour 1493 KBBL/D kilobarrel per day 1537 SL/S Standard Liters per Second (default) 1538 SL/M Standard Liters per Minute 1539 SL/H Standard Liters per Hour 1540 SML/D Standard Mega Liters per Day 1527 Sm3/S Standard Cubic Meter per Second 1528 Sm3/M Standard Cubic Meter per Minute 1529 Sm3/H Standard Cubic Meter per Hour 1530 Sm3/D Standard Cubic Meter per Day 1361 SCFH standard cubic feet per hour 1360 SCFM standard cubic feet per minute 1061 m/s Meters per sec (default) 1067 ft/s Feet per sec 1054 s second 1056 ms Millisecond 1057 us Microsecond 1059 h Hour 1077 Hz Hertz 1080 MHz Mega Hertz 1081 kHz Kilo Hertz 1209 amp Ampere 1211 ma Milliampere Standard Volume Flow Velocity Units Time Units Frequency Units Current 126 PanaFlow HT User’s Manual Appendix C. Modbus Map C.5 Modbus Protocol In general, the PanaFlow HT flowmeter follows the standard Modbus communications protocol defined by the reference MODBUS APPLICATION PROTOCOL SPECIFICATION V1.1b. This specification is available at www.modbus.org on the Internet. With this reference as a guide, an operator could use any Modbus master to communicate with the flowmeter. Listed below are two limits of this implementation: 1. The PanaFlow HT supports only four of the standard function codes. These are Read Holding Registers (0x03), Read Input Registers (0x04), Write Multiple Registers (0x10), and Read File Record (0x14). 2. The flowmeter needs a 15 msec gap between Modbus requests. The prime objective of the flowmeter is to measure flow and drive the SIL output, so the Modbus server has a low priority. PanaFlow HT User’s Manual 127 [no content intended for this page] 128 PanaFlow HT User’s Manual Appendix D. HART Menu Maps D.1 HART Connection D.1.1 Wiring to the HART Circuit When connecting a HART communicator to the wiring terminals on the PanaFlow HT electronics terminal board, the circuit must be terminated in an appropriate resistive load, as shown in Figure 34 below. The HART communicator is connected in parallel with that load. Figure 34: Wiring Diagram for HART Communication D.1.2 Write Mode Switch The PanaFlow HT HART circuit includes a slide switch which can be used to disable write access to the instrument via HART. This white slide switch (pictured below) is designed to lock out HART configuration access for those customers who require this extra level of security. Figure 35: HART Circuit Write Mode Switch. With the Write Mode switch pushed toward the Display board (as shown), the HART circuit is in write access mode. PanaFlow HT User’s Manual 129 D.1.2 Write Mode Switch (cont.) Note: The following sections of this Appendix provide a map to programming functions via HART communication. To make programming changes through HART, the HART circuit must be set to “write” mode. If your HART device cannot make program changes, inspect the switch to be sure your HART circuit is in “write” mode. D.1.3 Use Force High with HART The Authorized User may select Force High or Force Low for the Dangerous Detected state, the mA level that the SIL Output will go to in case of an error detection. If the HART signal is going to be used by the system for frequent communication, we recommend selecting Force High. The Force Low level, 3.6 mA, is marginally capable of carrying HART signals. By selecting Force High, 21.0 mA, the Operator can be confident that in case of a fault condition HART communication will be available to diagnose the cause of the fault D.2 Root Menu Figure 36: Root Menu 130 PanaFlow HT User’s Manual D.3 HART Service Map for General Users If users log in the system with a General User password, they can edit the variables below in the HART Service menu. Figure 37: HART Service Menu for General User PanaFlow HT User’s Manual 131 D.4 HART Service Menu for SIL Users If users log in the system with a SIL User/ Service User / Factory User password, they can edit the variables in the HART Service menu as shown below. Figure 38: HART Service Menu for SIL User and Higher Levels 132 PanaFlow HT User’s Manual D.5 Review Menu Figure 39: Review Menu PanaFlow HT User’s Manual 133 [no content intended for this page] 134 PanaFlow HT User’s Manual Appendix E. Special Applications Appendix E. E.1 Special Applications Pig Detection When a pig passes through the pipeline, it will block the ultrasonic signals for a brief time. In previous products, this might have resulted in a slight blip on the strip chart recorder or been completely missed, but the PanaFlow HT makes flow measurements so fast that it will identify the pig in the line and signal a flow error. The expected result is an error on the LCD, and the SIL Output will go to Fire Low or Fire High, depending on what the Dangerous Detected state is set to. Once in that state, the flowmeter is designed to remain in that state until an Authorized User intervenes. There is a simple method for clearing the error. The Authorized User goes into the Program Menu by entering a valid SIL User password, then the Authorized User exits again without making any changes. This ensures the flowmeter that an Authorized User is intervening, because the password checks out. This will clear the error. If the Safety Engineer on site wishes to clear this type of error automatically, the DCS may be set up to do so. It is the responsibility of the Safety Engineer at the customer site to ensure that this method is properly protected by a password or other means in the DCS to avoid a risk of clearing errors unwisely. What follows is the method for setting the DCS to clear a Dangerous Detected state in the flowmeter. The DCS would issue the following commands over Modbus. Note: The SIL User password indicated in step 2 is unique to every flowmeter, so please insert your unique code where the XXXX is stated. 1. Write “2” to SysReqLevel reg. 0x540 to program “SIL USER” 2. Write SIL User password “XXXX” to SysReq_Password reg. 0x542 3. Write “1” to SysReq_Command reg. 0x544 to execute “logging in” 4. Write “3” to SysReq_Command reg. 0x544; UPMU resets, takes about 1 sec to process reset. Note: The DCS will record a Fire Low or Fire High, followed by a return to normal flow measurement after a few seconds. This may serve to indicate to the Operator when a pig passed through a particular measurement point. If there are any questions, please contact GE Service. PanaFlow HT User’s Manual 135 Appendix E. Special Applications E.2 Path Error Handling One program parameter that is in the menu map but not used by the PanaFlow HT is 2-path Error Handling. However, an explanation of this parameter is included here for future reference. In this context, a “path” is a measurement channel in the flowcell. The PanaFlow HT electronics is compatible with five possible path configurations, two of which are released for purchase. The five configurations are: 1. Single mid-radius path 2. Single diameter path 3. Two mid-radius paths 4. Two crossed-diameter paths 5. Three paths - 1 diameter and 2 mid-radius PanaFlow HT offers options 2 (PanaFlow Z1H) and 3 (PanaFlow Z2H). One can also purchase the PanaFlow R2H, which consists of two sets of redundant electronics, each set up as option 2 above. The 2-path Error Handling technique only applies to a system with two or more paths. For multi-path systems, the technique only applies to symmetrical pairs of paths, or “sister” paths. For applicability, see the table below: Flowcell Symmetrical Paths 3. Two mid-radius paths Two mid-radius paths 4. Two crossed-diameter paths Two diameter paths 5. Three paths - 1 diameter and 2 mid-radius Two mid-radius paths With the physical layout in mind, the error handling technique should be fairly simple to understand. The theory is that for homogeneous, well-developed flow conditions, the symmetrical paths should be measuring the same flow rate. Therefore, if one of those paths goes into error, we can assume the measurement would have been the same as the other path and substitute that value. Therefore, with 2-path error handling turned ON, the following actions result from the various error detection scenarios. 2-path system (with 2-path error handling ON): Error Detection Scenario 136 Action Path 1 error Substitute path 2 measurement, keep measuring Path 2 error Substitute path 1 measurement, keep measuring Path 1 and Path 2 in error Multichannel Error, stop measuring PanaFlow HT User’s Manual Appendix E. Special Applications E.2 Path Error Handling (cont.) 3-path system (with 2-path error handling ON): Note: Path 1 and Path 2 are the mid-radius paths. Path 3 is the diameter path. There is no symmetrical path for Path 3. Error Detection Scenario Action Path 1 error Substitute path 2 measurement, keep measuring Path 2 error Substitute path 1 measurement, keep measuring Path 3 error Single Channel Error, stop measuring Path 1 and Path 2 in error Multichannel Error, stop measuring Path 2 and Path 3 in error Multichannel Error, stop measuring Path 1 and Path 3 in error Multichannel Error, stop measuring Path 1, Path 2, and Path 3 in error Multichannel Error, stop measuring With 2-path Error Handling set to OFF, there are only two error conditions. If any one path is in error, the reaction is Single Channel Error, stop measuring. If more than one path is in error, the reaction is Multichannel Error, stop measuring. PanaFlow HT User’s Manual 137 [no content intended for this page] 138 PanaFlow HT User’s Manual Appendix F. Data Records Appendix F. F.1 Data Records Service Record Whenever any service procedure is performed on the PanaFlow HT flow transmitter, the details of the service should be recorded in this appendix. An accurate service history of the meter can prove very helpful in troubleshooting any future problems. F.1.1 Data Entry Record complete and detailed service data for the PanaFlow HT in Table 12. Make additional copies of the table as needed. Table 12: Service Record Date PanaFlow HT User’s Manual Description of Service Performed By 139 Appendix F. Data Records Table 12: Service Record (cont.) Date 140 Description of Service Performed By PanaFlow HT User’s Manual Appendix F. Data Records F.2 Initial Settings The values for the initial measurement settings immediately after initial installation of the meter and verification of proper operation should be entered below. Table 13: Initial Settings Parameter Initial Value Velocity Volumetric Mass Flow Forward Batch Totals Reverse Batch Totals Totalizer Time Sound Speed Current Correction Factor Current Reynolds Number Current Operating Temperature Standard Volumetric Net Batch Totals Inventory Forward Inventory Reverse Inventory Net Inventory Time Channel 1 Velocity Channel 1 Sound Speed Channel 1 Transit Time Up Channel 1 Transit Time Down Channel 1 Delta T Channel 1 Up Signal Quality Channel 1 Down Signal Quality Channel 1 Up Amp Disc Channel 1 Down Amp Disc Channel 1 SNR on Up Channel 1 SNR on Down Channel 1 Time in Buffer on Up Channel 1 Time in Buffer on Down Channel 1 Signal Gain Up Channel 1 Signal Gain Down Channel 1 Up Peak PanaFlow HT User’s Manual 141 Appendix F. Data Records Table 13: Initial Settings (cont.) Parameter Initial Value Channel 1 Down Peak Channel 1 Dynamic Threshold Up Channel 1 Dynamic Threshold Down Channel 2 Velocity Channel 2 Sound Speed Channel 2 Transit Time Up Channel 2 Transit Time Down Channel 2 Delta T Channel 2 Up Signal Quality Channel 2 Down Signal Quality Channel 2 Up Amp Disc Channel 2 Down Amp Disc Channel 2 SNR on Up Channel 2 SNR on Down Channel 2 Time in Buffer on Up Channel 2 Time in Buffer on Down Channel 2 Signal Gain Up Channel 2 Signal Gain Down Channel 2 Up Peak Channel 2 Down Peak Channel 2 Dynamic Threshold Up Channel 2 Dynamic Threshold Down 142 PanaFlow HT User’s Manual Appendix F. Data Records F.3 Diagnostic Parameters The values for the diagnostic parameters immediately after initial installation of the meter and verification of proper operation should be entered below. These initial values can then be compared to current values to help diagnose any future malfunction of the system. Table 14: Diagnostic Parameters Parameter Initial Current Parameter Ch1 Velocity Ch2 Velocity Ch1 Soundspeed Ch2 Soundspeed Ch1 Transit Time Dn Ch2 Transit Time Dn Ch1 Transit Time Up Ch2 Transit Time Up Ch1 Delta T Ch2 Delta T Ch1 Up Signal Quality Ch2 Up Signal Quality Ch1 Dn Signal Quality Ch2 Dn Signal Quality Ch1 Up Amp Disc Ch2 Up Amp Disc Ch1 Dn Amp Disc Ch2 Dn Amp Disc Ch1 SNR Up Ch2 SNR Up Ch1 SNR Dn Ch2 SNR Dn Ch1 Active TWup Ch2 Active TWup Ch1 Active TWdn Ch2 Active TWdn Ch1 Gainup Ch2 Gainup Ch1 Gaindn Ch2 Gaindn Ch1 Error Status Ch2 Error Status Ch1 Report Error Ch2 Report Error Ch1 Peak Up Ch2 Peak Up Ch1 Peak Dn Ch2 Peak Dn Ch1 Peak% Up Ch2 Peak% Up Ch1 Peak% Dn Ch2 Peak% Dn Ch1 Error Ch2 Error PanaFlow HT User’s Manual Initial Current 143 [no content intended for this page] 144 PanaFlow HT User’s Manual Appendix G. CE Mark Compliance Appendix G. CE Mark Compliance G.1 Introduction For CE Mark compliance, the PanaFlow HT flowmeter must be wired in accordance with the instructions in this appendix. IMPORTANT: CE Mark compliance is required only for units intended for use in EC countries. G.2 Wiring The PanaFlow HT must be wired with the recommended cable, and all connections must be properly shielded and grounded. Refer to Table 15 for the specific requirements. Table 15: Wiring Requirements Cable Type Connection Transducer Input/Output Power Ground Termination Armored RG62 a/U Grounded using a cable gland. Armored 22 AWG shielded (e.g. Baystate #78-1197) with armored material added to outside of jacket Grounded using a cable gland. Armored 14 AWG 3 conductor Grounded using a cable gland. Note: If the Panaflow HT is wired as described in this appendix, the unit will comply with the EMC Directive 2004/108/EC. PanaFlow HT User’s Manual 145 [no content intended for this page] 146 PanaFlow HT User’s Manual Index A Access Levels . . . . . . . . . . . . . . . . . . . . . . . . . . . . . 39 Accuracy . . . . . . . . . . . . . . . . . . . . . . . . . . . . . . . . 83 Active Temperature Compensation . . . . . . . . . . . . . . . 2 Alarm, Setting . . . . . . . . . . . . . . . . . . . . . . . . . . . . . 64 Alarms . . . . . . . . . . . . . . . . . . . . . . . . . . . . . . . . . . 17 Wiring . . . . . . . . . . . . . . . . . . . . . . . . . . . . . . . . . 17 Alarms Option Card Fail-Safe Operation . . . . . . . . . . . . . . . . . . . . . . . 17 Analog Measurements . . . . . . . . . . . . . . . . . . . . . . . 55 Analog Measurements, Setting . . . . . . . . . . . . . . . . . 52 Analog Output Menu . . . . . . . . . . . . . . . . . . . . . 51, 54 Analog Outputs Wiring . . . . . . . . . . . . . . . . . . . . . . . . . . . . . . . . . 13 Analog Outputs (Slot 0) Connecting . . . . . . . . . . . . . . . . . . . . . . . . . . . . . 13 Arrow Keys . . . . . . . . . . . . . . . . . . . . . . . . . . . . . . 27 B Backlight, Setting . . . . . . . . . . . . . . . . . . . . . . . . . . 50 Backlight, Timeout . . . . . . . . . . . . . . . . . . . . . . . . . 50 Base Value, Setting . . . . . . . . . . . . . . . . . . . . . . 52, 55 Baud Rate . . . . . . . . . . . . . . . . . . . . . . . . . . . . . . . . 69 Bundle Waveguide Technology™ System . . . . . . . . . 84 C Cable Transducers . . . . . . . . . . . . . . . . . . . . . . . . . . . . . . 9 Cable Lengths . . . . . . . . . . . . . . . . . . . . . . . . . . . . . . 9 Calibrating Analog Output . . . . . . . . . . . . . . . . . . . . 53 Calibration Port Wiring . . . . . . . . . . . . . . . . . . . . . . . . . . . . . . . . . 20 Calibration Value, Selecting . . . . . . . . . . . . . . . . . . . 56 CE Mark Compliance . . . . . . . . . . . . . . . . . . . . . . 145 Channels . . . . . . . . . . . . . . . . . . . . . . . . . . . . . . . . . 85 Communication Error String . . . . . . . . . . . . . . . . . . 76 Connecting See Part Name Control Output Wiring . . . . . . . . . . . . . . . . . . . . . . . . . . . . . . . . . 18 Control Output, Setting . . . . . . . . . . . . . . . . . . . . . . 66 Corrosion, Transducers . . . . . . . . . . . . . . . . . . . . . . 82 PanaFlow HT User’s Manual D Data Logging . . . . . . . . . . . . . . . . . . . . . . . . . . . . . 87 Decimal Places Programming for Totalizer . . . . . . . . . . . . . . . . . . 33 Density Changing Flow Units . . . . . . . . . . . . . . . . . . . . . . 46 Diagnostic Parameters Initial Values . . . . . . . . . . . . . . . . . . . . . . . 141, 143 Table of Values . . . . . . . . . . . . . . . . . . . . . 141, 143 Diagnostics . . . . . . . . . . . . . . . . . . . . . . . . . . . . . . . 80 Digital Outputs Wiring. . . . . . . . . . . . . . . . . . . . . . . . . . . . . . . . . 14 Digital Outputs, Programming . . . . . . . . . . . . . . . . . 57 Display Option . . . . . . . . . . . . . . . . . . . . . . . . . . . . 50 Display Programming . . . . . . . . . . . . . . . . . . . . . . . 29 Document Number . . . . . . . . . . . . . . . . . . . . . . . . . . i Down Arrow Key . . . . . . . . . . . . . . . . . . . . . . . . . . 27 E Electrical Connections . . . . . . . . . . . . . . . . . . . . . . . 11 Electronics . . . . . . . . . . . . . . . . . . . . . . . . . . . . . . . 10 Electronics Classifications . . . . . . . . . . . . . . . . . . . . 85 Electronics Console Mounting . . . . . . . . . . . . . . . . . . . . . . . . . . . . . . 10 Electronics Enclosure Location . . . . . . . . . . . . . . . . . . . . . . . . . . . . . . . . 9 Electronics Enclosures . . . . . . . . . . . . . . . . . . . . . . . 85 Electronics Mounting. . . . . . . . . . . . . . . . . . . . . . . . 85 Enter Key . . . . . . . . . . . . . . . . . . . . . . . . . . . . . . . . 27 Environmental Compliance . . . . . . . . . . . . . . . . . . . vi Error Display . . . . . . . . . . . . . . . . . . . . . . . . . . . . . 75 Error Handling, Setting . . . . . . . . . . . . . . . . . . . 53, 56 Error Header . . . . . . . . . . . . . . . . . . . . . . . . . . . . . . 75 Error String SIL . . . . . . . . . . . . . . . . . . . . . . . . . . . . . . . . . . . 79 Error String, Communication . . . . . . . . . . . . . . . . . . 76 Error String, Flow . . . . . . . . . . . . . . . . . . . . . . . . . . 76 Escape Key . . . . . . . . . . . . . . . . . . . . . . . . . . . . . . . 27 F Flow Error String . . . . . . . . . . . . . . . . . . . . . . . . . . 76 Flow Measurement . . . . . . . . . . . . . . . . . . . . . . . . . 83 147 Index Flowcell Problems . . . . . . . . . . . . . . . . . . . . . . . . . . 80 Fluid . . . . . . . . . . . . . . . . . . . . . . . . . . . . . . . . . . 80 Pipe . . . . . . . . . . . . . . . . . . . . . . . . . . . . . . . . . . 81 Fluid Physical Requirements . . . . . . . . . . . . . . . . . . . . . 80 Problems . . . . . . . . . . . . . . . . . . . . . . . . . . . . . . . 80 Soundspeed . . . . . . . . . . . . . . . . . . . . . . . . . . . . . 80 Fluid Problems . . . . . . . . . . . . . . . . . . . . . . . . . . . . 80 Fluid Types . . . . . . . . . . . . . . . . . . . . . . . . . . . . . . . 83 Frequency Output Wiring . . . . . . . . . . . . . . . . . . . . . . . . . . . . . . . . . 16 Frequency, Setting . . . . . . . . . . . . . . . . . . . . . . . . . . 60 Full Value, Setting . . . . . . . . . . . . . . . . . . . . . . . 52, 55 G Global Menu . . . . . . . . . . . . . . . . . . . . . . . . . . . . . . . . . 37 Submenus . . . . . . . . . . . . . . . . . . . . . . . . . . . . . . 37 Grounding. . . . . . . . . . . . . . . . . . . . . . . . . . . . . . . . 11 H HART Menu Maps . . . . . . . . . . . . . . . . . . . . . . . . 129 I Identification Meter Body . . . . . . . . . . . . . . . . . . . . . . . . . . . . . . 7 XMT Transmitter . . . . . . . . . . . . . . . . . . . . . . . . . . 6 Identification Labels . . . . . . . . . . . . . . . . . . . . . . . . . 6 Information Paragraphs . . . . . . . . . . . . . . . . . . . . . . . v Input Voltage . . . . . . . . . . . . . . . . . . . . . . . . . . . . . . 21 Input/Output Menu . . . . . . . . . . . . . . . . . . . . . . . . . 51 Inputs/Outputs . . . . . . . . . . . . . . . . . . . . . . . . . . . . . 85 K Keypad . . . . . . . . . . . . . . . . . . . . . . . . . . . . . . . . . . 85 Keypad Lockout . . . . . . . . . . . . . . . . . . . . . . . . . . . 37 Keypad Program, Exiting if Unused . . . . . . . . . . . . . 28 Location Electronics Enclosure . . . . . . . . . . . . . . . . . . . . . . . 9 Locking Keypad . . . . . . . . . . . . . . . . . . . . . . . . . . . 37 LVD Statement . . . . . . . . . . . . . . . . . . . . . . . . . . . . . 9 M Magnetic Keypad, Using . . . . . . . . . . . . . . . . . . . . . 27 Main Menu Entering . . . . . . . . . . . . . . . . . . . . . . . . . . . . . . . 36 Main Menu Map . . . . . . . . . . . . . . . . . . . . . . . . . . . 36 Mass, Changing Flow Units . . . . . . . . . . . . . . . . . . . 44 Measurement Type Programming . . . . . . . . . . . . . . . . . . . . . . . . . . . . 30 Menu Map . . . . . . . . . . . . . . . . . . . . . . . . . . . . . . . 25 Meter Body Identification . . . . . . . . . . . . . . . . . . . . . . . . . . . . . 7 Materials . . . . . . . . . . . . . . . . . . . . . . . . . . . . . . . 84 Meter Setup Option . . . . . . . . . . . . . . . . . . . . . . . . . 47 Meter Sizes . . . . . . . . . . . . . . . . . . . . . . . . . . . . . . . 83 Meter Tag . . . . . . . . . . . . . . . . . . . . . . . . . . . . . . . . 41 Min/Max Output, Testing . . . . . . . . . . . . . . . . . . . . . 73 Modbus Wiring. . . . . . . . . . . . . . . . . . . . . . . . . . . . . . . . . 19 Modbus Parity . . . . . . . . . . . . . . . . . . . . . . . . . . . . . 70 Modbus Stop Bits . . . . . . . . . . . . . . . . . . . . . . . . . . 71 Modbus/Service Port Address . . . . . . . . . . . . . . . . . 71 Modbus/Service Port, Setting Up . . . . . . . . . . . . . . . 69 Mounting . . . . . . . . . . . . . . . . . . . . . . . . . . . . . . . . 10 Electronics . . . . . . . . . . . . . . . . . . . . . . . . . . . . . 10 O On Board Temperature, Setting . . . . . . . . . . . . . . . . Operating Temperature . . . . . . . . . . . . . . . . . . . . . . Output A Option Board, Programming . . . . . . . . . . . Output Analog Switch, Testing . . . . . . . . . . . . . . . . . Output B Option Card . . . . . . . . . . . . . . . . . . . . . . . 73 86 51 73 54 L Language Change . . . . . . . . . . . . . . . . . . . . . . . . . . 41 Languages. . . . . . . . . . . . . . . . . . . . . . . . . . . . . . . . 85 Leaks, Transducers . . . . . . . . . . . . . . . . . . . . . . . . . 82 Left Arrow Key . . . . . . . . . . . . . . . . . . . . . . . . . . . . 27 Line Power Wiring . . . . . . . . . . . . . . . . . . . . . . . . . . . . . . . . . 21 148 PanaFlow HT User’s Manual Index P S PanaFlow HT Electrical Connections . . . . . . . . . . . . . . . . . . . . . 11 Electronics Package . . . . . . . . . . . . . . . . . . . . . . . 10 Identification . . . . . . . . . . . . . . . . . . . . . . . . . . . . . 6 Magnetic Keypad . . . . . . . . . . . . . . . . . . . . . . . . . 27 Overview . . . . . . . . . . . . . . . . . . . . . . . . . . . . . . . 1 Transport . . . . . . . . . . . . . . . . . . . . . . . . . . . . . . . . 7 Unpacking . . . . . . . . . . . . . . . . . . . . . . . . . . . . . . . 6 Password . . . . . . . . . . . . . . . . . . . . . . . . . . . . . . . . 49 Path Error Handling . . . . . . . . . . . . . . . . . . . . . . . . . 48 Pig Detection . . . . . . . . . . . . . . . . . . . . . . . . . . . . 135 Pipe Measurements . . . . . . . . . . . . . . . . . . . . . . . . . . . 81 Problems . . . . . . . . . . . . . . . . . . . . . . . . . . . . . . . 81 Pipe Problems . . . . . . . . . . . . . . . . . . . . . . . . . . . . . 81 Power Connecting . . . . . . . . . . . . . . . . . . . . . . . . . . . . . 21 Terminal Block . . . . . . . . . . . . . . . . . . . . . . . . . . 21 Power Consumption . . . . . . . . . . . . . . . . . . . . . . . . 86 Power Supplies . . . . . . . . . . . . . . . . . . . . . . . . . . . . 86 Pressure Range . . . . . . . . . . . . . . . . . . . . . . . . . . . . 84 Problems, Transducers . . . . . . . . . . . . . . . . . . . . . . . 82 Program Menu . . . . . . . . . . . . . . . . . . . . . . . . . . . . 38 Program Review menu . . . . . . . . . . . . . . . . . . . . . . . 38 Programming Display Parameters . . . . . . . . . . . . . . . . . . . . . . . 29 Entering . . . . . . . . . . . . . . . . . . . . . . . . . . . . . . . 39 Measurement Type . . . . . . . . . . . . . . . . . . . . . . . . 30 Pulse Output, Setting . . . . . . . . . . . . . . . . . . . . . . . . 59 Safety Auxiliary Equipment . . . . . . . . . . . . . . . . . . . . . . . v General Issues . . . . . . . . . . . . . . . . . . . . . . . . . . . . v Personal Equipment . . . . . . . . . . . . . . . . . . . . . . . . v Safety Codes . . . . . . . . . . . . . . . . . . . . . . . . . . . . . . . 5 Sensor Setup . . . . . . . . . . . . . . . . . . . . . . . . . . . . . . 73 Service Record . . . . . . . . . . . . . . . . . . . . . . . . . . . 139 Settings . . . . . . . . . . . . . . . . . . . . . . . . . . . . . . . . . . 41 SIL Analog Output, Setting Up. . . . . . . . . . . . . . . . . 55 SIL Application . . . . . . . . . . . . . . . . . . . . . . . . . . . . . 3 SIL Certification . . . . . . . . . . . . . . . . . . . . . . . . . . . 83 SIL Error String . . . . . . . . . . . . . . . . . . . . . . . . . . . 79 SIL Limits . . . . . . . . . . . . . . . . . . . . . . . . . . . . . . . 42 SIL Testing . . . . . . . . . . . . . . . . . . . . . . . . . . . . . . . 72 Slot 0 See Analog Outputs (Slot 0) Soundspeed Fluid . . . . . . . . . . . . . . . . . . . . . . . . . . . . . . . . . . 80 Special Applications . . . . . . . . . . . . . . . . . . . . . . . 135 Specifications . . . . . . . . . . . . . . . . . . . . . . . . . . . . . 83 Starting or Stopping . . . . . . . . . . . . . . . . . . . . . . . . . 35 Storage Temperature . . . . . . . . . . . . . . . . . . . . . . . . 87 R Range . . . . . . . . . . . . . . . . . . . . . . . . . . . . . . . . . . . 83 Rangeability . . . . . . . . . . . . . . . . . . . . . . . . . . . . . . 83 Remote Mount Cable Wiring . . . . . . . . . . . . . . . . . . . . . . . . . . . . . . . . . 22 Repeatability . . . . . . . . . . . . . . . . . . . . . . . . . . . . . . 83 Right Arrow Key . . . . . . . . . . . . . . . . . . . . . . . . . . . 27 PanaFlow HT User’s Manual T Tau Value . . . . . . . . . . . . . . . . . . . . . . . . . . . . . . . . 48 Temperature Ranges Transducer . . . . . . . . . . . . . . . . . . . . . . . . . . . . . 84 Terminal Block Analog Outputs - I/O . . . . . . . . . . . . . . . . . . . . . . 13 Power - TB1 . . . . . . . . . . . . . . . . . . . . . . . . . . . . 21 Theory of Operation . . . . . . . . . . . . . . . . . . . . . . . . . 2 Totalizer Changing Measurement Units . . . . . . . . . . . . . . . . 45 Resetting . . . . . . . . . . . . . . . . . . . . . . . . . . . . . . . 35 Totalizer Measurement. . . . . . . . . . . . . . . . . . . . . . . 35 Totalizer Net . . . . . . . . . . . . . . . . . . . . . . . . . . . . . . 67 Totalizer Output Wiring. . . . . . . . . . . . . . . . . . . . . . . . . . . . . . . . . 15 Totalizer Programming Decimal Places . . . . . . . . . . . . . . . . . . . . . . . . . . 33 Transducer Cables . . . . . . . . . . . . . . . . . . . . . . . . 9, 84 Transducer Classifications . . . . . . . . . . . . . . . . . . . . 84 149 Index Transducer Problems . . . . . . . . . . . . . . . . . . . . . . . . 82 Transducer System . . . . . . . . . . . . . . . . . . . . . . . . . 84 Transducers Cables . . . . . . . . . . . . . . . . . . . . . . . . . . . . . . . . . . 9 Corrosion . . . . . . . . . . . . . . . . . . . . . . . . . . . . . . 82 Internal Damage . . . . . . . . . . . . . . . . . . . . . . . . . 82 Leaks . . . . . . . . . . . . . . . . . . . . . . . . . . . . . . . . . 82 Location . . . . . . . . . . . . . . . . . . . . . . . . . . . . . . . . 8 Physical Damage . . . . . . . . . . . . . . . . . . . . . . . . . 82 Placement . . . . . . . . . . . . . . . . . . . . . . . . . . . . . . 81 Problems . . . . . . . . . . . . . . . . . . . . . . . . . . . . . . . 82 Replacement . . . . . . . . . . . . . . . . . . . . . . . . . . . . 82 Transit-Time Flow Measurement . . . . . . . . . . . . . . . . 2 Transporting . . . . . . . . . . . . . . . . . . . . . . . . . . . . . . . 7 U UART Bits . . . . . . . . . . . . . . . . . . . . . . . . . . . . . . . 70 Unlocking Keypad . . . . . . . . . . . . . . . . . . . . . . . . . . 37 Unpacking . . . . . . . . . . . . . . . . . . . . . . . . . . . . . . . . 6 Up Arrow Key. . . . . . . . . . . . . . . . . . . . . . . . . . . . . 27 User Levels . . . . . . . . . . . . . . . . . . . . . . . . . . . . . . . 39 User Preferences . . . . . . . . . . . . . . . . . . . . . . . . . . . 40 V Velocity, Setting Flow Units . . . . . . . . . . . . . . . . . . . 43 Voltage, Input . . . . . . . . . . . . . . . . . . . . . . . . . . . . . 21 Volumetric, Setting Flow Units . . . . . . . . . . . . . . . . . 44 Wiring . . . . . . . . . . . . . . . . . . . . . . . . . . . . . . . . . . 17 Analog Outputs . . . . . . . . . . . . . . . . . . . . . . . . . . 13 Calibration Port . . . . . . . . . . . . . . . . . . . . . . . . . . 20 CE Mark Compliance . . . . . . . . . . . . . . . . . . . . . 145 Control Output. . . . . . . . . . . . . . . . . . . . . . . . . . . 18 Digital Outputs . . . . . . . . . . . . . . . . . . . . . . . . . . 14 Frequency Output . . . . . . . . . . . . . . . . . . . . . . . . 16 Line Power . . . . . . . . . . . . . . . . . . . . . . . . . . . . . 21 Modbus/Service Port . . . . . . . . . . . . . . . . . . . . . . 19 Option Card . . . . . . . . . . . . . . . . . . . . . See Card Name Preparation . . . . . . . . . . . . . . . . . . . . . . . . . . . . . 12 Terminal Block . . . . . . . . . . . . . . . . . See Block Name Totalizer (Pulse) Output . . . . . . . . . . . . . . . . . . . . 15 Transducers (Remote Mount Cable) . . . . . . . . . . . 22 Wiring Connection . . . . . . . . . . . . . . . . . . . . . . . . . 86 Wiring Diagram PanaFlow HT Wiring Diagram11 X XMT900 Transmitter Identification . . . . . . . . . . . . . . . . . . . . . . . . . . . . . 6 Z Zero Cutoff . . . . . . . . . . . . . . . . . . . . . . . . . . . . . . . 47 W Watchdog Test . . . . . . . . . . . . . . . . . . . . . . . . . . . . . 73 WEEE Directive . . . . . . . . . . . . . . . . . . . . . . . . . . . vi 150 PanaFlow HT User’s Manual Warranty Warranty Each instrument manufactured by GE Sensing is warranted to be free from defects in material and workmanship. Liability under this warranty is limited to restoring the instrument to normal operation or replacing the instrument, at the sole discretion of GE Sensing. Fuses and batteries are specifically excluded from any liability. This warranty is effective from the date of delivery to the original purchaser. If GE Sensing determines that the equipment was defective, the warranty period is: • one year from delivery for electronic or mechanical failures • one year from delivery for sensor shelf life If GE Sensing determines that the equipment was damaged by misuse, improper installation, the use of unauthorized replacement parts, or operating conditions outside the guidelines specified by GE Sensing, the repairs are not covered under this warranty. The warranties set forth herein are exclusive and are in lieu of all other warranties whether statutory, express or implied (including warranties or merchantability and fitness for a particular purpose, and warranties arising from course of dealing or usage or trade). Return Policy If a GE Sensing instrument malfunctions within the warranty period, the following procedure must be completed: 1. Notify GE Sensing, giving full details of the problem, and provide the model number and serial number of the instrument. If the nature of the problem indicates the need for factory service, GE Sensing will issue a RETURN AUTHORIZATION NUMBER (RAN), and shipping instructions for the return of the instrument to a service center will be provided. 2. If GE Sensing instructs you to send your instrument to a service center, it must be shipped prepaid to the authorized repair station indicated in the shipping instructions. 3. Upon receipt, GE Sensing will evaluate the instrument to determine the cause of the malfunction. Then, one of the following courses of action will then be taken: • If the damage is covered under the terms of the warranty, the instrument will be repaired at no cost to the owner and returned. • If GE Sensing determines that the damage is not covered under the terms of the warranty, or if the warranty has expired, an estimate for the cost of the repairs at standard rates will be provided. Upon receipt of the owner’s approval to proceed, the instrument will be repaired and returned. PanaFlow HT Ultrasonic Liquid Flowmeter User’s Manual 151 Warranty [no content intended for this page] 152 PanaFlow HT Ultrasonic Liquid Flowmeter User’s Manual Customer Support Centers U.S.A. The Boston Center 1100 Technology Park Drive Billerica, MA 01821 U.S.A. Tel: 800 833 9438 (toll-free) 978 437 1000 E-mail: [email protected] Ireland Sensing House Shannon Free Zone East Shannon, County Clare Ireland Tel: +353 (0)61 470291 E-mail: [email protected] An ISO 9001:2008 Certified Company www.ge-mcs.com/en/about_us/quality.html www.ge-mcs.com ©2012 General Electric Company. All rights reserved. Technical content subject to change without notice. 910-294U Rev. A


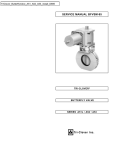
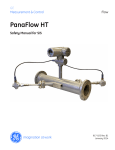
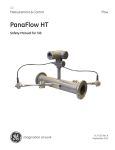

![Lifts Part 4: Operational Management [PDF 707Kb]](http://vs1.manualzilla.com/store/data/006003154_1-8f988a4c31a2e96372488ae8439271db-150x150.png)