1
Configuring IPS™
Important: the Internet Printing System™ Plus will initially work as a
thirty day demo. It must then be authorised for continued use.
After you have installed IPS™ and rebooted your computer, a small world
icon will appear in the bottom right corner of your screen. Right clicking on
the icon will access the IPS™ Suite main menu. From here you will be able
to access all the applications belonging to the IPS™ Suite as well as Help &
Information.
Note: By clicking on Quit IPS Main Menu in the list, the globe will disappear
and access to the IPS™ Suite will be denied. To re-start the IPS™ Suite,
and for licencing, the Readme file and uninstallation purposes, go to the
Start menu and select Programs, then select Internet Printing System.
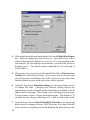
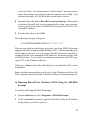
To start using IPS™, it is first necessary to add IPS™ ports to each printer
you wish to print to.
Setting the Port Details
Note 1: To print to a printer using IPS™, you will need to know the IP
address of the printer.
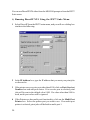
Note 2: IP address ports for IPS™ are either added by selecting Internet
Printing System from the IPS™ Suite main menu or from the Windows
printer settings (for assistance with Windows printer settings, click on
Start > Settings > Printers. In the Printers window, click on Help > Help
Topics > How To... > Print. You will find various Print-related help topics to
choose from).
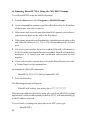
Note 3: You can add a new IPS™ port from the IPS™ Suite main menu, but
you cannot add a new printer. Either select a printer from the current
choices or create a new choice by selecting Printers from Settings in the
Start menu.
11