Download While in the SETUP menu normally the setup is for viewing only. To
Transcript
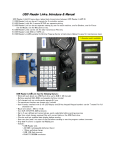
xlTRANSFER ® Quick Start Guide
1) There is a User Manual in PDF format on the enclosed USB memory stick – please, read that first.
2) Insert a USB memory stick into the xlTRANSFER ® unit. Remove the small pink plastic stop from the
xlTRANSFER ® unit On/Off switch and turn the unit on.
3) After a couple of seconds the xlTRANSFER ® will display its main menu. Press 4 for SETUP. Follow the
instructions in the User Manual to set and name the first machine. Hint: make sure to match the machine’s
baud rate. For 90% of the controls ISO code, LF only and XON/XOFF handshake will work fine. At the
end press the ENT key to get back to the Main Menu.
4) Select 2 for a Machine to USB transfer. Select the single dot, press ENT and name the incoming file for
simplicity 123 and press ENT (read the User Manual how to ‘rotate’ for letters) at the end press ENT again.
The xlTRANSFER ® unit is now ready to receive a file. Now perform a ‘Send’ or ‘Punch’ operation at the
machine tool. As the G code program is being sent, the second line of the xlTRANSFER ® unit’s LCD
display shows the incoming lines. Once the transfer ends, the LCD display will show the last received
characters (LF signals line feed and CR signals carriage return characters.). Press ESC key to display the
name and number of characters of the just received program then press ESC again.
5) Now at the CNC control rename the just punched program and set the control to receive. Once ready, on the
xlTRANSFER ® unit at the Main Menu select item 1), arrow down to the just received 123 program and
press ENT key. The second line of the LCD display will show the outgoing lines. Once done your CNC
control should have and display the just received program. You can also take program 123 on the USB
memory stick to your computer and view/edit it for example with Notepad.
6) Based on this experience now you can set up the rest of the machines. The similar machines can use the
same setup of the xlTRANSFER ® unit. You can name a setup in the unit (FANUC, MAZAK, etc…) up to
8 characters long. Before sending/receiving while at the Main Menu you can select a different setup using
the LIST and the arrow keys.
7) The xlTRANSFER ® can also drip feed a CNC control if the control itself is capable of doing that. For that
application an xlTRANSFER ® per machine is recommended with a permanent hookup. For a permanent
hookup you may remove the 4 AA batteries and connect the xlTRANSFER ® to its charger all the time.
While in the SETUP menu normally the setup is for viewing only. To enable
the change of BAUD rate, etc.. you need to type in – while in the SETUP menu
- the numbers 147 blindly. This code ‘unlocks’ the ‘view only’ mode. Once you
leave the SETUP menu and re-enter it you need to re-type this code again.
This is to prevent accidental parameter change.
If the rechargeable battery is completely depleted, the LCD screen will show
nothing after turning the unit on. In such a case: 1) Turn the unit OFF. 2)
Connect the charger for about 5 minutes. 3) Turn the unit ON – display
should come back and the red charge light should turn on. Charge the unit
like that before using it for at least 10 minutes – after done using it connect
the charger back having the unit ON but the USB key removed until fully
charged.
Communicating with a G-code control (FANUC or similar)
A) From USB memory stick CNC control
1) Plug the xlTRANSFER ® serial cable into the control RS232 port, make sure that the correct USB memory
stick is inserted into the unit and turn the unit on.
2) Press the LIST key on the xlTRANSFER ® to make sure that the correct setup is selected – press ENT if
the correct setup name is displayed else right/left arrow to the correct name and then press ENT. (You can
do a fast parameter check pressing the HOME key instead the LIST, but that shows only while the key is
pressed and won’t let to change the setup).
3) At the CNC control set the control to receive. Once ready, on the xlTRANSFER ® unit at the Main Menu
select item 1), arrow down to the program to be sent and press ENT key. The second line of the LCD
display will show the outgoing lines. Once done your CNC control should have and display the just
received program. (If there are too many programs on the USB key, you can do a ‘directory search’ –
please read the User Manual how to do that).
B) From Control to USB memory stick
1) Plug the xlTRANSFER ® serial cable into the control RS232 port, make sure that the correct USB
memory stick is inserted into the unit and turn the unit on.
Press the LIST key on the xlTRANSFER ® to make sure that the correct setup is selected – press ENT if
the correct setup name is displayed else right/left arrow to the correct name and then press ENT. (You can
do a fast parameter check pressing the HOME key instead the LIST, but that shows only while the key is
pressed and won’t let to change the setup).
2) Select 2) for a Machine to USB transfer. Select the single dot, press ENT and name the incoming file (for
numbers just press the key, read the User Manual how to ‘rotate’ for letters). Once the name is done, press
ENT again. (You can also key down and press the ENT over an existing program to overwrite it). The
xlTRANSFER ® unit is now ready to receive a file. Now perform a ‘Send’ or ‘Punch’ operation at the
machine tool. As the G code program is being sent, the second line of the xlTRANSFER ® unit’s LCD
display shows the incoming lines. Once the transfer ends, the LCD display will show the last received
characters (LF signals line feed and CR signals carriage return characters.). Press ESC key to display the
name and number of characters of the just received program then press ESC again to go back to the Main
menu.
3)
Communicating with a Mazak control/conversational program
A) From USB memory stick CNC control
1) Step 1) is same as for FANUC
2) Step 2) is same as for FANUC, just make sure that a setup with MZK code is selected.
3) On the xlTRANSFER ® unit at the Main Menu select item 1), arrow down to the program to be sent and
press ENT key. The unit will say ‘Sending’ but nothing else will happen yet. Now at the control go into the
CMT menu, press ‘LIST CMT CONTENT’ followed by START. After few seconds the control will list the
available work numbers. Now you can select CMT->NC (LOAD) operation followed by START and the
control will read the listed work number(s). Note here, that you can also execute a COMPARE operation
using the same steps as for LOAD.
B) From Control to USB memory stick
1) Step 1) is same as for FANUC
2) Step 2) is same as for FANUC, just make sure that a setup with MZK code is selected.
3) Select 2) for a Machine to USB transfer. Select the single dot, press ENT and name the incoming file (for
numbers just press the key, read the User Manual how to ‘rotate’ for letters). Once the name is done, press
ENT again. (You can also key down and press the ENT over an existing program to overwrite it). The
xlTRANSFER ® unit is now ready to receive a file. Now go to the CMT menu at the control, INPUT the
work number(s), press the NC->CMT (SEND) operation and press START. As the conversational program
is sent, the second line of the xlTRANSFER ® unit’s LCD display shows the incoming lines. Once the
transfer ends, the xlTRANSFER ® unit will display ‘Receiving done’ message. Press ESC key to display
the name and number of characters of the just received program then press ESC again to go back to the
Main menu.
Technical support:
[email protected]
or 586-727-3501


