1
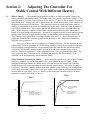
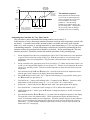
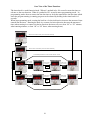
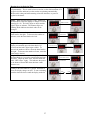
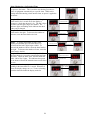
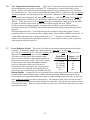
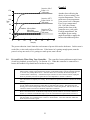
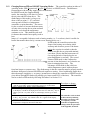
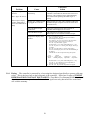
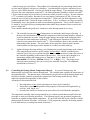
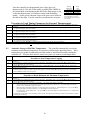
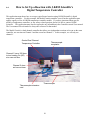
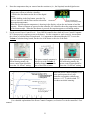
It’s important to understand that this controller isn’t a simple ON/OFF type controller (i.e. ON when below the set point, OFF when above [though it can be made to work this way, see Section 3.12]). Rather it’s a predictive controller. Based on the shape (slope) of the heating curve, the controller predicts (calculates) the percent of power to apply to the heater now to control the shape of the heating curve minutes in advance. The importance of the tuning parameters is that they are constants in the equation the temperature meter uses to perform its predictive calculations. If the temperature meter is programmed with tuning parameters that incorrectly describe the heater being used, poor temperature control will result. But, when the correct values are loaded, temperature regulation of ± 0.1o is typically achieved. Manual Tuning. Manual tuning is when the values of the 5 tuning parameters are determined manually then entered into the temperature meter via the push buttons on the front of the controller. Experienced users might prefer to manually tune the controller since this allows customization of the heating process. Autotune. Autotune is a feature built into the temperature meter that automatically calculates the tuning parameters (i.e. delay times, heating efficiency, etc.) for any type of heater. After the autotune procedure is complete the controller automatically stores the tuning parameters in nonvolatile memory. Heating mantles are a special case and are covered in a separate paragraph (Section 2.3). 2.2 Autotuning Procedure. This procedure is not recommended for heating mantles (see Section 2.3). 1. Set the equipment up in the exact configuration it will be used. For example, to tune to a vacuum oven, place the thermocouple in the room temperature oven and plug the oven into the controller. If the oven (or heater) has its own thermostat or power control, turn both as high as they’ll go. 2. Set the controller to the appropriate power level (see Section 3.7). Make sure the timer circuit is set to ON (i.e., the timer window displays On; see Section 3.5). Turn the Over Temperature Protection Circuit (7) to the OFF position. Turn the controller and heater on, and enter the desired set point o temperature. If the set point isn’t at least 30 C above ambient, skip this procedure and go to the next procedure, “Autotuning the Controller for Very Fine Control” 3. Press and hold in both the and buttons (for 3 seconds) on the front of the temperature meter until the word “tunE” appears in the display then release both buttons. 4. Press the button (5 times) until “CyC.t” appears in the display (if you go past this setting, press the button until you get back to it). 5. First, hold in the ‘*’ button, while holding in the ‘*’ button press the button. Continue to hold both buttons in until the display reads “A --”, or “A ##” where “##” is some number. 6. Release the ‘*’ button and press the button until “tunE” once again appears in the display. 7. Press and hold the ‘*’ button and “tunE” changes to “off” to indicate that autotune is off. 8. While holding in the ‘*’ button, press the button to change the display to “on”, then release both buttons. 9. Press and hold both the and buttons (for 3 seconds) until the temperature appears in the display. The controller is now in its autotune mode. While in autotune the display alternates between “tunE” and the process temperature. When the autotune sequence is done (this may take in excess of an hour) the controller stops displaying “tunE” and only displays the process temperature. [To abort autotune manually, repeat steps 3, 8 and 9 except in step 8 press the button until “off” is displayed]. If during the process of autotuning the message “Tune Fail” appears, see the paragraph at the end of section 2.2. 7