1
DirectADVANTAGE & DirectADVANTAGE White Ink
Version 2.1
USER’S GUIDE
Version 2.1
Note: For the absolute latest Information and Updates on all Products, Materials,
Processes, and/or Procedures relative to all offerings by or through Sawgrass
Technologies, Inc., Please refer to our Website: www.sawgrassink.com.
DirectADVANTAGE® & NaturaLink ® are Registered Trademarks & AdvantageQUEUE™ is a Trademark of Sawgrass Technologies, Inc.
DIRECTADVANTAGE® Users Guide
© Copyright May, 2009, Sawgrass Technologies™, Inc. All rights reserved.
Printed in the United States of America.
DirectAdvantage® and NaturaLink® are Registered Trademarks, and AdvantageQueue™,
ColorSure™ and Sawgrass Technologies™ are Trademarks of Sawgrass Technologies, Inc.
Important Notice: This manual covers two versions of the same DirectAdvantage printer,
depending upon the type of ink it uses— (1) Dual CMYK or (2) CMYK plus white Ink.
Most of the information being presented applies equally to both versions. Where the
information differs, pertinent descriptions are provided. The hardware base can differ as
well, although, from the user’s perspective, these differences are not readily apparent and
require no additional knowledge. Hardware Version 2.0 incorporates the Epson Model
4880 printer, whereas version 1.5 uses the Epson Model 4800. Since the software and
firmware is common to all platforms, there are no discernible operational differences
under a user’s point of view. Therefore, from this point onward, the version employed in
this manual for instruction and illustration purposes is version 2.0. In addition, when
describing the AdvantageQueue Software, the software version of some of the screen
captures may not correspond to the actual version you have in your system. The screen
information and prompts, however, remain the same.
General Notice: Other product names used herein are for identification purposes only and
may be trademarks of their respective owners. Sawgrass Technologies Inc. disclaims
any and all rights in those marks.
No part of this manual may be reproduced or transmitted in any form by any means
without the prior written consent of Sawgrass Technologies, Inc. Information in this
manual is subject to change without notice and does not represent a commitment on the
part of Sawgrass Technologies, Inc.
Note: For the absolute latest Information and Updates on all Products, Materials,
Processes, and/or Procedures relative to all offerings by or through Sawgrass
Technologies, Inc., Please refer to our Website: www.sawgrassink.com.
Rev. 05/2009.
Sawgrass Technologies, Inc. ~ DirectAdvantage ® ~ AdvantageQueue ® ~ NaturaLink ® ~ User’s Guide
iii
IMPORTANT – READ CAREFULLY:
This Process License Agreement (“PLA”) is a legal agreement between you and Sawgrass
Technologies, Inc. (“Sawgrass”). By installing NaturaLink ® in your printer, or otherwise using
NaturaLink ®, you agree to be bound by the terms of this PLA. If you do not agree to the terms
of this PLA, Sawgrass is unwilling to license the process of using NaturaLink ® to you.
In such event, you may not use NaturaLink ®, and you should promptly contact your supplier for
instructions on return of the unopened package.
The process of using NaturaLink ® is protected by U.S. and foreign patents. Sawgrass will
provide a complete list of the relevant patents upon request. The use of NaturaLink ® to practice
the patented process is permitted by this license.
GRANT OF LICENSE — This PLA grants you the following rights: You may install and use
NaturaLink ® packaged herewith, in your DirectAdvantage® printer to practice the printing
process described in U.S. Patent No. 6,341,856. The use of any ink, dye, or pigment to practice
the Sawgrass Process, other than NaturaLink ® purchased from Sawgrass or its authorized
distributors accompanied by a PLA, is not a licensed use of the Sawgrass Process. No rights to use
the Sawgrass Process, except those specified herein, are granted, and no rights to use any other
process, product, software, or hardware developed or sold by Sawgrass are granted or implied
hereby.
LIMITATIONS ON REVERSE ENGINEERING — You agree that you will not attempt to reverse
engineer, reproduce, or deformulate NaturaLink ®.
PATENTS AND COPYRIGHTS — Sawgrass owns multiple U.S. and foreign patents that
apply to the Sawgrass Process and/or NaturaLink ® or its use. All patents in and to
NaturaLink ® and the method of using NaturaLink ® are owned by Sawgrass Technologies,
Inc. You may not copy the printed materials accompanying NaturaLink ®. All rights
not specifically granted under this PLA are reserved by Sawgrass Technologies, Inc.
Made In U.S.A.
CAUTION:
• For best printing results, use the ink within six months of purchase. Please refer to the
individual ink bag/cartridge for the specific ink expiration date.
•
Keep out of reach of children.
•
º
º
Do not expose ink to temperatures above 75 F or below 50 F.
•
Keep ink out of direct sunshine.
Sawgrass Technologies, Inc. agrees to replace any defective ink within a reasonable time, which
shall be Sawgrass’ sole responsibility for errors or defects in these goods.
THERE ARE NO OTHER WARRANTIES, EXPRESSED OR IMPLIED, INCLUDING, BUT NOT LIMITED
TO, ANY IMPLIED WARRANTY OF MERCHANTABILITY OR ANY IMPLIED WARRANTY OF FITNESS
FOR A PARTICULAR PURPOSE. SAWGRASS SHALL NOT BE LIABLE FOR LOSS OF PROFIT OR
OTHER ECONOMIC LOSS, OR FOR INDIRECT, SPECIAL, CONSEQUENTIAL OR OTHER SIMILAR
DAMAGES.
iv
Sawgrass Technologies, Inc. ~ www.sawgrassink.com
END-USER LICENSE AGREEMENT
END-USER LICENSE AGREEMENT FOR SAWGRASS SOFTWARE — AdvantageQueue
IMPORTANT-READ CAREFULLY: This Sawgrass Technologies Inc. End-User License
Agreement (“EULA”) is a legal agreement between you (either an individual or a single entity)
and Sawgrass Technologies, Inc. for the Sawgrass Software Product identified above, which
includes computer software and may include associated media, printed materials, and “online” or
electronic documentation (“SOFTWARE PRODUCT”). By installing, copying, or otherwise using
the SOFTWARE PRODUCT, you agree to be bound by the terms of this EULA. If you do not agree
to the terms of this EULA, do not install or use the SOFTWARE PRODUCT.
Software PRODUCT LICENSE — Copyright laws and international copyright treaties, as well as
other intellectual property laws and treaties protect the SOFTWARE PRODUCT. The SOFTWARE
PRODUCT is licensed, not sold. The title to, and ownership of, this SOFTWARE PRODUCT remains
with Sawgrass Technologies, Inc. (Sawgrass).
GRANT OF LICENSE — This EULA grants you the following rights:
•
This license is provided to you for your use according to the terms hereof. You may install
and use the SOFTWARE PRODUCT packaged herewith to practice the printing process
described in U.S. Patent No. 5,488,907 (the "Sawgrass Process"). The use of any ink, dye
or pigment to practice the Sawgrass Process, other than a NaturaLink ink that is
purchased from Sawgrass or its authorized distributor, is not a licensed use of the
SOFTWARE PRODUCT. You agree not to use the SOFTWARE PRODUCT for any other purpose
or in any process except as expressly permitted hereby.
•
Not for Resale — You may not sell, or otherwise transfer for value, the SOFTWARE
•
No Reverse Engineering, Decompilation, Copying or Disassembly — You may
•
PRODUCT.
not reverse engineer, decompile, copy or disassemble the SOFTWARE PRODUCT.
No Rental — You may not rent, lease, or lend the SOFTWARE PRODUCT.
Support Services — Sawgrass Technologies, Inc. may provide you with support services
•
related to the SOFTWARE PRODUCT ("Support Services"). Use of Support Services
is governed by the Sawgrass policies and programs described in the user manual, in
"online" documentation, and/or in other Sawgrass-provided materials. Any supplemental
software code provided to you as part of the Support Services shall be considered part of
the SOFTWARE PRODUCT and subject to the terms and conditions of this EULA. With respect
to technical information you provide to Sawgrass as part of the Support Services, Sawgrass
may use such information for its business purposes, including for product support and
development. Sawgrass will not utilize such technical information in a form that personally
identifies you.
•
hereby.
•
Termination — Without prejudice to any other rights, Sawgrass may terminate this EULA
if you fail to comply with the terms and conditions of this EULA. In the event of termination,
you must destroy all copies of the SOFTWARE PRODUCT and all of its component parts.
No Assignment or Sublicense — You may not assign or sublicense the rights granted
Sawgrass Technologies, Inc. ~ DirectAdvantage ® ~ AdvantageQueue ® ~ NaturaLink ® ~ User’s Guide
COPYRIGHT:
All title and copyrights in and to the SOFTWARE PRODUCT (including
but not limited to any images, photographs, animations, video, audio, music, text, and
"applets" incorporated into the SOFTWARE PRODUCT), the accompanying printed materials,
and any copies of the SOFTWARE PRODUCT are owned by Sawgrass Technologies Inc.
or its suppliers. Copyright laws and international treaty provisions protect the SOFTWARE
PRODUCT. Therefore, you must treat the SOFTWARE PRODUCT like any other copyrighted
material, except that you may install the SOFTWARE PRODUCT on a computer for the uses
permitted hereby. You may not copy the printed materials accompanying the SOFTWARE
PRODUCT. You may not loan, rent, lease, or otherwise transfer the other medium to another
user, except as part of the permanent transfer (as provided above) of the SOFTWARE PRODUCT.
U.S. GOVERNMENT RESTRICTED RIGHTS: The SOFTWARE PRODUCT and documentation
are provided with RESTRICTED RIGHTS. Use, duplication, or disclosure by the Government
is subject to restrictions as set forth in subparagraph (c)(1)(ii) of the Rights in Technical
Data and Computer Software clause at DFARS 252.227-7013 or subparagraphs (c)(1) and (2)
of the Commercial Computer Software-Restricted Rights at 48 CFR 52.227-19, as applicable.
MISCELLANEOUS:
a. If you acquired this product in the United States, this EULA is governed by the laws
of the State of South Carolina. In the event of any dispute arising under this license or
from the use of the SOFTWARE PRODUCT, each party irrevocably agrees to the jurisdiction
of the United States District Court for the District of South Carolina, Charleston Division.
b.
If you acquired this product in Canada, this EULA is governed by the laws of the
Province of Ontario, Canada. In the event of any dispute arising under this license or
from the use of the SOFTWARE PRODUCT, each party irrevocably agrees to the jurisdiction
of the courts of the Province of Ontario and further agrees to commence any litigation that
may arise hereunder in the courts located in the Judicial District of York, Province of Ontario.
c. If this product was acquired outside the United States, then local law may apply.
LIMITED WARRANTY — Sawgrass warrants that (a) the SOFTWARE PRODUCT will perform
substantially in accordance with the accompanying written materials for a period of thirty (30)
days from the date of receipt, and (b) any Support Services provided by Sawgrass shall be
substantially as described in applicable written materials provided to you by Sawgrass, and
Sawgrass support engineers will make commercially reasonable efforts to solve any problem
issues. Some states and jurisdictions do not allow limitations on duration of an implied
warranty, so the above limitation may not apply to you. To the extent allowed by applicable
law, implied warranties on the SOFTWARE PRODUCT, if any, are limited to thirty (30) days.
CUSTOMER REMEDIES — Sawgrass' and its suppliers' entire liability and your exclusive
remedy shall be Sawgrass' repair or replacement of the SOFTWARE PRODUCT that does not
meet Sawgrass' Limited Warranty and which is returned to Sawgrass with a copy of your
receipt. This Limited Warranty is void if failure of the SOFTWARE PRODUCT has resulted from
accident, abuse, or misapplication. Any replacement SOFTWARE PRODUCT will be warranted
for the remainder of the original warranty period or thirty (30) days, whichever is longer.
Outside the United States, neither these remedies nor any product support services offered
by Sawgrass are available without proof of purchase from an authorized international source.
vi
Sawgrass Technologies, Inc. ~ www.sawgrassink.com
NO OTHER WARRANTIES — To the maximum extent permitted by applicable law, Sawgrass
and its suppliers disclaim all other warranties and conditions, either express or implied,
including, but not limited to, implied warranties of merchantability, fitness for a particular
purpose, title, and non-infringement, with regard to the SOFTWARE PRODUCT, and the
provision of or failure to provide Support Services. This limited warranty gives you specific
legal rights. You may have others, which vary from state/jurisdiction to state/jurisdiction.
LIMITATION OF LIABILITY — To the maximum extent permitted by applicable law, in no event
shall Sawgrass or its suppliers be liable for any special, incidental, indirect, or consequential
damages whatsoever (including, without limitation, damages for loss of business profits, business
interruption, loss of business information, or any other pecuniary loss) arising out of the use of
or inability to use the SOFTWARE PRODUCT or the provision of or failure to provide Support
Services, even if Sawgrass has been advised of the possibility of such damages. In any case,
Sawgrass' entire liability under any provision of this EULA shall be limited to U.S. $5.00.
Because some states and jurisdictions do not allow the exclusion or limitation of liability, the
above limitation may not apply to you.
Sawgrass Technologies, Inc. ~ DirectAdvantage ® ~ AdvantageQueue ® ~ NaturaLink ® ~ User’s Guide
vii
DIRECT ADVANTAGE® PRINTER LIMITED WARRANTY
LIMITED WARRANTY. The DirectAdvantage® Inkjet Printer and the Ink Delivery System
are intended for commercial use only. Sawgrass Technologies warrants that the Ink Delivery
System, and the DirectAdvantage® Inkjet Printer used with the Ink Delivery System, will
perform substantially in accordance with the accompanying written materials (including written
materials supplied with your DirectAdvantage® Inkjet Printer) for a period of one (1) year from
the date of purchase of the DirectAdvantage® Inkjet Printer, or, in the cases of refurbished
or reconditioned printers, six (6) months from the date of purchase. Any Expanded Warranty
purchased or acquired by the purchaser of the DirectAdvantage® Inkjet Printer is provided by
a third party, and Sawgrass has no obligations to consumer under the Expanded Warranty.
CUSTOMER REMEDIES.Sawgrass Technologies’ and its suppliers’ entire liability, and your
exclusive remedy, shall be Sawgrass Technologies’ repair or replacement of the Ink Delivery
System or DirectAdvantage® Inkjet Printer that does not meet Sawgrass Technologies’ Limited
Warranty, and which is returned to Sawgrass Technologies with a copy of your receipt. This
Limited Warranty is void if failure of the Ink Delivery System or DirectAdvantage® Inkjet
Printer has resulted from accident, abuse, modification, or misapplication, including the failure
to perform maintenance on the Ink Delivery System or DirectAdvantage® Inkjet Printer in strict
compliance with the requirements set forth in the accompanying material. Any replacement of
any product will be warranted for the remainder of the original warranty period, or thirty (30)
days, whichever is longer. Neither these remedies, nor any product-support services offered
by Sawgrass Technologies are available without proof of purchase from an authorized source.
NO OTHER WARRANTIES. To the maximum extent permitted by applicable law, Sawgrass
Technologies and its suppliers disclaim all other warranties and conditions, either express or
implied, including, but not limited to, implied warranties of merchantability, fitness for a particular
purpose, title, and non-infringement, with regard to both the ink-delivery system and the Direct
Advantage inkjet printer. If implied warranties may not be disclaimed by applicable law, then
to the extent allowed by applicable law, implied warranties on the Ink Delivery System and/or
the DirectAdvantage® Inkjet Printer, if any, are limited to thirty (30) days. This Limited Warranty
gives you specific legal rights. You may have others, which vary from state/jurisdiction to state/
jurisdiction.
LIMITATION OF LIABILITY. To the maximum extent permitted by applicable law, in no event shall
Sawgrass Technologies or its suppliers be liable for any special, incidental, indirect, or consequential
damages whatsoever (including, without limitation, damages for loss of business profits, business
interruption, loss of business information, or any other pecuniary loss) arising out of the use of,
or inability to use, the Ink Delivery System or DirectAdvantage® Inkjet Printer, or the provision
of, or the failure to provide, support services, even if Sawgrass Technologies has been advised of
the possibility of such damages. In any case, Sawgrass Technologies’ entire liability under any
provision of this Limited Warranty shall be limited to US $5.00. Because some states and
jurisdictions do not allow the exclusion or limitation of liability, the above limitation may not
apply to you.
viii
Sawgrass Technologies, Inc. ~ www.sawgrassink.com
DIRECT ADVANTAGE® PRINTER with White Ink LIMITED WARRANTY
LIMITED WARRANTY. The DirectAdvantage® Inkjet Printer with White Ink and the
Ink Delivery System are intended for commercial use only. Sawgrass Technologies
warrants that (a) the Ink Delivery System (excluding the DirectAdvantage® Inkjet
Printer) will perform substantially in accordance with the accompanying written
materials for a period of thirty (30) days from the date of purchase of the Ink Delivery
System; and (b) the DirectAdvantage® Inkjet Printer with White Ink used with
the Ink Delivery System (excluding all other elements of the ink-delivery system)
will perform substantially in accordance with the accompanying written materials
(including written materials supplied with your DirectAdvantage® Inkjet Printer ) for
a period of one (1) year from the date of purchase of the DirectAdvantage® Inkjet
Printer, or, in the cases of refurbished or reconditioned printers, six (6) months
from the date of purchase. Any Expanded Warranty purchased or acquired by
the purchaser of the DirectAdvantage® Inkjet Printer is provided by a third party,
and Sawgrass has no obligations to consumer under the Expanded Warranty.
CUSTOMER REMEDIES.Sawgrass Technologies’ and its suppliers’ entire liability, and your
exclusive remedy, shall be Sawgrass Technologies’ repair or replacement of the Ink Delivery
System or DirectAdvantage® Inkjet Printer that does not meet Sawgrass Technologies’ Limited
Warranty, and which is returned to Sawgrass Technologies with a copy of your receipt. This
Limited Warranty is void if failure of the Ink Delivery System or DirectAdvantage® Inkjet
Printer has resulted from accident, abuse, modification, or misapplication, including the failure
to perform maintenance on the Ink Delivery System or DirectAdvantage® Inkjet Printer in strict
compliance with the requirements set forth in the accompanying material. Any replacement of
any product will be warranted for the remainder of the original warranty period, or thirty (30)
days, whichever is longer. Neither these remedies, nor any product-support services offered
by Sawgrass Technologies are available without proof of purchase from an authorized source.
NO OTHER WARRANTIES. To the maximum extent permitted by applicable law, Sawgrass
Technologies and its suppliers disclaim all other warranties and conditions, either express or implied,
including, but not limited to, implied warranties of merchantability, fitness for a particular purpose,
title, and non-infringement, with regard to both the Ink Delivery System and the DirectAdvantage®
Inkjet Printer. If implied warranties may not be disclaimed by applicable law, then to the extent
allowed by applicable law, implied warranties on the Ink Delivery System and DirectAdvantage®
Inkjet Printer, if any, are limited to thirty (30) days. This Limited Warranty gives you specific
legal rights. You may have others, which vary from state/jurisdiction to state/jurisdiction.
LIMITATION OF LIABILITY. To the maximum extent permitted by applicable law, in no event shall
Sawgrass Technologies or its suppliers be liable for any special, incidental, indirect, or consequential
damages whatsoever (including, without limitation, damages for loss of business profits, business
interruption, loss of business information, or any other pecuniary loss) arising out of the use of, or
inability to use, the Ink Delivery System and/or the DirectAdvantage® Inkjet Printer, or the provision
of, or the failure to provide, support services, even if Sawgrass Technologies has been advised of
the possibility of such damages. In any case, Sawgrass Technologies’ entire liability under any
provision of this Limited Warranty shall be limited to US $5.00. Because some states and
jurisdictions do not allow the exclusion or limitation of liability, the above limitation may not apply to
you.
Sawgrass Technologies, Inc. ~ DirectAdvantage ® ~ AdvantageQueue ® ~ NaturaLink ® ~ User’s Guide
ix
NOTES:
Sawgrass Technologies, Inc. ~ www.sawgrassink.com
TABLE OF CONTENTS
AGREEMENTS AND WARRANTIES
Process Licence Agreement.............................................................................. iv
End User Licence Agreement............................................................................. v
Copyright..................................................................................................... vi
Miscellaneous............................................................................................... vi
DirectAdvantage Printer Limited Warranty........................................................... viii
DirectAdvantage Printer w/ White Ink Limited Warranty........................................... ix
DIRECTADVANTAGE PRINTER
Introduction.................................................................................................. 5
About This Document...................................................................................... 6
Printer Overview............................................................................................ 7
Storing, Unpacking and Positioning the Machine.................................................... 8
Printing Operations........................................................................................ 12
Ink Loading.................................................................................................. 13
SOFTWARE
The AdvantageQueue And PowerRip DA Software................................................... 16
System Requirements..................................................................................... 16
Setup Instructions – Windows 2000 And Xp........................................................... 17
Installing The PowerRip DA Software.................................................................. 27
PRINTING WITH THE DIRECTADVANTAGE PRINTER
Printing Procedures........................................................................................ 33
Applying Pretreatment for White Ink................................................................... 35
Adjusting the print head................................................................................... 36
Unlocking the Control Panel.............................................................................. 36
THE ADVANTAGEQUEUE APPLICATION
Step-by-step printing with the AdvantageQueue..................................................... 39
Main AdvantageQueue Window.......................................................................... 40
Printing to One Printer..................................................................................... 41
Printing to Multiple Printers.............................................................................. 41
Printer Properties.......................................................................................... 43
Tools/Options Menu........................................................................................ 44
A pplications................................................................................................. 45
ADVANTAGEQUEUE IN WINDOWS 2000 OR WINDOWS XP
Quick Start Example (using CorelDRAW).............................................................. 45
Setting the AdvantageQueue Printer Properties..................................................... 46
From the Windows XP Desktop.......................................................................... 46
From an Application........................................................................................ 46
Sawgrass Technologies, Inc. ~ DirectAdvantage ® ~ AdvantageQueue ® ~ NaturaLink ® ~ User’s Guide
ADVANTAGEQUEUE PROPERTIES
Overview..................................................................................................... 48
Color Options................................................................................................ 48
Vector and Bitmap Explanation.......................................................................... 48
Bitmap and Vector Color Profile Selector.............................................................. 48
ColorSure Palette........................................................................................... 49
Input Profile.................................................................................................. 49
About.......................................................................................................... 49
APPENDICES
APPENDIX A:
Defeating Application Color Management............................................................. 51
CorelDraw™ version X4................................................................................... 51
CorelDraw™ versions X3, 12, 11 and 10............................................................... 52
CorelDRAW™ (version 7, 6, or 5)....................................................................... 53
Adobe Photoshop CS4, CS3, CS2, CS, & Photoshop 7.............................................. 54
Adobe Photoshop™ 6...................................................................................... 55
APPENDIX B:
Using ColorSure™ & Custom Palette................................................................... 57
Introduction.................................................................................................. 57
Printing the ColorSure Palette........................................................................... 57
Designing Your Artwork................................................................................... 58
Using Color Finder.......................................................................................... 58
How to use Color Finder................................................................................... 59
How to Use the Custom Palette.......................................................................... 62
Adding Swatches to your Application Palette......................................................... 62
APPENDIX C:
Tips for Successful Printing.............................................................................. 63
Printer........................................................................................................ 63
Printing....................................................................................................... 63
Curing the Image............................................................................................ 63
APPENDIX D:
Troubleshooting Image Quality Issues................................................................. 64
APPENDIX E:
Printer Troubleshooting & Maintenance............................................................... 65
Routine Maintenance...................................................................................... 65
Printing a Nozzle Check: Method 1...................................................................... 65
Printing a Nozzle Check: Method 2...................................................................... 67
Head Cleaning............................................................................................... 67
Power Cleaning............................................................................................. 68
Waste Ink Tank.............................................................................................. 69
Sawgrass Technologies, Inc. ~ www.sawgrassink.com
APPENDICES (Continued)
Supplies & Equipment..................................................................................... 69
Operating Conditions...................................................................................... 69
Storage....................................................................................................... 69
APPENDIX F:
Creating And Ripping a Job With PowerRip........................................................... 70
Introduction.................................................................................................. 70
Section 1 - Create and Rip an Image File with Create Job.......................................... 70
Section 2 – Ripping and Printing an Image File from CorelDRAW................................ 78
Section 3 – Ripping and Printing an Image File from Adobe Photoshop......................... 82
Section 4 – Automatic Layer Types, Ink Density and Choking..................................... 86
Choke Values and Fine Traces........................................................................... 86
Section 5 – Exporting a White Mask for Editing...................................................... 88
WARRANTY AND TECHNICAL SUPPORT
Standard Warranty......................................................................................... 91
Depot service................................................................................................ 91
Sawgrass Technologies, Inc. ~ DirectAdvantage ® ~ AdvantageQueue ® ~ NaturaLink ® ~ User’s Guide
NOTES:
Sawgrass Technologies, Inc. ~ www.sawgrassink.com
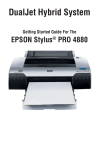
Introduction
The DirectAdvantage® (DA) direct-to-cotton and digital garment printer, fueled by
NaturaLink® – a solution that meets the demand for a high quality direct-to-cotton
system. The DirectAdvantage® printer is fueled by Sawgrass-patented NaturaLink®
inks, using eight-color piezo heads to print customized images onto a wide range of
garments, including 100 percent cotton and 50/50 blends. The system is driven by
Sawgrass’ industry-tested software, designed to achieve brilliant color output and image
quality.
There has never been a better time to tap into the short–run, high profit business of
direct-to-cotton and digital garment printing. As your total solution provider, Sawgrass
Technologies has developed a complete digital garment and direct-to-cotton printing
solution to complement traditional screen-printing.
DirectAdvantage® Printer Fueled by NaturaLink®
Advantages
Streamlined process
Cost-effective for short-run, multi-colored orders.
High resolution image output
Print photographic quality images directly onto cotton and cotton garments.
Clean technology
NaturaLink ® direct-to-cotton inks are water-based and environmentally
friendly.
Printer mobility
The DirectAdvantage’s durable craftsmanship and quality construction allows
you to take your business to your customers.
Adjustable platen for flexible garment printing
Print on a wide variety of fabric thicknesses, from T-shirts to sweatshirts.
NaturaLink ® chemistry
Colors actually start bright, chemically bond to the fabric, and stay bright.
Sawgrass service after the sale
Sawgrass has a comprehensive support program dedicated to taking care
of you and your business.
For additional information on the DirectAdvantage® Printer, NaturaLink ® inks, or
our other products, visit our web site at www.sawgrassink.com.
Sawgrass Technologies, Inc. ~ DirectAdvantage ® ~ AdvantageQueue ® ~ NaturaLink ® ~ User’s Guide
About this Document
This document contains descriptions and procedures for using the DirectAdvantage®
Printer and NaturaLink® Inks. The information includes details for setting up your
printer and for how to obtain the best results from use of this system. The documentation
provided pertains only to the use of your DirectAdvantage® Printer and NaturaLink®.
To help point out important information, specific instructions, and helpful tips, look for
the following symbols:
Sawgrass Technologies, Inc. ~ www.sawgrassink.com
Printer Overview
The instructions and information included in this manual will assist you in effectively
operating this machine.
The machine and inks must be stored and operated in a temperature-controlled room,
free from excessive temperature variations (under 50° F and over 75° F), and free from
dust and vibrations, which may jeopardize the functionality of the machine.
It is critical before operating this machine and after changing garment materials that you
carefully check the print head height. Any touching or scraping of any surface including
the jig will damage the print head, and its repair or replacement will not be covered by
warranty.
USE ONLY SAWGRASS SUPPLIED INKS! THE USE OF OTHER INKS WILL DAMAGE THE
PRINTER, AND SAWGRASS WILL NOT BE LIABLE FOR ANY DAMAGES INCURRED, OR
PRODUCTION LOST.
Sawgrass Technologies, Inc. ~ DirectAdvantage ® ~ AdvantageQueue ® ~ NaturaLink ® ~ User’s Guide
Printer Overview
Note: For more detailed instructions, please refer to the Video
Installation Guide on the CD sent with your printer.
When your printer arrives, check for any visible damage to box or packaging. Check the
shockwatch on the outside of the box to see if printer has been dropped. White means
that the shockwatch has not been dropped, and red means it has been dropped. Also,
check the shockwatch on the inside of the box located on the top of the printer.
Shockwatch White – Okay to Proceed
Shockwatch Red – Contact Sawgrass
If there is any damage to the printer packaging or it has been
dropped, please notify the shipping company’s delivery driver
before he or she leaves your facility. Immediately contact
Sawgrass Technologies.
1. If there are no damages, cut the packing straps, remove the jig box from the top, and
set aside the box top.
Be careful not to drop the box top and set shockwatch
to red while uncrating your DirectADVANTAGE Printer.
Remember to save all packing materials for your printer including the
palette, box top and all other packing materials. This is critical for
future service or shipping requirements.
Sawgrass Technologies, Inc. ~ www.sawgrassink.com
2. Place three styrofoam packing blocks aside with box top.
3. Remove printer from bag and place on
sturdy table rated to hold up to at least
150 pounds (68 kg).
Check shockwatch on
top of the printer to
see if printer has been
dropped.
4. On top of the printer platen,
you should find a package
with the USB cord, a power cord,
and a foot pedal with a connector
cord. Set these aside.
5. Open the other package that contains
the LCD screen.
6. Remove the setscrew from the LCD
bracket using a medium
Phillipshead screwdriver.
size
7. Attach the LCD to the printer by sliding
it onto the bracket attached to the
printer.
8. Reinsert the setscrew and tighten
with a medium size Phillips-head
screwdriver.
Sawgrass Technologies, Inc. ~ DirectAdvantage ® ~ AdvantageQueue ® ~ NaturaLink ® ~ User’s Guide
9. Remove t he ligh t b ar fr om i t s
packaging.
10. Located on the side of the printer
are the mounting screws for the
status light. Loosen and remove
these screws with a 4-millimeter hex
wrench.
11. Mount the light bar and tighten
10
screws. Use the Velcro strap to
stabilize the mid section of the light
bar.
Sawgrass Technologies, Inc. ~ www.sawgrassink.com
12. On the back of the machine, plug in the power cord, plug in the USB cord into the
USB port marked “Main”, plug in the connector for the foot pedal, and screw
fastener tight.
DO NOT connect the Direct Advantage USB cable
to your computer until instructed to do so.
13. Open the cover on top of the printer.
Remove the print head lock by
loosening and removing the
thumbscrews. Do not discard the
headlock. Keep it with other packaging
materials.
14. Pull the green unlock tab to release
the print head.
Sawgrass Technologies, Inc. ~ DirectAdvantage ® ~ AdvantageQueue ® ~ NaturaLink ® ~ User’s Guide
11
PRINTING OPERATIONS
Starting the Machine
In case of frequent power
surges or outages, use a UPS
(uninterruptible power supply)
1. Plug the DirectAdvantage ® printer into a standard grounded wall outlet.
2. Pull the red “Emergency Stop” button out. On the back of the printer, press the
green power button to the “ON” position to power up the printer. The power
switch will light up green, and after a few seconds, the light bar will flash.
3. On the “DirectAdvantage” Control Panel at the
front of the printer, press the “ONLINE” Button (see
Illustration at right).
The smaller LCD screen above the
“Printer Control Panel” on the
printing unit will now read “Set Ink
Cartridges” to indicate the printer
is ready for you to install the ink.
12
Sawgrass Technologies, Inc. ~ www.sawgrassink.com
Ink Loading
1. Press the ink compartment cover to release the latch and open the cover.
2. Raise the ink levers to the unlocked position. The ink
levers are located to the right of each ink compartment.
CMYK and White Ink Cartridges installed
3. Remove the ink cartridges from their packaging. Starting from the left side of the
printer, install the cartridges in their proper position. Each cartridge has a number on
it that corresponds to a numbered slot on the printer (see images above). This is
where you need to insert them. (If you are installing white ink, these cartridges go in
slots 5 – 8).
Sawgrass Technologies, Inc. ~ DirectAdvantage ® ~ AdvantageQueue ® ~ NaturaLink ® ~ User’s Guide
13
Dual CMYK Cartridges installed
If a cartridge does not insert smoothly into its slot, double-check to
make sure you have the correct cartridge installed in the correct
slot. If the ink light (small red LED) remains on after installing the
cartridge, remove the cartridge and reinsert it to ensure it was fully
placed in the slot.
4. Watch the small LCD screen and follow the printer instructions, such as placing
ink levers in the up and down position. Once the cartridges are installed, the
printer will return to its READY state.
5. Close the ink compartment covers.
The printer and ink installation are now complete. The next section of the
manual will outline how to install the software necessary for printing.
14
Sawgrass Technologies, Inc. ~ www.sawgrassink.com
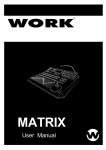
PowerRIP for NaturaLink
TM
®
P ost S cript C ompatible R I P
Optimized For The
and direct advantage (white)
Suite 2.1
And featuring:
For Distribution Only
NOT FOR RESALE
Revision 2.1
Sawgrass Technologies, Inc. ~ DirectAdvantage ® ~ AdvantageQueue ® ~ NaturaLink ® ~ User’s Guide
15
THE ADVANTAGEQUEUE AND POWERRIP DA SOFTWARE
Introduction
Obtaining the benefits of the PowerRIP DirectAdvantage (DA) and AdvantageQueue’s
color management is incredibly easy. Simply print from your design application by
choosing the PowerRIP printer entity from the drop-down menu, select your printing
options and click Print. Your files will route through the AdvantageQueue as you
watch how the Queue magically makes the DirectAdvantage® colors picture-perfect!
The PowerRIP DA and AdvantageQueue deliver both convenience and the highest quality
color management technology. The innovation demonstrated is the result of our dedication
to you, our customers. At Sawgrass Technologies, we are focused on delivering the highest
quality digital printing technology available. We fully expect that you will be impressed by the
results you obtain with the DirectAdvantage® printer and the PowerRIP DA/AdvantageQueue.
The PowerRIP DA/AdvantageQueue combination runs under Windows 2000, Windows XP and Windows Vista.
System Requirements
Minimum Hardware:
Recommended Hardware:
16
Pentium 4 – 2.5GHz Processor
1 GB System Memory
80 GB Hard Drive
USB 2.0
Pentium 4 – 3.0GHz Processor
2 GB System Memory
80 GB Hard Drive
USB 2.0
Sawgrass Technologies, Inc. ~ www.sawgrassink.com
SETUP INSTRUCTIONS – WINDOWS 2000 AND XP
Product Overview
This installation program will install the Sawgrass AdvantageQueue and printer software
and ColorSure Tools and Utilities. In a few instances, the version numbers shown on the
screen illustrations will differ from those on your system, as most of these images were
captured during the final testing (beta) stages of the programs. The dialog, however,
will be accurate.
Step-by-Step Installation
Before beginning, please make sure that the only USB device connected
to your computer is the DirectAdvantage printer. All other
USB devices, with the exception of the mouse and the keyboard,
should be disconnected at this time! You may reconnect them after
this installation.
1. Navigate to the Direct Advantage CD-ROM in your operating system. Double-click on
the DirectAdvantage ® Setup 2.xx.x.x icon (where x represents the latest software
Revision, 2.10.0.0 at the time of this writing) to run the Setup.exe program and
begin the software installation. The following screen will appear:
2. Click Next to proceed. A “Welcome” screen will pop up.
Sawgrass Technologies, Inc. ~ DirectAdvantage ® ~ AdvantageQueue ® ~ NaturaLink ® ~ User’s Guide
17
3. Click Next to advance to the license-agreement screen.
4. Click on the radio button beside Accept License Agreement and then click Next.
18
This will take you to the first of the two registration screens as follows:
Sawgrass Technologies, Inc. ~ www.sawgrassink.com
5. Click on Register Now. The following window will open:
6. Follow one of the registration procedures outlined in this screen—on-line, by
phone or by fax—and obtain the applicable Registration Code. Enter this registration code in the block provided on this screen, then click on Apply Code.
Your registration is now complete, and the following window will open:
Sawgrass Technologies, Inc. ~ DirectAdvantage ® ~ AdvantageQueue ® ~ NaturaLink ® ~ User’s Guide
19
7. The system will detect compatible graphics applications, such as CorelDRAW and Adobe Photoshop, that are installed in your system, and will suggest a destination folder for the program files you are about to install. Click on Next to proceed.
8. A screen will open up temporarily as files are being loaded. A subsequent screen
20
will then instruct you to make sure that the DirectAdvantage printer is powered up
and connected to the computer by way of a USB cable. Please verify that the
DirectAvantage printer is connected to your computer, and that no other USB devices
(except the mouse and the keyboard) are connected to the computer. Click on Next
to proceed.
Sawgrass Technologies, Inc. ~ www.sawgrassink.com
9. The system will warn you that this software “has not passed Windows Logo testing...”
You may safely disregard this warning and click on Continue Anyway to proceed.
10. A copying files… window will open up temporarily as files are being copied,
followed by a window advising you that the Direct Advantage printer queue will be
installed next. Click on Next to proceed.
11. Once again, the system warns you that this software “has not passed Windows Logo
testing...” You may disregard this warning and click on Continue Anyway to proceed.
21
®
®
®
Sawgrass Technologies, Inc. ~ DirectAdvantage ~ AdvantageQueue ~ NaturaLink ~ User’s Guide
12. The system will begin copying the necessary files, after which the following window
will open:
13. Click on Continue to proceed (but keep in mind that, when you are ready to
print from the DirectAdvantage Queue, you must disable color management in
your application—CorelDRAW, Photoshop, or other). The following window will open:
14. Click on Next to begin Installation of the DA Queue. The following warning will be
22
displayed:
Sawgrass Technologies, Inc. ~ www.sawgrassink.com
15. As before, you can safely ignore this warning and click on Continue Anyway to proceed
with the DA Queue installation. A “copying files…” window will open up temporarily
as files are being copied, followed by a window advising you that the DA Queue setup
will begin.
16. Click OK to begin installation of the Advantage Queue application. The following
window will open (your version will be final, and not beta, so the number will be
different):
17. Click on Next to proceed. Now the system will ask you what type of DirectAdvantage
are you installing—Double Color or CMYK with white ink.
Sawgrass Technologies, Inc. ~ DirectAdvantage ® ~ AdvantageQueue ® ~ NaturaLink ® ~ User’s Guide
23
18. Click on the radio button to select the option appropriate to your situation. Click on
the Color Only radio button if yours is a dual CMYK printer. Otherwise, click on Color
with White Ink (the example above shows Color with White Ink (4 x 110 mL + 4 x 220 mL)).
Click Next to go on to the next window, which will enable you to select the file
folder where the Queue program will be installed.
19. Accept the default folder listed (unless you prefer some other location youcreated)
and click Next to advance to the next screen and confirm the installation.
20. Click Next to begin program installation. A window titled Installing AdvantageQueue
24
Application 2.xx.x.x will open, and you will see the installation progress bar.
Sawgrass Technologies, Inc. ~ www.sawgrassink.com
21. When the installation completes successfully, you will be presented with the
following screen:
22. Click on Close to conclude the installation. You will see the following, and final,
screen:
23. Click OK to exit the installation and close the application. Your new Advantage Queue
is now ready for use.
Sawgrass Technologies, Inc. ~ DirectAdvantage ® ~ AdvantageQueue ® ~ NaturaLink ® ~ User’s Guide
25
NOTES:
26
Sawgrass Technologies, Inc. ~ www.sawgrassink.com
INSTALLING THE POWERRIP DA SOFTWARE
The PowerRIP DA contains color management software. It is designed to work with
the DirectAdvantage ® printer and Sawgrass NaturaLink ® inks in order to optimize
your color output. Follow these instructions to install this software on your computer.
1. Insert the PowerRIP DA CD into your computer CD drive. Select Open folder
to view files using Windows Explorer (see illustration below left) and doubleclick on the PowerRIPDAW_CD_FCxx application file, where ‘xx’ is the version
build of your program. A WinZip Self-Extractor window will open up and display
the folder to which the PowerRIP files will be extracted (see illustration below right).
2. Click on Browse in the WinZip Extractor window and select ‘C:’ as the destination
drive for the PowerRIP program folder, which will be C:\PowerRIPDA_CD. Otherwise,
the program will attempt to create this folder on the CD drive itself and result in an error.
3. Leave the check boxes labeled, “Overwrite files…” and “When done unzipping open…”
checked and click on Unzip to unzip the files and begin the program installation wizard.
Sawgrass Technologies, Inc. ~ DirectAdvantage ® ~ AdvantageQueue ® ~ NaturaLink ® ~ User’s Guide
27
4. On the Installation Options window that opens up, select Install/Remove/Repair
PowerRIP DA (see illustration below).
5. On the next window--the PowerRIP Direct Advantage Set-up window—select Next.
6. Click on Yes on the next screen to accept the license agreement.
28
Sawgrass Technologies, Inc. ~ www.sawgrassink.com
7. Fill in the customer information (User Name, Company Name) in the fields provided
on the next screen. You may leave the default EVALUATION value on the Serial
Number field. You will be entering the required, appropriate information during
program registration. Then click on Next to advance to the next screen
(Select Printer Drivers).
8. On the Select Printer Drivers screen, leave all of the selections checked,
unless you have reasons no to install specific drivers, in which case you
uncheck the drivers you do not want installed (see illustration below). It is
best to leave ALL of the options checked, as this list contains not only the printer
driver files but also the executable program and support files! Then click Next.
Sawgrass Technologies, Inc. ~ DirectAdvantage ® ~ AdvantageQueue ® ~ NaturaLink ® ~ User’s Guide
29
9. On the Select Program Folder window, accept the default folder, which is
PowerRIP Direct Advantage, and which the program will create, and then click on Next.
The program begins the installation as denoted by the progress bar.
(See illustration below.)
10. On the Select Print Queues to Create window, you will see four drivers highlighted—
30
DirectAdvantage w/White Ink; DirectAdvantage Double Color; PowerRIP PDF;
PowerRIP TIFF. Leave all four choices highlighted and click on Continue to
advance to the next screen.
Sawgrass Technologies, Inc. ~ www.sawgrassink.com
11. As the queues are being installed, the program will notify you of the completion
of each individual installation. Click OK on each of these four windows to
advance to the next stage. Also, if a driver already exists in your system, the
program will detect it and ask if you want to update it (see illustration page 30).
Click Yes.
12. When the installation is complete, the system will ask you if you want to restart
the computer. Select Yes, I want to restart my computer now and then click on
Finish.
13. After a full restart of the computer, be sure to print the User’s Guide by
following this step sequence from the Windows Start menu: Start>All Programs
>PowerRIP DirectAdvantage>Documentation>PowerRIP DA Manual.
14. You must now validate your software package in order to eliminate the watermark
that will otherwise appear on all of your prints. To validate the software you just
installed, run the PowerRIP program (double-click on the PowerRIP icon on your
desktop), click on the Configure menu, and select Validate Software.
(See illustration below.)
Sawgrass Technologies, Inc. ~ DirectAdvantage ® ~ AdvantageQueue ® ~ NaturaLink ® ~ User’s Guide
31
15. A PowerRIP Validation window will open up (see illustration above). Consult
your PowerRIP Direct Advantage User’s Guide and follow the steps located on
the section titled “Validating PowerRIP Direct Advantage” to validate your software.
IT IS STRONGLY RECOMMENDED THAT YOU READ THE ENTIRE
PowerRIP DA USER’S GUIDE BEFORE PROCEEDING TO THE
PRINTING PROCEDURES THAT FOLLOW.
Appendix F describes common techniques for obtaining the
best results when using PowerRIP. For full instructionson how
to use the AdvantageQueue, please refer to the pertinent section
on this Guide.
32
Sawgrass Technologies, Inc. ~ www.sawgrassink.com
PRINTING PROCEDURES
Install the shirt jig on the platen by sliding
it onto the track and pushing it forward
(i.e., toward the rear of the printer) until
it clicks.
NOTE: Some jig models are already
secured in place to the bottom driving
plate and are thus not moveable.
1. To load a shirt, press LOAD on the
front panel to bring the shirt jig
forward, towards you, and remove
the hoop. If the front panel is locked,
press the UP and DOWN buttons
simultaneously to unlock the panel,
then press LOAD.
2. Dress the garment into the jig such
that the printing side is flat
and evenly spread on the jig.
The collar, or the top, of the garment
should be at the outside end of the
jig.
3. Place the hoop over the garment so
that it fits tightly against the base.
When placing the hoop, make sure that
the thinner side of the white L-shaped
bezel is at the front (closest to you),
and the wider side of the bezel is
to your right. Ensure also that the
garment is pulled tight to avoid
wrinkles that could interfere with the
print head and, as a result, stain your
garment and/or even damage the
print head.
4. Tuck any sleeves or excess fabric under the base so that the fabric does not get
caught as it passes through the printer.
5. Once the shirt is loaded, slide the jig back onto the platen (if your jig is one of the
moveable types).
With moveable jigs, failure to slide the jig back onto the platten will
result in your image printing lower than expected on your garment,
or cause a media detection error.
Sawgrass Technologies, Inc. ~ DirectAdvantage ® ~ AdvantageQueue ® ~ NaturaLink ® ~ User’s Guide
33
6. Press the AUTO button on the front panel of the printer to set the printer to the
optimum height for the shirt that is loaded in the machine. The jig will move back
towards the middle, and the auto-height operation will get under way. Autoheight is finished when the printer stops moving up and down. At this point, the jig
will briefly advance forward and then move back to the ready-to-print position at the
rear of the chassis. As the jig is moving, the yellow status light on the machine will flash.
Failure to press the AUTO button will result in incorrect
positioning of the print head, causing light prints or head
strikes.
7. The printer will enter Alignment Mode (for 25 - 30 seconds), after
which the status light will turn GREEN signaling that the printer is
ready to receive a print job.
8. Send the print job to the printer via the PowerRIP DA and the
AdvantageQueue. For instructions on the settings to use for
printing, consult the PowerRIP DA Manual. As the printer is printing, the
status light will flash GREEN until the image is completely printed.
9. Once printing is finished, the jig will automatically move forward so that
you can check the printed results and remove the garment.
The status light will flash YELLOW indicating the job is completed.
10. Wait for the jig to come to a complete stop and remove the hoop.
11. Carefully remove the garment without touching the image, since it
will still be wet from printing.
12. Heat-press the garment according to the following specifications:
White ink: 340º F (171º C) @ 10 - 12 psi (69 - 83 kPa) for 140 Seconds.
Dual CMYK: 375º F (191º C) @ 40 psi (276 kPa) for 25 Seconds.
Place a fresh sheet of parchment (>10% siliconeimpregnated) paper over the garment to prevent ink
transfer onto the heat platen.
In the event of light prints or head strikes on the printed
garment, the print head height can be manually adjusted
to eliminate this issue. See the section on the next page
titled, “Adjusting the print head.”
13. Put a new garment on the holder and repeat from Step 3.
34
If multiple copies of a job were sent to the printer, the LCD
screen will display the number of copies printed, and the
printer will continue with that job until all copies are
completed.
Sawgrass Technologies, Inc. ~ www.sawgrassink.com
Lay your dark cotton T-shirt on a work surface and smooth all wrinkles. The work surface
to use for this procedure can be the platen on your heat press--a practical and timesaving solution--a job-preparation table, or even the DirectAdvantage platten.
1. Lightly apply the pre-treatment solution to the shirt using the roller
provided. Make sure that the print area becomes visibly damp, but not
overly saturated. As long as total coverage is achieved, less pre-treatment
is better for wash fastness and color vibrancy than too much pre-treatment.
NOTE: The pretreatment is a water-based, low-viscosity solution, which is
quickly absorbed by the garment, sometimes seeping through to the
work surface underneath it. To prevent contamination of the work surface,
you can either place a waterproof sheet of silicone between the garment and
the work surface, or use a damp cloth to wipe the pretreatment off the
surface afterwards.
2. While the garment is on the work surface, roll pretreatment onto the print area of
the shirt as follows:
a. Using light, top-to-bottom strokes in one direction only, begin applying parallel
b. Once the print area is covered, straighten out any wrinkles in the garment that
layers of pre-treatment from left to right, or vice-versa.
may have developed during the pre-treatment process, and touch up any
noticeable spots on the shirt to make sure that there are no voids
(i.e., untreated spots).
3. When you finish pre-treating the garment, place it on the heat press (unless you
have already pre-treated it there), place a sheet of parchment paper,
containing at least 10% silicone, over the garment, set the press temperature
to 340º F, and dry the garment for 45 seconds at a low pressure (10 - 12 psi).
NOTE: For uninterrupted printing and curing of jobs, you can apply pretreatment
and dry a number of garments beforehand, so they will be ready to
print when you need to expedite production. If you batch-process shirts
and leave them in storage for later use, it is recommended that you press
the shirts at 340º F for 5 – 10 seconds before printing.
Pre-pressing the shirts will:
Matte down any shirt fibers that have lifted over time.
Smooth out wrings that have formed.
Eliminate image printing variability.
Improve wash fastness.
Sawgrass Technologies, Inc. ~ DirectAdvantage ® ~ AdvantageQueue ® ~ NaturaLink ® ~ User’s Guide
35
Adjusting the print head
The auto-adjust feature on the printer allows for automatically adjusting of the height of
the print head with the garment in the jig. There might be times, however, when a manual
adjustment is necessary to compensate for such things as pockets and raised collars.
To manually adjust the space between the garment and the print head, proceed as
follows:
1. Load the shirt onto the jig as shown in steps 1-6 in the printing procedures.
2. Manually move the printer by using the
UP or DOWN buttons on the front panel
(highlighted on the image at right).
3. Use the UP button to raise the printer
and put more space between the garment
and the print head.
NOTE:Moving the print head too
far away from the garment
will cause light prints and
ink over-spray.
4. Use the DOWN button to lower the printer
and put less space between the garment
and the print head.
NOTE:Moving the print head too close to the garment will cause head
strikes and could damage your printer or require printhead
replacement.
Unlocking the Control Panel
When printing requires more than one pass,
such as when printing with white ink where the
white layer is printed first, followed by the color
layer, the printer is set to operate in precision
mode. In this mode, the Epson printer is set to
roll and cut mode, and the paper margin is set
to 3 mm, which is denoted on the LCD by an open/closed parenthesis symbol (see image
above). In precision mode, the DA control (front) panel locks automatically during printing
to prevent accidental operator interference that could result in mis-registered or otherwise
damaged prints. When you must perform maintenance or other critical functions, you
can unlock the control panel by way of a reset operation or from the AdvantageQueue.
36
Sawgrass Technologies, Inc. ~ www.sawgrassink.com
Perform a reset operation by pressing the UP and DOWN buttons on the control panel
simultaneously. From the Queue, right-click on the printer name and then click on Unlock
Panel (see illustration below) to unlock the panel.
Sawgrass Technologies, Inc. ~ DirectAdvantage ® ~ AdvantageQueue ® ~ NaturaLink ® ~ User’s Guide
37
NOTES:
38
Sawgrass Technologies, Inc. ~ www.sawgrassink.com
THE ADVANTAGEQUEUE APPLICATION
If you are printing through the PowerRIP DA software, such as when you are printing with
white ink, the AdvantageQueue settings are controlled by PowerRIP. If you are printing
solely on white garments, you can print your image directly from your computer to your
garment with ease, thanks to the DirectAdvantage ® Software Suite. An important
component of this package is the AdvantageQueue, which provides for increased
manageability of each individual print job, while fully exploiting the capabilities
of the DirectAdvantage ® Printer.
Step-by-step printing with the AdvantageQueue
1. Print from your preferred design application (the example below is from CorelDRAW)
and select the AdvantageQueue from your list of available printers.
2. Select Properties in the “AdvantageQueue Document Properties” window
and choose your desired print settings (See the “The AdvantageQueue Properties”
section, beginning on page 43, for details on the various print settings).
3. Click OK, and then click Print.
4. Your system is now spooling your job to the AdvantageQueue application.
Depending on job file size and your system resources, this may take
anywhere from one to five minutes or longer.
5. Open the DirectAdvantage Queue
program under the DirectAdvantage
folder in the Windows Start > All
Programs > Direct Advantage menu.
6. In the Job View Area under Job Name, you will see the filename of the job you just
spooled.
Sawgrass Technologies, Inc. ~ DirectAdvantage ® ~ AdvantageQueue ® ~ NaturaLink ® ~ User’s Guide
39
Main AdvantageQueue Window: (Enlargements for Clarity)
15
16
1.
2.
3.
4.
5.
6.
7.
Change:To large icon view
Change:To detailed view
Refresh:The job view and update the job information
Delete: Selected job(s)
About: Information about the program version and build
Job Name: Name of the job file
Total Copies Printed: The total number of times that particular job has been sent
to the printer since the job has been created.
8. Job Status: Creating – File is being created in the queue.
Ready – File has been created and it is ready to be sent to the printer.
9. Job Type: The type of job in the queue - a DA Queue job or a PowerRIP DA job
10. File Size: The size of the created job file
11. File Location: The actual file location of the job
12. Printer Name: Lists the different DirectAdvantage® printers available to print,
as well as the Auto Queue (if more than one printer are
installed)
13. Printer Status: Displays the current condition of each printer
14. Job Count: The number of jobs in the printer’s job view area
15. Job View Area: The upper area of the window that lies above the Printer Name/
Printer Status/Job Count divider and where all the jobs are
listed.
16. Printer View Area: The lower area of the window that lies below the Printer
Name/Printer Status/Job Count divider and where all the
printers are listed.
40
Sawgrass Technologies, Inc. ~ www.sawgrassink.com
7. Under the Job Status column, you will see the job status change from Creating to
Ready. This signals your job is ready to be sent to the printer.
8. Print the job following one of the methods outlined next.
NOTE: If you accidentally hit or bump the jig, the LCD
screen will read, Wait for printer to display “Ready”
- then press LOAD. Press LOAD and wait for the jig
to move forward (towards you), then press LOAD
again to move the jig back to the ready-to-print
position at the rear of the chassis.
Printing to One Printer
1. Right-click on the job file and select Send to> to send it to the desired printer, or
simply drag the job file down into the desired printer listed in the Printer View Area.
2. Enter the number of copies of the selected job you want to send to the
printer.
Since you are sending the job to only one printer, multiple
copies will be queued up and printed sequentially to that specific printer only.
Printing to Multiple Printers
1. Right-click on one of the printers listed by the Auto Queue* selection in the
Printer View area, and select Properties to open the Printer Properties window.
Under the General tab, check the box labeled Accept AutoQueue Jobs and click
OK. (This only needs to be done once. These settings will be retained henceforth.)
2. Next, right-click on the job file and send it to the AutoQueue, or simply drag the job
file down into the AutoQueue located in the Printer View Area.
3. Enter the number of copies of the selected job you want to send to the AutoQueue. The AutoQueue will now recognize how many DirectAdvantage® printers you have
authorized to accept AutoQueue jobs. It will then assign the print jobs to any
authorized printer that is in the Ready status until all printed copies are complete.
*NOTE: The option AutoQueue will not be displayed, unless you have more than one DirectAdvantage
printer active on your system.
Sawgrass Technologies, Inc. ~ DirectAdvantage ® ~ AdvantageQueue ® ~ NaturaLink ® ~ User’s Guide
41
4. To split the job between multiple
printers, select Options under the
Tools menu and click on the Printer
Options tab. Check the Split multicopy jobs option and click OK.
The job is now being printed. You can double-click on the Printer Name to which the
job was sent and see more details in the printer queue (see the following window):
1.
Job Name: Name of the job file.
2.
Copies: Number of total copies to be printed.
3.
Copies Printed: Number of copies that have been sent to the printer.
4. Job Status:
Ready
Printing Spooled Paused Error The printer is ready to print the selected job
The printer is currently printing that specific job
All copies have been printed
The job will be ignored when the queue searches for jobs to print
Error printing the job
NOTE: You may always increase the desired copy count by double-
clicking onthe specific job from within the printer window.
This will bring up the Job Properties window, where you
may enter your new preferred amount of copies to be
printed.
5. Image Cost: This number is the estimated cost of ink to be consumed for this particular
image. It displays the estimated cost for each print and the cost for the total
copies to be printed.
42
6.
File Location: This is where job file is stored.
Sawgrass Technologies, Inc. ~ www.sawgrassink.com
Printer Properties
To access these options, right-click on the desired printer in the Printer View Area and
select Properties.
The General tab in the Printer Properties window displays general details regarding
the selected printer. This is also where you authorize the use of the printer to handle
AutoQueue jobs.
The Control Tab is where the communications (COM) port for the printer will be
selected during installation. The Printer Commands window displays several
commands that allow the user to control the mechanics of the printer from a desktop
setting.
NOTE: Do Not Use The Auto Height Adjustment Feature,
Unless Instructed By Technical Support.
Sawgrass Technologies, Inc. ~ DirectAdvantage ® ~ AdvantageQueue ® ~ NaturaLink ® ~ User’s Guide
43
In the Cost Estimation tab, you will enter the size of ink cartridges in use (110 or 220
ml) on the left, and the amount paid for each individual cartridge on the right.
Tools/Options
This menu (Tools) and submenu (Options) set enables you to adjust refresh rates, autoqueue jobs, split multi-copy jobs and establish a default number of copies.
In the Job Options tab, you can adjust the refresh rates of Job list and Job monitor,
as well as auto-queue new jobs. The default settings are ideal for most system
configurations. If you wish to tweak these settings, do so in small increments.
The Printer Job Options tab allows you to change the printer job list refresh rate.
As mentioned earlier, the default setting is ideal for most system
configurations. If you wish to tweak these settings, do so in small increments.
44
Sawgrass Technologies, Inc. ~ www.sawgrassink.com
The Printer Options tab allows you to change the Printer status refresh
rate and the Spool available jobs rate, as well as split multi-copy jobs.
As mentioned earlier, the default settings are ideal for most system configurations.
If you wish to tweak these settings, do so in small increments.
Applications
T-shirts--both long and short sleeve--Sweatshirts and Terry towels.
Adjustable platen accommodates a range of product widths
Apparel Specifications
The printer currently works with white, pastel, and dark shirts, which represent
100% of the T-shirt market.
Works with 100% cotton and cotton blends.
ADVANTAGEQUEUE IN WINDOWS 2000 OR WINDOWS XP
NOTE: You can print directly to the AdvantageQueue when
printing on white shirts only.
Quick Start Example (using CorelDRAW)
1.
2.
3.
4.
Open/Create an image in CorelDRAW.
Select Print from the File menu.
Select the AdvantageQueue printer.
Use the Properties Button under the General Tab Options to access and set the Detail Level, Speed and Color Profile Selector options.
5. Click Print.
Sawgrass Technologies, Inc. ~ DirectAdvantage ® ~ AdvantageQueue ® ~ NaturaLink ® ~ User’s Guide
45
Setting the AdvantageQueue Printer Properties
To configure the AdvantageQueue for the correct settings, you must display its
printer properties. There are two ways to display the printer properties:
From the Windows XP Desktop
1. Click on Start > Printers & Faxes.
2. Right-click on your AdvantageQueue
printer driver.
3. Select Properties from the pop-up
menu.
4. Select the Printing Preferences
button.
From an Application
1. Select File > Print Setup.
2. Choose the AdvantageQueue from
the list of printers.
3. Click the Properties button.
46
Sawgrass Technologies, Inc. ~ www.sawgrassink.com
THE ADVANTAGEQUEUE PROPERTIES
The following figure shows the printer properties for the AdvantageQueue. The main
window tab displays the various color options.
Sawgrass Technologies, Inc. ~ DirectAdvantage ® ~ AdvantageQueue ® ~ NaturaLink ® ~ User’s Guide
47
Advantagequeue
Color Options
Overview
The Color Options tab in the Advantage Queue Properties window, which is accessible
through the Print command in your application (select AdvantageQueue as the
printer of choice), gives you access to all of the color management controls available
in AdvantageQueue. Color correction allows you to create apparel from all kinds of
images, from photorealistic images to spot color logos. For maximum flexibility, the
AdvantageQueue lets you color-correct bitmap and vector elements differently, even if
they are in the same graphics file. For example, if you scan a photograph and import
it into CorelDRAW, The AdvantageQueue will use the color management settings that
have been selected for Bitmap. If you then add text on top of the bitmap image, The
AdvantageQueue will use the color management settings that have been selected for
Vector. The photograph and the text will be color corrected differently! You can now
print images with realistic photographic backgrounds that have vivid spot color text.
Color Options
This tab provides access to a variety of color controls, including selected profiles and
palettes.
Vector and Bitmap Explanation
Bitmaps are a grid of pixels. Bitmaps come from digital cameras, scanners, and photo CDs.
Bitmaps can also be created in applications like Corel PhotoPaint or Adobe PhotoShop.
Bitmaps have file extensions like GIF, JPG, BMP, and TIF. Vector components consist of
shapes, curves, lines, and text. They are created in programs such as CorelDraw and Adobe
Illustrator. Higher end programs such as CorelDraw can combine vector and bitmap files
into a single image. As a rule of thumb, if the object in your image is made of curves, text,
shapes, or fills, it will be color-corrected using the AdvantageQueue Vector settings. All
other image types will be color-corrected based on the AdvantageQueue Bitmap setting.
Bitmap and Vector Color Profile Selector
Color Profiles: Off.. In some vector artwork, this setting, which bypasses color management,
will produce more accurate color reproduction, closely matching the
original artwork.
RGB......................... This setting will produce the most photo-realistic results for RGB
bitmap images, adding warmth to photo images. This setting will also
produce the most accurate colors for vector artwork.
CMYK...................... This setting will produce more vivid reds and blues on vector artwork.
Detail Level............ Normal — This high-speed setting prints at 360 dpi
Fine
— This high quality setting prints at 720 dpi
Speed...................... High Speed On/Off – This toggles the printer between unidirectional
48
printing and bi-directional printing. With the High Speed box
checked, the printer will print bi-directionally, almost twice
the speed as it would in the unchecked, unidirectional setting.
Sawgrass Technologies, Inc. ~ www.sawgrassink.com
ColorSure Palette
ColorSure Enhancement – Checking this box will enable this feature. ColorSure
enhancement is used to replace specific colors in your image with a
spot color chosen from the ColorSure palette. This resulting spot color
enhancement is not affected by color setting.
A ColorSure spot color
will ALWAYS print the same. See Appendix B for an overview of ColorSure.
Print Palette button – Prints the ColorSure palette. ColorSure is a method for
reproducing exact spot colors. The two main components are: 1) the printed
palette and 2) the CorelDRAW, Corel PhotoPaint, and Adobe swatches. For a complete
description on how to use ColorSure to obtain perfect spot colors, see appendix B.
Input Profile
Clicking on this tab, provides access to options that will enable you to specify an input
profile that the driver will use when color-correcting your image. If you are printing
scanned artwork and your scanner manufacturer provided ICC profiles for your
scanner model, select the profile here. In order to select a profile, IT MUST BE
INSTALLED ON YOUR MACHINE. To install a profile on your machine, right-click on
the profile file name and select “Install”.
About
Clicking on this tab, will display the version number of the AdvantageQueue, as
well as a link to the Sawgrass Technologies website. Click the Register
button for instructions on how to register the product. Registration must take
place within five days of the initial installation. Failure to register within the fiveday period will result in the loss of most of the AdvantageQueue functionality–
utilities such as color settings, head cleaning, and nozzle check, to name a few.
Sawgrass Technologies, Inc. ~ DirectAdvantage ® ~ AdvantageQueue ® ~ NaturaLink ® ~ User’s Guide
49
NOTES:
50
Sawgrass Technologies, Inc. ~ www.sawgrassink.com
APPENDIX A:
Defeating Application Color Management
The AdvantageQueue provides a complete color management solution for your
NaturaLink ® printing. It is extremely important that you turn off any color-matching
features associated with your design software. An explanation of how to disable
print-time color management in several popular design packages follows:
CorelDraw™ version X4
Create a new graphic.
From the main menu, choose Tools > Color Management. In the Color Management
window (see figure below), set the Style option to Color Management Off.
Sawgrass Technologies, Inc. ~ DirectAdvantage ® ~ AdvantageQueue ® ~ NaturaLink ® ~ User’s Guide
51
CorelDraw™ versions X3, 12, 11 and 10
Create a new graphic.
From the main menu, choose Tools > Color Management. In the Color Management
window (see figure above), set the Style option to Color Management Off.
CorelDRAW™ versions 9 and 8
Create a new graphic.
From the main menu, choose Tools > Color Management. The Color Management
dialog box is displayed. In the Color Management window (see figure above),
UNCHECK the Calibrate colors for display box.
52
Sawgrass Technologies, Inc. ~ www.sawgrassink.com
CorelDRAW ™ (version 7, 6, or 5)
Advantage Queue
Advantage Queue
If you are using version 5, 6, or 7 of CorelDRAW, ensure that you have the
Printer Color Profile check box unchecked. This setting is found in the lower
left of the Print dialog window. See figure above.
Sawgrass Technologies, Inc. ~ DirectAdvantage ® ~ AdvantageQueue ® ~ NaturaLink ® ~ User’s Guide
53
Adobe Photoshop CS4, CS3, CS2, CS, & Photoshop 7
Color Setup
From the main menu, choose Edit > Color Settings. On the Color Settings dialog
box, turn all Color Management Policies off. Turn off Profile Mismatches.
To Print
Always select File > Print with Preview. On the print dialog page, set the options
as described below:
a. Check Show More Options
b. Choose Color Management
c. Choose Document as Source Space
d. Choose Same as Source for Print Space
From the Color Management drop option list, make sure that Source is
set to “Document,” and Print Space is set to “Same as Source”.
54
Sawgrass Technologies, Inc. ~ www.sawgrassink.com
Adobe Photoshop™ 6
Color Setup
From the main menu, choose Edit > Color Settings. On the Color Settings
dialog box:
a. Set all Color Management Policies (RGB, CMYK, Gray) to Off
b. Uncheck Profile Mismatches
c. Uncheck Ask When Opening
Sawgrass Technologies, Inc. ~ DirectAdvantage ® ~ AdvantageQueue ® ~ NaturaLink ® ~ User’s Guide
55
To Print RGB Graphics
To Print CMYK Graphics
56
Choose File > Print, and set the options as illustrated above.
Choose File > Print, and set the options as illustrated above.
Sawgrass Technologies, Inc. ~ www.sawgrassink.com
APPENDIX B:
Using Colorsure™ & Custom Palette
Introduction
ColorSure is a method for reproducing exact spot colors. There are four main
componentsof the ColorSure System: 1) the printed palette; 2) Color Finder; 3)
Custom Palette; and 4) the CorelDRAW and Adobe application palettes/swatches.
1. ColorSure Palette: This is your main color palette and includes a wide
variety of 152 commonly used colors.
2. Color Finder: If a color you need is not on the ColorSure palette, the
Color Finder tool allows you to locate the exact custom color you are seeking.
3. Custom Palette: With the Custom Palette feature, you can add new custom
colors to the existing ColorSure Palette mentioned in step 1.
4. Application Palettes: You can add your Color Finder colors to an existing
application palette, or you can add multiple custom colors to
new, custom palette files (*.cpl, *.acl).
Printing the ColorSure Palette
The first thing you will want to do is to print your ColorSure palette to the shirt
you will be using. Most likely, you will have customers who desire precise colors.
Having your ColorSure palette available, allows customers to choose the color from
the palette that is the closest match to what they want, and this gives you a starting
point for finding the exact custom color that will match your customer’s needs.
TO PRINT THE COLORSURE PALETTE, FOLLOW THESE STEPS:
1.
Click Start and navigate to the Printers and Faxes folder. Right-click on your
Advantage Printer and select Printing Preferences from the menu. You
may also open the Advantage Printer from within an Adobe or CorelDRAW
program by going to File > Print, and choosing the Advantage Printer from
the pull-down menu. Click Properties to open the Advantage Printer Document
Properties.
2.
Select the color options, detail level (normal or fine) and the speed that you wish
to print the palette, and click the box Print Palette. (When using the slider in
Color Options to adjust the color intensity level of your bitmap or vector image
output, the higher you move the slider, the more intensive your output will be.)
You now have a visual representation of how the ColorSure palette colors will appear
on that particular substrate.
Sawgrass Technologies, Inc. ~ DirectAdvantage ® ~ AdvantageQueue ® ~ NaturaLink ® ~ User’s Guide
57
Designing Your Artwork
By picking colors from the ColorSure palette, you will be able to consistently
reproduce colors in a reliable manner. To assist you in designing your artwork,
AdvantageQueue installs three palettes: two for Adobe products and one for Corel
products. These colors match the palette that is printed from within
AdvantageQueue.
1. To open the ColorSure Palette in CorelDRAW 10, 11, and 12, choose Window >
Color Palettes > Open Palette. Select the file “ColorSure Palette Corel v5.”
2.
To open the ColorSure Palette in Illustrator, choose Window > Swatch Libraries
> Other Library. Navigate to the folder where this library was installed when you
installed the AdvantageQueue Driver (C:\ProgramFiles\Adobe\Adobe Illustrator
Presets\Color Swatches) and select Open. For easier access to the Palette file,
copy it from this [above] path to Illustrator10\Presets\Swatches, and the
palettes will show up in your pull-down list directly under the Swatch Libraries
menu. Other versions of Illustrator will have similar steps.
3. To open the ColorSure Palette in Adobe PhotoShop, choose the Swatches
Palette, click the option arrow on the palette, choose Replace Swatches
and pick the “ColorSure PDIQ v6 ” file.
HINT:
After you have the ColorSure palette loaded into
CorelDRAW or Adobe, move the cursor over each color. As the cursor hovers over each different color, the
ColorSure name is temporarily displayed in the area
directly below the cursor.
Using Color Finder
After printing the ColorSure Palette, you will see that you have an array of colors to work
with. There will be times, however, when the color you need is not included
in the ColorSure Palette. This is a common example of when you will launch the
AdvantageQueue Custom Palette Utility.
58
Sawgrass Technologies, Inc. ~ www.sawgrassink.com
The Custom Palette Utility is a small program that coincides with AdvantageQueue
to assist you in finding custom colors and making custom palettes.
Within the Custom Palette Utility is the Color Finder tool. This tool enables you
to start with a specific color (e. g., navy blue) and find similar colors in the same
family by adding or subtracting up to three colors (CMYK) called “Step Colors.”
For example, starting with navy blue with a CMYK value of 60, 60, 0, 40 and
choosing two step colors (e. g., cyan and magenta), would expand the original navy
blue in four directions (more cyan, less cyan, more magenta, and less magenta).
This expanded color chart is output directly to your DirectAdvantage® printer.
How to use Color Finder
1. First, open DirectAdvantage® Printing Preferences window as instructed
on the section titled, “Setting the AdvantageQueue Printer Properties.”
2. In the middle right of the window, click the Custom Palette Utility
button; this will open the Advantage Custom Palette Utility window.
3. Select the appropriate settings for Printer, Substrate, and Print Quality.
Then click the Start Color Chooser button and select your desired starting
color from the basic colors or from the color matrix. To use the color matrix,
click anywhere in the matrix window. You can use the slider at the right of the
matrix to adjust luminosity. Clicking ‘OK’ will automatically fill the CMYK
boxes with the corresponding values. If you do not wish to use Color Chooser,
you also have the option to manually enter the Start Color values in the CMYK boxes.
Custom Palette Utility
For advanced users, CMYK values can be determined by printing out a Custom Palette,
a procedure that is outlined in the next section.
59
®
®
®
Sawgrass Technologies, Inc. ~ DirectAdvantage ~ AdvantageQueue ~ NaturaLink ~ User’s Guide
Color Finder Palette with two Step Colors
4. You may alter the chosen start color’s CMYK value by selecting two or three Step
Colors. Using multiple step colors will present you with a greater range and variety
of colors from which to choose.
For instance, if you choose to modify your Start Color with two steps, then Step
Color 1 will change its values on the X (horizontal) axis, and Step Color 2 will
change its values on the Y (vertical) axis.
Color Finder Palette with three Step Colors
60
If you modify your Start Color with three steps, Step Color 1 will remain
the same.
However, Step Color 2 and Step Color 3 will form
an imaginary ‘X’, and their values will change on opposing diagonal Y-axes.
Sawgrass Technologies, Inc. ~ www.sawgrassink.com
5. Next, determine what Step Size you want to apply to the Color Finder palette. This is
simply a question of how much you want your Start Color to fluctuate. If your Start
Color is close the color you are looking for, use a low Step Size (i. e., 5 - 10). However,
if your start color is not close to what you are looking for, use a higher Step Size. You
can enter any Step Size value between 1 and 40.
As an example, let us say your Start Color is C:20, M:100, Y:150, K:0, and you select
Cyan and Magenta to be your Step Colors. You also enter a Step Size of 10. When
the “Print Similar Colors Chart” button is clicked, your Start Color will be in the middle
of the Similar Colors Chart, and from there, each color will vary the Cyan and Magenta
values by 10.
6. When you are finished selecting the Start Color, Step Colors, and the Step Size, click
on the Print Similar Colors Chart button. This will print your custom Similar Colors
Chart directly to the DirectAdvantage® Printer.
7. After printing the Color Chart, try to match your desired color to one that is on the
palette. If you find a suitable match, you are finished using the Color Finder tool.
Move on to Section V, The Custom Palette.
8. If you could not find an accurate match on the first printed Similar Colors Chart, do
not worry. Follow the easy steps below, and you will find a more suitable custom
color.
a) First, try to locate a new Start Color from the chart that is closer than the
original color.
b) Next, after finding a more suitable Start Color, write down that color’s CMYK
value. Here is how to obtain this value. There are numbers under each color
that are dependent upon which Step Colors you chose. For example, the
numbers might be C:70, M:120. Take note of these values. Then, at the
bottom left of the Color Finder palette, you will see a full set of CMYK values.
The new Start Color’s CMYK value would be C:70, M:120, and whatever the
YK values are from the full set.
c) Lastly, plug the CMYK values for the new Start Color into the boxes in Color
Finder, choose your Step Size, and click on Print Similar Colors once again.
Continue with steps a - c until you find your desired color.
Sawgrass Technologies, Inc. ~ DirectAdvantage ® ~ AdvantageQueue ® ~ NaturaLink ® ~ User’s Guide
61
The Custom Palette
Let us assume that you have found the exact color you need using the Color Finder
tool. What you will want to do next is apply these custom color values to either an
existing palette, or to create a new custom palette altogether. This allows you access
to this color again, should the same job arise.
How to Use the Custom Palette
1. First, you need to assign the CMYK values of the matched color from the Similar
Colors Chart to the Output Color CMYK fields in the Custom Palette section.
2. Give your new custom color a descriptive Name in its designated field (e.g., IBM
Blue).
3. Next, assign an RGB Input Color value. There are two methods for establishing
this value.
a) If you have the original file, sample the color that was matched in your
graphic design application with the eyedropper tool. This will give you the
RGB value of that color. Input this value into the RGB Input Color fields of
the Custom Palette section, and click ‘OK.’
b) If you do not have the original file, or the artwork has not yet been designed,
simply click on the Input Color Chooser button, and then click anywhere in
the color spectrum. Move the slider bar up or down to refine your color
choice, or click on the palette to the left to pick a color that closely resembles
the color that you are adding to the custom palette. Click ‘OK,’ and the RGB
Input Color values will be automatically entered. Please make note of these
RGB values for later use in your design applications.
4. Click the Add Color button. A window will pop up asking you whether you want
to add the color to the palette for all substrates, or just the current substrate.
Click ‘YES’ here, unless you have the same custom color saved on palettes for
other substrates. Another window will then ask you if you want to save the
custom color for all resolutions or just the current one. Click ‘YES’ here, unless
you have the same custom color saved on palettes for other resolutions.
5. Lastly, click the Save Palette button. When finished, simply exit out of the
window.
Note: The Import Palette and Export Palette buttons are convenient to
have in the event you need to transfer palettes to and from different
computers.
Adding Swatches to your Application Palette
62
It is possible to add your custom color(s) swatch to an application palette as well.
You will need to take note of the Input Color RGB value that you assigned in the
previous step in order to create the new swatch. Refer to your specific design
application software manual for instructions on this.
Sawgrass Technologies, Inc. ~ www.sawgrassink.com
APPENDIX C:
Tips for Successful Printing
Printer
Make sure the print head is adjusted properly, or striking will occur on the garment
if the garment is too high, and the image will look faded if the garment is too low.
If you are using precision mode, as you should when printing with white ink, make
sure the printer is set to roll paper and cut mode as indicated in the image below ( ).
If you are using a dual CMYK printer, be sure to cancel the cut and the 3 mm options,
the latter option denoted by the open-closed parenthesis symbol in the illustration ( ).
Printing
Make sure that the garment is placed flat on the jig, and all of the wrinkles are smoothed
out. Not smoothing out wrinkles, will result in white areas in the image, and head
strikes that can ruin a print head.
Be sure that the hoop fits tightly over the jig, with the larger white border to your right-as you face the printer--and the narrow white border nearest you (on dual CMYK
printers, the hoop may not have the white borders, so its orientation is not relevant).
Failure to slide the jig back onto the platen will result in your image printing lower on
your garment than expected.
DO NOT touch the final printed image, as it is not dry until heat-pressed.
In the Advanced section of the Print dialog for the Direct Advantage w/White Ink
Document Properties, make sure that the page size is set to 17” x 18.5”. For other
printing tips, refer to the PowerRIP DA Manual.
Curing the Image
To eliminate ink on the heat platen, make sure that a sheet of parchment paper,
containing at least 10% silicone, is used over the image when curing it.
Gently place the sheet of parchment paper over the image – DO NOT pat or rub the
sheet across the image, or the paper will smear the image.
Set the pressure on the heat press to light (10 - 12 psi, or 69 – 83 kPa) and cure the
image at 340° F (171° C) for 140 seconds, for white-ink-based images. If curing
CMYK (color only) images, set the pressure to medium (40 psi, or 276 kPa), the
temperature at 375° F (191° C), and the dwell time at 25 seconds.
Sawgrass Technologies, Inc. ~ DirectAdvantage ® ~ AdvantageQueue ® ~ NaturaLink ® ~ User’s Guide
63
APPENDIX D:
Troubleshooting Image Quality Issues
The colors in my printed image are incorrect
Ensure that you used the correct PowerRIP DA settings. Please see your PowerRIP
DA Manual.
Ensure that you heat-treated the item at the recommended time, temperature, and
pressure. For guidelines, see the section titled Printing Procedures.
Verify that all of the print heads and all of the nozzles are firing. Run the Nozzle Check
utility and clean the print heads as needed.
Before or after pressing, there are streaks of ink showing in non-printed
areas.
Verify that the print head is not touching the garment during printing. See the section
titled Printing Procedures.
Ensure that the wet image did not rub against the garment when removing the garment
from the printer or during pressing.
Ensure that you are using silicone-curing paper when pressing the garment. When
placing curing paper on the image for pressing, ensure that it is not smearing the
image.
My image looks good but it washes out
Ensure that you are heat-treating the item at the recommended time, temperature, and
pressure. If so, try pressing longer to ensure that the dyes are penetrating the fibers
sufficiently. For guidelines, see the section titled Printing Procedures.
Colors are light and splotchy, or the image looks blurred
Ensure that you are pressing the item with the proper time, temperature, and pressure.
For guidelines, see the section titled Printing Procedures.
Verify that your printer driver settings are correct. Please refer to your PowerRIP DA
Manual for additional information.
My image has gaps or bands present
Perform a Nozzle Check and ensure that all of the printer’s nozzles are firing properly.
If one or more of the nozzles fail to print, perform a print head cleaning (Clean Heads).
You can execute these functions from either the utility tab in the AdvantageQueue or
the Epson menu.
Make sure that the garment is placed flat on the holder, and that all wrinkles are
smoothed out prior to printing.
64
Sawgrass Technologies, Inc. ~ www.sawgrassink.com
APPENDIX E:
Printer Troubleshooting & Maintenance
Routine Maintenance
Following these simple steps daily, will help ensure that your printer lasts longer,
and you achieve optimal performance with little-to-no down time.
1. Maintain proper humidity and temperature conditions
For optimal printing, the relative humidity in the work place should be kept at
35%~60%, with a temperature around 73° F (22° C).
2. Use textile substrates appropriate for the application
Not all cotton substrates are the same. For better opacity with NaturaLink,
Sawgrass recommends 100% cotton Hanes Beefy T-shirts.
3. Clean the capping station and wiper blade
Take a foam swab moist with cleaning solution and clean around the capping
station and wiper blade daily to remove any ink build up that may be deposited
onto the print head. Removing ink build-up will help ensure smooth, uninterrupted
printing.
4. Clean the encoder strip
Moisten a swab with isopropyl alcohol or cleaning solution and gently wipe the
encoder strip to remove any ink residue. Please refer to the section in the
Preventive Maintenance CD for proper cleaning instructions.
5. Extended idling
If you are not going to use your Direct Advantage White printer for two weeks or
longer, it is recommended that you discharge the ink and fill the ink-delivery
system with cleaning solution. This will prevent the solid particles in the ink from
falling out of suspension and settle in the dampers or the print head, where
irreparable damaged may occur as a result. When you are ready to use your
printer again, be sure to discharge the cleaning solution and refill the system with
new ink. Sometimes, you might have to follow the initial ink refill with a power
cleaning to eliminate any traces of the cleaning solution.
Printing a Nozzle Check
Printing a nozzle check requires the use of
an 8 ½” x 11” (A4) sheet of white copy
paper on a jig. You can print a nozzle check
from the Epson printer control panel (method 1)
or from the Direct Advantage Queue (method 2).
Method 1
To print a nozzle check from the Epson control
panel when the Direct Advantage printer is in
precision mode, proceed as follows:
Sawgrass Technologies, Inc. ~ DirectAdvantage ® ~ AdvantageQueue ® ~ NaturaLink ® ~ User’s Guide
65
1. Press the LOAD button to move the jig to the ready-
to-print position at the rear and wait for the
alignment sequence to finish.
2.
Place an 8 ½”” x 11” (A4) or larger piece of white
paper on the jig so that the outside edge of the
paper hangs over the jig slightly (1/4 inch or less)
and aligns with the driving (bottom) plate.
3. If you open the top cover of the printer and look
down to the paper, the paper should be in the
position shown in the illustration at right.
NOTE: This view is from the front of the
printer, looking down into the head area.
Because the jig is already in position to print, you will find it easier to feed the
paper from the front. Make sure that the paper is straight and does not touch
the printhead.
NOTE:
If your Direct Advantage printer is operating in non-precision
mode, you should load the paper while the jig is at the load
position (up front), since there is no alignment sequence that
takes place when the jig moves to the ready-to-print position at
the rear. Therefore, this step sequence is altered such that steps
2 and 3 come before step 1, and step 1 becomes step 3.
4. At the Epson control panel, perform the following step sequence:
a. Press the Menu button
b. Press the down arrow ( ) once to TEST PRINT
c. Press Menu again to NOZZLE CHECK
d. Press Menu again to NOZZLE CHECK - PRINT
e. Press Menu once more to execute the procedure.
f.
If the printer is set to precision mode, the jig will remain in place, and the
Epson will enter a PAPER NOT CUT error. Press LOAD on the Direct
Advantage control (front) panel to advance the jig so that you can remove
the paper and check the results. Once you press LOAD again in preparation
for a new print, the Epson will clear the Paper not Cut error and resume
normal operation.
5. If the pattern has gaps between the tick marks (each tick mark, or line,
represents one nozzle), press and hold the Menu button on the Epson printer
for three seconds to perform a normal head-clean operation.
6. After cleaning, run the nozzle check again. If no gaps appear, you are ready to
print. If gaps continue to appear, perform another head cleaning.
66
Sawgrass Technologies, Inc. ~ www.sawgrassink.com
Method 2
1. To perform a nozzle check from the DirectAdvantage Queue, begin with steps
1 – 3 from Method 1.
2. Right-click on the DirectAdvantage printer listed on the Printer View area and
select Nozzle Check from the drop-down Utilities menu (see screen below).
3. If your Direct Advantage printer is set to normal mode (as opposed to precision
mode), once the printing is finished, the printer will automatically bring the jig
forward so that you can check the printed results.
4.
If the printer is set to precision mode, the jig will remain in place, and the Epson
will enter a PAPER NOT CUT error. In this situation, press UP and DOWN
simultaneously on the Direct Advantage control (front) panel to unlock the panel
and advance the jig so that you can remove the paper and check the results.
Once you press LOAD again in preparation for a new print, the Epson will clear
the Paper not Cut error and resume normal operation.
5. If the pattern has gaps between the tick marks (each tick mark, or line, represents
6. After cleaning, run the nozzle check again. If no gaps appear, you are ready to
one nozzle), right-click on the DirectAdvantage printer listed on the Printer View
area in the Queue to access the drop-down Utilities menu, and then select Clean
Heads.
print. If gaps continue to appear, perform another head cleaning.
NOTE: Do not perform a normal clean more than two or three times. If you
have not recovered all of the nozzles after three normal cleanings,
perform a power cleaning (see the Power Cleaning procedure below).
Head Cleaning
Because of residues or impurities, it is possible that the printing heads will work
incorrectly in a way that you will observe such abnormalities as bending, color lack,
tonality variations, etc., in your printed image. In this case, it is possible to clean the
print heads through a menu selection available from the AdvantageQueue. To perform a
normal head cleaning operation from the AdvantageQueue, proceed as follows:
1. Right-click on the name of the printer in the printer view area of the
AdvantageQueue to access the Utilities menu.
Sawgrass Technologies, Inc. ~ DirectAdvantage ® ~ AdvantageQueue ® ~ NaturaLink ® ~ User’s Guide
67
2. Select Clean Heads from the drop-down Utilities menu (see illustration below).
3. Perform a nozzle check to verify that all nozzles are present (see Printing a
4. If you still find nozzles missing, repeat steps 1 – 3.
The printer will go through the cleaning cycle, a process that takes approximately
two minutes.
Nozzle Check procedure above)
If you still find nozzles missing after repeating this normal cleaning procedure, please
perform a Power Cleaning.
Power Cleaning
If the normal cleaning process is not sufficient to recover all the print head nozzles,
a Power Clean may be necessary. This procedure consumes a noticeable amount of
ink. Therefore, it should be run only when all other troubleshooting methods have been
unsuccessful.
To perform a Power Clean, proceed as follows:
1. Press the Menu button on the printing unit.
2. Press the down-arrow button ( ) until you see MAINTENANCE, then press
the Menu button again.
3. Press the down-arrow button ( ) until you see PWR CLEANING, then press the
Menu button again.
4. Follow the instructions on the Epson LCD screen to raise or lower the ink levers
at regular intervals.
5. Once the cleaning is completed, the pause light will stop flashing.
6. Print a nozzle check to see if the cleaning was successful.
68
Sawgrass Technologies, Inc. ~ www.sawgrassink.com
Waste Ink Tank
The waste ink tank, with two tubes extending from it, is located in
the lower right side of the printing unit and collects the ink that is
not actually being used for printing. Even thought this is waste ink,
the printer still records the amount of ink that is being deposited.
A small chip on the waste ink tank counts these ink droplets. Over
time, the waste-ink tank chip will read full, and the tank will need to
be replaced or emptied out. If the tank is emptied out, the chip needs
to be reset. Follow the instructions on the Maintenance CD included
with the printer on how to reset the chip in the waste ink tank.
Supplies & Equipment
The DirectAdvantage® fueled by NaturaLink®, is sold through a network of Authorized
Channel Partners. A full listing of authorized resellers is available on Sawgrass’ web site
at www.sawgrassink.com.
Operating Conditions
For optimum performance of NaturaLink®, you should adhere to the following
environmental conditions, including temperature and relative humidity:
Operating conditions are 73° F (23° C) with 35~60% relative humidity.
Optimum operating conditions are 73°F (23° C) with 35~60% relative humidity.
Storage
NaturaLink® products should be stored in an environmentally controlled room
with a temperature range of 50 ~ 75° F (10 – 24° C).
Do not expose NaturaLink® cartridges directly to light, especially sunlight, for
extended periods.
For best results, install your NaturaLink® cartridges by the date on the cartridge.
Please refer to the individual ink bag/cartridge for the specific ink expiration
date.
Sawgrass Technologies, Inc. ~ DirectAdvantage ® ~ AdvantageQueue ® ~ NaturaLink ® ~ User’s Guide
69
APPENDIX F:
Creating And Ripping a Job With PowerRIP
Introduction
When printing with white ink, there are several techniques you can use to rip an image
and print it on a cotton garment so that the final output conforms to your specifications.
The quickest way is to use the Create Job feature in PowerRIP for Direct Advantage.
Unless you need to modify the artwork (such as when you need to remove a background
or edit a bitmap), you do not have to use such applications as CorelDRAW and Adobe
Photoshop. If you have a jpeg, tiff, gif or psd file that you need to rip for printing on your
Direct Advantage printer, you can open the file directly in PowerRIP, rip it, and send it to
the Advantage Queue for printing.
The first section of this Quick Guide describes the procedure for bringing an image directly
into PowerRIP, ripping it and sending it to the Direct Advantage (DA) Queue for printing.
Subsequent sections cover the preparation of an image in a separate application, such as
CorelDRAW and Adobe Photoshop, ripping it and sending it to the DA printer for final
output. This document is designed to be a quick and easy guide to these procedures. For
more detailed information on editing and ripping unusual or complex images, please refer
to the user manuals for the specific applications.
Section 1 - Create and Rip an Image File with Create Job
To open and rip an image file using PowerRIP, proceed as follows:
1. From the PowerRIP main window, click
on the File menu and select Create Job
(see illustration at right). The Create
Print Job window will open up.
2. In the Create Print Job window, click on
File and select Import Graphic (see
illustration below right). Navigate to the
folder where you have stored your
image file and select it (see the first
illustration on the next page).
Create Print Job window in the RIP 70
Alternately, you may click on the chosen job in the folder and simply drag and drop
it into the image area of the “Create Print Job” window.
Sawgrass Technologies, Inc. ~ www.sawgrassink.com
3. Wait for the image to arrive at the RIP
and position it at your will. At this point,
you can also resize the image to fit your
desired output size. To move the image,
simply click anywhere inside the
image area and drag it. To resize it,
click on the “handles” (small squares)
at the corners of the image area and
extend or contract the image. You have
the option of centering the image on the
screen, horizontally, vertically or both.
These choices are accessible from the
Artwork tab (see illustrations below).
4. Select your printing parameters—print quality (resolution), media (white or color
cotton, or paper), print direction (uni- or bi- directional printing), density (for the
white layer) and number of passes for each layer (color and white). Of course, if you
will be printing in color only, such as when you are printing on a white T-shirt,
you need not concern yourself with white-ink settings. You can set the printing
parameters in one of two ways (see illustrations A and B, Page 72):
Sawgrass Technologies, Inc. ~ DirectAdvantage ® ~ AdvantageQueue ® ~ NaturaLink ® ~ User’s Guide
71
Fig. A: Pre-defined printing parameters
a.
Select predefined parameters. Click on the Pre-defined Settings drop-down
menu arrow at the top right of the screen to make your choice (see illustration
A above). The most common one is Black Cotton, 720 or White Cotton, 720,
depending on whether you will be printing on black or white cotton,
respectively.
Fig. B: Defining parameters manually
b.
72
Define the parameters, one by one, manually. Click on the Print Settings tab
to display all of these choices (see illustration B above). When you define
your printing parameters this way, you can save them for later use, in which
case you can recall them from the “Pre-defined Settings” field.
Sawgrass Technologies, Inc. ~ www.sawgrassink.com
The most common settings are as follows:
Media: black (or white) cotton
Print Quality (Color Layer): 720 x 720 (dpi)
Print Density (White Layer): 1440 x 1440 (dpi)
White Passes: 1
Color Passes: 1
Print Direction (Color): Bidirectional
Use Dual CMYK: Check this box only if your Direct Advantage printer is not
using white ink and, instead, has two sets of color inks installed—one on
each side.
5. Click on the Color Settings tab and select your color settings (see illustration
above). For most applications, the best all-around color settings to use are these:
RGB source Profile: RIP Default (this is the sRGB Profile)
CMYK Source Profile: RIP Default (this equates to “None,” or no profile
applied)
Output Profile: Auto-Select
Color Appearance: Photo Normal (for photographic images) or Vivid/Darker
(for text and vector images, or if you prefer higher color saturation).
Sawgrass Technologies, Inc. ~ DirectAdvantage ® ~ AdvantageQueue ® ~ NaturaLink ® ~ User’s Guide
73
6. If you are printing with white ink, you are now ready to generate the white layer
(underbase, or mask). Be sure that the image is selected (if not, simply click on
it to select it) and click on the White Ink Control tab. Begin by selecting what you
want the RIP to use to generate the underbase—the background color, 100%
white under any color pixel, underbase entire image, etc. In the example shown,
the option Use Transparency to Detect Background was chosen because the
original image was created with a transparent background. Click on Create to
begin generating the white layer (see the first two illustrations above).
Clicking on the White radio button at the top left of the Create Print Job screen, enables
you to see the white mask you have just created.
7. Click on the Preview radio button at the top of the screen to view the completed
74
image, and click on the Set Material Color (for previewing only) to generate a
preview of your composite image as it would look on the selected background
(black cotton, in this example. See the illustrations above).
Sawgrass Technologies, Inc. ~ www.sawgrassink.com
8. Click on the square that represents the color of your garment (black in this
9. Save your job before proceeding, as you might need to rework the image and
example), and then click OK (see illustration above). Your preview will now be
generated, and you will see the composite image set against the selected
background.
re-rip it before printing. To save the job, select File from the main menu and then
select Save Job (see illustration above). Select the folder where you want the
job to be saved and give the file a name.
Sawgrass Technologies, Inc. ~ DirectAdvantage ® ~ AdvantageQueue ® ~ NaturaLink ® ~ User’s Guide
75
10. Now, click OK to instruct PowerRIP to proceed with the ripping of this image (see
illustration above).
This window will close, and ripping ensues. The main RIP window will open, and the
name of the file being ripped will appear in the Incoming Jobs screen.
Once ripping is completed, the file will automatically transfer to the Processed Jobs
window (see illustrations below) and, from there, immediately to the Direct Advantage
Queue.
76
Sawgrass Technologies, Inc. ~ www.sawgrassink.com
11. Click on the Processed Jobs tab and double-click on the name of the file to see a
preview of the ripped job. A preview window will open showing the image as it
will look in its final form when printed (see illustration below). In this window,
you can selectively view the white layer (mask), the color layer, or the composite
image against your selected fabric color. If the ripped image does not conform
to your requirements, you can edit it in your preferred application and re-rip it
before printing it.
Section 5 describes a common procedure for editing the white mask of an image.
Sawgrass Technologies, Inc. ~ DirectAdvantage ® ~ AdvantageQueue ® ~ NaturaLink ® ~ User’s Guide
77
Section 2 – Ripping and Printing an Image File from CorelDRAW
This section describes the most common procedure for ripping and printing a job onto
a black garment using CorelDRAW version 12, 13 or X4. To achieve the desired results
when following this auto-masking procedure, it is imperative that your artwork be laid
on a black background. This proceedure assumes that the DirectAdvantage printer is
in the precision mode.
1.
78
In CorelDRAW, select Color Management from the Tools menu and verify that this
function is active, i.e., the arrows are orange. If not, click on the arrows, and they
will turn orange. Verify also that you have the correct profile being applied. If not,
click on the small down arrows below the desktop printer and web offset press
icons and select the DirectAdvantage_Master.ICM profile from the drop-down
list (see illustrations above and on the next page for reference).
Sawgrass Technologies, Inc. ~ www.sawgrassink.com
2. Now select File > Print and
select Direct Advantage w/
White Ink as the printer of
choice (see illustration at
right). If you get a warning
about non-matching “printer
paper orientation,” click
“No” (so as not to choose
automatic adjustment by
the system).
3. Click on the Properties
button, then click on the
Advanced button (refer to
the illustrations at right).
Sawgrass Technologies, Inc. ~ DirectAdvantage ® ~ AdvantageQueue ® ~ NaturaLink ® ~ User’s Guide
79
4. Change the following RIP settings to the values shown below (refer to the screen
images below). Leave all of the other settings not listed here at their default values:
Paper Size: 17 x 18.5 Platten.
Print Quality: 720 x 720. This setting specifies the color printing resolution in dpi.
Color Appearance: Photo-Normal. This setting instructs the RIP how much color
ink to lay down and it normally yields the best results with raster (photo) images.
Select “Vivid-Darker” for vector and text artwork, or if you want more color
intensity (although you might sacrifice color accuracy).
Layer Type*: Color Layer Auto-Mask (Black Bkgd). This setting instructs the RIP
to use the black background in place of black ink where this ink is called for, and
thus not to lay white ink on those areas. This option works only on pure black
fabric. With other colors, use Auto-Mask in conjunction with Capture Black.
Media Type: Black Cotton. Always use this setting when printing on a black or
dark- color fabric.
White Ink Resolution: 1440 x 720. This setting determines the resolution of the
white ink in dpi. The higher this number, the tighter the coverage (and the more
intense the white). You want the tightest white coverage to be sure that the
layered colors are reproduced with maximum fidelity.
Black Ink/Underbase Behavior*: No Underbase, No Black Ink. This is the only
setting allowed when you select “Color Layer Auto-Mask (Black Bkgd)” as the
layer type. The setting instructs the RIP not to lay down white ink in the black
areas of the image and not to lay down black ink either in those areas. The black
color of the fabric is used in place of black ink.
*Note: Whenever a selection is in conflict with another (e.g., you selected an 8.5” x
80
11” print area, but you have a 10” x 16” image), a warning icon (a small yellow
triangle) will appear next to the conflicting options. Do not print until all
conflicts are resolved. See additional information on layer types and resulting
conflicts in Section 4 of this document.
Sawgrass Technologies, Inc. ~ www.sawgrassink.com
5. Click “OK” twice to conclude this dialog
and then click “Print.”
At this time, the image is sent to the RIP.
It will take a few minutes to process the
image. Take this time to mount the T-shirt
on the platen. Once the image is ripped,
PowerRIP will automatically transfer it to
the Direct Advantage Queue.
Sawgrass Technologies, Inc. ~ DirectAdvantage ® ~ AdvantageQueue ® ~ NaturaLink ® ~ User’s Guide
81
6. Click on the name of the file in the Advantage Queue job view area (the upper
window) and drag it into the printer in the printer view area (the lower window).
7. Once the image is printed, carefully remove the garment from the platen and cure
it on a heat press set at 340° F, for 2 min 20 sec at very low pressure (10 - 12
psi).
Section 3 – Ripping and Printing an Image File from Adobe Photoshop
This section describes the most common procedure for ripping and printing a job onto
a black garment using Adobe Photoshop version 8 (CS). To achieve the desired results
when following this auto-masking procedure, it is imperative that your artwork is laid
on a black background.
I. ADOBE PHOTOSHOP CS
1. Select File > Page Setup from the main menu (see illustration below).
2. On the “Page Setup” window that opens up, click on Printer (see illustration
above), select the “Direct Advantage w/White Ink” printer, and click OK to
conclude this selection (see illustrations next page).
82
Sawgrass Technologies, Inc. ~ www.sawgrassink.com
3. On the Size drop-down menu, select
“17 x 18 platen,” and select “Flatbed”
from the Source drop-down menu.
Sawgrass Technologies, Inc. ~ DirectAdvantage ® ~ AdvantageQueue ® ~ NaturaLink ® ~ User’s Guide
83
4. Go back to the File menu and select the Print with Preview option. In the “Print”
dialog window that opens up, make sure that the checkbox beside Show More
Options is checked. If not, check it.
5. Select Color Management from the drop-down menu, and check the radio button
beside Document in the Source Space submenu.
84
Sawgrass Technologies, Inc. ~ www.sawgrassink.com
6.
Still in the Color Management menu, in the Print Space submenu, click on the
down arrow ( ) in the Profile selection field and select the DirectAdvantage_
Master.ICM profile from the pull-down menu that appears. The selection on the
Intent field should be Perceptual. If not, click on the down arrow ( ) in this
field and select Perceptual from the drop-down list (see illustration on the
previous page).
7. Click on Print and select the Direct Advantage w/White Ink as the printer of
choice.
8.
Repeat steps 3 trough 7 in the CorelDRAW procedure described before. There is
an exception to step 5 where, in Adobe Photoshop, you click OK three times
(instead of twice), and the selection Print does not appear at the end of the dialog
(essentially, the third OK substitutes for Print).
Sawgrass Technologies, Inc. ~ DirectAdvantage ® ~ AdvantageQueue ® ~ NaturaLink ® ~ User’s Guide
85
Section 4 – Automatic Layer Types, Ink Density and Choking
PowerRIP Direct Advantage offers two auto-masking layer types for printing with
white ink--Color Layer Auto-Mask (Black Bkgnd) and Color Layer Auto-Mask. If you
are printing on a white garment, ignore all other layer types and simply select Color
Layer. In addition, you can also choke the white underbase if there is a chance that
the white will “peek” from the color layer, especially at the edge of an object. Choking
will enable you to instruct the RIP not to lay white ink on an outer row or column of
pixels by a pre-established amount. The information in this section applies only when
you are using white ink, as is the case when you print on black or dark-color garments.
Color Layer Auto-Mask (Black Bkgnd. Be sure to select the option No Underbase/
No Black Ink when using this type of automatic layer. If you print an image that
has a black background and you select the Light Underbase, Use Black Ink option,
the entire black background will print, thus leaving a black box on your garment!
Color Layer Auto-Mask. If there are no pure (100%) white areas in the image,
and you are printing on a colored garment, choose the Color Layer Auto-Mask
layer type and do not create a black background around the image. This selection
instructs the RIP to treat all 100% areas as a physical white background, and
therefore not to print anywhere there is 100% white. As a result, the printer will
not print on any 100% white areas in the image--but it will print process white-
and the color of the garment replaces the pure (100%) white (which is the
background) in the image.
Capture Black. Use this feature in conjunction with Color Layer Auto-Mask (Black
Bkgnd) whenever black ink must be used. This is the case when you are printing
on a colored shirt, and the image has black areas. This layer type causes the RIP
to capture and store the black channel (either pure black or composite) so it can
be superimposed on the next color layer.
When you print white at 1440 x 1440 dpi, you might want to reduce the amount
of white ink being laid to prevent bleeding. A common setting is 90, but use the
value that results in the most white ink being laid down without bleeding. On the
other hand, if you are using a 720 x 1440 resolution, leave the white (W) density
value at 100. You make this adjustment in the following “PowerRIP Advantage”
menu/submenu tree: Utilities > Printer & Ink Configuration > Ink Configuration
In the Ink Configuration Type window, slide the W bar to a value of 90 (see
illustrations next page).
Choke Values and Fine Traces
In the RIP, there is an option that enables you to choke the white underbase in cases
where you find the need to eliminate the possibility of the white layer “peeking out”
from under the color layer. This phenomenon often results when you print the two
layers--white and color--at different resolutions (1140 x 1440 dpi for white, 720 x 720
for color, as an example). By default, the choke value is set at minus one (-1), which
causes the RIP to choke the underbase by one pixel width in all four directions. If you
are printing small text (< 24 pt) or fine lines, it is recommended that you remove
choking altogether by setting the values to zero. Otherwise, these small traces may
86
Sawgrass Technologies, Inc. ~ www.sawgrassink.com
not be visible in the final print. This is because, in these situations, choking the
underbase will essentially remove the white layer in these areas, rendering the color
layer nearly invisible on a black T-shirt.
The choking option is accessible from the Utilities > Printer & Ink Configuration >
Choke & Feed Adjustment menu tree in the RIP. To remove choking, change the four
(Top, Left, Bottom and Right) choke values from -1 to zero (see illustration below).
Sawgrass Technologies, Inc. ~ DirectAdvantage ® ~ AdvantageQueue ® ~ NaturaLink ® ~ User’s Guide
87
Section 5 – Exporting a White Mask for Editing
Sometimes, the choices available for white ink control in Create Job within PowerRIP
are not sufficient to produce a final image without either undesirable, or improperly
rendered, white areas. Such is the case when your image has a white background
(standard photographs are one example). If you select the Use Background Color to
generate the white layer, PowerRIP will generate a white square underlying the entire
image (see image below). The same outcome will result if you choose the Underbase
Entire Image option. This might not be what you want your final image to look like.
On the other hand, if you select the 100% White under Any Colored Pixel option, the
circular area inside the signs will receive no white ink (there are no color pixels there),
and the color of the shirt will show through (see image above). Again, this might not be
the optimum or desired outcome for this type of image.
One way to get around this issue is to fill the image mask (the white layer) with color—
black in this case. The Rip, however, provides no means to accomplish this task, so
you will have to use an outside application, such as Corel Photo-Paint, to edit the white
layer.
88
Sawgrass Technologies, Inc. ~ www.sawgrassink.com
To edit the white layer so PowerRIP can use it in its new form, you will need to export
it, edit it in the application, and then import the edited version into PowerRIP. Different
images will require different editing. Some images are best processed if you remove
the background entirely; others rip and print well if you apply a transparent background,
and still others, such as the example being used here, require other minor editing. In
this example, the procedure is as follows:
1. Generate the white layer
using the 100% White under
Any Pixel option. When you
view the resulting white
layer (mask), you will notice
that the mask is white where
there will be no white ink
laid down, and it appears
black where there is color
and, therefore, white will be
printed (see the image at
right).
2. Select Export White Channel
from the Export menu in
PowerRIP (see illustration
at right), and save the image
with a file name of your
choice. The resulting file will
be a TIF file.
3. Edit the image in your favorite application by filling the circular area inside the
signs completely with black (see image below), and save the file (you will be
overwriting the original white mask).
Sawgrass Technologies, Inc. ~ DirectAdvantage ® ~ AdvantageQueue ® ~ NaturaLink ® ~ User’s Guide
89
4. In the PowerRIP White
Layer Generation tab, select
the Import from File option
to create the new white layer
and click Create (see image
at right).
5. Select the edited file from the
folder where you saved it
(see illustration above).
PowerRIP will now use this
edited image to re-create the
white mask. Once finished, the
white layer will look like the
image above right--exactly like
the image you edited in, and just
saved from, Corel Photo-Paint.
6. The final output will now
look like this (illustration at
right):
90
Sawgrass Technologies, Inc. ~ www.sawgrassink.com
WARRANTY AND TECHNICAL SUPPORT
If you are having difficulties achieving good results from your DirectAdvantage ® or
NaturaLink ® inks, please contact your authorized DirectAdvantage ® or NaturaLink ®
reseller during their normal hours of operation for assistance. A full listing of authorized
DirectAdvantage ® Resellers is available on Sawgrass web site at www.sawgrassink.
com.
Standard Warranty:
One-year warranty on the dual CMYK Direct Advantage printer parts and
labor, including print heads.
One-year warranty on the Direct Advantage w/White Ink printer parts and
labor, excluding the ink-delivery system and print heads. Thirty-day (30)
warranty on the ink-delivery system, including the print heads.
Dedicated Service Center for Levels 1 and 2 telephone support.
Depot service:
Equipment returned to Sawgrass for repairs.
Seven-to-ten-day turnaround service (from the day the printer is received at
Sawgrass). Shipping costs are borne by Sawgrass Technologies.
The one-year warranty applies only to new printers. The warranty on refurbished or
reconditioned printers is six months. The warranty period begins at the time of shipment.
Sawgrass Technologies, Inc. ~ DirectAdvantage ® ~ AdvantageQueue ® ~ NaturaLink ® ~ User’s Guide
91
NOTES:
92
Sawgrass Technologies, Inc. ~ www.sawgrassink.com