1
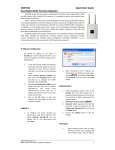
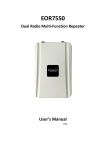
EOR7550
Dual Radio Multi-Function Repeater
Quick Start Guide
____________________________________________________________________________________
EOR7550 equips with two powerful independent RF interfaces which
support 802.11a/b/g and 802.11b/g/n. With certified IP‐65 protection, it is designed to deliver high reliability under harsh outdoor environment. Built‐in advanced multi‐functions provide flexibility in constructing scalable WiFi networks for all possible applications. With two individual interfaces, each can be configured into 6 different modes with maximum of 18 combinations. With 802.11n support, EOR7550 offers bandwidth up to 300Mbps to accommodate heavy traffic services such as multimedia streaming. Establishing backbone network using 802.11a ensures stability and reduces interference while 802.11b/g offers great compatibility to all wireless clients. EOR7550 provides wide‐range of authentication and encryption standards (including WEP, WPA, WPA2, TKIP/AES and IEEE 802.1X) to enforce maximum security. Furthermore, friendly security management user interface reduces configuration complexity. EOR7550 is a true carrier‐grade product which is guaranteed to fulfill any business proposals.
____________________________________________________________________________________
IP Address Configuration
The default IP address of the device is 192.168.1.2. In order to log into this device, you must first configure the TCP/IP settings of your PC/Notebook. 1. In the control panel, double click Network Connections and then double click on the connection of your Network Interface Card (NIC). You will then see the following screen. 2. Select Internet Protocol (TCP/IP) and then click on the Properties button. This will allow you to configure the TCP/IP settings of your PC/Notebook. 3. Select Use the following IP Address radio button and then enter the IP address (192.168.1.21) and subnet mask (255.255.255.0). Ensure that the IP address and subnet mask are on the same subnet as the device. 4. Click on the OK button to close this window, and once again to close LAN properties window. Logging In
1. To configure the device through the web‐browser, enter the IP address of the device (default: 192.168.1.2) into the address bar of the web‐browser and press Enter. 2. After connecting to the IP address, the web‐browser will display the login page. Specify admin as the default User Name
and Password, and then click on the Login
button.
2. After connecting to the IP address, the web‐browser will display the login page. Specify admin as the default User Name
and Password, and then click on the Login
button. Administration
1. Under Management section, click on the [Admin] link. This option allows you to modify the default password for the device. For security it is highly recommended for security reasons. 2. Old Password: please type in admin
3. Password: Specify a password into this field and then re‐type the password into the Confirm New Password field. Then click on the Apply button. 4. Click on the [Apply] button to save the changes. EOR7550
Dual Radio Multi-Function Repeater
Quick Start Guide
IP Settings
3.
1.
4.
Under Network section, click on [LAN].
This feature allows you to configure the
LAN interface using a static IP address.
This IP address is also used to access the
web-based interface.
2.
IP Address: Specify an IP address
3.
IP Subnet Mask: Specify the subnet
mask for the IP address
4.
Click on the Apply button to save the
changes.
Note: If you change the IP address here, you
may need to adjust your PC’s network settings
to match the same domain.
Wireless Network
EOR7550 provides 2 separate Radio Channel
which allows you configuring your device into
different separate modes. Each Radio Channel
can be configured separately with different
configuration menu.
1.
Wireless Security
2.
The default Radio2 is set to AP mode. You can
start by changing the security setting on Radio2.
3.
4.
1.
2.
Under Wireless section, click
[Radio2].
Under Radio2 sub-menu, click
[Security].
Select your preferred security from
[Encryption] select-box.
Please refer to user manual for more
security configuration details.
on
5.
on
6.
Under System section, click on
[Operation Mode] to configure each
radio.
You will see the current operation mode
setting for each radio and Ethernet type.
Click on [Reset] to start configuration.
There are 7 modes for each radio.
Please start by setting Radio1.
Note that Radio1 mode will determine
the available choices on Radio2.
Please refer to user manual for more
detail.
Dural Radio Operation Mode Table
18 Modes
Radio1(11a/b/g)
Radio2
AP
CB
O
O
WDS
WDS
Bridge
Repeater
O
O
CR
(11/b/g/n)
O
AP
(LAN/WAN)
(LAN/WAN)
(LAN)
(LAN)
(LAN/WAN)
X
X
X
X
UR(AP)
UR(STA)
X
X
O
(LAN/WAN)
O
CB
Disable
O
X
X
(LAN/WAN)
(LAN)
O
CR
O (LAN)
X
X
X
X
X
X
(LAN)
WDS
O
O (LAN)
X
X
X
X
X
X
Bridge
WDS
(LAN)
O
O
X
Repeater
X
X
X
X
X
(LAN/WAN)
(LAN/WAN)
O
UR(AP)
X
X
X
X
X
X
X
(LAN/WAN)
O
UR(STA)
X
X
X
X
X
O
O
O
O
O
(LAN/WAN)
(LAN)
(LAN)
(LAN)
(LAN/WAN)
X
(LAN/WAN)
X
X
X
X
Disable
Quick Start Guide v.1.0
Refer to User’s Manual for complete instructions
2