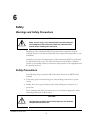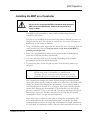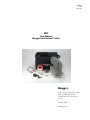
1
AVTMMDP Rev B May 2007 MDP User Manual Megger Distribution Profiler M Valley Forge Corporate Center 2621 Van Buren Avenue Norristown, PA 19403-2329 U.S.A. 610-676-8500 www.megger.com MDP User Manual Megger Distribution Profiler Copyright© 2006 by Megger. All rights reserved. The information presented in this manual is believed to be adequate for the intended use of the product. If the product or its individual instruments are used for purposes other than those specified herein, confirmation of their validity and suitability must be obtained from Megger. Refer to the warranty information below. Specifications are subject to change without notice. WARRANTY Products supplied by Megger are warranted against defects in material and workmanship for a period of one year following shipment. Our liability is specifically limited to replacing or repairing, at our option, defective equipment. Equipment returned to the factory for repair must be shipped prepaid and insured. Contact your MEGGER representative for instructions and a return authorization (RA) number. Please indicate all pertinent information, including problem symptoms. Also specify the serial number and the catalog number of the unit. This warranty does not include batteries, lamps or other expendable items, where the original manufacturer’s warranty shall apply. We make no other warranty. The warranty is void in the event of abuse (failure to follow recommended operating procedures) or failure by the customer to perform specific maintenance as indicated in this manual. M Valley Forge Corporate Center 2621 Van Buren Ave Norristown, PA 19403-2329 610-676-8500 (Telephone) 610-676-8610 (Fax) www.megger.com Table of Contents 1 Introduction ............................................................................................................................................................................1 2 Receiving Information...........................................................................................................................................................3 3 MDP Software License..........................................................................................................................................................5 Megger Software License Agreement .................................................................................................................................5 Megger SOFTWARE.......................................................................................................................................................5 4 Overview of MDP..................................................................................................................................................................9 Intended Use...........................................................................................................................................................................9 Features ..............................................................................................................................................................................9 Applications .....................................................................................................................................................................10 Definitions ............................................................................................................................................................................10 Calculations...........................................................................................................................................................................13 5 MDP Specifications..............................................................................................................................................................15 6 Safety ......................................................................................................................................................................................17 Warnings and Safety Precautions ......................................................................................................................................17 Safety Precautions................................................................................................................................................................17 7 Installing the MDP software...............................................................................................................................................19 8 MDP Operation....................................................................................................................................................................21 Connector Layout / Interconnect.....................................................................................................................................21 Installing the Setup File.......................................................................................................................................................21 Installing the MDP on a Conductor .................................................................................................................................23 Downloading Data from Units..........................................................................................................................................24 9 Creating a Custom Setup File .............................................................................................................................................27 10 Analyzing Downloaded Data.............................................................................................................................................31 Charting Data .......................................................................................................................................................................31 Creating a Chart ...................................................................................................................................................................32 Exporting s Chart to Excel.................................................................................................................................................39 Detailed Harmonic Analysis...............................................................................................................................................43 Creating a Detailed Harmonic Analysis ......................................................................................................................43 Creating Reports ..................................................................................................................................................................46 Report Types ...................................................................................................................................................................46 Creating a Report ............................................................................................................................................................48 Exceedance Reports .......................................................................................................................................................49 11 Unit Maintenance ................................................................................................................................................................53 Battery Life............................................................................................................................................................................53 Battery Replacement............................................................................................................................................................54 Block Diagrams of Unit Function.....................................................................................................................................56 12 Spare Parts ............................................................................................................................................................................59 13 Troubleshooting Problems ................................................................................................................................................61 Cannot download sequentially...........................................................................................................................................61 Cannot verify communication ...........................................................................................................................................62 Resetting the Unit ................................................................................................................................................................63 AVTMMDP Rev B May 2007 i M AVTMMDP Rev B May 2007 ii 1 Introduction Thank you for purchasing the MDP KIT, from Megger. These units will allow you to perform Load Studies, Power Factor Surveys, Power Analysis, Harmonic Analysis, Thermal Analysis and more. This manual will list the requirements as well as the instructions on how to use the MDP and its software. If you find any discrepancies in the MDP or its software or have any comments, please send them to Megger via fax, e-mail or phone. Megger Valley Forge Corporate Center 2621 Van Buren Avenue Norristown, PA, 19403 Attn: Customer Service Fax: (214) 331 7397 e-mail: [email protected] Customer service / Technical Support 1-800-723-2861 ext. 3519 For more information please visit our web site at: www.megger.com AVTMMDP Rev B May 2007 1 M M AVTMMDP Rev B May 2007 2 2 Receiving Information Contents of MDP Kit: Qty Part No. Description 3 1, 2, 3 MDP Units 1 CA-RS232 RS-232 Communications Cable 1 CA-USB USB Communications cable 1 PS-MDP 6V AC Adapter 12 23415 AA Batteries (4 per pack, 1 pack required per unit) 1 36133 Carrying Case 1 36175-1 CD containing the MDP Software 1 AVTMMDP Manual When your Megger MDP Kit arrives, check the equipment received against the packaging list to ensure that all materials are present. Notify Megger of any shortages. Examine the contents for damage received during transit. If any damage is discovered, file a claim with the carrier at once and notify Megger or it’s nearest authorized sales representative, giving a detailed description of the damage. AVTMMDP Rev B May 2007 3 M M AVTMMDP Rev B May 2007 4 3 MDP Software License Megger Software License Agreement IMPORTANT Read carefully before opening software packet. By opening the sealed packet containing the software, you are agreeing to be bound by the terms of this agreement. This is a legal agreement between you and Megger. If you do not agree to all of the terms of this agreement, return the unopened software packet and the accompanying items (including written materials and their containers) to Megger for a full refund. Megger SOFTWARE 1. GRANT OF LICENSE. This License Agreement permits you to use one copy of the enclosed software program (the "SOFTWARE") on a single computer. If you have a multi-user license for the SOFTWARE, then at any time you may have as many copies of the SOFTWARE in use as are permitted by the multi-use license. The SOFTWARE is in "use" on a computer when it is loaded into temporary memory (i.e., RAM) or installed into permanent memory (e.g., hard disk, CD-ROM, or other storage device). If the anticipated number of users of the SOFTWARE could exceed the number of users permitted by applicable licenses, then you must have a reasonable mechanism or process in place to ensure that the number of persons using the SOFTWARE does not exceed the number permitted by the applicable licenses. All rights not expressly granted to you in this agreement are reserved to Megger. 2. COPYRIGHT. The SOFTWARE is owned by Megger or its suppliers and is protected by United States copyright laws and international treaty provisions. Therefore, you must treat the SOFTWARE like any other copyrighted material. You may, however, either (a) make one copy of the SOFTWARE solely for backup or archival purposes, or (b) transfer the SOFTWARE to a single hard disk, provided you keep the original solely for backup or archival purposes. You may not copy the written materials accompanying the SOFTWARE. 3. OTHER RESTRICTIONS. You may not reverse engineer, decompile, or disassemble the SOFTWARE. You may transfer the SOFTWARE to a third party provided that after each transfer you do not retain any copies of the AVTMMDP Rev B May 2007 5 M SOFTWARE, including all upgrades that you may have received, nor retain any of the written materials accompanying the SOFTWARE. 4. OPERATING SYSTEM OPTIONS (CD-ROM MEDIA). If the SOFTWARE is distributed with multiple versions on a CD-ROM for compatibility with different operating systems, your license grant extends to using only the applicable version for your operating system. You are, however, granted the limited right to use more than one version of the SOFTWARE solely for the purpose of creating executables for multiple operating systems. LIMITED WARRANTY Megger warrants, for your benefit alone, that (a) the SOFTWARE will perform substantially in accordance with the accompanying written materials for a period of ninety (90) days from the date of receipt, and (b) the medium on which the SOFTWARE is recorded will be free from defects in materials and workmanship under normal use and service for a period of ninety (90) days from the date of receipt. Some states/jurisdictions do not allow limitations on duration of an implied warranty, so the above limitation may not apply to you. CUSTOMER REMEDIES. Megger's entire liability and your sole and exclusive remedy shall be at Megger's option, either (a) return of the fees paid, or (b) repair or replacement of the SOFTWARE that does not meet Megger's Limited Warranty stated previously, and which is returned to Megger with a copy of your receipt. The Limited Warranty is void if failure of the software has resulted form accident, abuse, or misapplication. Any replacement SOFTWARE will be warranted for the remainder of the original warranty period or thirty (30) days, whichever is longer. NO OTHER WARRANTIES. Except as expressly set forth in the preceding, the SOFTWARE and the documentation are provided "as is" without warranty of any kind, and no other warranties, either expressed or implied, are made with respect to the SOFTWARE, including but not limited to any implied warranties of merchantability or fitness for a particular purpose or any other warranties that may arise from usage of trade or course of dealing. Megger does not warrant, guarantee, or make any representations regarding the use of or the results of the use of the SOFTWARE or the documentation in terms of correctness, accuracy, reliability, or otherwise and does not warrant that the operation of the SOFTWARE will be uninterrupted or error-free. Megger expressly disclaims any warranties not stated herein. NO LIABILITY FOR CONSEQUENTIAL DAMAGES. The entire liability of Megger and its dealers, distributors, officers, directors, agents, and employees are set forth in the preceding. To the maximum extent permitted by applicable law, in no event shall Megger or its suppliers be liable for any damages including any special, direct, indirect, incidental, exemplary, or consequential damages, expenses, lost profits, lost savings, business interruption, lost business information, or any other damages arising out of the use or inability to use the AVTMMDP Rev B May 2007 6 MDP Software License SOFTWARE or the documentation even if Megger has been advised of the possibility of such damages. You acknowledge that the license fee reflects this allocation of risk. Because some states/jurisdictions do not allow the exclusion or limitation of liability for consequential or incidental damages, the preceding limitation may not apply to you. GENERAL WARNING Megger products are not designed with components and testing for a level of reliability suitable for use in the diagnosis and treatment of humans or as critical components in any life support systems whose failure to perform can reasonably be expected to cause significant injury to a human. Reliability of operation of the SOFTWARE can be impaired by adverse factors, including but not limited to fluctuations in electrical power supply, computer hardware malfunctions, computer operating system software fitness, fitness of compilers and development software used to develop an application, installation errors, software and hardware compatibility problems, malfunctions or failures of electronic monitoring or control devices, transient failures of electronic systems (hardware and/or software), unanticipated uses or misuses, or errors on the part of the user or application designer. (Adverse factors such as these are hereafter collectively termed "system failures." Any application where a system failure would create a risk of harm to property or persons (including the risk of bodily injury and death) should not be reliant solely upon electronic monitoring due to the risk of system failure. To avoid damage, injury or death, the user or application designer must take reasonably prudent steps to protect against system failures, including but not limited to back-up or shut-down mechanisms. U.S. GOVERNMENT RESTRICTED RIGHTS. The SOFTWARE and the documentation are provided with restricted rights. Use, duplication, or disclosure by the Government is subject to restricts as set forth in the Rights in Technical Data and Computer Software clause at DFARS 252.227-7013(c)(1)(ii) or the Commercial Computer Software - Restricted Rights clause at 48 CFR 52.227-19(c)(2), or clause 18-52.227-86(d) of the NASA Supplement, as applicable. Contractor/manufacturer is Megger, 2621 Van Buren Avenue, Norristown, PA, 19403. This agreement is governed by the laws of the Commonwealth of Pennsylvania, exclusive of any provisions of the United Nations Convention on the international sale of goods, and without regard to principles of conflicts of law, and constitutes the complete agreement between you and Megger. It supersedes any oral or written proposals, prior agreements, purchase orders or any other communication between you and Megger relating to the subject matter of this agreement. If any action is brought by either party to this Agreement against the other regarding the subject matter hereof, the prevailing party shall be entitled to recover, in addition to any relief granted, reasonable attorney fees and court costs. If any provision of this Agreement is held invalid, the offending clause will AVTMMDP Rev A Oct 2006 7 M be modified so as to be enforceable and, as modified, shall be fully enforced, and the remainder of this Agreement will continue in full force and effect. Year 2000 Statement In order for this software to be year 2000 (Y2K) compliant, it must be operated on a Y2K compliant operating system and Y2K compliant hardware platform. Disclaimer: The content of this document and related Year 2000 information does not constitute a warranty nor extends the terms of any existing warranty. AVTMMDP Rev B May 2007 8 4 Overview of MDP Intended Use The MDP is intended to be mounted on medium and high voltage distribution lines with voltages from 4KV up to but not exceeding 35.4KV and carrying a current of 10 to 1000Amps. The MDP is meant to be left on the lines for periods of 1 day up to 3 months. NOTE: The MDP can be mounted on power lines with voltages less than 4KV for a current ONLY recording, provided the current to be measured exceeds 10Amps but does not exceed 1000Amps. Features The MDP is a highly versatile profiler. This unit cannot only record loadprofiling data but can also record Power Quality data as well. The MDP and its software can provide the user with the following data. RMS CURRENT REACTIVE CURRENT UNBALANCE POWER (KW, KVAR, KVA & PF) WAVEFORMS THD HARMONICS 1-32 AVTMMDP Rev B May 2007 9 M Applications The features of the MDP make the unit very versatile and capable of performing many various applications. Some of the applications the MDP can perform are listed below. LOAD STUDIES CAPACITOR BANK SWITCHING POWER FACTOR STUDIES POWER SURVEYS HARMONIC ANALYSIS HARMONIC DE-RATING OF TRANSFORMERS THEFT OF POWER Definitions Active Mode A mode of operation in which the MDP draws maximum current from its batteries in order to either communicate with a host PC or record actual measurements. Auto Range A setup option in the MDP software that will allow the unit to measure the value of the current and electrical field prior to actual recording and then automatically determine whether to record in low range or high range. Auto-range is not available when the unit is programmed in a Manual Record Mode. Auto Stop A setup feature in the MDP software that when selected will tell the MDP unit to automatically stop recording after a given interval of time. Clock Hour Orientation A setup feature in the MDP software that when selected will delay the start of the MDP recording until the real time clock in the MDP reaches a time interval that is a multiple of the selected storage interval. This will keep each interval from having fractional time stamps. Current Present A recording mode in the setup file that will delay the start of the MDP recording until a current in excess of the Current Trigger level is measured. The unit remains in Sleep Mode waking up once every 5 minutes to Sample the line until the Current Trigger level is exceeded, then the unit starts recording. AVTMMDP Rev B May 2007 10 Overview of MDP Current Range Defines the maximum limits of the current measurement before saturation occurs. Low Range is 200Amps with saturation at approximately 240 Amps. High Range is 1000 Amps with saturation at approximately 1200 Amps Current Trigger A setup file variable that the user programs to indicate the current value that must be exceeded to start the MDP recording, providing the Record Mode is set to Current Present. Default Frequency A setup file variable that the user sets to indicate the voltage frequency of the line that the MDP unit is to be hung on. (50Hz or 60Hz) Electric Field The field surrounding the conductor that is composed of photons and containing electrical energy with energy density proportional to the square of the field intensity. Harmonic A sinusoidal component of a periodic wave or quantity having a frequency that is an integral multiple of the fundamental frequency. Manual A recording mode in the setup file that will allow the user to start and stop the MDP recording from the Remote screen of the MDP software. This feature is reserved for bench testing of the MDP. Auto-Ranging is not available in this mode. Memory Mode A selection in the MDP setup file that allows the user to determine how the memory in the MDP unit behaves. (Stop When Full or Wrap Around) Phase Angle The delay between the zero crossing of the fundamental voltage signal and the fundamental current signal represented in degrees. Power Factor The ratio of the total power input, in watts, to the total voltampere input to the converter. Record Mode A selection in the MDP setup file that allows the user to determine under what conditions the MDP will start recording. (Current Present, Manual Mode or Scheduled Run) Response Time A selection in the MDP setup file that allows the user to determine how long the unit will record for each Storage Interval. RMS Current Root Mean Square of the Current. The MDP measures this value every cycle of the Response Interval then averages these values together. This averaged value is then saved to memory each Storage Interval. Sample The actual discrete instantaneous measurement the MDP performs 128 times per cycle. Scheduled Run A recording mode in the setup file that will allow the user to select a date and time that the MDP will start recording. AVTMMDP Rev A Oct 2006 11 M Sleep Mode A mode of operation in which the MDP draws the minimum current from its batteries. The unit automatically goes into sleep mode between Storage Intervals and when it is not recording, provided the user is not communicating with the unit at the time. Stop When Full A memory mode in the setup file that the user selects. This mode will tell the unit to stop recording once the internal memory has filled. Storage Interval A selection in the MDP setup file that allows the user to determine how often the unit wakes up from sleep mode and takes measurements. THD The ratio of the root-mean-square of the harmonic content to the root-mean-square value of the fundamental quantity, expressed as a percent of the fundamental. Vars A unit which is the imaginary counterpart of the watt. The relationship between a VAR and a watt in an alternatingcurrent electrical system is determined by the power factor. Volt Amps A measurement of apparent power. Voltage Range Defines the maximum limits of the electrical field measurement before saturation occurs. Since the magnitude of the electrical field depends on the voltage magnitude as well as the height of the wire to the ground, exact voltage values are not possible. However; the following values can be used as rough approximations. Low Range is up to approximately 20KV. High Range is up to 69KV Watts A unit of energy equivalent to one joule per second. Waveform Capture A selection in the MDP setup file that allows the unit to record sample by sample data of each waveform for both Current and Electric Field. A waveform will be captured once every storage interval. Note: This feature must be enabled in order to calculate THD and Harmonics. Wrap Around A memory mode in the setup file that the user selects. This mode will tell the unit to start over-writing the recorded data on memory once the internal memory has filled. This feature should only be used in cases of long term recordings where the user is looking for an intermittent problem. AVTMMDP Rev B May 2007 12 Overview of MDP Calculations 1. RMS Current 2. Voltage and Current Waveform Data 3. Phase Angle 4. Internal Battery 5. Reactive Current 6. Power KW 7. Power KVAR 8. Power KVA 9. Power Factor DPF 10. Power Factor TPF AVTMMDP Rev A Oct 2006 13 M M AVTMMDP Rev B May 2007 14 5 MDP Specifications Conductor Size 0.25 to 1.2 inches Current Range 10 to 1000 Amps Voltage Range 4KV to 35.4KV Current Accuracy +/- 1.0% of Reading +/-2A Phase Angle Accuracy Low Ranges +/- 1% From 50 to 200A +/- 2% From 10 to 50A Phase Angle Accuracy High Ranges +/- 1% From 200 to 1000A +/- 2% From 50A to 200A Current THD Accuracy Low Range 10-25A +/-5% 25-40A +/-2% >40A +/- 1% Current THD Accuracy High Range 10-20A +/-10% 20-50A +/-5% 50-80A +/-2% >80A +/- 1% Voltage THD Accuracy >4000V +/- 1% Frequency Range 40Hz to 2Khz Fundamental Frequencies 50Hz and 60Hz Real Time Clock Accuracy 0.005% over one year Sample Rate 128 Samples per Cycle Statistics Stored RMS Current Waveform Data Phase Angle Internal Battery Memory 8 Meg Flash Data Retention 10 Years AVTMMDP Rev B May 2007 15 M Input Power 6VDC – 30mA MAX Battery 4 – AA Batteries Physical size 10” x 5” x 2” Weight 4.6 lbs Encapsulation Weather Proof / UV Stable Operating Temperature -40C to +60C Storage Temperature -50C to +85C Operating Humidity 0 to 90% non-condensing Storage Humidity 0 to 95% non-condensing EMF IEC 61326:2002 Safety IEC61010 NOTE: Do NOT keep batteries in the unit if the unit is to be stored at temperatures below freezing. AVTMMDP Rev B May 2007 16 6 Safety Warnings and Safety Precautions WARNING! Death, serious injury, or fire hazard could result from improper use/installation of this instrument. Read and understand this manual before installing this instrument. Installation of this instrument MUST be performed in compliance with the National Electric Code and any additional safety requirements applicable to your installation. Installation, operation and maintenance of this instrument MUST be performed by qualified personnel only. The National Electrical Code defines a qualified person as one familiar with the construction and operation of the equipment and the hazards involved. Safety Precautions The following safety precautions MUST be taken whenever the MDP will be installed. Wear safety glasses and insulated gloves when making connections to power circuits Hands, shoes, floor/ground must be dry when making any connection to a power line These warnings and safety precautions are to be used where appropriate when following instructions in this manual. CAUTION! The equipment could be impaired from improper use. Read the complete manual before use. AVTMMDP Rev B May 2007 17 M M AVTMMDP Rev B May 2007 18 7 Installing the MDP Software Install the MDP software into an IBM compatible PC as follows. For a First Time Software Installation Only 1. Verify the PC meets or surpasses the minimum requirements of the software. a. Operating System Windows NT, 2000, Me or XP b. 133 MHz Pentium Processor minimum c. 512 Meg RAM d. 256 Color VGA card e. 125 Meg free hard drive disk space f. Asynchronous communications port or USB port 2. Verify the PC is powered up and there are no open programs. 3. Insert the 36175-1 CD into the PC’s CD ROM. 4. Double Click on “MY COMPUTER”. 5. Double Click on the CD Drive. 6. Double Click on Metrosoft executable. 7. Follow the Software instructions displayed on the screen until the software is installed. 8. A message may be displayed reading this is not a Windows approved driver. This is because it is not part of the Windows software it is nothing to worry about. Click on “Continue Anyway”. 9. After the software is installed connect the unit to the PC using the USB cable. 10. The PC will indicate a new device was found and ask if you wish to have Windows install the driver. Click OK for an automatic driver installation. This will install the TI driver. 11. A message will be displayed reading this is not a Windows approved driver. This is because it is not part of the Windows software it is nothing to worry about. Click on “Continue Anyway”. 12. The TI driver shall now install. AVTMMDP Rev B May 2007 19 M After the TI driver is installed the PC will indicate a new device was found and ask if you wish to have Windows install the driver. This is the MEGGER driver. Click OK for an automatic driver installation. This will install the TI driver. 13. A message will be displayed reading this is not a Windows approved driver. This is because it is not part of the Windows software; it is nothing to worry about. Click on “Continue Anyway”. 14. The MEGGER driver shall now install. The software and driver installation are now complete. AVTMMDP Rev B May 2007 20 8 MDP Operation The following section describes the operation of the MDP unit. This section will describe in a step by step manner how to setup, program, install and download the MDP. Connector Layout / Interconnect Installing the Setup File 1. Install fresh AA batteries into the units. Note: If the temperature the units will operate in are from 0ºC to +50ºC then energizer E2 AA batteries are recommended. For temperatures outside this range, lithium AA batteries are recommended. 2. Connect AC adapters to units 3. Connect each unit one at a time to the PC via the communications cable. 4. Execute the MDP software. AVTMMDP Rev B May 2007 21 M 5. Verify communication by clicking on RECORDER / VERIFY. 6. Click on RECORDER / PROGRAM in order to select a setup program for the unit. 7. A window shall open that shall display two buttons, DEFAULT and CUSTOM. The user can select either one of the DEFAULT setup files that are embedded in the software or select a custom setup file that the user has created. To select a default setup file click on DEFAULT then select the desired setup file and click OK. To select a default setup file click on CUSTOM then select the desired setup file and click OK. See Section 9.0 for creating custom setup files. 8. Repeat Steps 5 through 7 with the remaining MDP units. 9. Remove units from ac adapters. Units are now ready to be installed on a conductor in the field. AVTMMDP Rev B May 2007 22 MDP Operation Installing the MDP on a Conductor WARNING! Be sure to use all appropriate safety equipment went mount the MDP unit on an overhead wire. Failure to do so can result in injury or death. The MDP is easily mountable to many readily available clamp sticks for installation on live lines. For ease of use, the MDP can be mounted using either a standard hot-stick or a shotgun style hot-stick. The unit can be used on wire sizes from .250 inches in diameter up to 1.20 inches in diameter. 1. Using a standard hot stick, mount the unit around the wire to be tested. Verify all safety practices are followed. Verify the arrow on the back of the MDP is pointing toward the load. 2. If the unit is programmed for either current present mode or scheduled run mode then it will start recording automatically. 3. Leave the unit in the field for up to 4 months depending on the setup file programmed into the unit and the battery life. 4. To remove the unit, use the shotgun hot stick. Verify all safety practices are followed. NOTE: The probe that is placed around the power line being measured has two different sensors inside it. One functions as a standard current transformer. The other measures the electric field between the wire and ground. For this reason the Profilers must be used on an unshielded wire. Also, anything that changes this electric field will change the measured power factor. This means that any conductor within about three feet of the Profiler will change the electric field, changing the measurement. Any conductor inside a cone extending below the unit out to 15 degrees from vertical will also alter the electric field, changing the measurement. So, if the Profiler is ten feet off the ground, a conductor 1.3 feet to the side and 5 feet below will change the electric field. For this reason, the Profilers cannot be used on lines that are vertically stacked unless there is enough horizontal separation. Since water is also a conductor, rain is able to change the measurements. The unit’s encapsulation makes water bead which keeps a conductive film from forming around the sensor. As long as the water remains in a liquid state there is not a problem. If condensation forms a film of ice that surrounds the sensor, the AVTMMDP Rev A Oct 2006 23 M power factor measurement will be affected. Under this condition, the measurement is not accurate and should be ignored. Downloading Data from Units The MDP units can be downloaded either one at a time or up to 4 units can be downloaded sequentially. After the units are removed from the line, the data can be downloaded as follows. 1. Connect the unit that was on Phase A to either a charger or a cigarette lighter adapter. 2. Connect the unit to a PC using the communications cable. 3. Execute the MDP software on your PC. 4. Verify communications by clicking on RECORDER / VERIFY. The following message should appear. 5. Click on RECORDER / RETRIEVE. The following Window should open. 6. Input the desired customer information or notes you like. This data will be saved in the data file. AVTMMDP Rev B May 2007 24 MDP Operation 7. Click on BROWSE and the following Window will appear. 8. Input the desired name of the data file. Then click SAVE. This will return you to the previous screen. 9. Click on RETRIEVE. The following Window will open. 10. Input the Assumed Phase Voltage and check the Phases that data was recorded on. Then click on OK. The download shall begin. 11. After Phase A is downloaded the software will prompt you connect the next unit. This will continue until all the data is downloaded. AVTMMDP Rev A Oct 2006 25 M 12. When the data download is complete disconnect the MDP. The data file shall be displayed in the Data file bar as shown below. AVTMMDP Rev B May 2007 26 9 Creating a Custom Setup File 1. In the software click on CONFIG then on NEW RECORDER SETUP. A setup screen will appear as shown below. Enable RMS Recording: With this checked the unit will record RMS current data. If this is not checked then the unit will not record RMS current data. RMS Storage Interval: The unit will save RMS data to memory at the end of each storage interval. So if the time is set to 0000:02:00 then the unit will save data to memory every 2 minutes. Enable Demand Recording: With this checked the unit will record Phase Angle data. This along with the assumed voltage will allow the software to calculate KW, KVAR, KVA as well as DPF and TPF. Enable Clock Hour Orientation: If this is checked it will cause the unit to delay recording until the next synchronized storage interval. The unit divides an hour into whole number of storage intervals. When asked to record, it will delay recording until its real time clock reaches the beginning of one of these storage intervals. AVTMMDP Rev B May 2007 27 M 2. Once all the desired settings have been selected click on WAVEFORM to proceed to the next screen, as shown below. Enable Waveform Capture: In order for the recorder to record waveforms "Enable Waveform Capture" must be checked. Time Mode: In this mode the unit will capture a waveform on each enabled channel, once every storage interval. So if you select time and the storage interval is "0000:10:00", the unit will capture a waveform once every ten minutes Number of Cycles: This will tell the unit how many cycles each waveform capture should be. (In the time mode the unit can capture up to a maximum or 12 cycles every storage interval. In Exceedance Trigger mode the unit can capture up to 60 cycles. However exceedance trigger mode is only meant for conductor testing.) AVTMMDP Rev B May 2007 28 Creating Custom Setup File 3. Once all the desired settings have been selected click on GENERAL to proceed to the next screen, as shown below. Response Time: This is the time interval that the recorder uses to calculate the RMS values. If the response interval is set to 10 cycles and the storage interval is set to 10 minutes then this means that every 10 minutes the unit will wake up, record 10 cycles of data, and calculate the RMS data over that 10 cycles. Then the unit will go back to sleep. Default Frequency: This should be set to the line frequency the unit will be recording. Memory Mode: Stop When Full: In this mode the unit will stop recording when the memory fills up. Wrap Around: In this mode the unit will start writing over the recorded data when the memory fills up. Starting at the beginning of the data file. AVTMMDP Rev A Oct 2006 29 M Recorder Mode: Current Present: In this mode the unit will periodically sample the current on the line. When that current surpasses the user input current trigger level then the unit will start recording. Note: When the current is in low range, the minimum current trigger is 10 amps. When the current is in high range, the minimum current trigger is 25 amps. Manual: In this mode the unit can have its recording started and stopped by the remote screen only. This mode is for bench testing of the units. Scheduled Run: If this is checked then the user can input a start date and time of when they want the unit to start recording. This is generally used for multiple unit recordings, where the start and stop times are to be the same. Enable Auto-Stop (In Hours): If this is selected then the user can program in the number of hours they want the unit to record for. If this is not selected then the unit will continue recording until it runs out of memory, the batteries die or someone stops the recording. Range: Low Range: Low range current should be selected if you plan on measuring current below 200A. Low range voltage should be selected if you plan on measuring a line less than 20KV. High Range: High range current should be selected if you plan on measuring current above 200A. High range voltage should be selected if you plan on measuring a line greater than 20KV. Auto-Range: Auto-range only operates in either the Current Present Mode or the Scheduled Run mode. Auto-Range does not operate in manual mode. When the unit is placed in auto-range it automatically defaults to the low range. Once the unit starts recording it measures the first interval of current and voltage. If the current is above 200A then it sets the current range to high. If the current is below 200A then the current range remains low. If the voltage is above 20KV then it sets the voltage range to high. If the voltage is below 20KV then the voltage range remains low. 4. Maximum Record Time: This section of the screen will show the user the maximum amount of time the recorder can record for. This assumes that the batteries are new in the unit. 5. Saving the Setup File: After a setup file is created it can be saved by just clicking the SAVE button. Then input a file name and then click SAVE. AVTMMDP Rev B May 2007 30 10 ANALYZING DOWNLOADED DATA The MDP software allows the user to view recorded data as either text reports, or in chart format. The software also allows the user to export the recorded data to Excel, for further custom analysis. This section of the manual will describe the various software features available for charts and reports. Charting Data The software allows you to create the following type of charts. Current RMS Imbalance Waveform Power (KW, KVAR, KVA, DPF and TPF) THD Harmonics Battery AVTMMDP Rev B May 2007 31 M Creating a Chart 1. Viewing Multiple Tests under one file name. When a unit is recording in current present mode and the current drops below the current trigger for a few minutes the unit will stop recording and go into a standby mode. When the current goes above the current trigger mode the unit will start recording again. However the unit will store the recorded data as another test. When the unit is downloaded all the tests will be downloaded under a single file name. To view the number of tests under each file name, click the plus sign in front of the file name. AVTMMDP Rev B May 2007 32 Analyzing Downloaded Data 2. Viewing File Information. File information will allow the user to view any input customer information, the date the test started, the date the test ended, the total number of intervals in the test and the total number of waveform captures in the test. To view this information, do the following. a) Highlight the desired data file in the data file bar. b) Click on "File" c) Click on "Information" AVTMMDP Rev A Oct 2006 33 M 3. To create a chart, do the following. a) Highlight the desired test in the data file bar. b) Click on "Chart" c) Click on "Create" d) Fill out the chart setup as desired. e) Then click on "Create" Chart Type: Allows you to select the type of chart you wish to create. Highlight the chart type you wish to create by clicking on it once. Note: Each current interval that is below 10 amps will not be viewable in the THD or Harmonic charts. Chart Title: In this location you can enter a label. This will appear on the chart and on the print out. Time Axis: This is the start and end time of the plot. This is user selectable. Major Tick Interval: Lets the user know the amount of time between the vertical grid lines in the generator chart. This is not user selectable; it is a function of the start and stop sign. AVTMMDP Rev B May 2007 34 Analyzing Downloaded Data Show Grid Lines: Allows the user to either display or not display the grid lines on the generated charts. Trace: Allows the user to plot specific channels. Just select the check box next to the desired trace title. If the check is present then that channel shall be plotted. If the check is not present then that trace shall not be plotted. Y axis MIN - Y axis MAX: This field enables the user to manually set the Y axis range of the chart. If a box is not checked then the software will auto scale that channel. If a box is checked then the software will use the user input value for the range. Line Color: Allows the user to select the line color of each trace. Line Type: Allows the user to select either a solid or a dashed line for each trace. 4. Once the chart is created there are various charting tools that can be utilized to help view the data. AVTMMDP Rev A Oct 2006 35 M Left Axis – Right Axis: Allows the user to view the scale for various traces on the chart. Click the RIGHT AXIS or LEFT AXIS buttons. The Label and scale then on the right or left axis will then scroll showing the scale for the different traces. Scan Line: A scan line will tell the user the exact value of any point on the graph and the exact time this value occurred. To create a Scan Line first create a chart then click on SCAN LINE. To move the scan line, just move the arrow on the screen using the mouse. Then right click on the location in which you want the scan line. If you wish to move the scan line one recorded point at a time then press the left or right arrow keys. (Note: Moving the scan line one point at a time is usually only done when the user has zoomed in on the chart.) Vector Diagrams: This will show the user the positional vectors of each phase. The currents phase angle will be referenced to the voltages phase angle. The actual value of the voltage and current will be displayed as well. To view a vector diagram create a Demand Chart. Then click on CHART and verify that SHOW VECTOR DIAGRAM has a check next to it, then click on SCAN LINE. Now both a scan line and a vector diagram will be created. See below picture for examples of Scan Line and Vector Diagram. AVTMMDP Rev B May 2007 36 Analyzing Downloaded Data Zoom: To zoom in on portions of the chart, using the mouse place the arrow on the chart. Then hold down the left key of the mouse and drag the mouse diagonally across the chart. A dotted line box should appear. When you release the left mouse key the chart will zoom into the area within the dotted line box. Or just click on the ZOOM IN Button. Zoom Out: To Zoom Out just click on the ZOOM OUT button. Event: This feature allows the user to scroll through the waveform captures, by clicking on the up / down buttons. This feature allies to the Waveform Charts ONLY. View Waveform: If a THD or Harmonic chart is created and a scan line box is open then a button, VIEW WAVEFORM will appear in the scan line box. Clicking this button will cause the software to perform a detailed Harmonic Analysis of the interval presently displayed by the scan line. AVTMMDP Rev A Oct 2006 37 M 5. To copy a chart into Word, do the following. a) Create the chart using Metrosoft for Windows software. b) Click on "Chart" c) Click on "Copy" The chart is now in the computer clipboard. It can now be pasted into Word. AVTMMDP Rev B May 2007 38 Analyzing Downloaded Data EXPORTING A CHART TO EXCEL 1. Create the desired chart 2. Now Zoom into the entire chart TWICE. (This MUST be done). SEE NEXT PAGE. If this is not done the resulting Excel chart will be scaled incorrectly. AVTMMDP Rev A Oct 2006 39 M 3. After Zooming into the entire chart TWICE, (or you can zoom into just a portion of the chart once) then double left click on the trace itself. This will open the Plot Parameters Window. 4. Now click on “Data” in the Plot Parameter Window. This will open the Data Window for that trace. 5. Now click on “Copy” this will copy all the data points shown into the clip board of the computer. 6. Now open Excel. AVTMMDP Rev B May 2007 40 Analyzing Downloaded Data 7. Once Excel is open click on “Edit” then on “Paste”. This will paste the data points into Excel. See Next Page 8. Now click on column B and then on the Icon for the Chart Wizard. AVTMMDP Rev A Oct 2006 41 M 9. The chart Wizard will now open. Select the “Line” chart and the type of chart you desire. Then either click “Finish” to create the chart or click “Next” for more options. The resulting chart will look the same as the chart created by Metrosoft. AVTMMDP Rev B May 2007 42 Analyzing Downloaded Data Detailed Harmonic Analysis The MDP software has the ability to create a detailed harmonic analysis of any captured waveform. This feature will analyze any single cycle through the 32nd harmonic. The data will be presented as either text data or as a bar chart. Creating a Detailed Harmonic Analysis 1. Select desired data file by highlighting data file in data file bar. 2. Click on CHART / HARMONIC ANALYSIS. 3. The following screen will open. AVTMMDP Rev A Oct 2006 43 M This screen shall support the following features. Create: When this button is clicked a detailed harmonic analysis shall be created for the cycle that is selected. Note: If a current cycle is below 10 amps then a detailed Harmonic analysis will not be available. Event: This feature allows the use to scroll through the various recorded waveforms. Cycle: This feature allows the user to place the select box over different cycles within the waveform capture. Channel: This feature allows the user to place the select box over cycles of different channels within the waveform capture. Full View: UNKNOWN 4. Select the desired cycle to be analyzed, by clicking on it. 5. Click CREATE 6. The following detailed harmonic analysis shall be created. AVTMMDP Rev B May 2007 44 Analyzing Downloaded Data This screen shall display the amplitude of each harmonic, through the 32nd as a percentage of fundamental. This screen shall also display the Odd and Even contribution as well as displaying the RMS value of the fundamental without harmonics. 7. In order to select another cycle to be examined, click on SETUP to back up one screen. Or you can scroll through the channels and cycles using the EVENT and PHASE up / down keys. 8. Creating a BAR CHART: In order to display a bar chart click on CHART / SHOW BAR CHART. AVTMMDP Rev A Oct 2006 45 M 9. The following bar chart shall be displayed. Creating Reports The MDP software allows the user to view recorded data as either text reports, or in chart format. This section of the manual will describe the various software features available for reports. Report Types The software allows you to create the following type of charts. RMS Tabular Data Exceedance Tabular Report Demand Report (KW, KVAR, KVA and PF) Exceedance Demand Report Total Demand THD Analysis Summary and Setup Report AVTMMDP Rev B May 2007 46 Analyzing Downloaded Data RMS Tabular Data: This report will display the values of each channel for every recorded interval. Exceedance Tabular Report: This report displays the values of each channel for every interval that is either higher or lower than the limits programmed in the report setup. (See Exceedance Reporting) Demand Report: This report will display the power values (KW, KVAR, KVA and PF) of each phase of every recorded interval. Exceedance Demand Report: This report displays the power values of each phase of every interval that is either higher or lower than the limits programmed in the report setup. (See Exceedance Reporting) Total Demand: This report will display the power values (KW, KVAR, KVA and PF) for the total of all phases. THD Analysis: This report will display the Total Harmonic Distortion for the first cycle of each waveform captured. Summary and Setup Report: This report will display the overall totals for the test. This report will also display the setup of the MDP. AVTMMDP Rev A Oct 2006 47 M Creating a Report 1. Viewing Multiple tests under one file name. When a unit is recording in current present mode and the current drops below the current trigger for a few minutes the unit will stop recording and go into a standby mode. When the current goes above the current trigger mode the unit will start recording again. However the unit will store the recorded data as another test. When the unit is downloaded all the tests will be downloaded under a single file name. To view the number of tests under each file name, click the plus sign in front of the file name. 2. To create a report, do the following: a. Highlight the desired test in the data file bar. b. Click on "Report" c. Click on "Create" d. Select the desired report type and report options. (See Below Pictures) e. Then click on "Create" AVTMMDP Rev B May 2007 48 Analyzing Downloaded Data From – To: Allows the user to select the start date and time and the end date and time of the report. Time Interval Precision: Allows the user to set the precision of the time of each interval to either seconds or milliseconds. Display Data Notation: Allows the user to select whether the data should be viewed in Kilo Notation or Scientific Notation. Combine Periods: This feature allows the user to average together multiple intervals in order to create a smaller report. Exceedance Reports There are two types of Exceedance Reports that can be selected, using the MDP software, RMS Tabular Exceedance or Demand Exceedance. Both of these reports allow the user to input limits. Only the intervals that exceed these limits shall be displayed. AVTMMDP Rev A Oct 2006 49 M RMS Tabular Sag: If the Sag box next to a desired channel is selected and a limit input then the software will only display intervals below this limit, in the report. Swell: If the Swell box next to a desired channel is selected and a limit input then the software will only display intervals above this limit, in the report. Demand Tabular Check Exceedance Limit By: This feature allows the user to compare lower and / or upper limits to either the power measurements of each individual phase or the power measurements of the total of all phases. Sag: If the Sag box next to a desired measurement is selected and a limit input then the software will only display intervals below this limit, in the report. Swell: If the Swell box next to a desired measurement is selected and a limit input then the software will only display intervals above this limit, in the report. AVTMMDP Rev B May 2007 50 Analyzing Downloaded Data Report Options After a report is created the user has several options for viewing and saving the data. Setup: By clicking this button the user can back up one screen to create a new report. Font: This option allows the user to change the font type and size of each report. Save as Text: This option allows the user to save the report as a text file. << Section: Each report is created in sections. This button allows you to move forward to the next section. Section >>: Each report is created in sections. This button allows you to move backwards to the last section. >>>>: Each report is created in sections. This button allows you to move forward to the last set of sections. AVTMMDP Rev A Oct 2006 51 M AVTMMDP Rev B May 2007 52 11 Unit Maintenance The MDP is a very low maintenance device. However the MDP does require the following periodic maintenance. Battery Life The MDP uses 4 AA batteries. How often these need to be replaced will depend on the use of the unit as well as the environment the unit is used in. There is a low battery LED indicator on the bottom of the unit. If this is flashing then the batteries do need to be replaced. If the unit is to be placed up on a line for a long term recording in excess of 1 - 2 weeks, it is recommended the batteries be replaced with a fresh set. If the battery voltage drops below approximately 5.1VDC the LED will start flashing. If the battery voltage drops below approximately 4.0VDC the recording will be terminated. Since the unit uses Flash memory no data will be lost even if the battery voltage drops below 4.0VDC Battery Life: Alkaline AVTMMDP Rev B May 2007 53 M Battery Life: Lithium Battery Replacement In order to replace the batteries perform the following procedure. 1. Remove the bottom cover of the unit by releasing two latches. AVTMMDP Rev B May 2007 54 Unit Maintenance 2. Unplug the battery connector from the unit 3. Remove the battery pack by pulling on the pull tab. (DO NOT PULL ON THE BATTERY CABLE) 4. Remove the 4 AA batteries from the battery pack. 5. Install 4 fresh batteries into the battery pack. Verify they are all facing the correct direction. 6. Re-insert the battery pack into the unit. 7. Plug the battery connector back into the unit. 8. Re-install the bottom cover of the unit. 9. COMPLETE AVTMMDP Rev A Oct 2006 55 M Block Diagrams of Unit Function Power Supply Communications AVTMMDP Rev B May 2007 56 Unit Maintenance Current – Voltage Input Memory AVTMMDP Rev A Oct 2006 57 M M AVTMMDP Rev B May 2007 58 12 Spare Parts Part No. Description CA-RS232 RS-232 Communications Cable CA-USB USB Communications cable PS-MDP 6V AC Adapter 23415 AA Batteries 36133 Carrying Case 36175-1 CD containing the MDP Software AVTMMDP Manual 35896 Bottom Cover 36168 Thumb Screws 36164 Battery Holder without Batteries 35863 Phase Labels 36047 Partial Discharge Ball 36160 Eye Hook AVTMMDP Rev B May 2007 59 M M AVTMMDP Rev B May 2007 60 13 Troubleshooting Problems The following section has been included in the manual to assist users with possible problems they could run into during normal operation. The following sections are included. 1. Cannot download the unit. 2. Cannot communicate with the unit 3. Resetting the unit. Cannot download sequentially 1. Select “Help” and “About”. Verify software version is the latest available. You can view the latest version available by checking our web page on latest software/ firmware for units on the Megger web site at www.megger.com 2. If you need a newer version then download the new version off of web site at www.megger.com 3. Verify all the units are the same model number. (MDP or DP-1000r or DP-200r or PF-1) Units cannot be mixed and matched. 4. Verify profiler is connected to the AC Adapter. 5. Verify no other programs are running. 6. Verify the computers screen saver is disabled. 7. Connect phase A profiler to the computer. 8. In MDP software click on CONFIG then COMMUNICATIONS. 9. Select correct COM port and the baud rate to 9600 then click OK. 10. Click on RECORDER then on VERIFY. Verify unit connects. 11. If communication error occurs, see next sections. (Unit will not verify communication and resetting the unit.) 12. Repeat step 8 with phase B and phase C profilers hooked to computer. Verify they all connect. 13. If they all connect then reconnect phase A profiler to the computer. 14. Select RECORDER then RETRIEVE. AVTMMDP Rev B May 2007 61 M 15. Click on BROWSE to name the data file to be downloaded, then click SAVE. 16. Input any customer information you wish then click OK. 17. Follow instructions displayed by software to download units. 18. If units fail to download sequentially then download each individually. 19. If any of the units fail downloading individually call Megger Technical Support. 20. If the units download individually but not sequentially they may be set up different. To verify this, hook up phase A profiler to computer. 21. Click on RECORDER then REMOTE and record the sample rate and storage rate of the unit. 22. Connect phase B recorder and phase C recorder to computer and repeat step 20. Verify all the sample and storage rates are the same. If they are different the units will not download sequentially. 23. If units are set up identically then exit software and restart computer. 24. Restart MDP software and retry download. 25. If download still fails then try a different computer, (Desk Top preferably). 26. If the download still fails then call Megger Technical Support. Cannot verify communication 1. Select HELP and ABOUT. Verify software version is the latest available. You can view the latest version available by checking our web page on latest software / firmware for units under the support link on the home page. 2. If it is not the latest version, download a new version off of web site at www.megger.com 3. Click on CONFIG then on COMMUNICATIONS. Verify the correct COM port is selected. 4. Verify the profiler is connected to the AC Adapter. 5. Click on RECORDER then on VERIFY. Verify unit connects. 6. If a communications error occurs then exit software and restart computer. 7. Restart MDP software. 8. Click on RECORDER then on VERIFY. Verify unit connects. 9. If communications error occurs disconnect profiler from the charger and connect a different profiler to the same cable. 10. Click on RECORDER then on VERIFY. Verify unit connects. 11. If unit connects, then the other unit could be locked up. Go to resetting unit below. AVTMMDP Rev B May 2007 62 Troubleshooting Problems 12. If communications error occurs replace the charger with another charger and repeat step 8. 13. If unit connects then the charger that was being used is faulty. 14. If communications error occurs disconnect the charger from the unit and plug the unit into a different channel of the charger, then repeat step 8. 15. If unit connects then the channel of the charger you where using is faulty. 16. If a communications error occurs load the software onto a different computer. Then hook the units up to that computer and repeat step 8. ( If no other computer is available call Megger Technical support and ask for a copy of “Connecting to a profiler with Hyper-terminal”) 17. If the unit connects then there is a problem with the computer that was being used. 18. If a communications error occurs then call Megger Technical Support. Resetting the Unit 1. Disconnect the Battery Pack. 2. Wait 10 Seconds 3. Re-connect Battery Pack. AVTMMDP Rev A Oct 2006 63 M M AVTMMDP Rev B May 2007 64