1
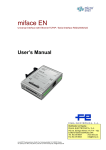
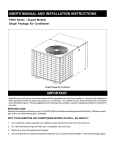
User’s Manual
Variable Speed Ultra-High
SEER Split System
These units have been designed and
tested for capacity and efficiency in
accordance with ARI standards.These
outdoor air conditioning units are designed for use exclusively with select
NORDYNE G6 gas furnaces and select
NORDYNE B5 air handlers equipped
with dedicated matched indoor coils.
IMPORTANT NOTE
This equipment is one part of a total
system designed for maximum efficiency, adequate capacity and total
comfort. The system must function as
intended. Under no circumstances any
part of the system may be substituted
with other components.
USER’S INFORMATION
IMPORTANT
Read this owner information to become
familiar with the features, capabilities
and use of your system.
Keep this with literature of other
appliances where you have easy
access to it in the future.
If a problem occurs, check instructions
and follow recommendations given.
If these suggestions don’t eliminate
the problem, call your servicing
contractor.
THE iQ Drive SYSTEM
The iQ Drive Air Conditioning System
features fully variable speed compressor technology and variable speed
indoor and outdoor motors.The system
provides variable cooling capacity as
needed modulating over a five degrees Fahrenheit temperature range.
It operates near the nominal rated
capacity at the thermostat set point
and modulates as the temperature
difference between the set point and
the room temperature changes. The
system can operate at approximately
20% higher capacity than the nominal
capacity to provide rapid cooling. Then
as the room temperature decreases,
the system modulates down through
the intermediate capacities until reaching the minimum capacity if the room
temperature reaches 2 degree F below
set point. If the room temperature decreases below the set point by 2 degree
F, then the unit will turn off.
The system has a built-in humidity
control that will maintain the humidity
of the home in the desired range. If the
humidity in the home is too low, then
the system will activate the humidifier
(if installed). If the humidity is too high,
then the system will reduce the indoor
blower speed to increase the water
removal from the conditioned space
and lower the humidity.
The iQ Drive System consists of an
outdoor unit, indoor unit, thermostat
controller and connecting lines.
1) The Outdoor Unit:
The outdoor section consists of a
large heat exchanger surface, an
inverter motor drive, a variable speed
rotary compressor, a variable speed
fan motor, and a specially-designed
fan blade housed in sturdy attractive
chassis.
3) System Thermostat Controller:
The system controller is the master
component that communicates with
and controls the remaining system
components. The inverter in the
outdoor unit receives signals from
compressor, heat exchanger, fan motor
and outdoor ambient sensor which
are communicated to the controller
via connections to the indoor interface
board. The controller responds back
with appropriate messages for each
device operation command.
2) The Indoor Unit:
The matched indoor coil may be a
stand alone cased coil intended to be
installed in NORDYNE G6 model gas
furnaces or may be part of a dedicated
NORDYNE B5 model air handler. The
indoor coil is equipped with electronic
expansion valve to precisely control
refrigerant flow over the wide range of
system capacity modulation.
For the stand alone dedicated cased
coil in gas furnace, a furnace conversion
kit is required to allow the addition of
the required system components such
as the variable speed indoor blower
assembly, interface board, upgraded
transfor mer and the electronic
expansion valve controller. Consult
Installation Instructions provided with
the Indoor Coil and the Conversion Kit
for details.
For the dedicated Air Handler,
the matched coil and all required
components are included. Consult
Installation Instructions provided with
the Air Handler Unit for details.
2
The controller communicates with the
indoor section via the indoor interface
board which is powered by 24 VAC
from the transformer in the furnace
or air handler. Transformer in the gas
furnace MUST be replaced with the
one supplied in the gas furnace blower
conversion kit.
GENERAL INFORMATION
CAUTION:
This unit is charged with R-410A
refrigerant. DO NOT under any
circumstances use any other
refrigerant besides R-410A in this
unit. Use of another refrigerant will
damage this unit.
START UP AND CHECK OUT
WARNING:
Ensure electrical power to the unit is
off prior to performing the following
steps. Failure to do so may cause
personal injury or death.
Outdoor Unit: Ensure the outdoor
coil, the inverter heat sink, and the top
of the unit are free from obstructions
and debris. Furthermore, ensure that
all access and control panel covers
are in place.
Indoor Unit: Consult the installation
instructions of the indoor unit (i.e.; air
handler, indoor coil and furnace) for
details regarding installation. Ensure
wiring is secure and correct.
Air Filters: Ensure air filters are clean
and in place prior to operating the
equipment. Ensure that the unit has
been properly and securely grounded
and that power supply connections
have been made at both the facility
power interface and outdoor unit.
iQ Drive Controller Thermostat:
The main screen displays indoor and
outdoor temperatures, set points in
cooling and heating, relative humidity
and mode of operation. The controller
thermostat is designed to display information screens for use by the installer
and homeowner.The “Installer Settings
Menu Screen” should be accessed only
by qualified personnel.
The controller screens display all pertinent system information in normal
operation. When necessary, important
messages may be sequenced along
the top line to indicate conditions that
need attention. The controller is also
designed to function as an important
service and troubleshooting tool.
3
iQ Drive ControllerThermostat
Operation:
ADJUSTING TEMPERATURE:
1- Before you can adjust the temperature, a MODE must be selected. If
you are already in Heating or Cooling mode, skip to step 5.
2- To select a MODE, use the keypad
arrows to scroll to MODE, then press
the center button on the keypad to
enter the operating mode menu.
3- Select the desired mode by scroll
ing up and down arrows, then press
center button.
4- The main menu appears and the
view displays the mode selected,
indoor temperature and outdoor
temperature.
5- Use the up and down arrows to set
desired temperature, then press
center button to save.
SETTING DATE AND TIME:
1- From the main menu screen, scroll to
menu and press the center button.
2- Select “SET DATE AND TIME”.
3- If your area observes daylight saving time, select “AUTO DAYLIGHT
SAVING”, scroll to “ON”, then press
center button to save. You will be
returned to “SET DATE AND TIME”
menu. Scroll to “SET DATE AND
TIME” and press the center button.
4- Set Month, Day, Year, Hour and
Minute by using the up and down
arrows followd by center button to
save.
5- Return to main menu by pressing
the left arrow.
HOLD SETTING (Vacation & Permanent)
Vacation Hold:
1- From the Main Screen, scroll to
MENU and press center button.
2- Select HOLD, VACATION
3- First, the controller prompts you for
a temperature to hold. If you are in
AUTO Mode, you will be prompted
for both heating and cooling setting.
Use up and down arrows to select
desired temperatures and press
center button.
4- Next, it will prompt you for a date
and time when you wish to return
to programmed operation. Specify
date and time using up and down arrows. Returning to the main screen,
you will see in the upper part of
screen alternating HOLD TIL date
and time you specified and actual
day and time.
5- To cancel this hold, scroll to CANCEL HOLD from the main menu
and press center button.
will remain until the permanent hold
is cancelled.
5- To cancel this hold, scroll to CANCEL HOLD from the main menu and
press center button. This will revert
to the programmed settings.
PERMANENT HOLD:
1- From the Main Screen, scroll to
MENU and press center button.
2- Select HOLD, PERMANENT
3- The controller prompts you for a
temperature to hold. If you are in
AUTO Mode, you will be prompted
for both heating and cooling setting.
Use up and down arrows to select
desired temperatures and press
center button.
4- Returning to the main screen, you
will see in the upper part of screen
alternating PERMANENT HOLD
and and actual day and time.You can
adjust to permanent hol temperature
at will, and the temperature selected
PROGRAMMING CONTROLLER:
Programming a day or series of days:
1- From the main screen, scroll to
MENU and press center button.
2- Select PROGRAM.
3- You can program each day differently
by going through each day or you
can program everyday the same
by scrolling to EVERYDAY. You can
program weekdays and weekends
by selecting the appropriate menu
item.
4- To program everyday the same,
select EVERYDAY and press center
button.
5- Using the arrows, program all settings, scroll down to SAVE and press
center button
4
FAN OPERATION:
The controller can operate the fan in
three ways:
AUTO: Fan is on only during heating
and coolong modes.
ON: Fan is always on.
PROGRAMMED FAN: Fan follows the
program set in the program screen.
1- From the Main Screen, scroll to
MENU and press center button.
2- Select FAN.
3- Select the operation desired.
CHANGING MODE:
1- From the main screen, select
MODE.
2- Select the operation mode required
and press center button.
MAIN SCREEN:
The iQ Drive controller Thermostat
main screen displays system normal
operating information. It displays Outdoor and Indoor temperatures, Set
points in cooling and heating, humidity
and mode of operation for system and
indoor fan. In addition, it displays five
options to select from:
RH Option: Screen displays humidity
conditions.
If your system is equipped with a
humidifier, you may select one of the
available options:
Humidifier Only.
Dehumidifier Only.
Both.
None.
TEMP Option:
Select this option to temporarily override program setting until next program
interval is activated.
MODE Option:
Select this option to choose operating
mode (Cool, Heat, Auto or off).
FAN Option:
Select this option to set desired indoor
blower operation mode (Auto, On or
Programmed).
MENU Option:
Select “MENU” option to input the following: Set Date & Time, Hold Temp
info, Program of Operation, Fan, Mode,
Settings and Security Lockout).
Note: “Fan” and “Mode” may be selected
from Main Screen directly.
Use SETTINGS screen to scroll
through options such as:
5
SCREEN SETTINGS to set “Temp
scale”, “Clock setting”, “Language”,
“Contrast” and “Backlight on Time”.
OFFSET screen to Set temperature
offsets, humidity offset, heat anticipator
and heat differential.
AUTO CHANGEOVER: Select “Auto or
Manual Change” and select the “Auto
Changeover Time” to input desired time
interval between cooling and heating
changeover.
PROGRAM SETTINGS:
Select Smart Recovery feature to save
energy by gradually adjusting temperature when time for a programmed
temperature change is anticipated.
EVENTS PER DAY:
Select to set the number of scheduled
setpoints intervals per day. You may
select from 2- Business, 2- Residential
or 4- Residential (default).
COOLING LOCKOUT:
Select to restrict cooling operation if
outdoor temperature is below certain
point. Ranges are None (default), 45F,
50F or 55F.
INTERMITTENT FAN:
Select to overcome variation of temperature and air stratification that may
be especially pronounced during mild
outdoor conditions. If the fan hasn’t
been ON for an hour, start cycling the
fan based on selected intervals. Select
from OFF, 5 to 20 minutes in 5 minute
increments and press center button.
Next, select the amount of time the fan
is to be off. Range is from 0 minutes
to 40 minutes in 5 minute increments.
Press center button to save and return
to the setting menu screens. The fan
will continue to cycle until a call for
cooling or heating is energized.
SERVICE INFORMATION:This screen
lists components status and faults if
any. Scroll up and down to obtain “Fault
Status” showing active fault and last 5
faults, “Compressor Status”, “Outdoor
fan Status”, “Indoor fan Status”, “Temperature Status” and option to “Clear
Fault History”.
SECURITY LOCKOUT: Select from
“Temp Adjust Only” or “Total Keypad
Lockout” options.
A PIN number will be required. Use
the up, down and right arrows to select
your pin number. Press the center button to save. Screen will display locked
and return to main screen which will
alternate between “Locked” and the
“date and time”. If “Temp Adjust Only”
is selected, you will be able to adjust
set points. For any other operations, the
PIN will be required. Once unlocked,
you need to set up a pin number again
to lockout the controller.
OPERATING INSTRUCTIONS
To Operate System in Cooling:
From MODE Screen, select AUTO
or COOL. From Main Screen use the
down arrow to set cooling temperature
below room temperature.Verify that the
indoor fan calibration is performed and
that system starts running. To set system operation, select MENU from the
Main Screen and follow the instructions
listed under previous section.
6
To Operate Furnace in Heating:
From MODE Screen, select AUTO or
HEAT. From Main Screen use the up
arrow to set heating temperature above
room temperature. If system has been
properly configured, heating will start
to operate.
To Shut Off the System:
The system is designed to continuously
operate within a wide range of speeds
to provide ultimate comfort, adequate
matched to load capacity and maximum
efficiency. It will turn off automatically if
required. However if there is a need to
shut off the system, select OFF from
Operating Mode Screen.
To Operate Indoor Blower Only:
SelectFANfromMAINmenuscreen,then
select ON for continuous blower operation or Programmed Fan for intermittent
option.
NOTE: The controller is programmed to
start a fan calibration occurrence every
week and every time the power is lost
for more than 8 hours. This function
starts the indoor blower and calibrates
air volume to motor speed.
TO MAINTAIN SYSTEM:
CAUTION:
Be certain the electrical power to the
outdoor unit and the indoor unit is
disconnectedbeforedoingthefollowing
recommended maintenance.
1- Regularly, clean or replace the
indoor air filter at the recommended
intervals set by the installer and
displayed on the controller screen
when due for replacement.
2- Remove any leaves and grass
clippings from the outdoor unit.
3- Check for any obstructions to the
outdoor unit.
Before calling for service, be certain:
1- The unit controller is properly set
and programmed.
2- The unit disconnect fuses are
in good condition, and electrical
power to the unit is turned on.
SYSTEM PROTECTION MEASURES
The inverter driver is designed to provide a full scale of protection measures
against conditions that may cause
compressor and/or other components
failure. When the protective function
is triggered, the inverter shuts down
the unit and communicates the fault
description to the thermostat controller which will display an error code or
component fault status. To release the
trip, the fault cause must be corrected
by qualified service personnel.
7
Diagnostics and Troubleshooting:
The thermostat controller is designed
to provide service personnel with
detailed description of faults that may
cause system malfunction, as well
as, messages indicating maintenance
required. Only qualified service
personnel shall get into “Service
Information Menu” screen to investigate
the fault and make the appropriate
correction.
The last five fault codes are stored in
the thermostat controller memory. If the
same fault code is triggered five times
sequentially or the fault will damage
the equipment, then the system will
lockout and display the red “SERVICE
NEEDED” screen on the thermostat.
The “SERVICE NEEDED” screen
will display the system information,
generalized fault description, and/or
contractor phone number.
INSTALLER: PLEASE LEAVE
THESE INSTALLATION
INSTRUCTIONS WITH THE
HOMEOWNER.
¢708604$¤
7086040
7086040 (Replaces 7085560)
Specifications and illustrations subject to change
without notice and without incurring obligations.
Printed in U.S.A. (07/06)