1
Madame Tussauds New York Audio Systems: Show Control and Playback MADAME TUSSAUDS NEW YORK CITY AUDIO SYSTEMS: SHOW CONTROL AND PLAYBACK Bruce Ellman Theatre Sound 917-446-6797 [email protected] P. 1 June 24, 2011 Rev. 2.0 Madame Tussauds New York Audio Systems: Show Control and Playback 1.0 INTRODUCTION : Bruce Ellman Theatre Sound and HG Lighting Design have provided Madame Tussauds New York a themed entertainment technical control system to deliver sound and lighting control to many of the attractions within the New York City venue. The sound, lighting and control systems are located in the eighth floor control room. This document gives an overview of the audio and show control systems. We have designed this system under the concept of having a “master” audio show control system (Web based Midi control) issue several mode commands to the “slave” target control systems (Audio, Lighting, etc.). The audio show control system uses an intranet website as its control interface. Clicking on one of the control web page buttons sends a command to a MIDI Web Server which generates a simple “control change” MIDI message. This message is received by a Midi Translator program (Bomes MIDI Translator) which then generates one or several System Exclusive (Sysex) messages. Each of these Sysex commands controls a specific hardware component including playback, live input, lighting, and video systems. The audio system is comprised of five computer CPU's. The show control system uses the Midi Instrument Digital Interface (MIDI) protocol and shares a computer with the audio system. The show control/audio system CPU, labeled “CPU-05,” can be accessed by pressing the fifth button on the KVM located over the LCD monitor in the control room. “Master Control” of the entire audio/lighting system is accessible either through the Audio “Lighting Control” intranet web page or via the CueServer iPad controller (See the CueServer/Lighting systems documentation for information about that interface). 2.0 MTNY WEB PAGE SHOW CONTROL INTERFACE : The Master Show Control System for the audio system is a MIDI webserver accessed via the MTNY intranet site. The three software components of this system are: • • • A web browser to access the intranet site and MidiServer The MIDI webserver Bomes MIDI Translator When a request is made to the Midi Server a simple MIDI control change message is sent to the MIDI Translator (MT). The MT will then send the appropriate System Exclusive (Sysex) MIDI message(s) to the audio and lighting systems. Bruce Ellman Theatre Sound 917-446-6797 [email protected] P. 2 June 24, 2011 Rev. 2.0 Madame Tussauds New York Audio Systems: Show Control and Playback 2.0 MTNY WEB PAGE SHOW CONTROL INTERFACE (CONTINUED): In order for the control system to function all three software components must be running and properly configured. When CPU-05 is booted these components should automatically start up. However, if they fail to start take the following actions: • • • OPEN "index.htm" in the "Documents/my webs/MTNY" folder OPEN MIDI Web Server and set Midi OUTPUT to "Bome's Midi Translator 1" OPEN Bome's MIDI Translator (It should be running minimized on the taskbar) and open the latest Tussauds file. NOTE: AS LONG AS THE MIDI WEB SERVER AND BOME’S MIDI TRANSLATOR ARE RUNNING AND PROPERLY CONFIGURED ANY COMPUTER WITH A WEB BROWSER, A COPY OF THE INTRANET FILES, AND IS CONNECTED TO THE AUDIO NETWORK CAN REMOTELY CONTROL ALL OF THE MTNY WEB PAGE SHOW CONTROL FUNCTIONS INCLUDED HEREWITH. 3.0 MASTER CONTROL (“Lighting Control” Webpage) : Our design approach was that show control could issue simple commands to the target systems to go into the following operating states, or “modes” • DAY MODE (Show lighting, show audio – attractions running, facility open to public.) • NIGHT MODE (No lighting, no audio - attractions not running, facility closed to public, staff is not present in the building.) • CLEANING MODE (Work lighting, and no audio attractions not running, facility closed to public, but staff is present in the building) Bruce Ellman Theatre Sound 917-446-6797 [email protected] P. 3 June 24, 2011 Rev. 2.0 Madame Tussauds New York Audio Systems: Show Control and Playback 3.1 AUDIO ONLY CONTROL (“START HERE”) : From the “Start Here” control page ALL AUDIO can be stopped and started WITHOUT initiating lighting control. • RESET/STOP ALL (Stops and resets ALL audio) • START ALL (Wait 10 seconds after a “Reset” before issuing a startup command) 3.2 AUDIO ONLY CONTROL (“UNIT CONTROL”) : From the “UNIT CONTROL” control page audio can be stopped / started apart from lighting on an individual CPU basis. Additionally, external playback can be routed to any and all areas of the facility served by the computer playback system. Each of the five CPU’s feature each of the following four controls: • STOP/RESET UNIT X ( Stops and resets audio for only that unit) • STARTUP UNIT (X) (Wait 10 seconds after a “Reset” command before issuing. Only the selected unit will start) • (X) EVENT (UNMUTES external playback and MUTES internal playback) • END (X) EVENT (UNMUTES internal playback and MUTES external playback) At the end of an “event” you do not need to reset/stop the units to restore normal playback operation. The END EVENT command will mute external playback and unmute the normal program material. Bruce Ellman Theatre Sound 917-446-6797 [email protected] P. 4 June 24, 2011 Rev. 2.0 Madame Tussauds New York Audio Systems: Show Control and Playback 3.3 ONLINE DOCUMENTATION (“Documentation”) : Basic system operating instructions are available on the “Documentation” page of the MTNY intranet website. 3.4 MTNY MIDI CONNECTIONS : There are five M-Audio MidiSport 2X2 USB audio interfaces—one for each CPU. There are also three Midi Solutions devices: • • • Midi Solutions M8 - Merges 8 MIDI inputs to its MIDI output Midi Solutions T8 - Provides 8 MIDI outputs from a single MIDI input Midi Solutions F8 - offers 8 footswitch or contact closure inputs which can be individually programmed to generate MIDI messages and perform various MIDI functions There are two NC (Normally Closed) Motion Sensors: • • One mounted in the cab near the interior dome light One mounted behind the exterior cab front grill. There is one NO (Normally Open) momentary push button mounted on the Wall Street set. The F8 is programmed via CPU-01 and currently generates MSC/Sysex commands as follows: 1. CC IN 1 – On release: F0 7F 00 02 10 15 36 F7 (Device 0, Sound, Start Clock, Cue List 6) 2. CC IN 2 – On release: F0 7F 00 02 10 15 35 F7 (Device 0, Sound, Start Clock, Cue List 5) 3. CC IN 3 – On depress: F0 7F 00 02 10 01 31 30 00 32 00 31 F7 (Device 0, Sound, Go, Cue 10, List 2, Path 1) CC (Closed Contact) inputs 4-8 are currently unused. Bruce Ellman Theatre Sound 917-446-6797 [email protected] P. 5 June 24, 2011 Rev. 2.0 Madame Tussauds New York Audio Systems: Show Control and Playback 3.4 MTNY MIDI CONNECTIONS (CONTINUED) Midi Solutions Device M8 IN 1 (POWER) Configured/Connected To IN 2 IN 3 IN 4 IN 5-8 OUT MidiSport 5 (MS-05) OUTPUT “A” Spirit of New York–Control computer FROM LIGHTING CUESERVER MIDI OUT Midi Solutions F8 OUTPUT FROM YAMAHA 01V96VCM MIDI OUT NOT USED TO MIDI SOLUTIONS T8 T8 IN (POWER) OUT 1 OUT 2 OUT 3 OUT 4 OUT 5 OUT 6 OUT 7 OUT 8 FROM MIDI SOLUTIONS M8 TO MS-01 INPUT “A” TO MS-02 INPUT “A” TO MS-03 INPUT “A” TO MS-04 INPUT “A” TO MS-05 INPUT “A” NOT USED TO LIGHTING CUESERVER MIDI IN TO YAMAHA 01V96VCM MIDI IN F8 MIDI IN (POWER) MIDI OUT CC IN 1 CC IN 2 CC IN 3 CC IN 4-8 FROM MS-01 OUTPUT “B” TO MIDI SOLUTIONS M8 FROM INTERIOR CAB MOTION SENSOR FROM EXTERIOR CAB MOTION SENSOR FROM WALL STREET TRADING BELL BUTTON UNUSED Bruce Ellman Theatre Sound 917-446-6797 [email protected] : P. 6 June 24, 2011 Rev. 2.0 Madame Tussauds New York Audio Systems: Show Control and Playback 3.4 MTNY MIDI TRANSLATER SETTINGS : AUDIO CONTROL Translator 0: ALL OFF Incoming: MIDI BF 17 7F Outgoing: MIDI F0 7F 7F 02 10 08 F7 Translator 1: RESET ALL Incoming: MIDI BF 15 7F Outgoing: MIDI F0 7F 7F 02 10 0A F7 Translator 2: STARTUP ALL Incoming: MIDI BF 16 7F Outgoing: MIDI F0 7F 7F 02 10 01 F7 Translator 3: RESET AB 1-2 Incoming: MIDI B0 17 7F Outgoing: MIDI F0 7F 01 02 10 0A F7 Translator 4: STARTUP AB 1-2 Incoming: MIDI B0 21 7F Outgoing: MIDI F0 7F 01 02 10 01 F7 Translator 5: RESET AB 3-4 Incoming: MIDI B0 18 7F Outgoing: MIDI F0 7F 04 02 10 0A F7 Translator 6: STARTUP AB 3-4 Incoming: MIDI B0 22 7F Outgoing: MIDI F0 7F 04 02 10 01 F7 Translator 7: RESET AB 5-6 Incoming: MIDI B0 19 7F Outgoing: MIDI F0 7F 06 02 10 0A F7 Translator 8: STARTUP AB 5-6 Incoming: MIDI B0 23 7F Outgoing: MIDI F0 7F 06 02 10 01 F7 Translator 9: RESET AB 7-8 Incoming: MIDI B0 1A 7F Outgoing: MIDI F0 7F 07 02 10 0A F7 Bruce Ellman Theatre Sound 917-446-6797 [email protected] P. 7 June 24, 2011 Rev. 2.0 Madame Tussauds New York Audio Systems: Show Control and Playback 3.4 MTNY MIDI TRANSLATER SETTINGS (CONTINUED) : Translator 10: STARTUP AB 7-8 Incoming: MIDI B0 24 7F Outgoing: MIDI F0 7F 07 02 10 01 F7 Translator 11: RESET SoNY Incoming: MIDI B0 1B 7F Outgoing: MIDI F0 7F 00 02 10 0A F7 Translator 12: STARTUP SoNY Incoming: MIDI B0 25 7F Outgoing: MIDI F0 7F 00 02 10 01 F7 Translator 13: AB 1 SUB1 OFF (PARTY PLAYBACK SILENCED) Incoming: MIDI BF 00 00 Outgoing: MIDI F0 7F 01 02 10 06 00 06 00 00 F7 Translator 14: AB 1 SUB1 ON (PARTY PLAYBACK RESTORE) Incoming: MIDI BF 00 7F Outgoing: MIDI F0 7F 01 02 10 06 00 06 00 40 F7 Translator 15: AB 1 SUB3 ON (LIVE FEED ENABLE) Incoming: MIDI BF 00 00 Outgoing: MIDI F0 7F 01 02 10 06 00 06 02 64 F7 Translator 16: AB 1 SUB4 ON (LIVE FEED ENABLE) Incoming: MIDI BF 00 00 Outgoing: MIDI F0 7F 01 02 10 06 00 06 03 7F F7 Translator 17: AB 1 RAISE PARTY OUTS Incoming: MIDI BF 00 00 Outgoing: MIDI F0 7F 01 02 10 01 33 00 34 00 31 F7 Translator 18: AB 1 SUB3 OFF (LIVE FEED DISABLE) Incoming: MIDI BF 00 7F Outgoing: MIDI F0 7F 01 02 10 06 00 06 02 00 F7 Translator 19: AB 1 SUB4 DOWN (LIVE FEED DISABLE) Incoming: MIDI BF 00 7F Outgoing: MIDI F0 7F 01 02 10 06 00 06 03 40 F7 Bruce Ellman Theatre Sound 917-446-6797 [email protected] P. 8 June 24, 2011 Rev. 2.0 Madame Tussauds New York Audio Systems: Show Control and Playback 3.4 MTNY MIDI TRANSLATER SETTINGS (CONTINUED) : Translator 20: AB 1 RESTORE OUTS FOR PLAYBACK Incoming: MIDI BF 00 7F Outgoing: MIDI F0 7F 01 02 10 01 34 00 34 00 31 F7 Translator 21: AB 3 SUB2 OFF (PARTY PLAYBACK SILENCED) Incoming: MIDI BF 01 00 Outgoing: MIDI F0 7F 04 02 10 06 00 06 01 00 F7 Translator 22: AB 3 SUB2 ON (PARTY PLAYBACK RESTORE) Incoming: MIDI BF 01 7F Outgoing: MIDI F0 7F 04 02 10 06 00 06 01 40 F7 Translator 23: AB 3 SUB3 ON (LIVE FEED ENABLE) Incoming: MIDI BF 01 00 Outgoing: MIDI F0 7F 04 02 10 06 00 06 02 64 F7 Translator 24: AB 3 SUB3 OFF (LIVE FEED DISABLE) Incoming: MIDI BF 01 7F Outgoing: MIDI F0 7F 04 02 10 06 00 06 02 00 F7 Translator 25: AB 5 SUB1 OFF (PARTY PLAYBACK SILENCED) Incoming: MIDI BF 02 00 Outgoing: MIDI F0 7F 06 02 10 06 00 06 00 00 F7 Translator 26: AB 5 SUB1 ON (PARTY PLAYBACK RESTORE) Incoming: MIDI BF 02 7F Outgoing: MIDI F0 7F 06 02 10 06 00 06 00 40 F7 Translator 27: AB 5 SUB3 ON (LIVE FEED ENABLE) Incoming: MIDI BF 02 00 Outgoing: MIDI F0 7F 06 02 10 06 00 06 02 64 F7 Translator 28: AB 5 RAISE OUTPUTS (LIVE FEED ENABLE) Incoming: MIDI BF 02 00 Outgoing: MIDI F0 7F 06 02 10 01 31 30 00 38 00 31 F7 Translator 29: AB 5 SUB3 OFF (LIVE FEED DISABLE) Incoming: MIDI BF 02 7F Outgoing: MIDI F0 7F 06 02 10 06 00 06 02 00 F7 Bruce Ellman Theatre Sound 917-446-6797 [email protected] P. 9 June 24, 2011 Rev. 2.0 Madame Tussauds New York Audio Systems: Show Control and Playback 3.4 MTNY MIDI TRANSLATER SETTINGS (CONTINUED) : Translator 30: AB 5 RESTORE PLAYBACK OUTPUT (LIVE FEED DISABLE) Incoming: MIDI BF 02 7F Outgoing: MIDI F0 7F 06 02 10 01 32 30 00 38 00 31 F7 Translator 31: AB 7 SUB1 OFF (PARTY PLAYBACK SILENCED) Incoming: MIDI BF 03 00 Outgoing: MIDI F0 7F 07 02 10 06 00 06 00 00 F7 Translator 32: CUESERVER FANS MACRO Incoming: MIDI BF 24 00 Outgoing: MIDI F0 00 43 59 05 6D 61 63 72 6F 20 31 30 31 00 F7 Translator 33: AB 7 SUB1 ON (PARTY PLAYBACK RESTORE) Incoming: MIDI BF 03 7F Outgoing: MIDI F0 7F 07 02 10 06 00 06 00 40 F7 Translator 34: AB 7 SUB3 ON (LIVE FEED ENABLE) Incoming: MIDI BF 03 00 Outgoing: MIDI F0 7F 07 02 10 06 00 06 02 64 F7 Translator 35: AB 7 SUB3 OFF (LIVE FEED DISABLE) Incoming: MIDI BF 03 7F Outgoing: MIDI F0 7F 07 02 10 06 00 06 02 00 F7 Translator 36: SoNY SUB1 OFF (PLAYBACK SILENCED) Incoming: MIDI BF 04 00 Outgoing: MIDI F0 7F 00 02 10 06 00 06 00 00 F7 Translator 37: SoNYSUB1 ON (PLAYBACK RESTORE) Incoming: MIDI BF 04 7F Outgoing: MIDI F0 7F 00 02 10 06 00 06 00 40 F7 Translator 38: SoNY SUB3 ON (LIVE FEED ENABLE) Incoming: MIDI BF 04 00 Outgoing: MIDI F0 7F 00 02 10 06 00 06 02 64 F7 Translator 39: SoNY SUB3 OFF (LIVE FEED DISABLE) Incoming: MIDI BF 04 7F Outgoing: MIDI F0 7F 00 02 10 06 00 06 02 00 F7 Bruce Ellman Theatre Sound 917-446-6797 [email protected] P. 10 June 24, 2011 Rev. 2.0 Madame Tussauds New York Audio Systems: Show Control and Playback 3.4 MTNY MIDI TRANSLATER SETTINGS (CONTINUED) : Translator 40: SoNY SUB2 OFF (PLAYBACK SILENCED) Incoming: MIDI BF 04 00 Outgoing: MIDI F0 7F 00 02 10 06 00 06 01 00 F7 Translator 41: SoNYSUB2 ON (PLAYBACK RESTORE) Incoming: MIDI BF 04 7F Outgoing: MIDI F0 7F 00 02 10 06 00 06 01 40 F7 LIGHTING: Translator 0: FANS Incoming: MIDI BF 24 00 Outgoing: MIDI F0 00 43 59 00 4D 41 43 52 4F 20 31 30 31 00 F7 Translator 1: FAN MACRO Incoming: MIDI 90 3C 7F Outgoing: MIDI F0 00 43 59 00 4D 41 43 52 4F 20 31 30 32 00 F7 Translator 2: CAB MACRO Incoming: MIDI 90 3D 7F Outgoing: MIDI F0 00 43 59 00 4D 41 43 52 4F 20 31 30 31 00 F7 Translator 3: TS MACRO Incoming: MIDI 90 3E 7F Outgoing: MIDI F0 00 43 59 00 4D 41 43 52 4F 20 31 30 33 00 F7 Translator 4: DAY MODE Incoming: MIDI BF 21 00 Outgoing: MIDI F0 00 43 59 00 4D 41 43 52 4F 20 31 00 F7 Translator 5: NIGHT MODE Incoming: MIDI BF 22 00 Outgoing: MIDI F0 00 43 59 00 4D 41 43 52 4F 20 32 00 F7 Translator 6: CLEANING MODE Incoming: MIDI BF 23 00 Outgoing: MIDI F0 00 43 59 00 4D 41 43 52 4F 20 33 00 F7 (Settings as of May 3, 2011) Bruce Ellman Theatre Sound 917-446-6797 [email protected] P. 11 June 24, 2011 Rev. 2.0 Madame Tussauds New York Audio Systems: Show Control and Playback 4.0 YAMAHA 01V96VCM (MIDI) : The Yamaha mixer serves several functions. Besides its normal audio routing features it is also a MIDI controller. The Yamaha 01V96VCM can also accept add-on accessories to expand its capabilities including adding inputs and outputs as well as transmitting and receiving audio over Ethernet cable. MIDI: Layer 1-16 17-32 MASTER REMOTE When operating in the “Remote” layer the Yamaha has been programmed so the first 10 and the last (number 16) faders control the level of computer playback. The nominal level is midway between the fader’s highest and lowest setting and corresponds to a MIDI level of 64. This control of volume is provided for TEMPORARY level changes. Permanent changes should be programmed into the shows. Restore to programmed levels by recalling Scene 1. To recall a Scene, press the SCENE MEMORY Up [ ] or Down [ ] buttons to select a Scene memory number, then press the SCENE MEMORY [RECALL] button. Programmed playback levels will automatically be restored after issuing a “Stop/Reset” command. However, the fader levels on the Yamaha mixer will NOT be automatically restored. The easiest way to restore mixer fader levels, once again, is to recall Scene 1. Current Remote Fader assignments are: FADER 1 2 3 4 5 6 7 8 9 10 11 12 13 14 15 16 AREA CONTROLLED CELEBRITY PARTY SCREAM CHAMBER ENTRANCE / PIRATES OF THE CARIBBEAN SCREAM CHAMBER PORTRAIT GALLERY 1920’S-1950’S 1960’S-1980’S 1980’S-1990’S 1990’S-2000’S SPIRIT OF NY (EXCEPT SINATRA & CAB HORN) SPIRIT OF NY (SINATRA) WALL STREET BELL NOT USED NOT USED NOT USED NOT USED SPIRIT OF NY (CAB HORN) Bruce Ellman Theatre Sound 917-446-6797 [email protected] P. 12 June 24, 2011 Rev. 2.0 Madame Tussauds New York Audio Systems: Show Control and Playback 4.1 YAMAHA 01V96VCM (AUDIO) : AUDIO: Layer 1-16 17-32 MASTER REMOTE The 01V96VCM is configured to accept an unbalanced audio signal via an 1/8” TRS plug connected to inputs 1 and 2. These inputs are routed to Auxiliary busses 1 & 2 (OMNI outputs 1 and 2), Auxiliary busses 3 and 4 (OMNI outputs 3 and 4), and the Stereo buss (Master outputs L and R) which feeds an audio distribution amplifier. Output levels can be adjusted on the “Master” level, but they have been preprogrammed and should be adjusted with care. Layer 1-16 17-32 MASTER REMOTE Master levels can be restored by recalling Scene 1. 4.1 YAMAHA 01V96VCM (AUDIO) (CONTINUED) : This is the current channel 1 and 2 stereo external playback routing settings. There are four sets (ONLY THREE ARE CURRENTLY USED) of Main L and R outputs on the distribution amp: OUTPUT OMNI 1 OMNI 2 OMNI 3 OMNI 4 MAIN L (A) MAIN R (A) MAIN L (B) MAIN R (B) MAIN L (C) MAIN R (C) AREA SERVED CELEBRITY PARTY L CELEBRITY PARTY R PORTRAIT GALLERY L PORTRAIT GALLERY R 1920’S-1980’S L 1920’S-1980’S R 1990’S-2000’S L 1990’S-2000’S R SPIRIT OF NY L SPIRIT OF NY R Bruce Ellman Theatre Sound 917-446-6797 [email protected] P. 13 June 24, 2011 Rev. 2.0 Madame Tussauds New York Audio Systems: Show Control and Playback 5.0 COMPUTER (AUDIOBOX) PLAYBACK : The live audio control and playback systems are updated software versions of the hardware used for the original Madame Tussauds New York installation. Much of the original programming and the existing physical infrastructure was retained during this refurbishment. The original eight AudioBox devices have been replaced by four computers that run SM-A and SM-S. A fifth computer has been added for the new Spirit of New York exhibit. To maintain programming consistency we have utilized the same system in the design of the Spirit of New York exhibit. The five industrial grade computers furnished by Richmond Sound Design each have an Intel dual-core Xeon CPU, 4GB of ram memory, Enterprise 250GB hard drive rated at 500,000 MTBF, and use Windows 7, 32-bit as their operating system. To provide audio each computer contains a Mark of the Unicorn (MOTU) PCI424 internal audio card to which two MOTU 24I/O external audio interface devices are attached. The ten MOTU 24I/O units provide a total of 240 inputs and 240 outputs. There are two software components that emulate the original AudioBox, SoundManServer (SM-S) which is the audio engine, and SoundMan-Assistant (SM-A) which retains the audio files and programming and translates AudioBox shows into SM-S commands. SoundMan-Server (SM-S) requires a hardware dongle to enable the features that have been licensed by Madame Tussauds. This USB device is mounted in a USB port located in the INTERIOR of the computer chassis. Should a computer need to be replaced the USB dongle MUST be retrieved to be used in the replacement computer. SM-S can be utilized with a number of other programs besides SM-A. One of the options we considered for this project was the excellent show control software system from Medialon which offers a programming environment specifically designed for SM-S. However, using Medialon would not have allowed us to retain the original programming created for Madame Tussauds. Both SM-A and SM-S must be running to enable playback and live audio control. Starting SoundMan-Assistant will also start SoundMan-Server. The Tussauds computers are all configured to start both on boot-up PROGRAMMING: A third program, SoundMan-Designer (SM-D), is used to program the shows. However, once the show is programmed SM-D does not have to be running. In fact, to preserve computer resources it is best to not have SM-D running when in “show” mode. Bruce Ellman Theatre Sound 917-446-6797 [email protected] P. 14 June 24, 2011 Rev. 2.0 Madame Tussauds New York Audio Systems: Show Control and Playback 5.0 COMPUTER (AUDIOBOX) PLAYBACK (CONTINUED) : A complete description of the architecture and programming environment of all three SoundManager (SM) software components can be found on the Richmond Sound Design website (www.richmondsounddesign.com) and the SM-D program manual can be found at the end of this document. At the core of each computer system is a forty-eight by forty-eight (48 x 48) crosspoint matrix which can route any input signal or playback to any output or combination of outputs. SM-D provides an additional sixteen virtual playback channels for a total matrix of 64 x 48. An input signal can be either a live input from one of the forty-eight physical input channels, or it can be hard disk playback from one of the sixty-four virtual playback channels. SM-A/SM-S has on-board equalization and delay that can be applied to either inputs or outputs to allow for tonal correction and time-alignment of speaker systems if required. All signal input, output and crosspoints within each computer can be programmed with level and fade time information using SM-D and this information can then be stored for later retrieval during show-running, along with information regarding EQ, delay, and audio playback. Programmed information is stored in cues, which are held in cue-lists. A maximum of eight cue-lists can be open at any one time. Groups of cue-lists are stored as shows and a large number of shows can be stored if needed, with new shows being loaded and saved as necessary. Audio files must first be loaded into the show environment before they can be programmed into cues. 6.0 SUMMARY : These systems have been designed to be reliable and as fool-proof as possible. For trouble shooting purposes please refer to the documents attached herewith and feel free to contact us. NOTE: Our system drawings accurately reflect the Spirit of New York installation as well as the patching from the MOTU units to the original DP lines. However, the original “as built” PRG/SPL drawings should be referred to for accurate DP/PA/Speaker patches. Bruce Ellman May 3, 2011 (Revised June 24, 2011) Bruce Ellman Theatre Sound 917-446-6797 [email protected] P. 15 June 24, 2011 Rev. 2.0 SoundMan-Designer EDITING & CONTROL SOFTWARE for SoundMan-Assistant, SoundMan-Server & AudioBox II USER MANUAL to be used with SoundMan-Server, SoundMan-Assistant & AudioBox II systems ONLY Current Version: 2.2.2 Coded By: Shelly Kantrow Manual By: Charlie Richmond, Carleton Underwood & Susanne Clampett All Rights Reserved, Copyright ©2010 Developed and Distributed by: Richmond Sound Design Ltd. Vancouver, Canada Phone +1-604/715-9441 http://www.RichmondSoundDesign.com CONTENTS: 1. INTRODUCTION z 1.1. SOFTWARE VERSIONS 2. SYSTEM HARDWARE z z z 2.1. COMPUTING EQUIPMENT 2.2. INTERFACING { 2.2.1. COMPUTING EQUIPMENT { 2.2.2. MIDI CONNECTIONS { 2.2.3. ETHERNET CONFIGURATION { 2.2.4. USB CONNECTIONS 2.3. OPERATING PRECAUTIONS { 2.3.1. DISK HANDLING { 2.3.2. DATA/SHOWS DISK BACKUP { 2.3.3. OBTAINING THE SOFTWARE { 2.3.4. HARD DISK INSTALLATION 3. USING THE PROGRAM z z z z z z z z 3.1. SETTING UP { 3.1.1. PREFERENCES { 3.1.2. CREATING FOLDERS { 3.1.3. STARTING THE PROGRAM 3.2. SHOW EDITOR WINDOW { 3.2.1. SHOW EDITOR MENUS { 3.2.2. MAKING SHOWS AND CUES 3.2.2.1. NEW MESSAGES 3.2.2.1.1. SET INPUT/OUTPUT LEVEL 3.2.2.1.2. SET SUBMASTER LEVEL 3.2.2.1.3. SET CROSSPOINT LEVEL 3.2.2.1.4. SET CROSSPOINT PHASE/POLARITY 3.2.2.1.5. SET DELAY 3.2.2.1.6. ENABLE/DISABLE DELAY 3.2.2.1.7. MUTE/UNMUTE CHANNEL 3.2.2.1.8. SOLO/UNSOLO CHANNEL 3.2.2.1.9. SET EQ 3.2.2.1.10. PLAYBACK (GO, STOP, LOAD, RESUME) 3.2.2.1.11. PLAYBACK (GO CHANNEL SET) 3.2.2.1.12. MIDI SHOW CONTROL EVENT 3.2.2.1.13. SET MATRIX 3.2.2.1.14. SET INPUT CHANNEL MODE 3.2.2.1.15. SET MIDI ECHO 3.2.2.1.16. MTC GENERATOR 3.2.2.1.17. HEX EDITOR 3.2.2.2. TRACKSHEET 3.2.2.3. EVENT MANAGER 3.3. SHOW PROPERTIES WINDOW { 3.3.1. SUBMASTERS { 3.3.2. CONTROLLER ASSIGNS { 3.3.3. ALL_OFF ACTIONS { 3.3.4. RESET ACTIONS { 3.3.5. GPIO PARAMETERS 3.4. CONTENTS WINDOW 3.5. SHOW CONTROL WINDOW 3.6. VU METER WINDOW 3.7. STATUS WINDOW 3.8. IMPORT SHOW WINDOW P.16 z z z z z z 3.9. PLAYBACK WINDOW 3.10. SUBMASTERS WINDOW 3.11. INPUTS WINDOW 3.12. OUTPUTS WINDOW 3.13. CROSSPOINTS WINDOW 3.14. MIDI TO HOTKEY MAPPING WINDOW 4. TUTORIAL z z z 4.1. LIVE AUDIO PLAYBACK { 4.1.1. MAKING CUE #10 4.2. EIGHT CHANNEL PLAYBACK { 4.2.1. SETTING INPUT & OUTPUT LEVELS { 4.2.2. SETTING CROSSPOINT LEVELS { 4.2.3. LOADING SELECTIONS { 4.2.4. STOPPING SELECTIONS { 4.2.5. FINISHING CUE #20 4.3. TUTORIAL SHOW 2 5. TROUBLESHOOTING z z z 5.1. MIDI HARDWARE 5.2. SOFTWARE/COMPUTER 5.3. SOFTWARE SUPPORT 6. REFERENCE SECTION z z z z z 6.1. 6.2. 6.3. 6.4. 6.5. KEYBOARD COMMANDS KEYBOARD LABELS MIDI IMPLEMENTATION MSC RESPONSES MOTORMAN/MOTORMIX IMPLEMENTATION 7. GLOSSARY 8. INDEX TOP INDEX 1. INTRODUCTION This manual is for use with SoundMan-Designer software version 2.0.0. and higher and SoundMan-Server, SoundMan-Assistant & AudioBox II only! Please read and study this guide thoroughly - it is the key to satisfaction in the use of SoundMan-Assistant, SoundMan-Server & AudioBox II with SoundMan-Designer. We highly recommend that the Windows Reference Guide, supplied with the operating system, be read and studied thoroughly as well. Although this guide provides complete information about the use of SoundMan-Designer software, it is not a substitute for the information provided by other manuals supplied with the system. Throughout this manual the term 'SoundMan-Assistant, SoundMan-Server & AudioBox II' means Windows computers running RSD's SoundMan-Server and/or SoundMan-Assistant software, properly configured and set up with appropriate audio inputs and outputs. SoundMan-Designer communicates with SoundMan-Assistant, SoundMan-Server & AudioBox II using IP telnet commands over a network or locally if it is installed on the same computer. The following configurations are legal: z z z z z z z z z z SoundMan-Designer, SoundMan-Assistant & SoundMan-Server all running on the same computer SoundMan-Designer, SoundMan-Assistant & SoundMan-Server each running on their own separate computers, networked together within the same subnet without any router or firewalls blocking free communication between all three computers SoundMan-Designer & SoundMan-Assistant running on one computer and SoundMan-Server each running on a second computer, both networked together within the same subnet without any router or firewalls blocking free communication between both computers SoundMan-Designer running on one computer and SoundMan-Assistant & SoundMan-Server both running on a second computer, both computers networked together within the same subnet without any router or firewalls blocking free communication between them SoundMan-Designer & SoundMan-Assistant both running on the same computer - in this case, no sounds will be heard because SoundMan-Server is not running but a CMLabs MotorMix can be connected to the computer and emulation only of the show will be done by SoundMan-Assistant. SoundMan-Designer & SoundMan-Assistant both running on two separate computers, both computers networked together within the same subnet without any router or firewalls blocking free communication between them - in this case, no sounds will be heard because SoundMan-Server is not running but a CMLabs MotorMix can be connected to the SoundMan-Assistant computer and emulation only of the show will be done by SoundMan-Assistant. SoundMan-Designer running on a single computer - in this case, shows can be edited and MIDI interfaces connected to the SoundMan-Designer computer can capture and send MIDI messages for testing and programming but there is no emulation of the show because SoundMan-Assistant is not running. For first time use of SoundMan-Designer or upon changing any system hardware, follow this guide carefully beginning with section 2. For first time editing or programming with SoundMan-Designer, follow this guide carefully beginning with section 3. Allow adequate time to work with the software without interruption. Please become completely familiar with SoundMan-Designer before programming your show. Even highly knowledgeable designers, programmers and operators will save time and confusion if they follow Section 4. completely to learn the most efficient way to program and operate SoundMan-Designer. Throughout this guide, we attempt to consistently use words with specific meanings as defined in the glossary. Please consult the glossary to clarify the meaning of any word. TOP INDEX 1.1. SOFTWARE VERSIONS The latest version of SoundMan-Designer is always available for downloading at RSD's web site: RSD Download Page P.17 TOP INDEX 2. SYSTEM HARDWARE The latest hardware requirements for SoundMan-Designer are always available on RSD's web site: RSD Frequently Asked Questions Page Interface all components correctly for total system control. If desired, you may run SoundMan-Designer to program shows without restriction on the computer without being connected to SoundMan-Assistant, SoundMan-Server & AudioBox II, but of course nothing can be changed on SoundMan-Assistant, SoundMan-Server & AudioBox II until it is connected. At that time, you will be automatically prompted by SoundMan-Designer to update and refresh SoundMan-Assistant, SoundMan-Server & AudioBox II. You can run SoundMan-Designer with SoundManAssistant only in order to fully simulate all show actions but without SoundMan-Server and properly interfaced audio inputs and outputs, nothing will be audible. SoundMan-Assistant, SoundMan-Server & AudioBox II licenses are provided on USB dongles which can be connected to the SoundMan-Assistant, SoundMan-Server & AudioBox II computer through any standard USB hub. We can provide temporary license files by email to get you up and running immediately, without having to wait for the dongle to arrive. TOP INDEX 2.1. COMPUTING EQUIPMENT Recommended computing equipment, properly connected and installed, for SoundMan-Designer, periodically upgraded and available free on our web site is always kept up to date at: RSD Frequently Asked Questions Page Amount of RAM required depends on the size and number of .wav files being manipulated by associated sound editing software not provided by RSD. The minimum amount of RAM is enough to run most basic Digital Audio Workstation software. Please refer to your DAW software's documentation for specific advice. SoundMan-Assistant, SoundMan-Server & AudioBox II hard disks can contain many hours of audio, so there should be enough computer hard disk space to store these as original .wav files. The computer must have enough storage device space to store all original .wav files. A computer network with a large file server is an ideal solution for most production requirements. TOP INDEX 2.2. INTERFACING TOP INDEX 2.2.1. COMPUTING EQUIPMENT WARNING: DO NOT CONNECT OR DISCONNECT ANYTHING WHILE POWER IS APPLIED! Please consult the Computer and Windows Reference Manuals for all mouse, keyboard, printer and monitor interconnection and power-up procedures. Install a MIDI interface with at least two I/O ports to the SoundMan-Assistant computer. The first MIDI OUT and IN (DIN-5) ports connect to all peripheral MIDI equipment and the second can be used to connect with a CMLabs MotorMix or MotorMan (see Section 2.2.2. ). Install a MIDI interface with a minimum of one set of I/O ports to the SoundMan-Designer computer. The MIDI OUT and IN (DIN-5) ports connect to peripheral MIDI equipment that will be used to control SoundMan-Designer or from which SoundMan-Designer will need to capture MIDI in the process of programming shows. Connect the computers running SoundMan-Designer and all SoundMan-Assistant, SoundMan-Server & AudioBox II computers to your Local Area Network (LAN). Make sure there is no router or firewall BETWEEN SoundMan-Designer and SoundMan-Assistant, SoundMan-Server & AudioBox II computers. Also, make sure there is no firewall software running on your computer, including any Windows firewalls. The SoundMan-Designer and SoundMan-Assistant, SoundMan-Server & AudioBox II computers should normally be set to automatically obtain IP addresses via DHCP if there is a router or other device in the network that assigns IP numbers via DHCP. Otherwise, IP addresses must be manually assigned and have no conflicts. SoundMan-Designer and SoundMan-Assistant, SoundMan-Server & AudioBox II computers must all be in the same subdomain. (see Section 2.2.3. ). TOP INDEX 2.2.2. MIDI CONNECTIONS Use the following third party devices (available from RSD) to interface more than one MIDI device with SoundMan-Designer, SoundMan-Assistant & SoundMan-Server or AudioBox II computers: QTY ITEM 1 "MIDI Merge Box" or "MIDI Merger" with sufficient number of MIDI IN ports. 1 "MIDI Splitter" with sufficient number of MIDI OUT ports. Connect each MIDI OUT port of every SoundMan-Designer, SoundMan-Assistant, SoundMan-Server or AudioBox II computer to a MIDI IN port on a standard MIDI Merge Box. Connect each MIDI OUT port uniquely via a standard MIDI cable to each merge box MIDI IN port. If interfacing only one SoundMan-Assistant, SoundMan-Server or AudioBox II computer, connect its MIDI OUT directly to the MIDI IN port of the MIDI interface adapter cable. The MIDI Merge Box is not necessary. Connect the MIDI OUT port of the MIDI interface adapter cable to the MIDI IN port of the nearest SoundMan-Designer, SoundMan-Assistant, SoundMan-Server or AudioBox II computer. Connect the MIDI THRU port of that SoundMan-Designer, SoundMan-Assistant, SoundMan-Server or AudioBox II computer to the MIDI IN port of the next SoundMan-Designer, SoundManAssistant, SoundMan-Server or AudioBox II computer. Connect MIDI THRU ports to MIDI IN ports in a "daisy chain" fashion provided all devices receive MIDI messages reliably. We do not recommend this method of MIDI signal distribution because it may result in erroneous data transmission. The recommended and superior method of sending a single MIDI OUT signal to multiple MIDI IN ports is as follows: Connect the MIDI OUT of the MIDI interface Adapter cable to the MIDI IN of the MIDI Splitter. Connect each MIDI OUT of the MIDI Splitter one-to-one to each MIDI IN of each MIDI unit in the system. If there are more controlled units than OUTS on the Splitter, connect one of the Splitter's MIDI OUT ports to the MIDI IN of another Splitter. P.18 Connect the MIDI IN of each additional device to a MIDI OUT of the splitter. Connect each MIDI IN uniquely via a standard MIDI cable to a single MIDI OUT. Do not merge MIDI OUT from the SoundMan-Designer computer with other MIDI OUTs and return it to the MIDI IN of the interface. This can cause a condition in which MIDI messages pass continuously around in a closed loop and will very quickly cause the system to freeze. TOP INDEX 2.2.3. ETHERNET CONFIGURATION First, set up a Windows 'Home Network' on all computers then make sure there is no firewall or firewall software isolating them SoundMan-Designer, SoundMan-Assistant, SoundMan-Server & AudioBox II works with 10Mb/S, 100Mb/S or 1Gb/S Ethernet but the latter is preferred. Connect the control network to the SoundMan-Designer, SoundMan-Assistant, SoundMan-Server or AudioBox II computer's Ethernet Network RJ45 connector. It is recommended that your network use a router that assigns IP addresses via DHCP and that each SoundMan-Designer, SoundMan-Assistant, SoundMan-Server or AudioBox II computer on the network be set to obtain IP addresses via DHCP. Each SoundMan-Assistant, SoundMan-Server & AudioBox II computer communicates with multiple devices on the network (including multiple computers running SoundMan-Designer) automatically by opening as many ports as necessary. If you must set a static IP address on the SoundMan-Designer, SoundMan-Assistant, SoundMan-Server & AudioBox II computers (if there is no DHCP server available, for example) you must make sure the SoundMan-Designer, SoundMan-Assistant, SoundMan-Server & AudioBox II computers' IP addresses are different from all other devices on the network and the IP address is within the submask range of your computer's IP configuration. You can see the IP configuration by opening a command prompt window, and typing ipconfig then pressing return. It will show something like this: Ethernet adapter Local Area Connection 5: Connection-specific DNS Suffix . : vc.shawcable.net IP Address. . . . . . . . . . . . : 192.168.0.3 Subnet Mask . . . . . . . . . . . : 255.255.255.0 Default Gateway . . . . . . . . . : 192.168.0.1 The subnet mask is usually 255.255.255.0 which means in this case that the IP address of SoundMan-Assistant, SoundMan-Server & AudioBox II has to match the first 3 fields of the IP address shown. In this case (for example) that means that the SoundMan-Designer, SoundMan-Assistant, SoundMan-Server & AudioBox II computers' IP addresses must start with 192.168.0.something. If settings are not correct, SoundMan-Designer will generate an error message if the IP address of SoundMan-Assistant, SoundMan-Server & AudioBox II is not in the proper range that will work on the local network. This message specifies the IP address and that it can't work on the network. Do not use 127.0.0.x as an external address for any computer in the group since that is the "local loopback" address and is synonymous with 'localhost' which is what should be used when programs are talking to each other through internal IP communications. If a standalone, non-networked computer is used to run all programs concurrently, use the Microsoft virtual network adapter: http://technet.microsoft.com/en-us/library/cc708341% 28WS.10%29.aspx We recommend configuring the net adapter with a 10.10.1.2 address (static) and a sub mask as 255.0.0.0 and default gateway as 10.10.1.1 Installation instructions are here: http://tinyurl.com/4cqt8 For more details, please refer to the instructions included with your SoundMan-Assistant & SoundMan-Server software. Current information is always available on our web site in the Frequently Asked Questions section. The URL for this page is RSD Frequently Asked Questions Page TOP INDEX 2.2.4. USB CONNECTIONS The license dongle may be connected directly to the SoundMan-Server, SoundMan-Assistant or AudioBox II computer's USB port or to a standard USB hub. USB to MIDI adapters may also be used. SoundMan-Designer is free and does not require any license or dongle. Please refer to the instructions included with your USB to MIDI interface adapter for further information. Current information is always available on our web site in the Frequently Asked Questions section. The URL for this page is RSD Frequently Asked Questions Page TOP INDEX 2.3. OPERATING PRECAUTIONS TOP INDEX 2.3.1. DISK HANDLING IMPORTANT: NEVER REMOVE PORTABLE MEDIA UNTIL TWO SECONDS AFTER THE DISK DRIVE LIGHT GOES OUT! TOP INDEX 2.3.2. DATA/SHOWS DISK BACKUP SoundMan-Assistant and SoundMan-Designer work together as backups for each other. Everything that is on SoundMan-Assistant, SoundMan-Server & AudioBox II is presumably already on the SoundMan-Designer computer or the network it is connected to. The only way this is not so is if the user deletes the files on the SoundMan-Designer computer or network. Also, when reviewing the contents on SoundMan-Assistant, SoundMan-Server & AudioBox II, the program will automatically check to make sure there is a copy of each selection and show on the SoundMan-Designer computer or network using the preferred path. If there is no backup of the designated file, a message will indicate that those files cannot be found. But before copying from SoundMan-Assistant, SoundMan-Server & AudioBox II back on to the SoundMan-Designer computer's hard drive, make sure the show & selection paths are correct. In order to safeguard against power failure, equipment failure or operator errors, periodically make at least two backup copies of all user data by simply copying the SoundMan-Designer folder that is automatically created in the My Documents\RSD folder. To revert to a saved backup, or to copy a user's data to another computer, quit SoundMan-Designer on the target machine then simply drag the backed up copy of the SoundMan-Designer folder into the My Documents\RSD folder and replace all files and folder when prompted. Then restart SoundMan-Designer. TOP INDEX 2.3.3. OBTAINING THE SOFTWARE RSD supplies the SoundMan-Designer program by Internet only. P.19 Browse to RSD's software web page RSD Download Page and save the SoundMan-Designer installation program (SM-D_install.EXE) to a temporary folder on your hard disk. The current version of this User Manual can be obtained from our Manuals page: RSD Manuals Page TOP INDEX 2.3.4. HARD DISK INSTALLATION 1. 2. 3. 4. 5. 6. 7. 8. 9. IMPORTANT: If SM-Designer and/or ABEdit has been previously installed on your computer at any time, you MUST uninstall SM-Designer and ABEdit completely and restart your computer before installing SoundMan-Designer! To completely uninstall SM-Designer and ABEdit, select the Custom option in the uninstaller menu (there are three options: Automatic, Repair, and Custom) and Select All when asked what files and folders to remove at each step of the uninstall process. When completed, restart your computer. Open the temporary folder containing SM-D_install.EXE. Double click on SM-D_install.EXE to install SoundMan-Designer in an 'RSD' folder in the Start menu's 'Programs' folder. Other files will be placed where they need to be. If a message appears saying a file is in use and cannot be replaced, click 'Ignore' and the installation will continue. SoundMan-Designer may be installed in alternate folders but we recommend using the installation defaults. If an update is being installed, place the updated version in the same folder - no data will be affected. It is always a good idea to restart the computer after installing or updating a program. To run the program, open the Start menu, go to Programs/RSD/SoundMan-Designer/SoundMan-Designer or simply double-click the SoundMan-Designer icon on the desktop. Installation should proceed without incident. In case of difficulty, please copy all errors reported and advise us immediately so that we may assist. TOP INDEX 3. USING THE PROGRAM IT IS HIGHLY ADVISABLE TO FREQUENTLY MAKE AT LEAST TWO BACKUP COPIES OF EVERY USER'S DATA TOP INDEX 3.1. SETTING UP This guide assumes SoundMan-Designer is installed on the computer's internal hard disk drive. If not, follow the instructions in Section 2.3.4., above. After connecting all equipment according to Section 2., connect the computer to the AC mains supply and switch on the power. The standard Desktop soon appears. TOP INDEX 3.1.1. PREFERENCES To put SoundMan-Designer on the desktop: 1. 2. 3. 4. z z Find the folder that SoundMan-Designer.exe is in (normally C:\Program Files\RSD\SoundMan-Designer) Right click the SoundMan-Designer.exe icon Drag it to the desired location on the desktop Release the mouse button and select 'Create Shortcut(s) Here' Run SoundMan-Designer only once on a single computer. All computers running SoundMan-Designer networked with each SoundMan-Assistant, SoundMan-Server or AudioBox II will automatically detect changes made to shows and selections in it and will prompt the user to update everything appropriately. For information on further installation customizing, please contact RSD. TOP INDEX 3.1.2. CREATING FOLDERS There is no need to manually create show and selection folders since SoundMan-Designer prompts you automatically during first time operation. All necessary files copy automatically during the backup process if the backup instructions are followed faithfully. SoundMan-Designer and SoundMan-Assistant will find all backed up files automatically. To copy selections and shows between computers, follow the backup procedures outlined in Section 2.3.2. The Root Directory in SoundMan-Assistant must be set, however: run SoundMan-Assistant, click Configuration, and type the complete path in the Root Directory field then click SET. TOP INDEX 3.1.3. STARTING THE PROGRAM Start SoundMan-Designer by double-clicking the SoundMan-Designer icon on the Desktop or open the Start menu, go to Start/All Programs/RSD/SoundMan-Designer/SoundMan-Designer If the SoundMan-Designer computer is NOT networked with a computer running SoundMan-Assistant or SoundMan-Assistant is not already running on the SoundMan-Designer computer: 1. 2. The window titled No SoundMan Assistant(s) Found appears which explains that SoundMan-Assistant must be running on another computer on the same network which is set to the same subnet IP address or on the same computer as SoundMan-Designer before SoundMan-Designer is run. Click OK to shut down SoundMan-Designer and start it again after SoundMan-Assistant is running. If this is the first time the program is run and the computer IS connected to SoundMan-Assistant, SoundMan-Server or AudioBox II: 1. The SoundMan-Designer window appears stating 'No SoundMan-Assistant is selected. SoundMan-Designer requires SoundMan-Assistant to be running. Please select a SoundMan- P.20 2. 3. 4. 5. Assistant. If no SoundMan-Assistant is selected SoundMan-Designer cannot operate and will be shut down.' Click OK Then the Select a SoundMan-Assistant window appears. Click the SoundMan-Assistant you would like to use then click OK. If there is a duplicate entry for the same SoundManAssistant, there are two network paths between computers and one should be disconnected. SoundMan-Designer then copies the demo show and selections into the Designer Shows and Selections folders and opens all program windows The demo show is automatically placed in the show editor and is made the default show and placed in the show control window, ready to go. The demo show and selections are copied to the SoundMan-Assistant root directory and are now ready to play. SoundMan-Designer is a multi document interface, in which all windows open and close within the confines of the main Editor window unless you choose to make a window float. Windows capable of floating have an 'F' button in the lower right hand corner. The top line of the main SoundMan-Designer window displays various values: SoundMan-Assistant, SoundMan-Server or AudioBox II's Serial Number, firmware version, Device ID, Default Show file name and current operating status. Running additional programs with SoundMan-Designer requires more memory. Determine the exact amount of memory required in advance of critical show programming and with adequate time for thorough testing. TOP INDEX 3.2. SHOW EDITOR WINDOW To open the Show Editor window, select Show Editor in the View menu. If the Show Editor window is already open, it can be brought to the foreground by selecting Show Editor in the Window menu or clicking on the Show Editor button in the Toolbar. The toolbar is displayed if it is selected in the View menu. Show Editor automatically creates a show folder for each show inside the Shows folder of the C:\Program Files\RSD\SoundMan-Designer folder and the user can quickly load all shows into SoundMan-Assistant, SoundMan-Server or AudioBox II. Within each show folder, it creates an individual list path(s) folder for each of the up to 128 cue lists per show. Show Editor also creates cue within each list. Each cue path provides up to 32KB of cue storage space, normally enough for about 1000 cues of average size. The third line of the Show Editor window in the left 'tree' column displays the currently selected level (show, list, path or cue) within the Show: 'Show Tracksheet' is a way to view all messages within a show in different orders. This will be discussed in detail in Section 3.2.2.2. The menus available in the Editor window change depending upon the selected level of the Show. The left side of the Show Editor window displays the various levels of a show: Lists, Paths and Cue. Right-clicking on any item provides a menu of options. For Shows: z z z z z z z Edit Show Defaults Remove Show from Editor Delete Show New List Save Show as Show (*.sho) File Refresh Show Change Device IDs The same choices are available in the Show menu of the Editor window. For Lists: z z z z Edit List Defaults Delete List New Path Change Device IDs The same choices are available in the List menu of the Editor window. For Paths: z z z z Edit Path Defaults Delete Path Make New Cue Change Device IDs The same choices are available in the Path menu of the Editor window. For Cues: z z z Edit Cue Defaults Delete Cue Change Device IDs The same choices are available in the Cue menu of the Editor window. The right side of the Show Editor window displays the properties of the level below the one on the left: Lists, Paths, Cues and Messages. Messages can be created, manipulated and edited using P.21 the toolbar that appears when messages are displayed. Also please see the quick reference section. TOP INDEX 3.2.1. SHOW EDITOR MENUS The following menus and menu items are only available in the Editor window when the Show Editor window is highlighted: z z z z z z z z z z z File View Settings Contents Help Window Show Control Show List Path Cue The last four menus are only displayed when the appropriate show level is selected. The File Menu contains: z z z z z z New Show - opens the Show Properties window to create a new show folder into which lists, paths, cues and messages from other shows in the window can be dragged and dropped and new elements created and edited. Load Show - brings an existing show into the Show Editor window so it can be further edited or used to assemble new shows by dragging and dropping elements between shows in the window. Import Show File - retrieves an existing show from SoundMan-Assistant or from an exported show (*.sho) file. See Section 3.8. New Show - opens the Show Properties window to create a new show folder into which lists, paths, cues and messages from other shows in the window can be dragged and dropped and new elements created and edited. Load Show - brings an existing show into the Show Editor window so it can be further edited or used to assemble new shows by dragging and dropping elements between shows in the window. Import Show File - retrieves an existing show from SoundMan-Assistant, SoundMan-Server or AudioBox II or from an exported show file. See Section 3.8. The View menu contains: z z z z z z z z z z z z Show Editor - opens the Show Editor window in which all SoundMan-Assistant, SoundMan-Server or AudioBox II shows are created and edited. See Section 3.2.2. VU Meters - opens SoundMan-Assistant, SoundMan-Server or AudioBox II VU window in which the levels of all audio signals in input and output channels are visible. See Section 3.6. Record/Playback - opens/closes the Playback, Record or Multi Channel Playback windows which provide interactive audio selection playback, record or multitrack playback controls and displays. See Section 3.9. LCD Screen - not currently applicable to SoundMan-Assistant, SoundMan-Server or AudioBox II SoundMan-Assistant Show Control - opens/closes the window which displays the status of the show currently running on SoundMan-Assistant, SoundMan-Server or AudioBox II. Fully interactive show control buttons and icons are provided with which to control the show live and in real time. See Section 3.5. LIVE/Submasters - opens/closes the Submasters window. See Section 3.10. LIVE/Inputs - opens/closes the Inputs window. See Section 3.11. LIVE/Outputs - opens/closes the Outputs window. See Section 3.12. LIVE/Crosspoints - opens/closes the Crosspoints window. See Section 3.13. Taskbar - opens the taskbar which displays which windows are currently open. Just like in Windows, it also allows you to quickly bring windows to the foreground. SoundMan-Assistant Status - opens/closes the status window which displays total number of messages and commands received and acted upon plus operating status of SoundManAssistant, SoundMan-Server or AudioBox II. See Section 3.7. Command History - opens the Message History window which shows recent MIDI messages sent to SoundMan-Assistant, SoundMan-Server or AudioBox II. The Settings menu contains: z Preferences - opens the Preferences window in which the default path for the Selections directory is specified. This allows defining a network location for all .wav files, for example. z Joystick Configuration - Opens the Joystick Configuration window to set up joystick actions MIDI-Hotkey Mapping- Opens the MIDI to Hotkey Mapping window to define which incoming MIDI messages actuate hotkeys. Hotkeys are also created and edited using this window. See Section 3.14. z The Contents menu contains: z z z z Audio Selections - opens SoundMan-Assistant contents window with the Audio Selections tab preselected. See Section 3.4. Shows - opens SoundMan-Assistant contents window with the Shows tab preselected. See Section 3.4. Multichannel Files - opens the Process Selection window to select and process multichannel files which have been recorded in SoundMan-Assistant, SoundMan-Server or AudioBox II Empty All Directories - Removes all shows and selections from SoundMan-Assistant, SoundMan-Server or AudioBox II hard drive. Use this if the hard disk directory information has been externally altered. You will be prompted to reload selections and shows. The Help menu contains: z z SoundMan-Designer Manual - Opens this document About - Opens the splash screen for version information The Window menu contains the names of all currently open windows - select the one you want to bring to the front. The Show Control menu contains all function key options which control Show Control operations. See Section 3.5. The Show menu contains: P.22 z z z z z z z z Edit Show Defaults - opens the Show Properties window with the selected show's properties displayed Remove Show from Editor - does not permanently delete the show Delete Show - removes the show permanently from the system New List - opens the Set List Number window followed by the List Properties window to create a new List in the selected show (maximum 127 lists per show) Save Show as Show (*.sho) File - saves as a single .sho file for exporting to another system. Refresh Show - downloads the current show to SoundMan-Assistant, SoundMan-Server or AudioBox II Change Device IDs - will change the device ID number of all messages in current show. Set all Event Descriptions to Default - will revert all user entered descriptions to the standard parsed description The List menu contains: z z z z Edit List Defaults - opens the List Properties window with the selected list's properties displayed Delete List - permanently removes the selected list from the show New Path - opens the Set Path Number window followed by the Path Properties window to create a new Path in the selected list (maximum 2047 paths per show) Change Device IDs - will change the device ID number of all messages in the current list The Path menu contains: z z z z Edit Path Defaults - opens the Path Properties window with the selected path's properties displayed Delete Path - permanently removes the selected path from the list Make New Cue - opens the Make New Cue window to create a new Cue in the selected path (maximum 32768 cue Bytes per path) Change Device IDs - will change the device ID number of all messages in the current path. The Cue menu contains: z z z Edit Cue Defaults - opens the Cue Properties window with the selected cue's properties displayed Delete Cue - permanently removes the selected cue from the path Change Device IDs - will change the device ID number of all messages in the current cue. TOP INDEX 3.2.2. MAKING SHOWS AND CUES If the Show Editor window is not visible, select Show Editor in the View menu or on the Taskbar. To illustrate the show making process, we will make a show that will be used in one of the tutorials. See Section 4. Choose New Show in the File menu. A dialog box appears stating 'When creating a new show, it is necessary to select a SoundMan-Assistant Device ID for the show.' Click OK. Another dialog box appears: 'You are about to set the Device ID for this show. If it is changed, the device ID in every SoundMan-Assistant message in the Show will need to be changed. Please consider this choice carefully. When copying messages, cues, paths, or lists into the Show from Shows with a different device ID, you will have to change the device ID in every message copied. For this reason, it is advisable to use the same device ID whenever possible. It is recommended to use Device ID # 0.' Click 'ID 0'. The Show Properties window then comes to the foreground. Click the Show Name field and type 'Tutorial Show 1'. Three fields which set global settings appear in the Show Properties window. z The Auto Clock Start menu provides the following choices: Off, On, MSC GO, and Zero Clock. This determines when a stopped list clock will automatically start again by itself: { Off: will not start until specifically given a Start Clock message { On: will start when any cue GOes { MSC GO: will start when any MSC GO cue (not a timed cue) 'GO's. { Zero Clock: will start when any cue that Zeros the clock 'GO's. The safest setting for this is 'On' since that will automatically start the Clock when any Cue GOes. P.23 This causes auto follows and internally timed messages to execute even if the Clock has been temporarily turned off. z z z z z The MIDI-MIDI Echo box defines whether the MIDI messages received by the MIDI IN of the computer will be merged with any MIDI data generated by the show being played by SoundMan-Assistant and will be passed through to the Computer's MIDI OUT port. If this box is not ticked, only the internal SoundMan-Assistant and SoundMan-Server processes will receive the messages from the MIDI IN port. Make sure this box is ticked. The Local SM-A Command Filter box defines whether messages in the live show that are intended only for internal SoundMan-Assistant and SoundMan-Server processes also get sent out the computer's MIDI OUT port. If the filter is ticked these messages do not get sent out. This box should be ticked. The SMA-MIDI Echo box defines whether the MIDI messages sent by SoundMan-Designer to SoundMan-Assistant and SoundMan-Server will be merged with any MIDI data generated by the live show's cue data and passed through to the computer's MIDI OUT port. If this box is not ticked, only the internal SoundMan processes will receive messages from SoundMan-Designer. Make sure this box is NOT ticked. The MIDI LoopBack box defines whether the live show's cue data will be internally sent to SoundMan-Assistant and SoundMan-Server. This allows shows to self-modify or control themselves as well as control sound playback and matrix controls. If this box is not ticked, the show data will not control any internal SoundMan processes. Make sure this box is ticked. Click the 'Save' button and the show will be sent to SoundMan-Assistant. Tutorial Show 1 also appears in the left column of the Show Editor window. The Tutorial Show 1 folder will automatically be created in the Shows folder. Left-click the show's name and click the Show menu or right-click the show's name. Click the New List menu item. The Set List Number window appears. Select the number 1 and click OK. The List Properties window opens. Eight parameters appear and the defaults are typical for many shows: z z z z z z z z Type 'Tutorial List' in the List Name field. The List ID defaults to the lowest number available. The Channel Mask box defines on which MIDI channels SoundMan-Assistant, SoundMan-Server or AudioBox II show sends the 'All-Notes-Off' message whenever sequences stop. The default is to send this message on no channels. MTC Sequence Timing defaults to Follow List Clock so that the sequences and list clock are synchronized. Clock Type defaults to Stopwatch. Auto Cue Path Sequencing defaults to No. 'Yes' here makes the next cue path automatically open when the last cue in the current path finishes. Clock Running when list opened defaults to No - change this to Yes Open List when Show opens defaults to No - change this to Yes Click OK and a + appears to the left of the Tutorial Show 1 in the left column of the Show Editor window. Click the + (making it a -) and Tutorial List appears below the new show. Left-click the list's name and click the List menu or right-click the new list's name. Click the New Path menu item. The Set Path Number window appears. Select number 1 and click OK. The Path window opens. Two parameters appear: z z Type 'Tutorial Path' in the Path Name field. The Path ID defaults to the lowest number available. Click OK and a + appears to the left of the new list in the left column of the Show Editor window. Click the + (making it a -) and Tutorial Path appears below the new list. Left-click the path's name and click the Path menu or right-click the path's name. Click the Make New Cue menu item. The Cue Properties window appears. Four parameters appear: P.24 z z z z Type 1 in the Cue Number field. Whole cue numbers can be from 1 to 65535 with up to four subsections from 1 to 255 separated by decimal points (eg a maximum of 65535.255.255.255.255) Zero Clock defaults to On, which means that the cue will zero the list's clock when it GOes. The Cue Time defaults to all zeros, which means it will only GO when an appropriate MSC GO message is received. Type 'First Tutorial Cue' in the Description field. Click OK and a + appears to the left of the Tutorial Path in the left column of the Show Editor window. We can now add this show to SoundMan-Assistant. Go to Contents and select Shows. Click OK to all messages (if they appear) until the Contents window is in the foreground. Click 'Add New'. Select 'Tutorial Show 1' and when the window appears with the show number information, click OK. The show has now been sent to the SoundMan-Assistant, SoundMan-Server or AudioBox II. Click 'Exit'. Click the + (making it a -) and cue 1 appears below the new path. Left-click the new cue's number and a toolbar appears in the right side of the Show Editor window. The tools in the toolbar are (L to R): z Back to Parent z Delete and Copy to Clipboard (Cut) z Copy z Paste z Event Manager z Send Selected Message(s) to Output selected above z Play Cue (with time) z Capture Incoming MIDI via selected MIDI input device - this does not function in Windows XP SP3 or Windows 7 z Begin Recording Cue (Records Actions in SoundMan-Designer) z Add Snapshot Events z Move Message Up z Move Message Down z New Message z Edit Message z Delete Message(s) z Insert New Message z Change Device ID Some of these options are greyed because there is no message within the cue yet. TOP INDEX 3.2.2.1. NEW MESSAGES Click the New Message icon and the Choose Message Type window appears. There are 17 choices: P.25 Five parameters appear on all message editors in the top of the window: z z z z z Message Time Defaults to all zeroes, which defines how soon after the start of the previous message the current one will go. The Device ID defaults to 0 or the default ID set for the show. The Description is specifically what the message will do when executed during the show, which is not necessarily exactly the same that happens when similar commands are executed live by the operator - see the specific sections below which describe the live actions generated by Live action windows for more information on live commands. The top right is the hex data. Any valid MIDI hex message can be typed directly in the field or pasted from another cue. Click the Parse button at any time to automatically parse the hex data. Many specific SoundMan-Assistant, SoundMan-Server or AudioBox II commands cannot easily be created as 'New Messages' in the show editor since many of these more complex commands would be extremely difficult (if not impossible) to generate and 'New Messages' editing only deals with the large category of general commands more easily chosen from scratch. In many cases, such as Set Stop Notification, it is almost impossible to get to the custom editor that comes up in the Show Editor window when one simply double clicks on such commands after they have been initially created in the live action windows. Four buttons appear in the right portion of all Edit Message windows: z z z z Copy to Clipboard - This will send the message to the Windows clipboard. Send - This button will immediately send the message to SoundMan or AudioBox II. Cancel OK TOP INDEX 3.2.2.1.1. SET INPUT/OUTPUT LEVEL This window allows you to create a message that sets the parameters of one input or output channel. Start by selecting 'Input' or 'Output'. Then select a channel number from the drop-down menu. Drag the fader to the desired level. Enter a ramp time and type if this is to be a timed fade. Clicking 'OK' will automatically paste this message into the currently opened cue. TOP INDEX P.26 3.2.2.1.2. SET SUBMASTER LEVEL This window allows you to create a message that sets a submaster level. Select a submaster number from the drop-down menu. Drag the fader to the desired level. Clicking 'OK' will automatically paste this message into the currently opened cue. TOP INDEX 3.2.2.1.3. SET CROSSPOINT LEVEL This window allows you to create a message that will set the parameters for a crosspoint. Select an input channel number and an output channel number from the drop-down menus. Drag the fader to the desired level. Enter a ramp time and type if this is to be a timed fade. Clicking 'OK' will automatically paste this message into the currently opened cue. TOP INDEX 3.2.2.1.4. SET CROSSPOINT PHASE/POLARITY P.27 This window allows you to create a message that will set the polarity of a crosspoint. Select an input channel number and an output channel number from the drop-down menus. Select 0 degrees or 180 degrees. Clicking 'OK' will automatically paste this message into the currently opened cue. TOP INDEX 3.2.2.1.5. SET DELAY This window allows you to create a message that will set the delay time of an input or output channel. Start by selecting 'input' or 'output'. Then select a channel number from the drop-down menu. Drag the fader to the desired number of milliseconds for the delay time. Clicking 'OK' will automatically paste this message into the currently opened cue. TOP INDEX 3.2.2.1.6. ENABLE/DISABLE DELAY P.28 This window allows you to create a message that enables or disables the delay on an input or output channel. Start by selecting 'input' or 'output'. Then select a channel number from the dropdown menu. Click on the big red button to enable or disable the delay for the specified channel. Clicking 'OK' will automatically paste this message into the currently opened cue. TOP INDEX 3.2.2.1.7. MUTE/UNMUTE CHANNEL This window allows you to create a message that mutes or unmutes an input or output channel. Start by selecting 'input' or 'output'. Then select a channel number from the drop-down menu. Click on the big red button to mute or unmute the specified channel. Clicking 'OK' will automatically paste this message into the currently opened cue. TOP INDEX 3.2.2.1.8. SOLO/UNSOLO CHANNEL P.29 This window allows you to create a message that solos or unsolos an input or output channel. Start by selecting 'input' or 'output'. Then select a channel number from the drop-down menu. Click on the big red button to solos or unsolos the specified channel. Clicking 'OK' will automatically paste this message into the currently opened cue. TOP INDEX 3.2.2.1.9. SET EQ This window allows you to create a message that sets the equalization for an input or output channel. Start by selecting 'input' or 'output'. Then select a channel number from the drop-down menu. Select the number of bands to be used. Then choose the type of equalization to be used (bandpass, highpass, lowpass.) Then choose from left to right the center frequency, bandwidth, and the decibel boost or cut. Clicking 'OK' will automatically paste this message into the currently opened cue. TOP INDEX 3.2.2.1.10. PLAYBACK (GO, STOP, LOAD, RESUME) P.30 This window allows you to create a playback message. Select whether you want a selection to GO, STOP, LOAD, or RESUME. Select either 'specific location' or 'current location.' If 'specific location' is selected, a window pops up that allows you to choose a selection to be played. Select an input channel from the drop-down menu. Clicking 'OK' will automatically paste this message into the currently opened cue. TOP INDEX 3.2.2.1.11. PLAYBACK (GO CHANNEL SET) This window allows you to create a message that will assign a group of loaded playback channels to GO simultaneously. Select which playback channels you want to GO. Clicking 'OK' will automatically paste this message into the currently opened cue. TOP INDEX 3.2.2.1.12. MIDI SHOW CONTROL EVENT P.31 This window allows you to create a message for a MIDI Show Control event. It is used when SoundMan-Assistant, SoundMan-Server or AudioBox II is controlling other MSC devices. Clicking 'OK' will automatically paste this message into the currently opened cue. TOP INDEX 3.2.2.1.13. SET MATRIX This window allows you to create a message that sets the entire mixer to one of the five common matrix settings. Clicking 'OK' will automatically paste this message into the currently opened cue. TOP INDEX 3.2.2.1.14. SET INPUT CHANNEL MODE This window allows you to create a message that sets the input mode of a channel. Select an input channel number from the drop-down menu. Select what mode that input channel is to be in. Clicking 'OK' will automatically paste this message into the currently opened cue. TOP INDEX P.32 3.2.2.1.15. SET MIDI ECHO This window allows you to create a message that sets the MIDI echo status. These settings are discussed in detail in Section 3.2.2. Clicking 'OK' will automatically paste this message into the currently opened cue. TOP INDEX 3.2.2.1.16. MTC GENERATOR This window allows you to create a message that sets the commands for the MIDI Time Code generator. In the left column choose a command and in the box on the right, choose a frame rate. Clicking 'OK' will automatically paste this message into the currently opened cue. TOP INDEX 3.2.2.1.17. HEX EDITOR P.33 The Hex Editor is for MSC or MIDI messages other than what is provided in SoundMan-Designer. Any valid MIDI hex message can be entered in the bottom field: z z z z z z z It may be typed directly in the field. It can be cut and pasted from any other Windows program using the right-click cut and paste process. The MSCEdit button opens the MSC Editor and a MIDI Show Control Message can be created, edited analyzed and parsed automatically. Actions performed in the Show Control, Playback or any Live window will also be captured automatically. Additional message editors are available upon request at extra cost Click OK and the message appears in the right side of the Show Editor window if hex data has been entered. Click Cancel to proceed without adding a message. TOP INDEX 3.2.2.2. TRACKSHEETS Tracksheets are convenient way of viewing all messages in a particular show. Within each show, the messages can be viewed by groups and subgroups in the left column. Each Device ID number is master group. The main sub-groups are Live messages (inputs, outputs, crosspoints, and submasters), Playback messages, and Show Control messages. Under each main sub-group, you can either view ALL Live messages or Playback messages or Show Control messages at once or you can go deeper into the sub-groups by clicking on the '+' sign in the tree. For example, for the Live group you can view just the messages that involve level changes for input 10. For the Playback group you can view just the messages that are LOAD commands input 9. For the Show Control group you can view just the messages that say OPEN CUE LIST. Within all of these windows on the right-hand side, messages are sorted by List number, then Path number, then Cue number, then ID number. These messages can also be sorted by Cue number which is really useful when you are using multiple lists and the Cues are jumping from one list to the other. TOP INDEX 3.2.2.3. EVENT MANAGER Event Manager P.34 TOP INDEX 3.3. SHOW PROPERTIES AND SETUP WINDOW By right-clicking on the show icon and selecting Edit Show Defaults, the Show Properties and SoundMan-Assistant Setup window appears. Click the specific Command you wish to program and edit. Each Command opens a window which provides its unique editing tools. TOP INDEX 3.3.1. SUBMASTERS SET SUBMASTER ZERO The value chosen represents the submaster amplitude step value at which each submaster neither adds nor subtracts from the gain of the channel(s) it is assigned to. Default is 64. SET SUBMASTER GAIN P.35 Four choices are available: z z z z 0.75dB change every four submaster amplitude steps 0.75dB change every two submaster amplitude steps 0.75dB change every submaster amplitude step 1.50dB change every submaster amplitude step Each submaster has 128 amplitude steps, controlled by the continuous MIDI controller assigned to it. This provides a theoretical total control range of 24dB (default), 48dB, 96dB and 192dB, respectively. The gain structure of SoundMan-Assistant, SoundMan-Server or AudioBox II limits the maximum overall gain to 0dB (unity gain), however, so sending commands to rise above this level will be ignored. SUBMASTER ASSIGNS Click View by Submaster to see which Input and Output channels are currently assigned to that Submaster. Click Input and/or Output channel boxes to change assignments. Click View by Channel to see which Submasters are currently assigned to that channel. Click Submaster boxes to change assignments. Any combination of Submasters may be assigned to SoundMan-Assistant, SoundMan-Server or AudioBox II Input and Output channels. As each submaster level is changed live via MIDI controller messages (as assigned in the Assign Controller window, below), the volume of the channels they are assigned to change appropriately. TOP INDEX 3.3.2. CONTROLLER ASSIGNS Each MIDI Continuous Controller can control one submaster. Each submaster can be controlled by one Controller. Click the Controller-> Submaster number to select a MIDI Continuous Controller. Select the MIDI channel of the Controller at the top. Click the Submaster box below to choose which one is controlled by that Controller. Any previously stored assignments are displayed in the Controller field. Click any Submaster box to change the assignment. TOP INDEX P.36 3.3.3. ALL_OFF ACTIONS This opens the SET ALL_OFF ACTIONS window. This window indicates what functions will be affected when an ALL_OFF command is sent to SoundMan-Assistant, SoundMan-Server or AudioBox II. TOP INDEX 3.3.4. RESET ACTIONS This defines actions performed by SoundMan-Assistant, SoundMan-Server or AudioBox II processes when an MSC RESET command is received. Any combination of the following can be set: z z z z z Set all gain points to zero Clear all mutes and solos Stop all playback Clear all playback stop notifications, stop points and resume points Set submaster zero gain to defaults and zero all submasters P.37 z z z z Reopen current show / if bit clear, open default show Clear all delay settings Clear all EQs Send ALL_NOTES_OFF messages as defined in the current show, before it is closed There are buttons to Set and Clear all selections. TOP INDEX 3.3.5. GPIO PARAMETERS This opens the General Purpose Input Parameters window. This allows the setting of four modes for the action of the Playback Trigger GPI port if an optional GPIO card and drivers are installed in the AudioBox II or the computer running SoundMan-Assistant: z z z z Normal (playback started + cue triggered with cue number offset) No Playback (playback not started, cue triggered with cue number offset) Playback with no offset (playback started, cue triggered with no cue number offset) Second cue trigger (playback not started, cue triggered with no cue number offset) The left side of the window displays a slider which sets the Cue and Playback Trigger Lockout times (preventing double triggering of both GPI triggers within a specified period of time) in milliseconds from 0 to 16383 These are all advanced functions which are only used when interfacing the GPI port on the optional GPIO card. GPIO interface info: z z z z z z z z z z z The GPIO interface must be enabled in the license key before it can be used. Currently ONLY the Advantech PCI-1730 card is supported for digital input and output. More cards may be added in the future. Advantech IO cards have a dip switch that selects the "card number". The card number MUST be set to the default of 0 for the card to be recognized by the SoundMan-Assistant software program. The Advantech IO driver software MUST be installed and the card MUST be configured with the Advantech driver configurator before it will work The PCI-1730 card has 16 inputs and 16 outputs. Two of the low 8 inputs (those that will generate an interrupt) are used as the Cue Trigger and Playback Trigger lines. The remaining six low input bits are currently unused. The 8 high input bits are used as the Cue Number field that is used with a Cue Trigger or Playback Trigger is sensed. All 16 of the digital output lines can be controlled by the SET GPO command, which will set any of the bits on or off, one at a time. Currently there is no software interface to set a group of bits to some value all at once. The current value of both the digital input and output bits can be read with the GET DISK STATE EN command. The GPI bit mapping is: BIT FUNCTION 0 playback trigger PIN 1 1 cue trigger 20 2 unused 2 3 unused 21 4 unused 3 5 unused 22 6 unused 4 7 unused 23 8 binary 0 5 9 binary 1 24 10 binary 2 6 11 binary 3 25 12 binary 4 7 13 binary 5 26 14 binary 6 8 15 binary 7 27 COMMON GROUND 9, 10, 28, 29 The digital outputs have no assigned function, but it is possible to program a bit on or off using a SET GPO command. NOTE that the outputs are INVERTING. This means that when the output is OFF the voltage across it will be HIGH, and when the output is ON the voltage across it will be LOW. All outputs are OFF by default when SoundMan-Assistant is first started. The GPO bit mapping is: P.38 BIT FUNCTION PIN 0 out 0 11 30 1 out 1 2 out 2 12 3 out 3 31 4 out 4 13 5 out 5 32 6 out 6 14 7 out 7 33 8 out 8 15 34 9 out 9 10 out 10 16 11 out 11 35 12 out 12 17 13 out 13 36 14 out 14 18 15 out 15 37 TOP INDEX 3.4. CONTENTS WINDOW Select either menu item in the Contents menu of the Editor window and the Contents window appears with alternate tabs preselected. The Contents window completely manages the contents of SoundMan-Assistant, SoundMan-Server or AudioBox II. All coordination between editing and operation and SoundMan-Assistant, SoundMan-Server or AudioBox II, whether connected to the computer or not, is managed automatically and the user is prompted to refresh SoundMan-Assistant, SoundMan-Server or AudioBox II contents whenever necessary and possible. The Contents window communicates with SoundMan-Assistant, SoundMan-Server or AudioBox II via Ethernet only. It downloads 48K sample rate audio (.WAV) files created by audio editing software (not provided by RSD) and shows created in the Show Editor window to SoundMan-Assistant, SoundMan-Server or AudioBox II. z z z z z The Audio Selections section displays: A list of audio selections and their playback length A list of audio selections in SoundMan-Assistant, SoundMan-Server or AudioBox II and their playback length Buttons: { Refresh - updates the contents of SoundMan-Assistant, SoundMan-Server or AudioBox II { Print/Save - will print shows and selections in SoundMan-Assistant, SoundMan-Server or AudioBox II or will save shows and selections as backups onto the system hard drive. { Import - imports selected items from SoundMan-Assistant, SoundMan-Server or AudioBox II { Change Path - changes default path for shows and selections { Add New - downloads any .wav file (or shortcut) to SoundMan-Assistant, SoundMan-Server or AudioBox II and creates a list of the source files { SoundMan-Assistant Details - full information on any or all selections in the selected SoundMan-Assistant, SoundMan-Server or AudioBox II { Delete - removes a selection from SoundMan-Assistant, SoundMan-Server or AudioBox II { Defrag - this is disabled in SoundMan-Assistant, SoundMan-Server and AudioBox II { Exit - closes the window Total disk capacity in audio playback time P.39 z z z Disk space currently used Disk space currently free Disk space potentially available after defragmenting The Shows section displays: z z z z z z z A list of shows and their size in blocks A list of shows in SoundMan-Assistant, SoundMan-Server or AudioBox II and their size in blocks Buttons: { Refresh - updates the contents of SoundMan-Assistant, SoundMan-Server or AudioBox II { Print/Save - disabled in SoundMan-Assistant, SoundMan-Server and AudioBox II { Change Path - changes default path for shows and selections { Add New - downloads any Show in the Show Editor Show list to SoundMan-Assistant, SoundMan-Server or AudioBox II { SoundMan-Assistant Details - full information on any or all shows in the selected SoundMan-Assistant, SoundMan-Server or AudioBox II { Delete - removes a Show from SoundMan-Assistant, SoundMan-Server or AudioBox II { Defrag - disabled in SoundMan-Assistant, SoundMan-Server and AudioBox II { Exit - closes the window Total disk capacity in blocks Disk space currently used Disk space currently free Disk space potentially available after defragmenting Also please see the quick reference section. TOP INDEX 3.5. SHOW CONTROL WINDOW Select menu item Show Control in the View menu of the Editor window and the Show Control window appears with all currently operating show lists and cues displayed along with an interactive Show tree. The Show Control window completely monitors and can interactively manage the live show operation of SoundMan-Assistant, SoundMan-Server or AudioBox II. All live cue actions within SoundMan-Assistant, SoundMan-Server or AudioBox II are displayed and can be modified by the user as required. The SoundMan-Assistant, SoundMan-Server or AudioBox II will simultaneously respond to operator commands executed from this window as well as MSC commands received by the MIDI IN port of SoundMan-Assistant, SoundMan-Server or AudioBox II. All commands generated in the Show Control, Playback or any Live window can be recorded with the Show Editor Begin Recording Cue tool and individual commands can be captured into the Message Edit window and the Set Stop Notification window. The Show Control window communicates with SoundMan-Assistant, SoundMan-Server or AudioBox II via Ethernet only. The top left area of the window displays: z z z z z z Show name Show number Number of lists in the Show Number of paths in the Show MIDI Loopback status Operating status P.40 The top right area of the window displays: z z z z MIDI-MIDI Echo Status Enet-MIDI Echo Status Refresh Current Show - downloads the current show from Show Editor to SoundMan-Assistant, SoundMan-Server or AudioBox II MTC generator - MIDI Time Code generator The lower left portion of the window displays the status of an open list. The top part displays the List and Path number being displayed and the number of cue sequences currently running in that list. Below that is displayed: z z z z z z The number and name of the last cue to Go The number and name of the Standby Cue The current time value of the List Clock The current time value of the Sequence Clock An interactive Show tree, displaying all Lists, Paths and Cues in the Show - automatically opening and closing the tree as cues Go plus providing the user with an interactive operating environment Buttons: { Close Current List { Stop List Clock { Start List Clock { Zero List Clock { Load Previous Standby Cue { { Go Standby Cue Load Next Standby Cue Tree views of additional lists can be viewed by clicking on the '+' sign above the original tree. Also please see the quick reference section. TOP INDEX 3.6. VU METER WINDOW Select menu item VU Meters in the View menu of the Editor window and the VU Meter window appears. All 64 Audio Input and Output levels are displayed separately in this window. This window will not display unless at least SoundMan-Assistant is connected. Also please see the quick reference section. TOP INDEX 3.7. STATUS WINDOW Select menu item SoundMan-Assistant Status in the View menu of the Editor window and the Status window appears at the bottom of the Editor window. The following key operational statistics are displayed continuously in this window: z z z z z z z z z z Buffers Free - incoming command buffer queue tally Low Water Mark - lowest buffer tally level Ethernet Messages - tally of total SoundMan-Assistant, SoundMan-Server commands received via Ethernet MIDI Messages - tally of total SoundMan-Assistant, SoundMan-Server commands received via MIDI IN or loopback [Ethernet Messages] OK - tally of SoundMan-Assistant, SoundMan-Server commands successfully completed [MIDI Messages] OK - tally of SoundMan-Assistant, SoundMan-Server commands successfully completed [Ethernet Messages] Bad - tally of unsuccessful SoundMan-Assistant, SoundMan-Server commands [MIDI Messages] Bad - tally of unsuccessful SoundMan-Assistant, SoundMan-Server commands Status - flashing 'LED' indicates OK Status field - current status summary Buffer and message tallies are accumulated by SoundMan-Assistant, SoundMan-Server so they will not be reset until SoundMan-Assistant, SoundMan-Server or AudioBox II is reset. Also please see the quick reference section. TOP INDEX 3.8. IMPORT SHOW WINDOW Select menu item Import Show File/File in the File menu of the Editor window while the Show Editor window is highlighted and a file browser appears. Select any Show Editor .sho type file obtained from any SoundMan-Designer installation and click OK. The Import Show window appears. P.41 Select menu item Import Show File/From SoundMan-Assistant in the File menu of the Editor window while the Show Editor window is highlighted and a window appears in which all available SoundMan-Assistant, SoundMan-Server or AudioBox II servers can be selected by serial number. Select the SoundMan-Assistant, SoundMan-Server or AudioBox II and the Show desired and click OK. The Import Show window appears. Click: z z z View Show - to view all show data Import Show - to put the show into the Show Editor window so it can be edited Print - to print all show data to a correctly configured and connected printer TOP INDEX 3.9. PLAYBACK WINDOW Select menu item Playback in the View menu of the Editor window and the Playback window appears. The Playback window operates in two modes: Live or Setup, which is selected by clicking P.42 those words in the right end of each track. Tooltips are provided for every icon, button and display function in the Playback window. All buttons in the Live mode instantly control SoundMan-Assistant, SoundMan-Server or AudioBox II audio selection playback functions and the MIDI commands generated can be captured in the Show Editor message editor so they can be put into a show as desired. The top section ('ALL Channels') contains a Review, Stop, Go and Cue button. These buttons act on all enabled channels as indicated. To choose a selection to play and enable any channel, click Setup then LOAD then 'Click for Selection'. Make a selection in the window that appears and click the 'OK' button. Each channel in the Live mode can be controlled independently with its transport buttons once it is enabled as described above. The MIDI commands generated can be captured in Show Editor. Each channel displays the current selection number, name playback status and time. The top section in the Setup mode provides a convenient way to instantly make a chosen selection play and stop at a chosen selection on all playback channels simultaneously. To start or stop playing at a time other than 00:00:00.00, click in the time display area and enter the desired number or move the mouse up and down. Each channel in the Setup side provides for individual selections and times for GO, STOP, LOAD & RESUME. GO starts the selection whereever it is currently unless a specific time is inserted. Likewise, STOP makes the selection stop whereever it is currently unless a specific time is inserted. To make a selection simply start and stop use GO and STOP. Select the function desired before choosing the selection and setting the time. Clicking the 'Right Arrow' at the left of each display inserts the current live selection and time into the current setup display. RESUME specifies the exact point in any selection from which playback continues without pause when the current selection stops for any reason (including ending normally, receiving a live stop command or an appropriate playback STOP command with a specific location in a cue which gets executed while the selection is playing). RESUME is the command to use when wanting to make selections loop seamlessly: insert a RESUME message that specifies the start point of the loop repeat into the cue after the playback GO (and STOP) message(s). RESUME stays resident until it is cancelled with a RESUME CLEAR command. For more information on RESUME see the command set document: RESUME Command The bars on the right hand side link two adjacent channels so when playing back one channel of a linked stereo file, the other channel will play as well. The 'attention' icon brings up the SET STOP NOTIFICATION (SSN) window. This allows you to have SoundMan-Assistant, SoundMan-Server or AudioBox II send virtually any message you want whenever the selection stops. While the SSN window is open, simply generate the message you wish by performing the desired action in SoundMan-Designer and that message will be encapsulated in the SSN message which can then be saved in a cue. SET STOP NOTIFICATION stays resident until it is cancelled with a SET STOP NOTIFICATION CLEAR command. For more information on SET STOP NOTIFICATION see the command set document: Set Stop Notification Command Also please see the quick reference section. TOP INDEX 3.10. SUBMASTERS WINDOW Select menu item LIVE/Submasters in the View menu of the Editor window and the Submasters window appears. All 32 submasters are displayed and can be moved with the mouse. The current volume level of each submaster is always displayed correctly. Each submaster can be controlled by a MIDI controller as chosen in Setup. The submaster last clicked is displayed in red and the Input and Output level controls which are assigned in Setup to that submaster have their 'Assigned to Current Submaster' indicator illuminated, if the Inputs and/or Outputs windows are visible. TOP INDEX 3.11. INPUTS WINDOW P.43 Select menu item LIVE/Inputs in the View menu of the Editor window and the Inputs window appears. Live control functions for all input channels are accessible in the Inputs window. These include: Volume level, Auto-Pan rate and ramp, Mute, Solo, Delay & Link controls. There is also an indicator which displays current submaster assignments. Once Auto-Pan fade rates have been set, an automatic fade can be initiated by double-clicking at the desired volume level point. Also please see the quick reference section. Also please see the EQ/Delay and Snapshot quick reference section. TOP INDEX 3.12. OUTPUTS WINDOW Select menu item LIVE/Outputs in the View menu of the Editor window and the Outputs window appears. Live control functions for all output channels are accessible in the Outputs window. These include: Volume level, Auto-Pan rate and ramp, Mute, Solo, Delay, EQ & Link controls. There is also an indicator which displays current submaster assignments. Once Auto-Pan fade rates have been set, an automatic fade can be initiated by double-clicking at the desired volume level point. Also please see the Input , EQ/Delay and Snapshot quick reference section. TOP INDEX 3.13. CROSSPOINTS WINDOW P.44 Select menu item LIVE/Crosspoints in the View menu of the Editor window and the Crosspoints window appears. Live control functions for all crosspoints are accessible in the Crosspoints window by double clicking on the knobs. These include: Volume level, Auto-Pan rate and ramp. Once Auto-Pan fade rates have been set, an automatic fade can be initiated by double-clicking at the desired volume level point. Also please see the Crosspoint and Snapshot quick reference section. TOP INDEX 3.14. MIDI TO HOTKEY MAPPING WINDOW MIDI to Hotkey Mapping Window Select MIDI-Hotkey Mapping in the Settings menu to open the MIDI to Hotkey Mapping window to define which incoming MIDI messages actuate hotkeys. Hotkeys are also created and edited using this window. HotKeys can be created to do a number of tasks in a specific show or in a global sense - i.e. trigger events that are common to all shows. A good use of hot keys is to trigger a cue that in turn runs a sound effect for a knock, a doorbell, thunder, punches, etc. Any sound effect that the timing depends on the stage action. Perhaps you do system setup with the same music everytime and would rather not put that cue into every show. Make it a hotkey and then it can be used globally. Hot keys could also trigger a lighting console, video server, or any device that responds to MSC or any device that you can program as a cue in SoundMan-Designer. A hotkey is a single letter A thru Z modified by one of the following: CTRL, SHIFT+CTRL, CTRL+ALT, SHIFT+CTRL+ALT, ALT, or SHIFT+ALT. Hotkeys by themselves, are triggered from the PC's keyboard. Although, by using an outboard keypad such as are available from X-Keys (http://www.xkeys.com/xkeys.php), you can design a custom keyboard based interface to SoundMan-Designer events. An outboard keypad would allow you to emulate an 360 Systems Instant Replay (http://www.360systems.com/audio_instantreplay.html). However, hotkeys can also be triggered from a MIDI event - such as a note on, note off, poly key pressure, control change, program change, channel pressure, and pitch blend. Before you can trigger a hotkey via MIDI, you have to create a hot key. Then you can pair the hot key with a MIDI event via the Settings-MIDI-Hotkey Mapping menu pick. Hotkeys can contain ANY legal messages - they can have events copied and pasted to the hot key - and can be run immediately - no need to refresh a show as there is really no show to refresh. Hotkeys can be used to test cues too. Then when you have it composed "just right," the messages can be copied and pasted into a proper cue in a show. To create a hotkey, open the Show Editor tab - bring it forward by clicking on the tab called Show Editor or, if not already on the task bar, then select View -- Show Editor. On the left-hand pane of the Show Editor, double click the HotKeys folder. If there are already HotKeys defined, they will show as a list on the left hand pane. To create a new HotKey or if no HotKeys are defined, right-click in the right-hand pane and you can select the key modifier (via drop-down) as well as the letter, also via a drop down. You can. at this time, type in a description for your hotkey. After it is defined, it will show up on the left-hand pane. Double click the newly defined HotKey (or an existing HotKey) and either a blank right-hand pane will display (for a newly defined hotkey) or the messages making up that hotkey will display (for a previously created hotkey). Note that the events follow the same format as cue events. In fact, you can cut and paste from existing cues into the hotkey. So, if you have a bit of music you always run to check out the system, put it into a hotkey and save some time and clutter in your show files. Another use might be to set up a special equalization curve - for a specific reason - then you could execute the hotkey and then use the snapshot append to a cue ... or the Stage Manager's God P.45 microphone - just press a hotkey to activate and another to deactivate. TOP INDEX 4. TUTORIAL This section describes some typical SoundMan-Designer programming procedures but is not intended to provide examples of every show situation. RSD can provide suggestions on how to do more complex programming or we can provide a consultant programmer at extra cost. Please be aware, however, that we cannot solve every show programming puzzle over the phone or by email. Since each individual show setup is different, it will be difficult to describe precisely how to program your particular system but we will provide some typical examples. We'll begin with simple procedures and work our way to more advanced exercises in show control. We will be working with the Default show 'Tutorial Show 1'. Since, upon startup of the program a default show was created automatically, we will now change some of the defaults to suit our need. Right Click on the icon in the left column and select 'Edit List Defaults.' The three options (Auto CuePath Sequencing, Clock Running when list opened, and Open List when Show opens) on the right all need to be selected. Refer to section 3.2.2. for details. To prepare for this tutorial, we will have to put some audio selections on to the SoundMan-Assistant, SoundMan-Server or AudioBox II server. Using your CoolEdit (or equivalent) software, record at least nine 48K sample rate audio selections and save them as PCM format .wav files in the C:\Program Files\RSD\SoundMan-Designer\Selections folder. In the Editor window, select the Contents/Audio Selections menu item. In the Audio Selections window, click Add New and select the first .wav file then click OK. If the file is stereo, SoundMan-Designer will automatically split it into two mono files and send them to SoundMan-Assistant, SoundMan-Server or AudioBox II. Repeat this process for all nine .wav files. TOP INDEX 4.1. LIVE AUDIO PLAYBACK First we'll simply play the first selection on the SoundMan-Assistant, SoundMan-Server or AudioBox II hard drive. We will route the audio to output one of SoundMan-Assistant, SoundManServer or AudioBox II. Before beginning, we will make sure all of the live mixer windows are normalized (set to zero.) Select LIVE/Inputs under the View menu. Click on 'Set Matrix.' Click on 'Send' on the first option (all input, output, and crosspoint levels full off.) Then click 'Done.' We'll set things up to record our actions at the same time so that in the next section of the tutorial we can make a cue that does automatically what we first do manually: 1. 2. 3. Select Show Editor in the View menu of the Editor window Open the Tutorial Show 1 tree by clicking on all + symbols until Cue 1 is visible in the tree - see 3.2.2. if the Tutorial Show 1 has not yet been created Select Cue 1 in the tree on the left side of the Show Editor window 4. On the right side of the Show Editor window, click the Begin Recording Cue tool the following procedures - the Capture SoundMan-Designer Actions window should open which should be left open during Until you click Save in the Capture SoundMan-Designer Actions window all your actions will be recorded so make sure everything you do is what you want to into the cue. If you make a mistake, you can either click 'Clear' or remove unwanted messages after they have been saved into the cue. Now let's set some volume levels: 1. 2. 3. 4. 5. 6. 7. Select Inputs in the Window menu of the Editor window In the Inputs window, On input 9, place mouse at a nominal level in the middle of the fader so it reads somewhere around '75'. Now, double click. The fader will automatically go to that level and that message will get recorded into the capture window.If you simply drag the fader up to the desired level in capture mode, you will end up with dozens of messages that will have captured every move at a given interval. Select LIVE/Crosspoints in the View menu of the Editor window In the Crosspoints window, select the knob at the intersection of Input 9 (vertical column 9) and Output 1 (horizontal row 1) Set the Gain fader which appears to its maximum level by double clicking at the top of the fader and click OK. Select LIVE/Outputs in the View menu In the Outputs window, set the output fader one to a nominal level by double-clicking at the desired level Finally, we'll specify selection one to play and specify it to stop at the beginning of selection two. 1. 2. 3. 4. 5. Select Playback in the View menu of the Editor window In the Playback window, click GO in Channel 9 under Setup In the same area, click the message 'Click for Selection' In the window that appears, choose the first selection and click OK In the Channel 9 Setup area of the Playback window, click the green arrow 'go' icon in the lower left corner Selection one will be audible on audio output one and output VU one will show activity. INDEX 4.1.1. MAKING CUE #1 Now we'll make that cue that automatically does what we just did manually. 1. 2. The Capture SoundMan-Designer Actions window should still be visible - if not, click Capture SoundMan-Designer under the window menu to bring it to the foreground. In the Capture SoundMan-Designer Actions window, click Save - all actions recorded above should now be in Cue 1 in the Show Editor window Now we can test the whole cue: 1. Make sure the output device is set to Ethernet in the top left corner of the Show Editor window. 2. Click the 'Play Cue' button SoundMan-Assistant, SoundMan-Server or AudioBox II should do everything that cue 1 is supposed to make it do. If something does not perform correctly, recheck the messages to make sure they are all correct. P.46 Highlight Cue 1 and select Edit Cue Defaults in the Cue menu. Type 'Play Selection 1 routed to Output 1' in Cue Description. Edit the Cue Time in the Cue Properties window so it now reads 00 hours, 00 minutes, 30 seconds, 00 frames and 00 fractional frames. This will make the cue automatically GO 30 seconds after SoundMan-Assistant, SoundMan-Server or AudioBox II list clock starts. The list clock is set to start automatically when the list opens and the list is set to open automatically when the show opens. SoundMan-Assistant, SoundMan-Server or AudioBox II automatically opens the default show when it boots up. To make 'Tutorial Show 1' the default show, click on the top right button that has a show name already on it. Click on 'Select a show.' Click on Tutorial Show and click OK. This means that Cue 1 will go automatically after SoundMan-Assistant, SoundMan-Server or AudioBox II boots up - but first we have to refresh the show. To update Tutorial Show 1 on SoundMan-Assistant, SoundMan-Server or AudioBox II at any time, highlight Tutorial Show 1 in the Show Editor window, right click and select Refresh Show in the Show menu OR open up the Show Control window. Make sure the Tutorial 1 show appears, then click 'Refresh' Cue 1 can also be triggered at any time with a show controller or any MIDI system or via the live controls in the Show Control window. TOP INDEX 4.2. EIGHT CHANNEL PLAYBACK Now we'll simultaneously play all eight audio selections on the SoundMan-Assistant, SoundMan-Server or AudioBox II hard drive. We will route each selection one through eight to outputs one through eight of SoundMan-Assistant, SoundMan-Server or AudioBox II, respectively. We will do this by assigning selections 1-8 to inputs 9-16 respectively. We'll call this Cue 2: 1. 2. 3. 4. 5. 6. Select Show Editor in the Editor Window menu if not visible or click on the Show Editor taskbar. If Tutorial Show 1 is not loaded, use the File menu item Load Show to load it Select Tutorial Path of the Tutorial Show 1 Select New Cue in the Path menu and make cue 2 Name the cue 'Multitrack playback.' Click OK TOP INDEX 4.2.1. SETTING INPUT & OUTPUT LEVELS Now we'll set and 'snapshot' the input volumes: 1. 2. 3. Make sure all levels are at 0 and select Inputs in the Window menu of the Editor window Click the Link/Unlink Channel button at the bottom of input channels 9 through 16 to link those channels. Drag one of the linked faders up to a nominal level. You will notice inputs 9 through 16 are all at the new level. 4. At the bottom of the inputs window, click on the camera icon 1. 2. 3. 4. 5. At the top of the window, click on inputs 9 through 16, then click on the A to the left of the second row, which is the fader level row. Click 'Save Snapshot.' Naming the snapshot is not necessary and will be discussed in a different section so click OK. A dialogue window appears saying 'A Snapshot has been created. Would you like Add/Replace/Append a Cue now?' Click Yes. From the top pull down menu in this next window, select the Tutorial Show 1. In the tree below, click on the + signs until the cue list appears and click on Cue 2. Then Click 'Append to Cue.' and select 'Edit Snapshot Templates.' This window appears: Those input levels are now in Cue 2. For the outputs, we will follow the same procedure: 1. 2. 3. Make sure all levels are at 0 and select Outputs in the Window menu of the Editor window Click the Link/Unlink Channel button at the bottom of output channels 1 through 8 to link those channels Drag one of the linked faders up to a nominal level. You will notice outputs 1 through 8 are all at the new level. 4. At the bottom of the outputs window, click on the camera icon and select 'Edit Snapshot Templates.' This window appears: P.47 1. 2. 3. 4. 5. At the top of the window, click on outputs 1 through 8, then click on the A to the left of the second row, which is the fader level row. Click 'Save Snapshot.' Naming the snapshot is not necessary and will be discussed in a different section so click OK. A dialogue window appears saying 'A Snapshot has been created. Would you like Add/Replace/Append a Cue now?' Click Yes. From the top pull down menu in this next window, select the Tutorial Show. In the tree below, click on the + signs until the cue list appears and click on Cue 2. Then Click 'Append to Cue.' Those input levels are now in Cue 2. TOP INDEX 4.2.2. SETTING CROSSPOINT LEVELS We will now set the crosspoint volumes: 1. 2. 3. 4. Select Crosspoints in the Window menu of the Editor window The volume of the crosspoint at input 9, output 1 should already be at maximum - if it is not, just select that knob and double click at the top of the slot in the window that appears Select the knob at input 10, output 2 and double click at the top of the slot in the window that appears Set the volumes to full in the same manner for the following crosspoints: { Input 11, output 3 { Input 12, output 4 { Input 13, output 5 { Input 14, output 6 { Input 15, output 7 { Input 16, output 8 At the bottom of the crosspoints window, click on the camera icon 1. 2. 3. 4. 5. and select 'Edit Snapshot Templates.' Select the crosspoints that you want put into Cue 2 which is 9-1,10-2, etc. Click 'Save Snapshot.' Naming the snapshot is not necessary and will be discussed in a different section so click OK. A dialogue window appears saying 'A Snapshot has been created. Would you like Add/Replace/Append a Cue now?' Click Yes. From the top pull down menu in this next window, select the Tutorial Show. In the tree below, click on the + signs until the cue list appears and click on Cue 2. Then Click 'Append to Cue.' Those input levels are now in Cue 2. TOP INDEX 4.2.3. LOADING SELECTIONS Now we'll load the Audio Playback selections: Open the Capture SoundMan-Designer Actions window. window until you click Save in that window 1. 2. 3. 4. 5. 6. 7. 8. 9. 10. 11. 12. 13. 14. 15. 16. 17. 18. Every move you make will be recorded into the Capture SoundMan-Designer Select Playback in the Window menu of the Editor window In the Playback window, in the channel 9 Setup area, click LOAD Also in channel 9, click the message 'Click for Selection' In the window that appears, choose the first selection and click OK In channel 9, click the 'load' icon in the lower left corner of the setup area - this tells the track to prepare to play at the beginning of selection one In channel 10, click LOAD In channel 10, click the message 'Click for Selection' Choose the second selection and click OK In channel 10, click the 'load' icon in the lower left corner In channel 11, click LOAD In channel 11, click the message 'Click for Selection' Choose the third selection and click OK In channel 11, click the 'load' icon in the lower left corner In channel 12, click LOAD In channel 12, click the message 'Click for Selection' Choose the fourth selection and click OK In channel 12, click the 'load' icon in the lower left corner In channel 13, click LOAD P.48 19. 20. 21. 22. 23. 24. 25. 26. 27. 28. 29. 30. 31. 32. 33. In channel 13, click the message 'Click for Selection' Choose the fifth selection and click OK In channel 13, click the 'load' icon in the lower left corner In channel 14, click LOAD In channel 14, click the message 'Click for Selection' Choose the sixth selection and click OK In channel 14, click the 'load' icon in the lower left corner In channel 15, click LOAD In channel 15, click the message 'Click for Selection' Choose the seventh selection and click OK In channel 15, click the 'load' icon in the lower left corner In channel 16, click LOAD In channel 16, click the message 'Click for Selection' Choose the eighth selection and click OK In channel 16, click the 'load' icon in the lower left corner TOP INDEX 4.2.4. STOPPING SELECTIONS Each selection normally plays out, but if you want it to stop before the end, set stop points like this: 1. 2. 3. 4. 5. 6. Select Playback in the Window menu of the Editor window In the Playback window, in the channel 9 Setup area, click STOP Also in channel 9, click the message 'Click for Selection' In the window that appears, choose the first selection and click OK Click in the time display below the selection name Enter the time at which the selection should stop 7. In channel 9, click the square red 'stop' icon in the lower left corner of the setup area - this tells the track to stop playing at the time entered TOP INDEX 4.2.5. FINISHING CUE #2 Finally we can execute the GO: z In the top left of the Playback window ('Current Selection ALL Channels') click the Go button (green arrow) Simultaneously selections one through eight will be audible on audio outputs one through eight, respectively, and output VU meters one through eight will show activity. Now we'll make a cue that automatically does what we just did manually. 1. 2. The Capture SoundMan-Designer Actions window should still be visible - click Capture SoundMan-Designer under the Window menu to bring it to the foreground. In the Capture SoundMan-Designer Actions window, click Save - all actions recorded above should now be in Cue 2 in the Show Editor window Now we can test the whole cue: 1. 2. 3. Click the first message in cue 2 to highlight it Scroll to the end of the message list Hold the Shift key down and click the last message to highlight all messages in cue 2 4. Click the Send Selected Message(s) Tool is default) 5. You can also simply click on the 'Play Cue' icon to send all highlighted messages to SoundMan-Assistant, SoundMan-Server or AudioBox II via the output selected in the toolbar (Ethernet to run the entire cue in real time SoundMan-Assistant, SoundMan-Server or AudioBox II should do everything that cue 2 is supposed to make it do. If something does not perform correctly, recheck the messages to make sure they are all correct. If something does not perform correctly, recheck the messages to make sure they all have the desired commands in them. Highlight each message one at a time and send it to confirm its actions by clicking on the 'Send Selected Messages' icon. Highlight Cue 2 and select Edit Cue Defaults in the Cue menu. Edit the Cue Time in the Cue Properties window so it now reads 00 hours, 00 minutes, 30 seconds, 00 frames and 00 fractional frames. This will make the cue automatically GO 30 seconds after cue 1 goes. Select the Show Control in the Tutorial Show 1 will soon appear in the Show Control window which appears. 'Show Requires Refresh' will flash if a change has been made to the show. Click 'Refresh' Cues 1 and 2 can be triggered at any time with a show controller, any MIDI system or with the Show Control buttons in the Show Control window. TOP INDEX 4.3. TUTORIAL SHOW 2 Make sure the input, crosspoint, and output windows are all open (View Menu- Live, make sure they are each checked). Plug your sound generating or playback device (Mixer output, CD, cassette, etc.) into SoundMan-Assistant, SoundMan-Server or AudioBox II's first two audio inputs. Normalize the mixers. This can be done quickly by going to the input, output, OR crosspoint window, clicking on 'Set Matrix' and clicking on 'all input, output, and crosspoint levels full off "Send."' If you just finished stepping through Tutorial Show 1, you will also need to unlink all the input and output channels. Test the routing In the crosspoint window, set input 1 to outputs 1, 3, 5, etc. and set input 2 to outputs 2, 4, 6, etc. up to 16. For most applications, it is probably safest to set the crosspoint levels to full so you have one less level variable to think about. Set your inputs 1 & 2 to a nominal level (approximately 100). Once music is playing, make sure you, in fact, have signal on your input faders. Now bring up your output faders up one at a time to confirm signal and speaker assignments. P.49 Please take not as to what output levels are nominal levels for the room. This will come in handy when we begin programming output levels into Tutorial Show 2. Note: You can always bring a window to the foreground from the Window menu. Testing features While audio is being playing, it is a good idea at this point to experiment with the features on the faders. AutoPan function, mute, solo, EQ (Output only), and delay. With the AutoPan function, when you have changed the fade time and clicked OK, just double click at a different point on the fader and you will see the fader slide to your new level over time. Note that the breakdown is hh:mm:ss.ff. FYI the table ramp is generally a smoother sounding fade. The exponential ramp is better for crossfades of similar material (wind, crickets, other subtle ambiences). FYI, the stock table ramp is simply a linear fade and exponential is logarithmic. Internal Input Audio Playback To prepare for this section of the tutorial, we will need to make sure there are selections on SoundMan-Assistant, SoundMan-Server or AudioBox II. Using your DAW software, record at least a few 48K sample rate audio selections of varying lengths as PCM .wav format files in the C:\Program Files\RSD\SoundMan-Designer\Selections folder. In the Editor window, select the Contents/Audio Selections menu item. In the Audio Selections window, click Add New and select the first .wav file then click OK. If the file is stereo, SoundMan-Designer will automatically split it into two mono files and send them to SoundMan-Assistant, SoundMan-Server or AudioBox II. For the tutorials, it would be more useful if these first eight selections are longer than one minute (preferably ambience type stuff like birds, street sounds, etc.) Repeat this process for eight .wav files. In the crosspoint window, assign input 9 to output 1 & 2. Bring outputs 1 & 2 to full. Open up the playback window (View Menu). In channel 9 set-up column on the right, click on Go. Click for selection. Choose the s longer wav file and click OK. Click on the Play icon. You should be seeing level on the input mixer. Bring up the level on input 9 and you should be hearing the audio in outputs 1 & 2. In the playback window in the left column you can shuttle through the sound file. Keep in mind for future reference that this is the only window from which you can shuttle through an individual or group of sound files. In other words, if you need to stop in the middle of a sound file and pick up from that spot or start from anywhere else in the middle of the sound file, you must do it from the playback window. Making Cues We will be working with Tutorial Show 2. Refer to section 3.2.2. SETTING UP to make a 'Tutorial Show 2' prior to beginning and make sure the show created in that section is loaded into the Show Editor window. SoundMan-Assistant, SoundMan-Server or AudioBox II must be connected and configured properly and the MIDI and Ethernet connections established. Make sure the Tutorial Show 2 is the default show by clicking on the show button in the top right portion of the Show Editor and selecting on 'Select a show.' We are going to make a sequence of cues. There are several ways to make the same types of cues which will be demonstrated. After making the cues, we will go back to edit them as one would do under normal theatre tech circumstances. To begin, we will make a cue that normalizes the mixers. In section 3.2.2. a new list, path and cue were created for Tutorial Show 2. Right-click on Cue 1 and select 'Edit Cue Defaults'. Under description, type 'Normalize mixer.' Now, we are ready to do some programming: Click on 'Cue 1' 1. 2. 3. 4. 5. 6. Open the SoundMan-Designer Capture Window Bring any of the LIVE mixer windows to the foreground (input, output, crosspoint) Click on the 'Set Matrix' button at the bottom Click Send on the top selection Click Done In the Capture Window, Click Save This cue will set all inputs, outputs and crosspoints to 0 The following cues will include playback of audio selections and auto-panning. Each cue will demonstrate a different method of making cues. 1. 2. 3. 4. 5. 6. 7. 8. 9. 10. 11. 12. 13. 14. 15. 16. 17. 18. 19. 20. In the Show Editor window, right click on 'Path 1' { Make New Cue { Number it '5' (MSC Go) { Under Description type 'First Playback Inputs 9/10' { Click OK Click on Cue 5 Click on the New Message icon. Select 'Set Input/Output levels' and click OK Select Input 9 and set the fader to 100 and click OK Follow the same procedure (2-4) for Input 10 Follow the same procedure (2-4) for Output 1 Follow the same procedure (2-4) for Output 2 For Crosspoints, click on the New Message icon Select Crosspoint levels and click OK Select Input 9 and Output 1, bring the fader to full (127) and click OK Follow the same procedure (8-10) for Input 10 going to Output 2 For Playback, click on the New Message icon Select 'Playback (GO, LOAD, STOP, RESUME)' and click OK Click on LOAD and select the first selection and click OK Select channel 9 from the drop menu that says 'All' and click OK Follow the same procedure (12-15) for selection 2 in input 10 To create a GO command click on the New Message icon Select 'Playback (GO CHANNEL SET)' and click OK At the bottom of this window, click on 9 and 10, then click OK Cue 5 is now complete and should look something like this: P.50 Make a new Cue 10. This cue will use the SoundMan-Designer Capture Window. 1. 2. 3. 4. 5. 6. Under description, type 'Second Playback 11/12/13/14' { In the time slot in the top left of the window, make it 10 seconds, This means that Cue 10 will automatically Go 10 seconds after Cue 5 has begun. { Click OK Click on Cue 10 7. 8. 9. 10. Open the SoundMan-Designer Capture window. Every move that is made will now be recorded into the SoundMan-Designer Capture window. In the input window, link input 11 with input 12 by clicking on the arrow at the top of the two faders. It will turn red when linked. Follow this same procedure (3) for inputs 13 and 14 Double click somewhere on fader 11 or 12 at around the level 60. Both faders will jump to that level and there will be two new messages in the SoundMan-Designer Capture window. If, for some reason, more than two messages get recorded, it won't make any difference but you can always delete them afterwards if you want to keep your cues tidy. Double click somewhere on fader 13 or 14 at around level 90 In the crosspoint window, assign inputs 11 and 13 to Output 1 by clicking the crosspoint and double clicking at the top of the fader. Follow this same procedure (7) for assigning inputs 12 and 14 to Output 2 In the Playback window in inputs 11 through 14, click LOAD and then Click for Selection. For 11 through 14, choose selections 3 through 6 respectively. 11. 12. For each input, click on the LOAD icon in the right column. In the top left of the Playback window, click on the Synchronous Go button In the SoundMan-Designer Capture window, click Save Make sure that the last message is only commanding inputs 11 through 14 to GO. If it is different, double click on that message and edit it accordingly. { { Cue 10 should look something like this: Cue 15 will utilize the Snapshot function when possible as well as the New Message window. 1. 2. 3. 4. 5. Make a manual Cue 15 (MSC Go) and name it 'Third Playback 15/16' Click OK and then click on Cue 15. In the input window, link inputs 15 and 16 by clicking on the green 'LED' at the bottom of the faders. It will light up when activated. This links all faders that have the green 'LED' on...not just a pair. Bring the faders up to 50 Click on the Snapshot icon and select 'Edit Snapshot Template' { At the top of the window, select inputs 15 and 16 as well the fader button for each. { Click Save Snapshot, click OK, then click Yes { From the top, open the show 'Tutorial Show 2' and the corresponding list, path and Cue 15 P.51 6. { Click 'Append to Cue' In the crosspoint window, send inputs 15 and 16 to outputs 1 and 2 respectively at full (127) 7. Click on the snapshot icon and select 'Edit Snapshot Template' { Click on the two points that you just brought up to full { Click Save Snapshot, Click OK, then click Yes { From the top, open the show 'Tutorial Show 2' and the corresponding list, path and Cue 15 { Click 'Append to Cue' 8. Click on the New Message icon, select Playback (Go, Load, Stop, Resume), and click OK { Click on Load { Choose selection number 7 and click OK { Under Channel, select input 15 and click OK 9. 10. 11. In the Show Editor window, click once on the new Playback message. Copy and paste this message by clicking on the copy icon Double click on the new message { Change the selection number by clicking on the number of the selection { Choose selection number 8 and click OK { Now change the input channel to 16 { Click OK Click New Message, select Playback (Go Channel Set) and click OK { Click on input channels 15 and 16, then click OK Cue 15 should look something like this: The next cue will be a fade up or down of inputs 9 through 16 1. Make a Cue 20 named 'Shift in perspective' with a Cue Time of 2 sec. 2. Click the New Message icon, select 'Select Input/Output Level' and click OK { Select Input 9 and bring the fader up to 50 { In the green time window, click on 10 seconds { Click OK Copy and Paste this message { Edit the new message by double-clicking on the message { Change the input from 9 to 10 and click OK Copy and paste both these messages { Double click on the first pasted message { Change the input from 9 to 11 { Change the level from 50 to 100, and click OK { Double click on the other pasted message { Change the input from 10 to 12 { Change the level from 50 to 100, and click OK 3. 4. 5. 6. 7. Click the New Message icon, select 'Select Input/Output Level' and click OK { Select Input 13 (leave the fader at 0) { In the green time window, click on 7 seconds { Click OK Copy and Paste this message { Edit the new message by double-clicking on the message { Change the input from 13 to 14 and click OK Copy and paste both these messages { Double click on the first pasted message { Change the input from 13 to 15 { Change the fade time to 5 sec. { Bring the level up to 90, and click OK { Double click on the other pasted message { Change the input from 14 to 16 { Change the fade time to 5 sec. { Bring the level up to 90, and click OK Cue 20 should look like this: P.52 followed by the paste icon *Note: As stated before, there are several ways to create cues and their corresponding messages. It is obviously up to the individual operator on how he/she prefers to work. You are now ready to send these cues as a show to SoundMan-Assistant, SoundMan-Server or AudioBox II. 1. 2. 3. 4. 5. 6. 7. 8. 9. 10. 11. In the Show Editor, make sure that the output is switched to Ethernet Change the default show to Tutorial Show 2 by clicking on the button in the top right area of the Show Editor, click on 'Select show' and select Tutorial Show 2. Open the Show Control window from the View menu Send the show to SoundMan-Assistant, SoundMan-Server or AudioBox II by clicking on the Refresh button. In the left column, open the list and path of cues and Cue 1 will be standing by (Superman 'S'). The F12 key is the "Go' command Press F12 and you should see the faders in your input mixer windows all go to '0' Press F12 and 'Cue 5' will go 'Cue 10 will automatically Go after 10 seconds Press F12 to fire 'Cue 15' 'Cue 20' will automatically go after 2 seconds *Note: When changes are made to the show, a message will flash 'Show Requires Refresh' in the MSC window. *Note: You can always send individual or groups of messages to the SoundMan-Assistant, SoundMan-Server or AudioBox II by selecting one or more messages and clicking on the MIDI connection icon. This sends those messages immediately to SoundMan-Assistant, SoundMan-Server or AudioBox II. If you want to hear the entire cue including any timings related to it (fade times, start times within the cue), you can click on the icon that has musical notes and click Play. INDEX 5. TROUBLESHOOTING There are four basic equipment categories into which troubleshooting can be placed: Ethernet Hardware, MIDI Hardware, and the SoundMan-Designer and SoundMan-Assistant, SoundManServer or AudioBox II computers. Hardware problems are constantly monitored by RSD and we recommend you check our web site FAQ page for the latest information we have on known problems and solutions. INDEX 5.1. MIDI HARDWARE If the SoundMan-Designer computer or SoundMan-Assistant, SoundMan-Server or AudioBox II does not respond to commands or responds unreliably, the problem will almost certainly be solved by the following procedures. The most effective way to proceed with troubleshooting is to perform the following tasks one at a time, each time powering down the system before hand, then reassembling all functioning elements, powering up and testing: 1. 2. 3. 4. 5. 6. 7. 8. 9. Carefully reread Section 2. of this guide and follow all instructions carefully. Do not proceed further until there is no doubt that all aspects of the system in question fully conform to this section. Carefully reread the appropriate sections of the user guides for all other equipment, especially the troubleshooting sections. If you have any questions, it would be advisable to consult with an authority on the particular equipment rather than make any assumptions whatsoever. Try using new or different MIDI or Ethernet cables or a different interconnection procedure. Experience with electronic difficulties teaches that almost all problems are related to connections, connectors and interfaces between equipment. Try a different sound card MIDI interface Adapter cable. Ensure that MIDI Show Control Device #'s are correctly set for all pieces of equipment and in all MSC cues. Ensure that IP #'s are correctly set. Ensure that MIDI Channel #'s are set on all musical MIDI devices. Check our web site FAQ page for the latest information we have on known problems and solutions. If all above procedures do not produce results, contact RSD; we will be pleased to assist if possible. TOP INDEX 5.2. SOFTWARE/COMPUTER SOFTWARE PROBLEMS P.53 If the SoundMan-Designer windows seem to be too big to display properly, the display may be set incorrectly. We recommend 1280x1024. There is no particular advantage to using a higher resolution unless you want to display other programs simultaneously. If you experience difficulty with the software itself - if it fails to load or fails during operation - a variety of system message windows may appear when the problem occurs. If this happens, please make a detailed note of the contents of any messages which appear and report this to us immediately, along with a description of what was happening and/or what you were doing at the time. Apparent software problems may be a result of defective or inadequate hardware. Check with your local authorized computer repair facility to determine if the computer should be repaired or upgraded. UPGRADING DIFFICULTIES If you upgrade or add any equipment to your computer, this may be the cause of problems which did not previously occur. TOP INDEX 5.3. SOFTWARE SUPPORT If you have done everything in this tutorial, you will have a very good feel for SoundMan-Designer's basic capabilities. We have tried to present a typical but not exhaustive tutorial. We hope you will have a chance to try all the features of this software. Our goal is to make all our users proficient in the use of SoundMan-Designer in the shortest time possible. If you feel we have missed some essential point or that something could be explained or exemplified in a better manner, or that certain areas need to be more thoroughly covered, please let us know. As responsible providers we are always pleased to assist. We prefer to communicate via email for a variety of reasons but are aware of the sometimes urgent nature of show production so we will assist by telephone if necessary. Email for technical support is: CharlieR 'at' RichmondSoundDesign 'dot' com Our telephone support hours are 24 hours per day, 7 days per week. Call +1-604/715-9441. TOP INDEX 6. REFERENCE SECTION This section includes: z z z z Summary of Commands Keyboard Labels MIDI Implementation Detailed MSC Responses TOP INDEX 6.1. KEYBOARD COMMANDS NOTE:COMMAND NORMALLY APPLIES TO WINDOW SELECTED OR TO ALL OPEN CUE LISTS IF the Show Control WINDOW IS SELECTED CLOCK CONTROL z z z z z z z z z z z z z START CLOCK { Press 'F1' key RESTORE { Press 'Shift' plus 'F1' keys PLAYBACK RESTORE { Press 'Ctrl' plus 'F1' keys STOP CLOCK { Press 'F2' key PLAYBACK STOP { Press 'F6' key ZERO CLOCK { Press 'F3' key ALL OFF { Press 'F4' key RESET { Press 'Shift' plus 'F4' keys PLAYBACK ALL OFF { Press 'Ctrl' plus 'F4' keys MUTE ALL OUTPUTS { Press 'F5' key UNMUTE ALL OUTPUTS { Press 'Shift' plus 'F5' key GLOBAL MTC LOCK { Press 'Alt' plus 'L' keys GLOBAL MTC UNLOCK { Press 'Ctrl' plus 'L' keys STANDBY COMMANDS P.54 z z LOAD PREVIOUS STANDBY CUE { Press 'F9' key (or Joystick 'stick left') LOAD NEXT STANDBY CUE { Press 'F10' key (or Joystick 'stick right') GO COMMANDS z z GO TIMED CUE & SET CLOCK TO CUE TIME { Press 'F8' key ("Go Cue/Jam Clock") GO CUE { Press 'F12' key (or Joystick 'fire button') TOP INDEX 6.2. KEYBOARD LABELS Use the following format to create a keyboard label strip: +KEY F1 F2 F3 F4 F5 F6 F8 ALT F9 F10 F12 TOP OF SHOW CTRL PLAY BACK RESTORE PLAY BACK ALL OFF SHIFT RESTORE RESET UNMUTE ALL OUTPUTS NONE START CLOCK ALL OFF MUTE ALL OUTPUTS STOP CLOCK ZERO CLOCK PLAY BACK STOP GO/JAM CLOCK BEGIN LOOP END LOOP PREVIOUS SEQUENCE NEXT SEQUENCE PREVIOUS CUE NEXT CUE GO CUE TOP INDEX 6.3. MIDI IMPLEMENTATION SoundMan-Assistant's Show Control engine responds to MIDI Show Control (MSC) Sound and All Types Command_Format messages for the Device Number as set in the Device ID Number field of the the Editor window. SoundMan-Assistant's Audio Playback engine responds to MIDI Show Control (MSC) Playback and All Types Command_Format messages for the Device Number as set in the Device ID Number field of the Editor window. Please refer to the MSC 1.0 specification as published by the International MIDI Association for more detailed information on this standard. A copy of this specification is available on our web site. SoundMan-Assistant's MSC implementation is subject to change without notice. The current implementation is available via the RSD web site under 'Technical Information' in the index. Key: z SoundMan-Assistant RESPONSE { command/message received in hex (NAME OF COMMAND) z GO CUE { command 01 (GO) { See Section 6.4. LOAD TO STANDBY { command 05 (LOAD) { See Section 6.4. STOP/ZERO CLOCK/MTC CHASE OFF { command 08 (ALL_OFF) RESTART CLOCK/MTC CHASE RESTORE { command 09 (RESTORE) RESET { command 0A (RESET) GO CUE - JAM CLOCK { command 10 (GO/JAM CLOCK) STANDBY +1 { command 11 (STANDBY_+) STANDBY -1 { command 12 (STANDBY_-) NEXT SEQUENCE { command 13 (SEQUENCE_+) PREVIOUS SEQUENCE { command 14 (SEQUENCE_-) START CLOCK { command 15 (START_CLOCK) STOP CLOCK { command 16 (STOP_CLOCK) ZERO CLOCK { command 17 (ZERO_CLOCK) SET CLOCK TO A SPECIFIC TIME { command 18 (SET_CLOCK) MIDI TIME CODE ON { command 19 (MTC CHASE ON) MIDI TIME CODE OFF { command 1A (MTC CHASE OFF) OPEN CUE LIST { command 1B (OPEN_CUE_LIST) { See Section 6.4. z z z z z z z z z z z z z z z z P.55 z z CLOSE CUE LIST { command 1C (CLOSE_CUE_LIST) CHOOSE CUE PATH { command 1D (OPEN_CUE_PATH) { See Section 6.4. TOP INDEX 6.4. MSC RESPONSES SoundMan-Assistant MSC implementation is subject to change without notice. The current implementation is available via the RSD web site under 'Technical Information' in the index. In the following table, 'GO cue' indicates that there is no cue number specified. 'GO cue 0' means that Cue number '0' is specified. 'GO cue A' indicates that a number besides '0' is specified. MSC 'SOUND' MESSAGE LIST SPECIFIED PATH SPECIFIED SoundMan-Assistant PRECONDITION GO cue none none no lists open RESULTING ACTION nothing GO cue none none lists open standby cue goes, all open lists GO cue 0 none none no lists open nothing standby cue goes, all open lists GO cue 0 none none lists open GO cue A none none no lists open nothing GO cue A none none lists open all cues A go, all open lists GO cue 0 B none list B closed nothing GO cue 0 B none list B open next cue goes in list B GO cue A B none list B closed nothing GO cue A B none list B open cue A goes in list B GO cue 0 B C list B closed nothing GO cue 0 B C list B path C open next cue goes in list B GO cue 0 B C list B path D open nothing GO cue A B C list B closed nothing GO cue B C list B path C open cue A goes in list B go cue A path C GO cue A B C list B path D open LOAD cue 0 none none no lists open nothing LOAD cue 0 none none lists open reset lists to top of show LOAD cue A none none no lists open nothing LOAD cue A none none lists open load all cues A, all open lists LOAD cue 0 B none list B closed nothing LOAD cue 0 B none list B open load first cue, current path LOAD cue A B none list B closed nothing LOAD cue A B none list B open load cue A in list B LOAD cue 0 B C list B path C open nothing LOAD cue 0 B C list B path D open open path C, load first cue LOAD cue A B C list B closed nothing LOAD cue A B C list B path C open load cue A in list B LOAD cue A B C list B path D open open path C, load cue A OPEN B none list B open set 'last list opened' to 'B' OPEN B none list B closed open list B, former path & cue; set 'last list opened' to 'B' OPEN OPEN B C list B closed open list B path C OPEN OPEN B C list B open open path C list B OPEN C.B none list B closed open list B path C OPEN none C.B list B open open path C list B In the following table, 'GO' indicates that there is no selection number specified. 'GO selection 0' means that selection number '0' is specified. 'GO selection A' indicates that a selection number besides '0' is specified. MSC 'EPROM PLAYBACK' MESSAGE (CUE=SELECTION) LIST SPECIFIED (LIST=CHANNEL) SoundMan-Assistant PRECONDITION GO none no channels open nothing GO none channels open next selections play in all open channels GO selection 0 none no channels open nothing GO selection 0 none channels open next selections play in all open channels GO selection A none no channels open nothing GO selection A (<512) none channels open selection A plays in all open channels P.56 RESULTING ACTION GO selection A (>512) none channels open stops playback and sets no selection to play next in all open channels GO selection 0 B channel B closed nothing GO selection 0 B channel B open next selection plays in channel B GO selection A B channel B closed nothing GO selection A (<512) B channel B open selection A plays in channel B GO selection A (>512) B channel B open stops playback and sets no selection to play next in channel B LOAD selection 0 none no channels open nothing LOAD selection 0 none channels open sets next selections to play next in all open channels LOAD selection A none no channels open nothing LOAD selection A (<512) none channels open sets selection A to play next in all open channels LOAD selection A (>512) none channels open sets no selection to play next in all open channels LOAD selection 0 B channel B closed nothing sets next selection to play next in channel B LOAD selection 0 B channel B open LOAD selection A B channel B closed nothing LOAD selection A (<512) B channel B open sets selection A to play next in channel B LOAD selection A (>512) B channel B open sets no selection to play next in channel B OPEN B channel B open set 'last channel opened' to 'B' OPEN B channel B closed open channel B, former selection; set 'last channel opened' to 'B' TOP INDEX 6.5. MOTORMAN/MOTORMIX IMPLEMENTATION If a CMLabs MotorMan or MotorMix is connected to the computer (see Section 2.2.2. above), the following are the buttons and responses which currently are implemented. You can control most of the standard functions for show control, and lets you tweak inputs, crosspoints, outputs, and submaster levels. You can also run the show in "show" mode; that is, the GO button will trigger the lowest-numbered cue in all open lists. BUTTON NAME UNSHIFTED FUNCTION SHIFTED FUNCTION AUTO ENBL Input Mode none SUSPEND Output Mode none PLUG IN Crosspoint Mode none WINDOW none none ALL none none DEFAULT Submaster Mode Zero all Submasters UNDO Show Mode none PLAY Start Clock none STOP Stop Clock Zero Clock F-FWD All Off Reset REWIND Restore none NEXT Standby Next Cue none PREV Standby Prev Cue none ENTER Go Jam-Clock Go INPUT MODE In Input Mode the faders and mute and solo buttons control the input channels directly. The left and right buttons can scroll the input channels one at a time, or if Bank is on, eight at a time. Currently the other buttons in the fader columns do not do anything. The upper row of the display shows the input channel numbers. The lower row of the display shows the level in dB for the input channels. OUTPUT MODE In Output Mode the faders and mute and solo buttons control the output channels directly. The left and right buttons can scroll the output channels one at a time, or if Bank is on, eight at a time. Currently the other buttons in the fader columns do not do anything. The upper row of the display shows the output channel numbers. The lower row of the display shows the level in dB for the output channels. CROSSPOINT MODE Setting a crosspoint is a three step process. First you display the input or output channels. Find the channel that you want to set crosspoints for. If you are displaying input channels, you will be able to set all crosspoints between that single input and all of the outputs. If you are displaying an output channel you will be able to set crosspoints between that output and all of its input channels. Having located the correct input or output channel, press the Select button so that it lights. Now press the Crosspoint button (third from top in the left column). The display will switch from the input or output display to a display of the crosspoints. So that you know you are displaying crosspoints, the "I" or "O" channel designator will be in lower case. The input or output channel you are setting crosspoints for will show up in the 7-segment LED display. If you are setting crosspoints for an output channel, the decimal point between the digits P.57 will be illuminated and the LCD will display input channels. If you are setting crosspoints for an input channel the decimal point will not be illuminated and you will be setting output channels. If you select multiple input or output channels and enter crosspoint mode, the lowest numbered channel will be used, and the selects for the higher numbered channels will be cleared. When in crosspoint mode you can select a new base channel with the main rotary knob rather than going back into input or output mode and selecting a new base channel with the select buttons. SUBMASTER/SHOW MODE In both Submaster Mode and Show Mode the faders control the submasters. The submaster numbers are shown in the upper row of the display. They can be scrolled left and right in the same way as the input and output channels using the left and right buttons and the Bank button. In Submaster Mode, the lower row of the display shows the submaster levels. In Show mode, the lower line of the display shows the number of the standby cue in the show. NOTES If the MM goes away and comes back, it will be reset to the state it had when it disappeared, modulo any changes that may have taken place due to running fades and cues. The MM will now always display 64 input and output channels no matter how many channels there are in the physical interface, or if SoundMan-Assistant is running in demo mode. When you press the Shift key, the other keys that can respond with shifted functions will blink. The MM 2 has some differences from the original MM. The most noticeable difference is that the display formatting is off by one character. This is with MM 2 firmware version 1.05. TOP INDEX 7. GLOSSARY z z z z z z z z z z z z z z z z z z z z z z z z z z auto clock start { When this is selected, the list clock will automatically start when the list is opened auto cue-path sequencing { When this is selected, paths will automatically open when the last cue from the preceding path has gone. auto-pan { This function allows the user to set a time and a ramp shape to all input, output, and crosspoints. automatic { Generally: Process which is managed by the computer. Specifically: When a cue goes because its 'Time' is equal to (or less than if clock is in Internal mode) the clock's. backup { The process of making an accurate copy of a folder or file for use in case of difficulty with the original or to create mirrored installations in other locations. blank field { To erase previous information from the selected field. blind edit { Process of altering data in cues without affecting current show operation. Also called 'Deaf Edit.' box { A window requiring a response. buffer { A block of virtual memory containing data (i.e. edit cue, current cue, standby cue, etc.) mirroring stored or received data. choose { The process of selecting a menu, then moving the cursor until the desired menu item is highlighted and then clicking the left mouse button on it. clock { The list stopwatch whose time is visible in the Show Control window. Displays Internal, MIDI Time Code or Real Time value in the appropriate modes. configuration { The aggregate of all choices and selections which can be made in menus and windows. These can be saved and loaded as desired and SoundMan-Designer automatically defaults to these whenever it is loaded. cue { Numbered and described data, contained in a cue path folder, capable of containing multiple valid MIDI messages defined as a sequence which will be run by the list clock. current cue { The most recent cue to have gone. This cue is displayed just above the standby cue in the Show Control window except when cues are being loaded to standby in random order and is also known as the Last Cue Gone. default { A variable functional system characteristic which may be selected and saved when desired for semi-permanent storage and automatic retrieval by the system when loading any show at any time. dialog box { A window containing questions which must be answered by the operator before continuing. disk management { The system, as transparent to the operator as possible, by which multiple cue paths may be used for greatest operating flexibility with minimal chance of error. folder { In the Windows Desktop environment, the graphic representation of a directory in which additional folders (sub-directories) and other files such as cues and system files are stored. When a folder is dragged with the mouse to another window (such as during the show backup procedure) the entire contents of the folder are copied to the window. edit { To use the MIDI Message Editor to view, alter and save cue message data independently from the Show in SoundMan-Assistant, SoundMan-Server or AudioBox II. EQ { Equalization, available on all inputs and outputs fader { The movable slider for each input, output, and crosspoint. F key { One of the 12 'function' keys at the top of the keyboard, labeled F1 through F12. field { An area of the window in which alphanumeric text or prescribed values may be user inserted for a wide range of purposes. file { A complete set of data saved in a folder and organized in a prescribed manner. function { The system's specific reaction to pressing one of the 'function keys' (F1-F12) or choosing one of the system process items from the Clock or Standby menu or menu bar. Most functions interact with the system very comprehensively and must be chosen carefully. gadget { Any object in the window which generates a system response when pointed at and clicked with the mouse. P.58 z z z z z z z z z z z z z z z z z z z z z z z z z z z z z z z z z z z z z z z GO { The process of replacing the current cue with the one waiting in standby and therewith sending the standby cue's MIDI message data out the MIDI OUT port (and back to the originating system when Loopback is on). hardware { All physical system entities (not the program or data contained on disks) including the SoundMan-Designer, SoundMan-Assistant, SoundMan-Server or AudioBox II computer and all system modules, frames, cables, etc. highlight { Altering the background/foreground/border colours of (a) specific area(s) of the window from normal in order to draw attention to (it) them - usually accomplished by clicking the left mouse button on the desired object. information { The alphanumeric data displayed in fields and windows. interface { A module connected to or installed in the SoundMan-Designer, SoundMan-Assistant, SoundMan-Server or AudioBox II which allows the system to communicate with other devices or systems. list { The folder that holds multiple cue paths which can be loaded exclusively. load { Process of fetching cue or audio playback data from a permanent storage device and putting it into virtual memory for instantaneous use. loop { Process of multiple repeating cue sequences according to cue number decimal point hierarchies. menu { A series of choices listed under a specific heading, seen and available when the menu bar is pointed at and the left mouse button clicked. menu bar { The second line of a window, containing menus merge { Process of combining data coming from two or more MIDI devices into a single stream of MIDI data. MIDI { Musical Instrument Digital Interface MTC sequence { MIDI messages captured while MTC is being received while in the MTC Capture window and saved as cues according to the MTC time stamp as displayed in the MIDI Capture window. MTC Show { A show in which all cues will probably be timed cues, intended to be executed by MIDI time code alone. This is the normal choice for 'canned' or stand-alone shows. non-active { Area of window which does not contain gadgets that perform specific responses to mouse clicks. operate { Process of running the show using the Show Control window, displaying the clock, loops remaining, current cue information, and standby plus upcoming cues' information. path { The folder that holds all cues which are simultaneously executable. point { Process of moving mouse on flat surface to make the window pointer/cursor coincide with desired gadget, menu or list item. power-up/down { Process of switching on system power/shutting down the computer then switching off system power. priority { Ordering of importance of multitasking system tasks, with operation of show cues being most important. reset { Process of automatically stopping and zeroing the clock (if in Internal mode) while loading the first cues of all open cue lists to standby. run { The process of loading the first cue of a specific show to standby and then proceeding to make all cues go in a normal manner at the appropriate times until the cue sequence is finished. save { Process of assigning a cue number and adding information to a specific set of cue message data and permanently writing all data to a cue file in a cue folder for future retrieval. scroll { Moving of the contents of a window or field up/down or right/left in response to mouse control of the scroll bars. scroll bar { Gadget with arrows which allows moving of the contents of a window or field up/down or left/right. select { Process of pointing the cursor/pointer with the mouse then pressing and clicking the left mouse button. selected { Condition attributable to any window currently displayed on the video monitor which has a highlighted appearance. This indicates that all functions executed will apply to the selected window. set matrix { In the LIVE windows, this button allows the user to quickly reset the mixers to several different commonly used settings. show { The actual file that is stored on the SoundMan-Assistant, SoundMan-Server or AudioBox II computer and dictates what SoundMan-Assistant, SoundMan-Server or AudioBox II will actually do. standby { The cue that is highlighted in the Show Control window, waiting to become the current cue and have its message data sent when a go is given. system { The sum total of the SoundMan-Designer and SoundMan-Assistant, SoundMan-Server or AudioBox II computer and other hardware in the installation; including all show control and audio devices and hardware and software working together. System Disk { The CD-ROM containing the licensed software. time { The value given to all saved cues indicating at which clock time the cue will automatically go if it is in standby. timed cue { The type of cue which is given a time of other than 0:0:0:0.00 (which makes a cue go on a PRESS F12 or MSC GO command only) title page { A window providing copyright, date, licensing and authorship information; presented during program loading or About menu click. unselected { Condition attributable to any window or field currently displayed on the video monitor which has an unhighlighted appearance. This indicates that the user executed functions do not necessarily apply to the unselected window(s), but the displayed program is still fully operational since Windows is multitasking. window { A graphic display of a size as large as necessary presented as an overlay on the Desktop, providing important information and containing operator control and editing interfaces. write protect { The small sliding tab on the floppy disk which prevents accidental erasure of disk data when open. zero clock { The command in SoundMan-Designer Show Control Window that sets the list clock back to zero. P.59 TOP 8. INDEX PRIMARY REFERENCE SECONDARY REFERENCES SECTION All_Off Actions set 3.3.1. Auto clock start 3.2.2. Auto cue path sequencing 3.2.2. Auto pan 3.11. Backup floppy disk/folder 2.3.2. Backup selections 2.3.2. Backup shows 2.3.2. Backup system disk 2.3.2. Clock auto start 3.2.2. Clock menu/F key control 6.1. Clock running/stopped 3.5. Clock stopwatch 3.2.2. Clock time code 3.2.2. Clock type 3.2.2. Clock zeroed by cue 3.5. Clock zero, setting in editor 3.2.2. Connections Ethernet 2.2.3. Controller assign 3.3.1. Crosspoint auto-pan 3.13. Crosspoint phase 3.13. Cue current 3.2.1. Cue defaults 3.2.2. Cue delete 3.2.2. Cue edit 3.2.2. Cue last 3.5. Cue list 3.2.2. Cue operation 3.5. Cue parent 3.2.2. Cue path 3.2.2. Cue path auto sequencing 3.2.2. Cue path list 3.2.2. Cue properties 3.2.2. Cue sequence 3.2.2. Cue standby 3.5. Cue time 3.2.2. Cue time, entering value 3.2.2. Cue update 3.2.2. Cue list current 3.5. Cue list changing 3.5. Cue list close 3.5. Cue list display 3.5. Cue list name 3.2.2. Cue list open 3.5. Default show 3.2.1. Defaults loading/saving system 2.3.2. Defaults loading/saving show 2.3.2. Defaults loading/saving list 2.3.2. Delay inputs 3.11. Delay outputs 3.12. Device ID MIDI 3.1.3. IP Address Ethernet 2.2.1. P.60 Disk backup 2.3.2. Disk defragment 3.4. Disk format 2.3.2. Disk handling precautions 2.3.1. Echo MIDI-MIDI 3.2.2. Echo Enet-MIDI 3.2.2. Edit crosspoint message 4.3. Edit EQ 4.3. Edit hex 3.2.2. Edit input message 4.3. Edit MIDI Cue Editor 3.2.2. Edit MIDI Message Editor 3.2.2. Edit output message 4.3. Edit playback message 4.3. Edit save cue 4.3. EQ inputs 3.3.1. EQ outputs 3.3.1. EQ set gain table 3.3.1. ETHERNET configuration 2.2.3. F Keys-Clock functions/menus 6.1. F Keys-Standby functions/menus 6.1. Fader linking 3.11. Functions clock menu 6.1. Functions standby menu 6.1. Hard Disk installation 2.3.4. Hardware interconnection 2.2. Hardware requirements 2.1. Import show 3.8. Inputs auto-pan 3.11. Inputs delay 3.11. Inputs EQ 3.11. Inputs fader linking 3.11. Inputs GPI - general purpose 3.3.4. Inputs set matrix 3.11. Installation hardware 2.2. Installation software 2.3.4. List channel mask 3.2.2. List defaults 3.2.2. List delete 3.2.2. List edit 3.2.2. List ID 3.2.2. List new 3.2.2. List properties 3.2.2. List clock start 3.5. List clock stop 3.5. List clock zero 3.5. Live crosspoints 3.13. Live disable 3.9. Live enable 3.9. Live input channel mode 3.9. Live inputs 3.11. Live outputs 3.12. Live playback 3.9. Live P.61 submasters 3.10. Load audio 4.2.3. Loopback status 3.5. Memory requirements 2.1. Merge Box 2.2.2. Merge description 2.2.2. Message delete 3.2.2. Message insert 3.2.2. Message MIDI 3.2.2. Message move 3.2.2. Message new 3.2.2. Message Ethernet 3.2.2. Message timed 3.2.2. MIDI cue 3.2.2. MIDI device ID 3.1.3. MIDI edit cue 3.2.2. MIDI implementation 6.3. MIDI interface 2.2.1. MIDI loopback 3.2.2. MIDI make cue 3.2.2. MIDI MIDI echo 3.2.2. MIDI passthru 3.2.2. MIDI Time Code (MTC) 3.2.2. MIDI channel set 3.2.2. New message 3.2.2. Outputs auto-pan 3.12. Outputs delay 3.12. Outputs EQ 3.12. Outputs fader linking 3.12. Outputs set matrix 3.12. Parse messages 3.2.2. Path defaults 3.2.2. Path delete 3.2.2. Path edit 3.2.2. Path ID 3.2.2. Path new 3.2.2. Path properties 3.2.2. Playback go 3.9. Playback load 3.9. Playback loop 3.9. Playback resume 3.9. Playback resume clear 3.9. Playback set stop notification 3.9. Playback stop 3.9. Preferences requirements 3.1.1. Program shows 4 Properties cue 3.2.2. Properties list 3.2.2. Properties path 3.2.2. Properties show 3.2.2. Requirements hardware 2 Requirements RAM 2.1. Requirements system 2 Ethernet P.62 connections 2.2.3. Ethernet IP address 2.2.1. Ethernet MIDI echo 3.2.2. Set matrix inputs 3.11. Set matrix outputs 3.12. Setup clear/restore 3.3. Setup go 3.9. Setup load 3.9. Setup resume 3.9. Setup stop 3.9. Setup update 3.3. Show default 3.2.1. Show delete 3.2.2. Show edit 3.2.2. Show editor 3.2.2. Show file 3.2.2. Show import 3.8. Show refresh 3.5. Show remove 3.2.2. Show Editor add snapshot events 3.2.2. Show Editor back to parent 3.2.2. Show Editor capture incoming MIDI 3.2.2. Show Editor event manager 3.2.2. Show Editor play cue 3.2.2. Show Editor record actions 3.2.2. Show Editor send selected messages 3.2.2. Snapshots crosspoints 3.13. Snapshots inputs 3.11. Snapshots outputs 3.12. Software Versions demonstration 1.1. Software Versions production 1.1. SoundMan-Assistant/SoundMan-Server/AudioBox II status 3.7. Submaster assign 3.3.1. Submaster set gain 3.3.1. Submaster set zero 3.3.1. USB connections 2.2.4. Warnings making backups 2.3.2. Warnings removing disks 2.3.1. P.63


![AudioBox AB64 ABEdit Software User Manual [PDF Format]](http://vs1.manualzilla.com/store/data/005983205_1-2265185b3c4bf7986bc4222e13230c75-150x150.png)
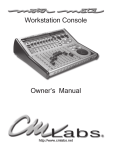



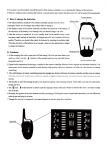
![ShowMan User Manual [PDF Format]](http://vs1.manualzilla.com/store/data/005637930_1-31cd6ced5af6c2a7a337ddd38fc92d65-150x150.png)