1
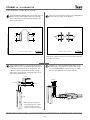
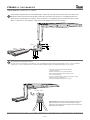
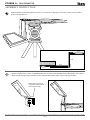
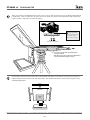
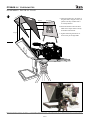
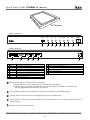
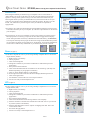
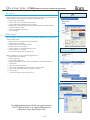
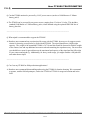
PT4000 20” TELEPROMPTER ASSEMBLY INSTRUCTION 7 Slide the Monitor with mounting bracket onto the 15” T-slot (Part O), aligning the T-slot Nuts with the T-slots of Part O. Refer to the diagram below. ikancorp.com your tripod Side View Part-P ikancorp.com Part-M 8 Part-O Install 4 x T-plates (Part C) and 8 x Long Phillips Head screws (Part G) onto the Metal frame with Prompter Glass (Part L). Then, slide the Prompter Glass assembly onto the completed Teleprompter frame. Refer to the diagram below. Part-Q Part-L > Install 4 x Part-C on Part-L and secure with 8 x Part-G (Place the Part-C on the inner sides) Part-G Part-C 3903 Stoney Brook Dr. Houston TX 77063 | +1.713.272.8822 | www.ikancorp.com | [email protected] | © 2009 ikan Corporation. All right reserved. 4 of 10