1
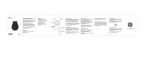
TV SOUND 2.3 MHz TV Listening Device (Product can support 2 Headsets) User Manual 2 (2) Headset Instructions for use Thank you for purchasing the TV Sound 2.3 MHz Infrared System, which will allow you to listen to your TV set at your own volume without disturbing others. You may also use TV Sound for listening to MP3 players & other Audio devices. For optimum results, please read the following instructions before use. Replaceable Silicone Ear Tips ON/OFF/ Volume Control (3) Power Supply (AC – DC Adapter, 100 - 240V) (4) Audio cable for connecting Transmitter to TV Audio Output PRODUCT CONTENTS (5) Spare Ear Tips (1) Transmitter/Charger Front View (6) Lithium Polymer Rechargeable battery (Sealed inside the headset) 3.7V/120mAH Back View Note: This series of TV Sound products comes in IR EMITTER Left Cradle Charging indicator (RED) IR EMITTER Power and Emission indicator 2 models variations and spare headsets as below DC 12V Power Jack Right Cradle Charging indicator (RED) Reset Audio Input Jack NOTE: The transmitter/charger can charge one or two headsets simultaneously. The product is supplied with one headset. Additional headsets can be obtained from the distributor. 3 and this Instruction Manual covers all of them. 1) TV Sound Wiress Single Headset System 2) TV Sound Wireless Double Headset System 3) Extra Wireless Headset 4 Contents Page Installation RESET Installation.......................................................................... 6 I - Connecting the audio cable .................................................... 7 II - Positioning / Power supply ................................................... 9 III –Re-charging the battery........................................................ 9 IV - Emission Auto OFF/ON.................................................... 10 To be plugged into the DC-12V port. Single end of the cable to be plugged into the ‘Audio’ port. Operation.......................................................................... 11 Using the Headset ..................................................................... 11 Taking the earphone headset off............................................... 12 Remarks on safety..................................................................... 12 Care and maintenance .................................................... 14 Left Power Supply (AC/DC ADAPTER, 100-240V) TV/Cable /Satellite Audio Out Right Accessories........................................................................ 14 Useful information........................................................... 15 Problems & solutions ...................................................... 16 Product Specification ...................................................... 18 Left To be plugged into an electrical outlet or surge protector. TV/Cable /Satellite Right Declaration of Conformity ............................................. 19 DVD/VCR Left Right Use Audio out Red/White Plugs 5 6 I - Connecting the audio cable We recommend connecting the audio cable to the TV's analogue audio-out jacks (RCA). • Connect the audio cable’s dual-end (red/white, R/L) to the TV’s analogue (RCA) audio-out jacks. • The other end (single plug) is connected to ‘Audio’ on the TV Sound transmitter unit. - For TV sets without audio-out jacks, the appropriate jacks on the cable or satellite box can be used instead. - Alternatively, a SCART adapter (not included) may be installed. Use only the Red & White plugs. Using a DVD or VCR unit when the audio cable is connected to a cable or satellite box: • Use the audio cables’ dual-end (red/white) and connect the red plug to the analogue (RCA) audio-out jack of the cable or satellite box, and the white plug to the analogue (RCA) audio-out jack of the DVD or VCR unit. • Connect the other end into ‘Audio’ jack on the TV Sound transmitter unit. Important note: In this configuration, it is necessary to turn off the device which is not in use at the time, i.e., when using the DVD or video, turn off the cable or satellite box. When watching TV, switch off the DVD and VCR units. 7 Connecting a digital converter box • Connect the digital converter box in a way similar to connecting a cable or satellite receiver/decoder. (see Installation). Only necessary if there are no analogue audio output plugs on TV. Connecting an MP3 player or other audio device. • Connect the audio output of the audio device to the audio input jack on the TV Sound Transmitter/Charger NOTE: The jacks on the front of TV sets are usually audio-in ports and are not designed to send audio signals to your TV Sound system. • Fixed/Variable Audio Setting: audio-out jacks may be marked 'Fixed', 'Variable/Fixed' or 'R & L'. • 'Fixed' audio-out settings enable your TV set’s volume to be adjusted separately from the TV Sound earphone set, e.g. you may mute the TV while the TV Sound is still audible at the desired level. - For modifications intended to enable your TV set to use a fixed audio setting, refer to your manual or contact the TV manufacturer or dealer. 8 II - Positioning / Power supply The IR signals need a direct (line-of-sight) connection between the headset and the transmitter. 1. Position the transmitter in a suitable location 1 – 1.5 m above floor level. 2. The LED indicators on the transmitter must be facing the direction of the area where the headset will be used. Connect the AC adapter plug to the 12V-jack at the rear of the transmitter. 3. Connect the plug of the AC adapter to the mains. (Note that the unit will not work or charge if disconnected from mains power). ƒ It is not possible to overcharge the battery; we strongly recommend you to keep the headset on the cradle when not in use. NOTE: The battery used in TV Sound is a re-chargeable Lithium-polymer battery. This type of battery should last for many years & normally should not need replacing. If after many years the performance of TV Sound deteriorates it is possible that the battery may need replacement. In this case ask your distributor for assistance. Do not try to replace the battery yourself. We recommend that the battery is charged for approx. 2 hours before TV SOUND is used for the first time, following the procedure above. IV - Emission Auto OFF/ON III - Re-charging the battery ƒ Use the On/Off/Volume switch to turn the headset off. ƒ Place the headset in the charging cradle. Verify that the LED charge indicator (RED) is lit. Left cradle charging indicator When there is no audio input signal to the transmitter/ charger (such as when the TV is turned OFF) transmission is turned OFF automatically. When audio signal is restored transmission STARTS automatically. Right cradle charging indicator 9 10 Operation Taking the earphone headset off Using the Headset Be careful when taking off the earphone set; to prevent damage to the set, always use both hands. 1. Lift the headset from the charging cradle. 2. Hold the headset in such a way that the silkscreened front part of the set is facing the transmitter. 3. Put on the headset; ensure that the earpieces are properly placed in the ears. 4. The On/Off/Volume control is located in the centre. Use the dial to turn the set on and adjust the volume. Note: The TV Sound earphone set uses an infrared signal from the transmitter. IR waves may be fully or partly blocked by solid objects such as walls, doors or even furniture; transmitter and earphone set should therefore be in close proximity in the same room. The invisible infrared waves need a direct line-of-sight connection between the earphone set and the transmitter. The infrared LEDs are lit during use. Even small objects such as plants or books may interfere with the signal. 11 1. Use the On/Off/Volume switch to turn the earphone set OFF, i.e. reduce the volume until the switch clicks off. 2. Pull the two arms of the earphone headset gently apart and take the set off over your forehead. 3. Place the earphone headset back into the charging cradle. Remarks on safety Caution: The headphone set generates a weak magnetic field. If used in compliance with the instructions, no significant magnetic interference with pacemakers or internal defibrillators should exist. It is recommended, however, that the ear phones are kept at least 5 cm away from any such device. No reports of pacemaker or defibrillator problems caused by the presence of this earphone system have been received to date. However, do not place the ear tips containing the speakers on your chest or near a pacemaker or defibrillator. In case of concerns, please contact your physician. 12 1. Keep these instructions for future reference. 2. Read this manual carefully; all instructions and warnings must be complied with. 3. Only the original accessories provided or such parts as specified by the manufacturer must be used with this system. 4. Installation must be done in accordance with these instructions. 5. Keep away from heat sources such as hot-plates, heating elements, radiators or other heat-generating appliances. 6. Do not use near water or in excessive humidity. Do not immerse in any kind of liquid. 7. Use only a lint-free, soft cloth for cleaning. 8. Do not attempt to change or modify the unit, including the cord, plugs, jacks or charging points. Should the plug not fit your home installation socket, use the appropriate adapter. In case of queries, contact a qualified technician. 9. Handle the power cord with care at all times; do not pinch or kink. 10. When removing the plug, do not pull on the cord; always grip the plug itself. 11. We recommend to use the earphone set with a power surge protector, connected between the power point & the AC/DC Adapter. 12. In order to comply with safety regulations and to avoid hazards, repairs must be carried out by qualified 13 personnel; this includes the replacement of the power cord and plug. 13. Should the appliance, for instance, have been dropped onto a hard surface or come into contact with liquid, it may no longer operate properly: even invisible damage may have adverse effects on its operational safety. 14. This product is intended for domestic use and not designed for commercial applications. 15. Caution: To prevent the risk of fire or electric shock, do not expose the unit to rain, splashes, drips or high humidity. Keep the TV SOUND system well away from any receptacles containing water. 16. Caution: In case of battery or battery fluid ingestion, contact a medical specialist immediately. 17.Caution: Help to protect our environment. Never dispose of old batteries in your domestic refuse. Batteries must be disposed of through the local special collection points in accordance with local regulations. Care and maintenance Accessories • 2nd set of earphones: The charger/ transmitter can accommodate (charge as well as transmit to) two earphone sets at the same time. Additional sets may be used if required. However, ensure they are of the same brand and model as the one used. 14 • Silicone ear Tips: 2 spare sets of ear tips are provided. Additional ear tips are available at most distributors. For reasons of hygiene silicone type ear tips may be removed from the headset & cleaned with warm water & a mild detergent from time to time. • Replacement Battery The lithium polymer rechargeable battery should last for many years. If after many years the performance of TV Sound deteriorates it is possible that the battery may need replacement. In this case ask your distributor for assistance. Do not try to replace the battery yourself. ƒ When watching a DVD or video, a TV station can be heard With the audio cable connected to the analogue (RCA) Audio-out port of a cable-type or satellite decoder/ receiver and, at the same time, to an analogue (RCA) Audio-out port of a DVD or VCR unit, always switch off the unit which is not in use. Frequency The operating frequency of the infrared signal between transmitter and earphones is 2.3MHz. For more technical information, refer to the section 'Problems & solutions' below. Problems & solutions Useful information ƒ The operating principle The TV Sound transmitter unit sends infrared signal to the headset receiver. ƒ No sound on the TV Sound when the TV set is muted A fixed audio-out setting allows the volume of the TV and the TV Sound to work separately. Certain types of TV sets can be adjusted by hand from a 'Variable' audio setting to a 'Fixed' one. This can be achieved in the TV’s setting menu. However, not all TVs allow such operation (refer to your TV manual). Under the 'Variable' audio setting, the volume of the TV and TV Sound will be the same. 15 The sound is not clear (static/interference) ƒ Check the line-of-sight connection. ƒ Make sure that the LEDs are lit. ƒ Check the transmitter location (height above the floor). ƒ Keep away from any window or interfering device. ƒ Check if the audio cable is connected to an analogue (RCA) audio-OUT jack on TV, cable or satellite decoder /receiver. ƒ Check that the audio cable is NOT connected to a digital audio-out jack. ƒ The power outlet may already be in use with another device. ƒ Audio cable is connected to the transmitter’s audio jack. 16 The transmitter’s LED lights are not on ƒ Check the connection to the wall socket or power outlet. ƒ Check the connection to the TV Sound 12V jack. The charging lights do not come on when the earphone set is in the cradle. ƒ ƒ Realign earphone set; if necessary, move around in the cradle. Ensure that the charging cradle is connected to mains power. The TV volume does not work independently from TV Sound volume Audio cable is in fixed audio-out jack; TV set is on fixed audio. (see 'Installation') Unrelated sound from a TV station when watching DVD or video Turn off cable or satellite receiver/decoder when watching a DVD or video. Note: it happens only if Audio cable is plugged into the audio out port of a cable or satellite and a DVD or VCR player. Product Specification General data Frequency Modulation Approx. range Audio frequency response Total harmonic distortion Signal to noise Ratio Auto ON/OFF Headset Max. sound pressure level (SPL) Battery requirement Operating time Weight Transmitter Audio connection Power Supply Weight Dimensions (H x W x D) 2.3MHz Infrared, mono 60m² (approx. 600 sq. ft.) 100-16,000 Hz < 1% 70 dB 120 dB Lithium Polymer Rechargeable battery, 3.7V / 120mAH Max.10 hrs. approx. 58 – 60 g Mini headphone/RCA cable/ DC Power Supply 12V, 500mA approx. 171 g 4.8 x 10.5 x 15.4 cm RESET SWITCH: Sometimes computers malfunction due to electrostatic discharge or other electrical disturbances, or when DC Jack is plugged. If this happens push a thin rod 17 18 into the RESET hole in the back of transmitter unit and press down for about one second. This Resets the computer, clears its memory and returns it to normal operation. Declaration of conformity This Product has been tested by an accredited testing laboratory and is in compliance with the following standards and directives: z z z z z EN60065 IEC60065+Amendment 1:2005 EMC 2004/108/EC RoHs UL1642 The materials used in this product can be recycled and/or reused. This symbol indicates that electrical and electronic equipment must be disposed of separately from normal waste at the end of its operational lifetime. WARNING: z No naked flame sources, such as lighted candles, should be placed on the apparatus. z Battery shall not be exposed to excessive heat such as sunshine, fire or the like. z No objects filled with liquids, such as vases, shall be placed on the apparatus. z Warning: Listening at high volumes from earphones can cause hearing loss. z Using only the AD/DC power supply adaptor provided by the manufacturer or its authorized agent WEEE (Waste Electrical and Electronics Equipment) Declaration Help to protect the environment. Do not dispose of defective electrical or electronic products with your household refuse, but dispose of them in compliance with local regulations through local collection or recycling points. 19 Warnings for lithium battery: CAUTION Danger of explosion if battery is incorrectly replaced. Replace only with the same or equivalent type. 20