1
1.
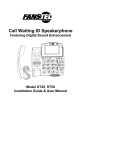
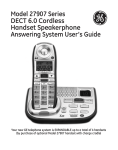
CALLER ID Model G99M
OWNER’S MANUAL
260H006
Caller ID Parts Check List
1.
2.
3.
CALLER ID UNIT
SEVEN FOOT LINE CORD
AC/DC ADAPTER WITH FIVE FOOT CORD
If you don’t have an area code for 7 digits dialing, presses
st
DELETE button 3 times to skip the 1 area code.
2. Press "REVIEW / ! REVIEW buttons to adjust to the correct
digit.
3. When the desired number is reached, press DELETE button
to move to the next digit.
4. Press DIAL/FLASH button to accept area codes on LCD
display.
If at any time the unit loses power or if the user enters the area
code(s) incorrectly, the unit must be re-set and the local area
code(s) must be re-entered. Refer to the beginning of this section
for instructions on how to enter local area code(s).
First Time Installation
1. Before you connect the Caller ID unit to your telephone locate
the DC plug on the rear of the unit and the AC/DC adapter that
came with your unit. The length of the cord on the AC/DC
adapter is approximately five feet. You must place your unit
within five feet of an AC outlet.
2. Plug the AC adapter into an AC outlet near your phone jack.
3. Attach the DC adapter plug into the back of the Caller ID unit.
(As a backup power source, you may also install 3 AA batteries
(not included) into the Caller ID unit. If you install batteries,
make sure to follow the diagram printed on the inside of the
battery compartment.
Batteries will prevent the loss of
memorized calls if a loss of AC power to the unit should occur
but batteries should not be used as the primary power
source. A battery symbol will appear on the LCD Display when
the batteries are low and need to be changed.)
4. Plug one end of the cord into the unit where it is labeled “TO
LINE.”
5. Unplug the cord from the wall jack that currently goes to your
telephone. Plug this cord into the unit where it is labeled “TO
PHONE.”
6. Next, take the line cord from the Caller ID unit that is plugged
into the “TO LINE” jack on the unit and plug this into the wall
jack.
7. Check for a dial tone to ensure proper connection. If there is no
dial tone, see the “TROUBLESHOOTING” section of this owner’s
manual.
Selecting Language
Adjusting LCD Contrast
To adjust LCD contrast (to make it lighter or darker):
1. Press and hold down the "REVIEW button for about 5
seconds. “LCD CONTRAST” prompt appears.
2. Press "REVIEW button to decrease brightness.
3. Or, press !REVIEW button to increase brightness.
4. Press DELETE button to accept the contrast level.
Setting up Clock and Calendar
Setting up the clock and calendar on your Caller ID unit requires no
user intervention. When your Caller ID service is activated by the
Telephone Company and the first call is received, the clock and
calendar are automatically set to the Telephone Company’s time
and date.
Connection to an Answering Machine
1. Take the seven foot line cord that came with your Caller ID unit
and plug one end of this cord into the unit where it is labeled “TO
LINE.”
2. Unplug the cord from the wall jack that goes to your answering
machine. Plug this cord into the Caller ID unit where it is labeled
“TO PHONE.”
3. Take the seven foot cord that is plugged into the “TO LINE” jack
on the Caller ID unit and plug the other end of this line cord into
the wall jack.
4. Check for a dial tone to ensure proper connection. If there is no
dial tone, see the “TROUBLESHOOTING” section of this guide.
After powering up the unit, LCD displays the following:
IMPORTANT NOTE: The answering machine must be set to
answer after 3 or more rings for the Caller ID unit to receive
data.
FRA ENG ESP
Displaying Incoming Calls
• For ENGLISH, press the DELETE button.
• For SPANISH, press one of the REVIEW (! or ") button.
• For FRENCH, press the DIAL/FLASH button.
The unit will default to English after a few seconds if no choice is
made.
Programming Your Area Code
Once your Caller ID unit has been powered up and attached
correctly (see above), your unit is ready to receive and display
incoming calls. *Note: You must also contact your local
telephone company to subscribe to and activate your Caller ID
service. The Caller ID unit stores the calling numbers and calling
times in the call memory. The Caller ID unit also displays and
stores the caller’s name if the caller’s name is transmitted. For
each call, the screen will display the following information:
To dial or call back a number in the Caller ID memory, you must
enter your local area code(s). You can enter area code(s) after
powering up or by press and hold the DIAL/FLASH button for about
5 seconds to begin entering of area codes.
You can enter up to 4 area codes:
•
If area code of a number is the same as the first area code, 7
digits are dialed (area
WAITING
code is not dialed).
# 00
•
If area code of a number
nd
___ ___ __ _
is the same as the 2 ,
rd
th
the 3 , or the 4 area
ENTER AREA CODE
code, 10 digits are dialed.
•
If area code of a number
is different from any area code entered, 1 + 10 digits are
dialed.
-
-
①
②
③
④
⑤
①
②
12:00AM 1/01
③
SMITH JOHN
# 01
WAITING
④ ,⑤ + ⑥
480-948-4928
The time and date of the call.
The caller’s area code and telephone number.
The caller’s name (if the caller’s name is transmitted).
The numerical sequence of the call
# as it is stored in
memory
The “WAITING” message indicating when there is another call
and the battery symbol
indicating it is time to replace the
batteries.
⑥ The Voice Mail Waiting symbol
when you have new
voice mail. You must have Visual Message Waiting Indication from
you local Telephone Company for the Voice Mail Waiting Symbol to
work.
IMPORTANT NOTE: You must wait for at least 2 full rings
before answering the phone for the Caller ID data.
Calling Back a Number from the Caller ID List
When the number you wish to call back is displayed on the LCD, lift
the handset of telephone connected to this unit, then press the
DIAL/FLASH button once. The displayed number is dialed with
correct area code and long distance call prefix automatically.
Call Waiting Caller ID
New Call Indication
If you subscribe to both Caller ID and Call Waiting Caller ID the
Caller ID unit will flash the “WAITING” message and the incoming
caller's information will be displayed when a call comes in while you
are talking on the phone. The number and/or name of the waiting
caller is displayed only if you are using the telephone connected to
this unit when the new call comes in and only if the unit is
connected between the wall jack and the telephone. If there is a
second telephone on the same line that is off the hook, the
information of the waiting caller will not be displayed.
When you have new calls to review the red LED light on the top
right hand corner of the unit will blink. When the unit is idle, total
number of new calls is displayed “NEW 02 TOTAL15”.
Switching Between Caller 1 and Caller 2
When a second call comes during a telephone conversation, you
can press the DIAL/FLASH button once to switch to caller 2. While
talking to caller 2, you can press the DIAL/FLASH button again to
switch back to caller 1.
New Calls and Total Calls
When the unit and phone are
idle, the LCD displays the
number of new calls that
have been received since
the last review of memory as
well as the total number of
calls in memory.
2:15PM 6/12
Message Waiting Indication
The new call LED Indicator also functions as a Visual Message
Waiting Indicator (VMWI). If you have Voice Mail messages
waiting, then the Voice Mail
WAITING
Waiting Symbol
will also
# 32
2:15PM 6/12
display reminding you to
check your messages. In
addition, “MESSAGES” and
MESSAGES
“NEW 02 TOTAL15” is
displayed alternatively on the
third line of LCD. *NOTE: You must activate Voice Mail and
VMWI through your local telephone company.
Troubleshooting
# 32
WAITING
NEW 20 TOTAL 54
Reviewing and Deleting Calls
Each call is assigned a number from call # 1 to call # 99. The most
recent call has the highest number. For example, if there are 99
calls in memory, then call # 99 is the most recent and call # 1 is the
oldest.
To review calls stored in memory push the #REVIEW button to go
backward through the calls stored in memory or push the
$REVIEW button to go forward through the calls stored in
memory. When you get to the last stored call, pressing the
$REVIEW button takes you back to call # 1. If you are on call # 1,
pressing the #REVIEW button takes you to call #99. When the
unit’s memory has 99 stored calls and a new call comes in, the
oldest call (# 1) is automatically erased to make room for the
incoming call. The new incoming call then becomes call # 99.
Deleting Calls
To manually delete a call push the #REVIEW button to go
backward through the calls stored in memory or push the
$REVIEW button to go forward through the calls stored in memory
until the call you want to remove is displayed. Now, push the
DELETE button once to remove this call. When you delete a call,
the previous call is then displayed and the calls are renumbered
accordingly. To delete all calls from the Caller ID unit at once
press and hold the DELETE button down for a minimum of 3
seconds or until the unit displays “NO CALLS!”
IMPORTANT NOTE: The Caller ID units’ buttons will not work
while the phone is ringing, or a few seconds afterward.
IMPORTANT NOTE: Disconnecting the AC/DC adapter and
removing the batteries deletes all stored Caller ID data. Write
down any important numbers before disconnecting power. If
you use 3 AA batteries as a back up power source, make
sure to replace them with new ones periodically.
What If the Caller ID Unit Displays “NO CALLS!” And No Caller
ID Data Is Shown as New Calls come in?
• Verify that the Caller ID service has been activated through your
local telephone company. Make sure that you answer a call only
after 2 or more complete rings to ensure the Caller ID data is
properly sent.
• Make sure that the unit is connected properly to a working wall
jack.
• Make sure all line cord and power connections are correct and
secure.
• Make sure that the answering machine is connected correctly
and set to answer after at least 3 or more rings.
• If you subscribe to a Call Forwarding service make sure that the
Call Forwarding feature is not activated.
What If the Caller ID Unit Is Set To Operate in the Wrong
Language?
If your unit is currently set to operate in the wrong language, you
must remove the AC/DC adapter and/or 3 AA batteries from your
unit for a minimum of 20 seconds and then reconnect/reinstall them
in order to get the language selection option again. See the
“CONNECTING THE AC/DC ADAPTER AND SELECTING THE
LANGUAGE” section at the beginning of this owner’s manual for
more details on setting your Caller ID unit to operate in French,
English or Spanish.
What If the Caller ID Has a Blank Screen and Displays No
Information?
• Press either (") REVIEW ($) key to see if “NO CALLS”
appears.
• Verify that the AC/DC adapter (included) and/or 3 AA batteries
are properly connected and installed and have enough power.
What If There is No Dial Tone from the Phone after Setting up
the Caller ID?
• Verify that all line cord connections are correct and secure.
• Try reconnecting the phone directly to the wall jack to see if there
is a dial tone. If there is still no dial tone, contact your local
telephone company.
What If The Message “ERROR” or a Dotted Line “-------” Is
Displayed?
Static noise on your phone line can cause this message. There is
a strong possibility that call information was distorted before
reaching the Caller ID unit. If this condition persists, contact your
local telephone company to ensure that there is no problem with
your phone line.
FANSTEL Limited Warranty
What If the Message “UNAVAILABLE” Is Displayed?
This warranty applies only to FANSTEL products purchased and
used in the United States.
“UNAVAILABLE” means that a
call may have originated from
an area that does not support
the Caller ID service.
2:15PM 6/12
# 32
WAITING
-----------UNAVAILABLE
What If the Message “PRIVATE CALL” Is Displayed?
“PRIVATE CALL” usually
means that the caller has
blocked their information from
being sent to you.
12:00AM 1/01
WAITING
# 01
------------PRIVATE CALL
Important Safety Instructions
When using telephone equipment, basic safety precautions should
always be followed to reduce the risk of fire, electric shock and
injury to persons, including the following:
1.
Read and understand all instructions in the owner’s manual.
2.
Follow all warnings and instructions marked on the product.
3.
Unplug this product from telephone jacks before cleaning. Do not
use liquid or aerosol cleaners. Use a damp cloth for cleaning.
4.
Do not use this product near water, or when you are wet. For
example, do not use it in a wet basement or near a swimming
pool, bathtub, shower, kitchen sink, wash bowl or laundry tub.
5.
Install this product securely on a stable surface. Serious damage
may result if the product falls and it will void the warranty.
6.
Install this product in a protected location where no one can step
on or trip over line cord. Do not locate this product where
persons walking on it will abuse the cord
7.
Do not place objects on the cord that may cause damage or
abrasion.
8.
Never insert any object into this product through case openings.
They may touch dangerous voltage points or short out parts that
could result in a fire or electric shock and it will void the warranty
9.
If the product comes in contact with any liquids, unplug the line
cord immediately. Do not plug the product back in until it has
been dried thoroughly. Liquid damage will void the warranty.
10. If this product does not operate normally, see the “TROUBLESHOOTING” portion of this owner’s manual. If you cannot
resolve the problem, or if the product is damaged, refer to the
“FANSTEL LIMITED WARRANTY”.
Opening the product or
reassembling it incorrectly may expose you to dangerous
voltages or other risks, and it will void the warranty.
11. Do not use a telephone in the vicinity of a gas leak. If you
suspect a gas leak, report it immediately using a telephone away
from the area where gas is leaking.
12. Use only with a Class 2 power source
300mA AC/DC adapter.
plug polarity, 9V DC,
Warranty Limitation
Implied warranties, including those of fitness for a particular
purpose and merchantability (an unwritten warranty that the
product is fit for ordinary use), are limited to one year from date of
purchase. We will not pay for loss of time, inconvenience, loss of
use of your FANSTEL product, or property damage caused by your
FANSTEL product or its failure to work, or any other incidental or
consequential damages. Some states do not allow limitations on
how long an implied warranty lasts or the exclusion or limitation of
incidental or consequential damages, so the above exclusions or
limitations may not apply to you.
WHAT IS COVERED? Any defect in materials or workmanship.
FOR HOW LONG? For one year from the date of purchase.
WHAT WE WILL DO: If we repair your FANSTEL product, we may
use new or reconditioned replacement parts. If we choose to
replace your FANSTEL product, we may replace it with a new or
reconditioned one of the same or similar design. The repair or
replacement product will be warranted for either (a) 90 days or (b)
the remainder of the original one-year warranty period, whichever
is longer.
WHAT WE ASK YOU TO DO: You must prepay all shipping and
handling costs. We suggest you retain your original packing
material in the event you need to ship your FANSTEL product.
When sending your FANSTEL product for repair service, include
your name, address, telephone number with area code, proof of
purchase including the date, prepaid shipping and handling costs,
and a description of the operation problem. Send all of this to:
FANSTEL, ATTN: WARRANTY REPAIR
7466 E MONTE CRISTO AVE
SCOTTSDALE, AZ 85260
(480) 948-4928 or (800) 556-0007
State Law Rights
This warranty gives you specific legal rights, and you may also
have other rights that vary from state to state.
What This Warranty Does Not Cover
This warranty does not cover defects resulting from accidents,
damage while in transit to or from our product service center,
alterations, unauthorized repair, failure to follow instructions,
misuse, use outside the United States and Canada, fire, flood, and
acts of God. We do not warrant your FANSTEL product to be
compatible with any particular telephone equipment or party line,
key telephone systems or more sophisticated customer premises
switching systems. If your FANSTEL product is not covered by our
warranty, call us for advice as to whether we will repair your
FANSTEL product and other warranty repair information, including
required prepaid shipping and handling charges. We, at our option,
may replace rather than repair your FANSTEL product with a new
or reconditioned product of the same or similar design. The repair
or replacement product will be warranted for either (a) 90 days or
(b) the remainder of the original one-year warranty period,
whichever is longer.
FCC Registration and Repair Information
Your new FANSTEL product has been registered with the Federal
Communications Commission (FCC). This product complies with
standards in Part 68 of the FCC Rules. The FCC requires us to
provide you with the following information:
1. Connection and use with the nationwide telephone network
The FCC requires that you connect your product to the nationwide
telephone network through a modular telephone outlet or jack. The
modular telephone outlet or jack to which the telephone must be
connected is a USOC RJ-11C or RJ-11W.
2. Notification to the Telephone Company
The FCC requires that upon request of your local telephone
company, you provide the following information: (1) the ‘line’ to
which you will connect the telephone equipment (that is, your
phone number), and (2) the telephone equipment’s FCC
registration number and ringer equivalence number (REN). These
numbers are on the back or bottom of your telephone equipment.
The REN is used to determine how many devices you may connect
to your telephone line and still have them ring when your telephone
line is called. In most, but not all areas, the sum of all REN’s
should be 5 or less. You may want to contact your local telephone
company.
3. Repair Instructions
If it is determined that your telephone equipment is malfunctioning,
the FCC requires that it not be used and that it be unplugged from
the modular outlet until the problem has been corrected. Repairs
to this telephone equipment can only be made by the manufacturer
or its authorized agents or by others who may be authorized by the
FCC. For repair procedures, follow instructions outlined under the
"FANSTEL LIMITED WARRANTY".
4. Rights of the Telephone Company
If your product is causing harm to the telephone network, the
Telephone Company may temporarily discontinue your telephone
service. If possible, they’ll notify you before they interrupt service.
If advance notice isn’t practical, you’ll be notified as soon as
possible. You’ll be given the opportunity to correct the problem,
and you will be informed of your right to file a complaint with the
FCC. Your telephone company may make changes in its facilities,
equipment, operations, or procedures that could affect the proper
functioning of your FANSTEL product. If such changes are
planned, you will be notified.
Interference Information: Part 15 of FCC Rules
Some telephone equipment generates, uses, and can radiate
radio-frequency energy and, if not installed and used properly, may
cause interference to radio and television reception.
Your FANSTEL product has been tested and found to meet the
standards for a Class B digital device, as specified in Part 15 of the
FCC Rules.
These specifications are designed to provide
reasonable protection against such interference in a residential
installation. However, there is no guarantee that interference will
not occur in a particular installation.
If your FANSTEL product causes interference to radio or television
reception when it is in use, you might correct the interference with
any one or all of these measures: Where it can be done safely,
reorient the receiving television or radio antenna. To the extent
possible, relocate the television, radio or other receiver with respect
to the telephone equipment. If your telephone product runs on AC
power, plug your product into an AC outlet that is not on the same
circuit as one used by your radio or television.
PLEASE SAVE THESE
INSTRUCTIONS