1
10 Commissioning
Please ensure the “Benchmark” logbook is completed and left
with the user.
The burner pressure is factory preset and no adjustment should
be required.
10.1 Filling Domestic Water Circuit
Check the burner pressure is within +/-0.2mbar. of 15.01mbar.
If this is incorrect, the burner pressure may be adjusted to the
correct setting by turning the hot water gas pressure adjuster
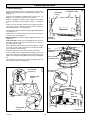
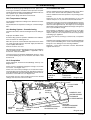
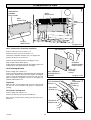
(potentiometer), located on the control board. To gain access
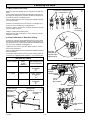
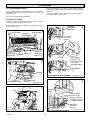
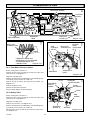
remove the two screws securing the controls facia, see diagram
9.1.
Check that the boiler is isolated from the electrical supply, at the
external isolator.
Fully open the domestic water supply stop cock or valve in the
supply to the boiler.
Hinge the control facia forward.
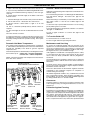
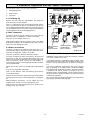
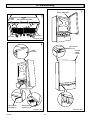
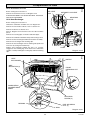
Open the inlet domestic water isolation valve, lever in line with
the valve body, see diagram 6.1.
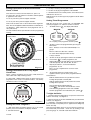
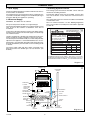
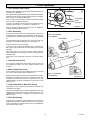
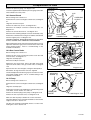
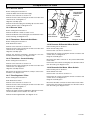
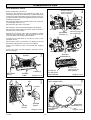
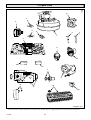
Remove the plastic plugs. Using the burner adjusting tool
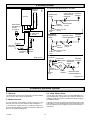
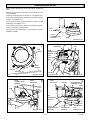
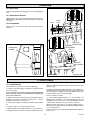
supplied. (clockwise to increase), see diagram 10.2. Turn the
adjuster slowly, always making adjustment by reducing below
the required pressure then increasing up to the required setting.
Open all hot water draw-off taps and close them when water
flows. Check for water soundness of the whole domestic water
system and boiler.
Close the hot water draw off.
10.2 Filling the Heating System
If the maximum pressure cannot be obtained, check that the gas
supply of adequate size, refer to Section 1.7.
Open the two central heating isolating valves, levers in line with
the valve body, see diagram 6.1.
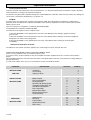
10.5 Gas Rate Modulation
Flush, fill and vent the system refer to Section 4.8 “Filling
Sealed Systems”.
The burner pressures are factory preset and no adjustment
should be required.
WARNING. SEVERAL COMPONENTS OPERATE ON MAINS
VOLTAGE AND WITH THE OUTER CASE REMOVED, LIVE
COMPONENTS BECOME EXPOSED.
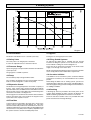
When checked if they are not consistant with the information in
table 1. the following steps should be taken.
Fully open a domestic hot water tap ensure there is no modulation.
Turn the domestic burner pressure potentiometer to minimum
by turnining anticlockwise with the tool supplied (do not force it),
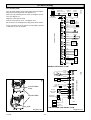
see diagram 10.2.
Make sure that the automatic air vent is operating correctly.
Take care not to splash any of the electrical components.
Open the controls cover.
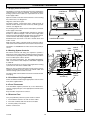
Carefully turn the minimum stop screw on the gas control valve.
When the correct setting is achieved adjust the potentiometer
on the control board (PCB) until the maximum is achieved. If it
is not possible to abtain the maximum required turn the
potentiometer fully clockwise (do not force it). Removing the
cover screw on the main gas control valve and turn the adjustment
screw until a pressure of 1mbar above the maximum stated in
table 1. is achieved. Refit the cover and adjust the potentiometer
to give the stated maximum setting by turning below the setting,
then slowly increasing upwards.
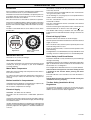
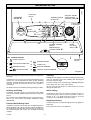
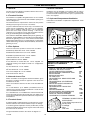
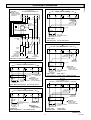
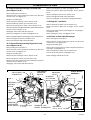
Refer to diagram 4 Instructions for Use. Operate button “J”
between “L” summer and “K” winter to ensure that water flows
through all parts of the boiler and air is not trapped in the boiler
internal bypass.
Pressurise the system until the pressure is 1.5bar. Check the
heating system and boiler for water soundness.
Check the operation of the safety valve by turning the safety
valve knob in the direction of the arrow.
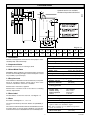
Lower the pressure to the initial cold fill design pressure, refer
to Table 1. Position the set pointer on the boiler pressure gauge
at this pressure also.
10.6 Domestic Water Flow Rate
This is factory preset and can not be adjusted.
Refit inner case front.
10.7 Burner Pressure - Heating
10.3 Preparation for Lighting
The burner pressure is factory preset and no adjustment should
be required.
Isolate the boiler from the mains electrical supply at the external
isolator.
Purge gas supply test for soundness . Turn on the gas service
cock, slot in line with the length of the cock.
Check that all remote heating system controls, room thermostats,
integral clock and the like are switched on/programmed and
calling for heat.
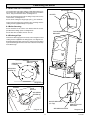
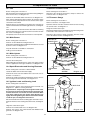
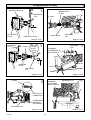
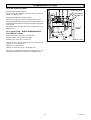
Loosen the burner pressure test point screw and connect a
suitable pressure gauge, see diagram 10.1.
Refer to diagram 4 Instructions for Use. Set button “J” to “K”
winter, see diagram 4.
10.4 Burner Pressure - Hot Water
The pump will circulate water through the boiler and the main
burner will light.
Connect the electrical supply; the pump will operate for about
30 seconds, then the pump will stop.
Check that the burner pressure, with the heating system cold to
prevent any modulation of the gas pressure, is within +/0.2mbar of 15.01mbar, the central heating pressure.
Fully open the largest hot water draw off tap whereby the main
burner will light, the flames gradually increasing to the maximum.
If the burner pressure is incorrect, it may be adjusted to the
correct setting by turning the central heating gas pressure
adjuster (potentiometer), located on the control board to gain
access remove the two screws securing the controls facia.
Check the soundness of the boiler gas joints, with the main
burner on, using a leak detection fluid. Take care not to splash
any of the electrical components.
Using the burner adjusting tool supplied. (clockwise to increase),
see diagram 10.2. Turn the adjuster slowly, always making
adjustment by reducing below the required pressure then
increasing up to the required setting.
To achieve this flow rate a water pressure of at least 0.8bar is
required during commissioning, although subsequently the
appliance will work at a minimum pressure of 0.5bar.
This flow rate should prevent any modulation of the gas
pressure.
221742D
Isolate the boiler from the electrical supply.
22