1
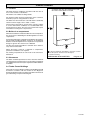
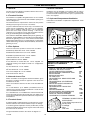
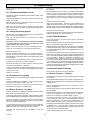
8.5 Rear Outlet Flue Fixing
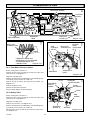
FITTED TO HYDRO BLOCK
Make sure that the ductings do not slope down towards the
boiler.
8080
8 Mounting the boiler
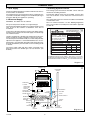
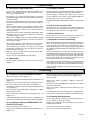
GAS SUPPLY
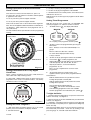
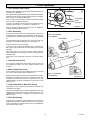
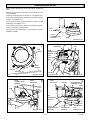
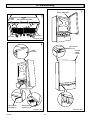
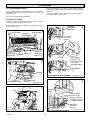
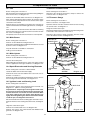
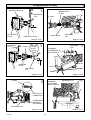
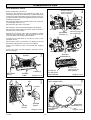
Fit the air duct into the flue spigot by pulling the air duct into the
flue spigot, locating cutouts. Turn the air duct anti-clockwise to
lock into the cutouts, see diagram 8.10.
Note: It is important the correct restrictor plate is fitted or refitted,
see restrictor table.
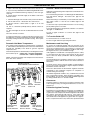
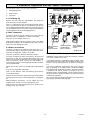
Fit the flue connecting sleeve onto the fan, see diagram 8.11.
Fit the fan to the flue ducting, see diagram 8.11.
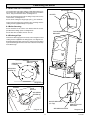
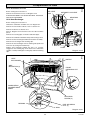
Fit the fan and flue collector the electrical connections and air
pressure tubes to the fan.
SERVICE
COCKS (4)
Refit the combustion chamber panel.
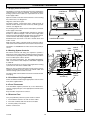
Make the outer wall weatherproof. A Flue Collar Kit Part No.
443286 is available.
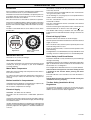
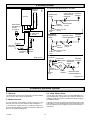
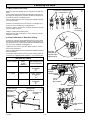
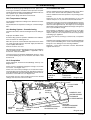
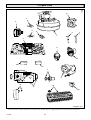
8.6 Top Outlet Side or Rear Flue Fixing
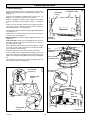
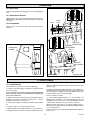
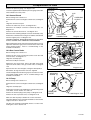
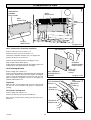
Position the restrictor plate supplied in the loose items pack,
between the flue elbow and boiler , (gasket facing upwards). Fit
the flue elbow to the restrictor plate and top of the boiler using
the four screws supplied, see diagram 8.7.
Tighten the four screws of the flue elbow evenly to ensure a
good seal at the gasket.
Note: It is important the correct restrictor plate is fitted or omitted
where instructed.
SEALING
WASHER (4)
(INSERT INTO
TUBING NUT)
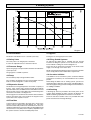
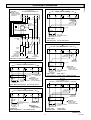
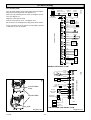
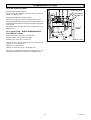
For top flue outlet be sure to use the correct restrictor plate, all
restrictors are supplied with the appliance, see restrictor table.
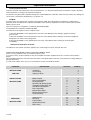
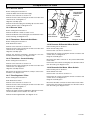
RESTRICTOR TABLE
FLUE OUTLET
MAX.
FLUE
LENGTH
USE RESTRICTOR
PLATE MARKED
1. REAR
0M to 0.5M
COMP 75E/80E
0.5M-MAX
or
'F'
0.5M to 2.5M
COMP 75E/80E
0.5m-3.5M
or
'G'
3. TOP
0M to 2.5M
COMP 75E/80E
2.5M-MAX
or
'E'
FLUE ELBOW
(REAR FLUE
SHOWN)
RESTRICTOR/
GASKET
SECURING
SCREW (4)
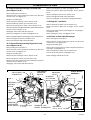
PRODUCTS
PROBE
DISCHARGE
PIPE
PRESSURE
GAUGE
CONNECTION
SAFETY
VALVE
DISCHARGE
SEAL
UNION CONNECTION
7405
2. REAR
7022
Diagram 8.8
DISCHARGE
PIPE
Diagram 8.7
221742D
Diagram 8.9
18