1
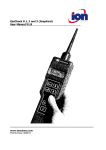
Kawasaki Motors Europe, Technical Information Section Copyright © 2008 Kawasaki Motors Europe N.V. (Edited from KMC K-Tech News article- Vol.20, Issue 4) All rights reserved. Subject to the exceptions provided for by law, no part of this publication may be reproduced and / or published in print, by photocopying, on microfilm, electronically or in any other way without the prior written consent of the copyright holder. All about KDS3 (Part 1) – published 03/04/08 KDS Overview Since more Kawasaki vehicles now require KDS, dealers are starting to discover the benefits of this service tool, so it’s a good time to cover KDS from start to finish. KDS 3 has been designed to operate on Windows 2000 / XP & Vista platforms. KDS is designed only for Kawasaki four-stroke fuel injected vehicles, you also may be familiar with a program we had in the past called KADIAG. This was a DOS based application intended only for twostroke direct-injected personal watercraft; different program, different hardware, different application. Don’t confuse these two resources. Benefits The benefits of using KDS are numerous. KDS allows the troubleshooter to go beyond the vehicle’s built-in “dealer mode” self-diagnosis capability, with the ability to retrieve and save-to-file stored codes, for example. The KDS user can perform engine power balance tests (where individual cylinders are “dropped” temporarily and the resulting change in idle compared), view starting and charging rates, and adjust the engine idle on vehicles lacking tachometers such as the KFX450R and the KVF750, and although throttle position sensors can be adjusted using a good multimeter, KDS makes this task a simple one-connection process. But there’s more. With the introduction of the 1400GTR, KDS plays an even larger role. Registering key fobs, replacing tyre pressure sensors and troubleshooting ABS all require the use of KDS. Not surprisingly, KDS has now become an official Kawasaki Minimum Standard tool for motorcycle dealers. Kit Components The KDS3 kit (P/No 57001-1687) includes the following parts: An adapter (sometimes called a signal converter), P/N 57001-1648. The adapter translates between the vehicle’s ECU and your personal computer. 2 communications cables for linking the signal adapter to the vehicle. A 4-pin cable (P/N 570011649) and an 8-pin cable (P/N 57001- 1688) are included. On most models these cables are used together for connection. The KDS software disc, P/N 57001-1650, includes both the program itself and a separate driver for the signal adapter, as well as an instruction manual in electronic form. Note: Periodically KDS software is updated whenever new related products are developed, always check that you are using the latest available version. Additional Parts A double shielded USB (A to B) cable is required to connect the adapter to the PC. This should be obtained locally as needed. For ZR750L/M & ZR1000B/C models an additional 4-pin to 4-pin adapter cable is needed (P/No 57001-1699) PWC: Although KDS needs no further cables or adapters to connect to Kawasaki Jet Ski watercraft, a special “relay” cable is needed to prevent the watercraft’s ECU from timing out whilst communicating with KDS. o For all JT1200 and JT1500 A models, this is relay cable 57001-1535. o For the JT1500 B and C models, use relay cable 57001-1696. A special storage case was provided by KME for all kits supplied initially to dealers. Future kits may or may not include this case. Installation of the software Installation of KDS3 onto a PC requires an added preliminary step - to install the special signal adapter driver. Turn on the PC and insert the KDS3 CD-ROM. A small black window will appear, don’t close it; we’ll come back to it later. Connect the adapter to a Kawasaki fuel injected four-stroke model, and turn on the ignition switch. Connect the USB cable to the adapter, and then plug the other end of the USB cable into the computer. A “Found New Hardware” wizard will appear. Prompt the computer to search the KDS disk for the adapter driver, and follow the prompts. Once the driver is installed, the “New Hardware Wizard” window will close and the black window will remain. Turn the ignition switch off, and type “1” in the black window, then press enter on your keyboard. Follow the prompts and KDS will install almost instantaneously. Using KDS3 Using KDS on all but the 1400GTR is pretty simple; however bear in mind a couple of things: First, like any diagnostic aid, KDS is only a tool, you’re the one doing the diagnosing, not the computer. If at any time the vehicle’s ignition switch is turned off, or a cable is disconnected, the KDS program will revert to its initial start screen. Simply restore the connection and resume using the program. Connection of KDS varies with the type of vehicle. The two communications cables are designed to be used in three different configurations, to suit the different kinds of connectors used on Kawasaki vehicles. Refer to the KDS instruction manual noting the following. On nearly all Kawasaki street bikes and ATVs, use both the communication cables together, terminating in a 4-pin connector and attach to the 4-pin connector on the vehicle (under the vehicle’s seat or inside the service panel at the front of the KFX450R). For JT1200D / JT1500A personal watercraft, it’s the same two cables and 4-pin connector, only here the connector is found inside the hull, near the rectifier. Don’t forget to add in the 57001-1535 relay cable as mentioned previously. For JT1500B/C models it is the same, except the 4-pin connector is located at the front of the craft near the battery, and a different 57001-1696 relay cable must be connected to the harness near the ECU. Using KDS3 (continued) 1400GTR connection requires no communication cables at all; the signal adapter attaches directly to a 6-pin connector under the seat. On all VN1500 models except the VN1500-P, only one communication cable is required to connect through a unique, otherwise unused, 8-pin connector found right on the ECU. ABS equipped models use the same communication cable as above to connect to a dedicated 8-pin connector on the harness for ABS diagnostics. Start KDS and note that the first window that comes up reminds you that not all problems on fuel injected vehicles are necessarily fuel injection system problems. In other words, remember to check the usual stuff as you would on a non fuel injected model, such as fuel quantity, quality, venting, spark, compression, air filter condition, etc. Turn the ignition switch on, and then click OK in the KDS window. The KDS start menu will appear, offering four choices. Select the appropriate option as needed. Don’t choose ‘With Smart System’ unless the bike is a 1400GTR. The KDS main menu then appears. Now select either FI (fuel injection) or KI-PASS, and continue. KI-PASS is the keyless fob system on the 1400GTR. You’ll most often work in the FI menu – 5 options are available. REAL TIME MONITOR: allows you to do such things ascheck sensor values,butalso more immediate jobs such as throttle position sensor (TPS) adjustment and idle adjustment. REAL TIME MONITOR GRAPHS: offers moving graphs on any three values you select, including voltage, throttle position, engine rpm, etc. This is useful for comparing readings at different throttle openings, and can be used to check charging voltage and voltage drop in the starting system. ACTUATOR: selection will bring up a list of actuators to test. Some such as the fuel pump or ignition coils can be tested by turning them on. Others, such as fuel injectors, can be tested by turning them off, for 5-second intervals while you compare the resulting engine rpm drop. DIAGNOSIS: displays the same information as the on-board dealer mode one. ERASE STORED CODES: this function only applies to some models. KDS can be a very useful tool in your service department. Learn to use it and become familiar with its many features, and prepare yourself to meet your customer’s expectations by providing the best possible diagnostic service. KDS 3 should be stored in the carrying case which conveniently holds all cables, adapter and master CD-ROM All about KDS3 (Part 2) – published 25/06/08 Using KDS3 for 1400 GTR On ZG1400 models, in addition to fuel injection diagnosis, the following procedures require the use of KDS 3.0: Replacement of the Tire Pressure Monitoring System (TPMS) wheel sensor Registering new key fobs TPMS (Tyre Pressure Monitor Sensor) The TPMS sensor will need to be replaced when its sealed-in battery runs down, or if it has been damaged. Always record the ID code which can be found on the label attached directly to the new sensor. This step is very important, and will save you a lot of time. Install the new sensor, refit the tyre and install the wheel. Connect and start KDS. From the start menu select Smart System, and then KI-PASS from the Main Menu. When the KI-PASS related menu appears choose Tire Air Pressure Sensor ID Registration. Finally select the appropriate Front or Rear Wheel, type in the new sensor’s ID number, and click Re-Registration. You’re done! Key FOBS New fobs need to be registered to the vehicle. Start by writing down the ID number found on the outside of the new fob’s package. Important note: For security reasons, unlike the tyre pressure sensor, the fob’s ID number is on the packaging, not on the part itself. Without this ID number the new fob cannot be registered, so don’t discard the packaging before recording the number. From the KI-PASS menu, select Fob Registration, then choose Additional Registration. Lay the new fob within a few inches of the SMART ECU (located in the centre of motorcycle under the seat). Type in the new fob’s ID number, and then click Additional Registration. However, you’re not done yet, as this procedure registers only the transmitting part of the fob and not the transponder portion. The transponder is that part that allows the fob to work even when its internal battery is run down (as a kind of emergency feature), and this transponder must also be registered. Gather up all the available fobs and remove mechanical keys, all existing fob’s transponders must be re-registered along with that of the new fob. From the KI-PASS menu, select Immobiliser Key Registration. From within the new menu, select Immobiliser Key Registration again. Slide the fob over the projection on the ignition switch, KDS will immediately recognise and register the fob’s transponder. Replace the fob with the second fob, and repeat, continuing for all of the customer’s fobs. Once all of the transponders have been registered, click Confirm Changed Item to complete the process. Now, double-check each of the newly registered transponders: 1. Open each fob and temporarily remove the battery and reassemble 2. Test the emergency transponder by sliding the fob over the projection on the ignition switch 3. Depress the ignition switch to turn on the vehicle, you don’t need to turn the key however, as the key icon should now appear on the vehicle’s instrument display. If it does, the transponder is working. If a customer has lost one of the fobs encourage them to re-register all remaining fobs so that the lost fob will be disassociated in the ECU, preventing unauthorised use and providing the customer with the maximum security possible: Starting from the KI-PASS menu, select Fob Registration then Registration. Place all of the remaining fobs near the smart ECU. When KDS asks if you have all the fobs together, choose yes and only the fobs present are recognised by the smart ECU. If at some point the customer recovers the lost fob, you can use this same process to re-associate it together with the existing fobs. Remember to lay all three fobs near the smart ECU. If on the other hand the customer ends up buying a replacement for the lost fob, follow the procedure for adding a fob, above. It may be useful to compare the Immobilizer and KI-PASS on the 1400GTR model with other Kawasaki immobiliser equipped models. Where these vehicles are similar is that they all use electronic keys, in fact, the Immobiliser circuits on each are very similar. Each vehicle’s ECU can store up to six key codes, and each vehicle is delivered to the customer with just two keys and two key “slots” already taken up in the ECU. It should be noted however that all ECUs except the KI-PASS one have re-writable memories. On the KI-PASS ECU once a key slot is registered it can not be over written only activated or deactivated. Each vehicle allows the technician to increase or decrease the number of working keys. From there things get very different. Obviously, the 1400GTR KI-PASS system is much more sophisticated, and adds features such as TPMS and the ability to sense when the fob is out of range, which the others do not. In fact, you can look at the other immobiliser systems as being simply preventative, locking out the wrong key, while the 1400GTR system is more preemptive, requiring a sort of “daisy-chain” of confirmations between no fewer than three onboard ECUs before the system will power up. All about KDS3 (Part 3) – published 16/09/08 Using KDS3 for Diagnosis (Use this information together with the KDS3 user manual) Three of the most commonly used options in KDS3 when troubleshooting DFI systems are Real Time Monitor, Diagnosis and Failure History: Real Time Monitor Use this function to view the actual real time values of up to 10 different sensors. Real time monitor also displays a failure count for all available sensors. The failure count shows all sensor failures including those which are not current. Note that they are not displayed in order of occurrence, nor can they be erased. To help confirm a diagnosis an experienced technician can compare the displayed sensor values against those expected to determine if the system has a problem or not. The failure count can be used to determine which sensor failures are likely to be related to any current problem under investigation. Diagnosis In the FI ECU Diagnosis screen, if any current (active) service codes exist, a description of the out of range sensor (or sensors) is shown. Failure History If a service code (fault code) is triggered, a failure record is generated. The last 3 failure records are displayed together with up to 15 sensor’s values recorded at the time of each of those failures. Scroll down the screen to see record 1, record 2 and record 3 in sequence. Note that record 1 is the most recent failure. Note: The displayed value of any failed sensor is the default value as described in the service manual under ‘Back Ups by ECU’. Be careful to remember this when making a diagnosis. Select ‘Warning Information’ from the pull down menu to see the Failure Records alone. Select ‘All Information’ from the pull down menu to see the sensor values at the time of failure. Scroll down to see more records. Note: A failure record is only shown if a sensor is out of range, not if it is giving an incorrect value within the expected (working) range. For example, if a water temperature sensor is showing 0 degrees C even though the engine is warm. The range expected for this sensor is -30 to +120 degrees C so the ECU does not ‘see’ any failure. However, the fuel injection system will provide a fuel mixture for a cold engine even though it is warm and rich running will result. An example of the importance of a skilled technician’s interpretation being needed! With some failures KDS3 cannot communicate with the ECU: Immobiliser failure In case of immobiliser component failure KDS3 cannot communicate with the ECU although the failure is recorded in the history. The problem must be fixed before KDS3 can communicate. However, a warning will flash in the instrument panel of the motorcycle to indicate there is a problem. Follow the service manual instructions to diagnose and repair. Sensor short If the 5V sensor feed is internally shorted to ground, KDS3 cannot communicate with the ECU. In this case there is no visual indication of a FI related problem as the FI warning light does not illuminate. The tell tale (audible) sign here is that the fuel pump does not operate when the ignition switch is turned on. To identify the source of this problem, connect fuel pump wiring & fuel pipe and turn on the ignition switch. One by one disconnect each 5V powered sensor, when the faulty sensor is disconnected you should hear the fuel pump start up. All about KDS3 (Part 4) – published 03/06/09 KDS3 Terminology This document explains the meaning of various terms used in the “Service Data” and “Values” columns in the “Real Time Monitor” screens of KDS3. Starter Switch: ON: The starter button is pressed (starter motor turning) OFF: The starter button is not pressed. Engine Emergency Stop: ON: The side stand switch circuit is activated to stop engine (not the engine stop switch). OFF: At all other times Engine Stopped: ON: Engine is not running OFF: Engine is running Engine Starting Mode: ON: Engine is cranking and r/min is below idle OFF: Engine stopped, or r/min is at idle or above. Unknown Item: This is a software error, please ignore this item Accelerator Position Sensor Failure (VN1700 models only): This refers to the throttle pulley sensor which is rider actuated via cables, not to be confused with the ECU controlled throttle valve sensor. Battery Voltage Malfunction: Activated if battery voltage drops below 6.6V ECU Failure (VN1700 models only): The ECU can monitor its internal Electronic Throttle Valve (ETV) control circuit. An ECU failure can be logged if a problem occurs with any of the following: CPU verification TPS input circuit CPU circuit ETV relay Limp home mode All about KDS3: FAQ – published 18/11/08 PC REQUIREMENTS: 1. Where can I find information about the required operating systems? This information is in the KDS 3 instruction manual (on the K-Care technical website under “Special Tools Info”). Windows 2000, XP and Vista are the only compatible operating systems. KDS 3 KIT: 1. Are any other cables required that are not included in the kit? Yes, some cables are not included in the kit. For motorcycle: o 57001-1699 (4-pin to 4-pin adapter) for Z750L/M & ZX1000B/C models. Note: This cable is included in later kits (P/No 57001-1729) For PWC: o 57001-1535 for JT1200 / JT1500A o 57001-1696 for JT1500B/C models (to prevent ECU timing out). SOFTWARE: 1. How can I tell if I am using the latest version of KDS 3 software? Double-click the KDS 3 shortcut Icon on your desktop, and then select <OK> on the “Important Information” screen. Both KDS 3 programme and database version numbers will be displayed on the bottom right hand corner of the next screen. Check the numbers match the KDS software version in the “Special Tools Section” of the technical website. The latest software will always be available on the website. 2. I have just received an e-mail from KHI regarding their newly uploaded KDS 3 software on the EDD server: is this software different to the one on the K-Care technical website? No, we will always upload the latest version to the K-Care technical website as soon as it becomes available. 3. Why am I having a problem with KDS 3 connecting to a recently released model? Check that you are using the latest software version. The software database is updated each time new models are introduced. If the model is not in the database, KDS 3 will not work. CONNECTION: 1. Where can I find information about how to connect KDS 3? The KDS 3 instruction manual contains connection information for most models. 2. Which adapter cables do I need to connect to models with a 4-pin adapter port? Join both kit cables (57001-1688 & 57001-1649) together so the joined cable ends in a 4-pin plug. 3. Why are there two 4-pin ports on some models? Most DFI models have two 4-pin ports, one for programming the ECU during production (which cannot be used with by KDS), and the other for KDS connection. Check the KDS user manual to make sure you have selected the correct port. IN USE: 1. Why is the TPS output reading displayed in degrees rather than volts on some models? Kawasaki uses different manufacturers for DFI systems; typically Mitsubishi and Denso. TPS values are displayed in volts by Mitsubishi ECUs and in degrees by Denso ECUs. Currently KDS 3 cannot convert the Denso values to volts. 2. Can stored service codes be erased? Generally you cannot erase stored service codes from the ECU. However, this is possible on some older models such as VN1500-P, VN1600-A, ZX1200-A/B, JT1200-B, ZX600-K/ 636-B & ZR1000-A. 3. What causes service codes to be stored? Service codes are logged each time a sensor is out of usable range. To simulate this you can disconnect a sensor with the ignition switched on and a service code will be logged. The failure count for that component will increase each time this happens. 4. What is the function of the injector actuator test? It is used as a cylinder drop test allowing the user to cut one cylinder at a time to aid diagnosis. It basically stops fuel injection on the chosen cylinder. 5. On a ZG1400, apart from FI diagnosis, is KDS 3 only needed to register key fobs? No, it also is needed to register other parts such as Smart ECU, FI ECU, Steering lock ECU & TPMS sensors. Further details can be found in the KDS 3 instruction manual. 6. If no service codes can be retrieved using KDS 3, is the DFI system OK, and can I assume that the problem is mechanical? No. The sensors may be OK but you need to be aware of the parameters under which sensors operate and when a service code is tripped. Sensor operating ranges are listed in the “Fuel System” chapter in the service manual. If a sensor remains within these parameters no service code will be displayed. However, if the sensor is giving a bad reading that is within the operating range (for example a temperature sensor shows a very low temperature when the engine is hot) then running problems may occur. Use the real time monitor option in KDS 3 to see the actual sensor values and confirm if they match expectations. This function within KDS 3 can be very useful for diagnosing DFI related problems.