1
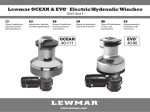
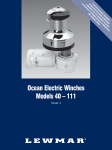
GB
WWWLEWMARCOM
Contents
GB
B2303 Issue 6. Ocean electric winches models 40 – 77.
For sizes over 77 please contact Lewmar for details.
Introduction
4
3. Electrical connections
13
Product support
4
3.1 E Series Electric 40–48
13
Important information about this manual
4
3.2 ELS Electric Load Sensing 40–48
14
EMC Recommended guidelines
4
3.3 ELS Electric Load Sensing 50–64
15
CE Approvals
4
3.4 ELS Electric Load Sensing 2/3 speed 66–77 16
Safety notices
5
3.5 EVC Electric Variable Control 40–48
17
General
5
3.6 EVC Electric Variable Control 50–64
18
Fitting
5
4. Performance diagrams
Electrical
5
5. Safe working loads
1. Installation
6
5.1 Optimum rope diameters
21
1.1 Identifying manual convertible winch
6
5.2 Maximum winch load values
21
1.2 Preparing manual winch for conversion
6
6. Operating your winch
21
1.3 Fitting a complete electric winch from new
6
7. Ser vicing your winch
22
1.4 Positioning winch above deck
7
8. Parts list
22
1.5 Positioning winch ancillaries below deck
8
19/20
21
8.1 Winch notes
22
1.6 Fitting a convertible electric winch 40–64 9/10
8.2 Models 40–64
23
1.7 Fitting a convertible electric winch 66–77
11
8.3 Models 66–77
24
1.8 Fastenings
11
1.9 Winch motor gearbox couplings
11
2. Electrical wiring installation
12
2.1 Typical electrical layout
12
2.2 Correct main spindle rotation
12
9. Dimensions
25
10. Total weight
26
11. Electric convertible model range
27
11.1 Winches 40–77
27/28
11.2 Circuit breakers
28
12. Fault finding
29
13. Lewmar limited warranty
30
Ocean Electric Winches
Models 40–77
3
GB
Introduction
Safety notices
Dear Customer,
Thank you for chosing Lewmar Electric Ocean
Winches. Lewmar products are world renowned
for their quality, technical innovation and proven
performance. With a Lewmar winch you will be
provided with many years of outstanding service.
We wish you happy sailing.
Product support
Lewmar products are supported by a worldwide
network of distributors and Authorised Ser vice
Representatives. If you encounter any difficulties
with this product, please contact your national
distributor, or your local Lewmar dealer. Details are
avaiable at:
To the best of our knowledge, the information in
this manual was correct when it went to press.
However, Lewmar cannot accept liability for
any inaccuracies or omissions it may contain.
In addition, our policy of continuous product
improvement may change specifications
without notice. As a result, Lewmar cannot
accept liability for any differences between the
product and the manual.
General
Please ensure that you thoroughly understand the
operation and safety requirements of the winch
before commencing the installation. Only persons
who are completely familiar with the controls and
those who have been fully made aware of the correct
use of the winch should be allowed to use it. If there is
any doubt of how to install or operate this unit please
seek advice from a suitably qualified engineer.
•
Winches used incorrectly could cause harm to
equipment or crew.
•
Winches should be used with care and treated
with respect.
•
www.lewmar.com
Sailing, like many other sports can be hazardous.
Even the correct selection, maintenance and
use of proper equipment cannot eliminate the
potential for danger, serious injury or death.
•
Lewmar winches are designed and supplied for
line control in marine applications and are to be
used in conjunction with appropriate clutches,
cleats and other manual controls and stoppers.
•
It is the unavoidable responsibility of the owner
or master or other responsible party to assess
the risk of any operation on the vessel.
The type of warnings, what they look like, and
how they are used in this manual are explained as
follows:
•
Under no circumstances should any self tailing
winch be used in self tailing mode for any lifting
operation; rather suitable and adequate manual
tailing should be arranged with proper means of
manually cleating or stopping the hoist.
Warning!
This is a warning against anything which may
cause injury to people if the warning is ignored.
You are informed about what you must or must not
do in order to reduce the risk of injury to yourself
and others.
•
Every winch should be installed with adequate
means of manually cleating or stopping the
loaded ropes.
•
Lewmar recommends the use of appropriate
Personal Protective Equipment and hands
free communication equipment by any person
going aloft, and only then where the person
going aloft is properly trained in the use of that
equipment and where there remain sufficient
trained and experienced personnel on deck to
ensure constant observation and the continued
safe conduct both of the vessel and the hoisting
operation.
Important information
about this manual
Throughout this manual, you will see safety and
product damage warnings. You must follow these
warnings carefully to avoid possible injur y or
damage.
Safety Symbol
When you see the safety symbol it means: “Do
not...”; “Do not do this”; or “Do not let this
happen”.
GB
Fitting
•
This equipment must be installed and operated
in accordance with the instructions contained in
this manual. Failure to do so could result in poor
product performance, personal injury and/or
damage to your boat.
•
Consult the boat manufacturer if you have any
doubt about the strength or suitability of the
mounting location.
•
Make sure you have switched off the power
before you start installing this product.
•
If in doubt about installing electrical equipment
please seek advice from a suitably qualified
electrical engineer.
Electrical
Approvals
For CE approval certificates contact Lewmar.
4 Ocean Electric Winches
Models 40–77
Ocean Electric Winches
Models 40–77
5
GB
1. Installation
1.4 Positioning winch
above deck
PRE 1992
1992 AUG 2000
40/44/48 AUGUST 2000 A
Lewmar recommend that the rope enters onto
the drum at an angle of –5° to –10° to the base
axis of the winch. To achieve this angle it may be
necessary to use a base wedge when installing
the winch (Fig. 1.41). The winch must be
mounted on an even surface.
Always keep in mind the space available below
the deck for the motor gearbox.
Use the template provided as a guide to position
the winch on the deck.
•
NOTE: Check the scale of the template
matches the winch (Fig 1.43).
Make sure there is room below deck for motor
and sub box.
Fig. 1.43
Fig. 1.41
-5° to -10°
Ocean
Wavespring Manual
Wavegrip Winch
Convertible
Manual
Convertible Manual
with Power Drive Unit
Complete Electric
Convertible Winch
-5° to -10°
1.1 Identifying the manual
convertible winch
1.2 Preparing the manual
winch for conversion to electric
•
•
Fig. 1.11
Pre Ocean winches, i.e. fixed jaw Wave
Grip winches, made before 1992 are NOT
convertable.
Description
Centre Stem Kit
Centre Stem Kit
Centre Stem Kit
Part Number
48040037
48044037
48048037
6 Ocean Electric Winches
Models 40–77
Fig. 1.21
AD
Winch Model
40
44
48
Fig. 1.42
LO
Ocean Wave Spring manual winches made
between 1992 and August 2000 are NOT fitted
with the necessary centre stem to convert to
powered operation. A Centre Stem Kit (A) is
available to convert the early Ocean Wave Spring
winches from (1992 to July 2000). The part
numbers are listed below. Pre Ocean Winches,
i.e. fixed jaw Wave Grip winches, made before
1992 are NOT convertable.
Remove any sharp edges and clean, to remove
all old bedding/sealing compounds from the
underside of the Centre Stem.
If practical, for best performance, the winch
should be installed so that the output gear is
situated in the optimum position in relation to
the load (Fig. 1.42).
Y
TR
EN
•
•
•
E
N
LI
Convertible manual winches made in August
2000 will be date marked H/00 on the centre
stem, (H = August; 00 = year 2000). They also
carry a blue sticker on the screw-on top-cap
showing a winch handle and a hand operating
an electric deck switch. These winches can be
converted by adding the Power Drive Base
(B) unit and the required Motor Gearbox (C),
Control Box and Switch-gear (12 V or 24 V).
Remove the winch from the deck (if already
installed) and remove the Centre Plate, which
is located on the underside of the Centre Stem,
by using a soft hammer and punch (Fig. 1.21).
OUTPUT GEAR
2 SPEED / 3 SPEED WINCHES
1.3 Fitting a complete
electric winch from new
•
Test fit the winch to the Power Drive Base
and Gearbox to check the orientation and
the necessar y clearence needed BEFORE
DRILLING ANY HOLES.
•
Now follow sections 1.4 and 1.5.
Ocean Electric Winches
Models 40–77
7
GB
1. Installation
•
•
Contact Lewmar for correct fitting of electrical
connections. If the motor is unitentionally
fitted this way on a single speed winch it will
not operate and make a clicking noise, on a 2
or 3 speed winch it will dramatically reduce
performance.
The positioning of the motor gearbox must be
checked prior to cutting for deck/hull and bulkhead
clearance.
•
NOTE: The motor can be fitted as Fig.
1.53.
The motor gearbox can be rotated in 90° steps,
Fig. 1.51.
•
1.6 Fitting a convertible
electric winch 40 – 64
•
NOTE: Illustrations are based on a model
50 winch.
•
Place the winch in position to ensure correct
fit once the holes have been drilled/cut (Fig.
1.61).
Fig. 1.53
Lift drum off (Fig. 1.64). Take care in re-fitting
the drum washer with bevel on underside.
Fig. 1.64
Fig. 1.61
Fig. 1.51
•
•
•
•
The motor rotation is factory set for fitting as
Fig. 1.52.
Fig. 1.52
Check clearance below deck and accessibility
then position the deck switches near and in view
of the winch. Use the templates provided as a
guide to cut/drill hole, fit switch and seal.
Unscrew the top cap (Fig. 1.62).
Fig. 1.62
•
NOTE: Air switch tubing must be twist and
chafe free to the switch unit (sub box).
DO NOT cover the air bleed hole with sealant
as this will stop air escaping and could result in
winches self operating as the air expands with
rising temperatures in the tube.
Once you have selected the position for the
winch, motor gearbox and controls, double check
everything and only then drill the holes in the
deck.
Remove all screws holding centre stem to base
(Fig. 1.65). Using a flat bladed screwdriver in the
drainage slots, lever off centre stem assembly
clear of the two dowel pins.
Fig. 1.65
•
Remove feeder arm and collets (Fig. 1.63).
Fig. 1.63
8 Ocean Electric Winches
Models 40–77
Ocean Electric Winches
Models 40–77
9
GB
1. Installation
1. Installation
GB
•
1.5 Positioning winch
ancillaries below deck
•
•
Consult the fastening guide in section 1.8 for
bolt type and length. Bolt the base plate to
the deck ensuring that all fastening heads are
countersunk and correctly and replace base plate
cover (Fig 1.68).
1.7 Fitting a convertible
electric winch 66−77
Fig. 1.91
For winches 66−77, simply remove the winch drum
and access to mounting holes is available through
holes in the base of the centre stem.
Fig. 1.68
Fig. 1.66
1.8 Fastenings
Fix the winch to the deck using CSK Head, Stainless
Steel Washers/Locknuts.
•
For the correct bolt length refer to Fig. 1.81 and
table.
NOTE: Deck fastenings are not supplied.
Fig. 1.81
15
+(x) mm/inch =
•
•
Remove the base plate cover. Lift the base
and bed down with a light coating of sealing
compound to prevent leaks (Fig 1.67).
Refit the centre stem assembly, taking care
to hold the gear stack in position as before
(Fig 1.69). Rotating the gears will facilitate reengagement of the pawls, and ratchet tracks.
Fig. 1.92
Fig. 1.69
NOTE: Do not use excessive sealant.
Fig. 1.67
Winch
Fastening
X mm
((min.))
X inch
(
(min.)
)
40
44 & 48
50 & 54
58
64
66 & 77
5 x M6 (1/4” W)
5 x M8 (5/16” W)
6 x M8 (5/16” W)
5 x M10 (3/8” W)
5 x M10 (3/8” W)
6 x M10 (3/8” W)
30
33
33
36
38
31
11/4
15/16
15/16
17/16
11/2
11/4
44~64
1.9 Winch/motor
gearbox coupling
Mechanical coupling of the horizontal drive unit and
reduction gearbox to the winch should be mounted
as Fig 1.91 (40−64) and Fig. 1.92 (66−77) with
instructions of previous pages.
•
10 Ocean Electric Winches
Models 40–77
Replace the drum, collets, feeder arm in correct
feeder position and screw on the top cap.
•
The horizontal drive unit assembly should be
bolted from below decks. Use threadlock on
item No.15 (see Sec. 8.2).
•
If a thick deck or increased motor/gearbox
distance from deck demands a greater ‘ T ’
dimension (see Sec. 9). Optional extension
kits are available to special order. Contact your
nearest Lewmar office.
GB
1. Installation
1. Installation
GB
Take care to hold the gear stack in position as
shown (Fig. 1.66). (If pawl gear falls away... note
shoulder face is down). Take care that pawls and
pawl springs are kept in place, while rebuilding/
placing the centre stem onto the base.
Ocean Electric Winches
Models 40–77
11
2. Electrical wiring installation
Fig. 2.11
3. Electrical connections
GB
3.1 E Series Electric 40– 48, 12 V or 24 V
Fig. 3.11 Single direction contactor in box with thermal cutout.
3
12 V (18000301) or 24 V (18000302).
1
5
Battery – VE
Blue
Thermal
Cutout
4
D1
A2
2
D2
System
y
Voltage
( )
(V)
Distance
Power supply to winch
Cross
sectional area
Cable size
(US Only)
12
Up to 10 m (33 ft)
50 mm2
1/Ø
12
10 to 15 m (33 to 49 ft)
70 mm2
2/Ø
12
15 to 20 m (49 to 66 ft)
95 mm2
3/Ø
24
Up to 7 m (23 ft)
25 mm2
3
24
7 to 10 m (23 to 33 ft)
35 mm2
2
24
10 to 13 m (33 to 43 ft)
50 mm2
1/Ø
2.1 Typical electrical layout
NOTE: This is not a wiring diagram.
1.
3.
4.
5.
Position the recommended circuit breaker close
to the battery. See wiring diagrams Sec. 3.
Route 2 cables (see size table above) from battery
to the control box.
Battery
size
Motor +VE
•
2.2 Main spindle rotation
•
Check correct main spindle rotation when fitted
and operated.
Fig. 2.21
Position the control box near the winch (±1
metre) in a dry area for watertight security and
accessible for maintenance.
Winch
2 Speed
66−77
3 Speed
66−77
12 Ocean Electric Winches
Models 40–77
1st Gear
2nd Gear
Battery
Isolator/Safety
Switch
Circuit
Breaker
3
Battery +VE
Up to 300
Amp/hrs
Attach motor cables to control box (see wiring
diagram) using recommended cable sizes.
Position deck switches in view of winch. Route
wire and attach to control box (see wiring
diagram).
Contactor
12 V - 18000301
24 V - 18000302
1
Grey
Not Used
Electric Switch Kit
69000018
Slow Blow Fuse
Customer Supplied
4
Black
2
3 Amp
GB
•
This simple installation of a power drive unit,
motor and switch gear controls the winch by
a single direction contactor, which can be a
Contactor housed in a waterproof box (Fig 3.11),
or a stand alone Nylon encased unit (Fig 3.12).
The motor thermal trip is connected to monitor
motor temperature while the Lewmar safety
electric deck switch can be easily wired.
•
Manual override facility is still available for
backup, or as a means of experiencing traditional
sailing.
•
Two plus one speed comes as standard control
which gives two speed manual drive (handle)
plus one speed electric drive.
Fig. 3.12 Contactor
12 V (0052505) or 24 V (0052506)
Motor +VE
0 V/Motor A2
Battery +VE
Electric
Switch Kit
69000018
Blue
3 Amp
Black
Slow Blow Fuse
Customer Supplied
Grey
Not Used
Thermal
Cutout
3rd Gear
NUMBER KEY FOR ALL ELECTRICAL DIAGRAMS
1. Negative earth MUST be used.
2. The deck switch wires MUST be fitted as
shown on wiring diagrams.
3. Connect all low power wiring (deck switches,
motor cutout etc.) before fitting high power cables
to controller.
4. Cable boots are supplied for all high power
cable connections, follow guidelines Fig. 2.11
for cable sizing.
Ocean Electric Winches
Models 40–77
13
3.2 ELS Electric Load Sensing 40 – 48, 12 V or 24 V.
•
This installation controls the winch by Lewmar’s
unique Overload Protection Control Box (Fig
3.21), this allows the winch to be operated up to
the Safe Working Load for winch size.
•
Other features as Section 3.1
Total voltage drop MUST NOT exceed 5% of
supply over completed cabling installation. Check
all connections for water tight security. Lewmar
recommends an isolator to be fitted in the circuit
in an accessible position as close as possible to
the supply.
Connect the power supply cables to the battery last
when the winch installation has been completed
and checked for correct installation. Incorrect
connection of motor cables may damage the
unit.
Fig. 3.21 12 V or 24 V Control box with overload protection.
PCB
3A
Fuse
•
This installation controls the winch by Lewmar’s
unique Overload Protection Control Box (Fig
3.21), this allows the winch to be operated up to
the Safe Working Load for winch size.
•
Other features as Section 3.1
Total voltage drop MUST NOT exceed 5% of
supply over completed cabling installation. Check
all connections for water tight security. Lewmar
recommends an isolator to be fitted in the circuit
in an accessible position as close as possible to
the supply.
Connect the power supply cables to the battery last
when the winch installation has been completed
and checked for correct installation. Incorrect
connection of motor cables may damage the
unit.
Fig. 3.31 12 V or 24 V Control box with overload protection.
Air Deck
Switch Kit
69000022
2
Two-way
Terminal Block
3.3 ELS Electric Load Sensing 50 – 64, 12 V or 24 V.
Air Deck
Switch Kit
69000022
PCB
Electric Switch Kit
69000016
3A
Fuse
2
Two-way
Terminal Block
Black
Black
Blue
Blue
1
Battery –VE
Control Box
Battery
A2
Motor + VE
F2
D2
Isolator/Safety
Switch
Circuit
Breaker
NUMBER KEY FOR ALL ELECTRICAL DIAGRAMS
1. Negative earth MUST be used.
2. The deck switch wires MUST be fitted as
shown on wiring diagrams.
4
Thermal
Cutout
Isolator/Safety
Switch
A1
A2
Circuit
Breaker
Motor +VE
Battery +VE
Battery +VE
Models 40–77
Battery
F1
D1
14 Ocean Electric Winches
Motor –VE
Thermal
Cutout
4
1
Battery –VE
Control Box
Sub Box
Grey
Not Used
Sub Box
Grey
Not Used
Motor –VE
Electric Switch Kit
69000016
3. Connect all low power wiring (deck switches,
motor cutout etc.) before fitting high power cables
to controller.
4. Cable boots are supplied for all high power
cable connections, follow guidelines Fig. 2.11
for cable sizing.
NUMBER KEY FOR ALL ELECTRICAL DIAGRAMS
1. Negative earth MUST be used.
2. The deck switch wires MUST be fitted as
shown on wiring diagrams.
3. Connect all low power wiring (deck switches,
motor cutout etc.) before fitting high power cables
to controller.
4. Cable boots are supplied for all high power
cable connections, follow guidelines Fig. 2.11
for cable sizing.
Ocean Electric Winches
Models 40–77
15
GB
3. Electrical connections
3. Electrical connections
GB
3.4 ELS Electric Load Sensing 2/3 speed controller 66−77, 12 V or 24 V.
•
This installation controls the winch by Lewmar’s
unique Overload Protection & Autoshift Control
Box (Fig. 3.41). This allows the winch to
be star ted in 1st and if reaches the Safe
Working Load, for the winch size and gear, will
automatically shift the winch into 2nd gear for
complete load control.
Total voltage drop MUST NOT exceed 5% of
supply over completed cabling installation. Check
all connections for water tight security. Lewmar
recommends an isolator to be fitted in the circuit
in an accessible position as close as possible to
the supply.
Connect the power supply cables to the battery last
when the winch installation has been completed
and checked for correct installation. Incorrect
connection of motor cables may damage the
unit.
In the case of a 3 speed winch (Fig. 3.41b) the
switch must be re-selected to achieve 3rd gear.
Fig. 3.41a 2 Speed winch electrical connections
Fig. 3.41b 3 Speed winch electrical connections
F1
F2
F2
F1
3.5 EVC Electric Variable Control. Standard controller
single speed winches 40 – 48, 12 V & 24 V.
•
The EVC controller uses current sensing to halt
the operation of the winch when the winch has
reached its Maximum Safe Working Load.
1.
SW 1 drives the winch at full speed.
•
2.
SW 2 drives the winch at a set speed determined
by adjustable dial marked (SP) on the control
box. On supply the dial is preset by Lewmar to
drive the winch at 60% of full speed.
The EVC controller features a Ramp/Soft Start to
control the winch start up, adjustment of dial RA
will vary the start period between 0.5 - 5 seconds.
The dial is preset by Lewmar for a start period
of 1 second.
3.
If optional Vario Control is fitted then the winch
will drive at a speed determined by adjustment
of the Vario Control when deck switch (SW 2)
is engaged.
•
In order to adjust the speed (SP) and Ramp (RA)
dials, unscrew the plug screws, on top of the
controller 4 full turns and retract the plug/screw
assembly. Use an electrical slotted (2.5mm Max.)
screwdriver to adjust the internal dial to the
desired setting.
Fig. 3.51
Two-way
Terminal Block
Fig. 3.41 2/3 Speed 12 V or 24 V control box with overload protection.
2
Electric Switch Kit
69000016
Sub Box
Black
Blue
Grey
Not Used
SW 2
Electric Switch Kit
69000018
Grey
Not Used
Black
Grey
Not Used
Black
Blue
3 Amp
Fuse
Air Deck
Switch Kit
69000022
(Optional)
Vario Control
1
Battery –VE
1
Battery –VE
SW 1
Electric Switch Kit
69000018
1 2 3 4 5 6 7 8
2
GB
• The EVC winch controller is a variable speed
motor controller which can drive the winch in 3
different ways:
Thermal
Cutout
Battery
Battery
Motor –VE
3
Thermal
Cutout
Isolator/Safety
Switch
F1
F2
Isolator/Safety
Switch
A1
8
4
Control Box
EVC
Control Box
BAT–
MOT–
MOT+
D1
A2
BAT+
Circuit
Breaker
3
D2
4
Battery +VE
Motor – VE
A2
Circuit
Breaker
Motor – VE
Battery +VE
Motor +VE
NUMBER KEY FOR ALL ELECTRICAL DIAGRAMS
1. Negative earth MUST be used.
2. The deck switch wires MUST be fitted as
shown on wiring diagrams.
16 Ocean Electric Winches
Models 40–77
3. Connect all low power wiring (deck switches,
motor cutout etc.) before fitting high power cables
to controller.
4. Cable boots are supplied for all high power
cable connections, follow guidelines Fig. 2.11
for cable sizing.
NUMBER KEY FOR ALL ELECTRICAL DIAGRAMS
1. Negative earth MUST be used.
2. The deck switch wires MUST be fitted as
shown on wiring diagrams.
3. Connect all low power wiring (deck switches,
motor cutout etc.) before fitting high power cables
to controller.
4. Cable boots are supplied for all high power
cable connections, follow guidelines Fig. 2.11
for cable sizing.
Ocean Electric Winches
Models 40–77
17
3. Electrical connections
3. Electrical connections
GB
The EVC controller features a Ramp/Soft Start to
control the winch start up, adjustment of dial RA
will vary the start period between 0.5 - 5 seconds.
The dial is preset by Lewmar for a start period
of 1 second.
•
In order to adjust the speed (SP) and Ramp (RA)
dials, unscrew the plug screws, on top of the
controller 4 full turns and retract the plug/screw
assembly. Use an electrical slotted (2.5mm Max.)
screwdriver to adjust the internal dial to the
desired setting.
1.
SW 1 drives the winch at full speed.
2.
SW 2 drives the winch at a set speed determined
by adjustable dial marked (SP) on the control
box. On supply the dial is preset by Lewmar to
drive the winch at 60% of full speed.
If optional Vario Control is fitted then the winch
will drive at a speed determined by adjustment
of the Vario Control when deck switch (SW 2)
is engaged.
Fig. 3.61
Two-way
Terminal Block
SW 1
Electric Switch Kit
69000018
2
SW 2
Electric Switch Kit
69000018
Cutout (500 kg)
1 2 3 4 5 6 7 8
Blue
Load (kg)
Model 48 Electric 12 & 24 Volts
Cutout (500 kg)
F2
Cutout (1000 kg)
Thermal
Cutout
Current (Amp)
Line Speed (m/min)
1
Line Speed (m/min)
(Optional)
Vario Control
Battery
F1
BAT+
Circuit
Breaker
3
A1
Load (kg)
A2
Model 44 Electric 24 Volts
4
Model 50 Electric 12 & 24 Volts
Cutout (800 kg)
Battery +VE
Motor +VE
Motor – VE
NUMBER KEY FOR ALL ELECTRICAL DIAGRAMS
1. Negative earth MUST be used.
2. The deck switch wires MUST be fitted as
shown on wiring diagrams.
18 Ocean Electric Winches
Load (kg)
3. Connect all low power wiring (deck switches,
motor cutout etc.) before fitting high power cables
to controller.
4. Cable boots are supplied for all high power
cable connections, follow guidelines Fig. 2.11
for cable sizing.
Cutout (1250 kg)
Load (kg)
Current (Amp)
Isolator/Safety
Switch
Line Speed (m/min)
EVC
Control Box
Models 40–77
Load (kg)
Model 40 Electric 24 Volts
Battery –VE
MOT+
Cutout (800 kg)
Black
3 Amp
Fuse
BAT–
MOT–
Model 44 Electric 24 Volts
Grey
Not Used
Grey
Not Used
Black
Model 40 Electric 12 Volts
Current (Amp)
3.
The following graphs show line speed and amperage
draw relative to the load applied. Each control box
is set to cut out at the SWL which is 50% of the
breaking load.
Current (Amp)
•
GB
Current (Amp)
NOTE: Standard EVC used on 50−64 24 V.
High power EVC used on 50−64 12 V.
•
Line Speed (m/min)
The EVC controller uses current sensing to halt
the operation of the winch when the winch has
reached its Maximum Safe Working Load.
Current (Amp)
• The EVC winch controller is a variable speed
motor controller which can drive the winch in 3
different ways:
•
4. Performance diagrams
Line Speed (m/min)
3.6 EVC Electric Variable Control. Standard & high power
controller single speed winches 50 – 64, 12 V & 24 V.
Line Speed (m/min)
3. Electrical connections
GB
Load (kg)
Ocean Electric Winches
Models 40–77
19
Model 54 Electric 12 & 24 Volts
GB
Cutout (2721 kg)
Load (kg)
Current (Amp)
Line Speed (m/min)
Current (Amp)
Line Speed (m/min)
Cutout (1350 kg)
5.1 Optimum rope diameters
Model
Rope Ø (mm)
Rope Ø (in)
40
8 to 12
5/16” to 1/2”
44 & 48
8 to 14
5/16” to 9/16”
50 & 54
8 to 16
5/16” to 5/8”
58, 62 & 64
8 to 18
5/16” to 11/16”
Model 58 Electric 12 & 24 Volts
Model
10 to 20
3/8” to 3/4”
77
12 to 22
1/2” to 7/8”
Current (Amp)
Line Speed (m/min)
Cutout (1450 kg)
66
GB
5.2 Maximum winch load values
Load (kg)
Maximum Load
(kg)
Maximum Load
(lbs)
40
795
1750
44
1136
2500
48
1247
2750
50
1363
3000
54
1474
3250
58
1587
3500
64
1700
3750
66
2727
6000
77
3409
7500
Maximum safe working loads are recommended
to be NOT MORE than the those detailed above.
This provides an acceptable safety margin for
dynamic load surges in extreme sea conditions.
Load (kg)
6. Operating your winch
Model 64 Electric 12 & 24 Volts
Cutout (1580 kg)
Current (Amp)
Line Speed (m/min)
Fig. 6.1
Load (kg)
•
Ocean Winches 40−64 are single speed powered
winches & manual 2 speed, these winches
employ an overide ratchet gearing for safety
when winching manually.
•
Ocean Winches 66−77 are 2 or 3 speed powered
and manually operated, they will not drive
electrically while the winch lock-in handle is in
the drive socket.
1.
Adjust the feeder arm so that the rope tails into
a secure area away from the incoming line.
2.
There must be at least 3 turns of rope around
the winch before being passed across the feeder
arm in to the wavespring self tailing jaws.
Model 66/3 Electric 24 Volts
Cutout (1814 kg)
Current (Amp)
Line Speed (m/min)
4. Performance diagrams
5. Safe working loads
Model 77/3 Electric 24 Volts
3.
Use the winch handle or electric switch to
operate the winch.
Remove handle after use.
NEVER hold the incoming rope to the winch while
the winch is operated. Only control the rope
leaving the winch.
4.
Pay out line as per manual winch.
ALWAYS switch off the winch at the circuit
breaker/isolator after sailing or when leaving the
boat to prevent accidental operation.
Load (kg)
20 Ocean Electric Winches
Models 40–77
Ocean Electric Winches
Models 40–77
21
GB
7. Servicing your winch
Fig. 8.21
GB
4
8. Parts list
TURN THE POWER OFF at the circuit breaker/
isolator before any maintenance/servicing is
carried out. Winches need regular maintenance
to operate at peak efficiency otherwise permanent
damage and premature wear can result.
8.2 Parts list 40−64
3
Fig. 7.1
4
5
1
1. MONTHLY
Hose down with fresh water then lightly oil
and grease as per illustration taking care not to
get any grease in the pawls as they will stick in
operation.
6
2
7
8
2. TWO OR THREE TIMES DURING ACTIVE
SAILING SEASON
10
Strip, clean, check and relubricate.
9
3. END OF SEASON OR BEGINNING OF
NEW SEASON
12
Strip, clean, thoroughly check for damage,
lubricate and reassemble as detailed in the
service manual.
Check condition of motor gearbox. In the event
of corrosion, clean and repaint motor with
marine grade oil based enamel paint.
Electric motors become hot during and for some
time after use. These units have an oil filled
gearbox. DO NOT remove the motor.
•
For more details ask for the free booklet and
manual “How to Service Your Winch” B 2304
“Winch Parts Manual Volume 10” B 2196 and
“Custom Winch Ser vice Manual Volume 8”
B2312 (77-144/2) or download from:
www.lewmar.com/winchser vice.
8. Parts list
8.1 Winch model notes
1.
2.
For winches after February 1995; Items 7, 9 &
10 are replaced by items 13, 45000248 (Bearing
sleeve). These items are not interchangeable.
On winches 50 to 64 the 2 lower bearings have
been replaced by item 5a 45003103 (Plain
Bearing). These items are interchangeable.
Manual winches cannot be converted into electric
versions by adding parts listed here.
16
Models 40–77
14
15
Item Description
Qty
40
44
48
50
54
58
64
1
Centre Stem
1
45000237
45000337
45000437
45000560
45000660
45000760
45000860
2
Gear Spindle
1
45000244
45000344
45000444
45000544
45000744
45000744
45000744
3
Rachet Pawl Gear
1
45000242
45000342
45000342
45000542
45000642
45000742
45000842
Pawl
4
15000094
15000094
15000094
15000301
15000301
15000301
15000301
Spring
4
1260/7
1260/7
1260/7
1260/7
1260/7
1260/7
1260/7
5
Bearing
3
15000378
15000398
15000398
15000017
15000017
15000017
15000017
6
Drive Shaft
1
45000357
45000357
45000357
45000543
45000543
45000543
45000543
7
Key
1
15003287
15003287
15003287
15003287
15003287
15003287
15003287
8
Plain Bearing
1
45000359
45000358
45000358
45000248
45000248
45000248
45000248
9
Base Plate Cover
1
45000229
45000329
45000429
45000529
45000529
45000759
45000759
Base Plate
1
45000228
45000328
45000428
45000528
45000528
45000758
45000758
Dowel
2
45000235
45000235
45000235
45000581
45000581
45000581
45000581
Shaft Seal
1
B6234
B6234
B6234
B6235
B6235
B6235
B6235
11
Insulation Shim
1
45000257
45000257
45000257
45000257
45000257
45000257
45000257
12
HEX Bolt M8x25
4
B0173
B0173
B0173
B0173
B0173
B0173
B0173
13
Washer M8
4
B1207
B1207
B1207
B1207
B1207
B1207
B1207
14
Plate
1
45000350
45000350
45000350
45000350
45000350
45000350
45000350
15
SKT HD screw M6 x 12
5
B0678
B0678
B0678
B0678
B0678
B0678
B0678
CSK HD screw M6 x 16
5
B0524
-
-
-
-
-
-
CSK HD screw M8 x 16
6
-
B0536
B0536
CSK HD screw M8 x 25
6
-
-
-
B0812
B0812
-
-
CSK HD screw M10 x 25
5
-
-
-
-
-
B0567
B0567
4
10
16
22 Ocean Electric Winches
13
11
Ocean Electric Winches
Models 40–77
23
9. Dimensions
8.3 Parts list 66−77
Fig. 8.31
GB
1
8. Parts list
Fig. 9.1
2
B
B
19
20
3
4
D
6
18
D
H
5
H
L
L
7
T*
8
N
T*
S
9
10
S
R
X
12
V
*Optional extension kits to increase ‘T’ are available to special order. Contact your nearest Lewmar office if required.
D
B
H
L
M
N
S
T*
R
V
X
40
44
48
50
54
58
64
66
66/3
77
77/3
73.5
87
93
105
105
118
118
141
141
178
178
154
174
186
209
209
234
234
282
294
294
294
189.4
215.5
228.0
258
270.8
286.3
291.3
302.2
348
348
348
95.4
103.5
108.5
126
135.8
138.8
141.8
142.1
170
174
174
237
238.5
238.5
290
290
290
290
290
290
290
290
38.1
42
44.5
48.5
48.5
52.9
52.9
-
99
130.5
130.5
138.5
138.5
138.5
138.5
144
144
144
147
33.5
64.4
64.4
59.5
59.5
59.5
59.5
67.5
87.5
87.5
87.5
156
186
186
182
182
182
182
188.5
191.1
191.1
191.1
70
72.5
72.5
80
80
80
80
80
80
80
80
112
112
112
11
112
112
112
112
112
112
112
Dimensions in mm
Model
16
*2 Speed versions shown/detailed
Qty
66/*2
77/*2
1
Push Rod Assembly
1
18000181
18000488
2
Spring
1
15044613
15044613
3
‘O’ Ring
1
B2532
B2532
4
Bush
1
15000184
15000184
5
Spring Clip
1
B9941
B9941
6
Drive Dog
1
15300688
15300575
Model
D
B
H
L
M
N
S
T*
R
V
X
7
Seal
1
B2593
B2593
40
2 7/8
6 1/16
7 15/32
3 49/64
9 5/16
1 1/2
3 7/8
1 5/16
6 1 /8
2 3/4
4 3/8
8
Thrust Sleeve
1
45002154
45002154
44
3 7/16
6 55/64
8 3/8
4 1/16
9 25/64
1 5/8
5 9/64
2 17/32
7 1 /4
2 55/64
4 3/8
9
Spring
1
15300489
15300489
48
3 11/16
7 21/64
9 3/8
4 1/4
9 25/64
1 1/4
5 9/64
2 17/32
7 1/4
2 55/64
4 3/8
10
Hollow Dowel
1
45002140
45002140
50
4 1 /8
8 1/4
10 1/8
4 15/16
11 7/16
1 15/16
5 7/16
2 5/16
7 1/8
3 1/8
4 3/8
11
Bush
1
15000569
15000569
54
4 1 /8
8 1/4
10 5/8
5 3 /8
11 7/16
1 15/16
5 7/16
2 5/16
7 1/8
3 1/8
4 3/8
Screw
4
B0686
B0686
58
4 5 /8
9 1/4
11 1/4
5 1 /2
11 7/16
2 1/16
5 7/16
2 5/16
7 1/8
3 1/8
4 3/8
Heli-coil
4
B2423
B2423
64
4 5/8
9 1/4
11 1/2
5 9/16
11 7/16
2 1/16
5 7/16
2 5/16
7 1 /8
3 1/8
4 3/8
13
Roller Bearing
1
15010007
15010007
66
5 9/16
11 1/8
11 15/16
5 9/16
11 7/16
-
5 7/16
2 11/16
7 3 /8
3 1/8
4 3/8
14
Thrust Washer
1
15003286
15003286
66/3
5 9/16
11 1/2
13 11/16
6 1/16
11 7/16
-
5 7/16
3 7/16
7 1 /2
3 1/8
4 3/8
77
7
11 1/2
13 11/16
6 7/8
11 7/16
-
5 7/16
3 7/16
7 1 /2
3 1/8
4 3/8
77/3
7
11 1/2
13 11/16
6 7/8
11 7/16
-
5 7/16
3 7/16
7 1/2
3 1/8
4 3/8
12
Description
M
15
17
Item
V
M
13
14
R
X
11
15
Connecting Shaft
1
45002156
45002156
16
Adaptor
1
45000944
45000944
17
Key
1
15003287
15003287
Motor/Gearbox 12 V
1
48000077
48000077
Motor/Gearbox 24 V
1
48000078
48000078
19
Power Base
1
45000940
45002040
20
Main Spindle - Elec./Hyd.
1
45000947
45002180
18
24 Ocean Electric Winches
Models 40–77
*Optional extension kits to increase ‘T’ are available to special order. Contact your nearest Lewmar office if required.
Dimensions in inches
GB
Ocean Electric Winches
Models 40–77
25
Weight in kg
10. Total weight
11. Model range
Model
Alloy (kg)
All Bronze (kg)
Chrome (kg)
St. Steel (kg)
All Chrome (kg)
40
19
21.2
20.7
20.5
21.2
44
23.3
25.8
25.8
25.5
25.8
48
26
30.1
29.4
28.6
50
30
35.7
34.8
34.7
11.1 Model range 40 – 77
Model
Chrome
Deck Unit
48050202
All Bronze
St. Steel
Deck Unit
48000075
40.6
39.8
38.1
40.6
48040259
All Chrome
Deck Unit
43.7
42.9
40.1
43.7
48040260
All Bronze
Deck Unit
66
42.0
49.7
48.8
46.0
49.7
66/3
48.0
-
54.8
52.0
55.7
77
49.3
-
53.3
53.0
62.3
77/3
51.3
-
57.3
55.0
64.3
40
All Chrome
(lbs)
N/A
12 V ‘E’ Contactor Box
48000087
12 V ‘ELS’ Control Box
48000301
or 0052505
12 V ‘E’ Contactor Box
48000088
24 V ‘ELS’ Control Box
48000144
12 V ‘EVC’ Control Box
48000145
24 V ‘EVC’ Control Box
48000302
or 0052506
24 V ‘E’ Contactor Box
48000081
12 V ‘ELS’ Control Box
48000082
24 V ‘ELS’ Control Box
48000138
12 V ‘EVC’ Control Box
48000139
24 V ‘EVC’ Control Box
48040055
Power Drive Kit
45.2
46.7
44
51.4
56.8
56.8
56.2
56.8
48044255
Alloy
Deck Unit
48
57.3
66.4
64.8
63.0
66.3
48044256
Chrome
Deck Unit
50
66.15
78.7
76.7
76.5
78.7
48044258
St. Steel
Deck Unit
All Chrome
Deck Unit
All Bronze
54
67.4
82.0
80.2
78.5
82.0
48044259
58
73.6
89.5
80.2
84.0
89.5
48044260
96.3
94.6
88.4
96.3
92.4
109.3
107.3
101.2
109.3
66/3
105.6
-
120.6
114.4
122.5
-
126.1
121.0
44
137.7
141.5
26 Ocean Electric Winches
Models 40–77
48050055
12 V Motor/Gearbox
48000117
24 V Motor/Gearbox
48000081
or 0052505
12 V ‘E’ Contactor Box
48000302
or 0052506
24 V ‘E’ Contactor Box
48000083
Power Drive Kit
48054200
Alloy
Deck Unit
48054201
Chrome
Deck Unit
48054204
St. Steel
Deck Unit
48054203
All Chrome
Deck Unit
48054202
All Bronze
48000075
54
Deck Unit
48000116
Deck Unit
12 V Motor/Gearbox
48000076
24 V Motor/Gearbox
N/A
12 V ‘E’ Contactor Box
N/A
12 V ‘E’ Contactor Box
48000089
12 V ‘ELS’ Control Box
48000090
24 V ‘ELS’ Control Box
48000146
12 V ‘EVC’ Control Box
48000147
24 V ‘EVC’ Control Box
48054055
Power Drive Kit
48058200
Alloy
Deck Unit
12 V ‘ELS’ Control Box
48058201
Chrome
Deck Unit
48000084
24 V ‘ELS’ Control Box
48058204
St. Steel
Deck Unit
48000140
12 V ‘EVC’ Control Box
48058203
All Chrome
Deck Unit
48000141
24 V ‘EVC’ Control Box
48058202
All Bronze
Alloy
Deck Unit
48000075
48048256
Chrome
Deck Unit
48048258
St. Steel
Deck Unit
48048259
All Chrome
Deck Unit
N/A
12 V ‘E’ Contactor Box
48048260
All Bronze
Deck Unit
48000091
12 V ‘E LS’ Control Box
48000116
12 V Motor/Gearbox
48000092
24 V ‘ELS’ Control Box
48000117
24 V Motor/Gearbox
48000148
12 V ‘EVC’ Control Box
18000301
or 0052505
12 V ‘E’ Contactor Box
48000149
24 V ‘EVC’ Control Box
48058055
Power Drive Kit
18000302
or 0052506
24 V ‘E’ Contactor Box
48000085
12 V ‘ELS’ Control Box
48048255
48
12 V ‘E’ Contactor Box
24 V Motor/Gearbox
45.6
78.7
24 V Motor/Gearbox
N/A
12 V Motor/Gearbox
46.7
66
48000076
48000117
41.9
64
50
Deck Unit
12 V Motor/Gearbox
48000116
40
112.9
Deck Unit
48040256
35.7
77/3
Deck Unit
35.7
33.4
116.6
St. Steel
All Chrome
64
121.7
Deck Unit
48050204
48050203
58
-
Chrome
Deck Unit
37.2
108.5
Deck Unit
48050201
Alloy
35.6
77
Description
Alloy
48040255
36.4
St. Steel (lbs)
Finish
48050200
30.1
37.2
Chrome (lbs)
Part No.
Description
30.6
All Bronze (lbs)
Model
Finish
54
Alloy (lbs)
GB
Part No.
48040258
Model
Weight in lbs
GB
48000086
24 V ‘ELS’ Control Box
48000142
12 V ‘EVC’ Control Box
48000143
24 V ‘EVC’ Control Box
48048055
Power Drive Kit
58
Deck Unit
12 V Motor/Gearbox
48000076
24 V Motor/Gearbox
N/A
12 V ‘E’ Contactor Box
Ocean Electric Winches
Models 40–77
27
11. Model range
GB
Model
64
66
66 &
66/3
66/3
77
77 &
77/3
77/3
Part No.
Finish
Description
48064200
48064201
48064204
48064203
48064202
48000075
48000076
N/A
N/A
48000093
48000094
48000150
48000151
48064055
48066200
48066201
48066204
48066203
48066202
48000077
48000078
N/A
N/A
18000430
18000431
N/A
N/A
48066205
48066206
48066209
48066208
48077200
48077201
48077204
48077203
48000078
48000077
N/A
N/A
48000022
48000023
N/A
N/A
48077205
48077206
48077209
48077208
Alloy
Chrome
St. Steel
All Chrome
All Bronze
Deck Unit
Deck Unit
Deck Unit
Deck Unit
Deck Unit
12 V Motor/Gearbox
24 V Motor/Gearbox
12 V ‘E’ Contactor Box
12 V ‘E’ Contactor Box
12 V ‘ELS’ Control Box
24 V ‘ELS’ Control Box
12 V ‘EVC’ Control Box
24 V ‘EVC’ Control Box
Power Drive Kit
Deck Unit
Deck Unit
Deck Unit
Deck Unit
Deck Unit
12 V Motor/Gearbox
24 V Motor/Gearbox
12 V ‘E’ Contactor Box
12 V ‘E’ Contactor Box
12 V ‘ELS’ Control Box
24 V ‘ELS’ Control Box
12 V ‘EVC’ Control Box
24 V ‘EVC’ Control Box
Deck Unit
Deck Unit
Deck Unit
Deck Unit
Deck Unit
Deck Unit
Deck unit
Deck Unit
24 V Motor/Gearbox
12 V Motor/Gearbox
12 V ‘E’ Contactor Box
12 V ‘E’ Contactor Box
12 V ‘ELS’ Control Box
24 V ‘ELS’ Control Box
12 V ‘EVC’ Control Box
24 V ‘EVC’ Control Box
Deck Unit
Deck Unit
Deck Unit
Deck Unit
Alloy
Chrome
St. Steel
All Chrome
All Bronze
Alloy
Chrome
St. Steel
All Chrome
Alloy
Chrome
St. Steel
All Chrome
Alloy
Chrome
St. Steel
All Chrome
11.2 Circuit breakers
Model
40
44
48
50
54
58
64
66
77
Voltage
Circuit
Breaker
Circuit Breaker
Part Number
12 V
90
68000349
24 V
40
68000542
12 V
110
68000350
24 V
50
68000348
12 V
120
68000239
24 V
70
68000240
12 V
150
68000351
24 V
90
68000349
* 12 V
250 FUSE
589008
24 V
90
68000349
* 12 V
325 FUSE
589009
68000350
24 V
110
* 12 V
325 FUSE
589009
24 V
110
68000350
12 V
110
68000350
24 V
50
68000348
12 V
110
68000350
24 V
50
68000348
12. Fault finding
GB
Fig. 12.1
Does the winch operate
manually?
Does the winch operate
electrically?
Check polarity.
Motor runs but winch
does not turn
Check for correct assembly,
over use of grease? pawls
stuck. Clean, check for
broken pawl/springs,
regrease lightly.
Winch handle locked in?
(Winches 66–77 only)
Remove handle.
Check drive dog &
spring (items 6 & 7
parts list)
Ensure free
operation.
Power at the battery?
Check terminal
connections.
Check battery
voltage.
Adequate reserve
battery capacity?
Isolator switch/circuit
breaker on?
Switch on.
*Order fuse holder 589006 with fuse indicated.
Check fuse in control box.
Change fuse
(3 Amp).
Check wiring.
NOTE: EVC does NOT
have a fuse.
Power at winch?
Check circuit
diagram.
Check
connections.
Clean & check cables
conductivity.
Check switch connection
in control box.
Reconnect.
Air hose correctly fitted?
Check tube is
sealed, no leaks.
Contact Lewmar
www.lewmar.com
28 Ocean Electric Winches
Models 40–77
Ocean Electric Winches
Models 40–77
29
GB
13. Lewmar limited warranty
LIMITED WARRANTY and
KEY TERMS OF SUPPLY BY LEWMAR
Lewmar war rants that in normal usage and with proper
maintenance its products will conform with their specification
for a period of three years from the date of purchase by the end
user, subject to the conditions, limitations and exceptions listed
below. Any product, which proves to be defective in normal usage
during that three-year period, will be repaired or, at Lewmar’s
option, replaced by Lewmar.
CONDITIONS AND LIMITATIONS
Lewmar’s liability shall be limited to the repair or replacement
of any parts of the product which are defective in materials or
workmanship.
ii Responsibility for the selection of products appropriate for the
use intended by the Buyer shall rest solely with the Buyer and
Lewmar accepts no responsibility for any such selection.
iii Lewmar shall not be liable in any way for Product failure, or
any resulting loss or damage which arises from:
a use of a product in an application for which it was not designed
or intended;
b. corrosion, ultra violet degradation or wear and tear;
c. a failure to service or maintain the product in accordance with
Lewmar’s recommendations;
d. faulty or deficient installation of the product (unless conducted
by Lewmar);
e. any modification or alteration of the product;
f. conditions that exceed the product’s per for mance
specifications or safe working loads.
iv Product subject to a warranty claim must be returned to the
Lewmar outlet which supplied the product for examination
unless otherwise agreed by Lewmar in writing.
v This warranty does not cover any incidental costs incurred for
the investigation, removal, carriage, transport or installation
of product.
vi Ser vice by anyone other than authorised Lewmar
representatives shall void this warranty unless it accords
with Lewmar guidelines and standards of workmanship.
vii Lewmar’s products are intended for use only in the marine
environment. Buyers intending to use them for any other
purpose should seek independent professional advice as to
their suitability. Lewmar accepts no liability arising from such
other use.
A
i
B EXCEPTIONS
Cover under this Warranty is limited to a period of one year from
the date of purchase by the end user in the case of any of the
following products or parts of products:
• Electric motors and associated electrical equipment
• Electronic controls
• Hydraulic pumps, valves and actuators
• Weather seals
• Products used in “Grand Prix” racing applications
C
i
LIABILITY
Lewmar’s liability under this warranty shall be to the exclusion
of all other warranties or liabilities (to the extent permitted
by law). In particular (but without limitation):
30 Ocean Electric Winches
Models 40–77
a
•
Lewmar shall not be liable for:
Any loss of anticipated turnover or profit or indirect,
consequential or economic loss ;
• Damages, costs or expenses payable to any third party;
• Any damage to yachts or equipment;
• Death or personal Injur y (unless caused by Lewmar’s
negligence).
Some states and countries do not allow the exclusion or limitation
of incidental or consequential damages, so the above limitation or
exclusion may not apply to you.
b Lewmar grants no other warranties regarding the fitness for
purpose, use, nature or satisfactory quality of the products.
ii Where applicable law does not permit a statutory or implied
warranty to be excluded, then such warranty, if permitted by
that state or country’s law, shall be limited to a period of one
year from the date of purchase by the end user. Some states
and countries do not allow limitations on how long an implied
warranty lasts, so this limitation may not apply to you.
D PROCEDURE
Notice of a claim for service under this warranty shall be made
promptly and in writing by the end user to the Lewmar outlet which
supplied the product or to Lewmar at Southmoor Lane, Havant,
Hampshire, England PO9 1JJ.
E SEVERANCE CLAUSE
If any clause of this warranty is held by any court or other
competent authority to be invalid or unenforceable in whole or in
part, the validity of the remaining clauses of this warranty and the
remainder of the clause in question shall not be affected.
F OTHER RIGHTS
This warranty gives you specific legal rights, and you may also
have other legal rights, which vary, from state to state and country
to country.
In the case of European States a Consumer customer (as defined
nationally) has legal rights under the applicable national law
governing the sale of Consumer Goods; this Warranty does not
affect those rights.
G LAW
This warranty shall be governed by and read in accordance with
the laws of England or the state or country in which the first end
user is domiciled at the time of purchase of the product.
H DISPUTES
Any dispute arising under this warranty may, at the option of the
end-user, be referred to alternative dispute resolution under the
rules of the British Marine Federation or to the Courts of the
State whose law shall govern the warranty or to the Courts of
England and Wales.
The British Marine Federation may be contacted at Marine House,
Thorpe Lea Road, Egham, England, TW20 8BF


![MFM_NC_7_00 [English]](http://vs1.manualzilla.com/store/data/006337347_1-941bd888a6bb6b638f9564937d1217d4-150x150.png)