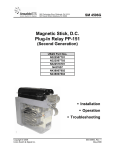
1
SM 4596F
1000 Technology Drive, Pittsburgh, PA 15219
645 Russell Street, Batesburg, SC 29006
POWER TRANSFER VITAL RELAY
PN-150P
(Second Generation)
ASTS USA Part Numbers
N322508 702
703
704
705
803
806
THIS MANUAL SUPERSEDES SM 4596F DATED JULY, 1984
©
Copyright 2013
Ansaldo STS USA, Inc.
SM 4596F, Rev. 0
August 1986
Notices
Proprietary Notice
This document and its contents are the property of Ansaldo STS USA,
Inc. (formerly known as Union Switch & Signal Inc., and hereinafter
referred to as "ASTS USA"). This document is furnished to you on the
following conditions: 1.) That no proprietary or intellectual property
right or interest of ASTS USA is given or waived in supplying this
document and its contents to you; and, 2.) That this document and its
contents are not to be used or treated in any manner inconsistent with
the rights of ASTS USA, or to its detriment, and are not to be copied,
reproduced, disclosed or transferred to others, or improperly disposed
of without the prior written consent of ASTS USA.
Important Notice
ASTS USA constantly strives to improve our products and keep our customers apprised of
changes in technology. Following the recommendations contained in the attached service manual
will provide our customers with optimum operational reliability. The data contained herein
purports solely to describe the product, and does not create any warranties.
Within the scope of the attached manual, it is impossible to take into account every eventuality
that may arise with technical equipment in service. Please consult an ASTS USA local sales
representative in the event of any irregularities with our product.
ASTS USA expressly disclaims liability resulting from any improper handling or use of our
equipment, even if these instructions contain no specific indication in this respect. We strongly
recommend that only approved ASTS USA spare parts are used as replacements.
Copyright© 2013, Ansaldo STS USA, Inc.
1000 Technology Drive, Pittsburgh, PA USA 15219-3120
645 Russell Street, Batesburg, SC 29006
www.ansaldo-sts.com
All rights reserved.
SM 4596F, August 1986, Rev. 0
i
Revision History
Revision History
REV.
0
ii
ISSUE DATE
July 1980
REVISION DESCRIPTION
This service manual supersedes all
previously issued 4596F manuals.
SM 4596F, August 1986, Rev. 0
Table of Contents
Table of Contents
1.
2.
3.
4.
GENERAL INFORMATION ............................................................................................................... 1-1
1.1. INTRODUCTION ...................................................................................................................... 1-1
1.2. DESCRIPTION ........................................................................................................................ 1-1
1.2.1. General ......................................................................................................................... 1-1
1.2.2. Coils .............................................................................................................................. 1-1
1.2.3. Contacts........................................................................................................................ 1-1
1.3. SPECIFICATIONS ................................................................................................................... 1-1
1.3.1. Electrical ....................................................................................................................... 1-2
1.3.2. Mechanical ................................................................................................................... 1-2
INSTALLATION ................................................................................................................................. 2-1
2.1. GENERAL ................................................................................................................................. 2-1
2.2. MOUNTING BASE ................................................................................................................... 2-1
2.3. RELAY INDEXING ................................................................................................................... 2-1
2.4. RECEPTACLE CONTACT SPRINGS .................................................................................... 2-2
2.4.1. Old-Style Base Only...................................................................................................... 2-2
2.4.2. Improved One-Piece Base Only .................................................................................. 2-2
2.4.3. Installing Wires in Receptacle Contact Springs .......................................................... 2-4
2.5. Rectifier Assembly Installation .................................................................................................. 2-4
2.6. Relay Insertion .......................................................................................................................... 2-5
2.7. Stick Contact .............................................................................................................................. 2-6
2.7.1. Typical Circuit Application ............................................................................................. 2-6
2.7.2. Contact Block ................................................................................................................ 2-6
FIELD MAINTENANCE ..................................................................................................................... 3-1
3.1. INTRODUCTION ...................................................................................................................... 3-1
3.2. PERIODIC PERFORMANCE TEST ..................................................................................... 3-1
3.2.1. Cleaning ....................................................................................................................... 3-1
3.2.2. Service Requirements .................................................................................................. 3-1
3.2.2.1. General .......................................................................................................... 3-1
3.2.2.2. In-Service Test ............................................................................................... 3-1
3.2.2.3. Test Procedures ............................................................................................ 3-1
3.3. REPAIR..................................................................................................................................... 3-1
3.3.1. Relays with Defective Internal Rectifiers ...................................................................... 3-1
3.3.2. Relays with Defective External Rectifiers ..................................................................... 3-3
SHOP MAINTENANCE ..................................................................................................................... 4-1
4.1. INTRODUCTION ...................................................................................................................... 4-1
4.2. CLEANING AND INSPECTION ............................................................................................. 4-1
4.2.1. Armature Stop Pin Conditioning.................................................................................. 4-1
4.2.2. Cleaning Relay Contacts ............................................................................................. 4-2
4.2.2.1. Contacts That Are Severely Burned ............................................................. 4-3
4.2.2.2. Contacts with Heavy Tarnish, Slightly Rough or Pitted ................................. 4-3
4.2.2.3. Contacts with Surface Film or Oxidation (Not Pitted) .................................. 4-3
4.3. CHECK-OUT PROCEDURE (Performance Test) ............................................................... 4-3
SM 4596F, August 1986, Rev. 0
iii
Table of Contents
4.4. REPAIRS AND REPLACEMENT ........................................................................................... 4-3
4.4.1. Recommended Tools .................................................................................................... 4-4
4.4.2. Disassembly.................................................................................................................. 4-4
4.4.3. Reassembly .................................................................................................................. 4-4
4.4.4. General Parts Replacement ....................................................................................... 4-4
4.4.4.1. Replacing Contact Block ............................................................................... 4-4
4.4.4.2. Permanent Magnet ........................................................................................ 4-5
4.5. ADJUSTMENTS ...................................................................................................................... 4-5
4.5.1. Recommended Tools and Test Equipment .................................................................. 4-5
4.5.2. Armature Air Gap .......................................................................................................... 4-5
4.5.3. Armature Stroke ............................................................................................................ 4-5
4.5.4. Indicator ........................................................................................................................ 4-6
4.5.5. Contact Adjustment ...................................................................................................... 4-6
4.5.5.1. General........................................................................................................... 4-6
4.5.5.2. Heel Contact Springs ..................................................................................... 4-6
4.5.5.3. Relays with Molded Drivers ........................................................................... 4-7
4.5.5.4. Contact Openings .......................................................................................... 4-8
4.6. Calibration ................................................................................................................................. 4-8
4.6.1. Recommended Test Equipment ................................................................................... 4-8
4.6.2. General ......................................................................................................................... 4-8
4.6.3. Procedure ..................................................................................................................... 4-8
4.6.4. Hold Down Torque ........................................................................................................ 4-9
4.6.5. Contact Resistance ..................................................................................................... 4-10
4.7. MODIFICATIONS ................................................................................................................... 4-10
4.7.1. External Rectifier (Relay Retrofit Kit X451131-3601) ................................................. 4-10
4.7.2. Parts List (X451131-360) ............................................................................................ 4-11
APPENDIX-A.
PARTS LIST ................................................................................................................ A-1
A.1 Parts List for PN-150P Relays with Molded Drivers .................................................................A-1
A.2 Parts List for Old-Style Mounting Base .....................................................................................A-4
4.8. Parts List for Improved Mounting Base for PN-150P Relays ...................................................A-6
iv
SM 4596F, August 1986, Rev. 0
Table of Contents
List of Figures
Figure 2-1. Typical Plug-In Relay and Mounting Base ............................................................................. 2-3
Figure 2-2. Receptacle Spring Installed .................................................................................................... 2-3
Figure 2-3. Rectifier Installation/Wiring Diagram ...................................................................................... 2-5
Figure 2-4. Typical Circuit Application of PN-150P Power Transfer Relay in Highway Crossing
Scheme Utilizing Special Stick Circuit ................................................................................... 2-7
Figure 2-5. Wiring of Contact Block .......................................................................................................... 2-8
Figure 3-1. Relay Base Before Wiring ...................................................................................................... 3-2
Figure 4-1. Armature Stop Pin Location .................................................................................................... 4-3
Figure 4-2. Assembly of Permanent Magnet ............................................................................................ 4-6
Figure 4-3. Heel Contact Spring ............................................................................................................... 4-7
Figure 4-4. PN-150P Relay Test Circuit .................................................................................................... 4-9
Figure A-1. PN-150P Relay with Molded Driver........................................................................................A-3
Figure A-2. Old Style Mounting Base ........................................................................................................A-5
Figure A-3. Improved Mounting Base for PN-150P Relays ......................................................................A-7
List of Tables
Table 1-1. Electrical Specifications ........................................................................................................... 1-2
Table 4-1. Adjustment and Calibration Summary for PN-150P Power Transfer Relays ........................ 4-12
Table 4-2. PN-150P (4-Point) Calibration Values ................................................................................... 4-12
Table 4-3. Parts List for External Rectifier Kit (X438967) .........................................................................A-8
Table 4-4. Parts List for Rectifier Assembly (N451131-3501) ..................................................................A-8
SM 4596F, August 1986, Rev. 0
v
Table of Contents
vi
SM 4596F, August 1986, Rev. 0
General Information
1.
GENERAL INFORMATION
1.1. INTRODUCTION
This manual provides service information for the PN-150P plug-in relay. The PN-150P relay is a
biased relay with a built-in, or external, rectifier for use on AC. This relay is used to detect the
presence of AC power and to switch equipment over to standby power when AC is not present.
The design of the PN-150P relay conforms to all applicable AAR specifications.
1.2. DESCRIPTION
1.2.1. General
The PN-150P power transfer relays are basically DC relays with a, built-in or external, rectifier
which enables them to be operated on AC voltage.
The relay is factory-calibrated to operate across a wide environmental range. All moving parts
are enclosed in a sturdy, transparent, dust and moisture resistant cover. To ensure the relay is
inserted in its proper mounting base, all relays have indexing pins. Relays lock securely in the
plug-in position.
1.2.2. Coils
Coil resistances of PN-150P relay are (depending on part number) 240 or 400 ohms. Refer to
paragraph 1.3.1 to correlate part numbers to coil resistance values. The resistance selected
depends on system voltage and circuitry.
1.2.3. Contacts
Contacts of the PN-150P relay are heavy duty low voltage (L.V.) silver to silver-impregnated
carbon front and back. The 'S' (Stick) #2 contact of this relay is a standard duty contact designed
to open slightly in advance of the other contacts. The purpose of this advance opening is to
eliminate intermittent opening and closing of the power contacts due to high resistance or poor
power supply regulation.
CAUTION
Equipment damage may result if the "S" #2 contact is employed
for any purpose other than its intended use.
1.3. SPECIFICATIONS
The following subsections provide the electrical and mechanical specifications of the
power transfer relays covered in this manual.
SM 4596F, August 1986, Rev. 0
1-1
General Information
1.3.1. Electrical
Relay electrical specifications are tabulated below:
Table 1-1. Electrical Specifications
Part Number
Part Number With
Without Front
Front Testing
Testing
N322508N322508*702, 704
*703, 705
803, 806
Coil
Energization Normal AC
Resistance
Volts
Volts
Ohms
Contacts
4FB H.D. & 1F
4FB H.D. & 1F
240
400
9.0
10.8
10
12
* These relays are presently furnished with a Lexan cover.
Contacts - Heavy duty low voltage silver to silver-impregnated carbon front and back.
Stick contact (#2) is Std. L.V.
Contact Assignments - Arrangement
Numbers
4FB
1, 4, 5, 6
1F LV Stick
2
Note: Relays, N322508-704, -705, and -806 have the rectifier assembly mounted external
to the relay. X438967 must be ordered separately for new installations.
1.3.2. Mechanical
The following mechanical specifications are common to all PN-l50P relays covered in this
manual.
Relay Dimensions:
Height 7-1/16" (17.93 cm)
Width 2-7/16" (6.19 cm)
Depth 8-3/8" (21.27 cm)
Temperature:
-40° F (-40° C) to +185° F (+85° C)
Indexing:
Refer to Section 2.3
Weight:
6-3/4 Lbs. (3.07 kg)
Mounting Base:
N438562 (Old-Style)
N451376-0302 (Improved Style)
Mounting Base Weight:
17.5 oz. (Old-Style)
9.5 oz. (Improved Style)
Mounting Base Dimensions: Height 7-15/16" (20.16 cm)
Width 2-7/16" (6.19 cm)
Depth 2-7/16" (6.19 cm) (Old-Style)
Depth l-25/32" (4.52 cm) (Improved Style)
1-2
SM 4596F, August 1986, Rev. 0
Installation
2.
INSTALLATION
2.1. GENERAL
Relays plug directly into a mounting base that is secured to a rack. The only installation
instructions required are for the mounting base and the rectifier assembly for those relays
designed or modified for external rectifiers.
2.2. MOUNTING BASE
Secure the mounting base directly to the rack using the hardware furnished. All wiring
terminates at the rear of the mounting base to solderless terminals (receptacle contact springs).
Mounting base details are shown in Figure A-2 (Old-Style Base) and Figure A-3 (Improved
Base) of the Appendix.
2.3. RELAY INDEXING
Relays are factory equipped with indexing pins to prevent insertion of an incorrect relay into a
mounting base. Each relay is accompanied by an indexing plate that is applied to the mounting
base at the time of initial installation. A typical plug-in relay with indexing pins and base with
indexing plate is shown in Figure 2-1.
The following data defines the indexing that has been established for relays covered by this
manual.
a. The index code always consists of four figures (such as 0001, 0002, or 0101) and is used
for both the relay and the indexing plate on the mounting base.
b. The index code for each relay can be determined from the relay part number and its suffix
which is marked on the name plate attached to the front of the relay. The first two digits
of the index code are the last two digits of the part number, and the second two digits of
the index code are the last two digits of the suffix. The index number thus obtained
should agree with the placement of the indexing pins in the numbered vertical rows on
the back of the relay starting with the top pin and reading down.
c. The index code for each mounting base is determined by the placement of the holes in
the numbered vertical rows of the large white nylon indexing plate that is affixed to the
front of the mounting base. This indexing plate should not be removed from the
mounting base unless it is damaged or the indexing is to be purposely changed to
accommodate a relay of a different part number. Discard the indexing plate that comes in
a bag tied to the handle of all new relays, unless it is needed for replacement of damaged
indexing plate or for application to a new mounting base.
SM 4596F, August 1986, Rev. 0
2-1
Installation
WARNING
Never drill new holes in a base indexing plate which will permit
application of relays with different part numbers, or change
indexing pins on the back of a relay unless it is being converted to
a new part number. Otherwise, a hazard will be created which may
compromise safety circuit functions.
2.4. RECEPTACLE CONTACT SPRINGS
2.4.1. Old-Style Base Only
The mounting base will normally be equipped with the required quantity of J680165 solderless
receptacle contact springs, and will accommodate one or two #14 or #16 wires. It can, however,
be equipped with receptacle contact springs for one or two #10 or #12 wires (J680181), or for
one or two #18 or #20 wires (J680179). Make certain which type of solderless receptacle contact
springs accompany the mounting base before proceeding with their installation.
2.4.2. Improved One-Piece Base Only
The one piece mounting base with hardware (N451376-0302) includes a full complement of
receptacle contact springs (M451142-2702) to accommodate one or two #14-#16 wires,
mounting fasteners, and tags. It can, however, be equipped with receptacle contact springs for
one or two #10-#12 wires (M451142-2703), or for one or two #18-#20 (M451142-2701). Make
certain which type of solderless receptacle contact springs accompany the mounting base before
proceeding with their installation..
Each solderless receptacle contact spring should be inspected for physical damage and
straightness before proceeding with installation.
The following is recommended when installing solderless receptacle contact springs:
a. Receptacle contact springs must be inserted into the base with the lock side down (See
Figure 2-2).
b. Make certain that the lanced tab is slightly compressed when the receptacle contact
spring is inserted along the top of the cavity. The lanced tab could have been bent during
handling, and therefore would not provide the required contact pressure after the relay is
inserted. If the lanced tab does not touch, pull it up slightly using fingers or a suitable
tool.
c. After insertion, pull firmly on the wire to make certain the receptacle contact spring is
locked in the receptacle.
2-2
SM 4596F, August 1986, Rev. 0
Installation
INDEXING PINS
0 1 23
4567
8 9
INDEX PLATE
4C5.0002.00
RELAY
MOUNTING BASE
Figure 2-1. Typical Plug-In Relay and Mounting Base
Figure 2-2. Receptacle Spring Installed
SM 4596F, August 1986, Rev. 0
2-3
Installation
2.4.3. Installing Wires in Receptacle Contact Springs
Use the following procedure to ensure a good electrical and mechanical connection between the
conductor wire and the receptacle contact spring. The following table identifies the correct
crimping tool to be used when installing wires in receptacle contact springs.
Crimping Tool
J397138
J397139
J397188
Wire Size
#10/#12 AWG
#14/#16 AWG
#18/#20 AWG
Old Style
Receptacle
Contact Spring
Improved Base
Receptacle
Contact Spring
J680181
J680165 (Standard)
J680179
M451142-2703
M451142-2702
M451142-2701
a. Strip 3/16 in. (0.187 in. or 0.47 cm.) of insulation from the end of the wire.
b. Place the receptacle contact spring into the jaws of the proper crimping tool. When using
only one terminal, of any wire size, use the shortest terminal.
c. Partially close the crimping tool jaws against the receptacle contact spring to hold it in
place. (Do not crush the receptacle contact spring barrel at this time.)
d. Insert the stripped end of wire all the way into the receptacle contact spring barrel.
Squeeze the tool handles until crimping is completed and the jaws release. When using
both terminals, it is more convenient to attach the first wire to the longest terminal.
e. Remove the crimped receptacle contact spring from the tool and inspect the connection.
Make certain that the wire is flush with the crimped barrel and that there are no loose
strands of wire.
2.5. Rectifier Assembly Installation
See Figure 2-3.
NOTE
This Rectifier Assembly installation is only necessary for relays
N322508-704, -705, -806 or relays that are to be modified to have
external electronic parts.
a. Remove the relay from the mounting base.
b. Place the Rectifier Assembly into position on the rear of the mounting base and attach,
using the appropriate (#6 or #8) hardware furnished in the kit.
c. Select the proper size receptacle contact springs and crimp onto the red and black leads.
d. Insert the red lead into the contact space +A (Al) and the black lead into -A (C1). Press
the Faston connectors onto the bridge rectifier; red to (+), black to (-).
2-4
SM 4596F, August 1986, Rev. 0
Installation
e. Crimp the external AC leads and the white leads onto the proper receptacle contact
springs. Insert the springs into spaces +B (A2) and -B (C2).
f. Perform a calibration check (Section 4.6) and then press the Faston connectors onto the
lower PC board terminals.
45
OR
B
40
A
EXTERNAL
AC WIRING
1
1
2
2
5
25
10
50
BLACK
AC
+
_
AC
55
RED
30 OR 15
35
20
60
60
WHITE
WHITE
C
B
A
7
7
8
8
80
9
9
70
10
10
11
11
12
65
12
B
A
4C5.0068.00
C
Figure 2-3. Rectifier Installation/Wiring Diagram
2.6. Relay Insertion
Orient the relay to the mounting base with the push rod to the left-hand side; then plug the relay
into the base. The relay should be pushed firmly against the mounting base while depressing the
latch rod. After the relay is completely seated in the base, release the latch rod and pull on the
handle to ensure that the relay has locked in place.
SM 4596F, August 1986, Rev. 0
2-5
Installation
2.7. Stick Contact
A standard low voltage contact has been added at 2F, 2H (B7, B8) base terminals of this relay for
stick circuit use only. It is recommended to be used in service. The stick contact of this relay is
designed to open slightly in advance of the other contacts. The purpose of this advance opening
is described below under typical circuit application.
CAUTION
Equipment damage may result if the stick contact is employed for
any purpose other than its intended use.
2.7.1. Typical Circuit Application
The PN-150P relay is made with one contact adjusted to open slightly in advance of the others.
This contact is marked "S" in the circuit diagram of Figure 2-4 (marked 2F-2H in Figure 2-4),
and is for the purpose of making the relay adaptable to a special stick circuit designed to
eliminate one type of difficulty that is common to all power transfer units. This difficulty occurs
under certain conditions, such as high resistance in the AC system, in fuse or wire connections,
or poor regulation of the transformer supplying the AC load, which might permit the AC voltage
to rise sharply as soon as the load is removed by the opening of the front contacts of the PN150P relay. This would cause an intermittent opening and closing of the contacts which would be
unsatisfactory both as to indication of the signals and service of the contacts.
The special stick circuit as shown in Figure 2-4 is so arranged that when the contact marked "S"
opens, the circuit of the relay is opened so that it drops regardless of any changes which may
occur in the AC voltage thereafter. After the relay has dropped, the load will be supplied by the
standby source of power until the crossing relay or track relay which applied the voltage to the
load, has picked-up to stop the display of the highway crossing indication. The picking up of the
control relay provides a pick-up circuit for the PN-150P relay.
2.7.2. Contact Block
Wiring the contact block is shown in Figure 2-5. Refer to paragraph 4.4.4.1 in this service
manual when replacing the contact block. The present relay, -702, -703, and -803 is not a direct
replacement of earlier design relays, -002 and -003. The stick contact has been changed from #6
to the #2 location and the mounting base wiring must be changed according to Figure 2-5.
2-6
SM 4596F, August 1986, Rev. 0
Installation
BX
NX
BATTERY
XR
OR
XTPR
AC
AC
C+
C-
+A
2H
BX
OR
B
+
-A
S
2F
BX
TO LIGHTS
B
4C5.0069.00
NX
OR
N
NX
N
Figure 2-4. Typical Circuit Application of PN-150P Power Transfer Relay in
Highway Crossing Scheme Utilizing Special Stick Circuit
SM 4596F, August 1986, Rev. 0
2-7
Installation
-A
+A
-B
+B
INTERNAL
RECTIFIER
EXTERNAL
JUMPERS
2F
1F
C+
2H
1H
AC
AC
1B
6F
5F
4F
6H
5H
4H
6B
5B
4B
NOTE:
CONTACTS SHOWN ARE
FOR 4-POINT RELAY
2F-2H STICK CONTACT
4C5.0070.00
C-
Figure 2-5. Wiring of Contact Block
2-8
SM 4596F, August 1986, Rev. 0
Field Maintenance
3.
FIELD MAINTENANCE
3.1. INTRODUCTION
This section provides the necessary periodic preventive maintenance procedures which must be
performed to ensure continuous, proper, and efficient operation of the PN-150P relays covered in
this manual. Field maintenance covers periodic inspections and performance tests.
3.2. PERIODIC PERFORMANCE TEST
3.2.1. Cleaning
Before inspecting and testing the relay, if necessary use a soft cloth to clean the exterior to
remove any dirt or dust that may have collected. A safe cleaning solution of alcohol and water
may be used for removal of accumulated dirt, grease, etc.
3.2.2. Service Requirements
3.2.2.1. General
All vital relays must be inspected and tested at least once every four (4) years. The tests and
inspections are to include: pick-up current, drop-away current, timing of slow operating and
timing relays; and visual inspection of contacts for damage or misalignment, corrosion or other
contamination of parts, loose parts inside of the cover, broken seal, and cracked or broken cover.
All vital relays installed in locomotive or car-carried equipment are to be removed from service
and adjusted, repaired and tested at least once every six (6) years.
Relays not passing the above stated tests and inspections must be replaced and not returned to
service until the operating characteristics and conditions are in accordance with ASTS USA
specifications.
3.2.2.2. In-Service Test
It is recommended that line relays in service be removed from service for shop repairs when one
or more of the following conditions occur: (Use as a reference the calibration values given in
Table 4-2.)
a. If the Drop-Away value (D. A.) falls below 90% of the new relay value.
b. If the Pick-Up value increases to more than 110% of the new relay value.
3.2.2.3. Test Procedures
Test the operating characteristics of the PN-150P relays as given in Section 4.6 Calibration.
3.3. REPAIR
3.3.1. Relays with Defective Internal Rectifiers
If it is found that a PN-150P relay failure is due to a defective internal rectifier, a relay retro-fit
kit (X451131-3601) can be used to disconnect the internal defective rectifier and mount its
replacement externally on the mounting base. This will convert relays with part numbers
N322508-702,-703, and 803 to relay part numbers N322508-704, -705, and -806 respectively.
SM 4596F, August 1986, Rev. 0
3-1
Field Maintenance
This repair causes the internal rectifier to be no longer functional and can be done in an
emergency, however, it is recommended that the relay part number be changed along with the
indexing and index plate so that the relay cannot be placed into a base that has not been
modified.
a. Remove the external wire jumpers from (+A) to (C+), and from (-A) to (C-), and discard.
See Figure 3-1.
b. Remove the external AC wiring from the (AC) spaces and then complete the Rectifier
Assembly Installation procedure found in Section 2.5.
-A
+A
-B
+B
INTERNAL
RECTIFIER
EXTERNAL
JUMPERS
(REMOVE AND
DISCARD)
2F
1F
C+
2H
1H
AC
AC
1B
6F
5F
4F
6H
5H
4H
6B
5B
4B
4C5.0071.00
EXTERNAL
AC WIRING
C-
Figure 3-1. Relay Base Before Wiring
3-2
SM 4596F, August 1986, Rev. 0
Field Maintenance
3.3.2. Relays with Defective External Rectifiers
After it has been determined that the failure of the relay is due to a defective rectifier assembly:
a. Disconnect the two leads (Figure 2-3, Item 60) and the two leads (Figure 2-3, Items 50
and 55) from the rectifier assembly.
b. Remove the two mounting screws and hardware. Replace the defective assembly with a
new one and attach with the hardware.
c. Reconnect the red and black leads (50 and 55).
d. Perform a calibration check (Section 4.6), and if the relay meets the calibration values,
press the remaining two Faston connectors onto the lower two terminals of the rectifier
assembly thereby connecting the relay into service.
SM 4596F, August 1986, Rev. 0
3-3
Field Maintenance
3-4
SM 4596F, August 1986, Rev. 0
Shop Maintenance
4.
SHOP MAINTENANCE
4.1. INTRODUCTION
This section provides the information necessary to perform shop level repairs of the PN-150P
relays covered in this manual. In general, relays arriving at the shop for repair have been checked
in the field and have been found to perform unacceptably or have been physically damaged.
4.2. CLEANING AND INSPECTION
Before inspecting the relay and initiating repairs, use a soft cloth to clean the exterior carefully to
remove any dirt or dust that may have collected. A safe cleaning solution of alcohol and water or
common laundry detergent may be used for removal of accumulated dirt, grease, etc.
Inspect the relay exterior for signs of physical damage, such as cracked or broken cover, cracked
or damaged housing, and damaged and or missing contact block terminals and indexing pins. If
severe damage is found, a careful inspection of the interior components should be made for
physical damage.
Remove the cover and clean the surface between the armature and the pole faces, especially the
stop pin area, using a lint-free cloth and alcohol.
Proceed with stop pin and relay contact cleaning, using the following recommended cleaning
materials:
Recommended Cleaning Materials
Order Reference
A relay contact cleaning kit, part number X451646-0901,
is available that consists of the following three items, or
which may be ordered individually:
Burnishing Tool, P. K. Neuses Co. No. 3-316
J397187 (pkg. of 5)
Burnishing Tool, P. K. Neuses Co. No. N318 (Heavy Duty)
J397187-001 (pkg. of 5)
Paper Strip, strips cut from 67 pound white
Springhill Vellum Bristol Paper
J793094 (pkg. of 50)
Also recommended (commercially available):
Emery Paper, Wet or Dry, 600 Grit, cut in strips
Freon TF, Miller Stephenson MS180
Stop Pin Conditioning Graphite Stick
(commercially available)
(commercially available)
(N4521151-3203)
4.2.1. Armature Stop Pin Conditioning
The following instructions are for cleaning the armature stop pin (See Figure 4-1). This
procedure should be followed wherever a relay is shopped for failure to meet its calibration
specifications during scheduled field inspection and tests.
SM 4596F, August 1986, Rev. 0
4-1
Shop Maintenance
a. After removing the cover, clean the stop pin and adjacent surface by saturating a paper
strip (contained in J793094) with Freon TF and then placing it between the armature and
pole face. Apply moderate pressure on the armature and draw the paper out. Continue
until no residue is removed from the surfaces. Dry the surfaces using a clean strip of
paper.
b. The next step is to apply a dry lubricant such as graphite to the relay stop pin and its point
of contact on the pole face.
(1) Insert the Stop Pin Conditioning Graphite Stick (N451151-3203) between the
armature stop pin and its point of contact on the pole face with graphite against stop
pin. While applying moderate pressure on the stick, pull the stick back and forth in a
circular motion over the stop pin, continuing several seconds to ensure a sufficient
amount of graphite transfer.
It is not necessary to observe a significant deposit of graphite since most of what
is required can only be determined by means of a microscope.
c. Recheck relay calibration and prepare relay for return to service.
4.2.2. Cleaning Relay Contacts
This section covers recommended methods for the preparation and cleaning of relay contacts.
After contacts have been dressed and/or after adjustments have been made to meet calibration
requirements, the contacts should be cleaned in accordance with the following procedures.
CAUTION
The following Caution statement is only mandatory for clear
Lexan molded drivers. Deviation from this may result in damage to
the equipment.
If it is desired to use an aerosol spray for cleaning relay contacts,
only virgin Freon TF (available from Miller Stephenson Chemical
Co. as MS-180 or MS-230 contact RE-NU FREON TF) is
approved by ASTS USA for cleaning contacts with the driver
attached to the contact springs.
NOTE
When using the paper strip, clean the back contacts first, then the
front contacts last. Discard the paper strips when dirty.
4-2
SM 4596F, August 1986, Rev. 0
Shop Maintenance
SAFETY PINS
4C5.0072.00
STOP PIN
Figure 4-1. Armature Stop Pin Location
4.2.2.1. Contacts That Are Severely Burned
a. Using a 600 grit emery paper strip folded with the grit side out so that both contacts can
be burnished simultaneously, stroke the contacts in the direction of contact wipe.
b. Using the burnishing tool, stroke the contacts several times in the direction of contact
wipe.
c. Place the paper strip between the open contacts, then close the contacts and withdraw the
paper strip.
d. Repeat step "c" several times, if necessary.
e. Using the Freon TF spray, give the contacts a degreasing/wash.
f. Place the paper strip between the open contacts, then close the contacts and withdraw the
paper strip.
g. Repeat step "f" several times if necessary.
4.2.2.2. Contacts with Heavy Tarnish, Slightly Rough or Pitted
Perform the procedure in Subsection 4.2.2.1, Steps "b" to "g".
4.2.2.3. Contacts with Surface Film or Oxidation (Not Pitted)
Perform the procedure in Subsection 4.2.2.1, Steps "f" and "g".
4.3. CHECK-OUT PROCEDURE (Performance Test)
Perform calibration in accordance with Section 4.6.
4.4. REPAIRS AND REPLACEMENT
Since the contacts are the only wearing parts in this relay, in most cases the relay can be restored
to proper operation by dressing (Section4.2.2.1) and readjusting (Section 4.5.5) them.
SM 4596F, August 1986, Rev. 0
4-3
Shop Maintenance
4.4.1. Recommended Tools
Twist Drill - #42
Screw Driver - Torque Measuring
4.4.2. Disassembly
Dismantle the relay only to the degree necessary to complete repairs. Refer to the parts list
appendix for part information and location of parts. In general, to dismantle the plug-in relay,
proceed with the following sequence:
a. Remove relay cover seal.
b. Carefully remove plastic cover.
c. Remove/disassemble relay components as required.
d. Remove contacts/contact block as required.
e. Remove permanent magnet as required.
NOTE
These magnets are of a special alloy that permits retention of
proper strength indefinitely if not abused. When not in place on
relays, magnet assemblies should be kept separated from other
magnetic objects and the screws, which hold the extension to the
magnet, be kept tight. Should a magnet become weakened, it
should be returned to the factory for recharging where there is
special equipment to fully charge the magnet. It will then be aged
it to its best working strength.
4.4.3. Reassembly
Reassembly is accomplished generally in the re terse order of disassembly. Do not overtighten or
force parts when reassembling a relay. The following paragraphs provide additional instructions
to be followed during reassembly of this relay.
Upon completion of reassembly, calibrate the relay as directed in paragraph 4.6.
4.4.4. General Parts Replacement
4.4.4.1. Replacing Contact Block
If the contact block is to be replaced by another, remove the old block, then use a small punch to
remove the small dowel pins. Attach the new block with the four screws. Run a #42 drill (0.0935
Dia.) thru the dowel pin holes into the epoxy contact block for a total depth of 9/16" + 1/32 - 0.
NOTE
Replacement contact blocks MUST be of the same general design.
4-4
SM 4596F, August 1986, Rev. 0
Shop Maintenance
Carefully install the dowel pins, tapping in until they are flush with the surface.
If it is necessary to install a used contact block from another relay, remove only one of the dowel
pins from the frame. Carefully press the block on the remaining pin and fasten in place with the
screws. One dowel pin will adequately hold the block in place. Install the contact block
mounting screws and torque them to 10 ± 2 inch pounds
Do not overtighten or force parts when reassembling a relay. Upon completion of reassembly,
calibrate the relay as directed in Section 4.6.
4.4.4.2. Permanent Magnet
The polarity of the magnet should be such that the top end farthest from the two notched holes
will attract the end of a compass needle which points toward geographic south.
NOTE
The magnetic shunt is not used in this relay.
The permanent magnet assembly should be applied to the relay as shown in Figure 4-2. Tighten
the two long screws holding the magnet assembly to the pole piece sufficiently to straighten the
curved strap against the magnet. Bend the nut locks securely up against the sides of the screw
heads.
4.5. ADJUSTMENTS
All adjusting and testing must be done with the relay in its normal operating position.
4.5.1. Recommended Tools and Test Equipment
Item
Part Number
Gap Gauge - 0.001 in. to 0.200 in.
Gram Gauge – 40 - 350 Grams
Driver Removal Tool
Bending Tool
N451151-2801
J397164-0039
4.5.2. Armature Air Gap
The armature air gap is the distance from armature to pole face, with the stop pin against the pole
face. It should not at any point be less than 0.038', minus 0.002'. At the stop pin, light must not
be visible across more than 25% of the diameter of the pin. Light must be visible between the
hinge plate on the armature and the forward pole face. Safety stop pins should have minimum of
0.001 inch clearance when the armature is at full stroke.
4.5.3. Armature Stroke
Armature stroke is the distance from stop pin to pole face, with the armature resting against the
permanent magnet assembly. Assemble the magnet to the relay frame with the magnet held
against the small step in the pole face, using a steel screw on the left side and a brass screw on
the right side. With a spacer between stop pin and pole face equal to the value for Test #1 called
for in Table No 1, adjust and tighten the magnet extension, to be just touching the two stop pins
on the bottom of the armature. Magnet hold down screws to be torqued to 15 + 2 inch pounds.
SM 4596F, August 1986, Rev. 0
4-5
Shop Maintenance
With the stop pin spacer removed and the armature released, both back stop pins should make
contact with the permanent magnet extension over at least 50% of the diameters and neither
should project over the edge of the permanent magnet extension. In this position, the air gap at
the permanent magnet extension face should average 0.004 inch parallel and must not be less
than 0.003 inch at any point. This is the physical air gap from plated magnet extension to plated
armature.
ADJUSTABLE SHUNT
(NOT USED)
MAGNETIC SHUNT
MAGNET
POLE PIECE
4C5.0073.00
MAGNET EXTENSION
REFERENCE
DIMENSIONS
PHOSPHOR BRONZE OR
STEEL SCREW AS REQUIRED
Figure 4-2. Assembly of Permanent Magnet
4.5.4. Indicator
Adjustment of the armature position indicator after calibration should be made so that the bottom
of the red painted surface is 1-13/16-inch from the main body of the relay frame. Viewed from
the front of the relay with cover applied, the indicator should be in full view with the armature in
the deenergized position, and should be hidden with the armature in the energized position.
4.5.5. Contact Adjustment
4.5.5.1. General
The fingers supporting the contact springs should be straight and approximately at right angles to
the relay base. All adjustments of contacts should be made using contact adjusting tool J3971640039. The contact driver can be removed by using the molded contact driver removal tool
N451151-2801. Because of the effect of the weight of the contact tips, all checks of contact
adjustment should be made with the relay in the normal upright position. Best contact stability is
obtained by slightly overbending the spring and returning it to the desired position.
4.5.5.2. Heel Contact Springs
Before adjusting these heel springs it should be determined that the dimensions exist as shown in
Figure 4-3 and that the bifurcated parts have a slight trapped pressure against the main member.
4-6
SM 4596F, August 1986, Rev. 0
Shop Maintenance
4C5.0074.00
.100"
.094"
Figure 4-3. Heel Contact Spring
4.5.5.3. Relays with Molded Drivers
The contacts are to be adjusted to just touch when using "closed" spacer. As a guide, there
should be no more than 2 grams spring pressure between the contact tips. For any contact
adjusted closed (using nominal spacers per Table 4-1), a 0.005" thicker spacer for the fronts and
a 0.005" thinner spacer for the backs must allow the contacts to be open.
If the heel springs show free play in the driver slots when the armature is held mid-stroke
(neither fronts nor backs touching), the driver must be removed and the heel spring driver clip
must be adjusted to 0.094 to 0.100 between the top of the dimple and the bottom of the heel
springs.
Adjustment Procedure
a. Plug relay into appropriate mounting base on test stand.
b. Check heel springs for bow and adjust as required.
c. Place contact driver in position on relay.
d. Insert front contact closed spacer per Table No. I over main stop pin.
NOTE
The value for the stick contact spacer is also given in Table 4-1.
e. Adjust front contacts to touch.
f. Insert back closed contact spacer marked per Table 4-1over main stop pin.
g. Adjust back contacts to touch.
h. Pull contact driver from relay. (Tool #N451151-2801)
i. Bend heel springs to approximately 0.005 min. from front contact (light perceptible).
Check that heel springs are approximately in line.
j. Place driver on relay.
k. Use front closed spacer per Table 4-1 and adjust front contacts to just close (0.048
typically).
l. Remove spacer and replace with front open spacer (per Table 4-1) and adjust front
contacts to just open (0.043 typically). Note the value for the stick contact also.
m. Remove spacer and replace with back close spacer (per Table 4-1) and adjust back
contacts to just closed (0.086 typically).
SM 4596F, August 1986, Rev. 0
4-7
Shop Maintenance
n. Remove spacer and replace with back open spacer (per Table 4-1) and adjust back
contacts to just open (0.081 typically).
o. Check to see if heels are floating. Adjust heel clip as required.
4.5.5.4. Contact Openings
In obtaining proper calibration it is permissible to vary the adjustments given in the foregoing
paragraphs, however:
a. With the armature in its fully released position, the front contacts must be open at least
0.050 inch.
b. When a front contact is just making, the corresponding back contact must be open more
than 0.020 inch.
4.6. Calibration
4.6.1. Recommended Test Equipment
Nomenclature
Part/Model/Type Number
Filament Transformer
Variable Transformer (Variac)
Digital Multimeter
120 VAC Primary, 12.6 VAC Secondary
120 VAC, 60Hz input
HP3435A
4.6.2. General
The calibration shall be obtained by adjusting the coil spring to meet the approximate
requirements outlined in the tables. The adjustable shunt should then be bent out if necessary to
obtain approximately 280 grams hold down force measured at the bottom of the operating arm.
Reset the coil spring to give a pick-up very close to, but no higher than the value given in Table
4-2. If the relay does not meet the calibration value, readjust the shunt to give a hold down force
in Table 4-1 and change the contact spacers.
All relay adjustments normally can be made by adjusting the coil spring and/or contacts within
the allowable limits.
4.6.3. Procedure
Connect power transfer relay test circuit, as shown in Figure 4-4, and proceed as follows, using
the referenced values for the specific relay given in Table 4-2.
a. Set switch S1 to the OFF position.
b. Set voltmeter M1 to appropriate AC voltage range (Refer to Table 4-2).
c. Set Variac output control to minimum output setting.
d. Connect circuit to 120 VAC, 60Hz line.
e. Set switch S1 to the ON position.
f. Adjust Variac output control up to, but no higher than the Normal/Charge voltage level as
given in Table 4-2 where relay energizes and armature picks up through full stroke.
4-8
SM 4596F, August 1986, Rev. 0
Shop Maintenance
g. Slowly decrease the Variac output until the armature just causes the front contacts to
open and back contacts to close. Voltmeter M1 should indicate between the dropaway
voltage limits given in Table 4-2.
NOTE
Drop-away and Hesitation. When measuring the drop-away, it
shall be considered acceptable to have the armature stop pin move
away from its pole piece by 0.005 inches and not go to full release.
However, after once the armature begins to move, after further
reduction in voltage, it must without any hesitation transfer from
the front to the back contacts. A hesitation or "hang" is defined as
the front contacts being closed with little or no contact pressure.
h. Further decrease the Variac output until the full back contact compression is achieved.
The voltmeter M1 should indicate no less than the dropaway with full back contact
compression voltage given in Table 4-2.
i. Immediately after drop-away value has been measured, reduce the current to zero. Open
the circuit for one second, and again apply current, gradually increasing it until the
armature moves away from the permanent magnet with a definite sudden motion. The
voltage at which this occurs should not be more than 95% of the actual pick-up value
measured on the tested relay. If it is, reduce the magnet hold down force by moving the
adjustable shunt closer to the magnet within allowable limits and/or increase the spacer
for adjusting the back contacts.
OFF
S1
ON
T1
M1
T2
AC
V
12.6 VAC
AC
POWER
TRANSFER
RELAY
UNDER TEST
4C5.0075.00
120 VAC
60HZ
(ISOLATED
LINE)
Figure 4-4. PN-150P Relay Test Circuit
j. Continue increasing current until the armature picks up to close the front contacts,
moving to the stop pin at the same energization value. The voltage at which this occurs
should not be more than that specified in the calibration tables for Pick-Up and Working.
4.6.4. Hold Down Torque
After the relay has been adjusted to meet calibration requirements, the force required to move the
armature away from the permanent magnet extension should be approximately 250 grams for the
SM 4596F, August 1986, Rev. 0
4-9
Shop Maintenance
4 point relays. This value should be measured at the bottom and center of the molded driver and
is the upward force in grams required to move the armature away from the permanent magnet.
When measured, the value must not be less than the value given in Table 4-1.
4.6.5. Contact Resistance
Resistance of front contacts should be measured with the armature in its full-stroke position, and
resistance of back contacts should be measured with the armature fully released. Cleaned contact
resistance should not exceed the following values.
Type of Contacts
Ohms Front Contacts
Silver to Silver-Impregnated Carbon
Heavy Duty Silver to Silver-Impregnated Carbon
0.09
0.09
Ohms Back Contacts
--0.05
4.7. MODIFICATIONS
4.7.1. External Rectifier (Relay Retrofit Kit X451131-3601)
Existing PN-150P relays with internal rectifiers can be modified to have an external rectifier
attached to the mounting base. Relays with part numbers N322508-702, -703, and -803 can be
converted to N322508-704, -705, and -806 respectively. This is accomplished by rewiring the
base and mounting the external rectifier. The procedure used is given in Section 3.3.1.
This rewiring causes the internal rectifier to be no longer functional and the relay part number,
indexing and index plate must be changed so that the relay cannot be installed in a base that has
not been modified. In the Relay Retro-Fit Kit (X451131-3601) is a new name plate, index plate
and index pin. Stamp the new part number on the name plate. Remove the index pin in the
number 2 or 3 location (depending on the relay to be revised). Using the new index plate as a
guide, drill a #42 hole ¼" deep at the appropriate new pin location and insert the pin.
After modifying the relay, a calibration check (Section 4.6) must be made using an externally
mounted rectifier. It is recommended that a rectifier board, N451131-3501, be available in the
shop for calibration purposes.
4-10
SM 4596F, August 1986, Rev. 0
Shop Maintenance
4.7.2. Parts List (X451131-360)
See Figure 2-3.
Item
5
10
15
20
25
30
35
40
45
50
55
60
65
70
75
80
Description
Rectifier Assembly
Screw, 6-32 x 3/8, Rd. Hd. Stl.
Washer, #6 Flt. Stl.
Washer, #6 Lock, Bz.
Screw, 8-32 x 3/8, Rd. Hd. Stl.
Washer, #8 Fit. Stl.
Washer, #8 Lock
Receptacle Contact Spring
Receptacle Contact Spring
Lead, Black, 6-1/2"
Lead, Red, 6-1/2'
Lead, White, 4"
Index Plate
Name Plate
Print, Drawing
Index Pin
SM 4596F, August 1986, Rev. 0
Part Number
N451131-3501
J525031
J047996
J047708
J525128
J047745
J047709
M451142-2702
J680165
N397832-005
N397832-004
N395673
J078457
M451496-6401
D451131-36
J487090
4-11
Shop Maintenance
Table 4-1. Adjustment and Calibration Summary for PN-150P Power Transfer
Relays
4 Point Relay
Stick
Cont.
Nominal Minimum Maximum
Test Number
1.
Permanent Magnet
Assembly
2.a Front Contact
Adjustment
2.b Front Contact
Adjustment
3. Back Contact
Adjustment
4. Back Contact
Adjustment
5.a Front Contact
Openings
2F
2P
Remarks
Main Stop-Pin Spacer For Adjustment.
Back Stop Pins Touching.
Main Stop-Pin Spacer.
Contact Just Open.
Main Stop-Pin Spacer.
Contact Must Close.
Main Stop-Pin Spacer.
Contact Just Open.
Main Stop-Pin Spacer.
Contact Just Close.
0.145"
0.135"
0.155"
Nom
Min
0.053"
0.048"
0.058"
0.035
0.030
0.048"
0.043"
0.053"
0.030
0.025
0.081"
0.086"
---
0.086"
0.091"
---
---
0.020"
---
With Back Contacts Just Closed.
5.b Front Contact
Openings
---
0.050"
---
Armature Released Against Permanent
Magnet.
5.c Front and Back
Contact Openings
---
0.005"
---
With Operating Arms Removed.
6.
Drop-Away
---
Table 4-2 ---
After Charge. To Close Back Contacts.
7.
Drop-Away To Full
Back Contact
Pressure
Break-Away from
Permanent Magnet
Pick-Up and
Working
---
Table 4-2 ---
After Drop-Away, Reduce Current Until
Armature Rests on Permanent Magnet.
---
---
95%
---
---
Table 4-2
8.
9.
10. Hold-Down Torque
Of Actual Pick-Up for Break-Away from
the Permanent Magnet.
Mark Actual Value on Left Side of
Armature
Force on Bottom Contact Engaging Pin
of Operating Arm to Pull Armature from
Permanent Magnet After Charge.
250 Gms
11 Final Electrical
Inspection
Recheck Tests No. 6 and 9 with Cover
Applied.
Table 4-2. PN-150P (4-Point) Calibration Values
Coil Resistance Normal/ Charge
Ohms
Volts (AC)
4-12
Min.
Max.
Full Back
Contact Pressure
Drop-Away
Volts (AC)
Drop-Away Volts
(AC)
240
10
7.0
7.3
3.5
400
12
8.4
8.75
4.2
SM 4596F, August 1986, Rev. 0
Appendix-A. Parts List
APPENDIX-A. PARTS LIST
A.1 Parts List for PN-150P Relays with Molded Drivers
See Figure A-1.
1
2
3
4
5
6
7
8
9
10
11
11
12
13
14
15
16
17
18
19
20
21
22
23
24
24
24
25
26
27
28
29
30
31
32
33
34
35
36
37
38
39
40
41
41
41
41
41
41
42
ITEM
DESCRIPTION
Frame, Relay
Rod, Latch
Washer
Spring, Coil
Latch
Dowel Pin
Spring
Armature
Washer
Screw, #6-32 x 7/16 Fil. Hd.
Block, Contact (-702, -703, -803)
Block, Contact (-704, -705, -806)
Screw, #6-32 x 3/4 Phillips Fil. Hd. Mach. TP
Arm Molded Operating
Indicator
Lock Nut
Screw, Spring Guide
Magnet, Permanent
Strap
Lock Bolt
Screw
Handle
Washer, Lock #10 Int. Tooth Ph. B2. NP
Screw, #10-32 x 3/8 Phillips Pan Rd. Stl. Cad. P.
Coil (Relay N322508-702, -704)
Coil (Relay N322508-703, -705)
Coil (Relay N322508-803, -806)
Deleted
Tubing, (-702, -703, -803)
Screw, 1/4-20 x 3/4 Hex. Cap. Stl. TP
Screw, #4-40 x 3/16 Rd. Stl. F
Plate, Name
Pin, Indexing
Gasket
Cover
Washer, 0.170 ID P1. Stl.
Deleted
Screw
Wire, Seal
Seal
Deleted
Tag, Calibration
Nut, 6-32 Stl. Hex (-702, -703, -803)
Parts Bag (Relay N322508-702)
Parts Bag (Relay N322508-703)
Parts Bag (Relay N322508-803)
Parts Bag (Relay N322508-704)
Parts Bag (Relay N322508-705)
Parts Bag (Relay N322508-806)
Insulation, Tubing (-702, -703, -803)
SM 4596F, August 1986, Rev. 0
PART NUMBER
N438410-001
M388888
M437208
M263919
M321728
J048716
M321861
N344118-001
M291657
J052243
N428420
N438966
J522168
M373632-001
M321894-002
M438415
M310328-001
M344418
M321853
J792919
J463078
J561111
J047710
J525277
N333975
N321647
N433498
-A578438
J050016
J525024
M451496-6401
J487090
J047081
J776596
J475199
-J522042-001
N330681-0802
N330681-0803
-S003665
J048148
N330681-0802
N330681-0803
N330681-0803
N330681-0806
M399568
M349785-001
M399568
A-1
Appendix-A. Parts List
43
44
45
46
47
48
49
50
51
52
53
54
55
56
57
A-2
ITEM
DESCRIPTION
Spring, Operating Arm
Washer,
Spacer Magnet (as required)
Counterweight
Seal Vent
Nut Lock
Tag
spacer
Plate Adjustment
Screw, 6-32 x 13/16 Hex. Cap. Stl.
Pin Roll
Deleted
Screw, 6-32 x 5/8 Rd. Ed.
Rectifier, (-702, -703, -803)
Washer, Int. Lock #6 (-702, -703, -803)
PART NUMBER
M349785-001
J047713
M347526
M451176-0401
J790257
M451574-0101
M451496-6201
M451446-1801
M451446-1701
M341634
J487087
-J525601
J726510-0123
J047713
SM 4596F, August 1986, Rev. 0
Appendix-A. Parts List
Figure A-1. PN-150P Relay with Molded Driver
SM 4596F, August 1986, Rev. 0
A-3
Appendix-A. Parts List
A.2 Parts List for Old-Style Mounting Base
See Figure A-2.
ITEM
1a
1b
1c
2
3
4
5
6
7
8
9
10
11
12
13
14
15
16
16
16
17
18
A-4
DESCRIPTION
Base Complete
Base Only
Receptacle Contact Springs, Solderless Type, for #18 to
#20 Wire
Receptacle Contact Springs, Solderless Type, for #14 to
#16 Wire
Receptacle Contact Springs, Solderless Type, for #10 to
#12 Wire
Base, Basic Mounting
Plate, Contact Clamping (Order should specify part
number of mounting base for which contact clamping
plate is desired.)
Plate, Coil Clamping (Order should specify part number of
mounting base for which coil clamping plate is desired.)
Strike
Tag
Screw, #4 x 3/16 Rd. Hd.
Screws, 1/4-20 x 1-1/4 Rd. Hd. (Not Shown)
Washer, Lock (Not Shown)
Washers, Plate 1/4 Stl.
Nut, 1/4 (Not Shown)
Deleted
Screw, #6-32 x 1-1/4 Fil. Hd. S. Mach.
Nut
Screw, #6-32 x 5/8 Fil. Hd. S. Mach.
Indexing Plate (Relay N322501-702)
Indexing Plate (Relay N322501-703)
Indexing Plate (Relay N322501-803)
Meter Test Plug
Insulated Test Plug (For opening any coil or contact
circuit and for removing receptacle springs)
PART NUMBER
N438562
N38562-099
J680179
J680165
J680181
J078455
J078458
J078459
M321745
J075828
J052674
J052667
J047775
J047501
J048002
--J052246
M267499
J522090
M322078-0101
M322078-0102
M322078-0104
N322965
J077931
NOTE "A:
When mounting base complete is ordered, a bag of parts is included in the
inner carton with the mounting base and instruction prints.
Bag Contains:
Tags (Item 6), Screws (Item 7), and Items 8, 9, 10, and 12 which are used for
attaching the mounting base to the rack.
Included Also are:
(Required Quantity) Receptacle contact springs (solderless) J680165 for #14
to #16 wire. If other wire size is used, request the proper part number as
shown in Item 1 when ordering base complete. (i.e., N438562 except using
receptacle contact springs, solderless J680181).
SM 4596F, August 1986, Rev. 0
Appendix-A. Parts List
Figure A-2. Old Style Mounting Base
SM 4596F, August 1986, Rev. 0
A-5
Appendix-A. Parts List
4.8. Parts List for Improved Mounting Base for PN-150P Relays
See Figure A-3.
1a
1b
1c
2
3
4
5
6
7
8
9
10
11
12
ITEM
DESCRIPTION
Base, Complete for Wayside Relays (Note "A")
Base Only
Base, Complete for Car Carrying Relays (Note "A")
Base, Mounting Molded
Strike-Relay
Nut-Speed Push-On
Receptacle Contact Spring
Screw, 1/4-20 x 1-1/4 Rd.
Washer, 1/4 Stl. Lk. Med
Washer, 1/4 Stl. Plate
Nut, 1/4-20 UNC 2B Hvy.
Tag, Relay Indent.
Sheet, Instr. Form #8
Bag, Plastic
PART NUMBER
N451376-0302
N451376-0301
N451376-0303
J780055
J792848
J480280
M451142-2702
J052667
J047775
J047501
J048002
J075951
S000008
J078399
NOTE "A:
When mounting base complete is ordered, a plastic bag of parts is included in
the inner carton with the mounting base and instruction prints.
Bag Contains:
Tags (Item 10), Screws (Item 6) Items 6, 7, 8, and 9 which are used for
attaching the mounting base to the rack.
Included receptacle contact springs are normally (M451142-2702) for #14 and #16 wire, unless
otherwise specified. If other wire size is used, the proper part number
(M451142-2701 for #18-20; M451142-2703 for #10-12) should be specified
when ordering the complete base (N451376-0302 except using receptacle
contact springs, solderless M451142-2703).
A-6
SM 4596F, August 1986, Rev. 0
Appendix-A. Parts List
Figure A-3. Improved Mounting Base for PN-150P Relays
SM 4596F, August 1986, Rev. 0
A-7
Appendix-A. Parts List
Table 4-3. Parts List for External Rectifier Kit (X438967)
5
10
15
20
25
30
35
40
45
50
55
60
75
ITEM
DESCRIPTION
Rectifier Assembly
Screw, 6-32 x 3/8, Rd. Hd. Stl.
Washer, #6 Flt. Stl.
Washer, #6 Lock, Bz.
Screw, 8-32 x 3/8, Rd. Rd. Stl.
Washer, #8 Flt. Stl.
Washer, #8 Lock
Receptacle Contact Spring
Receptacle Contact Spring
Lead, Black, 6-1/2"
Lead, Red, 6-1/2"
Lead, White, 4"
Print, Drawing
PART NUMBER
N451131-3501
J525031
J047996
J047708
J525128
J047745
J047709
M451142-2702
J680165
N397832-005
N397832-004
N395673
D451131-36
Table 4-4. Parts List for Rectifier Assembly (N451131-3501)
5
10
15
20
25
30
35
40
45
50
60
65
A-8
ITEM
DESCRIPTION
PC Mounting Board
Lead
Bridge Rectifier, Sil.
Screw, 4-40 x 5/8, Fl. Hd. Stl.
Washer, #4 Fl. Stl.
Washer, #4 Lock
Varistor, 82 VDC, V82ZZA12
Terminal, Cambion
Rivet, 1/8', Pop
Terminal, Dual Connector
Wire, Bare Tinned #14
Nut, 4-40, Hex. Stl.
PART NUMBER
M451451-3601
M436836
J726150-0123
J521089
J047640
J047829
J735528
J730940
J490037-0014
J731399-0015
A043241
J480006
SM 4596F, August 1986, Rev. 0
SM 4596F
1000 Technology Drive, Pittsburgh, PA 15219
645 Russell Street, Batesburg, SC 29006
MAINTENANCE NOTICE
PLUG-IN RELAY ARMATURE STOP PIN CLEANING
THIS NOTICE APPLIES TO THE FOLLOWING LIST OF RELAYS
Relay
PN-150B
PN-150B
PN-150B
PN-150B
PN-150BC
PN-150BC
PN-150BD
PN-150BE
PN-150BE
PN-150BE
PN-150BH
PN-150BH
PN-150BH
PN-150BL
PN-150BL
PN-150BM
PN-150BSR
Manual
SM4551
SM4551-A
SM4551-H
SM4551-N
SM4551-K
SM4596-C
SM4551-D
SM4551L
SM4551-P
SM4551-Q
SM4551-R
SM4551-T
SM4551-V
SM4551-J
SM6144
SM4551-M
SM4551-C
SM 4596F, August 1986, Rev. 0
Relay
PN-150BTR
PN-150HD
PN-150HD
PN-150N
PN-150N
PN-150NE
PN-150P
PN-150P
PN-150T
PN-156
PN-250B
PN-250BE
PN-258B
PN-258BSR
PN-259BSR
PN-259SRA
Manual
SM4596-A
SM4551-E
SM4596-E
SM4551-B
SM4596-X
SM4551-S
SM4551-F
SM4596-F
SM4587
SM4593
SM4563-E
SM4563
SM4563-C
SM4563-B
SM4563-D
SM4563-H
MN 1
Maintenance Notice
Should a relay fail to meet its calibration specifications during field inspection and test periods as
required by FRA Rules Standards and Instructions, the relay must be shopped.
In this event, the following supplemental stop pin cleaning instructions should be followed (Ref.
Figure A).
1. After removing the cover, clean the Stop Pin and adjacent surface by saturating a Paper
Strip (contained in J793094) with Freon TF and then placing it between the armature and
pole face. Apply moderate pressure on the armature and draw the paper out. Continue
until no residue is removed from the surfaces. Dry the surfaces using a clean strip of
paper.
2. The next step is to apply a dry lubricant such as graphite to the relay stop pin and its point
of contact on the frame.
a. Insert the Stop Pin conditioning Graphite Stick, N451151-3203, between the armature
stop pin and its point of contact on the pole face with graphite against stop pin. While
applying moderate pressure on the stick, pull the stick back and forth in a circular
motion over the stop pin, continuing several seconds to ensure a sufficient amount of
graphite transfer.
It is not necessary to observe significant deposits of graphite since most of what is
required can only be determined by means of a microscope.
3. Recheck the relay calibration and prepare the relay for return to service.
SEE ENLARGED AREA
4C5.0113.00
STOP PIN
Figure A
MN 2
SM 4596F, August 1986, Rev. 0
Maintenance Notice
SM 4596F, August 1986, Rev. 0
MN 3
Maintenance Notice
End of Document
MN 4
SM 4596F, August 1986, Rev. 0