1
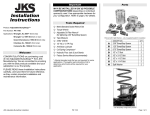
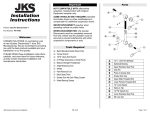
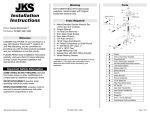
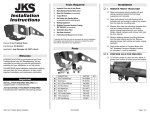
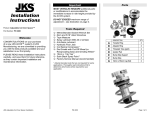
Important Installation Instructions NOT COMPATIBLE with some aftermarket track bar extension/relocation brackets. Call (308) 762-6949 for details. 2. REMOVE FACTORY SPRING MOUNTS FROM AXLE Inspect factory spring mount on axle housing. Locate the areas that are welded to axle tube. Tools Required Hydraulic Floor Jack and Jack Stands Metric/Standard Socket Wrench Set Torque Wrench Tape Measure Die Grinder with Cut-Off Wheel (for removing factory spring mounts) Grinding Wheel Satin Black Spray Paint Angle Measuring Tool Anti-Seize Lubricant Factory Service Manual (recommended) Cut factory spring mount off of the axle housing. Use care to avoid cutting into the axle tube. HINT: A die grinder with cut-off wheel is useful for cutting off the factory spring mount. Remove any remaining spring mount material from the axle housing until surface of axle tube is smooth. HINT: A grinding wheel is useful for removing remaining spring mount material. Installation 1. REMOVE REAR TRACKBAR AND COIL SPRINGS Raise and support vehicle chassis with jack Product: Adjustable Rear Spring Mounts Part Number: PN 2400 Application: Jeep Wrangler JK, 2007+ (rear) stands positioned in front of the rear lower suspension arm brackets. Locate the long factory weld on front (driver side) of rear axle tube. Raise and support rear axle housing with a hydraulic jack to relieve tension from track bar mounting hardware. Remove rear track bar mounting hardware from Welcome CONGRATULATIONS on purchasing a set of new Adjustable Spring Mounts from JKS Manufacturing. We are committed to providing you with the best products available and your satisfaction is our first priority. PLEASE READ these Installation Instructions carefully, and save them for future reference, as they contain important installation and maintenance information. JKS Adjustable Spring Mount Installation axle and chassis brackets. Retain original hardware and remove track bar from vehicle. Remove rear stabilizer bar drop link mounting hardware from axle housing. Disconnect drop links from axle and retain original hardware. Remove lower mounting hardware from shock absorbers and disconnect shocks from axle brackets. Retain original hardware. Lower rear axle housing until the coil springs are free from upper spring mounts. Remove coil springs from vehicle. PN 2400 On outboard side (closest to tire) of weld, grind off 2” of material until smooth and flush with surrounding area. With the factory spring mounts removed and the long factory weld shortened, paint bare metal on axle tube to prevent corrosion. Page 1 of 2 3. INSTALL ADJUSTABLE SPRING MOUNTS ON REAR AXLE Install optional JKS Spring Retainer PN 1600 (recommended – sold separately) at this time if purchased. Place coil spring on Adjustable Spring Mount and position assembly on axle housing. Make sure original rubber isolator pad is located between upper spring mount and top of coil. Slide Adjustable Spring Mount bracket outboard on axle tube until it is as close to the factory bump stop pad as possible. HINT: Stop when bracket contacts factory weld between bump stop pad and axle tube. Using the supplied U-bolts, loosely fasten Adjustable Spring Mount bracket to axle tube. Do not tighten U-bolt nuts yet. Slowly raise the rear axle housing with a hydraulic jack. Make sure top of coil spring is properly seated in the upper spring mount. Connect shock absorbers to axle housing using original mounting hardware. Tighten shock mounting bolts to 56 ft-lbs. Connect the rear stabilizer bar drop links to axle housing using original mounting hardware. Tighten hardware to 75 ft-lbs. 4. REINSTALL REAR TRACK BAR Apply anti-seize lubricant to bolt threads of original track bar mounting hardware. Insert axle end of track bar into axle bracket and loosely install the original mounting hardware. Mount chassis end of track bar and loosely Rotate Adjustable Spring Mount bracket to desired position on axle tube. HINT: When positioned properly, Adjustable Spring Mounts will allow full suspension travel without excessive bowing of coil springs. Check for interference between coil springs and track bar. Measure mounting angle of bracket to ensure both sides are identically adjusted. HINT: Use an angle measuring tool to accurately record mounting angle of Adjustable Spring Mount bracket. With Adjustable Spring Mount correctly IMPORTANT: Adjustable Spring Mount bracket must be installed with rounded side facing forward and flat side facing the rear as illustrated above. positioned, evenly tighten the U-bolt mounting nuts until bracket is secure. install the original mounting hardware. IMPORTANT: The vehicle must be on level ground and the coil springs supporting the full vehicle weight before the mounting hardware is tightened. Using a torque wrench, tighten mounting hardware at both ends of track bar to 125 ft-lbs. Maintenance Check torque specifications regularly. © 2009 JKS Manufacturing, Inc & Aftermarketing, LLC Revision Date 8/12/2009 On driver side of vehicle, notch in Adjustable Spring Mount bracket will line up with track bar bracket as illustrated below. Using a torque wrench, tighten U-bolt nuts to 50 ft-lbs. JKS Adjustable Spring Mount Installation PN 2400 Page 2 of 2